
Weak horn...
- OKC_Kent
-
 Topic Author
- Offline
- User
-

Registered
- Posts: 1718
- Thanks: 20
Weak horn...
05 Jun 2006 07:54
I bought a used Fiam AM-80 horn that worked great when I put it on. It's a nice loud piece that gets the cagers attention. The other night I used it and all I get is a weak sound, some of you probably know what I'm talking about.
I cleaned up the connections but it didn't help. Do I need to go adjust that screw.. that still has the factory goop on it?
I cleaned up the connections but it didn't help. Do I need to go adjust that screw.. that still has the factory goop on it?
Oklahoma City, OK
78 KZ650 B2 82,000+ miles
78 KZ650 B2 82,000+ miles
Please Log in or Create an account to join the conversation.
- Sandy
-

- Offline
- User
-
Registered
- Fly High,Tony
- Posts: 2448
- Thanks: 13
Re: Weak horn...
05 Jun 2006 07:58
Ya...I would try tweeking that screw,if it's getting week.That factory goop is only there to keep the screw from vibrating.
I think You'll want to turn the screw out...??
I'm actually waiting to hear back from a Guy that sells horns on e-bay.He's out of stock on them,but He says that they don't have that "Road-runner" sound,and they ARE pretty loud.I'll see if I can dig up the link to where there's a sound-clip...
I think You'll want to turn the screw out...??
I'm actually waiting to hear back from a Guy that sells horns on e-bay.He's out of stock on them,but He says that they don't have that "Road-runner" sound,and they ARE pretty loud.I'll see if I can dig up the link to where there's a sound-clip...
1977 KZ1000 A-1
Please Log in or Create an account to join the conversation.
- OKC_Kent
-
Topic Author
- Offline
- User
-
Registered
- Posts: 1718
- Thanks: 20
Re: Weak horn...
05 Jun 2006 08:08
Sandy,
thanks. Don't go by the sound clip, I tried it for this horn on the Fiam site and it sounded like....a horn blowing thru my pc speakers. Cheap and weak. But when I hooked this horn up and blew it, WOW. What a noise, as loud as any car!
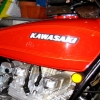
The only bad thing is it looks like a car horn, and when I mounted it, the horn takes up a lot of space in that area. I had to rotate it just right so the fender would not hit it under hard fork compression. I'll take a pic later. Maybe someone has a suggestion on another mounting place that's out of sight...
thanks. Don't go by the sound clip, I tried it for this horn on the Fiam site and it sounded like....a horn blowing thru my pc speakers. Cheap and weak. But when I hooked this horn up and blew it, WOW. What a noise, as loud as any car!
The only bad thing is it looks like a car horn, and when I mounted it, the horn takes up a lot of space in that area. I had to rotate it just right so the fender would not hit it under hard fork compression. I'll take a pic later. Maybe someone has a suggestion on another mounting place that's out of sight...
Oklahoma City, OK
78 KZ650 B2 82,000+ miles
78 KZ650 B2 82,000+ miles
Please Log in or Create an account to join the conversation.
- OKC_Kent
-
Topic Author
- Offline
- User
-
Registered
- Posts: 1718
- Thanks: 20
Re: Weak horn...
05 Jun 2006 08:24
Would the new horn's current draw have anything to do with it? It draws 5 amps, and the stock horn draws 2.6 per the wiring diagram..I wouldn't think so, but I 'm not sure. I'll measure the voltage to the wire and see if I'm getting at least 12v to it.
Oklahoma City, OK
78 KZ650 B2 82,000+ miles
78 KZ650 B2 82,000+ miles
Please Log in or Create an account to join the conversation.
- Sandy
-
- Offline
- User
-
Registered
- Fly High,Tony
- Posts: 2448
- Thanks: 13
Re: Weak horn...
05 Jun 2006 08:34
Horn link
This is the chrome horn(on back-order) and in this auction,the Seller lists a site where You can hear the horn.(read in the details on the item,and it's in there).
Ya Kent...I was wondering about the sound,and if a Guy COULD go by it or not.According to the seller,these horns are good,and they don't sound like the factory horns...they're a lower tone horn...more like a car(domestic) horn.
Ya...I would like to see a pic of the horn YOU have...
Post edited by: Sandy, at: 2006/06/05 11:34
1977 KZ1000 A-1
Please Log in or Create an account to join the conversation.
- OKC_Kent
-
Topic Author
- Offline
- User
-
Registered
- Posts: 1718
- Thanks: 20
Re: Weak horn...
05 Jun 2006 08:45
My horn link
It looks the same only the color is black. I see yours is made in Italy. Isn't Fiam an Italian company? Probably made by the same company.
It looks the same only the color is black. I see yours is made in Italy. Isn't Fiam an Italian company? Probably made by the same company.
Oklahoma City, OK
78 KZ650 B2 82,000+ miles
78 KZ650 B2 82,000+ miles
Please Log in or Create an account to join the conversation.
- hwms
-

- Offline
- User
-
Registered
- Posts: 263
- Thanks: 1
Re: Weak horn...
05 Jun 2006 09:55
OKC_Kent wrote:
Use a horn relay.
Would the new horn's current draw have anything to do with it? It draws 5 amps, and the stock horn draws 2.6 per the wiring diagram..I wouldn't think so, but I 'm not sure. I'll measure the voltage to the wire and see if I'm getting at least 12v to it.
Use a horn relay.
Please Log in or Create an account to join the conversation.
- OKC_Kent
-
Topic Author
- Offline
- User
-
Registered
- Posts: 1718
- Thanks: 20
Re: Weak horn...
05 Jun 2006 10:43
hwms wrote:
Great idea! I would use a bit heavier wire from the relay to the horn?
At lunchtime I went out and blew the horn, and noticed a bit of moisture come out the trumpet . I guess some water got in there last week when the bike got caught in a rainstorm at work. I'll drain it out and rotate it downward a bit more. Maybe that's all it needs..
Thanks guys
OKC_Kent wrote:Would the new horn's current draw have anything to do with it? It draws 5 amps, and the stock horn draws 2.6 per the wiring diagram..I wouldn't think so, but I 'm not sure. I'll measure the voltage to the wire and see if I'm getting at least 12v to it.
Use a horn relay.
Great idea! I would use a bit heavier wire from the relay to the horn?
At lunchtime I went out and blew the horn, and noticed a bit of moisture come out the trumpet . I guess some water got in there last week when the bike got caught in a rainstorm at work. I'll drain it out and rotate it downward a bit more. Maybe that's all it needs..
Thanks guys
Oklahoma City, OK
78 KZ650 B2 82,000+ miles
78 KZ650 B2 82,000+ miles
Please Log in or Create an account to join the conversation.
- OKC_Kent
-
Topic Author
- Offline
- User
-
Registered
- Posts: 1718
- Thanks: 20
Re: Weak horn...
11 Jun 2006 07:31
hwms wrote:
I got the horn working fine that same day, I guess it dried out.
Last night coming home from a late night cruise I noticed when I blew the horn the headlight would dim a little bit. I have the higher wattage H4 halogen bulb, and was wondering if I just have too much for the charging system to handle?
Would using the horn relay solve this?
OKC_Kent wrote:Would the new horn's current draw have anything to do with it? It draws 5 amps, and the stock horn draws 2.6 per the wiring diagram..I wouldn't think so, but I 'm not sure. I'll measure the voltage to the wire and see if I'm getting at least 12v to it.
Use a horn relay.
I got the horn working fine that same day, I guess it dried out.
Last night coming home from a late night cruise I noticed when I blew the horn the headlight would dim a little bit. I have the higher wattage H4 halogen bulb, and was wondering if I just have too much for the charging system to handle?
Would using the horn relay solve this?
Oklahoma City, OK
78 KZ650 B2 82,000+ miles
78 KZ650 B2 82,000+ miles
Please Log in or Create an account to join the conversation.
- pyxen
-
- Offline
- User
-
Registered
- Posts: 488
- Thanks: 7
Re: Weak horn...
24 Feb 2007 14:16
yeah - cause you'd power it right off the battery, and not through the wiring of the bike (along with everything else).
84 KZ550-F2 LTD
93 ZR550-B4
93 ZR550-B4
Please Log in or Create an account to join the conversation.
- KaZooCruiser
-
- Offline
- User
-
Registered
- Posts: 456
- Thanks: 7
Re: Weak horn...
24 Feb 2007 14:28
I installed a relay to power two automotive horns. I'll try to get some pictures and details up on the site. The twelve volts is there all the time, the trigger is a switched ground, via the button. The relay is a four wire unit that I cut out of a Mazda B2200 at the parts yard, with the harness. Stock motorcycle horns satisfy Federal requirements, but they are too anemic for the real world as far as I am concerned.
Please Log in or Create an account to join the conversation.
- KaZooCruiser
-
- Offline
- User
-
Registered
- Posts: 456
- Thanks: 7
Re: Weak horn...
26 Feb 2007 12:25
Ok, some of you never use a horn, so this article won't apply to you. But a horn is like a fire extinguisher. When you need it, it can save your life. A really loud horn can make the difference in whether someone hears you, before they see you. So, in looking at what comes stock on a motorcycle, there is a lot of room for improvement. This article is prepared in the hopes that others may benefit from my experience upgrading a basic horn circuit on a motorcycle.
A lot of motorcycles use the horn button to supply circuit completion by way of the grounding horn button on the handlebar. 12 volts is already supplied to the horn itself as soon as the key is turned on. The horn is a two-wire circuit, which is fine for a stock application, but there are problems with this approach. One is that the ground path through the button is not really designed to handle the amperage demands of a louder horn. This can lead to anemic horn operation and premature failure of the switch. Another problem is that the higher output horns many times use the mounting of the horn itself to provide the ground path, rendering the existing circuit ineffective. So the solution here is to utilize a relay in conjunction with the existing hardware in order to bypass existing limitations. By doing this, I was able to utilize 2 automotive horns to improve a safety margin dramatically at little cost.
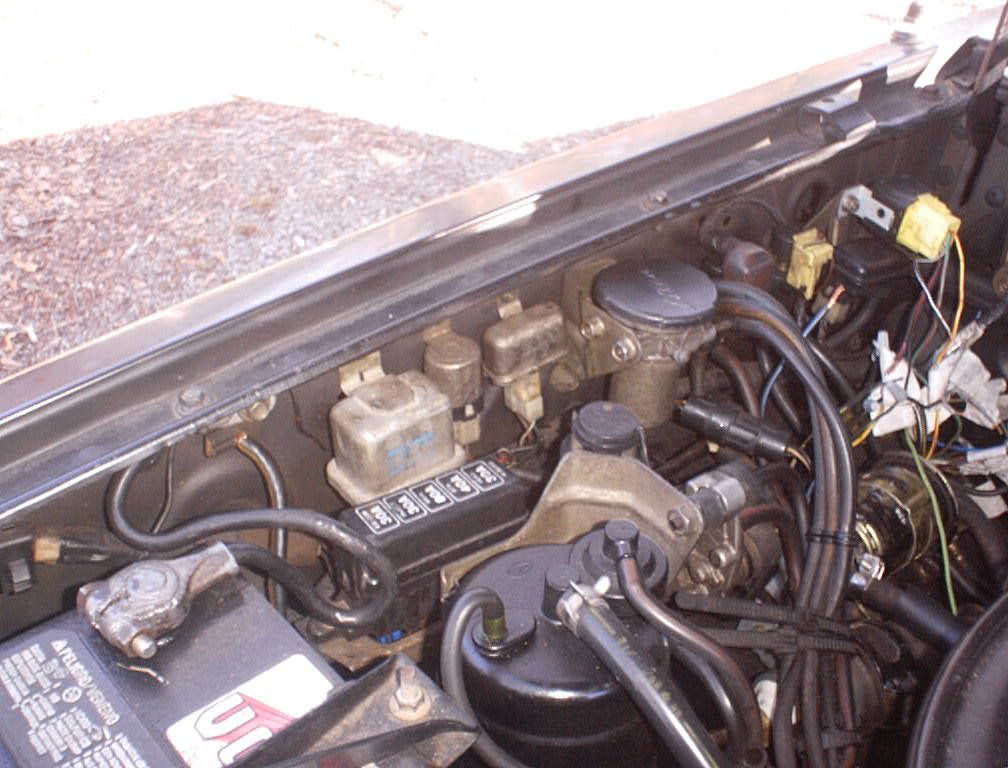
The relay I used is a four-wire unit, coming out of a parts truck at a salvage yard. The parts needed for this project came from different vehicles, all of them used. On a Mazda B2000-2200, the relay is located along the passenger fender well, directly in front of the cylindrical object with the black circle for a lid and two securing bolts.
What I did was get both the relay and the harness, by cutting it to include as much of the harness as I could. It can always be trimmed back later, during installation. I also found a two-wire connector that I was able to use to interface the existing female spade connectors on the bike harness.
Because my upgrade horns ground through their base, the horn button provides only ground for the relay itself. This is probably less of a load than what it was used for originally, so I think it will last forever under the new use. This leaves only the power feed to wire in.
On a four wire relay in this case, two of the wires energize the coil, and two of the wires are then able to deliver current, via a completed bridge. This would be called a normally open (NO) relay. In this application, you take the 12 volt supply voltage, and since it is available when the key in turned on, it is fed to one side of the bridge, and one side of the relay coil, as potential for both parts of the circuit. Once circuit completion is generated via the horn switch, current crosses the bridge and feeds the horns.
At the time I did this upgrade, I didn't have a wiring diagram, but from the little I knew about relays, I didn't need one. I did use an ohm-meter, but it really isn't necessary, if you have a battery. If using an ohm-meter, set the scale on a low reading. The coil leads will give a resistance reading. Nothing else will. The battery method is really easy. Because the relay I used is NO, it's Jonathan proof. I took the wire harness and touched 2 individual wires at a time to the battery posts until I heard a "click." That told me the coil was being activated. Those are the leads that are used to activate the relay. Because the relay coil is a magnetic coil, it doesn't appear to matter which polarity it is. Two down, two to go.
Once I had the relay coil itself isolated, I took the 12 volt supply (positive) and fed it to one of the other two, still unconnected wire leads. I hooked up the last of the wires to a test lamp wired to ground. Sure enough, with the 12 volt lead being held against the positive post of the battery, and by tapping the other coil lead to the negative post, my test light would blink on with circuit completion. So off to wire this mess in.
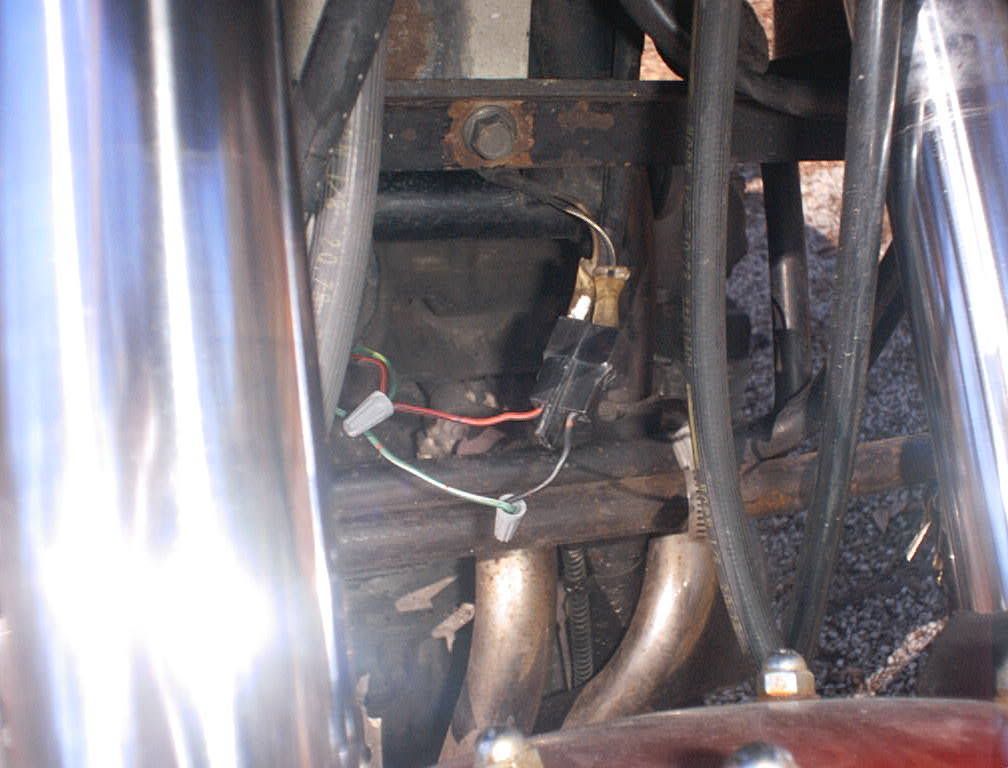
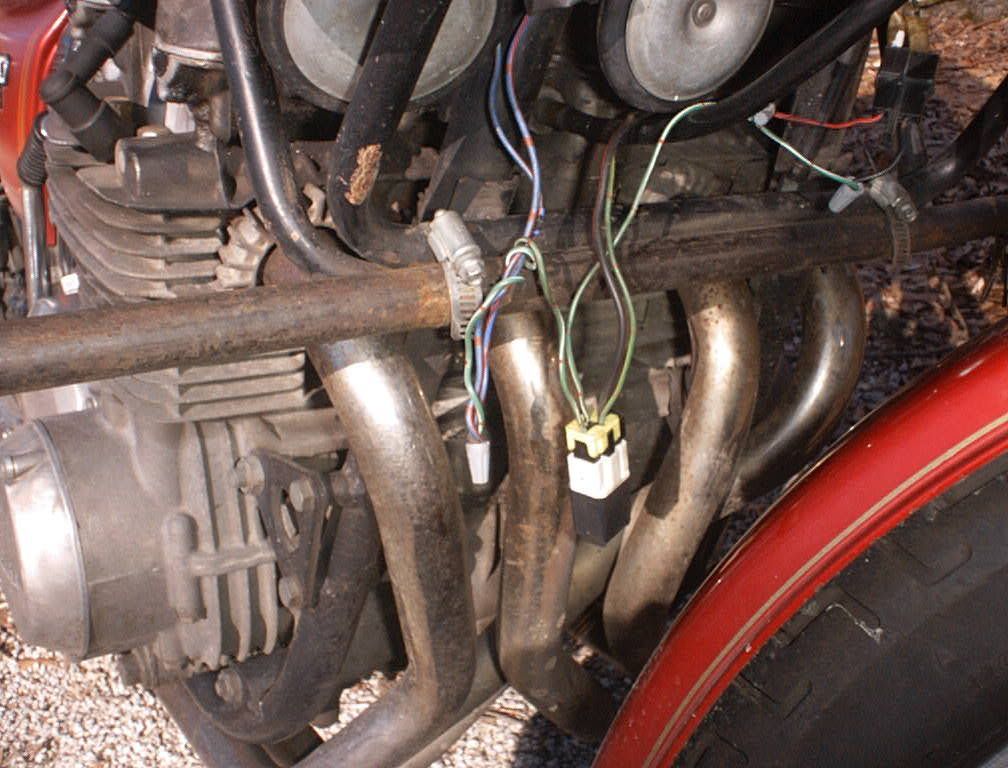
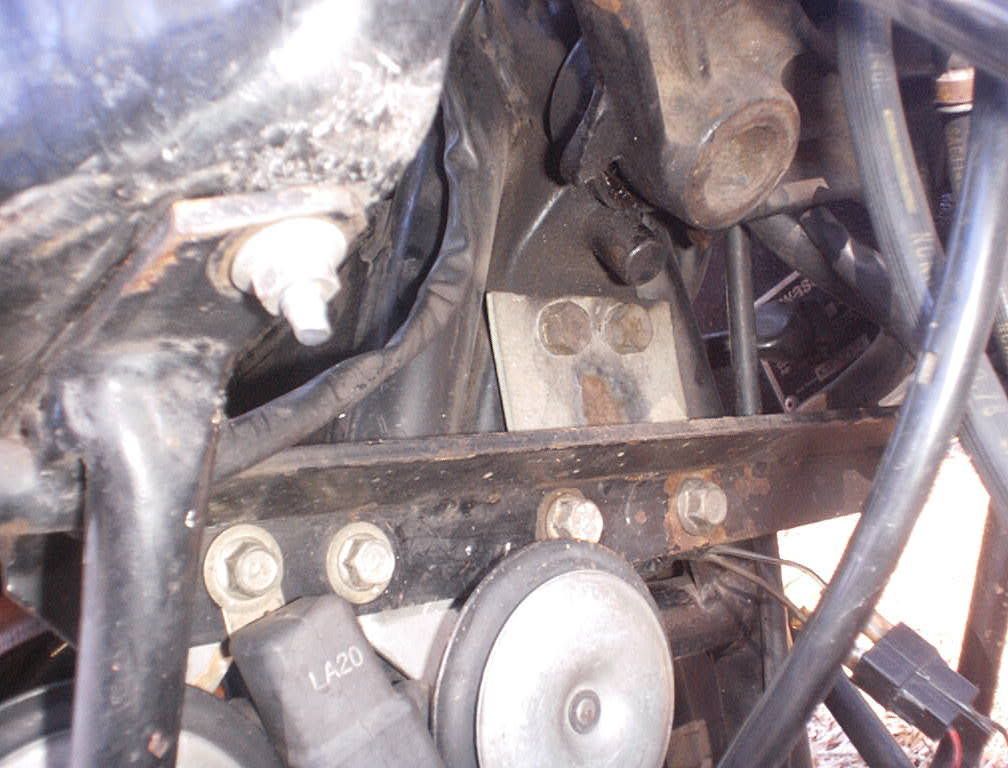
This is what the completed set-up looks like, and it's plenty loud.

Because I have a fairing I have additional places to mount all of this. Preexisting location was this.
But if that is what you have as well, maybe some of this stuff
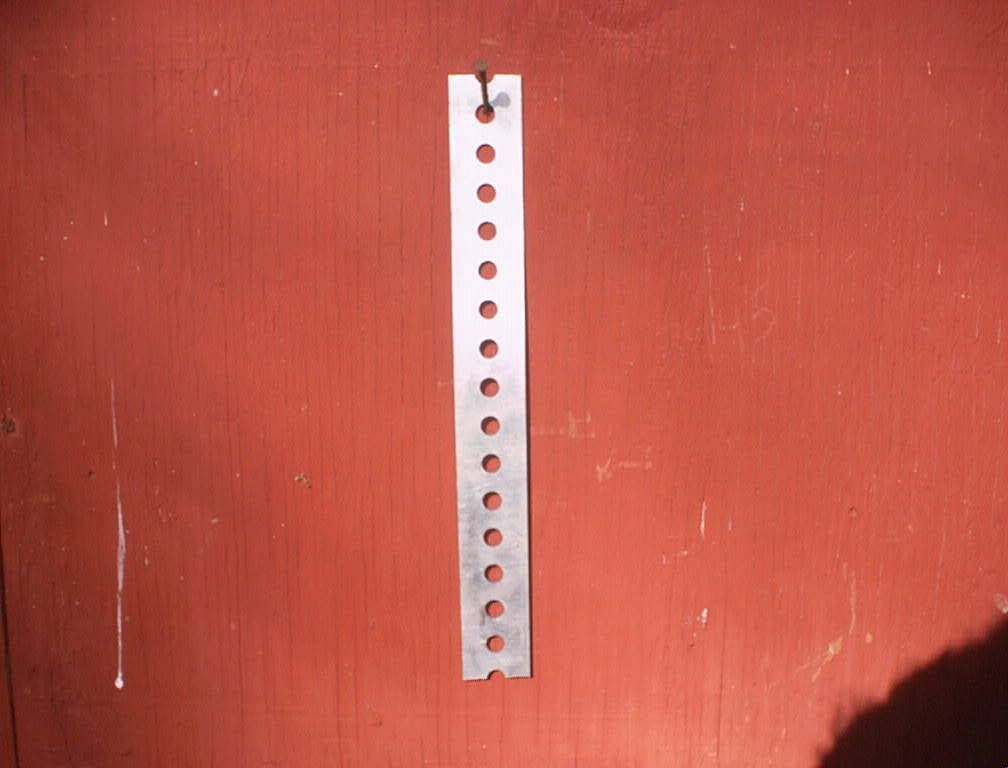
can make a difference.
One last thing. . .this post is provided "as is, where is" Your mileage may vary.
Post edited by: KaZooCruiser, at: 2007/02/26 15:40
A lot of motorcycles use the horn button to supply circuit completion by way of the grounding horn button on the handlebar. 12 volts is already supplied to the horn itself as soon as the key is turned on. The horn is a two-wire circuit, which is fine for a stock application, but there are problems with this approach. One is that the ground path through the button is not really designed to handle the amperage demands of a louder horn. This can lead to anemic horn operation and premature failure of the switch. Another problem is that the higher output horns many times use the mounting of the horn itself to provide the ground path, rendering the existing circuit ineffective. So the solution here is to utilize a relay in conjunction with the existing hardware in order to bypass existing limitations. By doing this, I was able to utilize 2 automotive horns to improve a safety margin dramatically at little cost.
The relay I used is a four-wire unit, coming out of a parts truck at a salvage yard. The parts needed for this project came from different vehicles, all of them used. On a Mazda B2000-2200, the relay is located along the passenger fender well, directly in front of the cylindrical object with the black circle for a lid and two securing bolts.
What I did was get both the relay and the harness, by cutting it to include as much of the harness as I could. It can always be trimmed back later, during installation. I also found a two-wire connector that I was able to use to interface the existing female spade connectors on the bike harness.
Because my upgrade horns ground through their base, the horn button provides only ground for the relay itself. This is probably less of a load than what it was used for originally, so I think it will last forever under the new use. This leaves only the power feed to wire in.
On a four wire relay in this case, two of the wires energize the coil, and two of the wires are then able to deliver current, via a completed bridge. This would be called a normally open (NO) relay. In this application, you take the 12 volt supply voltage, and since it is available when the key in turned on, it is fed to one side of the bridge, and one side of the relay coil, as potential for both parts of the circuit. Once circuit completion is generated via the horn switch, current crosses the bridge and feeds the horns.
At the time I did this upgrade, I didn't have a wiring diagram, but from the little I knew about relays, I didn't need one. I did use an ohm-meter, but it really isn't necessary, if you have a battery. If using an ohm-meter, set the scale on a low reading. The coil leads will give a resistance reading. Nothing else will. The battery method is really easy. Because the relay I used is NO, it's Jonathan proof. I took the wire harness and touched 2 individual wires at a time to the battery posts until I heard a "click." That told me the coil was being activated. Those are the leads that are used to activate the relay. Because the relay coil is a magnetic coil, it doesn't appear to matter which polarity it is. Two down, two to go.
Once I had the relay coil itself isolated, I took the 12 volt supply (positive) and fed it to one of the other two, still unconnected wire leads. I hooked up the last of the wires to a test lamp wired to ground. Sure enough, with the 12 volt lead being held against the positive post of the battery, and by tapping the other coil lead to the negative post, my test light would blink on with circuit completion. So off to wire this mess in.
This is what the completed set-up looks like, and it's plenty loud.
Because I have a fairing I have additional places to mount all of this. Preexisting location was this.
But if that is what you have as well, maybe some of this stuff
can make a difference.
One last thing. . .this post is provided "as is, where is" Your mileage may vary.
Post edited by: KaZooCruiser, at: 2007/02/26 15:40
Please Log in or Create an account to join the conversation.
Moderators: Street Fighter LTD