
Wiredgeorge Repowering Ignition Coils Parts List Q
- oberkfell
-
 Topic Author
- Offline
- User
-

Registered
- Posts: 29
- Thanks: 0
Wiredgeorge Repowering Ignition Coils Parts List Q
08 Nov 2009 21:21
I'm trying to buy all the parts for the wiredgeorge repowering ignition coils solution and can't figure out what these two items are:
press-in male connector (see the dual-outlet coil connector over your valve cover)
crimp on female lug connectors for 18A wire and 12A wire
Any links or pics?
I'm hoping this will help those damn sooty, fouled plugs I keep getting. That and a new set of Denso's for my 77 KZ1000.
Thanks.
press-in male connector (see the dual-outlet coil connector over your valve cover)
crimp on female lug connectors for 18A wire and 12A wire
Any links or pics?
I'm hoping this will help those damn sooty, fouled plugs I keep getting. That and a new set of Denso's for my 77 KZ1000.
Thanks.
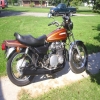
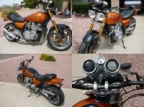
1977 KZ1000-A
Please Log in or Create an account to join the conversation.
- ArthurGoVroom
-
- Offline
- User
-
Registered
- I'd rather ride it than shine it
- Posts: 52
- Thanks: 0
Re: Wiredgeorge Repowering Ignition Coils Parts List Q
08 Nov 2009 21:34
The first one is commonly known as a bullet connector, they are found at an auto parts store. It is a round unsheathed metal connector (it looks like a penis, literally), and you can plug it into the socket on the end of the wire that connects to the ignition coils.
The second one, I am not sure what exactly a "lug" connector is, it depends on what they are wanting to connect to. If they are for screwing a bolt through it, they are called an eyelet connector. It is basically like a flat washer that has the crimp connection on one side.
If they are to connect to the pins on the relay, you need female spade connectors. A spade connector is a flat tab, much like the contacts on an automotive fuse. There are female ones that slide onto either male spade connectors, or in this case onto the spade terminals on the relay.
1976 KZ900A4, 4-1 header, rear lowering kit, grab bar removed, still shining and painting parts as time permits
Please Log in or Create an account to join the conversation.
- MFolks
-

- Offline
- User
-
Registered
- Posts: 6650
- Thanks: 541
Re: Wiredgeorge Repowering Ignition Coils Parts List Q
08 Nov 2009 21:35
www.easternbeaver.com
would be where I'd try first.
The press in connector might be a male "bullet style" used in Japanese motorcycle electrical systems.
The crimp on female connector,again might be the type that mates with the bullet connector.
Most Japanese motocycles use wire very similar in size to U.S. American Wire Gauge. The largest wire I've seen in electrical harness/looms is close to 12 gauge in size with 14 gauge,16 gauge and 18 gauge being the smallest.
The cable/wire coming off of the battery terminals is close to 8 gauge in size for comparison.
American Wire Gauge(AWG) goes backwards in sizing with 22 gauge many times smaller than 8 gauge.
1982 GPZ1100 B2
General Dynamics/Convair 1983-1993
GLCM BGM-109 Tomahawk, AGM-129A Advanced Cruise Missile (ACM)
General Dynamics/Convair 1983-1993
GLCM BGM-109 Tomahawk, AGM-129A Advanced Cruise Missile (ACM)
Please Log in or Create an account to join the conversation.
- Old Man Rock
-
- Offline
- User
-
Registered
- Posts: 6071
- Thanks: 225
Re: Wiredgeorge Repowering Ignition Coils Parts List Q
09 Nov 2009 06:06
Just out of curiosity.... :whistle:
What is your coil voltage measurements at >=+12Vdc?
Do you have >=+12Vdc @ the battery up to the igniiton switch?
If either of these measurements are above +12Vdc then your problem lies elsewhere... Most probably miss adjusted carbs/jetting or ignition timing...
OMR
What is your coil voltage measurements at >=+12Vdc?
Do you have >=+12Vdc @ the battery up to the igniiton switch?
If either of these measurements are above +12Vdc then your problem lies elsewhere... Most probably miss adjusted carbs/jetting or ignition timing...
OMR
1976 KZ900-A4
MTC 1075cc.
Camshafts: Kawi GPZ-1100 .375 lift
Head: P&P via Larry Cavanaugh
ZX636 suspension
MIKUNI, RS-34'S...
Kerker 4-1, 1.5" comp baffle.
Dyna-S E.I.
Earls 10 row Oil Cooler
Acewell 2802 Series Speedo/Tach
Innovate LC1 Wideband 02 AFR meter
Phoenix, Az
MTC 1075cc.
Camshafts: Kawi GPZ-1100 .375 lift
Head: P&P via Larry Cavanaugh
ZX636 suspension
MIKUNI, RS-34'S...
Kerker 4-1, 1.5" comp baffle.
Dyna-S E.I.
Earls 10 row Oil Cooler
Acewell 2802 Series Speedo/Tach
Innovate LC1 Wideband 02 AFR meter
Phoenix, Az
Please Log in or Create an account to join the conversation.
- oberkfell
-
Topic Author
- Offline
- User
-
Registered
- Posts: 29
- Thanks: 0
Re: Wiredgeorge Repowering Ignition Coils Parts List Q
09 Nov 2009 07:35
It measures about 8 at the coil.
Battery was fully charged.
The carbs have recently been jetted, cleaned.
Valves adjusted.
New points/condensers.
Running a hotter NKG plug. Runs ok for about 100 miles then puff the magic dragon appears and I have to limp home.
Thought I would try this procedure first before going with a DYNA.
Battery was fully charged.
The carbs have recently been jetted, cleaned.
Valves adjusted.
New points/condensers.
Running a hotter NKG plug. Runs ok for about 100 miles then puff the magic dragon appears and I have to limp home.
Thought I would try this procedure first before going with a DYNA.
1977 KZ1000-A
Please Log in or Create an account to join the conversation.
- PLUMMEN
-
- Offline
- User
-
Registered
- Posts: 7983
- Thanks: 104
Re: Wiredgeorge Repowering Ignition Coils Parts List Q
09 Nov 2009 08:02
check your wiring harness ")
Still recovering,some days are better than others.
Please Log in or Create an account to join the conversation.
- Old Man Rock
-
- Offline
- User
-
Registered
- Posts: 6071
- Thanks: 225
Re: Wiredgeorge Repowering Ignition Coils Parts List Q
09 Nov 2009 09:27
+8Vdc is a problem...
As most here know... I'm no big fan of this mod (for technical reasons only) so here goes just the same... Again!
This mod would provide direct battery feed to your coils which will help no doubt but the rest of your electrical system would still only receive the +8Vdc as in your case, not good... For a quick fix to get home, by all means wire it directly to the battery or temporarily through a on/off single pull single throw switch.
The mod was derived for coil voltages slightly under the +12Vdc requirements due to old wiring and terminations. Not sever loss as in your case.
In your case, you have a partially shorted issue such as faulty stator VAC, voltage regulator Vdc, faulty coil, partially shorted condensor or a harness conductor partially shorting somewhere...
Henceforth, if your charging system is putting out the ideal Volatges/currents you will be stranded with a drained battery, with out a doubt.
All in all, your problem is more than +12Vdc at the coils...
Sorry all, not trying to start a war here but this is a field for which I have a degree in (Engineering Electronics) and we've seen this way to many times now where this mod was accomplished only to find it didn't resolve a damn thing....
1976 KZ900-A4
MTC 1075cc.
Camshafts: Kawi GPZ-1100 .375 lift
Head: P&P via Larry Cavanaugh
ZX636 suspension
MIKUNI, RS-34'S...
Kerker 4-1, 1.5" comp baffle.
Dyna-S E.I.
Earls 10 row Oil Cooler
Acewell 2802 Series Speedo/Tach
Innovate LC1 Wideband 02 AFR meter
Phoenix, Az
MTC 1075cc.
Camshafts: Kawi GPZ-1100 .375 lift
Head: P&P via Larry Cavanaugh
ZX636 suspension
MIKUNI, RS-34'S...
Kerker 4-1, 1.5" comp baffle.
Dyna-S E.I.
Earls 10 row Oil Cooler
Acewell 2802 Series Speedo/Tach
Innovate LC1 Wideband 02 AFR meter
Phoenix, Az
Please Log in or Create an account to join the conversation.
- otakar
-

- Offline
- User
-
Registered
- Posts: 5069
- Thanks: 29
Re: Wiredgeorge Repowering Ignition Coils Parts Lis
09 Nov 2009 09:45
Just for the sake of my ignorance, is the voltage being measured between ground and the common black coil wire? Is the voltage being measured while bike is running or off? I am asking anyone who knows the proper procedure for this test since I do not.
Otto
Otto
74 Z1-A stock
76 KZ-900 Totaly stock vice MAC pipe
77 KZ-1000A stock
78 Z1-R 100%MINT 500 original Mi.
78 Z1-R Yoshi 1103 kit stage 1 cams Yoshi pipe. Etc
79 KZ-1300 (1400)
80 KZ-1300
81 Scratch built GPz1150R
82 KZ1000
76 KZ-900 Totaly stock vice MAC pipe
77 KZ-1000A stock
78 Z1-R 100%MINT 500 original Mi.
78 Z1-R Yoshi 1103 kit stage 1 cams Yoshi pipe. Etc
79 KZ-1300 (1400)
80 KZ-1300
81 Scratch built GPz1150R
82 KZ1000
Please Log in or Create an account to join the conversation.
- YUKABODOS
-

- Offline
- User
-
Registered
- Posts: 103
- Thanks: 0
Re: Wiredgeorge Repowering Ignition Coils Parts List Q
09 Nov 2009 09:46
If you do go the coil mod route, do a propper job of it and solder the connections and connectors and shrink wrap all of the joints.
All of the materials required in this mod can be had for 30 - 40 bucks and should take 1.5 hours to complete (start to finish).
The funny thing was the relay that I bought described how to complete a similar mod on the back cover, which helped.
Good luck. My bikes (i have done 2) start up much easier now and I have not had to change the plugs in quite a while. I used to go through a set every 3 - 4 weeks and have a box of sooty plugs to prove it.
Please Log in or Create an account to join the conversation.
- otakar
-
- Offline
- User
-
Registered
- Posts: 5069
- Thanks: 29
Re: Wiredgeorge Repowering Ignition Coils Parts Lis
09 Nov 2009 10:15
OK I just went to my bike and measured the voltage between the black common wire to the coils and the coil ground and measured 12.3V This is the original 1981 1000CSR harness which I am using on the bike. This is with the ignition switch on and the bike not running. Am I to presume that this modification would do absolutely nothing for me?
Otto
Otto
74 Z1-A stock
76 KZ-900 Totaly stock vice MAC pipe
77 KZ-1000A stock
78 Z1-R 100%MINT 500 original Mi.
78 Z1-R Yoshi 1103 kit stage 1 cams Yoshi pipe. Etc
79 KZ-1300 (1400)
80 KZ-1300
81 Scratch built GPz1150R
82 KZ1000
76 KZ-900 Totaly stock vice MAC pipe
77 KZ-1000A stock
78 Z1-R 100%MINT 500 original Mi.
78 Z1-R Yoshi 1103 kit stage 1 cams Yoshi pipe. Etc
79 KZ-1300 (1400)
80 KZ-1300
81 Scratch built GPz1150R
82 KZ1000
Please Log in or Create an account to join the conversation.
- MFolks
-
- Offline
- User
-
Registered
- Posts: 6650
- Thanks: 541
Re: Wiredgeorge Repowering Ignition Coils Parts List Q
09 Nov 2009 10:25
It will help if you will go to either Radio Shack or any good electronic supply store and buy a can of De-oxit contact cleaner/preservative.Their website is
www.deoxit.com
Open up the right and left handlebar switch pods/housings, spray some De-oxit on the electrical contacts and work them off and on a few times.
Do the same inside the headlight housing by removing the headlight,disconnect one bundle at a time so confusion is minimized and spray and connect,dis-connect,and reconnect the bundles. This helps remove the corrosion on the male and female pins of the connectors.
__________________________________________________________
Here's a guide I made up about the older fuses:
Fuse And Fuse Holder Designations
1. The older Kawasaki’s use a glass tubed fuse with the designation of AGX 1†long. Most good auto parts stores can get them for you. They are ¼†in diameter.
2. The more common AGC is 1 ¼†long and may not fit the smaller fuse clips. Again, ¼†in diameter.
3. To clean and polish the fuse clips, I use a cotton swab(Q- Tip) and some Brasso metal cleaner or Turtle Wax Chrome Polish. I suppose any good metal polish would work.
4. These fuses can fail internally but look good, only by removing them from the clip and electrically continuity checking with either a self powered test light, or a multimeter set on OHMS can they be determined to be in good shape.
5. A physical inspection of the metal end caps for tightness will tell you if the fuse is serviceable.
6. Most modern motorcycles are now using the automobile “Blade†style fuse with the designation of ATC or ATO.
7. The reduced sized “Mini†Blade style fuse holder uses the ATM size of fuses.
8. If the fuse and fuse holder overheat, it could soften or anneal the grip of the clip, it might require squeezing the clip to restore the tightness.
9. A list of where to purchase “Blade†style fuses and holders:
www.waytekwire.com
www.rallylights.com
www.delcity.net
1982 GPZ1100 B2
General Dynamics/Convair 1983-1993
GLCM BGM-109 Tomahawk, AGM-129A Advanced Cruise Missile (ACM)
General Dynamics/Convair 1983-1993
GLCM BGM-109 Tomahawk, AGM-129A Advanced Cruise Missile (ACM)
Please Log in or Create an account to join the conversation.
- chance
-

- Offline
- User
-
Registered
- Life long biker/
- Posts: 578
- Thanks: 0
Re: Wiredgeorge Repowering Ignition Coils Parts List Q
09 Nov 2009 10:31 - 09 Nov 2009 10:33
Last edit: 09 Nov 2009 10:33 by chance.
Please Log in or Create an account to join the conversation.
Moderators: Street Fighter LTD