
82 KZ750H Keihin Carbs leaking after cleaning
- zero10
-
 Topic Author
- Offline
- User
-

Registered
- Posts: 71
- Thanks: 6
82 KZ750H Keihin Carbs leaking after cleaning
09 Sep 2014 21:24 - 09 Sep 2014 21:26
I'll open with the problem: I just cleaned and reassembled the carbs on my 82 KZ750H and now they are leaking all over the place.
A bit of history about what I have done to them:
I removed the bowls and unscrewed each jet, blasting each passage out with carb cleaner and compressed air to make sure they were clear. While it was apart I inspected each of the jets and they all looked clear with no signs of trouble. I pulled the floats off and inspected the needles, the tips weren't dented in but they were very hard (this seemed weird to me, I expected them to be soft rubber or something). I installed new bowl o-rings (with a couple dots of RTV since the o-rings were slightly too small and would pull up at one corner if you tried to stretch them in place).
After this work I figured I had clean sealed up carbs so I tried to check the float levels. I ran a fuel line down from the tank and set the carbs on the footpeg and gear shift lever to hold them level. I also installed clear tubes on each of the drain fittings and loosened the screws then turned the petcock to PRI to let some fuel down to them.
When I did this gas started pouring out all over the place. It first ran out the small round passages by the choke plate on one of the carbs, then when I looked at that I noticed it had started pouring out of the air outlet (with the throttle butterfly) on 2 or 3 of them, and by then everything was so wet I couldn't tell where it was leaking from any more. I shut the fuel off and when the waterfall stopped the clear hoses showed 3 of the 4 carbs had fuel levels up as high as the outlet which is obviously way too high and is probably why they were pouring gas out so badly. On the up side (if there is one), it looks like none of the new bowl o-rings were leaking
I think the problem is that the needles aren't sealing on 3 of the 4 carbs. I have no idea what was done to this bike before I got it, but some of the bowl screws were partially stripped and one of the jets had some damage on the end of it (not affecting how it operates) from a previous removal so I know somebody's been in here before. All of the tabs on the floats were bent to different positions.
Can I remove the bowls, turn the carbs upside down then pour fuel into the housing to see if the needles seat? Is that a meaningful test?
Is it possible to have the tabs bent so wrong that the floats cannot close the fuel passage off?
Should the needles have been soft so that they can seal up?
What else should I check? What should I do first to get this sorted out?
I know these are stupid questions and I hate to even ask but coming from a background of exclusively fuel injected cars carburetors confuse and scare me and I was hoping somebody here would notice some rookie mistake I have made and help me get this all fixed up. I'll be reviewing the factory service manual section on carb service again - hopefully that will expose some oversight on my part.
Thanks in advance for any help!
-
Last edit: 09 Sep 2014 21:26 by zero10.
Please Log in or Create an account to join the conversation.
- TexasKZ
-

- Offline
- Platinum Member
-

Registered
- Posts: 8079
- Thanks: 2596
Re: 82 KZ750H Keihin Carbs leaking after cleaning
09 Sep 2014 21:41
Floats could be so far out of adjustment that they hit the carb body before closing the valve.
Needle valves may be so worn they cannot seat.
Floats may be installed upside down.
Needle valves may be so worn they cannot seat.
Floats may be installed upside down.
1982 KZ1000 LTD parts donor
1981 KZ1000 LTD awaiting resurrection
2000 ZRX1100 not ridden enough
www.kzrider.com/11-projects/620336-anoth...uild-thread?start=24
1981 KZ1000 LTD awaiting resurrection
2000 ZRX1100 not ridden enough
www.kzrider.com/11-projects/620336-anoth...uild-thread?start=24
Please Log in or Create an account to join the conversation.
- JR
-
- Offline
- Sustaining Member
-
Registered
- Posts: 2961
- Thanks: 477
Re: 82 KZ750H Keihin Carbs leaking after cleaning
10 Sep 2014 05:24
I would order new bowl o rings and float needles.
Take the carbs off and place upside down on a bench. Remove the bowls. Blow into the fuel line and if leak is at needle seat it will be obvious. It takes a very strong blow to lift the float of a properly sealing needle. Clean seat with either carb cleaner or liquid brasso on a Q tip. The needle tips are a hard - not soft- rubber. Clean needle tip with carb cleaner - if you decide to read use the old ones. Check if float is upside down. Repeat until all are sealing
Don't mix up parts from different carbs.
When you fix the leaking float valves check fuel level.
.
1980 kz750E1, Delkevic exhaust
Please Log in or Create an account to join the conversation.
- zero10
-
Topic Author
- Offline
- User
-
Registered
- Posts: 71
- Thanks: 6
Re: 82 KZ750H Keihin Carbs leaking after cleaning
10 Sep 2014 06:34
Thanks for the advice!
I have already installed new bowl o-rings, unfortunately I had to tack them in place with RTV since they were slightly too small and kept popping up in one corner however they seem to be dry (well, or are leaking so little I can't tell with the other massive leaks right now).
The tips of the needles are all in very good shape, no visible wear to them and I cleaned them as well as the seats quite thoroughly.
I cleaned and reassembled one carb at a time (except for the bowls which I left all off until the end) so there has been no parts mixing between them.
I had no idea you could install the float upside-down. It seems so obvious now :silly: I wonder if I did that on 3 of them? When I played around with them it sort of felt like the floats were hitting the body instead of the needle holding them up just a little bit. I'd feel pretty dumb if that's what it is but at least that doesn't require any new parts. There was quite a lot of fuel coming out of each carb, way too much for a needle that was seated but not sealing. I'll pursue that avenue first.
I had to evacuate the garage last night due to the gas fumes and give it the night to clear out (I have a small garage and spilled around 0.5L of gas in there, it was pretty bad). I'll check the float orientation and test the needle sealing with the carbs upside down when i get back out there tonight.
-
Please Log in or Create an account to join the conversation.
- JR
-
- Offline
- Sustaining Member
-
Registered
- Posts: 2961
- Thanks: 477
Re: 82 KZ750H Keihin Carbs leaking after cleaning
10 Sep 2014 08:11
I see you are in Calgary. All that wet snow :ohmy:
Hope it melts soon for you
Hope it melts soon for you
1980 kz750E1, Delkevic exhaust
Please Log in or Create an account to join the conversation.
- zero10
-
Topic Author
- Offline
- User
-
Registered
- Posts: 71
- Thanks: 6
Re: 82 KZ750H Keihin Carbs leaking after cleaning
10 Sep 2014 09:18
Thanks! The snow has been troublesome but I'm holding out hope we'll have some good weather for a couple more months this year. I wanted to be able to take the bike up and down my street before I put it away for the winter but that sure isn't going to happen right now, I've got about 40cm of snow on the ground at my house and it's still falling.
-
Please Log in or Create an account to join the conversation.
- zero10
-
Topic Author
- Offline
- User
-
Registered
- Posts: 71
- Thanks: 6
Re: 82 KZ750H Keihin Carbs leaking after cleaning
10 Sep 2014 20:50
I spent some time removing the carb bowls and cleaning the float needles and seats tonight. I then consulted the factory service manual for which orientation to install the floats in and it is not very clear (to me at least). Both orientations seem to have a clearance problem. I put a couple in each position then took some pictures to share here.
In either position the float needles seem to seal up and hold about 5psi of air pressure on the fuel supply line without any leakage. However, in both positions the float is unable to completely compress the spring in the float needle before some part of the float strikes some part of the housing.
Can somebody please help?
Here are the 2 options I have available to me:
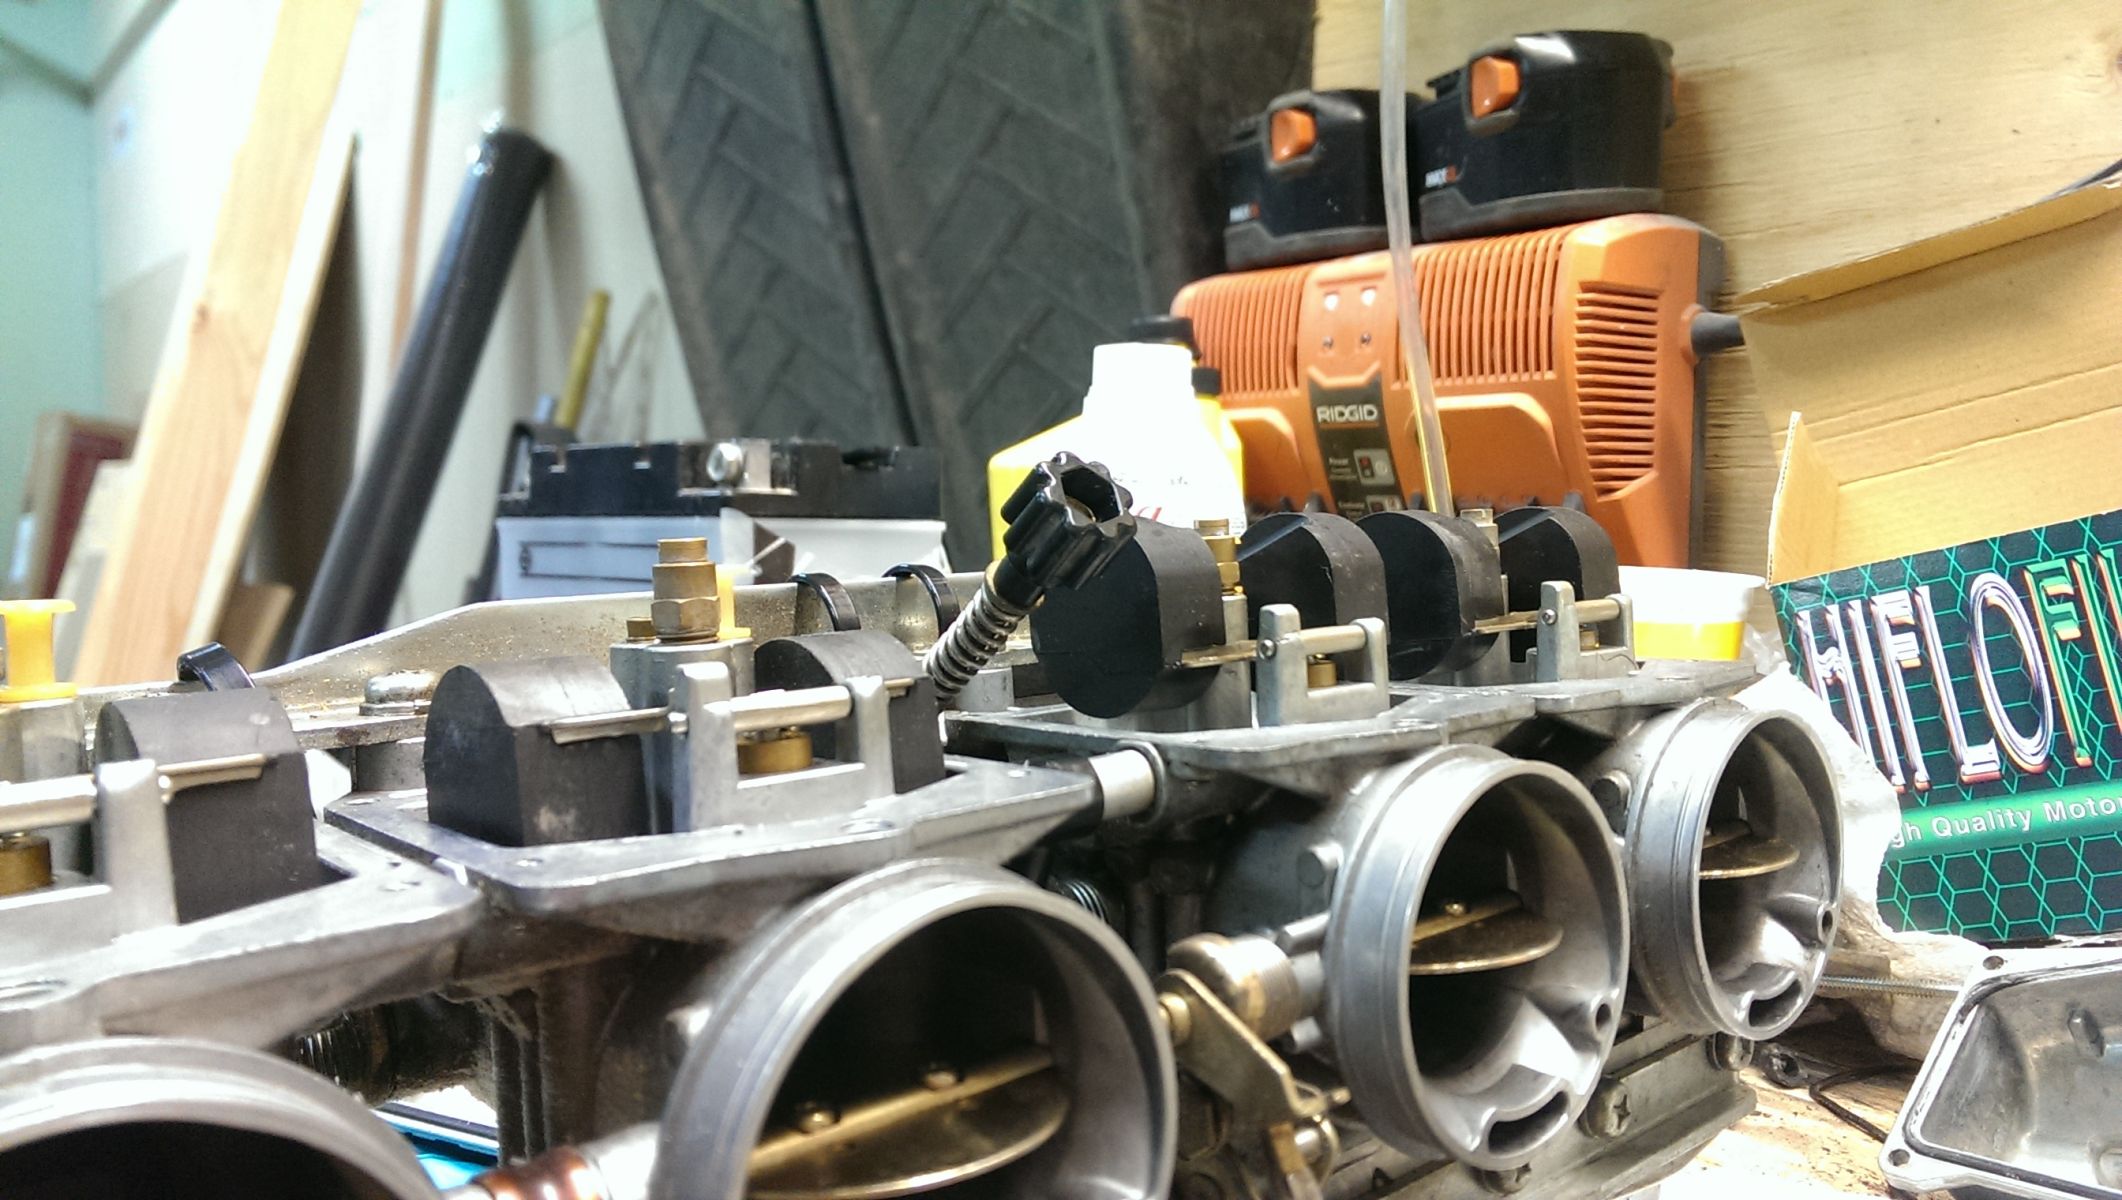
When the floats are installed such that the majority of them is up inside the housing they hit here:
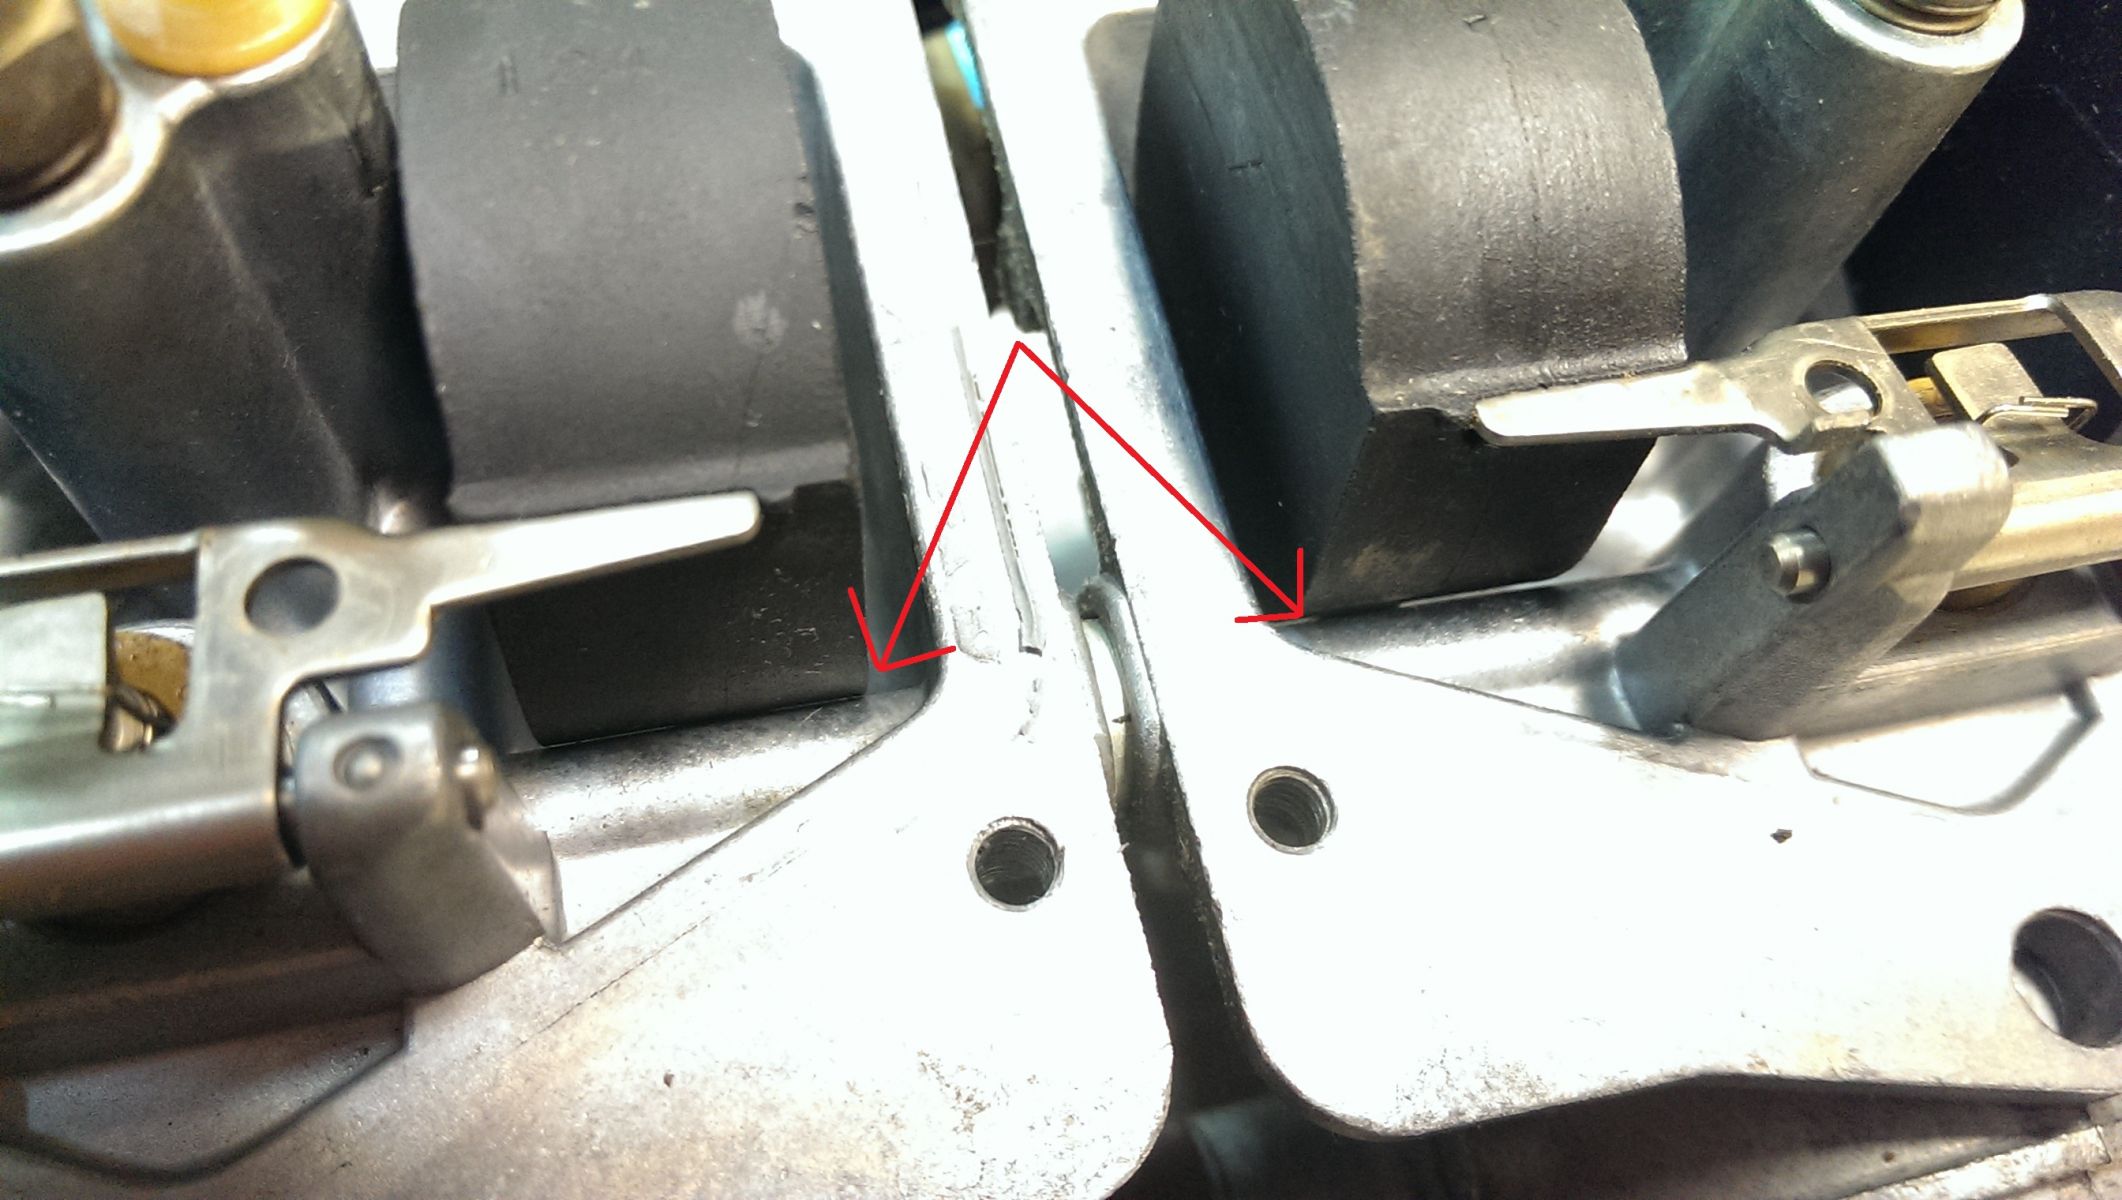
And when they are the other way this little tab contacts the body:
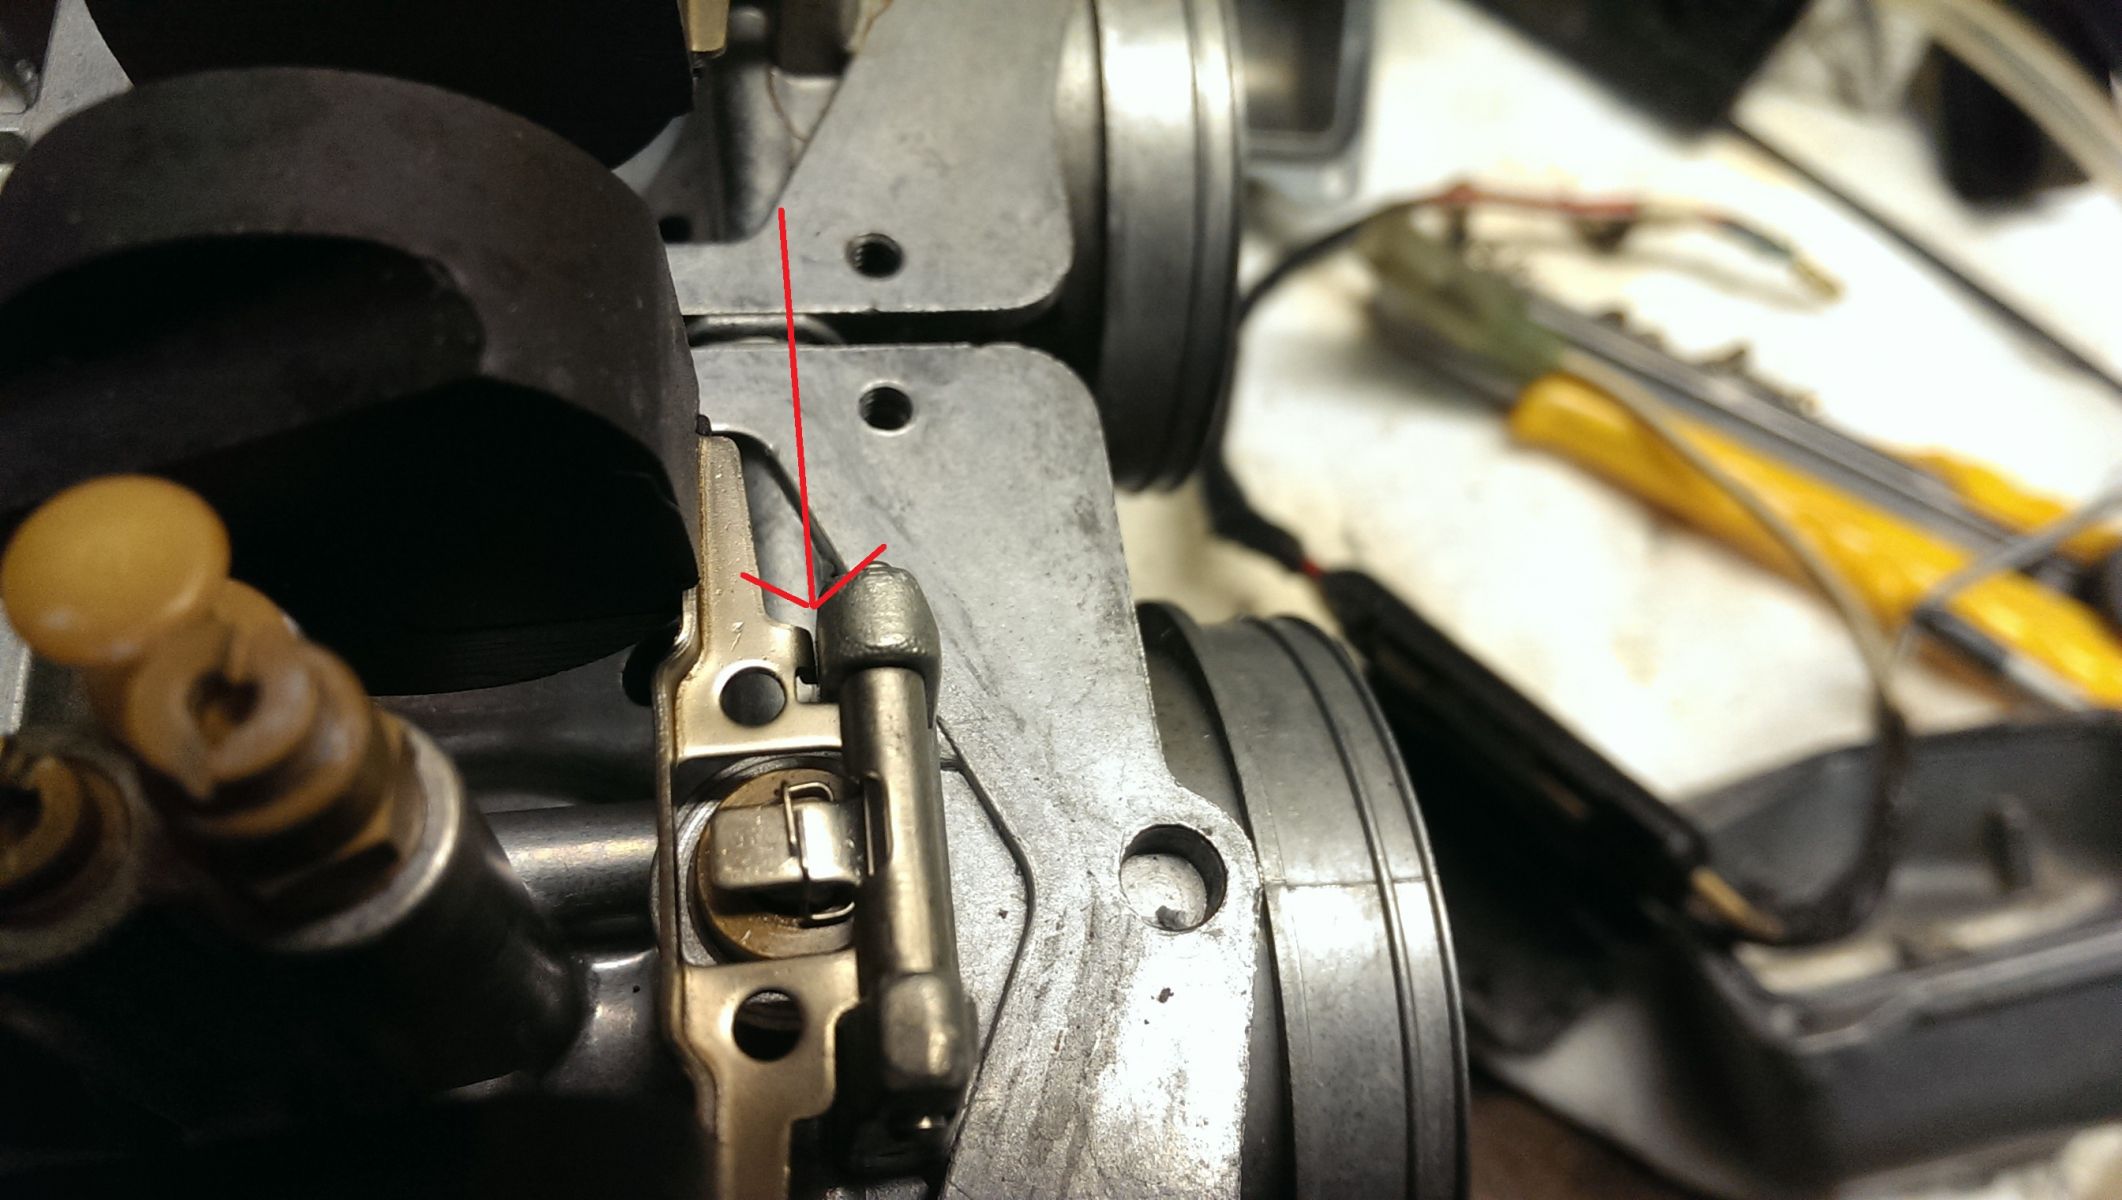
It looks to me like when the floats are installed such that the plastic parts are fully out of the body that they will end up setting the fuel level to be about 10mm from the bowl-body seam. However when they are the other way it looks like the fuel level will be at or 1-2mm above the bowl-body seam. I tried floating the floats in a bowl full of gas to see where they want to float on their own so I am somewhat confident on these distances.
If I had to guess I would think that I need to install them such that the plastic parts are positioned inside the carb body (the ones on the left in the first pic), but that I also need to bend the tabs quite a ways to get them to settle into the right position.
In either position the float needles seem to seal up and hold about 5psi of air pressure on the fuel supply line without any leakage. However, in both positions the float is unable to completely compress the spring in the float needle before some part of the float strikes some part of the housing.
Can somebody please help?
Here are the 2 options I have available to me:
When the floats are installed such that the majority of them is up inside the housing they hit here:
And when they are the other way this little tab contacts the body:
It looks to me like when the floats are installed such that the plastic parts are fully out of the body that they will end up setting the fuel level to be about 10mm from the bowl-body seam. However when they are the other way it looks like the fuel level will be at or 1-2mm above the bowl-body seam. I tried floating the floats in a bowl full of gas to see where they want to float on their own so I am somewhat confident on these distances.
If I had to guess I would think that I need to install them such that the plastic parts are positioned inside the carb body (the ones on the left in the first pic), but that I also need to bend the tabs quite a ways to get them to settle into the right position.
-
Attachments:
Please Log in or Create an account to join the conversation.
- JR
-
- Offline
- Sustaining Member
-
Registered
- Posts: 2961
- Thanks: 477
Re: 82 KZ750H Keihin Carbs leaking after cleaning
11 Sep 2014 06:24 - 11 Sep 2014 06:25
The floats on the right are upside down. The floats on the left are correctly oriented. You will have to bend the little tang which presses on the valve needle in order to get the correct fuel level. Yep. Your guess is correct. ")
This is probably the cause of your problem but while you have the bowls off you might also check for leaks in the brass overflow tube which goes up through the Centre of each bowl.
When you reassemble carbs the best way to check fuel level using the clear tube method is on the bench. I use a gas tank from and old lawnmower
Good luck
1980 kz750E1, Delkevic exhaust
Last edit: 11 Sep 2014 06:25 by JR.
Please Log in or Create an account to join the conversation.
- zero10
-
Topic Author
- Offline
- User
-
Registered
- Posts: 71
- Thanks: 6
Re: 82 KZ750H Keihin Carbs leaking after cleaning
11 Sep 2014 06:48
Thanks for the help. I thought that seemed right but when they leaked I started doubting everything. I had them all in that way to start but 3 or 4 were able to hit the housing before bottoming out the pin on the float needle. Hopefully that is all the issue was. I've marked one float for the level at which it floats in a bowl of gas when suspended by the pin to the side (as close as I could get to their installed arrangement) so I'll adjust the tabs to aim for 4mm below the bowl line and put them back together.
Unfortunately I found on disassembly that one of the bowl o-rings got pinched and is cut. I smeared both ends of the cut with RTV and applied RTV for approximately 1cm on each side of the cut in the groove to try to make up for this. A new o-ring has been ordered but I'm hoping this is enough to at least run the bike in my garage to flush out the engine while I wait for the new o-ring to arrive. I know using RTV here will complicate setting the float level but I'm hoping it will keep things safe and dry while I take care of some other things on the bike.
As for the brass overflow tube - I don't see one. The manual talks about there being an overflow pipe and a tube that runs to the air box. I have no tubes, no holes in the air box, and they make it look like there should be a tube installed in the bowl itself for this - I have nothing of the sort. In my final picture you can see one of the bowls open end up on my work bench, there is not even a provision for a tube in there. Do I have some wrong parts on my bike?
-
Please Log in or Create an account to join the conversation.
- JR
-
- Offline
- Sustaining Member
-
Registered
- Posts: 2961
- Thanks: 477
Re: 82 KZ750H Keihin Carbs leaking after cleaning
11 Sep 2014 08:18 - 11 Sep 2014 08:19
Bowl o rings are a PITA. Some expand after being in contact with gas and old ones tend to dry out and shrink.
Here's a poor photo of one of my bowls showing the overflow tube. If you dont have them then dont worry. I am only familiar with the carbs on my 1980 750/4 E1 and quite probable that the 82 750H used a different type of overflow system.
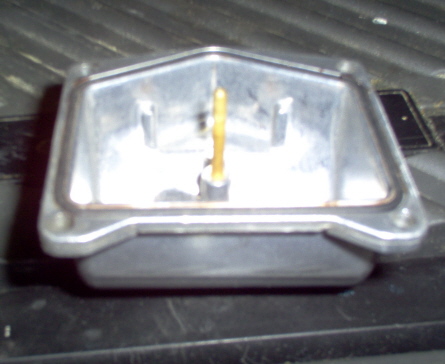
Here's a poor photo of one of my bowls showing the overflow tube. If you dont have them then dont worry. I am only familiar with the carbs on my 1980 750/4 E1 and quite probable that the 82 750H used a different type of overflow system.
1980 kz750E1, Delkevic exhaust
Attachments:
Last edit: 11 Sep 2014 08:19 by JR.
Please Log in or Create an account to join the conversation.
- zero10
-
Topic Author
- Offline
- User
-
Registered
- Posts: 71
- Thanks: 6
Re: 82 KZ750H Keihin Carbs leaking after cleaning
11 Sep 2014 21:22
Well I fiddled with the float levels to get it so that the needle would close fully without the floats hitting the housing and after a quick leak check off the bike they seemed to be holding fuel with an okay float level (~10mm below the seam instead of 4mm). I installed them on the bike thinking I would adjust that later once I got the bike to at least start and run so I could assess the other systems.
After installing and trying to start the bike I had no luck at all, it would crank and crank but not fire. After way too long thinking about it and troubleshooting I checked the fuel levels and all 4 bowls were almost completely empty, maybe 2-3mm of fuel in them. Not sure why but they aren't taking fuel. I had the petcock in the PRI position and removing the fuel line from the carbs produces plenty of fuel so I know it's getting that far. I'll either be pulling the bowls in place or removing the carbs again tomorrow night when I have more time to look at it.
I had a hell of a time getting the carbs installed, there just isn't enough room between the air intake boots and the carb holders / carb outlet boots. Any tips for getting the assembly in and out of there?
Everything else on this bike seems so easy to access but this requires prying, twisting and levering on things pretty hard, a lot of 4 letter words then 15 minutes of using screwdrivers and little pry bars to get the boots on the intake side back into position before rolling the spring clamps back on.
My factory service manual copy has the steps between unscrew the carb holder clamps and remove the carbs cut off, is there something useful missing there?
Thanks again for any help!
-
Please Log in or Create an account to join the conversation.
- JR
-
- Offline
- Sustaining Member
-
Registered
- Posts: 2961
- Thanks: 477
Re: 82 KZ750H Keihin Carbs leaking after cleaning
12 Sep 2014 06:06 - 12 Sep 2014 06:07
Sounds like you are making progress
Best to do this on the bench if you can at all.
The intake boots should be soft and pliable. If you have the originals they might be hard. Try softening with a hair dryer. I bought a used airbox a few years ago and had to buy new intakes (Z1enterprises.com). What a difference
The trick is to fold the boots back on themselves. They are designed for this. This makes them half as long and increases the available space. Slide the carbs in. Hook up throttle cable. Slip them into the engine side boots. Roll the folded half of the intake boot forward. Roll the spring forward etc etc.
Good luck
10mm below the seam would be pretty low . Could be the reason for hard to start.they seemed to be holding fuel with an okay float level (~10mm below the seam instead of 4mm).
I checked the fuel levels and all 4 bowls were almost completely empty, maybe 2-3mm of fuel in them. Not sure why but they aren't taking fuel. I had the petcock in the PRI position and removing the fuel line from the carbs produces plenty of fuel so I know it's getting that far.
Best to do this on the bench if you can at all.
I had a hell of a time getting the carbs installed, there just isn't enough room between the air intake boots and the carb holders / carb outlet boots. Any tips for getting the assembly in and out of there?
The intake boots should be soft and pliable. If you have the originals they might be hard. Try softening with a hair dryer. I bought a used airbox a few years ago and had to buy new intakes (Z1enterprises.com). What a difference
The trick is to fold the boots back on themselves. They are designed for this. This makes them half as long and increases the available space. Slide the carbs in. Hook up throttle cable. Slip them into the engine side boots. Roll the folded half of the intake boot forward. Roll the spring forward etc etc.
Good luck
1980 kz750E1, Delkevic exhaust
Last edit: 12 Sep 2014 06:07 by JR.
Please Log in or Create an account to join the conversation.
Moderators: Street Fighter LTD