
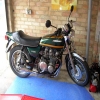
Z650B3, difficult to start, bogs pulling away when hot, bad misfire 5,500rpm
- purgeraptor
-
 Topic Author
- Offline
- User
-

Registered
- Posts: 12
- Thanks: 0
Z650B3, difficult to start, bogs pulling away when hot, bad misfire 5,500rpm
30 May 2008 10:37
Hi everyone, this is my first post here so be gentle ")
Restored a Z650B3 over the winter, got it running, but still a few issues.
Harris 4:1, K&N Pods, VM24 carbs with 110 mains, pilot screws 1 1/4 out.
The electric starter is dead (next project!), and it won't fire on the kickstart either hot or cold.
Bump starting is fine, and it settles to a good steady tickover.
When it gets warm/hot, the tickover falls and it bogs down when pulling away, often stalling, unless you feather the throttle to get the revs up and use plenty of revs to pull away.
Slow running above tickover is fine, pulling strongly to 5,500rpm, also cruises well up to this rev range.
From cruise, if you open the throttle, it hits a wall at 5,500rpm, misfiring and back-firing until you throttle off again.
Sometimes you can get through the wall (downhill), after which the engine takes full throttle and pulls very strongly right up to the redline!!!
The plugs are black (sooty not wet), and have been replaced B8ES, with no improvement.
I've replaced the coils with ZRX items, and have re-wired to get a strong 12V plus at the coils. It has Boyer Bransdon ignition, and I've set the timing correctly with a strobe.
I've replaced the float valves and seats to cure an overflow condition.
Also checked the vacuum stubs aren't leaking.
Next step is to fully dismantle and clean the carbs.
Going to clean the pilot circuits, see what pilot jets are fitted, check needle clip position (should be 4th from top?), check float height and check for inlet rubber leaks.
Anything I should be looking out for?
Thanks in advance!
Please Log in or Create an account to join the conversation.
- Patton
-

- Offline
- KZr Legend
-

Registered
- Posts: 18564
- Thanks: 2103
Re: Z650B3, difficult to start, bogs pulling away when hot, bad misfire 5,500rpm
30 May 2008 10:56 - 30 May 2008 17:34
Hello, Mark! And Welcome to KZR! We're glad you're here! 
If not already done, would also double-check for proper operation of the automatic ignition timing advancer unit (if so equipped) to see it moving back and forth as the rpm's change when blipping the throttle. And of course check the valve clearances.
Awaiting progress reports.
Good Luck!")
Edit -- to insert bolded text missing in original post.
If not already done, would also double-check for proper operation of the automatic ignition timing advancer unit (if so equipped) to see it moving back and forth as the rpm's change when blipping the throttle. And of course check the valve clearances.
Awaiting progress reports.
Good Luck!
Edit -- to insert bolded text missing in original post.
1973 Z1
KZ900 LTD
KZ900 LTD
Last edit: 30 May 2008 17:34 by Patton.
Please Log in or Create an account to join the conversation.
- purgeraptor
-
Topic Author
- Offline
- User
-
Registered
- Posts: 12
- Thanks: 0
Re: Z650B3, difficult to start, bogs pulling away when hot, bad misfire 5,500rpm
30 May 2008 11:27
Thanks for the welcome!
The Boyer Branson unit seems to be advancing OK; I checked it with a strobe light against the timing marks. It advances much earlier than the problem area of 5,500rpm, so I'm hoping it's carb issues rather than electrical.
Valve clearances is a good suggestion, the bike has 56,000 miles on it, and I've not checked yet since getting it last Summer. It took me a long time to completely re-wire it !
Carb strip down tomorrow, so will keep you updated.
Please Log in or Create an account to join the conversation.
- Patton
-
- Offline
- KZr Legend
-
Registered
- Posts: 18564
- Thanks: 2103
Re: Z650B3, difficult to start, bogs pulling away when hot, bad misfire 5,500rpm
30 May 2008 17:56 - 31 May 2008 07:16
Some further check-points for consideration if not already planned.
Would also remove and flush the fuel tank. And remove and clean the petcock (especially all the screens). And if not already using, install an in-line fuel filter (or two inline filters if equipped with dual fuel lines into carbs).
As known, want: (1) good strong properly time spark; (2) good compression with proper valve clearances; (3) ample good clean fuel supply to carbs. Because even perfect as-new carbs won't be able to compensate for deficiencies in these other non-carb components.
Regarding float height, would check service fuel level inside float bowls using the clear plastic tube test before carbs are removed, and again after refurbishment with reassembled carbs still on the bench. And not rely on the hit-and-miss upside-down-on-the-bench measuring method.
Here's a link to some specs found in the Filebase under KZ Information (see the green ribbon) which may be helpful if a service manual isn't already at hand.
Click > Hoping this link works
Good Luck!
1973 Z1
KZ900 LTD
KZ900 LTD
Last edit: 31 May 2008 07:16 by Patton.
Please Log in or Create an account to join the conversation.
- purgeraptor
-
Topic Author
- Offline
- User
-
Registered
- Posts: 12
- Thanks: 0
Re: Z650B3, difficult to start, bogs pulling away when hot, bad misfire 5,500rpm
31 May 2008 11:57
Many thanks, plenty for me to check there!
Also bought a relay today to do the wiredgeorge coil mod, just in case it is the weak wiring, even though I have just over 12V there with the ignition and kill switch on.
Found a mate who has an old shim over bucket removal tool to lend me, so I'm all set for a week of investigation.
Will post what I find out
Please Log in or Create an account to join the conversation.
- purgeraptor
-
Topic Author
- Offline
- User
-
Registered
- Posts: 12
- Thanks: 0
Re: Z650B3, difficult to start, bogs pulling away when hot, bad misfire 5,500rpm
03 Jun 2008 15:33 - 03 Jun 2008 15:38
Did the relay mod last night and getting 12.2V at the coils.
Flushed the tank and fitted a new non-vacuum petrol tap.
Took cam cover off to check the valve clearances in case they were closed up and losing compression.
Didn't realise they are shim under buckets, so the tool I borrowed wouldn't have helped.
All measured OK, which was a relief, so the cams stayed put. Cams in very good condition and salvaged the cam cover gasket too which saved me £22!
Did discover something strange...a home made cam cap! Even had an arrow pointing forwards scratched into the top of it :laugh:
Carbs out and will strip them for a clean tomorrow eve,
www.purgeraptor1.btinternet.co.uk/Pictures/PitStop/camcap1.jpg
www.purgeraptor1.btinternet.co.uk/Pictures/PitStop/camcap2.jpg
Last edit: 03 Jun 2008 15:38 by purgeraptor.
Please Log in or Create an account to join the conversation.
- Patton
-
- Offline
- KZr Legend
-
Registered
- Posts: 18564
- Thanks: 2103
Re: Z650B3, difficult to start, bogs pulling away when hot, bad misfire 5,500rpm
03 Jun 2008 16:14
purgeraptor wrote:
Shades of Burt Munro! :laugh:
...Did discover something strange...a home made cam cap! Even had an arrow pointing forwards scratched into the top of it :laugh:
Shades of Burt Munro! :laugh:
1973 Z1
KZ900 LTD
KZ900 LTD
Please Log in or Create an account to join the conversation.
- Patton
-
- Offline
- KZr Legend
-
Registered
- Posts: 18564
- Thanks: 2103
Re: Z650B3, difficult to start, bogs pulling away when hot, bad misfire 5,500rpm
03 Jun 2008 16:30
purgeraptor wrote:
In case not already familar with pilot circuit cleaning, here's some info about restoring it to as-new condition on a manual slide Mikuni carb with side located pilot air adjustment screw. (Should also be helpful when dealing with the similar carbs equipped with bottom located pilot mixture adjusting screw -- see note included later about the difference between the passages in these two different types of pilot circuits.)
Pilot Circuit Overview
Freshly filtered air goes into a small entrance hole on the airbox side of the carb. Sometimes there's an air jet, but oftentimes not. Thinking no air jet on carbs with side located pilot air screw -- just the simple entrance hole. Anyhow, air enters the small entrance hole and continues along a passageway until reaching the pointed tip of the pilot air adjusting screw which regulates amount of air allowed to continue thereafter on to the pilot jet.
Meanwhile the pilot jet has picked up raw fuel from the float bowl. The air reaches the end of the air passage at the pilot jet where the air joins the fuel creating an air/fuel mixture which mixture then travels from the top of the pilot jet on through the pilot passage and out the pilot outlet (a tiny orifice in bottom of carb bore), from where the mixture is sucked through the intake valve into the combustion chamber.
All this is accomplished while the throttle slides are positioned completely down with no additional mixture contributed from the needle jet. And the pilot circuit continues this function of providing fuel mixture until about 1/8th to 1/4th throttle opening position. As the throttle is opened, the slides are raised, which allows increasingly more mixture from the needle jet and lessening effect of mixture from the pilot circuit.
Now, toward achieving a perfect (as new) carb pilot circuit --- And there are undoubtedly other and perhaps better methods, maybe even far superior methods (the local dentist likely won't be too keen on the idea of loaning out his ultrasonic cleaner for this purpose -- probably wouldn't be big enough anyway), but here's how I do it, until learning a better way.
Pilot Air Passage
The pilot air passage throughout its entire length from entrance hole at airbox side of carb throat to the pilot jet should be clear and ultra-clean.
Pilot Passage
The pilot passage from top of pilot jet to and through the pilot outlet should be clear and ultra-clean.
Pilot Jet
The pilot jet central hole and lateral holes should be clear and ultra-clean. The pilot jet itself should be in pristine condition and the proper size. Remember, possible damage from previous cleaning efforts (with wire or otherwise) may be visually imperceptible. Holes appearing perfectly round and clean may be faulty enough to disallow the absolute precision needed to properly meter fuel intake from float bowl and infusion of air from the air passage. Because new pilot jets are relatively inexpensive, I prefer to replace them. Opinions may differ, but new pilot jets worked for me. And I have yet to see any visual defect in the old original pilot jets (even with some slight magnification).
Cleaning The Passages
With carb on the bench, remove float bowl, float and pilot jet. Wear protective goggles. Plug threaded area where pilot jet was removed so as to block access into float bowl (using finger is okay). If pilot air screw has been removed, block its hole with finger. Direct carb cleaner spray into air passage entrance and blast away until spray freely exits from pilot outlet.
Pilot Air Screw
Remove pilot air screw and examine pointed tip to assure it isn't damaged. Carb cleaner spray directed into the (1) pilot air screw hole has three places where it may exit, (2) Air passage entrance, (3) into float bowl through pilot jet location, (4) pilot outlet. Any two of these may be purposefully blocked so the spray flows between the other two. Spray every combination until assured all the passages are clear and clean as new.
Here's a diagram for reference (with side located pilot air screw).
(Note -- In carb with bottom located pilot mixture screw, the pilot circuit is different -- having metered air from a jet at the entrance hole, and part of the mixture from the pilot jet going to a bypass outlet orifice in bottom of carb throat and remaining part of the mixture from the pilot jet going out a second separate pilot outlet orifice in bottom of carb throat governed by the bottom located pilot mixture screw.)
In any event, all the pilot circuit passages (air passage, fuel passage, and mixture passage) should be returned to as-new condition.
Good Luck!
[click on image to enlarge]

...Carbs out and will strip them for a clean tomorrow eve....
In case not already familar with pilot circuit cleaning, here's some info about restoring it to as-new condition on a manual slide Mikuni carb with side located pilot air adjustment screw. (Should also be helpful when dealing with the similar carbs equipped with bottom located pilot mixture adjusting screw -- see note included later about the difference between the passages in these two different types of pilot circuits.)
Pilot Circuit Overview
Freshly filtered air goes into a small entrance hole on the airbox side of the carb. Sometimes there's an air jet, but oftentimes not. Thinking no air jet on carbs with side located pilot air screw -- just the simple entrance hole. Anyhow, air enters the small entrance hole and continues along a passageway until reaching the pointed tip of the pilot air adjusting screw which regulates amount of air allowed to continue thereafter on to the pilot jet.
Meanwhile the pilot jet has picked up raw fuel from the float bowl. The air reaches the end of the air passage at the pilot jet where the air joins the fuel creating an air/fuel mixture which mixture then travels from the top of the pilot jet on through the pilot passage and out the pilot outlet (a tiny orifice in bottom of carb bore), from where the mixture is sucked through the intake valve into the combustion chamber.
All this is accomplished while the throttle slides are positioned completely down with no additional mixture contributed from the needle jet. And the pilot circuit continues this function of providing fuel mixture until about 1/8th to 1/4th throttle opening position. As the throttle is opened, the slides are raised, which allows increasingly more mixture from the needle jet and lessening effect of mixture from the pilot circuit.
Now, toward achieving a perfect (as new) carb pilot circuit --- And there are undoubtedly other and perhaps better methods, maybe even far superior methods (the local dentist likely won't be too keen on the idea of loaning out his ultrasonic cleaner for this purpose -- probably wouldn't be big enough anyway), but here's how I do it, until learning a better way.
Pilot Air Passage
The pilot air passage throughout its entire length from entrance hole at airbox side of carb throat to the pilot jet should be clear and ultra-clean.
Pilot Passage
The pilot passage from top of pilot jet to and through the pilot outlet should be clear and ultra-clean.
Pilot Jet
The pilot jet central hole and lateral holes should be clear and ultra-clean. The pilot jet itself should be in pristine condition and the proper size. Remember, possible damage from previous cleaning efforts (with wire or otherwise) may be visually imperceptible. Holes appearing perfectly round and clean may be faulty enough to disallow the absolute precision needed to properly meter fuel intake from float bowl and infusion of air from the air passage. Because new pilot jets are relatively inexpensive, I prefer to replace them. Opinions may differ, but new pilot jets worked for me. And I have yet to see any visual defect in the old original pilot jets (even with some slight magnification).
Cleaning The Passages
With carb on the bench, remove float bowl, float and pilot jet. Wear protective goggles. Plug threaded area where pilot jet was removed so as to block access into float bowl (using finger is okay). If pilot air screw has been removed, block its hole with finger. Direct carb cleaner spray into air passage entrance and blast away until spray freely exits from pilot outlet.
Pilot Air Screw
Remove pilot air screw and examine pointed tip to assure it isn't damaged. Carb cleaner spray directed into the (1) pilot air screw hole has three places where it may exit, (2) Air passage entrance, (3) into float bowl through pilot jet location, (4) pilot outlet. Any two of these may be purposefully blocked so the spray flows between the other two. Spray every combination until assured all the passages are clear and clean as new.
Here's a diagram for reference (with side located pilot air screw).
(Note -- In carb with bottom located pilot mixture screw, the pilot circuit is different -- having metered air from a jet at the entrance hole, and part of the mixture from the pilot jet going to a bypass outlet orifice in bottom of carb throat and remaining part of the mixture from the pilot jet going out a second separate pilot outlet orifice in bottom of carb throat governed by the bottom located pilot mixture screw.)
In any event, all the pilot circuit passages (air passage, fuel passage, and mixture passage) should be returned to as-new condition.
Good Luck!
[click on image to enlarge]
1973 Z1
KZ900 LTD
KZ900 LTD
Please Log in or Create an account to join the conversation.
- purgeraptor
-
Topic Author
- Offline
- User
-
Registered
- Posts: 12
- Thanks: 0
Re: Z650B3, difficult to start, bogs pulling away when hot, bad misfire 5,500rpm
04 Jun 2008 16:06
Thanks for that!
I stripped and cleaned the carbs this evening before seeing the post, but I did it pretty much as the suggestions.
Mine is a side air screw type carb, so I took the screws out and the pilot jets and blasted the passage ways and jets with both carb cleaner and my air-line. All four of the pilot jets were completely blocked, so I'm hoping that was my problem.
While in there, I also cleaned the main jets (which were 112.5) and the needle tube (which also had some of the side holes blocked).
Floats were all about 28mm high from gasket surface with carbs inverted.
I reset the pilot screws to 1 turn out and it's all back together now.
Was too late to try to fire it up tonight (that Harris is extremely loud!), so will take a test ride tomorrow and report back.
Thanks for all the info
Please Log in or Create an account to join the conversation.
- Patton
-
- Offline
- KZr Legend
-
Registered
- Posts: 18564
- Thanks: 2103
Re: Z650B3, difficult to start, bogs pulling away when hot, bad misfire 5,500rpm
04 Jun 2008 16:35
purgeraptor wrote:
Floats were all about 28mm high from gasket surface with carbs inverted. -- Shame on you for not using and relying on the clear plastic tube test. :pinch: The upside-down while disassembled-on-the-bench dry measurement method may get in the ball park but often misses the mark.
I reset the pilot screws to 1 turn out -- Perhaps too rich. Would defer to the FSM, but usually 1+1/4 or 1+3/8 or 1+1/2.
Good Luck!
...Floats were all about 28mm high from gasket surface with carbs inverted. I reset the pilot screws to 1 turn out and it's all back together now....
Floats were all about 28mm high from gasket surface with carbs inverted. -- Shame on you for not using and relying on the clear plastic tube test. :pinch: The upside-down while disassembled-on-the-bench dry measurement method may get in the ball park but often misses the mark.
I reset the pilot screws to 1 turn out -- Perhaps too rich.
Would defer to the FSM, but usually 1+1/4 or 1+3/8 or 1+1/2.Good Luck!
1973 Z1
KZ900 LTD
KZ900 LTD
Please Log in or Create an account to join the conversation.
- purgeraptor
-
Topic Author
- Offline
- User
-
Registered
- Posts: 12
- Thanks: 0
Re: Z650B3, difficult to start, bogs pulling away when hot, bad misfire 5,500rpm
05 Jun 2008 06:03
Just back from a 50 mile test ride.....and the Zed lives!
Low rev pull away bogging has almost completely gone, so it's rideable now in traffic. As you suggest, I'll set the pilots to 1 1/4. I'll also get some tube to check the floats accurately
Still have a rough stumble from needle circuits onto the main jets, but also much improved.
Top end is fine, cruises and puills well from 80mph and saw over 100 downhill before a gentle weave set in over a bumpy section of road!
Great fun, and that Harris is the noisiest pipe I've had since my Z1R days with a Alfa 4-1 pipe
Starter motor to fix next as it's still difficult to start on the kicker. I've ordered a brush and spring set from Z Power.
Going on a 100 mile ride tonight to meet some friends in a country pub
Please Log in or Create an account to join the conversation.
- purgeraptor
-
Topic Author
- Offline
- User
-
Registered
- Posts: 12
- Thanks: 0
Re: Z650B3, difficult to start, bogs pulling away when hot, bad misfire 5,500rpm
08 Jun 2008 10:20 - 08 Jun 2008 10:21
Well, I'm still not happy with the transition from needles on to main jets.
It pulls OK through the flat spot on full throttle, but if you slowly roll it on gently, it hits a wall and misfires.
When I hold it flat out, it starts to misfire after 2 minutes, fouling the plugs. It only recovers when revs fall below 5K on part throttle and plugs start to clean and it fires on all four again.
I thought it was too big main jets #112.5, so I fitted some Dynojet DJ 106 mains on the recommendation of a tuner I trust and use for my ZRX's. A little better , but not solved the problem.
I'm thinking ignition timing now as I changed the points set-up to a Boyer Bransdon electronic unit over the Winter.
How critical is the ignition timing to good running?
Last edit: 08 Jun 2008 10:21 by purgeraptor.
Please Log in or Create an account to join the conversation.
Moderators: Street Fighter LTD