KZ650 Aftermarket Petcock Installation
- danonelson0109
-
 Topic Author
- Offline
- User
-

Registered
- Posts: 8
- Thanks: 0
KZ650 Aftermarket Petcock Installation
17 Aug 2007 11:56
Disclaimer: First time poster...go easy on me. I do have a Clymer Manual, and I will post pics once I get the bike back together.
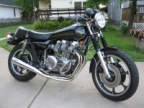
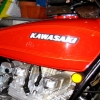
I just bought a stock 1980 KZ650-E (LTD). The lever on the petcock is broken off, the valve is very hard to turn, and the vacuum diaphram needs replacing (gas pours out when I disconnect the fuel line with the valve in the "on" position).
I've accepted the fact that replacing the petcock is probably a better approach than rebuilding or buying an expensive OEM replacement, especially if I'm planning on adding performance upgrades later.
I realize that I will need to drill the oval shaped slot in order to accept an aftermarket filter screen. I read on this forum that the best approach is to use a step drill bit to open up the hole. I was just wondering if anyone had any advice on how to keep the drill bit from "walking" resulting in an off-center condition with the mounting holes, and also a good way to ensure that all metal shavings are removed from the tank.
I thought about making a jig that would center the bit, but figured I'd check with the experts before I go reinventing the wheel.
I'm a little aprehensive about drilling into the tank without absolute certainty that I'm doing it right.
The petcock I was looking at is from Z1. It's the Custom Chrome-Single Outlet-3/8 NPT with the corresponding female adaptor plate (I need to double-check my spacing).
Minneapolis, MN
1980 KZ650-E1 LTD
VM24 Carbs
Pod Filters
Vance & Hines 4 into 1
Dyno Jet Kit
Drag Bars
1980 KZ650-E1 LTD
VM24 Carbs
Pod Filters
Vance & Hines 4 into 1
Dyno Jet Kit
Drag Bars
Please Log in or Create an account to join the conversation.
- JMKZHI
-

- Offline
- Platinum Member
-

Registered
- Posts: 2428
- Thanks: 48
Last edit: 03 Dec 2008 09:51 by JMKZHI.
Please Log in or Create an account to join the conversation.
- OKC_Kent
-

- Offline
- User
-

Registered
- Posts: 1719
- Thanks: 21
Re: KZ650 Aftermarket Petcock Installation
17 Aug 2007 14:22
I bought the cheaper manual petcock from Z1 and the proper adapter plate. Works great.
A step drill is nice but some are pricey, I used a file. You have a dremel tool? That works too.
Remove the old petcock and place the new adapter plate in position. Mark the new hole on the tank, and get a round or half-round small file and just file the tank as needed. It won't take long at all. The shavings can be vacuumed out, or blown out with a compressor or the vacuum on reverse. I happened to have a small round magnet that I could slip inside the old petcock opening before I filed and it caught the shavings and was easy to remove. I blew out the rest the magnet didn't snag. Use a small inline fuel filter just in case.
Cashion, OK
78 KZ650 B2 85,000+ miles
78 KZ650 B2 85,000+ miles
Please Log in or Create an account to join the conversation.
- danonelson0109
-
 Topic Author
- Offline
- User
-

Registered
- Posts: 8
- Thanks: 0
Re: KZ650 Aftermarket Petcock Installation
17 Aug 2007 14:37
Thanks alot Kent. I'm kind of favoring the aftermarket over the Suzuki. I also think my mounting holes are 46mm vs. the Suzuki 44mm, but I'm going to double-check. This will give me a chance to use the dremel that's been collecting dust in the garage...I'll have to let my brother know I finally was able to use his Christmas gift!
Thanks for the quick posts guys! Now I can place the order with Z1 for all the parts I need to get this new bike up and running. When it's all back together this newbie will post some pics.
Thanks for the quick posts guys! Now I can place the order with Z1 for all the parts I need to get this new bike up and running. When it's all back together this newbie will post some pics.
Minneapolis, MN
1980 KZ650-E1 LTD
VM24 Carbs
Pod Filters
Vance & Hines 4 into 1
Dyno Jet Kit
Drag Bars
1980 KZ650-E1 LTD
VM24 Carbs
Pod Filters
Vance & Hines 4 into 1
Dyno Jet Kit
Drag Bars
Please Log in or Create an account to join the conversation.
- bubba_d
-
- Offline
- User
-

Registered
- Posts: 56
- Thanks: 0
Re: KZ650 Aftermarket Petcock Installation
18 Aug 2007 18:55
i think they are 44mm if im not mistaken.
1977 kz1000.
Please Log in or Create an account to join the conversation.
Moderators: Street Fighter LTD

