
- Posts: 52
- Thank you received: 3
valve adjustment
- jerry a smith
- Topic Author
- Offline
- User
Less
More
03 Oct 2018 18:22 #791795
by jerry a smith
valve adjustment was created by jerry a smith
I've been vintage racing a "78 Rickman frame Kawasaki with a 1075 kit. All the valve clearances are within tolerance except the #1 cylinder intake. measures .006 . I have the special tool but the shim needs more clearance to come out. Can I slide a shim under the cam to gain enough clearance before I hold down the valve. The clearance should decrease with valve wear. The cam profile miked within spec. I wondered why the clearance increased. Possibly it was over when the engine was built. The engine runs great and pulls well. At Mosport in August I did Friday practice,endurance race with a buddy and 2 sprint races.Roughly 125 racing miles and this is the first time since 2009 that I've looked at the valve clearances. Lots of racing miles and still starts on the second kick. Regular maintainance,forks,oil, suspension. Not sure how to get the shim out. Thought about loosening the cap bolts but wasn't sure if that was a good idea.
Jerry
Jerry
Please Log in or Create an account to join the conversation.
- hardrockminer
-

- Offline
- Sustaining Member
Less
More
- Posts: 3035
- Thank you received: 1090
03 Oct 2018 20:39 #791801
by hardrockminer
I have several restored bikes along with a 2006 Goldwing with a sidecar. My wife has a 2019 Suzuki DR 650 for on and off road.
Replied by hardrockminer on topic valve adjustment
Is the measurement (0.006) inches or mm?
I have several restored bikes along with a 2006 Goldwing with a sidecar. My wife has a 2019 Suzuki DR 650 for on and off road.
Please Log in or Create an account to join the conversation.
- Nessism
-

- Offline
- Sustaining Member
Less
More
- Posts: 7504
- Thank you received: 2821
03 Oct 2018 21:02 #791802
by Nessism
Replied by Nessism on topic valve adjustment
Maybe try the zip tie under the valve trick?
members.dslextreme.com/users/bikecliff/i...lve_tool_zip_tie.pdf
members.dslextreme.com/users/bikecliff/i...lve_tool_zip_tie.pdf
Please Log in or Create an account to join the conversation.
- jerry a smith
- Topic Author
- Offline
- User
Less
More
- Posts: 52
- Thank you received: 3
04 Oct 2018 08:12 #791816
by jerry a smith
Replied by jerry a smith on topic valve adjustment
.006" - .152mm
Please Log in or Create an account to join the conversation.
- hardrockminer
-
- Offline
- Sustaining Member
Less
More
- Posts: 3035
- Thank you received: 1090
04 Oct 2018 10:46 #791822
by hardrockminer
I have several restored bikes along with a 2006 Goldwing with a sidecar. My wife has a 2019 Suzuki DR 650 for on and off road.
Replied by hardrockminer on topic valve adjustment
If the engine is a KZ1000 ,the spec is right at the upper limit. You should have plenty of room to pull the shim. Do you have the Kawasaki tool or the Motion Pro one? I use the Kawasaki one.
I have several restored bikes along with a 2006 Goldwing with a sidecar. My wife has a 2019 Suzuki DR 650 for on and off road.
Please Log in or Create an account to join the conversation.
- z1kzonly
-

- Offline
- User
- Sustaining Member
Less
More
- Posts: 2890
- Thank you received: 540
04 Oct 2018 11:45 - 04 Oct 2018 11:46 #791824
by z1kzonly
Livin in "CheektaVegas, NY
Went thru 25 of these in 40 yrs.
I SOLD OUT! THE KAW BARN IS EMPTY.
More room for The Old Girl, Harley 75 FLH Electra Glide,
Old faithful! Points ign. Bendix Orig. carb.
Starts everytime!
Replied by z1kzonly on topic valve adjustment
Yes, need a little more clarification. As to which tool you are using. OEM tool is the best. 40 yrs. and going on mine. The tip is actually wore a little.
Are you sure shim, it is not just oil stuck to the bucket top?
Patience! It will come out. Never force or barn job anything.
I just sold this head, bench shimmed all to .004" All stock stuff.
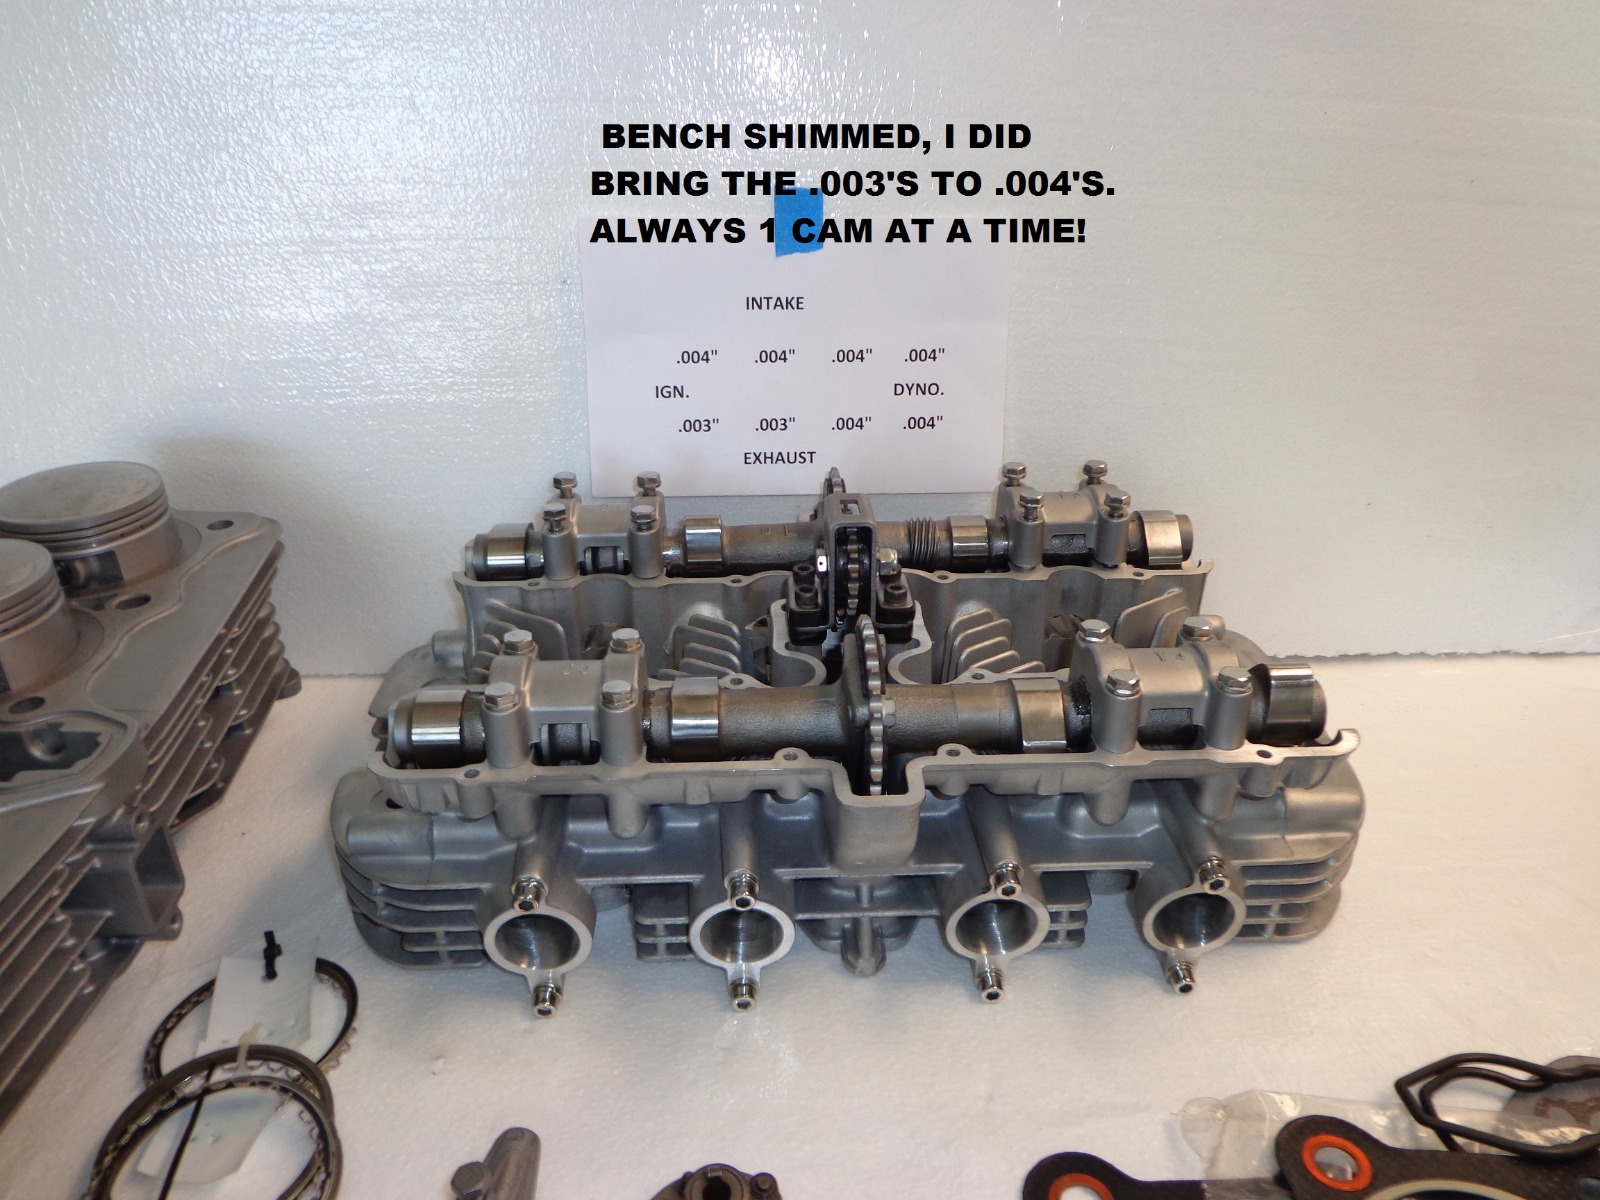
Are you sure shim, it is not just oil stuck to the bucket top?
Patience! It will come out. Never force or barn job anything.
I just sold this head, bench shimmed all to .004" All stock stuff.
Livin in "CheektaVegas, NY
Went thru 25 of these in 40 yrs.
I SOLD OUT! THE KAW BARN IS EMPTY.
More room for The Old Girl, Harley 75 FLH Electra Glide,
Old faithful! Points ign. Bendix Orig. carb.
Starts everytime!
Last edit: 04 Oct 2018 11:46 by z1kzonly.
The following user(s) said Thank You: hardrockminer
Please Log in or Create an account to join the conversation.
- DFIGPZ
- Offline
- User
Less
More
- Posts: 635
- Thank you received: 122
04 Oct 2018 15:54 #791831
by DFIGPZ
1984 750 Turbo
Replied by DFIGPZ on topic valve adjustment
and if they are after market cams .006 in is on the money.
1984 750 Turbo
Please Log in or Create an account to join the conversation.
- SWest
-

- Offline
- Sustaining Member
- 10 22 2014
Less
More
- Posts: 22966
- Thank you received: 2749
04 Oct 2018 16:53 #791836
by SWest
Replied by SWest on topic valve adjustment
Glad I didn't chime in. I thought .006 was a little fat. :whistle:
Steve
Steve
Please Log in or Create an account to join the conversation.
- shrap66
-
- Offline
- User
Less
More
- Posts: 98
- Thank you received: 14
05 Oct 2018 06:17 #791851
by shrap66
1979 KZ1000B3 LTD Glacier Green
Replied by shrap66 on topic valve adjustment
If you are using the Kawasaki tool it should work fine.
Step 1 -Rotate the cam using a wrench on the big bolt on the timing side (right side) so that the narrow part of the lobe faces away from the shim either upwards or towards the center of the head and that the bucket and shim move freely.
Step 2 - Using your fingers (or whatever other tool just as long as you do not damage anything) rotate the shim bucket so that the notch is aligned the center of the head or the other cam. This will give you access to the pry area when its time to lift the shim.
Step 3 - Depress the valve completely, the narrow lobe of the cam should be 90 degrees in relation to the shim surface.
Step 4 - Install the tool. It should be centered to the cam lobe.
Step 5 - Rotate the cam inversely, away from the tool (DO NOT ALLOW THE LOBE TO CONTACT THE TOOL YOU MIGHT DAMAGE SOMETHING) so that the tool is now holding the bucket down and that cam lobe is facing upward or towards the center of the head or the other camshaft.
Step 6 - Remove the shim. I use a small exacto knife with a narrow blade which I use to stick between the bucket and the shim, you need to give it a little twist sometimes to beat the suction created by oil between the 2 surfaces.
Step 7 - Change the shim
1979 KZ1000B3 LTD Glacier Green
Please Log in or Create an account to join the conversation.
- jerry a smith
- Topic Author
- Offline
- User
Less
More
- Posts: 52
- Thank you received: 3
05 Oct 2018 08:54 #791874
by jerry a smith
Replied by jerry a smith on topic valve adjustment
Thanks for the help. had the wrong tool. Just ordered shims.
Jerry
Jerry
Please Log in or Create an account to join the conversation.