
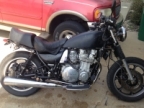
kz1000 #1 not firing please help
- Garbosh
-
 Topic Author
- Offline
- User
-

Registered
- Posts: 94
- Thanks: 0
Re: kz1000 #1 not firing please help
05 Aug 2014 17:02
I really don't want to take the bike all apart to get the valves situated :sick: :sick: :sick: lol I will probably do the swapping of the ignition wires tomorrow. Throwing in the rag for today.
82 KZ1000P
Café Racer/ Brat Project
-Clubman Bars
-End Mirrors
-Rear Shocks
Café Racer/ Brat Project
-Clubman Bars
-End Mirrors
-Rear Shocks
Please Log in or Create an account to join the conversation.
- PLUMMEN
-
- Offline
- User
-
Registered
- Posts: 7986
- Thanks: 104
Re: kz1000 #1 not firing please help
05 Aug 2014 17:59Sounds like theres something plugged up still in the carb.Garbosh wrote: My compression test was ran warm, did it as the instructions on the kit said. At WOT too. FSM? Also when I run it with the choke on, the exhaust tube gets warm/hot to the point I cant hold It with my bare hand. With the choke not on it stays cool. Also when I progressively rev it slowly....I get to about 4k and the tac then drops down to 2k and I get the engine shake/shutter vibration going on.
My favorite way to clean carbs is a big v8 sized can of sea foam in the gas tank and top it off with good gas,then take it out on a back highway some place and ride the hell out of it!(make sure your phone has a good battery and reception where youre going first! :woohoo: )
Still recovering,some days are better than others.
Please Log in or Create an account to join the conversation.
- Garbosh
-
Topic Author
- Offline
- User
-
Registered
- Posts: 94
- Thanks: 0
Re: kz1000 #1 not firing please help
05 Aug 2014 18:28
B12 Chemtool is pretty much a more aggressive version of seafoam.
82 KZ1000P
Café Racer/ Brat Project
-Clubman Bars
-End Mirrors
-Rear Shocks
Café Racer/ Brat Project
-Clubman Bars
-End Mirrors
-Rear Shocks
Please Log in or Create an account to join the conversation.
- !Seymore
-

- Offline
- User
-
Registered
- Ride on...
- Posts: 489
- Thanks: 88
Re: kz1000 #1 not firing please help
05 Aug 2014 21:59 - 05 Aug 2014 22:01Garbosh wrote: FSM?
Factory Service Manual. Make sure you get the Kawasaki type... and that it covers your year/model. This info is on the back cover. Any seller, on ebay or elsewhere, should also show a PIC of the back cover.
C.
79' KZ650-D2 [fsm] (Max)
83' KZ750-F1 LTD [clymers] (Kay)
82' KZ1100-D1 Specter (another project)
78' KZ650-B2a (J&H, A Project)
91' KZ1000-P (P = parts)
83' KZ750-F1 LTD [clymers] (Kay)
82' KZ1100-D1 Specter (another project)
78' KZ650-B2a (J&H, A Project)
91' KZ1000-P (P = parts)
Last edit: 05 Aug 2014 22:01 by !Seymore.
Please Log in or Create an account to join the conversation.
- LineArtist
-
- Offline
- User
-
Registered
- Posts: 302
- Thanks: 35
Re: kz1000 #1 not firing please help
06 Aug 2014 07:24
I recently bought a very minty clean FSM (Kawasaki factory service manual) on eBay for my 79/650 for a cool $19.95 Just keep on eye on it and look for a book not in the motorcycle section. My seller had all sorts of hand knits in other auctions.
'79 KZ650B3 (stock)
'79 KZ650B3 (parts bike)
'06 HD 883R
'79 KZ650B3 (parts bike)
'06 HD 883R
Please Log in or Create an account to join the conversation.
- Garbosh
-
Topic Author
- Offline
- User
-
Registered
- Posts: 94
- Thanks: 0
Re: kz1000 #1 not firing please help
06 Aug 2014 07:37
Yea I should probably get one of those, One of those and a repair manual.
82 KZ1000P
Café Racer/ Brat Project
-Clubman Bars
-End Mirrors
-Rear Shocks
Café Racer/ Brat Project
-Clubman Bars
-End Mirrors
-Rear Shocks
Please Log in or Create an account to join the conversation.
- moneypit
-
- Offline
- User
-
Registered
- Posts: 389
- Thanks: 35
Re: kz1000 #1 not firing please help
06 Aug 2014 12:56
Have not seen any mention of checking the float height. It could be low enough that #1 isnt getting enough fuel.
2-76 kz900
St Paul MN
St Paul MN
Please Log in or Create an account to join the conversation.
- Garbosh
-
Topic Author
- Offline
- User
-
Registered
- Posts: 94
- Thanks: 0
Re: kz1000 #1 not firing please help
06 Aug 2014 18:34
The float heights looked the same...As far as carb cleaning went, I drained each one and took the caps off the bottoms and visually inspected everything, made sure the floats went up and down correctly, took out the main jets and cleaned those. Jet one was pretty clogged. I also inspected the rubber gasket in the top part. Would it be advisable to maybe actually take the carb assembly completely off and clean everything in and out or would what I did be good enough? Sorry if it seems like a stupid question.
82 KZ1000P
Café Racer/ Brat Project
-Clubman Bars
-End Mirrors
-Rear Shocks
Café Racer/ Brat Project
-Clubman Bars
-End Mirrors
-Rear Shocks
Please Log in or Create an account to join the conversation.
- LineArtist
-
- Offline
- User
-
Registered
- Posts: 302
- Thanks: 35
Re: kz1000 #1 not firing please help
07 Aug 2014 04:18Garbosh wrote: Yea I should probably get one of those, One of those and a repair manual.
FSM = repair manual (everything you need to know about your motorcycle)
'79 KZ650B3 (stock)
'79 KZ650B3 (parts bike)
'06 HD 883R
'79 KZ650B3 (parts bike)
'06 HD 883R
Please Log in or Create an account to join the conversation.
- LineArtist
-
- Offline
- User
-
Registered
- Posts: 302
- Thanks: 35
Re: kz1000 #1 not firing please help
07 Aug 2014 04:38 - 07 Aug 2014 04:55Garbosh wrote: Would it be advisable to maybe actually take the carb assembly completely off and clean everything in and out or would what I did be [strike]good enough[/strike]?
There is no such things as "good enough" when it comes to these good old bikes. Any bike that has been sitting or a long time of isn't running right because of fuel should get a very thorough carb cleaning FIRST AND FOREMOST.
- get a factory service manual
- air hose the dirt off the carb and surrounding parts
- remove the carb off the bike
- take photos of the carb assembly
- cover the intake holes to the engine (I like to use aluminum foil), same for airbox (I like to cap the top opening with foil when I work on the bike
- remove the carbs off the mounting bracket
- label each carb (1-4)
- start on carb #1
- 1 by 1 dissemble EVERYTHING
- inspect each part for wear
- clean each part (I use Berryman's B-12 Chemtool Carburetor/Choke and Throttle Body Cleaner)
- use air to dry the parts, make sure they are perfectly clean
- inspect each part for wear
- assembly the carb
- if your carb#2 has a fuel accelerator skip it and save for last
- repeat the process on the other carbs
- put it all back together
- wrap it in a bag until it's ready to go back on the bike
- while the carbs are off it's a good time to clean the airbox and inspect everything
- clean the top of the engine under the carbs
It helps if you know and understand every part of the carb BEFORE you open it up. There are springs (some tiny ones) and parts you don't want to bend or break. Don't force anything. Read up before you start. Find the parts diagram/list before you start. GET THE FSW BEFORE YOU START.
Also, give yourself plenty of time and patience the first time you remove the carbs. The black boots from the airbox tend to get STIFF over time. I use a heat gun on a low setting to bring them back to rubber. Again take your time. Start on the #1 side and remove 1 at a time. You need to get your hand in the airbox and pull the boot all the way through and remove it from the bike. Rotating the boot and pulling helps. If the boot can't be made malleable (rubber) it will not go through the hole and will need to be replaced. Another hint is to loosen the airbox mounting screws that are on the sides of the battery tray, this gives you more room when pulling the carb off the engine. Make sure you loosen the clamps on the carbs on the engine side intakes. There is also an air hose on the bottom of the airbox going into the engine, remove/loosen this also gives you a few more hairs of space to work with.
Before you start, read everything you can and find a youtube video with your particular bike. There is also a ton of carb info here on the forum and a write up in the "Filebase" section.
...just my 79 cents
'79 KZ650B3 (stock)
'79 KZ650B3 (parts bike)
'06 HD 883R
'79 KZ650B3 (parts bike)
'06 HD 883R
Last edit: 07 Aug 2014 04:55 by LineArtist.
The following user(s) said Thank You: Garbosh
Please Log in or Create an account to join the conversation.
- Garbosh
-
Topic Author
- Offline
- User
-
Registered
- Posts: 94
- Thanks: 0
Re: kz1000 #1 not firing please help
07 Aug 2014 08:05
Ok I will for sure get on the cleaning thing, Ill be going on a trip here soon. I wont be driving so I might as well bring it along and take it apart, clean it there, put it back together on the way back. Ill be sure to bring extra baggies, tape for labeling, and a sharpie. I will update if I find anything interesting and/or when I reinstall it.
82 KZ1000P
Café Racer/ Brat Project
-Clubman Bars
-End Mirrors
-Rear Shocks
Café Racer/ Brat Project
-Clubman Bars
-End Mirrors
-Rear Shocks
Please Log in or Create an account to join the conversation.
- Brad Pitt
-
- Offline
- User
-
Registered
- Posts: 6
- Thanks: 1
Re: kz1000 #1 not firing please help
08 Aug 2014 11:36
I am new to KZs, so maybe someone can jump in and confirm from experience, but those compression numbers sound very low to me. Your "good" cylinders are at #s that would warrant a rebuild on most other bikes that I am familiar with. And the bad cylinder at 100psi is at or below the "wont" run point. Couple that with the 10% deviation rule of thumb (the lowest cylinder should not be more than 10% lower in compression ), and i think you have your answer. It is almost certainly due to the problem cylinders low compression. Now determining what is causing that is another question. Bad rings/blow by, valves/cams/timing or air leak.
Btw, cleaning out the main jet does not count as cleaning the carb. If shit occluded the main jet I would BET $$$ its gunking up the passages and circuits you cant see and clean. Every passage and ever screw must be removed and cleaned thoroughly and repeatedly. If it moves it must be cleaned/sprayed/blown. If there is a passage in, it must come out. Tops Bottoms and Insides. Done overlook the idle circuits and air mixture screws and passages. Pull them and clean thoroughly as well.
Btw#2. Float heights can "look" the same. Thats why they should be measured. A mm differnce can shove a tapered float needle far enough into the seat to keep gas from filling bowl at same rate or at all. Make sure everything is clean clean clean and up to spec. As an old biker once told me. Clean that carb like it was going to take you into space. And then clean it again.
77- KZ1000
76-RD400
74-RD250
73-RD350
73-RD200
73-RD60
72-CL350
72-LS2
71-G3TR
71-CL350
76-RD400
74-RD250
73-RD350
73-RD200
73-RD60
72-CL350
72-LS2
71-G3TR
71-CL350
The following user(s) said Thank You: Garbosh
Please Log in or Create an account to join the conversation.
Moderators: Street Fighter LTD