
DOHC's blue Z1R Refresh
- Rick H.
-

- Offline
- User
-

Registered
- Posts: 840
- Thanks: 241
Re: DOHC's blue Z1R Refresh
31 May 2021 06:02
DOHC, I felt a lot like you when I first attempted R&R of my carbs on my KZ-1000. I couldn't believe someone, let alone Kawasaki, had designed a bike with such a difficult carb removal process but what do I know. I can't remember where I heard about a little trick in this process and I don't know if it is applicable to your bike or not, but with the air box in place I heat the air box rubbers up with a hair dryer and roll them over on themselves. This gives may be 1/2" to 3/4" of an inch of extra room to get the carb rack out or in and it just kind of slides in with little hassle. If the carb rack is off already it is easy to heat up the rubber inlets on the airbox and roll them over before inserting the carb rack. If the carb rack is on the engine the rubbers on carb #1 and #4 are easy to roll back on themselves, but #2 and #3 are a bit more difficult. Once the carb rack is slid in I then hook up the cables and push the rack into the pre-lubed intake runners. Once I feel the "pop" I know I am good. When the carb rack is installed then it's back to the hair dryer to heat up the airbox rubbers and with a bit of lube around the carb flange they just slip on pretty as could be. I did tear an airbox rubber on my initial try at this, but they were old and very hard. I decided to replace the airbox rubbers and it made the job of rolling them back on themselves much easier. You may already know of this process and if you do forgive me for wasting your time. I don't know the setup on your specific bike, so it may not work for you. What I do know is that what was once a dreaded job is now nothing more than a small nuisance and goes really fast for me. Now the most difficult part for me is getting the gas tank off. Rolling the rubber inlets gives just enough room to slide the carb rack in without much grief. I also take a bungee cord and wrap it around the airbox to keep it pulled back as far as it will go and out of my way. Hope this helps.
Rick H.
Rick H.
Rick H.
1977 Kawasaki KZ-1000A1
1977 Kawasaki KZ-1000A1
The following user(s) said Thank You: DOHC
Please Log in or Create an account to join the conversation.
- slmjim+Z1BEBE
-

- Offline
- User
-
Registered
- Enjoy Life! IT HAS AN EXPIRATION DATE!
- Posts: 1410
- Thanks: 900
Re: DOHC's blue Z1R Refresh
31 May 2021 06:33
Great project & nice stable!
We use a very thin smear of clear RTV on top of the end caps, straddling the slightly uneven transitions from rubber to aluminum. We install the valve cover and gasket while the RTV is still un-cured, allowing excess to squeeze out when tightening the valve cover bolts. Once cured, trim any excess with a razor or, just roll the extruded bead off with a finger. The next time the valve cover gasket needs to be removed, it releases cleanly from the RTV.
Good Ridin'
slmjim & Z1BEBE
A biker looks at your engine and chrome.
A Rider looks at your odometer and tags.
1973 ('72 builds) Z1 x2
1974 Z1-A x2
1975 Z1-B x2
1993 CB 750 Nighthawk x2
2009 ST1300A
www.kawasaki-z-classik.com
A Forum tightly focused on all things Z1 and Z2.
A Rider looks at your odometer and tags.
1973 ('72 builds) Z1 x2
1974 Z1-A x2
1975 Z1-B x2
1993 CB 750 Nighthawk x2
2009 ST1300A
www.kawasaki-z-classik.com
A Forum tightly focused on all things Z1 and Z2.
Please Log in or Create an account to join the conversation.
- DOHC
-
 Topic Author
- Offline
- Sustaining Member
-

Registered
- Those Doe-Hawks really go!
- Posts: 1271
- Thanks: 600
Re: DOHC's blue Z1R Refresh
02 Jun 2021 21:04with the air box in place I heat the air box rubbers up with a hair dryer and roll them over on themselves.
I admit I have not installed carbs on a KZ1000 with airbox, but I have on a kz650, '95 GPz1100 and '00 ZRX1100. The most shocking thing is that this stupid design from the mid-70 was still in use in the 2000. With the Kz650, I pushed the airbox rubbers back into the box. I pulled them back into place after the carbs were mounted, but it was a ton of work and made my fingers sore. I can't image what it would do to my hands now 20 years later. I think I did a somewhat similar thing with the GPz1100, but I don't recall. It either wasn't that bad, or I blocked it out. I did the ZRX1100 recently, and I eventually settled on the trick you recommend. I folded the boots back on themselves. That allowed me to get the carbs mounted. But the issue with the ZRX was that there was absolutely no space for me to get my hand past the frame and carbs to reach those two inside boots. I had to poke them with tools to get them to unfold, and poke at them to get them into place. It took me a lot of tries before I got it to work. I think the other trick was to find a thin piece of plastic to wedge between the rolled-back boots and the carbs, to keep the boots in place. The whole thing was ridiculous, and I don't ever want to take those carbs off again.
hardrockminer post=849308
The gasket is not glued to the end caps. I normally check the caps to ensure they are flat and then lay the gasket over top. I use OEM gaskets only. I will add a bit of grease to the bottom side before laying it down. This makes it easier to remove when re-opening the valve cover.
I have a Cometic gasket. Their reputation seemed to be ok. What kind of grease do you use?
slmjim+Z1BEBE post=849313
We use a very thin smear of clear RTV on top of the end caps, straddling the slightly uneven transitions from rubber to aluminum.
Yes, it's the top surface of the end caps that I'm worried about. I'm worried it's not perfectly flat. RTV sounds like it could get messy.
Looking around, the name for this type of application seems to be "gasket dressing".
Anyone have any experience with Hylomar Advanced Formulation or Permatex PermaShield? Both are high temperature and non-curing, and both clean up with Acetone. The Hylomar says it's solvent free, while the Permatex says to wait for the acetone smell to go away, so I'm guessing not solvent free.
hylomar.com/en/hylomar-advanced-formulation/
www.permatex.com/products/gasketing/gask...sing-flange-sealant/
Both of those seem like overkill for my case, but I was just curious.
'78 Z1-R in blue
, '78 Z1-R in black,
'78 Z1-R in pieces
My dad's '74 Z1
'00 ZRX1100
My dad's '74 Z1
'00 ZRX1100
Please Log in or Create an account to join the conversation.
- DOHC
-
Topic Author
- Offline
- Sustaining Member
-
Registered
- Those Doe-Hawks really go!
- Posts: 1271
- Thanks: 600
Re: DOHC's blue Z1R Refresh
23 Jul 2021 20:48
I’ve made a lot of progress. Let’s start with the brakes.
I didn’t plan to rebuild the entire brake system, but it sort of happened anyway.
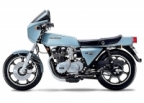
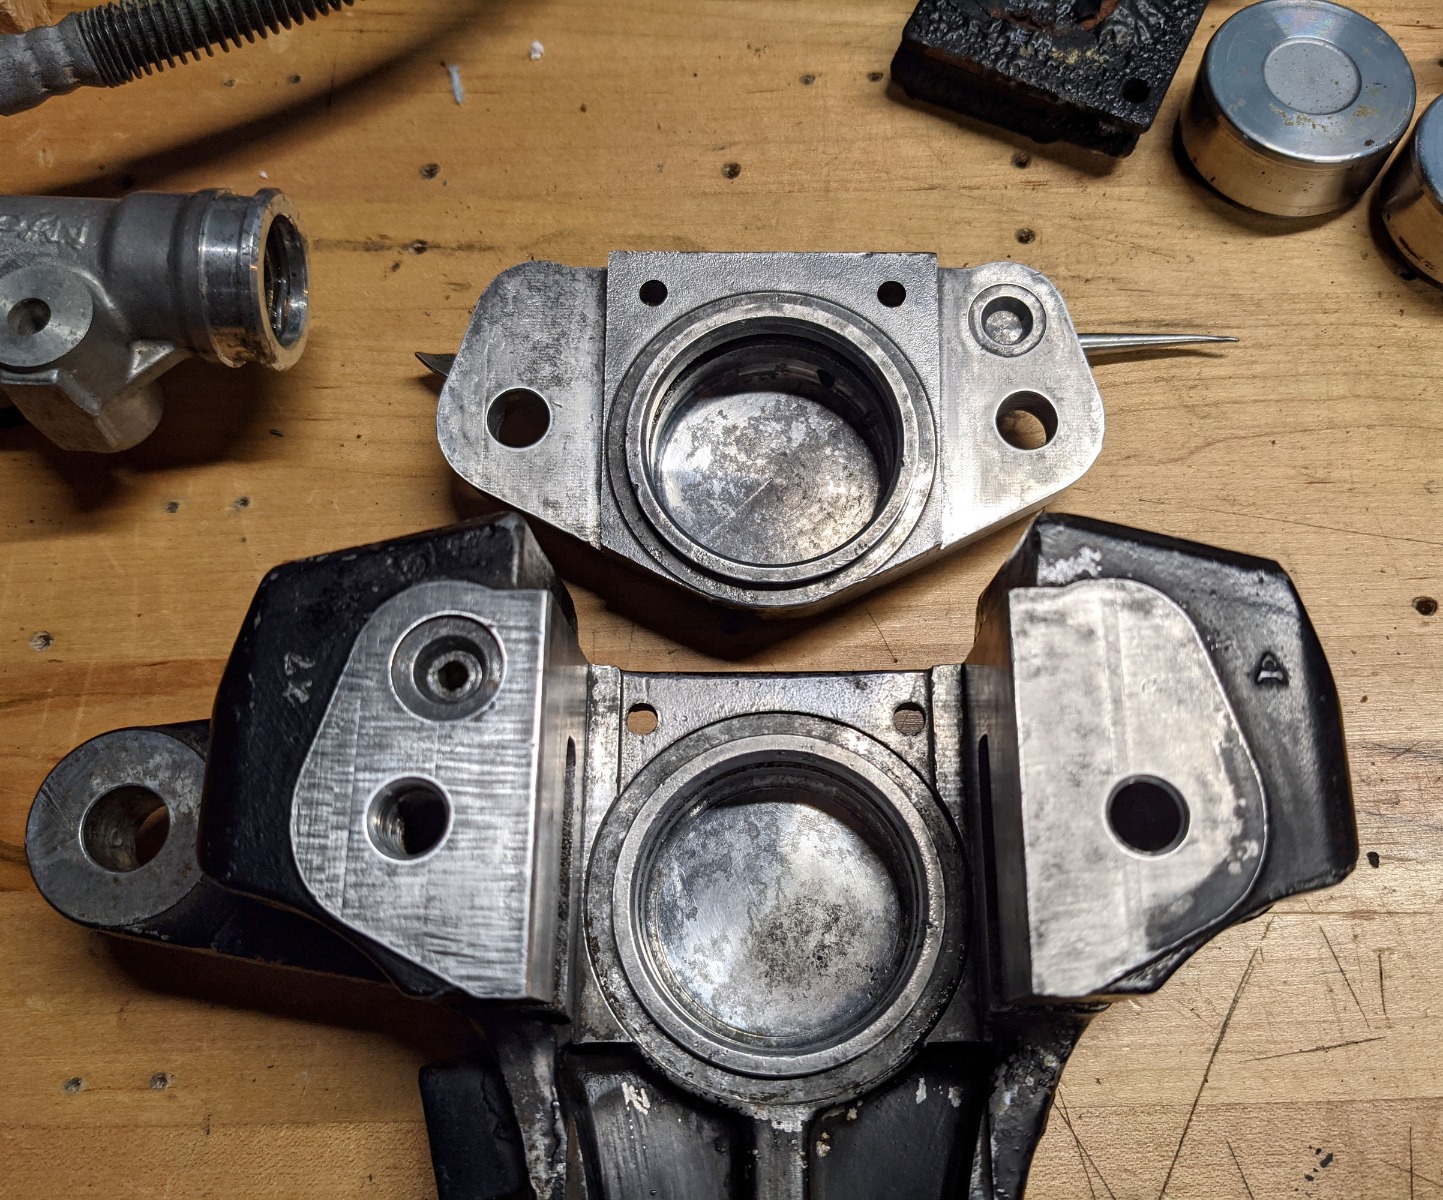
I had the rear wheel and swingarm off, so I had the idea that I would remove the rear caliper just drain to drain all the old fluid out, then put it back on and bleed it. But when I pulled it off I found two things. First, one of the two bolts that holds the caliper halves together was about half-way out. OOPS.
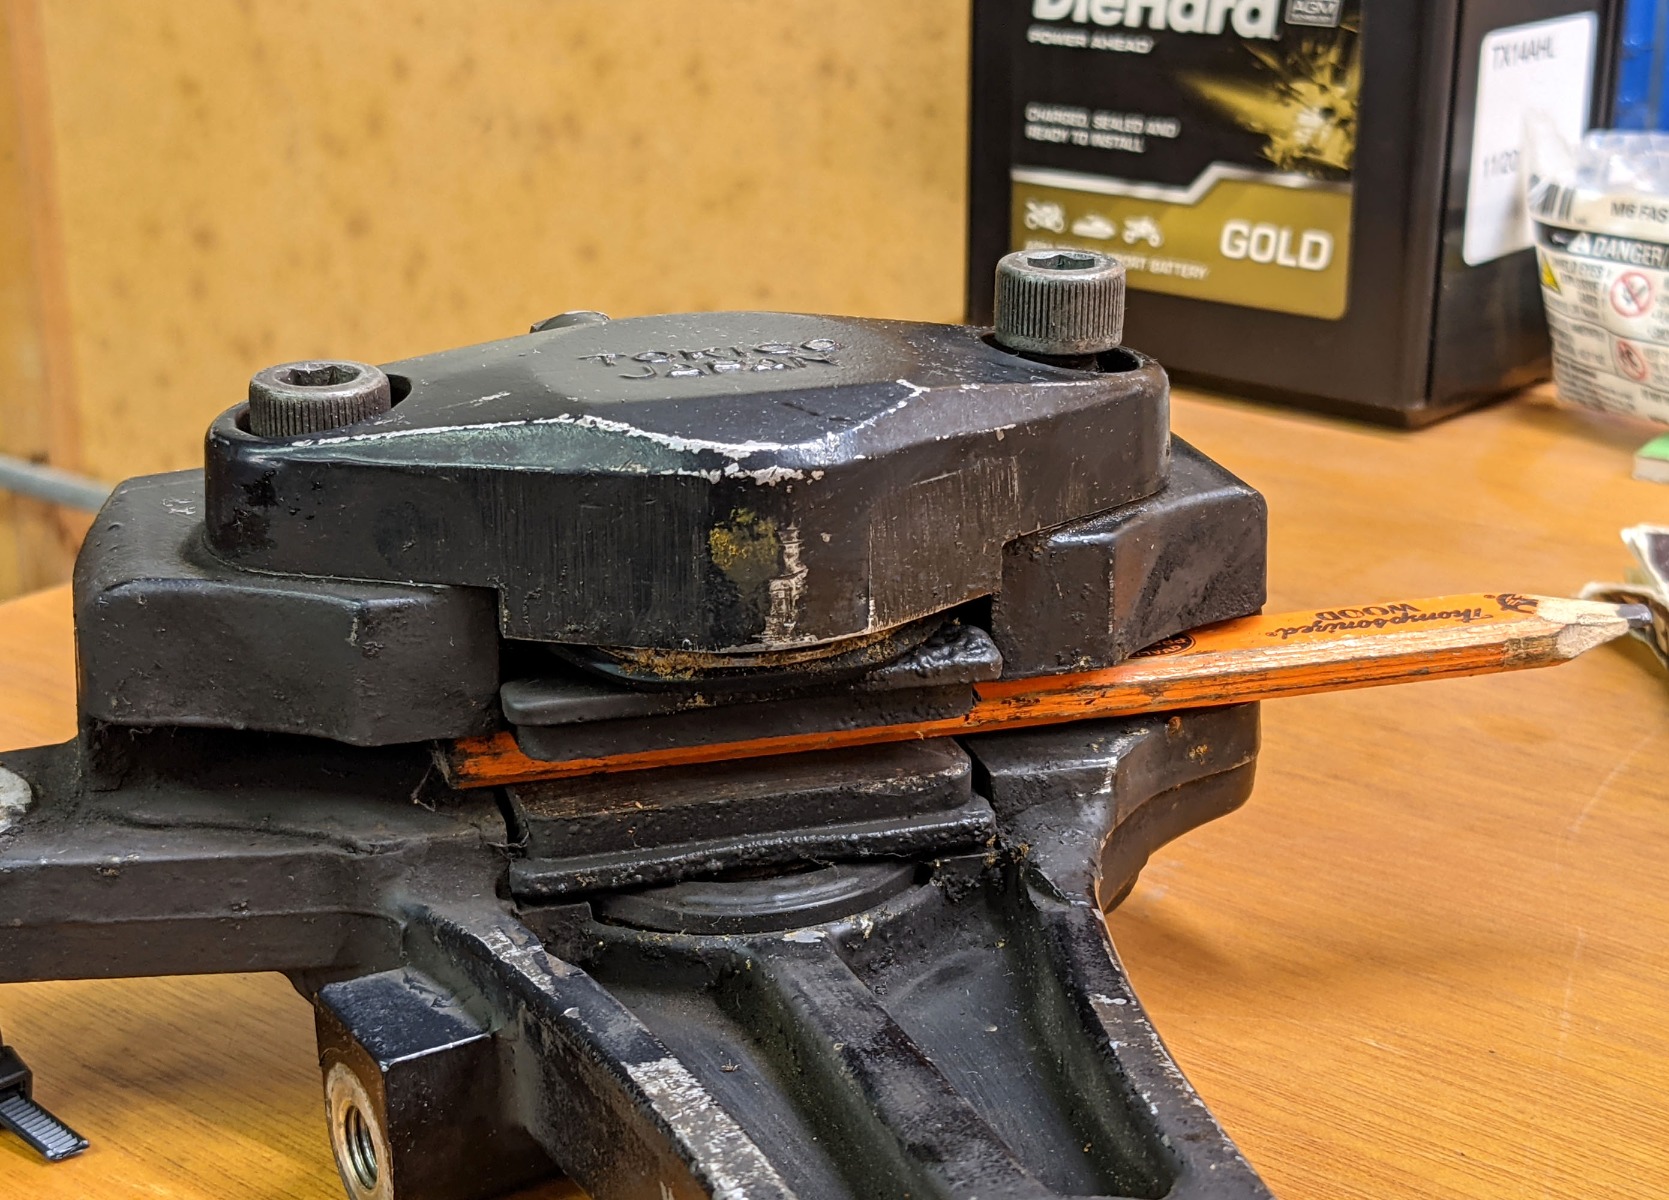
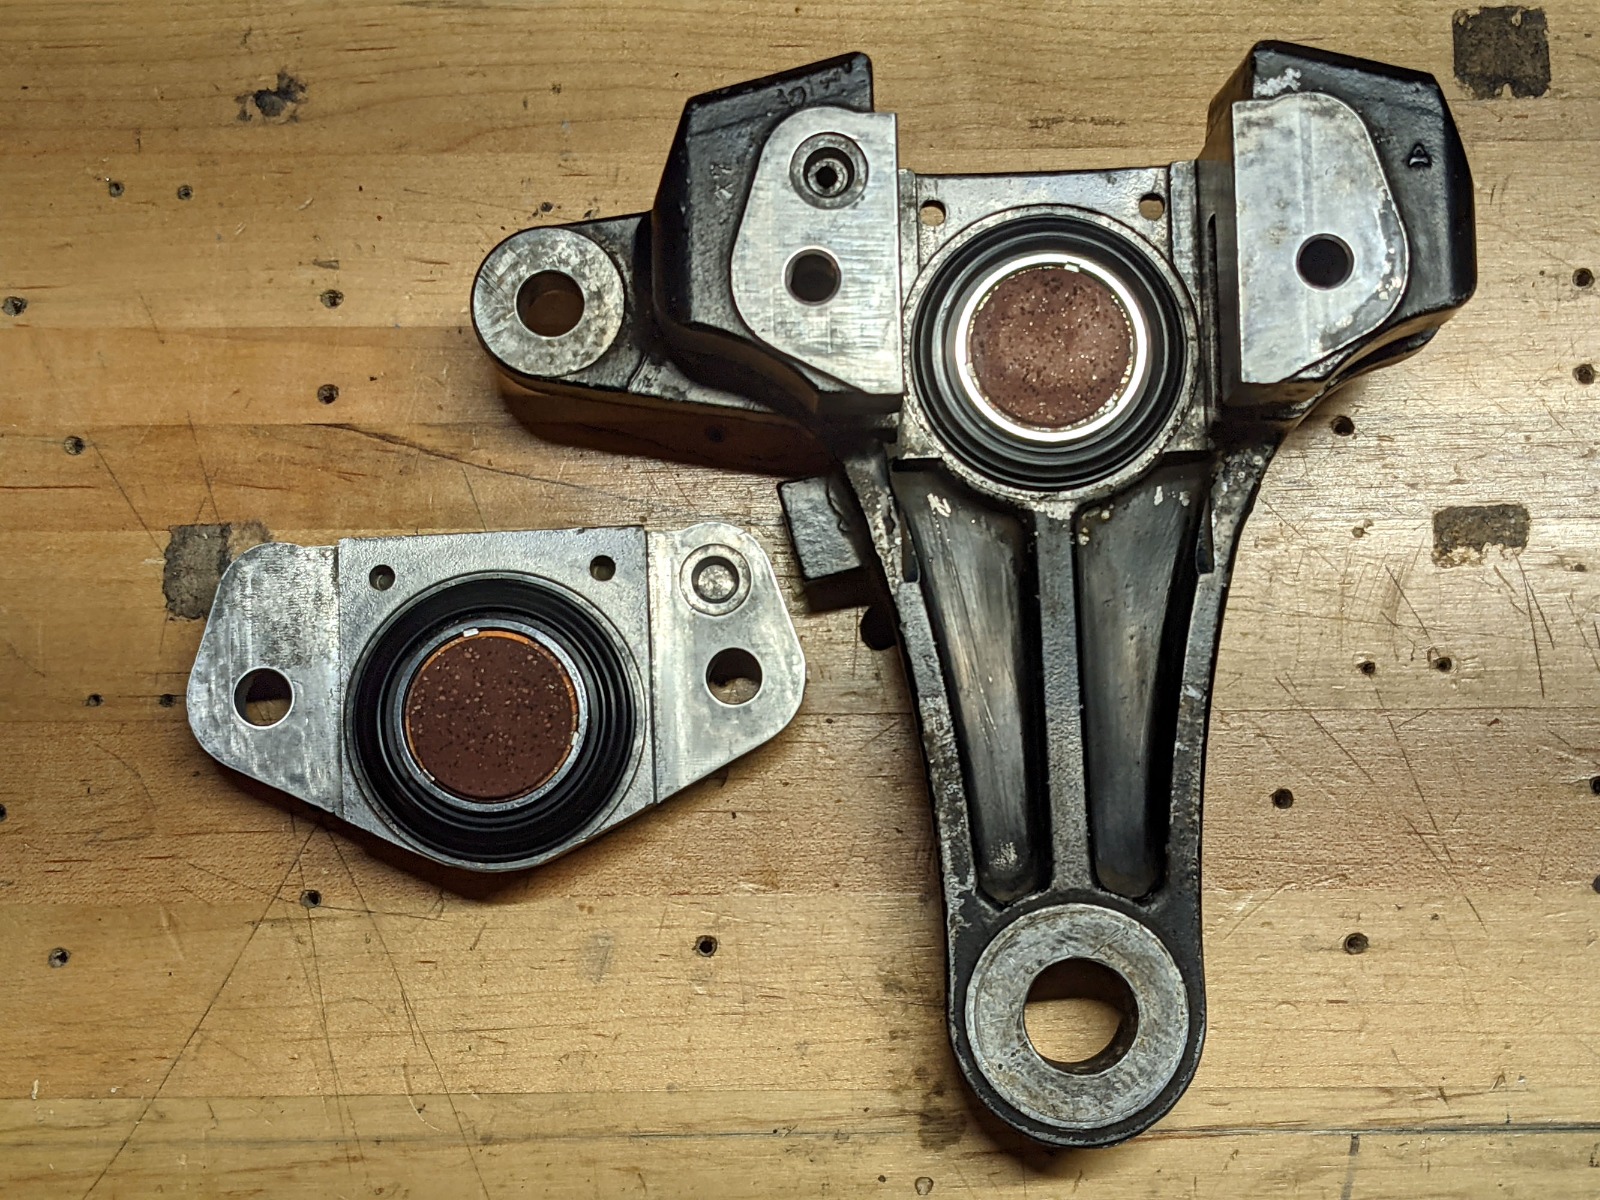
Second, it was clear the seals were leaking and the pads backing plates were rusty. So it all came apart.
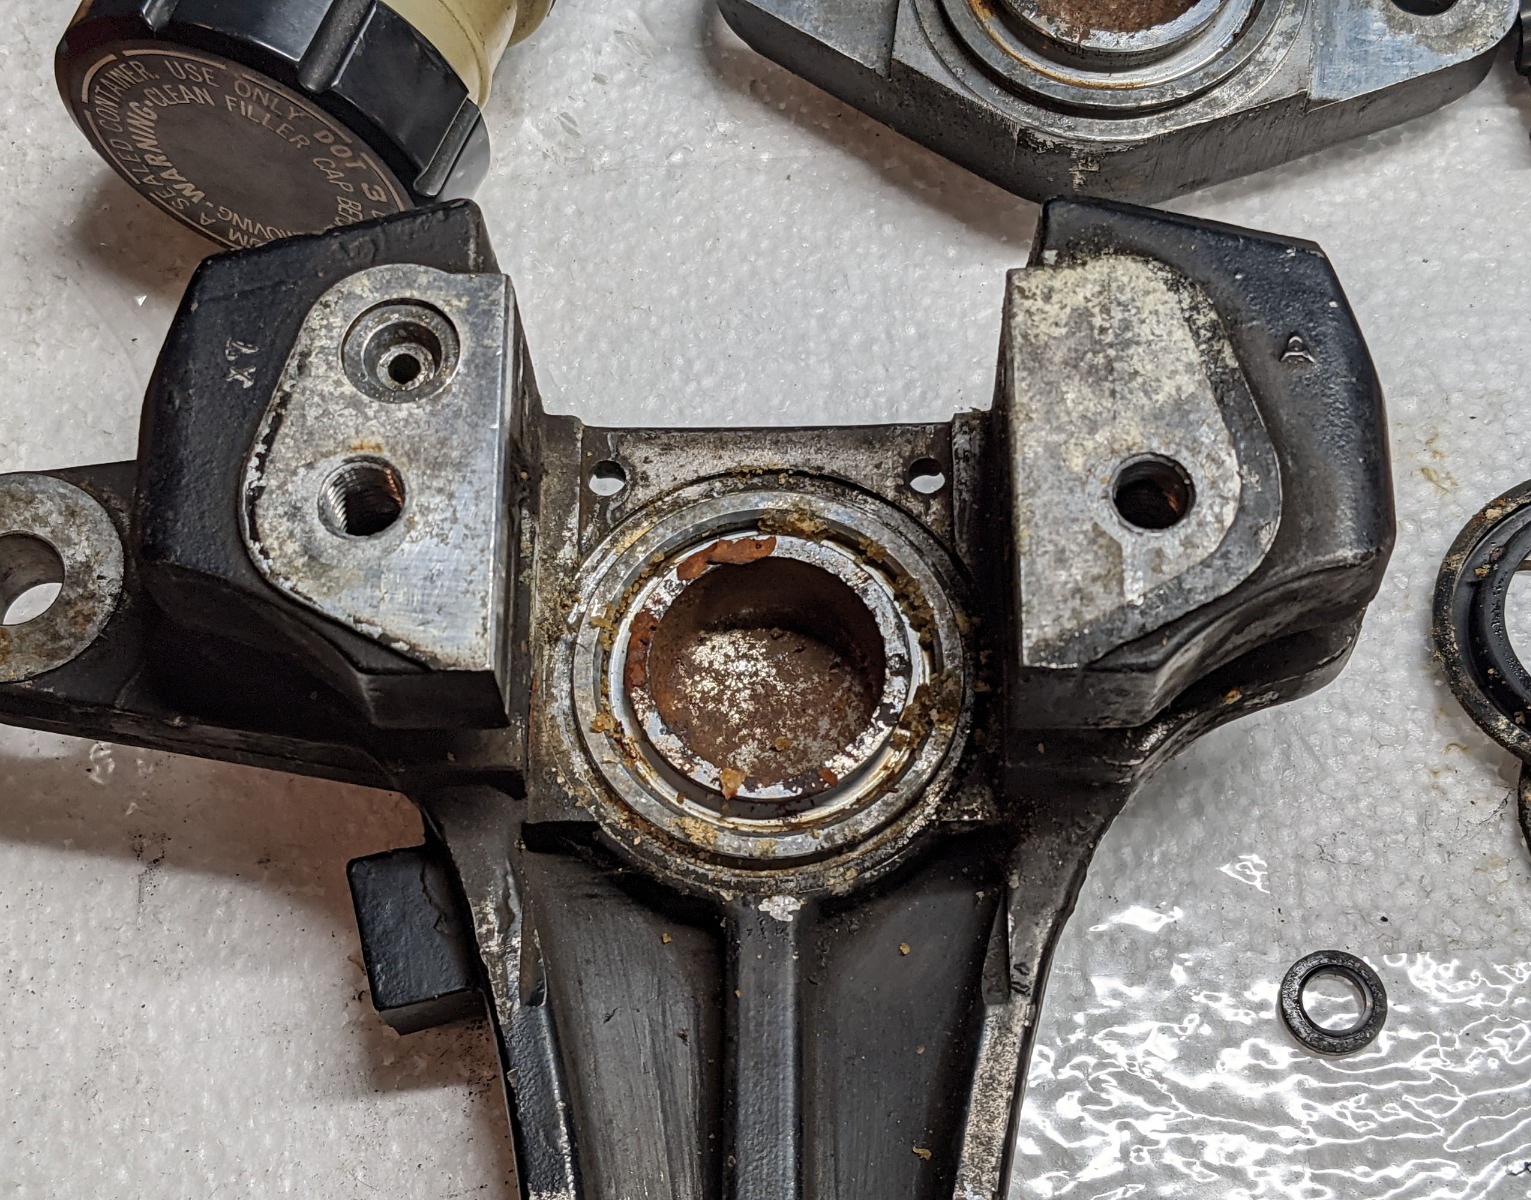
Based on recommendations here, I got a rebuild kit from Brakecrafers. I bought the later style 79-80 pistons with the insulating disk. I figured why not. I had two issues with the kit. It was missing the correct seal for the passage between the two halves, and the dust seals wouldn’t stay in place. It seemed like they were too small, and would just pop off of the lip on the body no matter what I did. I spoke with Brakecrafers and they were very eager to help sort it out. Absolutely an “A+” for customer service.
I had already ordered OE parts to replace the kit parts before I spoke with them, but he assured me that the dust seals in the Brakecrafers kit were identical to the current OE parts. This appears to be correct. The OE part I later received looked identical. I ended up cleaning and reusing the existing dust seal, which were fine and did not pop off.
And for good measure, I also rebuilt the rear master.

I used an aftermarket kit from Z1parts.net instead of the OE parts. The piston wasn’t quite as nicely made as the OE part, but it looks like it will work fine.
z1parts.net/kawasaki-rear-brake-master-c...r-repair-kit-kz1000/
I didn’t plan to rebuild the entire brake system, but it sort of happened anyway.
I had the rear wheel and swingarm off, so I had the idea that I would remove the rear caliper just drain to drain all the old fluid out, then put it back on and bleed it. But when I pulled it off I found two things. First, one of the two bolts that holds the caliper halves together was about half-way out. OOPS.
Second, it was clear the seals were leaking and the pads backing plates were rusty. So it all came apart.
Based on recommendations here, I got a rebuild kit from Brakecrafers. I bought the later style 79-80 pistons with the insulating disk. I figured why not. I had two issues with the kit. It was missing the correct seal for the passage between the two halves, and the dust seals wouldn’t stay in place. It seemed like they were too small, and would just pop off of the lip on the body no matter what I did. I spoke with Brakecrafers and they were very eager to help sort it out. Absolutely an “A+” for customer service.
I had already ordered OE parts to replace the kit parts before I spoke with them, but he assured me that the dust seals in the Brakecrafers kit were identical to the current OE parts. This appears to be correct. The OE part I later received looked identical. I ended up cleaning and reusing the existing dust seal, which were fine and did not pop off.
And for good measure, I also rebuilt the rear master.
I used an aftermarket kit from Z1parts.net instead of the OE parts. The piston wasn’t quite as nicely made as the OE part, but it looks like it will work fine.
z1parts.net/kawasaki-rear-brake-master-c...r-repair-kit-kz1000/
'78 Z1-R in blue
, '78 Z1-R in black,
'78 Z1-R in pieces
My dad's '74 Z1
'00 ZRX1100
My dad's '74 Z1
'00 ZRX1100
Please Log in or Create an account to join the conversation.
- DOHC
-
Topic Author
- Offline
- Sustaining Member
-
Registered
- Those Doe-Hawks really go!
- Posts: 1271
- Thanks: 600
Re: DOHC's blue Z1R Refresh
23 Jul 2021 20:53 - 23 Jul 2021 21:12
No eBay APP ID and/or Cert ID defined in Kunena configurationAround the same time DoctoRot was selling some phenolic pistons that were supposed to fit the Z1R. Turns out he had been sent the wrong parts when he bought them, but he did a bunch of work and got the manufacturer to swap for the correct parts, which was really awesome. Thanks again!
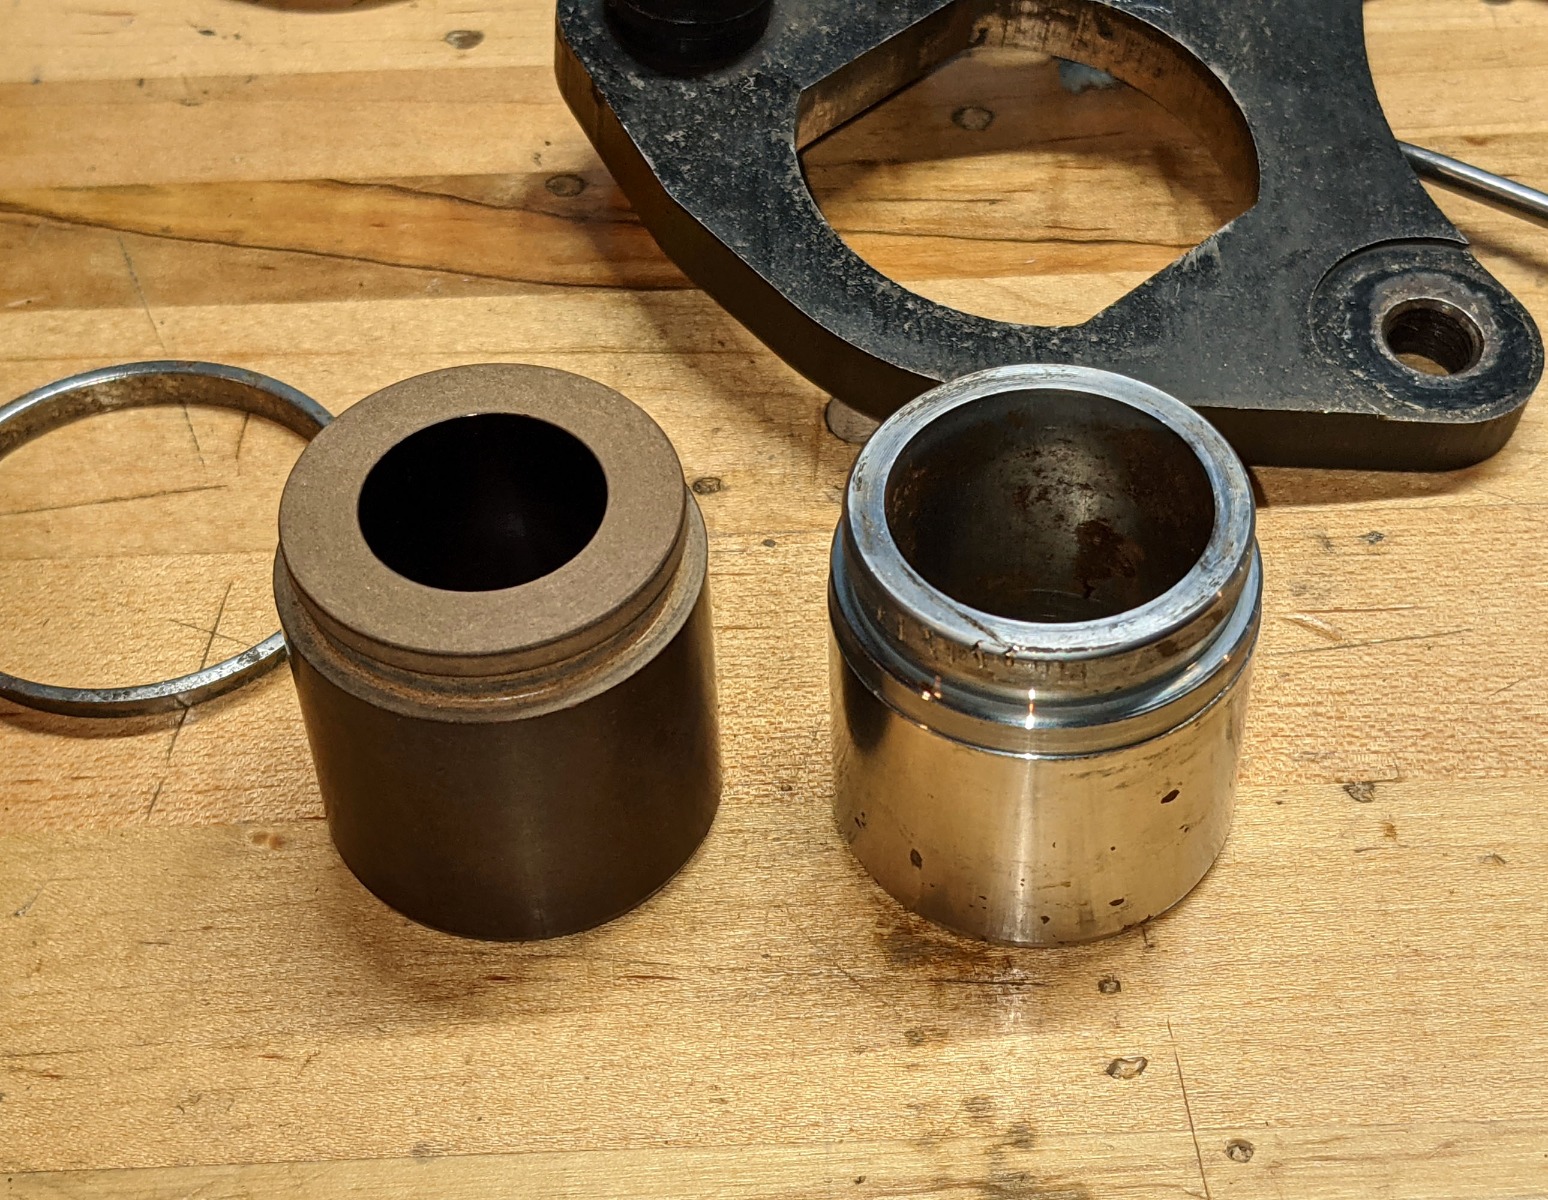
With those in hand, I went ahead and rebuilt the front calipers. I used OE piston seals, but the rest of the parts were from a K&L kit. The OE piston seals really look like a high quality part. It seemed like a good place to invest.
All cleaned and back together:

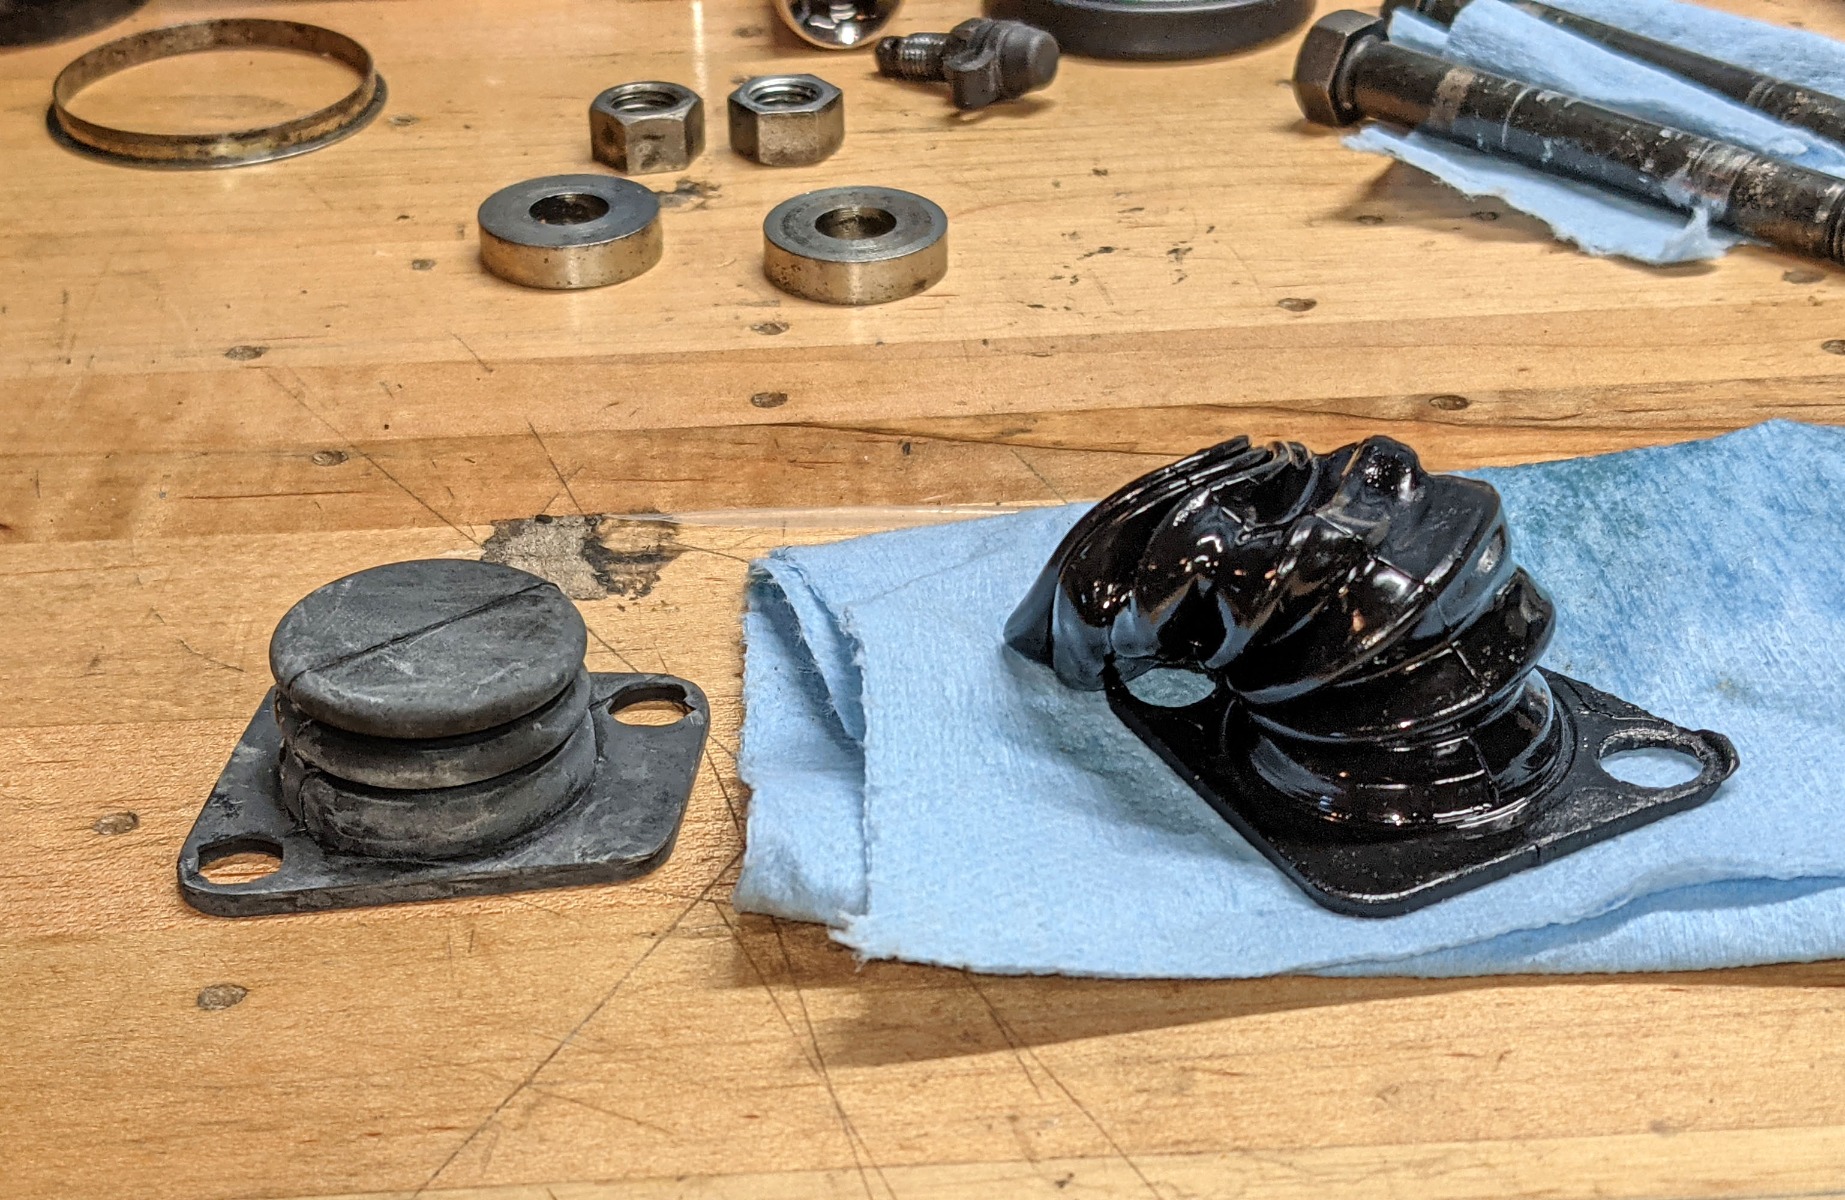
The last piece was the rubber diaphragm for the front reservoir. I was aware that this was basically useless 10 years ago, but I couldn’t find a replacement. Then a guy in Australia reproduced them.
kzrider.com/forum/5-chassis/569907-z1r-f...tute?start=12#644099
So I replaced my wet noodle with a new part. In my opinion, the reproduction is much too thick and should be more flexible. But it will at least keep the air and water vapor out of my fluid. I figure if I keep it topped off it doesn’t need to flex very much.
With those in hand, I went ahead and rebuilt the front calipers. I used OE piston seals, but the rest of the parts were from a K&L kit. The OE piston seals really look like a high quality part. It seemed like a good place to invest.
All cleaned and back together:
The last piece was the rubber diaphragm for the front reservoir. I was aware that this was basically useless 10 years ago, but I couldn’t find a replacement. Then a guy in Australia reproduced them.
kzrider.com/forum/5-chassis/569907-z1r-f...tute?start=12#644099
So I replaced my wet noodle with a new part. In my opinion, the reproduction is much too thick and should be more flexible. But it will at least keep the air and water vapor out of my fluid. I figure if I keep it topped off it doesn’t need to flex very much.
'78 Z1-R in blue
, '78 Z1-R in black,
'78 Z1-R in pieces
My dad's '74 Z1
'00 ZRX1100
My dad's '74 Z1
'00 ZRX1100
Last edit: 23 Jul 2021 21:12 by DOHC.
The following user(s) said Thank You: DoctoRot
Please Log in or Create an account to join the conversation.
- hardrockminer
-

- Offline
- Sustaining Member
-
Registered
- Posts: 3118
- Thanks: 1230
Re: DOHC's blue Z1R Refresh
24 Jul 2021 04:13
Nicely done! That cylinder looked terrible in the first photo. But it cleaned up pretty well.
I have several restored bikes along with a 2006 Goldwing with a sidecar.
Please Log in or Create an account to join the conversation.
- DoctoRot
-
- Offline
- Sustaining Member
-
Registered
- Oh, the usual... I bowl, I drive around...
- Posts: 2614
- Thanks: 780
The following user(s) said Thank You: DOHC
Please Log in or Create an account to join the conversation.
- DOHC
-
Topic Author
- Offline
- Sustaining Member
-
Registered
- Those Doe-Hawks really go!
- Posts: 1271
- Thanks: 600
Re: DOHC's blue Z1R Refresh
26 Jul 2021 21:22
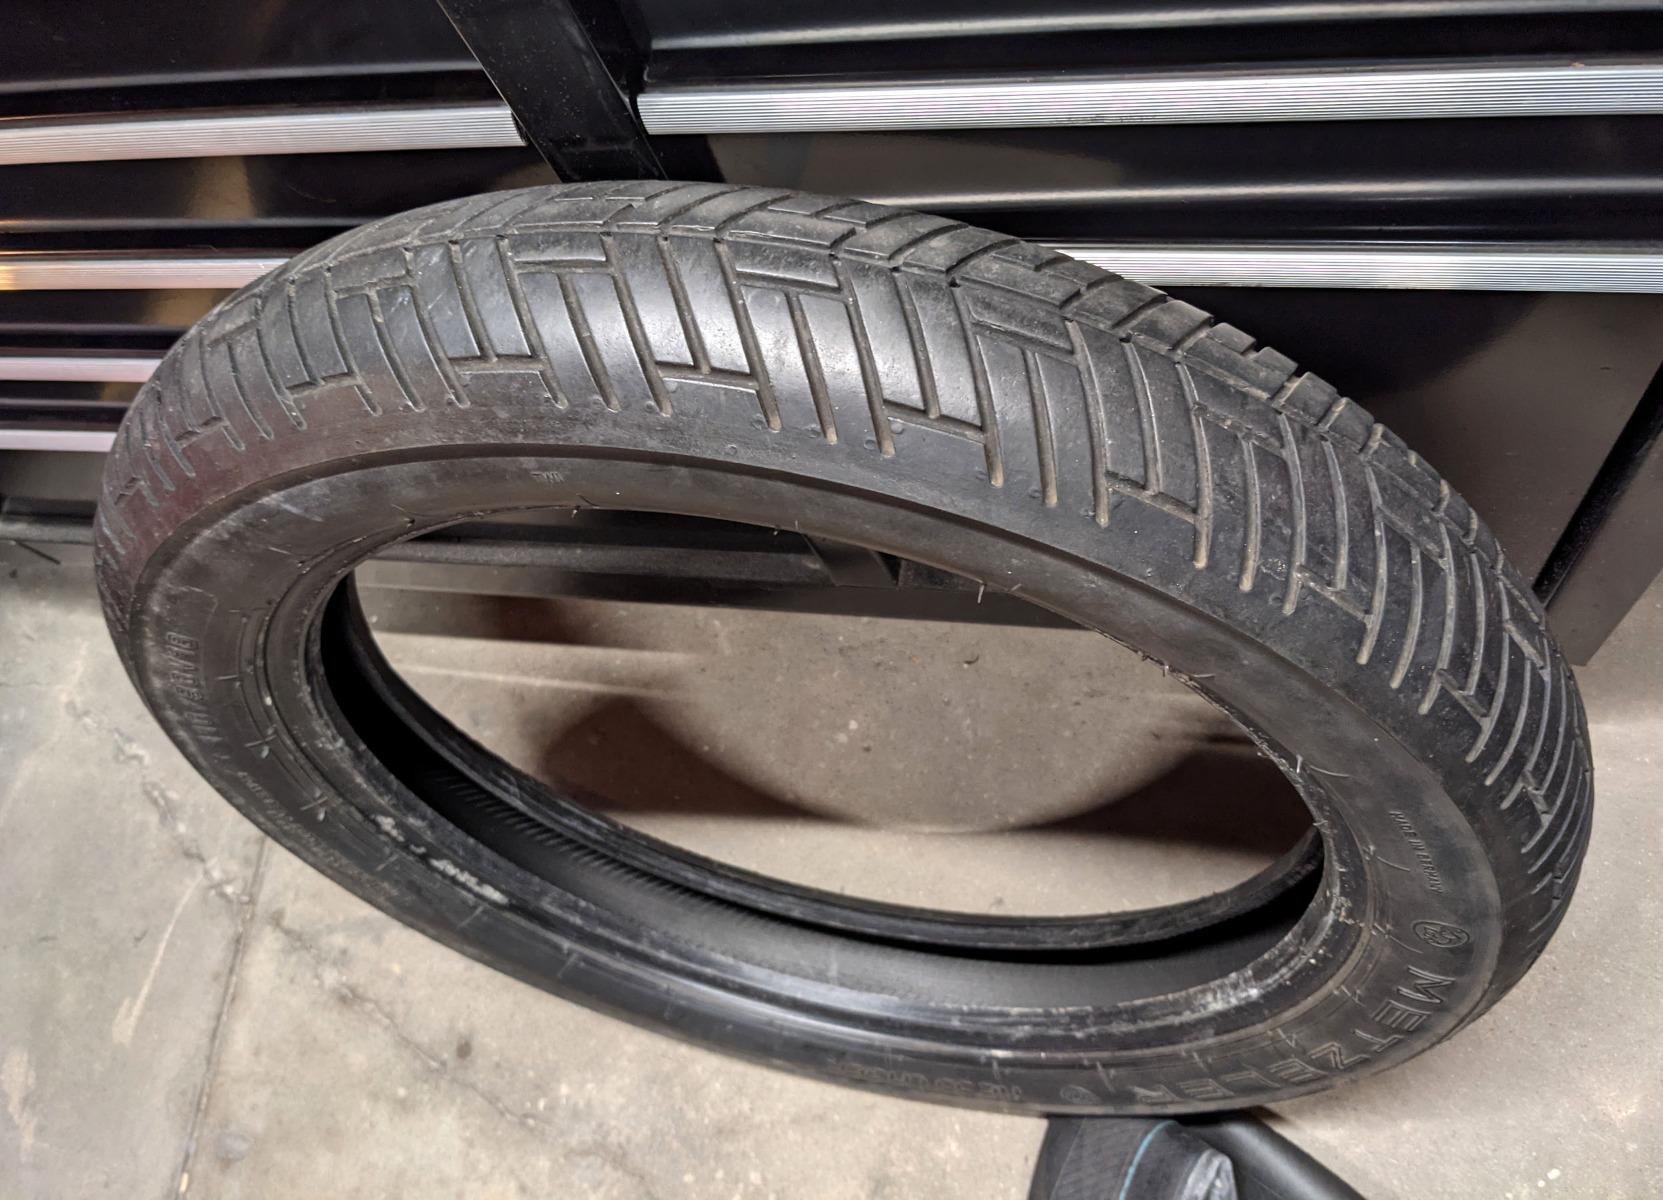
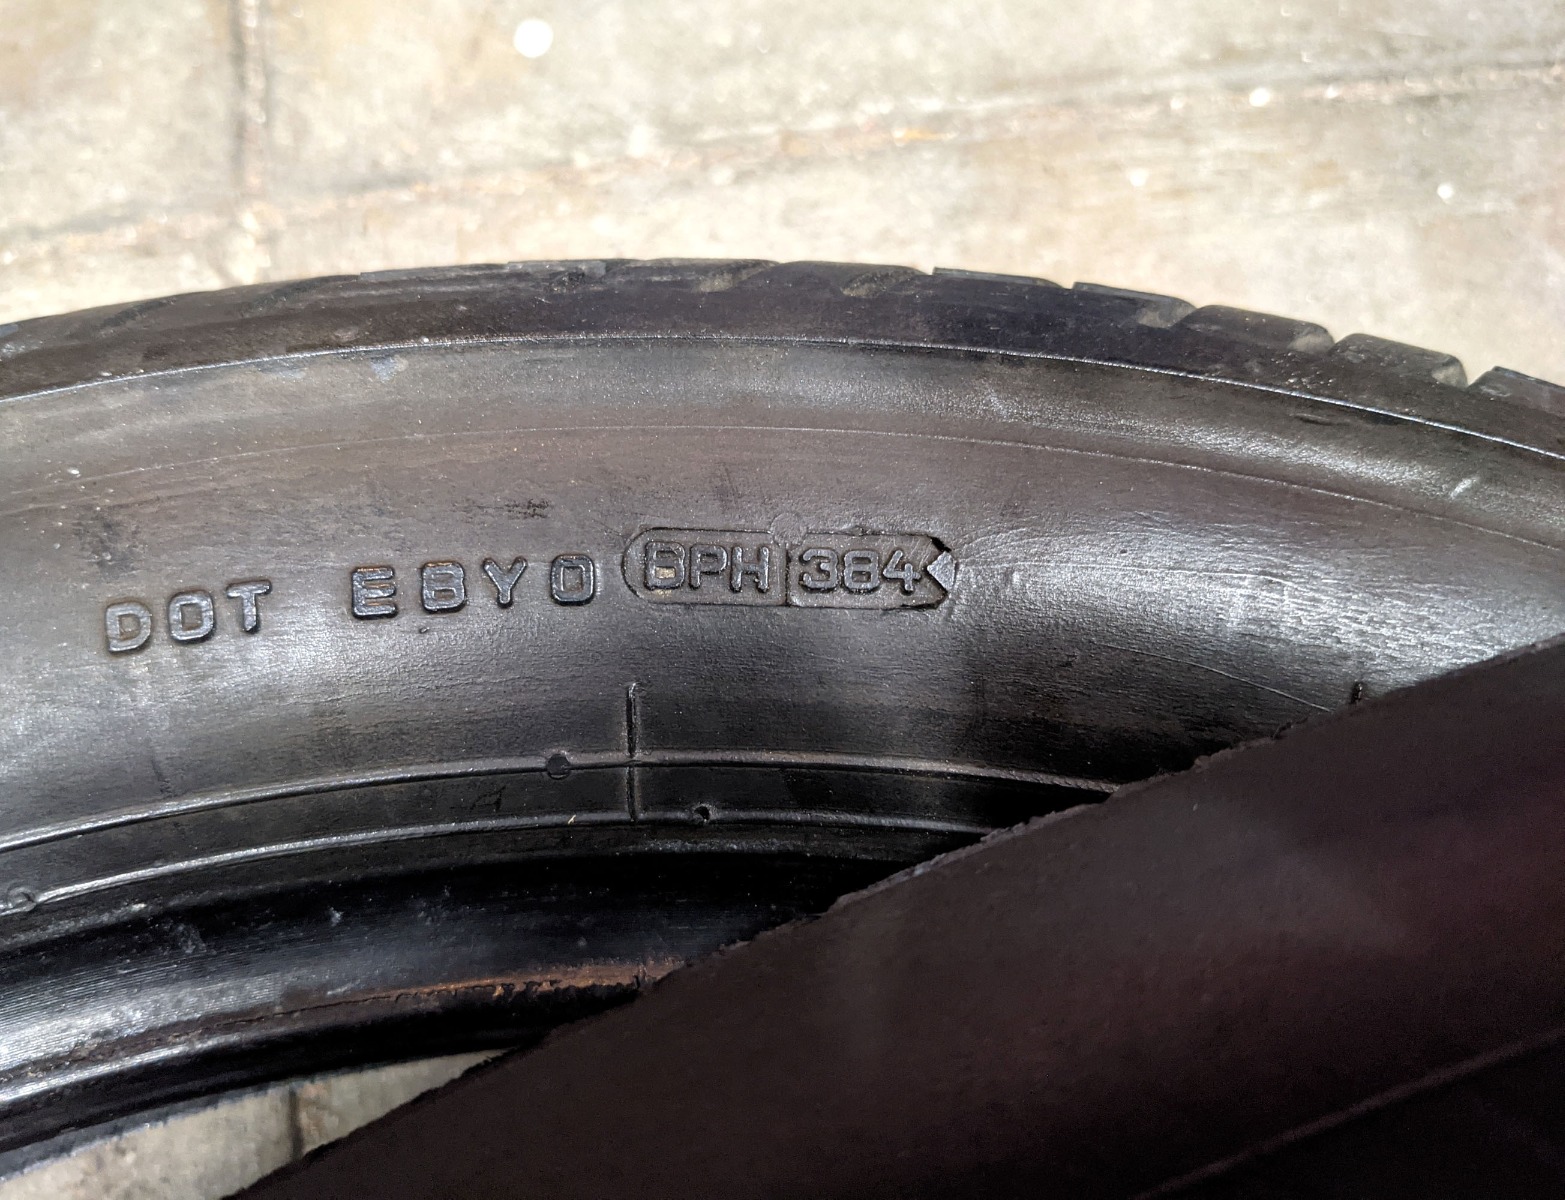
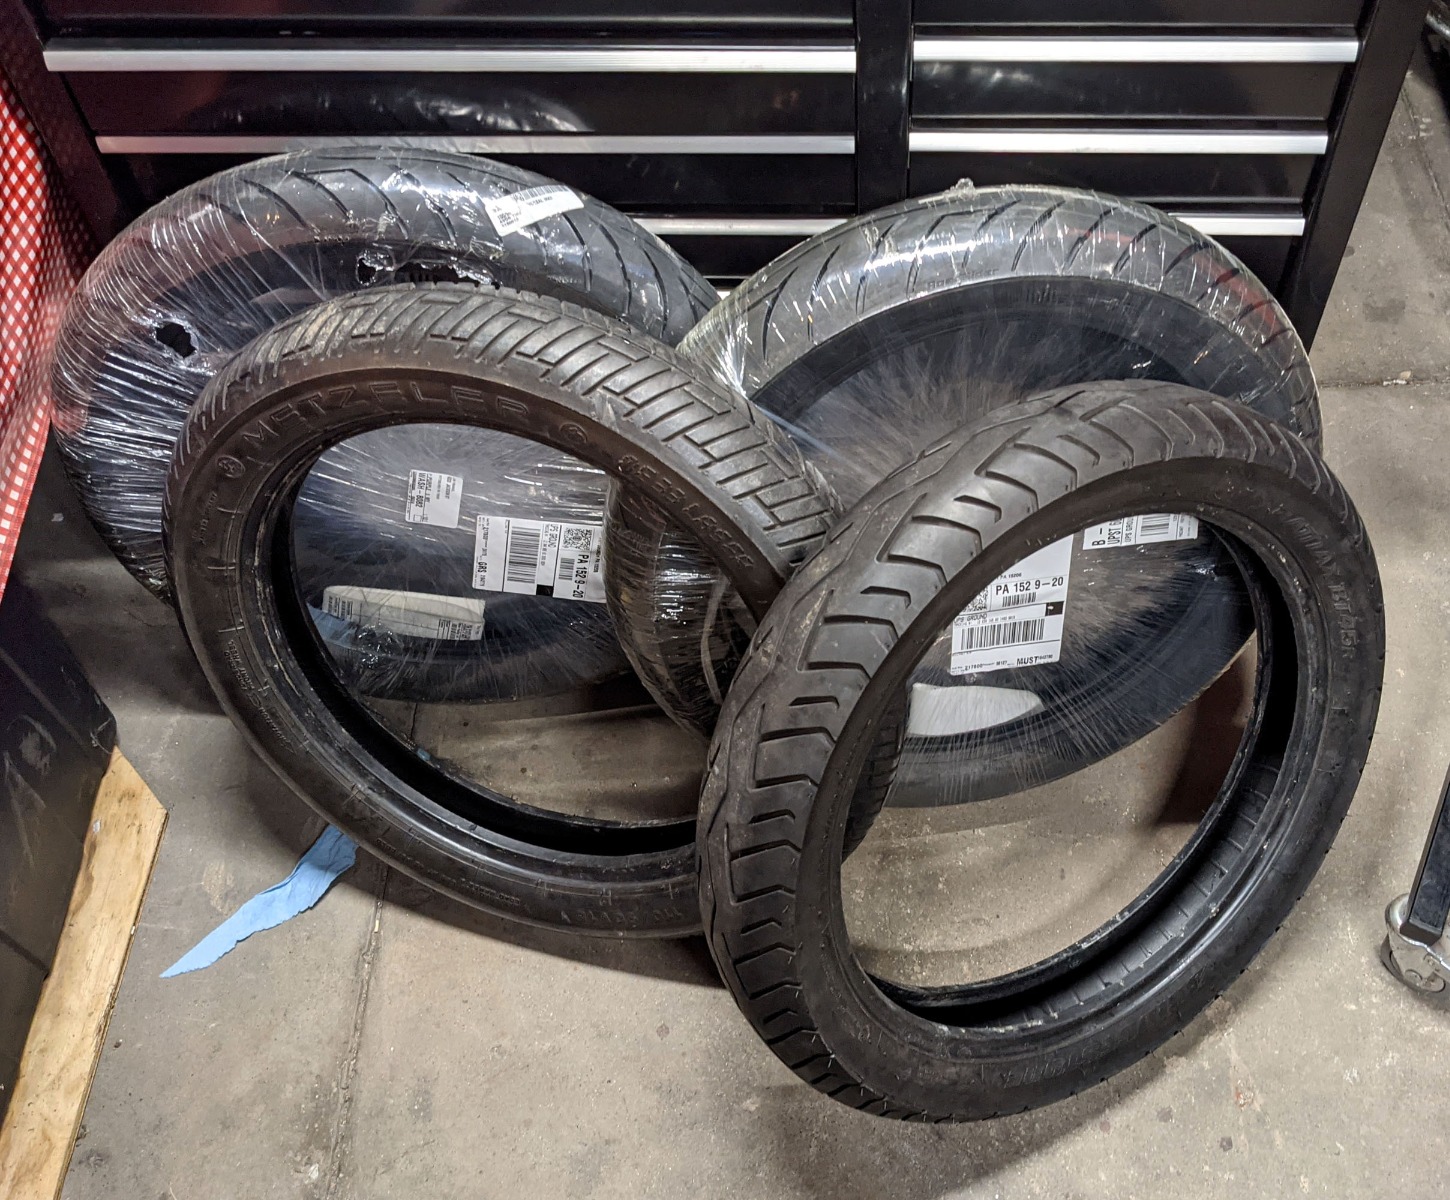
Next up is tires. I replaced the rear tire when I rebuilt the bike in 2008. Initially I used a Dunlop, maybe a k491? It was a 130 size, maybe 130/70-18. It turned out to be too wide, and rubbed a big slot right through the inside of my chain guard before I realized it was touching. That made me grumpy, so I swapped that for a Bridgestone BT45 in 120/80-18. That size fits fine. The front tire on the bike when I got it was a Metzeler ME33 Laser, which had plenty of tread on it, so I didn’t bother to do anything with it.
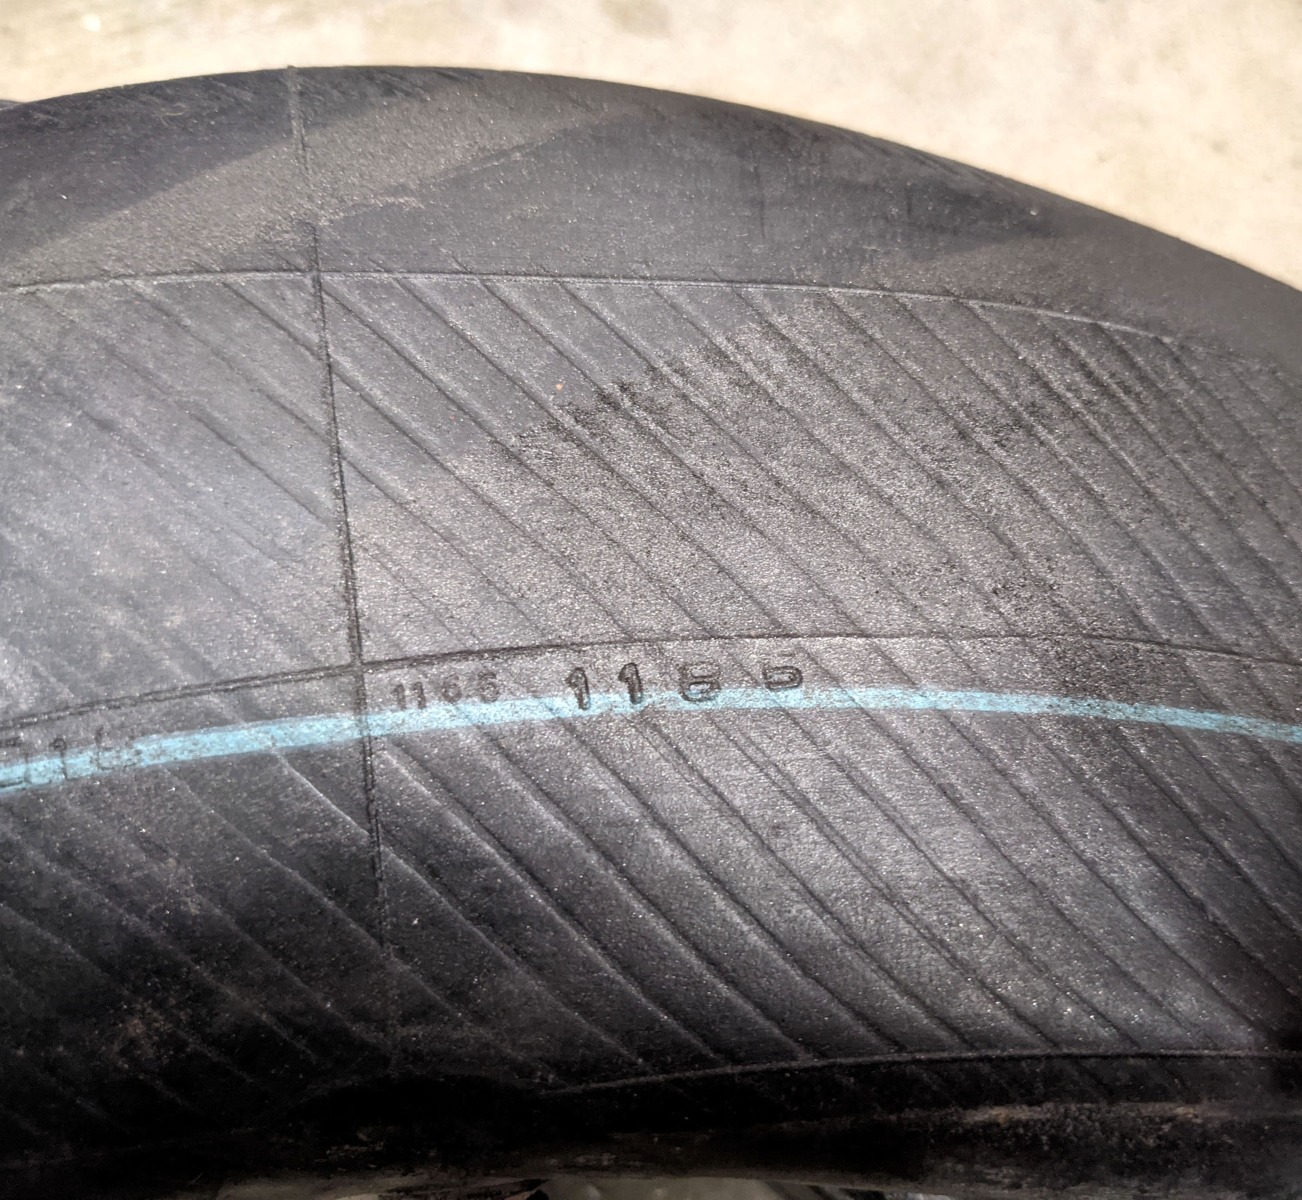
At that time I didn’t know anything about how tires age and get hard, or that they recommend you replace tires after 5 years. The date code on the ME33 was 384, which could be the 38th week of 1994, or 1984. The tube inside had raised numbers 1185, which might be 11th week of 1985. In any case, that tire was waaaaaay over the 5 year mark. Sometimes I’m not as careful as I’d like to be. The rear tires dates from 2008, so both of them were done. Look at how shiny the sidewall of the Laser is.
I was happy with the BT45, but many folks here recommend the Avon Roadrider so I wanted to give those a try. I was also tempted by the new BT46, so I went around in circles for a while.
Trying to figure out the correct size is tricky. The OE tires were 3.50-18 and 4.00-18. That would translate roughly to 90/90-18 and 100/100-18. But I don’t have any vintage tire measurements to confirm that translation. If you look at modern tires, it’s clear that the relationship between the “size” and the actual measurement is only approximate, so it’s hard to guess the actual size of the OE tires.
A few manufacturers sell modern tires in those inch sizes, so I used those for as a reference for dimensions. For example, the BT45 3.50-18 is actually more like 104/97, and the BT45 4.00-18 is a 119/108. The Roadrider 4.00-18 is 116/107, so similar, but both are far away from 4” (101.6mm).
There are two reasons I spent so much time thinking about this. Ok, three: This is just how I spend my time. But the first reason was that like everyone else I want to run the widest tires that fit, but the front tire I had was very close to the fender so I was worried the wrong front tire might be too wide or tall, and in the back I already chewed up my chain guard so clearances were tight all over. The second reason was that the Z1R has less trail than any other KZ1000, and period articles were critical of the steering. I had been running a tall front tire and a short rear tire, how tall and short is hard to tell, but pretty clearly different from the OE tires. I had no issues at all with the handling of the bike, but also have no idea if that particular tire combination was helping to relax the steering angle and increase trail a bit.
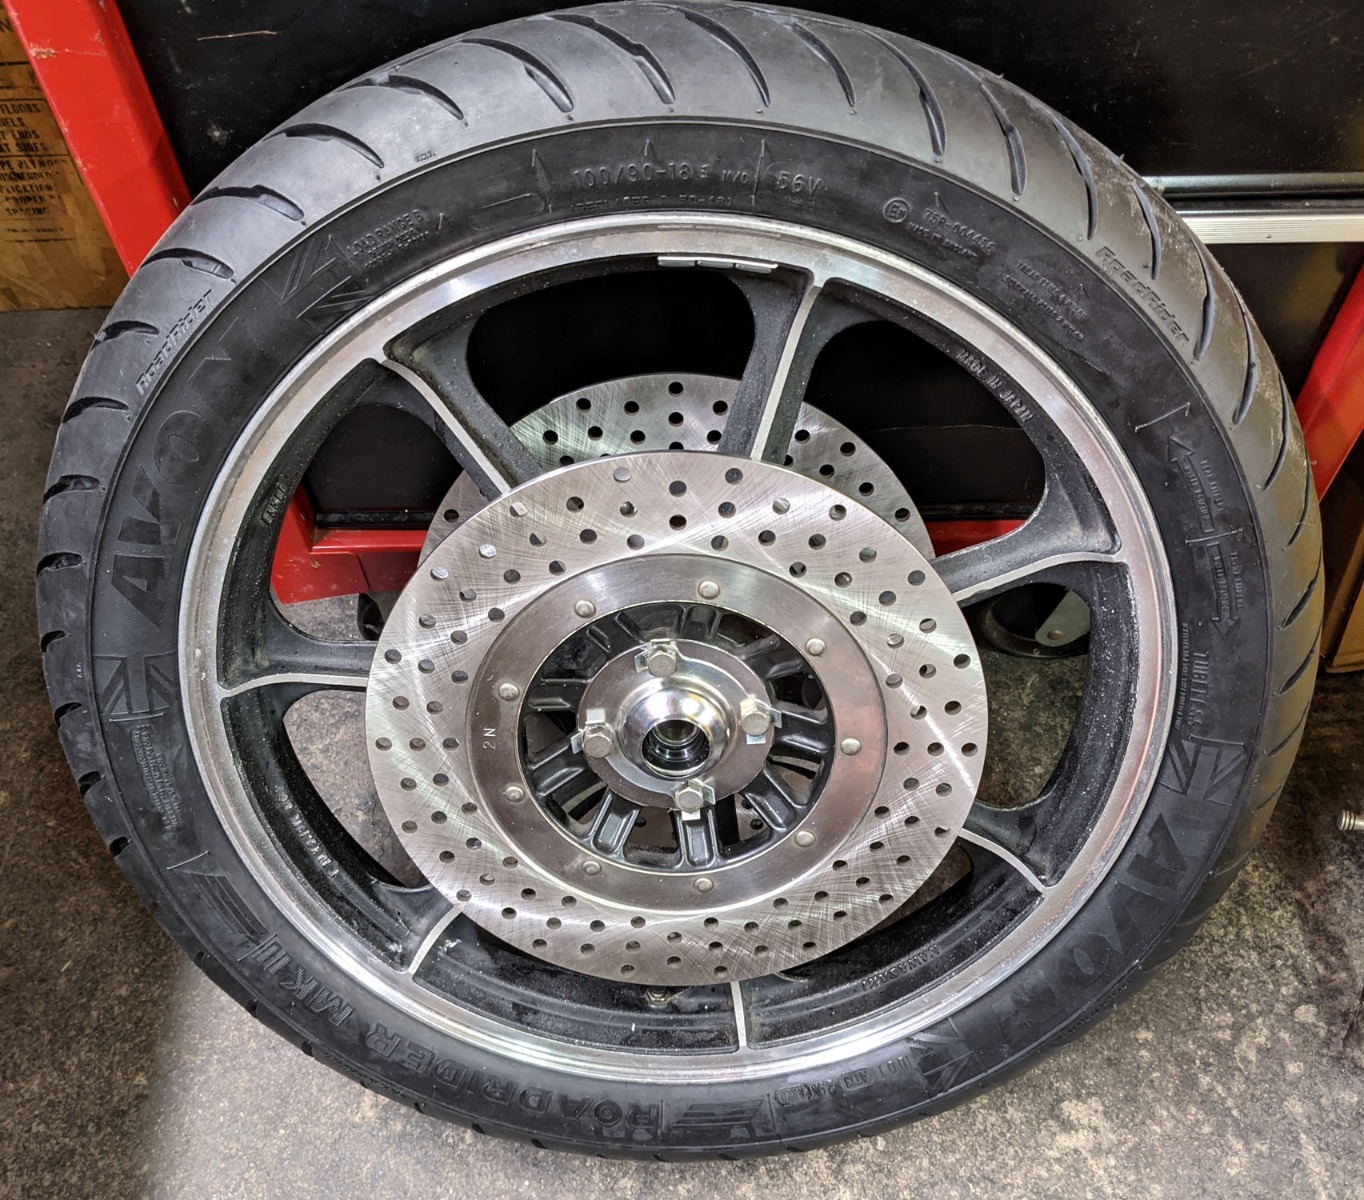
Anyway, I got all balled up in this and went back and forth between various sizes of BT45, BT46, and Roadrider Mk2. In the end I got the Roadrider Mk2 in 100/90-18V and 120/80-18V. The sticker on the front tire actually says “(3.50-18)” under the metric size, which seemed like a good sign. We’ll see how it works out.
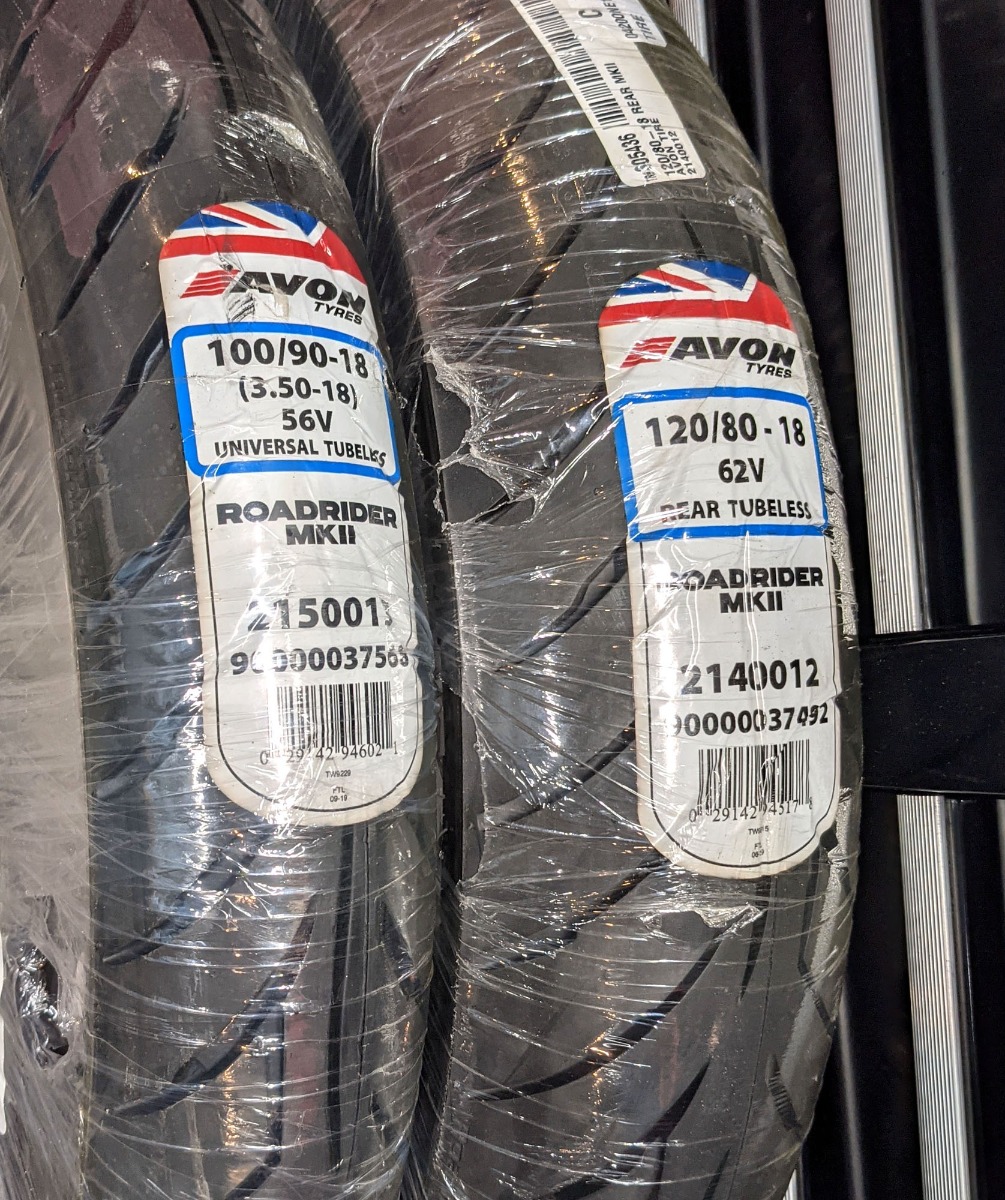
Then I needed tubes. Not much information is available for tubes. It seemed like Dennis Kirk had a good supply of the Michelin tubes, but I couldn’t find any info on the Michelin site to confirm the sizes. Avon is one of the few manufacturers that lists their tube part numbers and fitment.
www.avontyres.com/en-gb/tube-tyres/
In the end I got an Avon for the front, and a Michelin for the back.
Avon A18T325 and Michelin 39186.
www.denniskirk.com/535689.sku
www.denniskirk.com/535650.sku
I removed the old tires by hand with spoons so I could clean up the rims and the bead area, but I took them to a shop to have them put on. The tubes appear to be inside the tires now, so I’m guessing they fit.
At that time I didn’t know anything about how tires age and get hard, or that they recommend you replace tires after 5 years. The date code on the ME33 was 384, which could be the 38th week of 1994, or 1984. The tube inside had raised numbers 1185, which might be 11th week of 1985. In any case, that tire was waaaaaay over the 5 year mark. Sometimes I’m not as careful as I’d like to be. The rear tires dates from 2008, so both of them were done. Look at how shiny the sidewall of the Laser is.
I was happy with the BT45, but many folks here recommend the Avon Roadrider so I wanted to give those a try. I was also tempted by the new BT46, so I went around in circles for a while.
Trying to figure out the correct size is tricky. The OE tires were 3.50-18 and 4.00-18. That would translate roughly to 90/90-18 and 100/100-18. But I don’t have any vintage tire measurements to confirm that translation. If you look at modern tires, it’s clear that the relationship between the “size” and the actual measurement is only approximate, so it’s hard to guess the actual size of the OE tires.
A few manufacturers sell modern tires in those inch sizes, so I used those for as a reference for dimensions. For example, the BT45 3.50-18 is actually more like 104/97, and the BT45 4.00-18 is a 119/108. The Roadrider 4.00-18 is 116/107, so similar, but both are far away from 4” (101.6mm).
There are two reasons I spent so much time thinking about this. Ok, three: This is just how I spend my time. But the first reason was that like everyone else I want to run the widest tires that fit, but the front tire I had was very close to the fender so I was worried the wrong front tire might be too wide or tall, and in the back I already chewed up my chain guard so clearances were tight all over. The second reason was that the Z1R has less trail than any other KZ1000, and period articles were critical of the steering. I had been running a tall front tire and a short rear tire, how tall and short is hard to tell, but pretty clearly different from the OE tires. I had no issues at all with the handling of the bike, but also have no idea if that particular tire combination was helping to relax the steering angle and increase trail a bit.
Anyway, I got all balled up in this and went back and forth between various sizes of BT45, BT46, and Roadrider Mk2. In the end I got the Roadrider Mk2 in 100/90-18V and 120/80-18V. The sticker on the front tire actually says “(3.50-18)” under the metric size, which seemed like a good sign. We’ll see how it works out.
Then I needed tubes. Not much information is available for tubes. It seemed like Dennis Kirk had a good supply of the Michelin tubes, but I couldn’t find any info on the Michelin site to confirm the sizes. Avon is one of the few manufacturers that lists their tube part numbers and fitment.
www.avontyres.com/en-gb/tube-tyres/
In the end I got an Avon for the front, and a Michelin for the back.
Avon A18T325 and Michelin 39186.
www.denniskirk.com/535689.sku
www.denniskirk.com/535650.sku
I removed the old tires by hand with spoons so I could clean up the rims and the bead area, but I took them to a shop to have them put on. The tubes appear to be inside the tires now, so I’m guessing they fit.
'78 Z1-R in blue
, '78 Z1-R in black,
'78 Z1-R in pieces
My dad's '74 Z1
'00 ZRX1100
My dad's '74 Z1
'00 ZRX1100
Please Log in or Create an account to join the conversation.
- TexasKZ
-

- Offline
- Platinum Member
-
Registered
- Posts: 8142
- Thanks: 2647
Re: DOHC's blue Z1R Refresh
27 Jul 2021 05:38
It does seem a shame to toss tires with deep tread, but I beet that ME33 would be pretty exciting in the twisties.

1982 KZ1000 LTD parts donor
1981 KZ1000 LTD awaiting resurrection
2000 ZRX1100 not ridden enough
www.kzrider.com/11-projects/620336-anoth...uild-thread?start=24
1981 KZ1000 LTD awaiting resurrection
2000 ZRX1100 not ridden enough
www.kzrider.com/11-projects/620336-anoth...uild-thread?start=24
Please Log in or Create an account to join the conversation.
- DOHC
-
Topic Author
- Offline
- Sustaining Member
-
Registered
- Those Doe-Hawks really go!
- Posts: 1271
- Thanks: 600
Re: DOHC's blue Z1R Refresh
28 Jul 2021 20:08
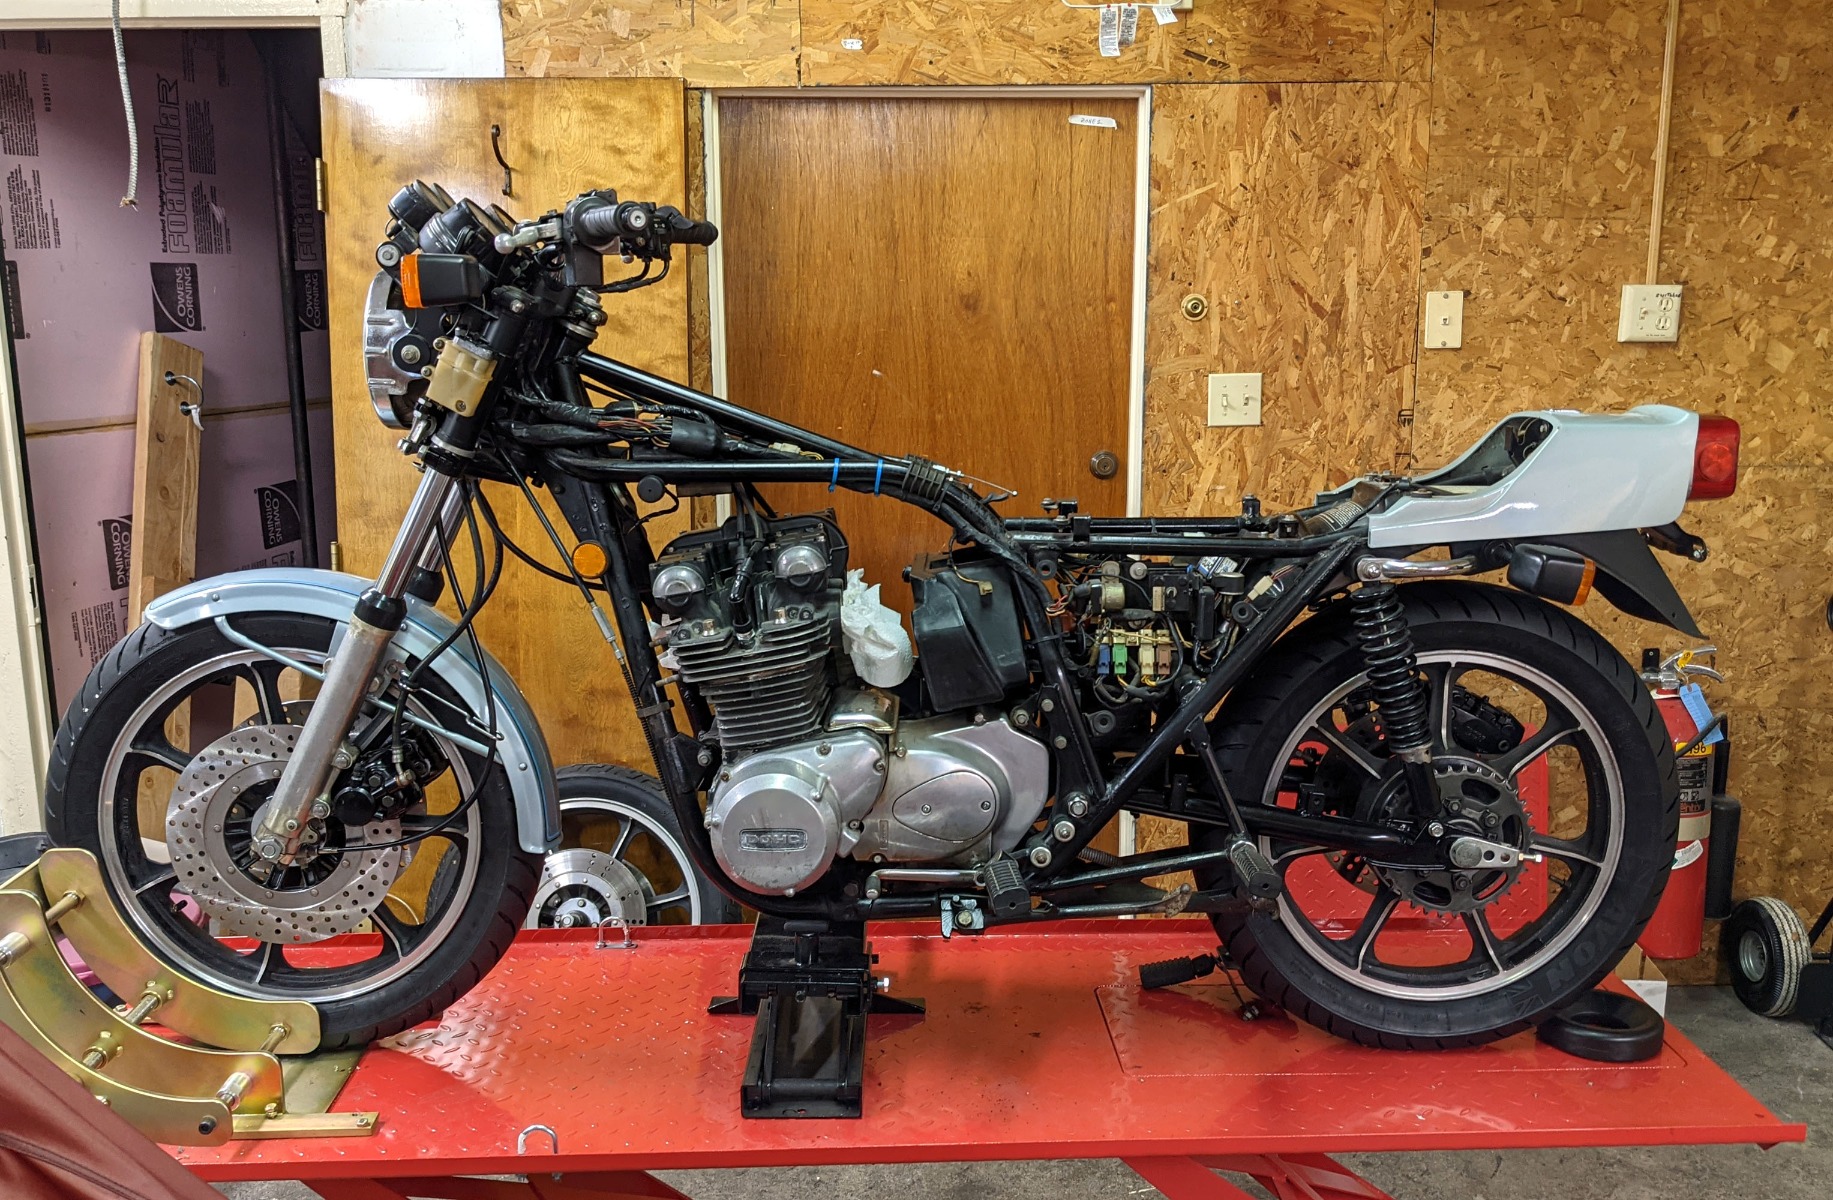
Ok. So at this point I’ll admit that I made a lot of progress and everything from here on is retroactive. It turns out my friend needs his space back, so I had a deadline of the end of July (now). So much for my really great shop space. Anyway, here are some more pics along the way.
I cleaned the speedo drive and replaced all of the shaft seals on the wheels. Cleaning the speedo drive was very satisfying. It was gross in there.
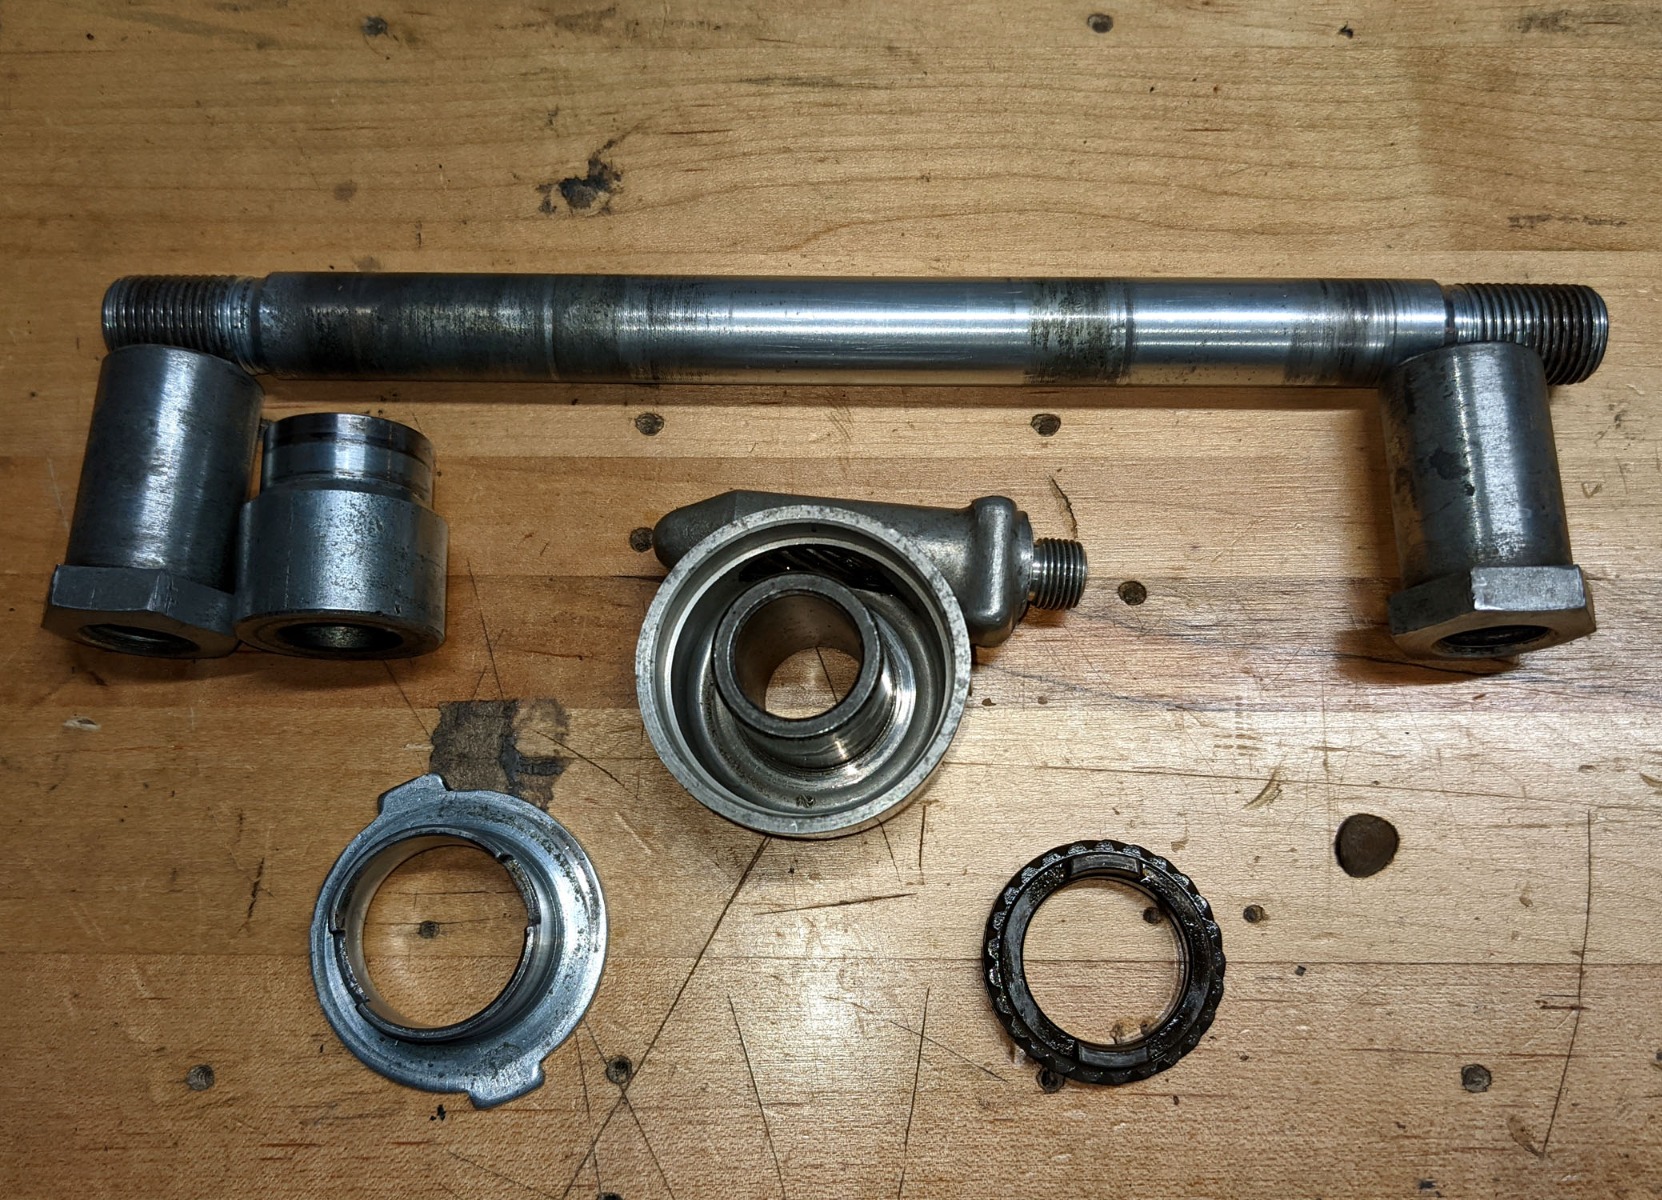

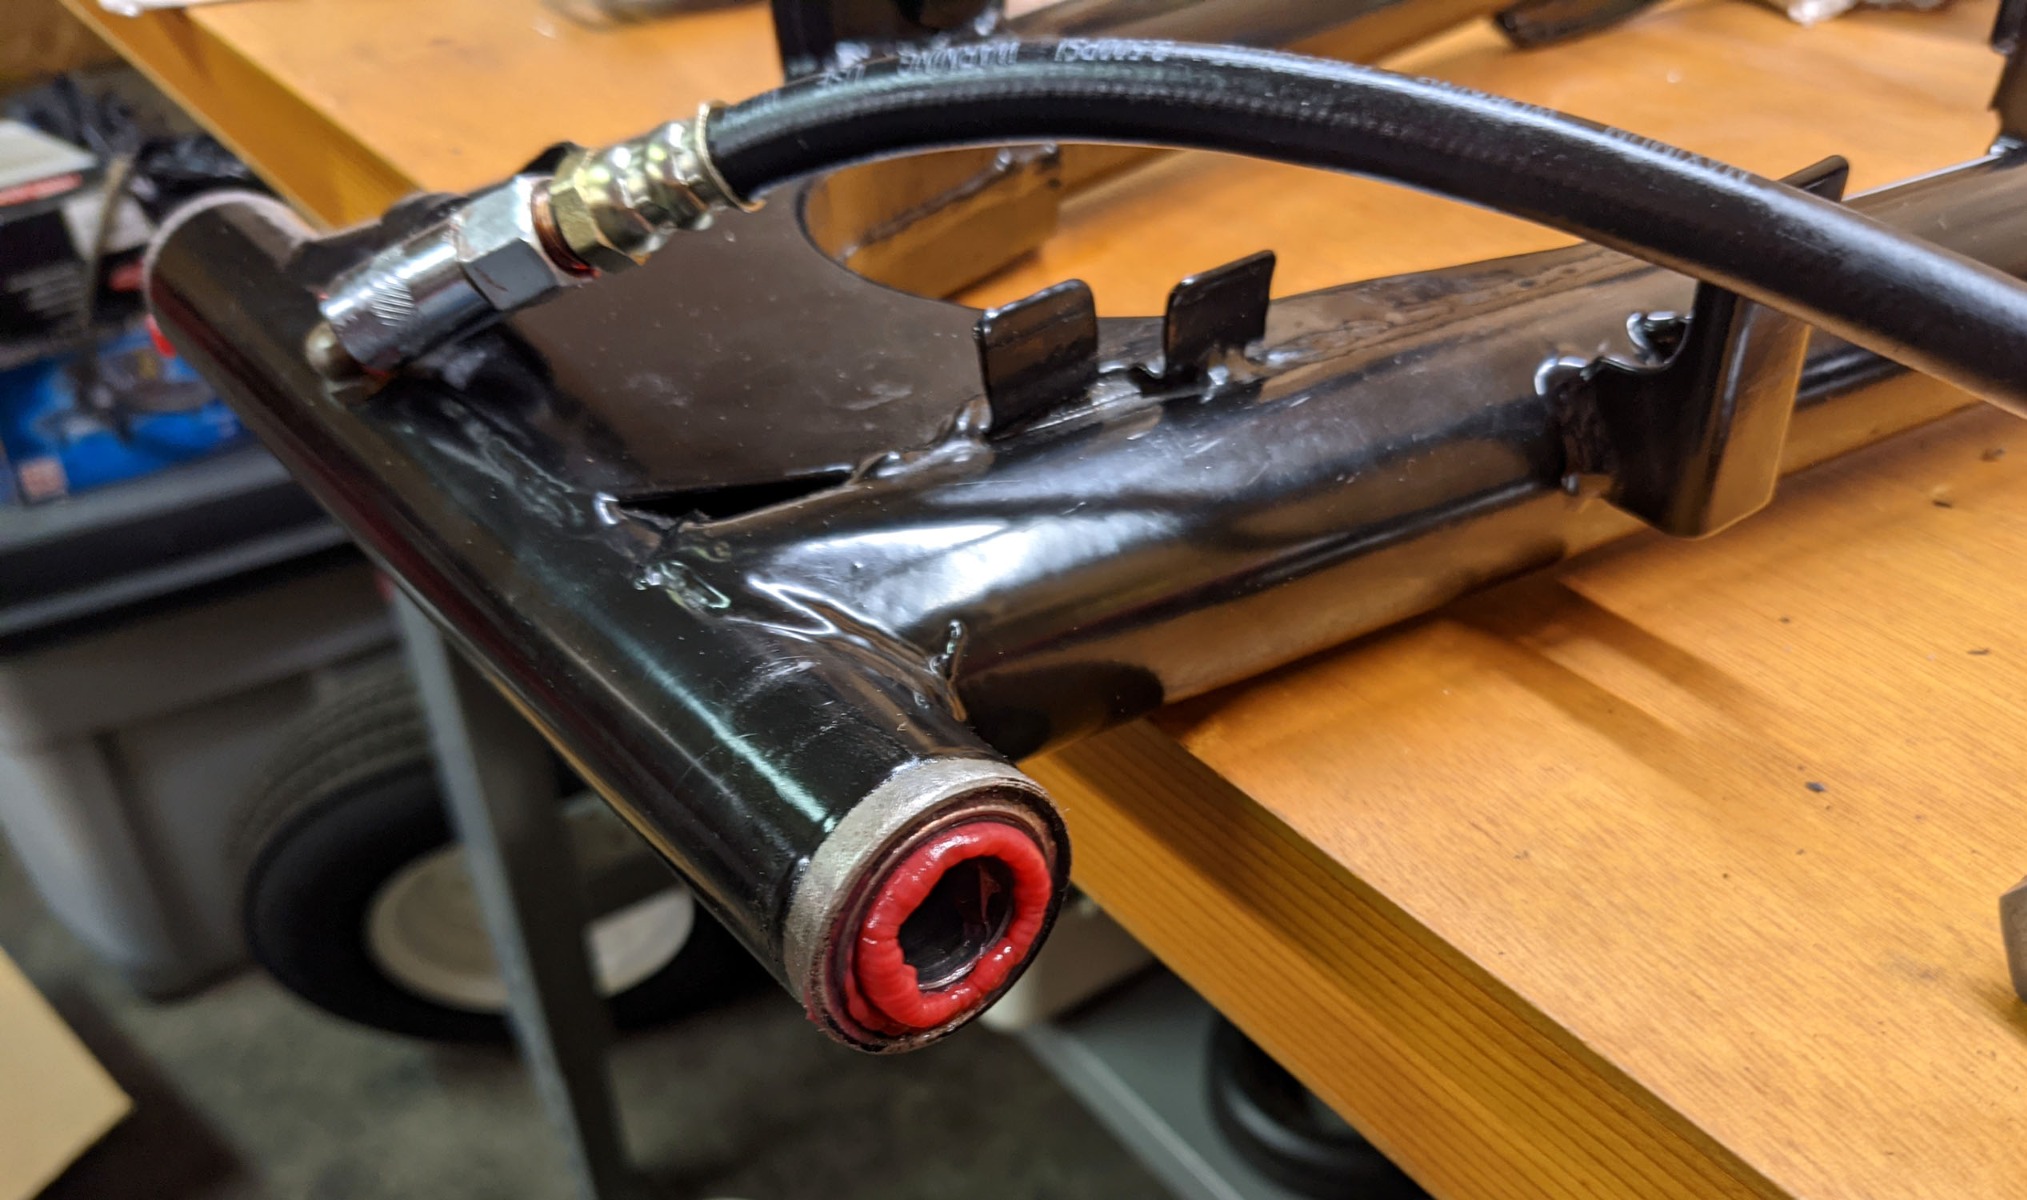
I pumped a bunch of new grease into the swignarm. Those bearings and shaft were all replaced 10 years ago. They still look nice.
Here is the whole rear wheel assembly back on.
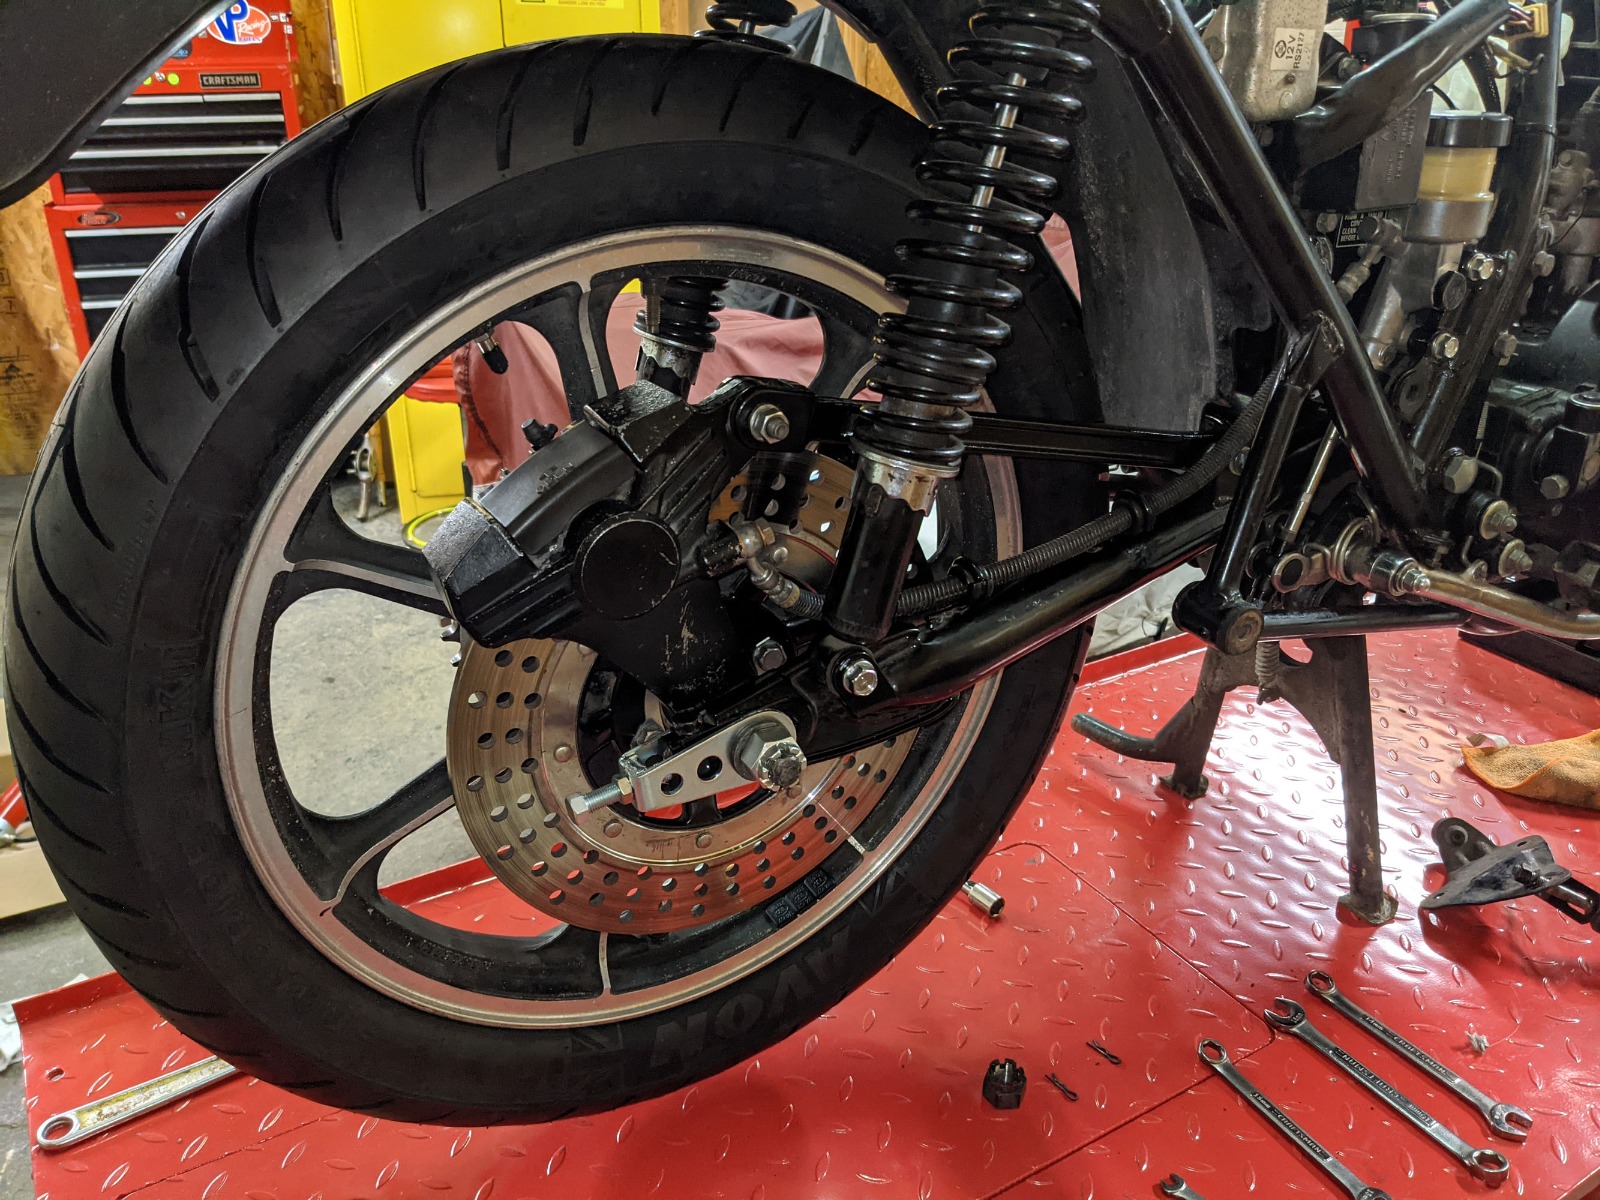
Shiny disks on the front wheel, with new lock tabs. I also swapped the chrome dust cover for a nicer one.
Finally it has both front and back wheels, with brakes, after 2 years sitting on the lift.
I cleaned the speedo drive and replaced all of the shaft seals on the wheels. Cleaning the speedo drive was very satisfying. It was gross in there.
I pumped a bunch of new grease into the swignarm. Those bearings and shaft were all replaced 10 years ago. They still look nice.
Here is the whole rear wheel assembly back on.
Shiny disks on the front wheel, with new lock tabs. I also swapped the chrome dust cover for a nicer one.
Finally it has both front and back wheels, with brakes, after 2 years sitting on the lift.
'78 Z1-R in blue
, '78 Z1-R in black,
'78 Z1-R in pieces
My dad's '74 Z1
'00 ZRX1100
My dad's '74 Z1
'00 ZRX1100
Please Log in or Create an account to join the conversation.
- DOHC
-
Topic Author
- Offline
- Sustaining Member
-
Registered
- Those Doe-Hawks really go!
- Posts: 1271
- Thanks: 600
Re: DOHC's blue Z1R Refresh
28 Jul 2021 20:19 - 28 Jul 2021 20:23
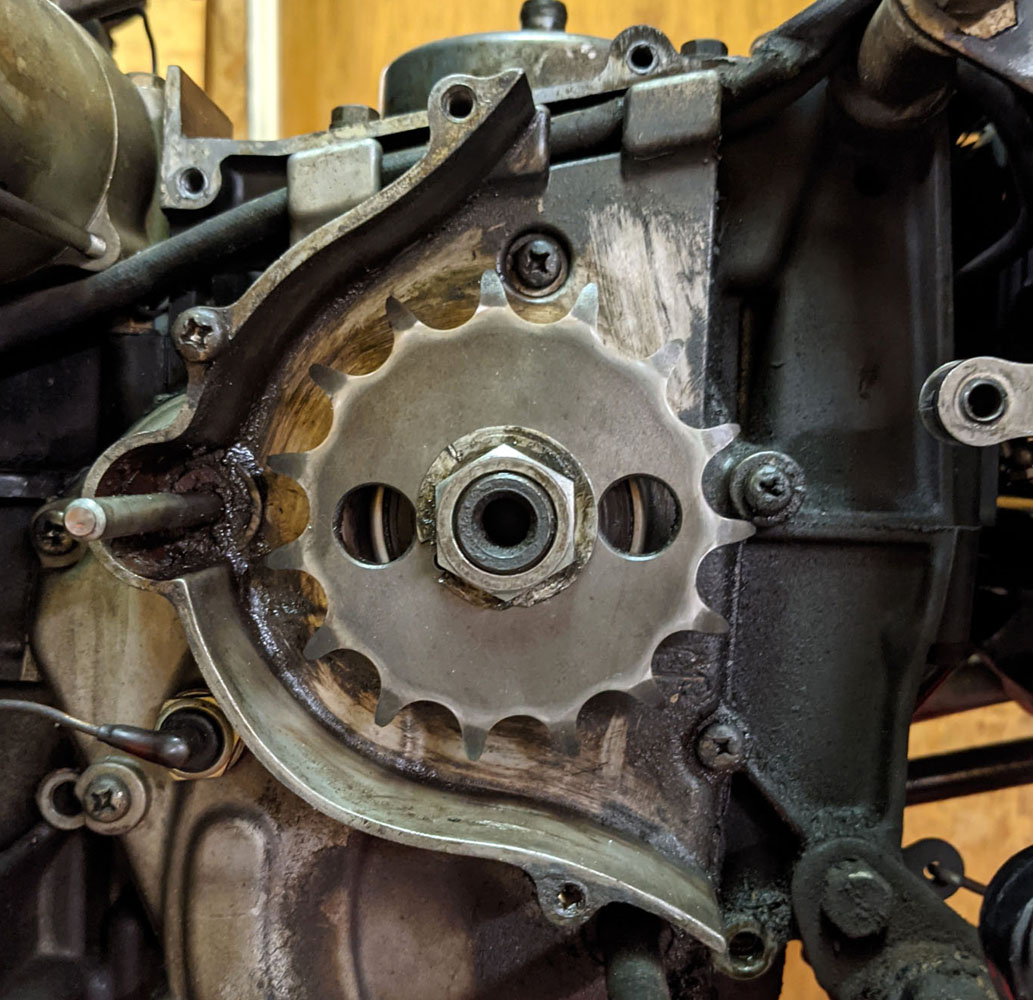
The next step was the chain. I pulled the sprocket cover and discovered my second loose fastener (the other was on the rear caliper bolt). The big nut holding the sprocket on was loose. Like wobbly loose, but the lock washer was still holding it in place. It’s not clear how the lock tab could still be in place and the nut that loose, but it doesn’t seem good.
I re-torqued the nut and re-bent the lock washer. I also noticed that the front sprocket is pretty worn.
The chain has also seen better days.
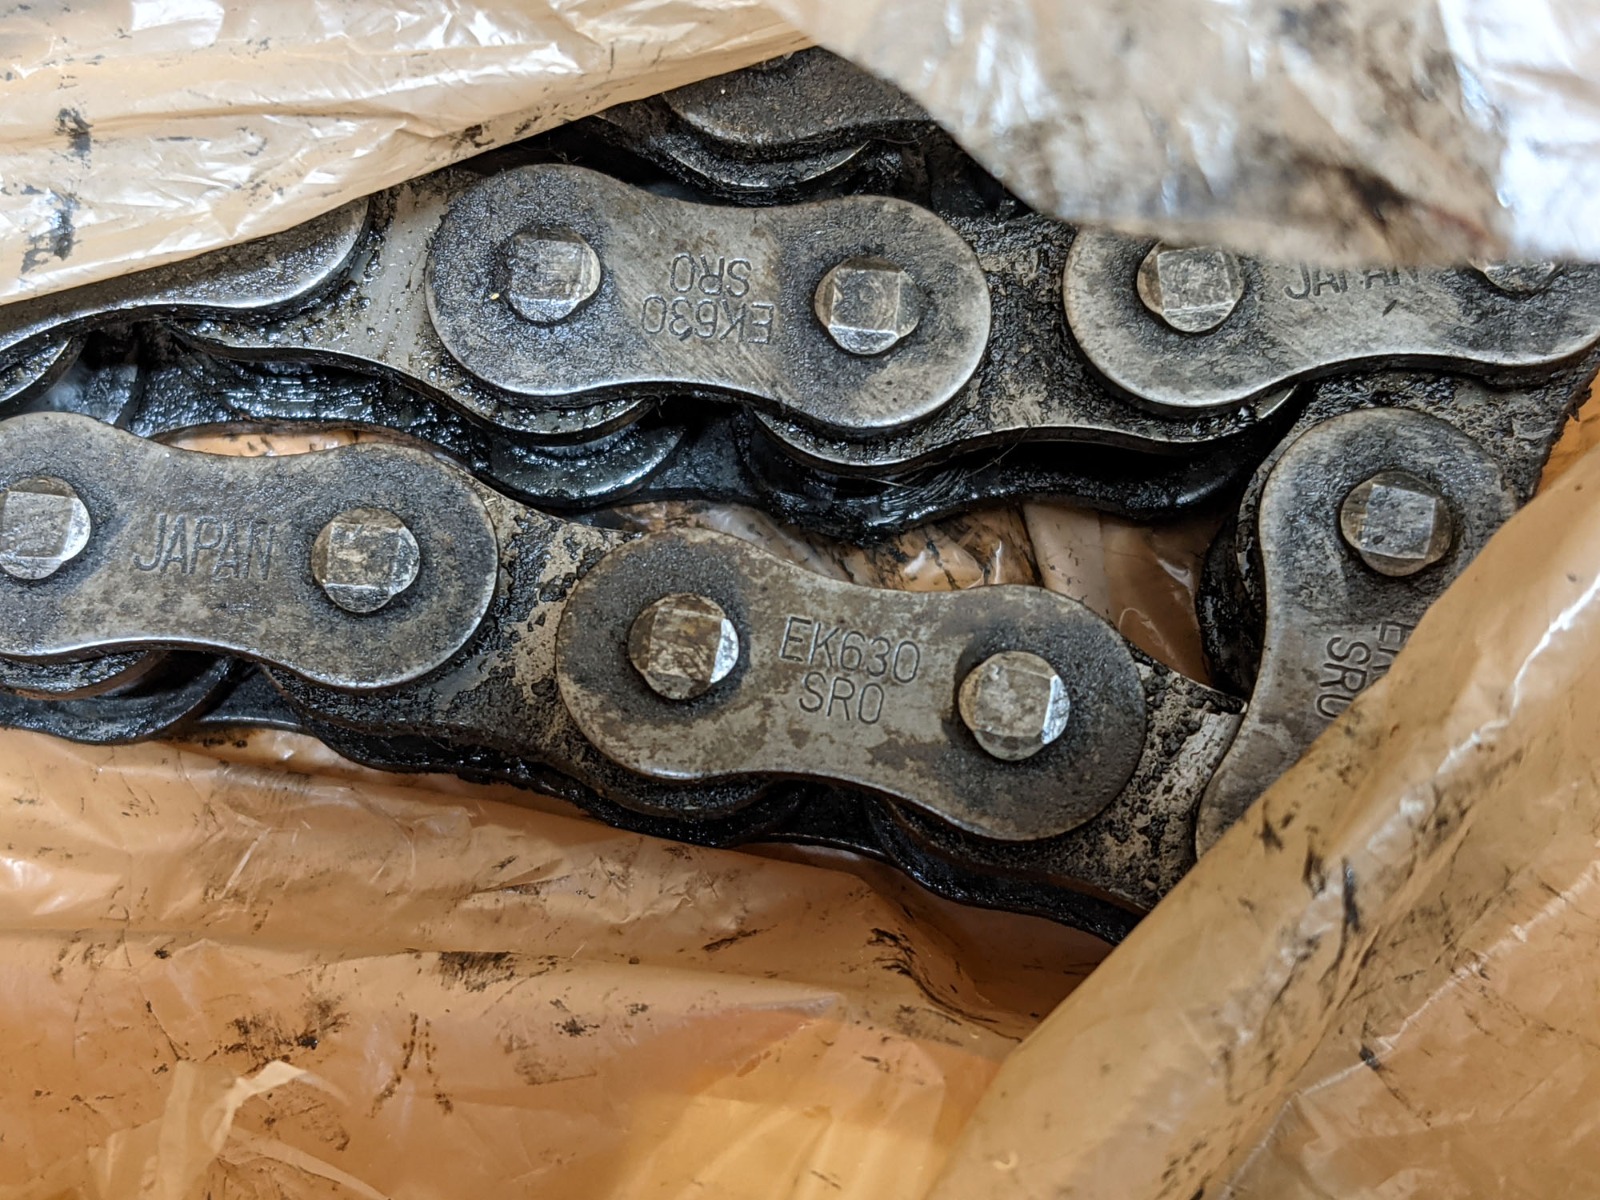
I cleaned it with chain cleaner and sprayed the heck out of it with chain lube. I used Maxima Clean-Up Chain Cleaner which is really stinky but worked really well. I also used a Simple Solutions Aluminum Grunge Brush, which also worked well. Both came from Amazon.
The chain looks much better, but it’s pretty much shot. A number of the links have a ton of play. However I was feeling pressed for time now that I had a deadline, so I figured I’d try to get a few more miles out of it. I had just but the wheels back on and I wasn’t excited about taking the rear back off to replace the rear sprocket. I did replace the master link. Maybe that helps?
I also did a quick Mothers polished on the sprocket and starter cover. There was a lot of gas varnish from gas dripping from the float bowls. Much better now.
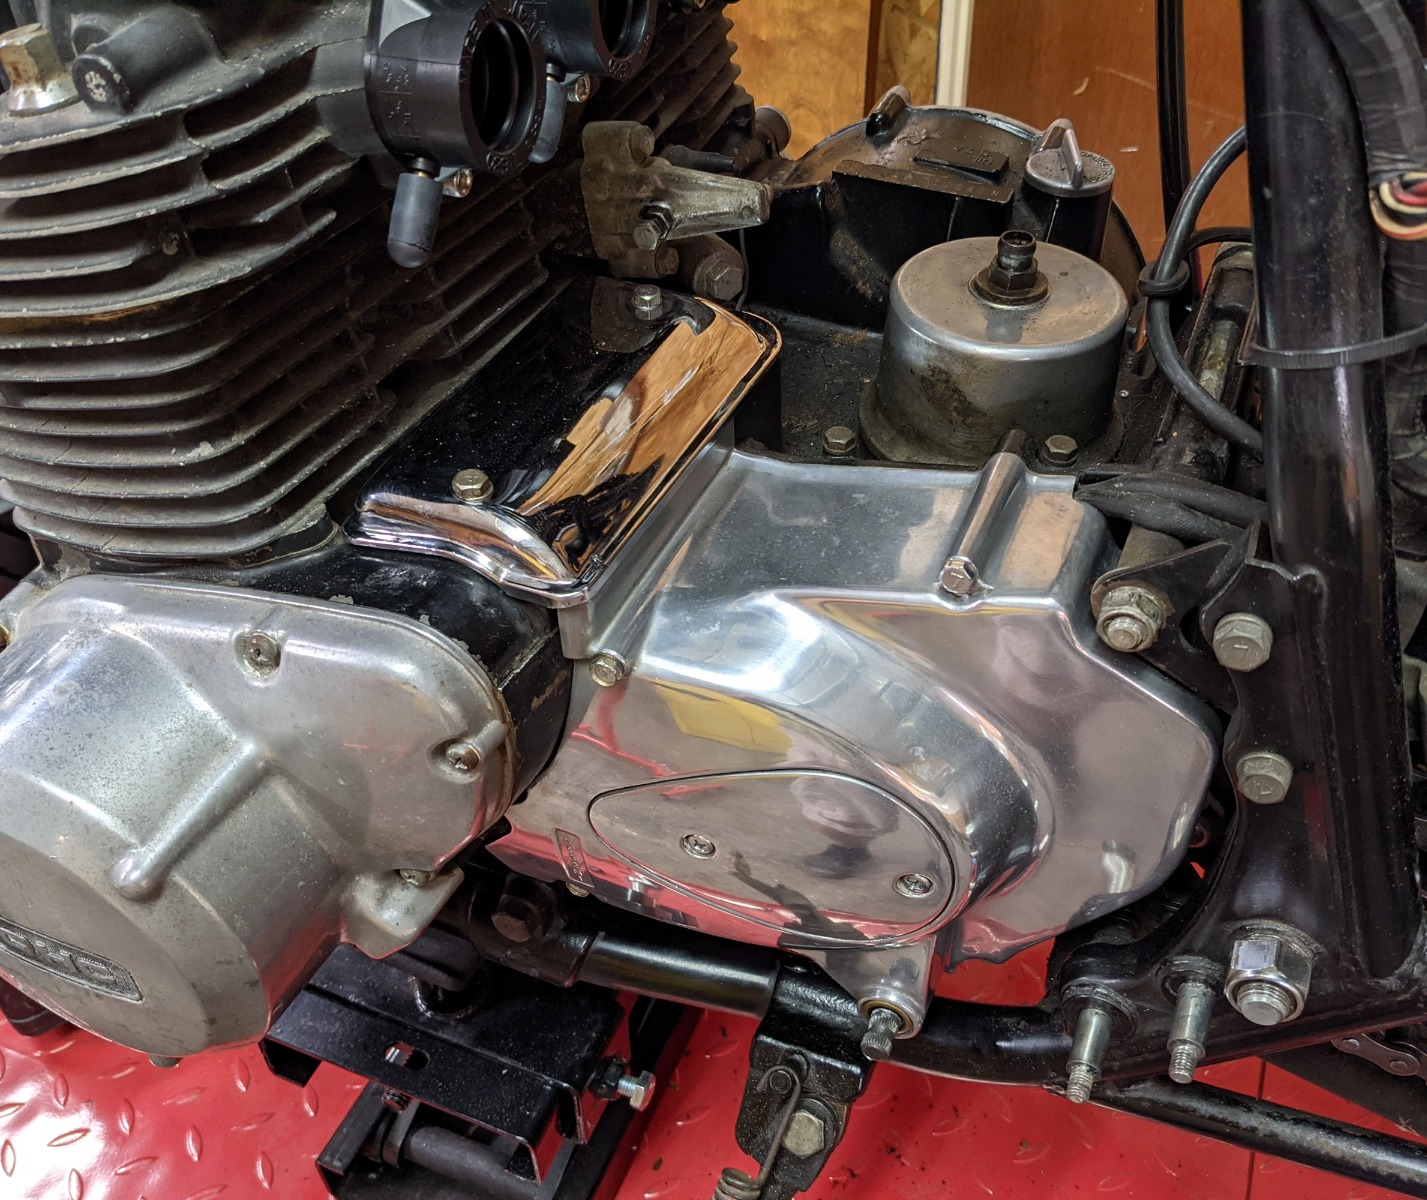
I re-torqued the nut and re-bent the lock washer. I also noticed that the front sprocket is pretty worn.
The chain has also seen better days.
I cleaned it with chain cleaner and sprayed the heck out of it with chain lube. I used Maxima Clean-Up Chain Cleaner which is really stinky but worked really well. I also used a Simple Solutions Aluminum Grunge Brush, which also worked well. Both came from Amazon.
The chain looks much better, but it’s pretty much shot. A number of the links have a ton of play. However I was feeling pressed for time now that I had a deadline, so I figured I’d try to get a few more miles out of it. I had just but the wheels back on and I wasn’t excited about taking the rear back off to replace the rear sprocket. I did replace the master link. Maybe that helps?
I also did a quick Mothers polished on the sprocket and starter cover. There was a lot of gas varnish from gas dripping from the float bowls. Much better now.
'78 Z1-R in blue
, '78 Z1-R in black,
'78 Z1-R in pieces
My dad's '74 Z1
'00 ZRX1100
My dad's '74 Z1
'00 ZRX1100
Last edit: 28 Jul 2021 20:23 by DOHC.
Please Log in or Create an account to join the conversation.
- Mikaw
-
- Offline
- Sustaining Member
-
Registered
- Posts: 4825
- Thanks: 1852
Re: DOHC's blue Z1R Refresh
28 Jul 2021 20:50
Great looking machine. Did Truedisk cut your rotors?
1976 KZ 900 A4
kzrider.com/forum/11-projects/613548-1976-kz-900-a4
1976 KZ 900 B1 LTD
1978 KZ 1000 B2 LTD
1980 KZ 750 E1
Kowledge Speaks, But Wisdom Listens.
Jimi Hendrix.
1976 KZ 900 B1 LTD
1978 KZ 1000 B2 LTD
1980 KZ 750 E1
Kowledge Speaks, But Wisdom Listens.
Jimi Hendrix.
Please Log in or Create an account to join the conversation.
Moderators: Street Fighter LTD