
Prep a kz650 for a 4,000 mile trip?
- baldy110
-
- Offline
- User
-

Registered
- Posts: 2272
- Thanks: 512
Re: Prep a kz650 for a 4,000 mile trip?
14 Feb 2012 16:06
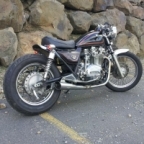
I rode this from California to South America and back in 1997. Just go to show you can tour on just about anything. That trip was a LOT of fun.
Please Log in or Create an account to join the conversation.
- clutch
-
- Offline
- User
-
Registered
- I wish I had a tad more patience to do it better!
- Posts: 1051
- Thanks: 12
Re: Prep a kz650 for a 4,000 mile trip?
14 Feb 2012 16:59sft1662 wrote:donthekawguy wrote: I would get a cruise control or at least one of those thinggies that you rest the heel of you hand on so you hand wont get tired.
Yes! I have seen those things before, I'll get one. Even after 100 miles without a decent break my hand gets tired!
I had one for a short while on my 750. It was great. I wish I still had it, but I didn't use the little rubber thingy on the grip under the "cramp buster" (or whatever brand it was), so it flew off when riding one day. It was close to home, so I rode up and down the street for a while looking for it, but never found it. If I ever do a long trip, I will make sure to get another one first.
Southern Maryland, USA
1980 KZ250 LTD (traded, but still missed)
1982 KZ750 E3 (Cafe Project) (Dyna-S, Dyna Coils, V&H 4-1, K&N Pods, 6 Sigma Jet Kit, Acewell Computer, Woodcraft Clip-ons, Custom Rewire)
1966 A1 Samurai (Restoration Project)
Wish List:
KZ1000 P (For a "touring" bike)
Z1 (need I...
1980 KZ250 LTD (traded, but still missed)
1982 KZ750 E3 (Cafe Project) (Dyna-S, Dyna Coils, V&H 4-1, K&N Pods, 6 Sigma Jet Kit, Acewell Computer, Woodcraft Clip-ons, Custom Rewire)
1966 A1 Samurai (Restoration Project)
Wish List:
KZ1000 P (For a "touring" bike)
Z1 (need I...
Please Log in or Create an account to join the conversation.
- sft1662
-
 Topic Author
- Offline
- User
-
Registered
- Posts: 130
- Thanks: 0
Re: Prep a kz650 for a 4,000 mile trip?
14 Feb 2012 17:00baldy110 wrote: I rode this from California to South America and back in 1997. Just go to show you can tour on just about anything. That trip was a LOT of fun.
That sounds amazing... My next bike other than another KZ will be a dual sport so that I can do something similar. The ultimate dream is to ride from the US to Brazil in 2014 for the world cup. Definitely a long shot, but man would that be fun!
1978 KZ650 B2A
Please Log in or Create an account to join the conversation.
- sft1662
-
Topic Author
- Offline
- User
-
Registered
- Posts: 130
- Thanks: 0
Re: Prep a kz650 for a 4,000 mile trip?
16 Mar 2012 13:10
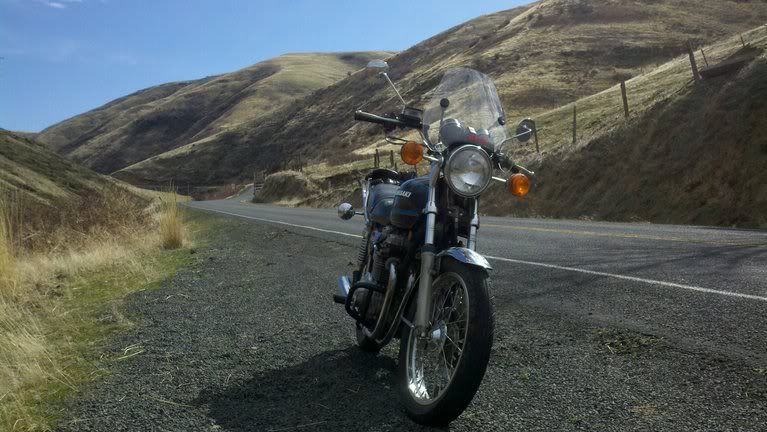
Whoops, I have not updated this thread in a while. I'll get it up to speed...
Bled the brake, new clutch cable, installed a new windshield, greased the swingarm, replaced the old fuse box with a new one, and some other odds and ends.
The new well-lubed clutch cable is noticeably much easier to pull.
The brake is slightly better - I noticed a difference but not a huge one, but was working well before. The old fluid was nasty dark brown with some brown deposits in the MC. I cleaned it as best I could and bled it until the fluid ran clear. Bad news is the diaphragm tore when I took the cover off and now there is a tiny leak that could get annoying. I checked all of the usual sources and it looks like kawasaki doesnt make them anymore > . If anybody has a spare diaphragm or for the trapezoidal MC reservoir let me know. The brake is working fine so I'll deal with it until I can get a diaphragm or save up enough cash for a new MC, at which time I'll get new hoses and a caliper rebuild as well. Not sure if it will be before June or not.
The swingarm took about 40 pumps worth of grease . Finally it started squirting out the sides... that puppy was dry, but I feel much better now knowing its all lubed up. I tried both before and after to get any play in the swingarm by moving it every which way and its solid so I'm going to hold off on replacing the needle bearings for now. Same with wheel bearings, they seem to be moving freely.
I checked some electrical connections that I had access to and everything looked like-new that I've uncovered so far.
1978 KZ650 B2A
Please Log in or Create an account to join the conversation.
- sft1662
-
Topic Author
- Offline
- User
-
Registered
- Posts: 130
- Thanks: 0
Re: Prep a kz650 for a 4,000 mile trip?
16 Mar 2012 13:12 - 16 Mar 2012 13:17
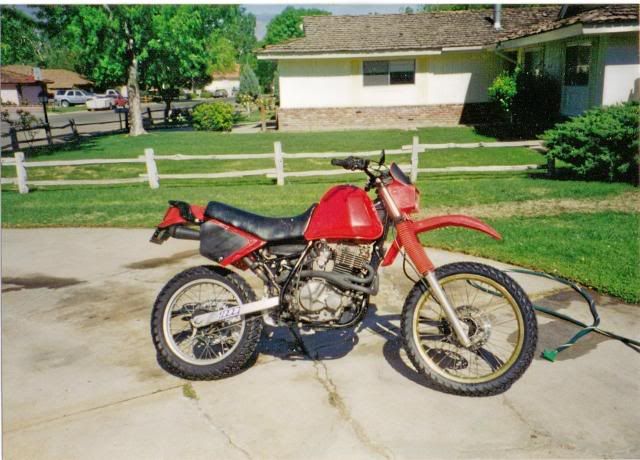
I even got a ride in last weekend:
and...
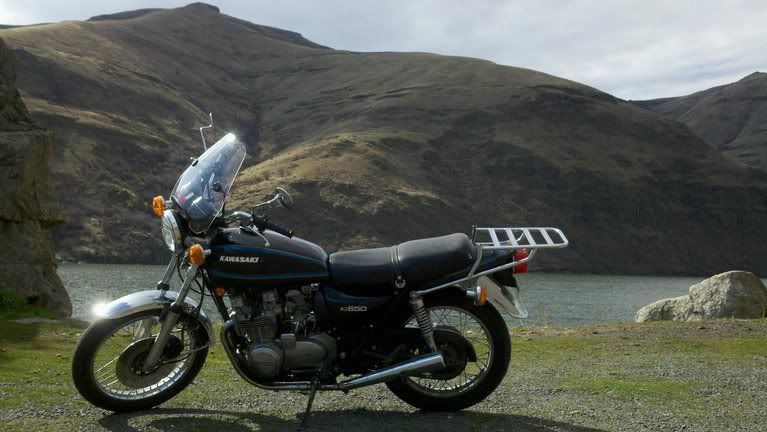
and...
and...
and...
1978 KZ650 B2A
Last edit: 16 Mar 2012 13:17 by sft1662.
Please Log in or Create an account to join the conversation.
- sft1662
-
Topic Author
- Offline
- User
-
Registered
- Posts: 130
- Thanks: 0
Re: Prep a kz650 for a 4,000 mile trip?
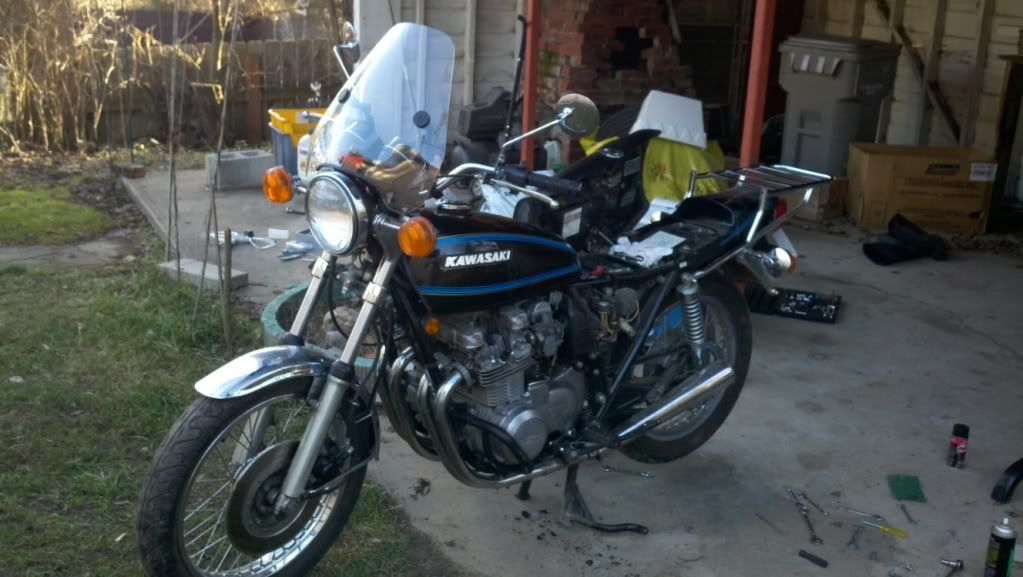
16 Mar 2012 13:18 - 16 Mar 2012 13:20
As you can see on those ride pics if you look closely, my forks are both starting to leak oil pretty bad (the left one worse), so I'm going to see if I can rent a pneumatic wrench from a shop in town, if I cant do that I may have to buy a cheapo from walmart and hope for the best. I know there are other methods (broomstick) but I dont have a spare wooden proomstick handle or large dowel laying around either . I've seen enough threads of what a nightmare that particular part of seal replacement can be, so I'd rather do it right than end up damaging a fork. I'll try and post some pics, though admittedly I often skip taking pics when wrenching... something to do with being too focused on not ruining something to stop and document it. It probably is easier to stop and relax the 2nd time around
I'm still on the look out for an intact trapezoidal diaphragm for my front MC. I've tried most all the kawi-parts places online and have not had any luck. It weeps a little but I can deal with it if need be, just wipe it off at gas stops or something (or put a sweatband over it as someone suggested in another thread). Eventually I'll just get an aftermarket MC.
I'm also planning to run the COIL MOD and replace the tail bulb with an LED bulb when I eventually get a dyna S to help a little bit with the charging system keeping up.
I'm considering going with dyna 5ohm coils instead of the 3 (3.4) ohm green coils. From what I've read, the 5ohm will take some load off of the ignition and possibly keep everything going longer. I could me misinformed. My main question is, does anyone run 5ohm coils, and do you still get the big improvement in spark? I know it will not be quite as high energy of a spark w/5ohm coils, but is it still a big improvement over points? Thanks
[100th post! That would deserve a beer if it wasn't 9am and I wasn't off to work very soon! Coffee will have to do!]
1978 KZ650 B2A
Last edit: 16 Mar 2012 13:20 by sft1662.
Please Log in or Create an account to join the conversation.
- faffi
-

- Offline
- User
-
Registered
- Posts: 554
- Thanks: 36
Re: Prep a kz650 for a 4,000 mile trip?
16 Mar 2012 20:58
Usually, the bolt holding the damper will come out if you leave the springs in under tension - that is, start by losening the damper rod bolts. And instead of just turning, give the lever a rap with a hammer. I usually tighten the bolts first this way to get the bolts going without spinning the rod. Then they tend to be simple to get out.
Also check the there are NOTHING sticking out from the fork legs. Pittings doesn't harm the seal, but if anything is even remotely resembling a peak, the new seal will tear instantly. Use a glass bottle or a soft limestone to check for smoothness and grind down everything suspicious.
I would also recommend stripping your master cylinder and caliper. It's not a difficult job, but it's not unheard of that the cylinder bore in the master gets scored from corrosion. Not good. Clean everything. In the caliper, the seal often gets jammed as water makes the aluminium "swell". Take the seal out and carefully scrape the groove clean.
You probably will not need to buy any new parts - in my experience, the seals are usually pliable and nice after decades of use. Just clean everything and coat with fresh brake fluid before reassembly.
1977 KZ650B1
1980 F1 engine
B1 3-phase alternator
B1 Points ignition
1980 F1 engine
B1 3-phase alternator
B1 Points ignition
Please Log in or Create an account to join the conversation.
- sft1662
-
Topic Author
- Offline
- User
-
Registered
- Posts: 130
- Thanks: 0
Re: Prep a kz650 for a 4,000 mile trip?
06 May 2012 02:19 - 06 May 2012 02:28
In the last few weeks I've gotten a colortune plug and dialed in my mixture and cleaned the carbs. I also installed my Bosch H4 bucket and new H4 bulb as well as cleaned all of the wiring in the bucket.
Another full day of work on the bike, well about 6 hours, and I accomplished what many of you probably could have done in one or 2 :blink: .
Today was ignition/coil day! I had to go buy a soldering iron and crimping tool because I don't know what happened to my old ones. A disclaimer: I have never been any good at soldering, I've only done it a handful of times and every one of them was pretty ugly. I did not want to rely on crappy insulated butt connectors or similar on a motorcycle though, I just don't trust the things and have had too many come apart too easily.
Goodbye old (Assumed OEM?) Tec? coils
i1078.photobucket.com/albums/w491/sft166...637.jpg?t=1336278159
Things went...okay... But I hit a few snags, and it got dark before I was actually able to put the gas tank back on and test things out.
I started with the coils, the coils themselves were easy, I soldered and crimped the ring terminals on:
i1078.photobucket.com/albums/w491/sft166...905.jpg?t=1336278181
Then I rigged up a method to get the posts insulated. I put a heat shrink on the allen bolt to insulate it a little from the coil terminal, and put some nylon tubing over the bolt and got rid of the brass cylinder on the "hot" side:
i1078.photobucket.com/albums/w491/sft166...637.jpg?t=1336278159
Maybe I'm not the brightest bulb when it comes to these things, but I had a HELL of a time trying to get the dyna wires put together. I cut it and measured out nice length wires, cut them, stripped insulation...fine. I got the 8mm suppression wires because I may be running a GPS at times. I could not figure out what part of the wire is the actually core, like where the power is supposed to flow through :iconthinking: After much googling I figured out that it is the little black center part. Then the fun began trying to figure out how you're supposed to attach the clips. I rigged something up with pliers and crimping and cursing and stripping more insulation and re-doing, Things should be solid, but I do wish dyna would put some pictures w their instructions!!! - and this is not the only time I was cursing at DYNA and their instructions today!
Goodbye Points Plate:
The actually installation of the dyna plate was easy enough, as was routing the wiring. Finding a switched 12v connection was driving me nuts though. I did NOT want to hack into the coil red/yellow wire as suggested. It just seemed like a bad idea to hack into something so important when you could presumably use the hazard relay wire or something. I did a lot of searching online to find another recommended source of switched 12v, which seemed like it should be about any wire on the bike that is (+) and not directly off the battery? Finally I just decided to go for it and used the red/yellow wire to splice in the red wire. My first attempt resulted in me melting a bunch of insulation and I had to cut more wire off. my second attempt looked like this:
i1078.photobucket.com/albums/w491/sft166...720.jpg?t=1336278200
It was soldered pretty solid, no stray strands, pretty well coated, looked good to me... ? In hindsight could I have just stripped some insulation off of the red/yellow and soldered on the red wire? It seems like that would have a lot fewer potential problems. Live and learn.
i1078.photobucket.com/albums/w491/sft166...434.jpg?t=1336278223
Then I moved on to timing as the light was fading. Again, I wish DYNA would have been a little clearer. I was trying to adjust the plate as far as I could trying to get it to fire at the advance marks, before realizing I had to twist the advancer while I do it... Finally got it timed and thats where I'm at right now. I'm going to replace my fuel line again in the morning, with real fuel line this time and not the crappy clear vinyl that goes rock hard in a week. Then I'll get things tidied up and cross my fingers that things fire up okay! Cheers.
Sorry I cant embed the pictures for some reason...
Another full day of work on the bike, well about 6 hours, and I accomplished what many of you probably could have done in one or 2 :blink: .
Today was ignition/coil day! I had to go buy a soldering iron and crimping tool because I don't know what happened to my old ones. A disclaimer: I have never been any good at soldering, I've only done it a handful of times and every one of them was pretty ugly. I did not want to rely on crappy insulated butt connectors or similar on a motorcycle though, I just don't trust the things and have had too many come apart too easily.
Goodbye old (Assumed OEM?) Tec? coils
i1078.photobucket.com/albums/w491/sft166...637.jpg?t=1336278159
Things went...okay... But I hit a few snags, and it got dark before I was actually able to put the gas tank back on and test things out.
I started with the coils, the coils themselves were easy, I soldered and crimped the ring terminals on:
i1078.photobucket.com/albums/w491/sft166...905.jpg?t=1336278181
Then I rigged up a method to get the posts insulated. I put a heat shrink on the allen bolt to insulate it a little from the coil terminal, and put some nylon tubing over the bolt and got rid of the brass cylinder on the "hot" side:
i1078.photobucket.com/albums/w491/sft166...637.jpg?t=1336278159
Maybe I'm not the brightest bulb when it comes to these things, but I had a HELL of a time trying to get the dyna wires put together. I cut it and measured out nice length wires, cut them, stripped insulation...fine. I got the 8mm suppression wires because I may be running a GPS at times. I could not figure out what part of the wire is the actually core, like where the power is supposed to flow through :iconthinking: After much googling I figured out that it is the little black center part. Then the fun began trying to figure out how you're supposed to attach the clips. I rigged something up with pliers and crimping and cursing and stripping more insulation and re-doing, Things should be solid, but I do wish dyna would put some pictures w their instructions!!!
- and this is not the only time I was cursing at DYNA and their instructions today!Goodbye Points Plate:
The actually installation of the dyna plate was easy enough, as was routing the wiring. Finding a switched 12v connection was driving me nuts though. I did NOT want to hack into the coil red/yellow wire as suggested. It just seemed like a bad idea to hack into something so important when you could presumably use the hazard relay wire or something. I did a lot of searching online to find another recommended source of switched 12v, which seemed like it should be about any wire on the bike that is (+) and not directly off the battery? Finally I just decided to go for it and used the red/yellow wire to splice in the red wire. My first attempt resulted in me melting a bunch of insulation and I had to cut more wire off. my second attempt looked like this:
i1078.photobucket.com/albums/w491/sft166...720.jpg?t=1336278200
It was soldered pretty solid, no stray strands, pretty well coated, looked good to me... ? In hindsight could I have just stripped some insulation off of the red/yellow and soldered on the red wire? It seems like that would have a lot fewer potential problems. Live and learn.
i1078.photobucket.com/albums/w491/sft166...434.jpg?t=1336278223
Then I moved on to timing as the light was fading. Again, I wish DYNA would have been a little clearer. I was trying to adjust the plate as far as I could trying to get it to fire at the advance marks, before realizing I had to twist the advancer while I do it... Finally got it timed and thats where I'm at right now. I'm going to replace my fuel line again in the morning, with real fuel line this time and not the crappy clear vinyl that goes rock hard in a week. Then I'll get things tidied up and cross my fingers that things fire up okay! Cheers.
Sorry I cant embed the pictures for some reason...
1978 KZ650 B2A
Last edit: 06 May 2012 02:28 by sft1662.
Please Log in or Create an account to join the conversation.
- MFolks
-

- Offline
- User
-
Registered
- Posts: 6650
- Thanks: 541
Re: Prep a kz650 for a 4,000 mile trip?
06 May 2012 02:34
Read this for a primer on hand soldering:
technologyinterface.nmsu.edu/fall97/electronics/solder.html
Repairing Motorcycle Soldered Connections on the older bikes.
When repairing soldered wires on motorcycle switches or light bulbs sockets, have the following on hand:
1. A 25 Watt soldering iron or one that the wattage can be adjusted.
2. Rosin core solder of 60/40 type. SN60 or SN63 is preferred.
3. Rosin flux or soldering paste (Never use solder or soldering paste designed for plumbing work, as it contains an acid that will corrode the electrical joint, ruining it).
4. 91% rubbing Alcohol, or 70%. The lower percentage will clean up flux residue, but not as good as the higher percentage stuff.
5. A cut down ½” paint brush, or acid brush for scrubbing the repaired solder joint.
6. Clean rags or paper towels
7. A damp sponge to keep the soldering iron tip clean.
8. Some “Solder Wick” a braided bare copper wire designed to collect heated excess solder, aiding in joint preperation, available at electronic supply stores.
9. Some wooden toothpicks.
10. Small Hemostats or clip on heatsinks.
A. Before soldering, “Tin” the soldering iron tip by plugging it in or turning the iron on, allowing it to get to operating temperature(2-3 minutes).
B. Unroll about 3” of solder from the roll of rosin core solder & then using a clean rag or paper towel moistened with Alcohol, wipe the unrolled solder, removing the finger print oils that will create a poor solder joint.
C. Apply a small amount of solder to the now heated soldering iron tip, wiping the excess off with the wet sponge, keeping a thin layer on the soldering iron.
D. The soldering iron is now ready for use, but before applying the heated tip to a wire, wipe the tip on the damp sponge, this removes any oxidized solder and makes for a much better connection.
E. If the joint to be repaired is grey in color or appears “Crumbled”, apply some rosin soldering paste or flux to the joint with a small toothpick or screwdriver, and then apply the soldering iron tip for a few seconds.
G. The fluxed joint should clean up, allowing for a better connection. If no luck, use the solder wick to remove all traces of the old solder by apply in it between the soldering iron tip and the bad joint.
H. Hemostats and clip on heatsinks will be used to prevent the wire insulation from burning, overheating & pulling away from the connection.
I. Apply a small amount of flux to the joint to be repaired & then a very short duration of heated soldering iron tip & solder(like a few seconds or so).
J. Clean off the repaired joint with the brush & rubbing Alcohol, the newly repaired joint should appear clean and bright, almost as if it were polished, with no voids or holes.
K. When repairing the bad or "Cold Solder Joints" (as the Electronics industry calls them), it takes really no special skills, just patience, and a place to work(along with the mentioned tools. You've got to be sober, and not stoned, as the soldering tool can be at 700 F, possibly giving the impaired bike owner severe burns.
L. If you have fine muscle control problems, have a friend do the soldering for you. Moving a wire before the electrical joint has properly set up, can create "Cold Joints" too. If possible, practice on the bench top with some scrap wires before attempting repairs on the bike.
M. This information comes from years of missile test cable and equipment assembly, when I worked at General Dynamics/Convair Division in San Diego California, on the BGM-109 Tomahawk and later on the AGM-129 Advanced Cruise Missile. This was from 1983-1993. The company had a week long soldering school, where you learned to solder meeting “Mil-Spec” standards.
1982 GPZ1100 B2
General Dynamics/Convair 1983-1993
GLCM BGM-109 Tomahawk, AGM-129A Advanced Cruise Missile (ACM)
General Dynamics/Convair 1983-1993
GLCM BGM-109 Tomahawk, AGM-129A Advanced Cruise Missile (ACM)
Please Log in or Create an account to join the conversation.
- Jonny
-
- Offline
- User
-
Registered
- woot!
- Posts: 210
- Thanks: 22
Re: Prep a kz650 for a 4,000 mile trip?
06 May 2012 04:05
Hey Sft1662,
I just caught this thread with the latest bump from MFolks about soddering. (Excellent link btw - I read it a few times, thanks MFolks!)
Anyway, I am planning a similar road from Ontario out to the East Coast and Maritimes of Canada, and have started a similar post which will be updated along the way as well. I'll see about finding it, but its out there somewhere. I've also not quite determined the route, and so total distance, but it will be something like 3 or 4k kilometres. I'll be taking my '78 C2, which is going to receive much the same kind of prep work and updates when I get back to Canada, and get her out of storage. I will be following your thread as it goes, and would really apprecatiate it if you could pass along any information specific to the bike that you may find useful along the way.
Like you, this is the first larger road bike I've had (put some miles on my old 440 before leaving the country again, and went bigger when I got back), and I can't afford to buy anything bigger right now, tho a ZRX is in the future when I cann afford one") I figure I'll be following a similar route, staying to blue road and lower speed limits, in the spirit of Zen And The Art of Motorcycle Maintenance.
I figure I'll be following a similar route, staying to blue road and lower speed limits, in the spirit of Zen And The Art of Motorcycle Maintenance.
Good luck with all the preparation for the trip, and more importantly on the trip itself! I expect to experience much the same privations along the way!
Cheers!
Jon
I just caught this thread with the latest bump from MFolks about soddering. (Excellent link btw - I read it a few times, thanks MFolks!)
Anyway, I am planning a similar road from Ontario out to the East Coast and Maritimes of Canada, and have started a similar post which will be updated along the way as well. I'll see about finding it, but its out there somewhere. I've also not quite determined the route, and so total distance, but it will be something like 3 or 4k kilometres. I'll be taking my '78 C2, which is going to receive much the same kind of prep work and updates when I get back to Canada, and get her out of storage. I will be following your thread as it goes, and would really apprecatiate it if you could pass along any information specific to the bike that you may find useful along the way.
Like you, this is the first larger road bike I've had (put some miles on my old 440 before leaving the country again, and went bigger when I got back), and I can't afford to buy anything bigger right now, tho a ZRX is in the future when I cann afford one
I figure I'll be following a similar route, staying to blue road and lower speed limits, in the spirit of Zen And The Art of Motorcycle Maintenance.Good luck with all the preparation for the trip, and more importantly on the trip itself! I expect to experience much the same privations along the way!
Cheers!
Jon
'78 KZ 650C2 'Lila'
'71 Norton Commando 750 'Eadie'
St. Catharines, ON (Mostly, anyway...)
'71 Norton Commando 750 'Eadie'
St. Catharines, ON (Mostly, anyway...)
Please Log in or Create an account to join the conversation.
- damarble
-
- Offline
- User
-
Registered
- Posts: 264
- Thanks: 13
Re: Prep a kz650 for a 4,000 mile trip?
06 May 2012 04:11 - 06 May 2012 04:13
Ambitious endeavor. Last summer I did a loop from Spokane to Boise, Reno, Sacramento, Portland and back to Spokane. 1200ish miles? in 2 weeks. Granted, I was on a 600cc supersport with a passenger but it was grueling. Was supposed to add Seattle to that loop but gave up.
A couple things I can add. Yoga mats make excellent seat pads for very cheap. Forget "cramp busters", get a actual throttle lock, it will save your sanity. Some kind of highway pegs will be appreciated as well.
Don't try to do too much in one day. When you're 3 hours behind schedule, 200 miles from your destination, sun has gone down, temp is nearing freezing, and the fog is so thick you can't see your front tire... the ride is no longer fun.
Go green, buy a Kawasaki!
82 KZ750M CSR Build Thread
89 ZX600C Streetfighter
82 KZ750M CSR Build Thread
89 ZX600C Streetfighter
Last edit: 06 May 2012 04:13 by damarble.
Please Log in or Create an account to join the conversation.
- Medina
-

- Offline
- User
-
Registered
- Posts: 271
- Thanks: 8
Re: Prep a kz650 for a 4,000 mile trip?
06 May 2012 09:23
So much wisdom in so many of these threads, and I cannot agree enough about seat (or one of those gel pads) fairing, and spares-fuses bulbs etc. So much of that stuff- I've seen H4 bulbs at a convienent store you might not need things outside the crucial fuses.
A fairing..man, I will never ever go a 200 mile trip WITHOUT one. Ever again. Ever.
Throttle lock- better than rocker add ons, cramp busters etc, but dont go without something.
Gear, body gear, vented body gear and rain gear. Comfortable helmet. Sunglasses, yellow lens, green or brown and clear..you know, cause that face shield will never ever get scratched to take a hit from an f'ing blackbird!1!!
fourthoooosand miles, you're ambitious but it can be done. That famous commie Che I'dshoothimmyself Rivara took some insane ride across s. america on an older, crappier, smaller bike..riding two.
1981 KZ1100 Vetter "Luminous Navy Blue" DAMN YOU COLOR CODES!
Medina, Oh
My Bike Thread
www.kzrider.com/forum/10-new-members/469298-from-ohio
Medina, Oh
My Bike Thread
www.kzrider.com/forum/10-new-members/469298-from-ohio
Please Log in or Create an account to join the conversation.
Moderators: Street Fighter LTD