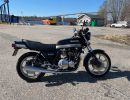
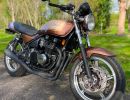
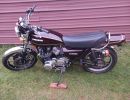
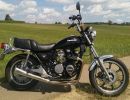
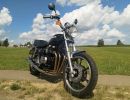
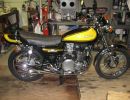
KZR's Bikes of the Month for 2024
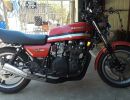
1981 KZ1000 J-to-K build

More
26 Mar 2017 19:52 #757777 by Shdwdrgn
Replied by Shdwdrgn on topic 1981 KZ1000 J-to-K build
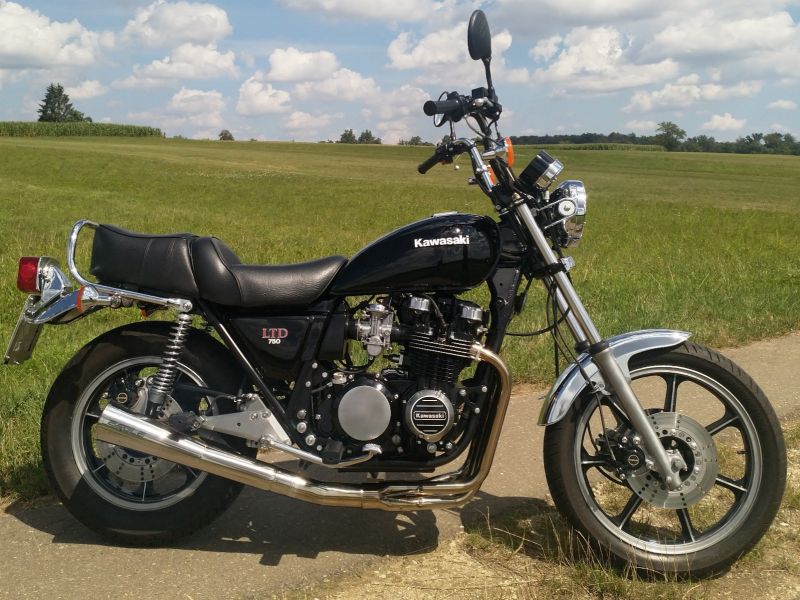
Every image I've found, everything in the manuals, they always show for the J model a front fork with the axle on the very end. I believe the CSR is the same way, but I haven't paid as much attention to those. It's only the LTD that I always see with the axle offset on the front side of the forks. This placement is important because there is a different in the angle of the neck between models to adjust for the placement of the axle. I did a lot of reading into this at one point, and it came down to the difference being small enough that it probably won't matter, but I think the direction of the difference in angle could result in less stability at high speed... exactly the sort of thing you don't want! But I'll ride it as-is and see what happens, and maybe I'll never notice the difference.

So I didn't get any answers to my questions and decided that because of the gaskets sealing up the generator housing, it likely does fill up with oil. I wiped some oil around the intermediary starter gear and dipped its pin in the oil to make sure there was something on it already when I hit the starter, then buttoned it all up. That was a bit of a mess. I dropped bolts in the holes until I thought I had the right set.. but no, the one on the bottom wouldn't seat, it was stripped out. Assuming the PO had an oil leak there and kept tightening the bolt. Fortunately it turns out that spot can take a bolt 10mm longer, so that was an easy fix. What I can't figure out is that I keep running into spots where I don't have the proper length of bolt for a particular spot. Had to run up to Ace again and get a 35mm #6 socket cap bolt because all I had were 30's and 40's. Now I could see one PO putting in the wrong bits, but I have two nearly complete engines that I've been pulling parts from, and not a single 35mm bolt in the pile. But that's why I like Ace, they have one of the best selections of bolts in town, and usually have what I need in stainless steel.

I also got the ignition housing bolted up, and have the center mechanism in place that has the timing marks. No problems there, and I confirmed that while holding up the timing chain I can crank the motor smoothly by hand. Checked the manual for any other info, then thought I was ready to finally drop the head in place. WRONG! The damn gasket kit doesn't have the four O-rings that go between the cylinders and head. I found two of them from pulling the engine apart, one was mangled. Yeah I don't trust re-using them, but the the drama started. OMG partzilla is the cheapest place I can find, and it cost $38 to ship four of them to me. I really hope I don't have any OTHER high-priced pieces that the gasket maker doesn't include. Anyway, parts are ordered, maybe I can get the head put on next weekend.

I also have the big cover with the oil level window painted it, it could go on now, but I wanted to try painting a row of small scales around the L-shaped ridge. But to do that, I need to figure out how to use latex based paints in the air brush. So for now it sits in the garage. Once I get this finished, and get the head and cams buttoned down, the engine will finally be sealed and I can dump in some oil.

1981 KZ1000-JK1
She's a beautiful mess, and I've made her all mine

Please Log in or Create an account to join the conversation.

More
30 Mar 2017 19:31 #758183 by Shdwdrgn
Replied by Shdwdrgn on topic 1981 KZ1000 J-to-K build
Well... bummer. Got in the new O-rings today, they don't look anything like the pieces I had, so I have no clue what happened to the original parts from when I tore down the engine. No loss, I slipped on the new ones, got the head torqued down and went through the procedure to get the timing chain aligned on the cams. I even remembered to pick up the assembly lube on the way home.

And that's when things went bad. Torquing down the cam caps, and three of the bolts stripped out. Well, two of them offered no resistance, I think they were already stripped, but the last one probably had some sand in the hole and gummed up the bolt. So this means that when I'm able, I need to pull the cams and head back off again and try to fix the threads. Fortunately it's only one bolt in each of three of the caps. Is helicoil an appropriate solution for this, or is there something better to fix threads in an aluminum head? I've never used the stuff before, but it seems like it is the go-to solution most people recommend. Hopefully someone can weigh in on this?

I went ahead and threw the cover over the head, and wrapped up the motor again. We have a big rain and snow storm moving in tomorrow, it'll probably be at least another week before I can get to it again. Needless to say, I'm really bummed about this setback. Everything has been going pretty smoothly, and I was happy to get the cam arrows to line up and have the right count of links between the arrows. I cranked the engine over by hand, and even without any oil in the system I still heard compression escaping as the valves opened. And it feels really good seeing the full size of the engine back on the frame again.

1981 KZ1000-JK1
She's a beautiful mess, and I've made her all mine

Please Log in or Create an account to join the conversation.

  • SWest
  • Offline
  • Sustaining Member
  • 10 22 2014
More
30 Mar 2017 20:57 #758191 by SWest
Replied by SWest on topic 1981 KZ1000 J-to-K build
You can do helicoils on the bike. Check out Fastenal. M6 tap and inserts.
Steve

Please Log in or Create an account to join the conversation.

More
30 Mar 2017 21:08 #758192 by Shdwdrgn
Replied by Shdwdrgn on topic 1981 KZ1000 J-to-K build
Ah good to know... I've seen the helicoils at a number of places around here, they're certainly not hard to find. And I have a full set of standard and metric taps, so no problems there either. It's just disappointing to have to take the head back off again. Thanks for the confirmation.

1981 KZ1000-JK1
She's a beautiful mess, and I've made her all mine

Please Log in or Create an account to join the conversation.

More
31 Mar 2017 10:44 - 31 Mar 2017 11:04 #758227 by Dr. Gamma
Replied by Dr. Gamma on topic 1981 KZ1000 J-to-K build
Before you try helicoils, look into using Time-Serts. The Time-Serts are actually stronger than the original threads that were in the head!!! Helicoils are more like a stop gap fix.

Personally I won't use a helicoil on a lawnmower!!!


1972 H2 750 Cafe Racer built in 1974.
1976 KH400 Production Road Racer.
1979 Kz1000 MK. II Old AMA/WERA Superbike.
1986 RG500G 2 stroke terror.
1986 GSXR750RG The one with the clutch that rattles!

Up in the hills near Prescott, Az.
Attachments:
Last edit: 31 Mar 2017 11:04 by Dr. Gamma. Reason: badd grammer

Please Log in or Create an account to join the conversation.

More
31 Mar 2017 10:55 #758229 by 650ed
Replied by 650ed on topic 1981 KZ1000 J-to-K build

1977 KZ650-C1 Original Owner - Stock (with additional invisible FIAMM horn)

Please Log in or Create an account to join the conversation.

More
01 Apr 2017 16:22 #758303 by Shdwdrgn
Replied by Shdwdrgn on topic 1981 KZ1000 J-to-K build
Well I didn't have much luck with the time-serts but I did find helicoil in various lengths. I measured the holes in the head, it drops down 10mm initially for the set pins, then drops another 20mm of threaded length. In reading about the helicoils, I got the idea that they are stretched a bit as you feed them into the new hole. The 18mm option seemed a bit too close for comfort, as I don't want any of the coil sticking up once I'm done, so I opted for the 15mm pieces. As for the kit to drill and tap the new holes, it turns out you can get a kit for the specific size for around $25, or you can order a full set that handles 5 different size for $33. Of course I couldn't find any kits that come with the longer coils, and there was no way I was going to trust torquing down the cam bolts on only 8mm of thread, so I had to order pieces separately.

All right, so while I'm waiting on that the next step is replacing the damaged bolts. These are the 16 that go in the caps which hold the cams in place. Several of them are marked as "7" on the head, and I can't seem to find a reference for that. The hardened bolts I've seen are usually 8.8 or 10.9. Since the bolt threads appear to have been stripped so easily, perhaps these bolts aren't hardened at all? Does anyone happen to know what I should look for to replace them?

1981 KZ1000-JK1
She's a beautiful mess, and I've made her all mine

Please Log in or Create an account to join the conversation.

More
01 Apr 2017 18:00 #758311 by aquaholic
Replied by aquaholic on topic 1981 KZ1000 J-to-K build
OK here is my take on your bolting issue.
1) Sandblasting is great BUT leaves allot of debris in the holes !!!! I have found this out AFTER pulling my head off 3 times even when I thought the bolt holes were clean AND after running a thread chaser down them.
2) I had one Cam bearing bolt strip out because I had to pull the head 3 times (using the bearing cap bolts to pull the cams into position while they were fighting the valve springs per the FSM). I'm still feeling like .... because I used a 1/4x20 Helicoil to replace that 1 bolt because I couldn't find a Metric replacement locally. It worked fine but not original. Make sure that whatever you use for a thread replacement that you use Permanent thread sealer on them and DO NOT TRY TO INSTALL the bolts immediately after installing the new inserts. It will permanently lock your bolts .... not good
3) Check your torque wrench to be sure it is fairly accurate.
4) There is a great post here on the website (I can't find it right now) about using a C-clamp to press the cams down into the bearings before installing and tightening the bearing caps in place so that the cam bearing bolts don't have to pull the cams down (and put extra pressure on the bolt threads) while working against the valves springs. I found this AFTER I stripped out the Cam bearing hold down bolts.
I need to make a correction in my earlier post about your front fender. I said mine was Plastic and it is NOT. Sorry. My bike is a 1981 KZ1000 J that has been sitting since 1990. If you want more information about what I have discovered, PM me. If it is something worth while I will post on the website BUT .... if it is something I did wrong (other than the 1/4x20 Helicoil) I won't post.
Be well and hope this helps, jon
The following user(s) said Thank You: GPz550D1

Please Log in or Create an account to join the conversation.

More
02 Apr 2017 10:45 #758356 by VTEC
Replied by VTEC on topic 1981 KZ1000 J-to-K build
Not sure if previously mentioned, but there is a quick fix for the stripped cap bolt holes. May not sound professional, but it does work.

Get grade 8 flange head cap screws in 1/4"-20. Blow out the stripped threads in the hole, add some anti-seize, and run the American bolts in without even having to tap. You may have to file out the inside of the dowels to fit the slightly larger bolts.

It will take 12 ft/lbs no problem when you're done.

KZ1000-K2
ZRX1100
XR400R
The following user(s) said Thank You: GPz550D1

Please Log in or Create an account to join the conversation.

More
02 Apr 2017 11:19 #758360 by Dr. Gamma
Replied by Dr. Gamma on topic 1981 KZ1000 J-to-K build
OUT GO THE BAD THREADS!!
IN GO THE GOOD THREADS!!!

1972 H2 750 Cafe Racer built in 1974.
1976 KH400 Production Road Racer.
1979 Kz1000 MK. II Old AMA/WERA Superbike.
1986 RG500G 2 stroke terror.
1986 GSXR750RG The one with the clutch that rattles!

Up in the hills near Prescott, Az.

Please Log in or Create an account to join the conversation.

More
06 Apr 2017 14:44 #758643 by Shdwdrgn
Replied by Shdwdrgn on topic 1981 KZ1000 J-to-K build
Grrr I never got notified that there were new replies in this thread! Ah well... As I mentioned I found the longer helicoils to order so I had the right thread AND enough length to get a good torque on them. Both the helicoils and the tap kit are being delivered today, so I won't try to mess with the 1/4-20 bolts.

Still looking for an answer on the bolt hardness though, just posted a new thread in the engine section... @VTEC, would there be a similar grade in metric that I should be using to replace the original bolts? Or was the grade-8 suggested so that it would cut its own new threads in the aluminum?

Now from what I understand, helicoils are supposed to self-lock into the new threads, allowing normal insertion and removal of the original bolts. I've never seen any mention of using thread locker with them?

Yeah the sand has definitely been an issue through the build. I don't know how I missed it in the head, I think I just *forgot*... but with all the previous engine parts, after the painting was done and had time to set up, I blasted out all the channels with the garden hose to try and knock out the rest of the sand before I put things together. When I finished up the head and got the springs back in last Fall, the weather was just turning nasty. The head has been sitting in the garage all Winter, so I didn't even think of flushing out the threads before assembly. And the place where these cap bolts go is especially a problem because all the channels are sealed, so the sand couldn't even fall out the back side. I'll be pulling it again this weekend, will try to remember to flush them all out after I get the helicoils tapped.

1981 KZ1000-JK1
She's a beautiful mess, and I've made her all mine

Please Log in or Create an account to join the conversation.

More
06 Apr 2017 15:09 - 06 Apr 2017 15:21 #758650 by Dr. Gamma
Replied by Dr. Gamma on topic 1981 KZ1000 J-to-K build
The only sure way of getting all the sand or glass bead out of all the threaded holes is buy yourself a few cans of carb cleaner. Put that little red tube on the can, and spray down each hole,then blow it out with air.Put a bolt all the way down each bolt hole. If you still feel or hear grit spray it again. I used to put my cylinder head into a Safety Kleen machine and just run the nozzle down each hole for a long time each. That still never got all the sand or glass out. Like I said, the carb cleaner is the only way that really works. BEEN THERE, DONE THAT!!!!

I like using flanged head bolts for cam caps. That what the factory used on all the early 900/1000 motors. Grade 8 will work just fine.

Heres a photo of the cam cap bolts Kawasaki used in the early 900/1000 motors. No hardness number on it at all. Plus its the same bolt that they use on the valve cover!!!! I have NEVER broke one in my life. Plus I use cams with up to .440 lift. And I used to adjust my valves about every other weekend. And with 650 style shim buckets, that meant pulling the cams!!!!


1972 H2 750 Cafe Racer built in 1974.
1976 KH400 Production Road Racer.
1979 Kz1000 MK. II Old AMA/WERA Superbike.
1986 RG500G 2 stroke terror.
1986 GSXR750RG The one with the clutch that rattles!

Up in the hills near Prescott, Az.
Attachments:
Last edit: 06 Apr 2017 15:21 by Dr. Gamma.

Please Log in or Create an account to join the conversation.

Powered by Kunena Forum

If you like KZR Please consider making a donation. Thank you.

KZRider is free, but not without cost.

Please consider chipping in a few bucks to help cover the cost of running the KZR servers.