
JUST ANOTHER APPROACH FOR CHECKING SYSTEM CURRENT
- Motor Head
-
 Topic Author
- Offline
- User
-

Registered
- FIX UP YOUR BIKE RIGHT AND CHEAP
- Posts: 5137
- Thanks: 393
JUST ANOTHER APPROACH FOR CHECKING SYSTEM CURRENT
06 Aug 2010 14:17
I Took this off of the web, I did not write any of this, it is pure plagiarism!!!!! :woohoo:
Installing an Ammeter
I was at a friend's house until late one evening, back in the middle 70s. It was time to go, and I fired up the bike (a CB500 Four) and almost immediately noticed that the charging system wasn't working. I knew that because the ammeter mounted in the top of the headlight shell was reading steady discharge. After killing the engine and hopping of the machine, a few minutes' probing found a corroded rectifier connector. A little scraping with a pocket knife (the only tool handy) quickly took care of that. I fired up the machine again and noted with the kind of detached satisfaction that only a professional motorcycle mechanic would have, that all was well again. The ammeter was reading happily on the charge side, and I could ride the 40 miles home without concern.
What is It?
The electrical energy coursing though your motorcycle has a couple of important characteristics. One of these is flow. That is, the electricity moves, it is not static. Rather like the water flowing from a faucet. This flow is often referred to as current, and it is measured in amperes, or amps for short. Electricity's other important attribute is pressure. Another way to look at it is to say it has weight. This pressure or weight is the result of the different magnetic power between one place and another in the circuit. We call this pressure volts. Voltage is really just electrical strain, between one place in the circuit and another. That is, the pressure of accumulated electricity that has not yet moved.
Amps and volts are measured with electrical meters. An ammeter indicates the flow of electricity. The heavier the flow, the higher the ammeter reads. If the flow reverses direction, the ammeter indicates that also. A voltmeter on the other hand measures accumulated electrical pressure. The difference between these two instruments is that one (the ammeter) shows electricity on the job and working, while the other (the voltmeter) shows only the afteraffects. One is active, the other is passive.
The History of Ammeter Use in Motor Vehicles
The ammeter was once widely used in cars and on motorcycles. It was important in earlier days to closely monitor electrical activity because the electrical systems were not as robust as they are today. On motorcycles, the pushrod Brit iron (and their unreliable electricals) became the classic home for the ammeter into the early 1970s. By then however, it had already disappeared on the car, and would soon on motorcycles. The reason was so few people understood what the ammeter did. The way its needle wiggled back and forth constantly confused people. Consequently the ammeter fell into disuse, and in many cases was replaced by a light which dutifully stayed off until something went wrong. When charging ceased, the light winked on and stayed on. This so-called "idiot" light (presumably named because the operator is an idiot who waits for it to come on before maintaining the system) is still with us today in most cars. In some of these same vehicles, and others besides, a voltmeter has taken the traditional role that was once the ammeter's. Ammeter use on either car or bike is rare today, the last OEM appearance probably being Kawasaki's ZIR, now a classic.
The Benefits of Installing an Ammeter
Even if your bike has neither light or voltmeter, and that's most machines now, an ammeter is a good thing to have. Remember, the ammeter monitors charging system activity in "real time," unlike the voltmeter whose information is as stale as yesterday's newspaper. When charging system trouble occurs, the ammeter's warning is instant. The voltmeter's response is delayed.
An ammeter looks good in older bikes such as old SOHCs and early Kawasakis and Yamahas. Put it in the headlight shell as in old Brit bikes. A fairing if you have one is also a good place to put an ammeter. Makes that fairing more useful, and it's the easiest way to install an ammeter.
Installing the Ammeter
First, pick an ammeter that has a small range, under 20 amps if possible. Most motorcycles don't charge over that figure, ever. An ammeter that reads to 30 amps or more is going to not be as effective in indicating a problem, because its needle just isn't going to move much.
Make the opening in the headlight shell or fairing with a hole saw. It will make the cleanest hole, and the this is important if you are going to use one of the motorcycle ammeters that are available. They have very small lips or bezels and so won't hide a sloppily cut hole very well.
Wire your ammeter in-line with the machine's main fuse. Some old bikes have only one fuse, and some really old ones have none. In that case, look at the battery positive cable. It should have attached to it a smaller wire. Break into that wire and put the ammeter in-line with that wire. DO NOT wire the ammeter into either battery cable. The starter motor will pull between 80 and 150 amps of current through those cables (that is why they are so heavy) and burn up your poor little ammeter.
Speaking of wiring, use fairly heavy wire to wire up your ammeter. Use 14-gauge stranded copper wire. The ammeter is going to be somewhat far from the battery. Its wiring will therefore be long, and extra thickness will prevent the wiring from absorbing too much energy and causing voltage drops. Route the wiring carefully. This can be difficult, but make an effort. You don't want to pinch the wiring in a fork stop, between parts and the frame, or anywhere else. You are carrying high current in this wire. It would be a good idea to wrap it with that curly plastic stuff the racers put on their brake hoses. You can get it from any auto parts store. Remember to solder on the eyelets and solder and insulate your splices.
Mike Nixon
1982 KZ1000LTD K2 Vance & Hines 4-1 ACCEL COILS Added Vetter fairing & Bags. FOX Racing rear Shocks, Braced Swing-arm, Fork Brace, Progressive Fork Springs RT Gold Emulators, APE Valve Springs, 1166 Big Bore kit, RS34's, GPZ cams.
1980 KZ550LTD C1 Stock SOLD Miss it
1979 MAZDA RX7 in the works, 13B...
1980 KZ550LTD C1 Stock SOLD Miss it
1979 MAZDA RX7 in the works, 13B...
Please Log in or Create an account to join the conversation.
- Old Man Rock
-
- Offline
- User
-
Registered
- Posts: 6073
- Thanks: 225
Re: JUST ANOTHER APPROACH FOR CHECKING SYSTEM CURRENT
06 Aug 2010 17:45
What... After reading all that... no Coil Mod? 
1976 KZ900-A4
MTC 1075cc.
Camshafts: Kawi GPZ-1100 .375 lift
Head: P&P via Larry Cavanaugh
ZX636 suspension
MIKUNI, RS-34'S...
Kerker 4-1, 1.5" comp baffle.
Dyna-S E.I.
Earls 10 row Oil Cooler
Acewell 2802 Series Speedo/Tach
Innovate LC1 Wideband 02 AFR meter
Phoenix, Az
MTC 1075cc.
Camshafts: Kawi GPZ-1100 .375 lift
Head: P&P via Larry Cavanaugh
ZX636 suspension
MIKUNI, RS-34'S...
Kerker 4-1, 1.5" comp baffle.
Dyna-S E.I.
Earls 10 row Oil Cooler
Acewell 2802 Series Speedo/Tach
Innovate LC1 Wideband 02 AFR meter
Phoenix, Az
Please Log in or Create an account to join the conversation.
- PLUMMEN
-
- Offline
- User
-
Registered
- Posts: 7986
- Thanks: 104
Re: JUST ANOTHER APPROACH FOR CHECKING SYSTEM CURRENT
06 Aug 2010 17:52
ive got an even simpler low buck way of doing it,clean all the electrical connections and tighten all the ground straps.
then ride the wheels off of it for years with no worries! :woohoo:
then ride the wheels off of it for years with no worries! :woohoo:
Still recovering,some days are better than others.
Please Log in or Create an account to join the conversation.
- bountyhunter
-

- Offline
- User
-
Registered
- Posts: 7245
- Thanks: 338
Re: JUST ANOTHER APPROACH FOR CHECKING SYSTEM CURRENT
06 Aug 2010 20:46 - 06 Aug 2010 20:47
Old cars all had ammeters as standard equipment. My brother's '53 Chevy had one labeled "Battery" and it had a "D" on the left and a "C" on the right which I thought meant "dead" and "charged".
Most new cars have battery voltage meters instead which show if the alternator is charging and the regulator is operating correctly.
Most new cars have battery voltage meters instead which show if the alternator is charging and the regulator is operating correctly.
1979 KZ-750 Twin
Last edit: 06 Aug 2010 20:47 by bountyhunter.
Please Log in or Create an account to join the conversation.
- Motor Head
-
Topic Author
- Offline
- User
-
Registered
- FIX UP YOUR BIKE RIGHT AND CHEAP
- Posts: 5137
- Thanks: 393
Re: JUST ANOTHER APPROACH FOR CHECKING SYSTEM CURRENT
07 Aug 2010 15:36 - 07 Aug 2010 15:48
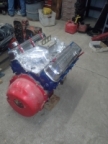
This is a picture of a $5.99 AMP meter hooked up to the charging system, with a volt meter monitoring battery voltage and the AMP meter displaying, of course, AMPs. This is with all of the factory electrical running, plus 1 additional head light bulb on high beam, 65 watts. I can prove that the current measured for total factory system operation is 5 amps, this was measured across the main 20 AMP fuse. Now @ 4000rpm I get still 13.8 DCV and the meter shows a Positive current flow of 4 AMPs which is all the system is requiring to keep up the already charged battery.

1982 KZ1000LTD K2 Vance & Hines 4-1 ACCEL COILS Added Vetter fairing & Bags. FOX Racing rear Shocks, Braced Swing-arm, Fork Brace, Progressive Fork Springs RT Gold Emulators, APE Valve Springs, 1166 Big Bore kit, RS34's, GPZ cams.
1980 KZ550LTD C1 Stock SOLD Miss it
1979 MAZDA RX7 in the works, 13B...
1980 KZ550LTD C1 Stock SOLD Miss it
1979 MAZDA RX7 in the works, 13B...
Last edit: 07 Aug 2010 15:48 by Motor Head. Reason: Add Picture
Please Log in or Create an account to join the conversation.
- Motor Head
-
Topic Author
- Offline
- User
-
Registered
- FIX UP YOUR BIKE RIGHT AND CHEAP
- Posts: 5137
- Thanks: 393
Re: JUST ANOTHER APPROACH FOR CHECKING SYSTEM CURRENT
07 Aug 2010 15:49 - 07 Aug 2010 15:51
And another,@ Idle

1982 KZ1000LTD K2 Vance & Hines 4-1 ACCEL COILS Added Vetter fairing & Bags. FOX Racing rear Shocks, Braced Swing-arm, Fork Brace, Progressive Fork Springs RT Gold Emulators, APE Valve Springs, 1166 Big Bore kit, RS34's, GPZ cams.
1980 KZ550LTD C1 Stock SOLD Miss it
1979 MAZDA RX7 in the works, 13B...
1980 KZ550LTD C1 Stock SOLD Miss it
1979 MAZDA RX7 in the works, 13B...
Last edit: 07 Aug 2010 15:51 by Motor Head.
Please Log in or Create an account to join the conversation.
- Motor Head
-
Topic Author
- Offline
- User
-
Registered
- FIX UP YOUR BIKE RIGHT AND CHEAP
- Posts: 5137
- Thanks: 393
Re: JUST ANOTHER APPROACH FOR CHECKING SYSTEM CURRENT
07 Aug 2010 15:50 - 07 Aug 2010 15:50
Again

1982 KZ1000LTD K2 Vance & Hines 4-1 ACCEL COILS Added Vetter fairing & Bags. FOX Racing rear Shocks, Braced Swing-arm, Fork Brace, Progressive Fork Springs RT Gold Emulators, APE Valve Springs, 1166 Big Bore kit, RS34's, GPZ cams.
1980 KZ550LTD C1 Stock SOLD Miss it
1979 MAZDA RX7 in the works, 13B...
1980 KZ550LTD C1 Stock SOLD Miss it
1979 MAZDA RX7 in the works, 13B...
Last edit: 07 Aug 2010 15:50 by Motor Head.
Please Log in or Create an account to join the conversation.
- loudhvx
-

- Offline
- KZr Legend
-

Registered
- Posts: 10863
- Thanks: 1622
Re: JUST ANOTHER APPROACH FOR CHECKING SYSTEM CURRENT
07 Aug 2010 15:51 - 07 Aug 2010 16:07
The bike's useage should vary with RPM since the ignition uses less at higher RPMs (because the coils don't have time to charge as much at very high revs).
Also, it should change as the battery voltage changes.
(I know you already know this, just pointing it out for others.)
The main fuse doesn't include what the battery is using to recharge or what the regulator is shunting, but only what the bike is using. However, on some KZ's the fuse layout is different (at least according to the diagrams). In those bikes, the main fuse only sees what the battery is giving or taking. The bike's main switch is not fused, essentially. I'll see if I can find an example.
EDIT: These are some examples:
82 kz750 N2
83 kz750 F3
Their main fuses go to the battery only. There is no fuse from reg/rec to main switch. This seems like an error, or at least a bad idea.
83 kz750 L3 does this too, but clearly has an error in the diagram since it shows no connection to the battery charge wire.
1981 KZ550 D1 gpz.
Kz550 valve train warning.
Other links.
Kz550 valve train warning.
Other links.
Last edit: 07 Aug 2010 16:07 by loudhvx.
Please Log in or Create an account to join the conversation.
- MFolks
-

- Offline
- User
-
Registered
- Posts: 6650
- Thanks: 541
Re: JUST ANOTHER APPROACH FOR CHECKING SYSTEM CURRENT
07 Aug 2010 15:58
Now the question is, is it vibration and water resistant? Finding a gauge to use on a bike can be expensive as well if it meets both requirments. Installing/mounting it is also a challenge.
I've found over the years to avoid any RFI or other interferrance, to use either shielded wiring or twist the two wires together,terminating at the instrument after twisting.
I've found over the years to avoid any RFI or other interferrance, to use either shielded wiring or twist the two wires together,terminating at the instrument after twisting.
1982 GPZ1100 B2
General Dynamics/Convair 1983-1993
GLCM BGM-109 Tomahawk, AGM-129A Advanced Cruise Missile (ACM)
General Dynamics/Convair 1983-1993
GLCM BGM-109 Tomahawk, AGM-129A Advanced Cruise Missile (ACM)
Please Log in or Create an account to join the conversation.
- loudhvx
-
- Offline
- KZr Legend
-
Registered
- Posts: 10863
- Thanks: 1622
Re: JUST ANOTHER APPROACH FOR CHECKING SYSTEM CURRENT
07 Aug 2010 16:13
Motor Head wrote:
I can't quite make out the numbers, but it looks like it showing basically zero. So I take it you are measuring battery current, and not the current through the main fuse.
That's what those type ammeters are used for, really just an indicator of whether it's charging or discharging the battery (as bountyhunter mentioned).
Again
I can't quite make out the numbers, but it looks like it showing basically zero. So I take it you are measuring battery current, and not the current through the main fuse.
That's what those type ammeters are used for, really just an indicator of whether it's charging or discharging the battery (as bountyhunter mentioned).
1981 KZ550 D1 gpz.
Kz550 valve train warning.
Other links.
Kz550 valve train warning.
Other links.
Please Log in or Create an account to join the conversation.
- Motor Head
-
Topic Author
- Offline
- User
-
Registered
- FIX UP YOUR BIKE RIGHT AND CHEAP
- Posts: 5137
- Thanks: 393
Re: JUST ANOTHER APPROACH FOR CHECKING SYSTEM CURRENT
07 Aug 2010 16:37
Sorry about the lousy photos, El-Cheapo camera, plus I was never that great with one.
But it does show a positive nearly 5 amp flow above Idle. Idle is nearly 0. This was as I said with the addition of 1 extra light. This is not a measurement of total AMP output of the system. This just shows that there is both plenty of DCV and current to maintain the electrical demand, and keep up the battery. I could also hook up it up to 1 of my 82 Big bikes that have the later 3 phase, it would be easy to disconnect the brown sense wire and watch the volts/ amps. But doing it all and taking a picture with 1 hand as you can tell just doesn't work out that well. I through a couple of big clamps, and 10 gauge wire onto the cheap AMP meter, all soldered and heat shrinked.
I hooked it up at the bullet connector Y near the battery, Red/ White wires. Battery of course to 1 side, then the system main fuse end, and the charging output wire from the regulator in the other together. Hooking across the main fuse its self shows system AMP draw.
1982 KZ1000LTD K2 Vance & Hines 4-1 ACCEL COILS Added Vetter fairing & Bags. FOX Racing rear Shocks, Braced Swing-arm, Fork Brace, Progressive Fork Springs RT Gold Emulators, APE Valve Springs, 1166 Big Bore kit, RS34's, GPZ cams.
1980 KZ550LTD C1 Stock SOLD Miss it
1979 MAZDA RX7 in the works, 13B...
1980 KZ550LTD C1 Stock SOLD Miss it
1979 MAZDA RX7 in the works, 13B...
Please Log in or Create an account to join the conversation.
- Motor Head
-
Topic Author
- Offline
- User
-
Registered
- FIX UP YOUR BIKE RIGHT AND CHEAP
- Posts: 5137
- Thanks: 393
Re: JUST ANOTHER APPROACH FOR CHECKING SYSTEM CURRENT
07 Aug 2010 17:01
Also I have been reading my FSM for my 82KZ1000 K2, Stator is supposed to be .36-.52 OHMs. Then output ACV at the stator for the 3 phase is only listed to be 50 ACV, @ again 4000rpm. The single verses the Three phase is substantial according to the FSM pages, for ACV output at the stator yellow wires and no other connection to R/R.
I will try between all of this rain to confirm this as both of my big bikes charge OK.
I will try between all of this rain to confirm this as both of my big bikes charge OK.
1982 KZ1000LTD K2 Vance & Hines 4-1 ACCEL COILS Added Vetter fairing & Bags. FOX Racing rear Shocks, Braced Swing-arm, Fork Brace, Progressive Fork Springs RT Gold Emulators, APE Valve Springs, 1166 Big Bore kit, RS34's, GPZ cams.
1980 KZ550LTD C1 Stock SOLD Miss it
1979 MAZDA RX7 in the works, 13B...
1980 KZ550LTD C1 Stock SOLD Miss it
1979 MAZDA RX7 in the works, 13B...
Please Log in or Create an account to join the conversation.
Moderators: Street Fighter LTD