
$6.00 DIY Ring Compresser set
- MDZ1rider
-
 Topic Author
- Offline
- User
-

Registered
- Posts: 381
- Thanks: 118
$6.00 DIY Ring Compresser set
22 Oct 2014 11:45 - 22 Oct 2014 12:15
I was perusing the plumbing section of my local home improvement store (Lowes) looking for hose clamps to use as ring compressors. What I found was 2’ galvanized pipe hangers. A 5 pack was $6 bucks and change. I thought I’d give them a try. I should note that I was installing rings in a stock bore 900 with a piston dia. of approx. 2 1/8”. You may have to straighten and re-bend the tab location for different dia. pistons. They also sell 1 ½” hangers that may be suitable for smaller bores (550’s?).
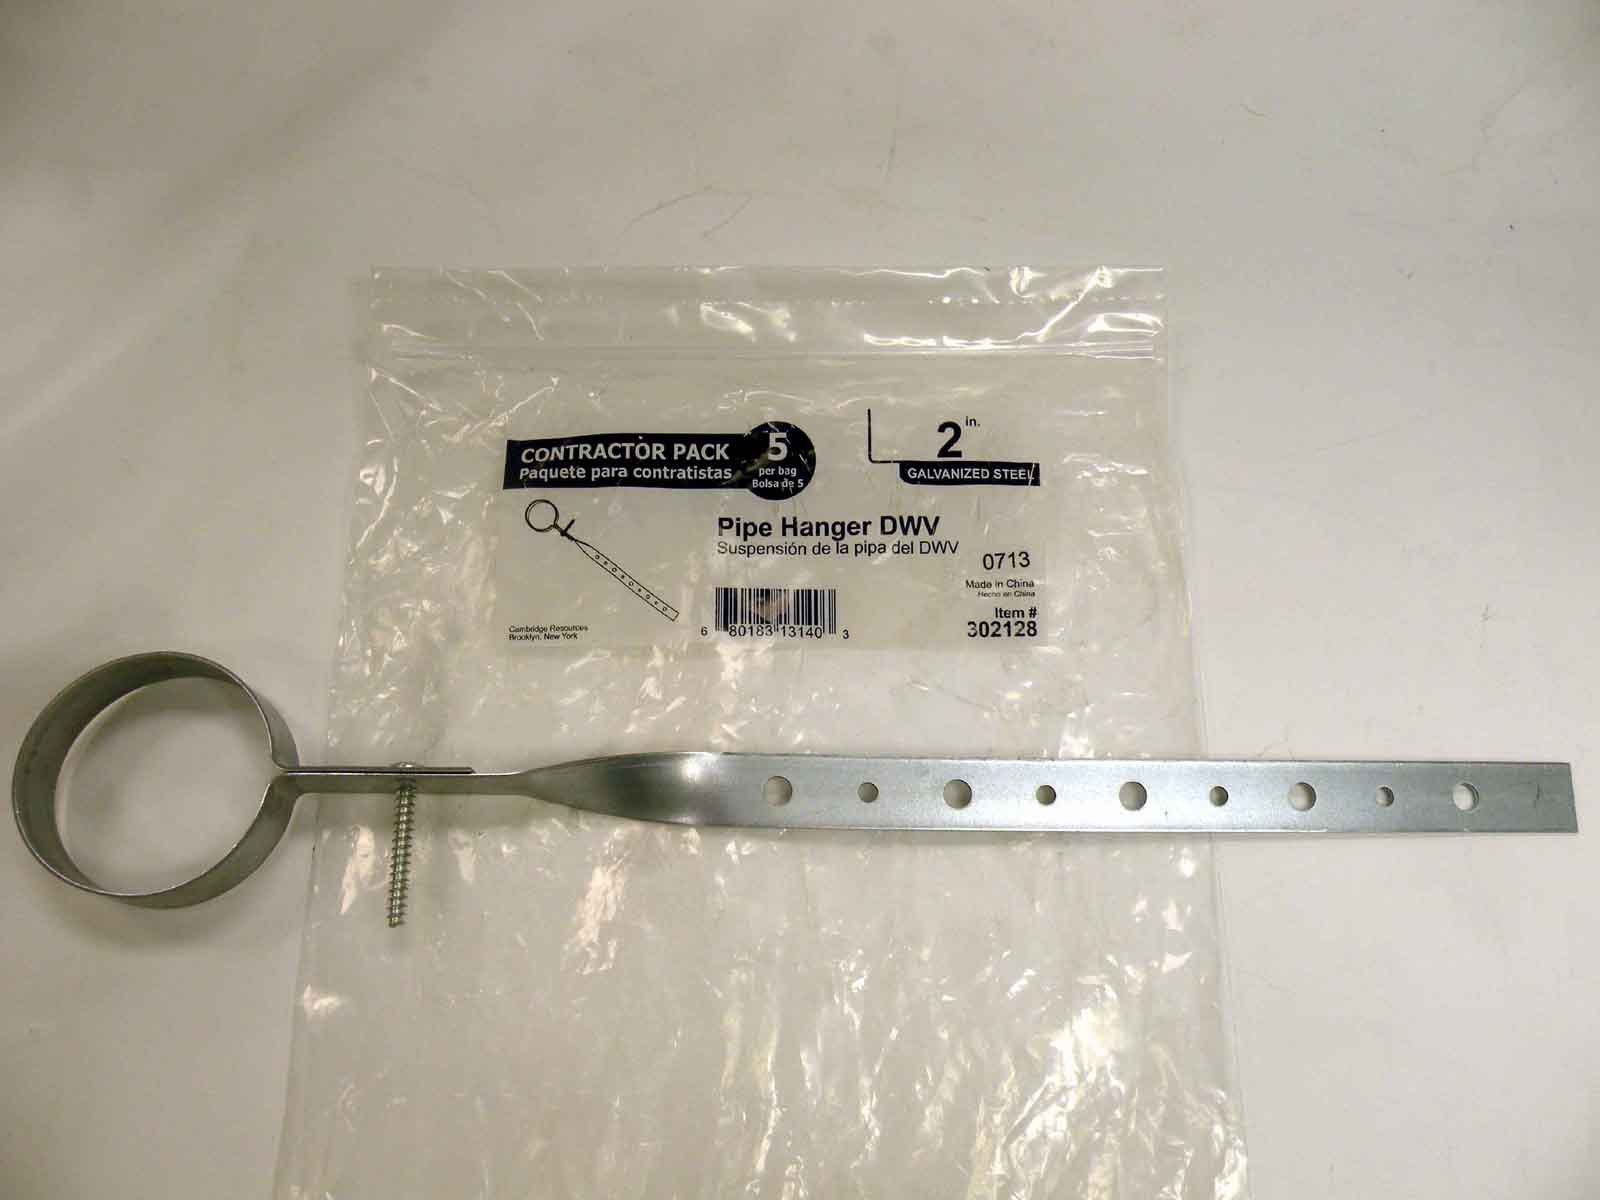
The first step was to cut off the hanger strap. If I was doing this over, I would have cut the tabs shorter. Leave approx. ½ to ¼” past the slot/screw hole. The shorter tab will make it easier when removing the clamps later.
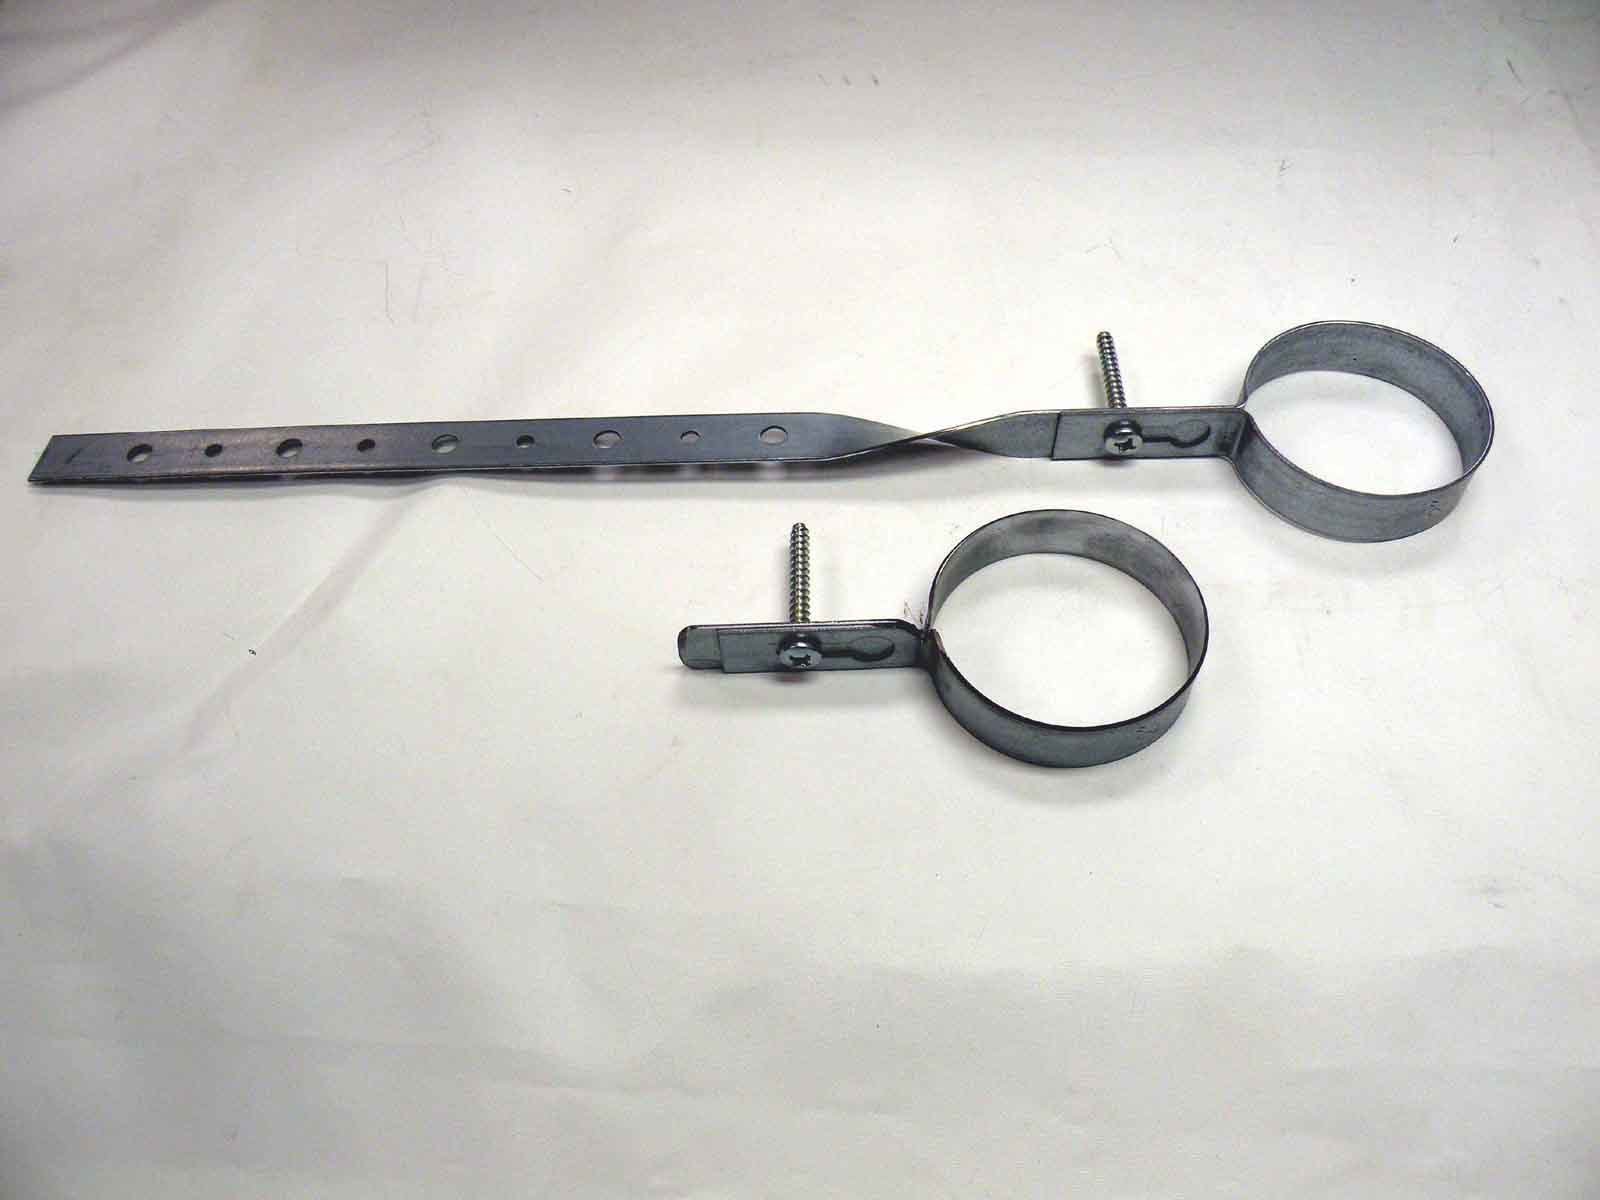
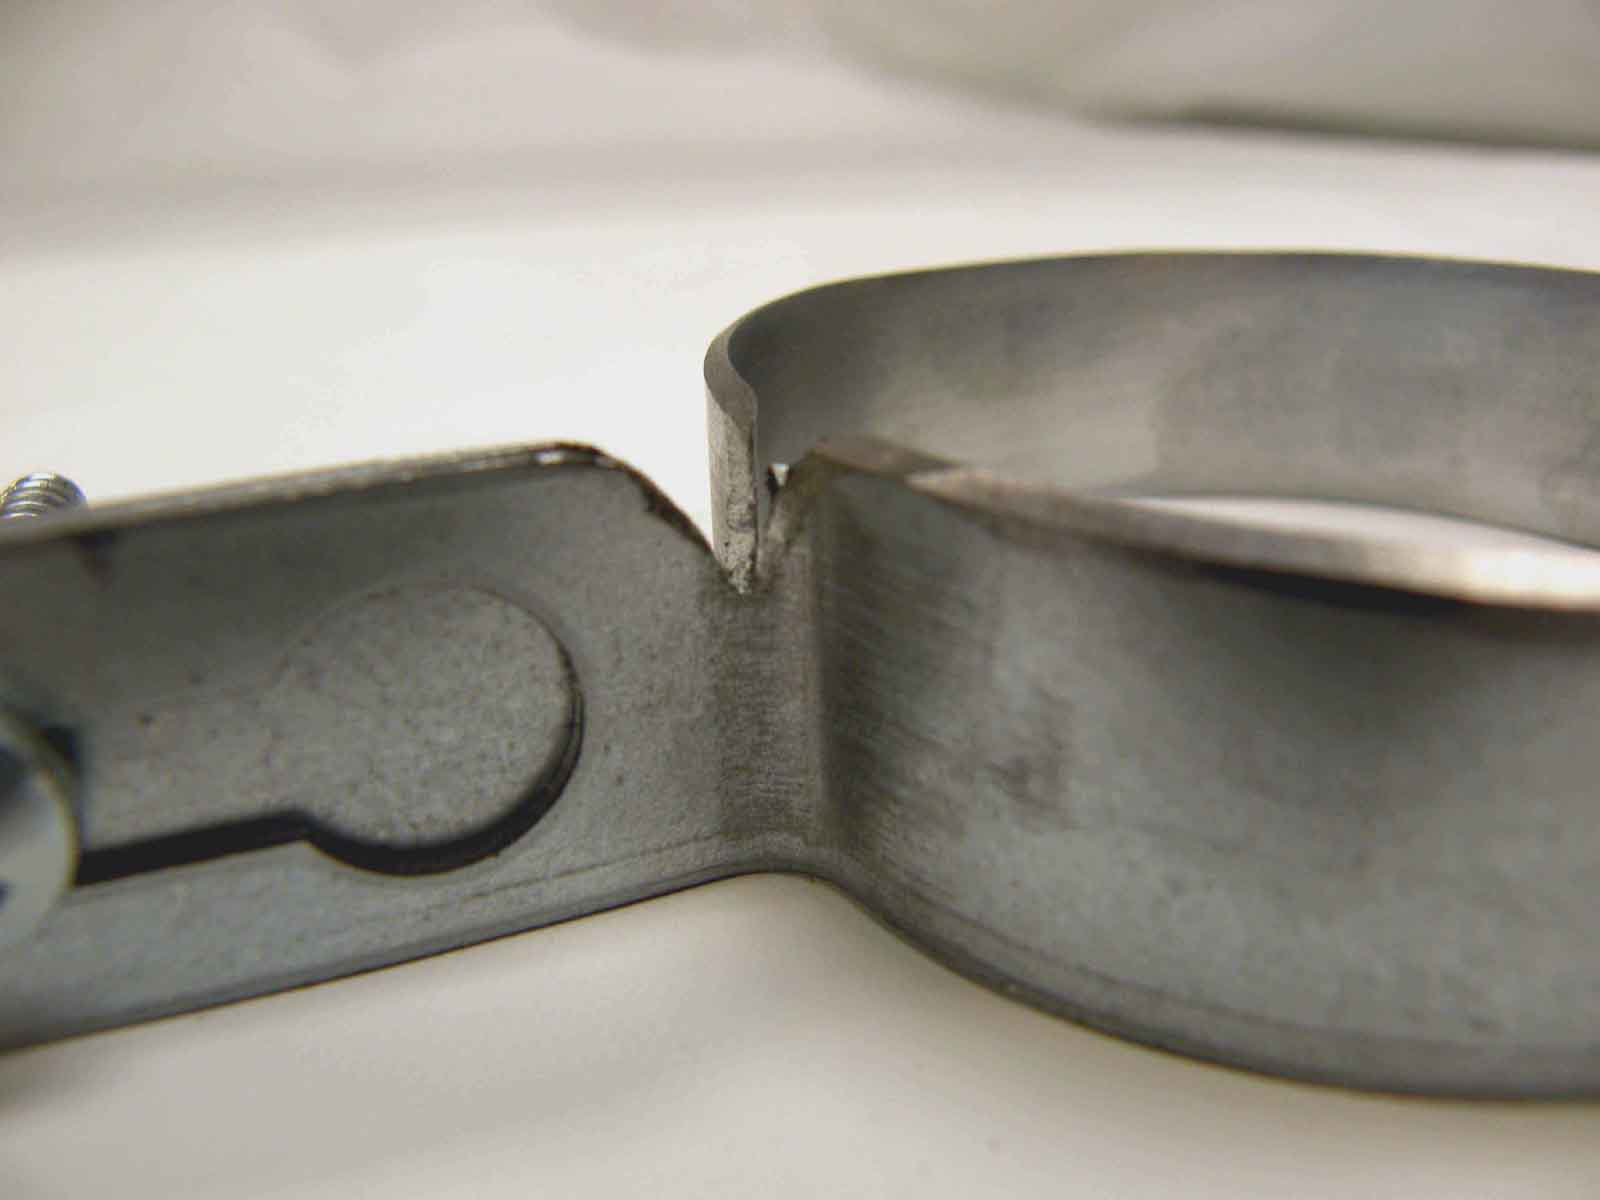
Next, I cut a relief notch at the base of the tab and chamfered the top of the clamp area approx 45 degrees. The bottom of stock cylinder sleeve is also chamfered. This will allow the clamp to move up into the cylinder sleeve and minimize the transition gap between the clamp and cylinder. I used a cutoff disk to make the notch and belt sander for the chamfer. You could do the same with hand files, a Dremmel tool or whatever you have available. Again, if I was doing this over I would also flip the notch on two of the clamps so the screw head faces out on the 3 & 4 cylinders. The final step is to go over the inner surface of the clamp area with 400 sandpaper and steel wool. This area needs to be smooth and burr free. The pistons and rings will slide across it. You don’t want anything that could cause a scratch. I spent about 1 hour making the 4 clamps.
My pistons were not on the rods, so I installed the clamps on the bench. You can insert the wrist pin/C-clips with the clamp in place. Don’t forget to install the base gasket before mounting the piston/clamp. It will not fit over the piston with the clamp in place. Coat the inside of the clamp and ring area with engine oil (lot of oil!) and tighten the clamp snug. Make sure the clamp is square with the piston. It should cover all 3 rings with a small amount of the piston exposed at the top.
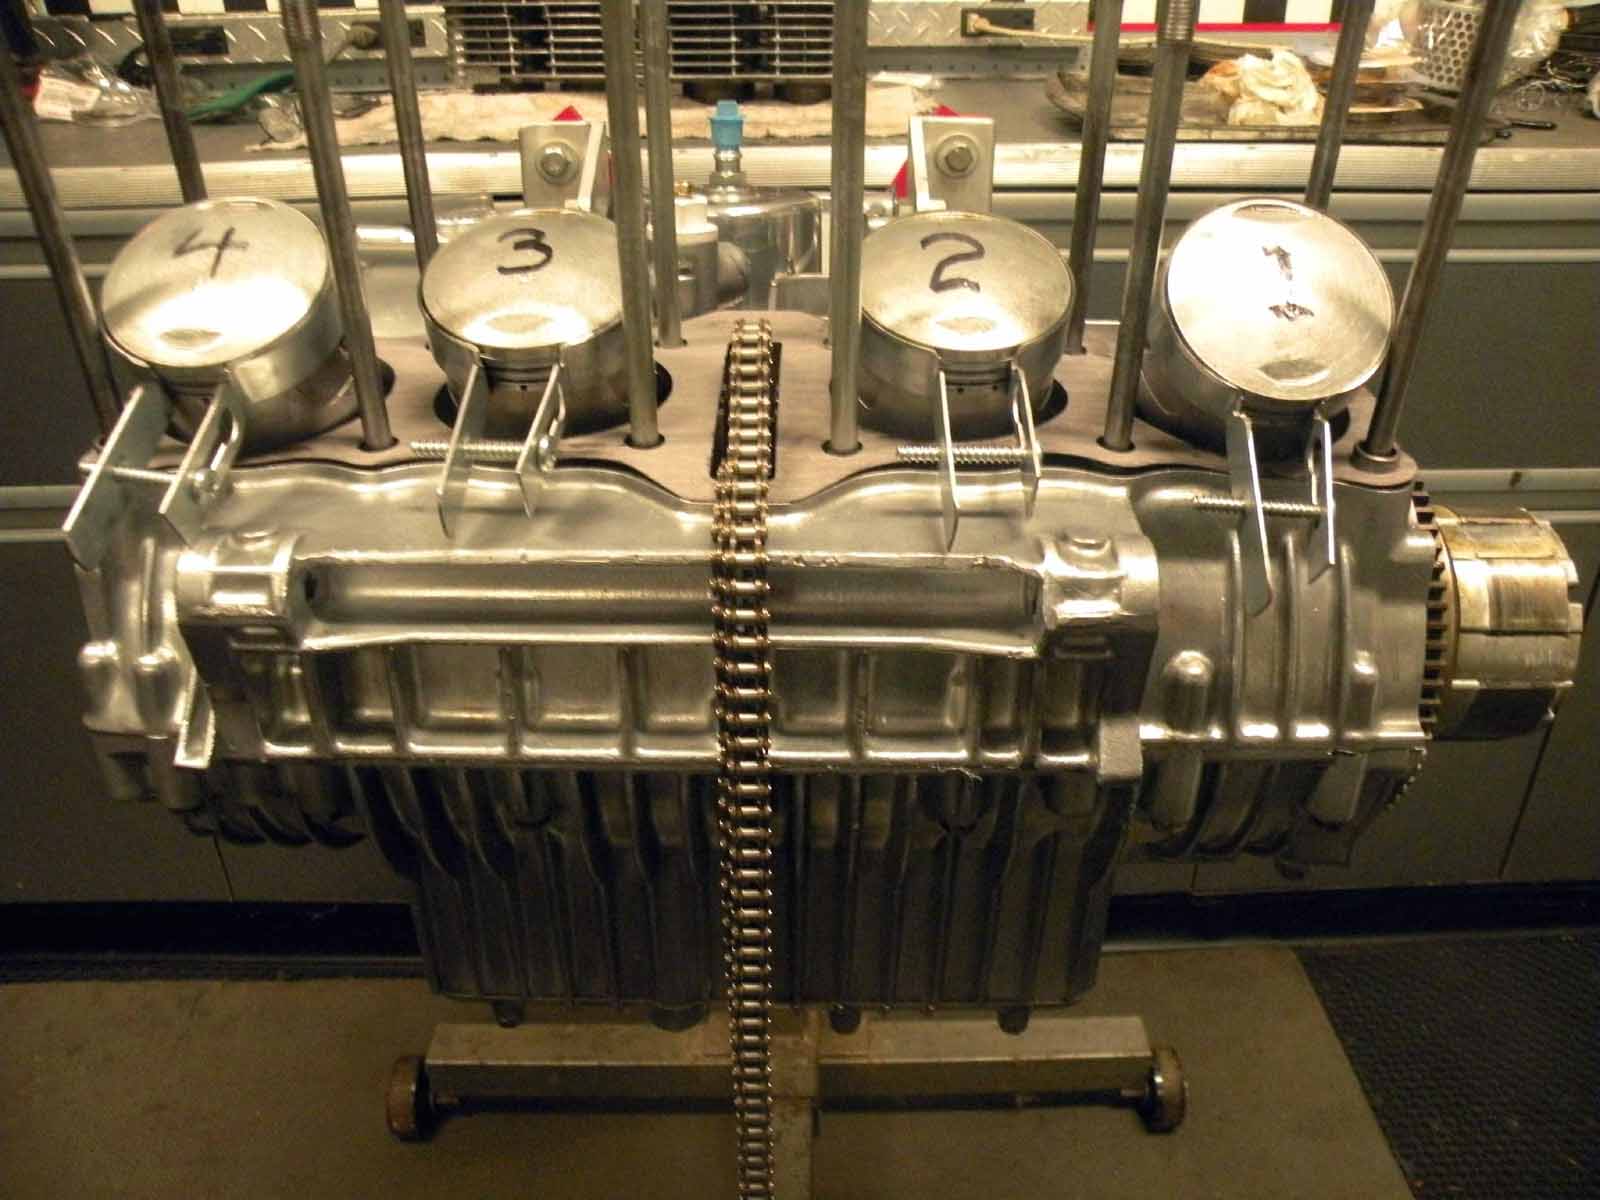
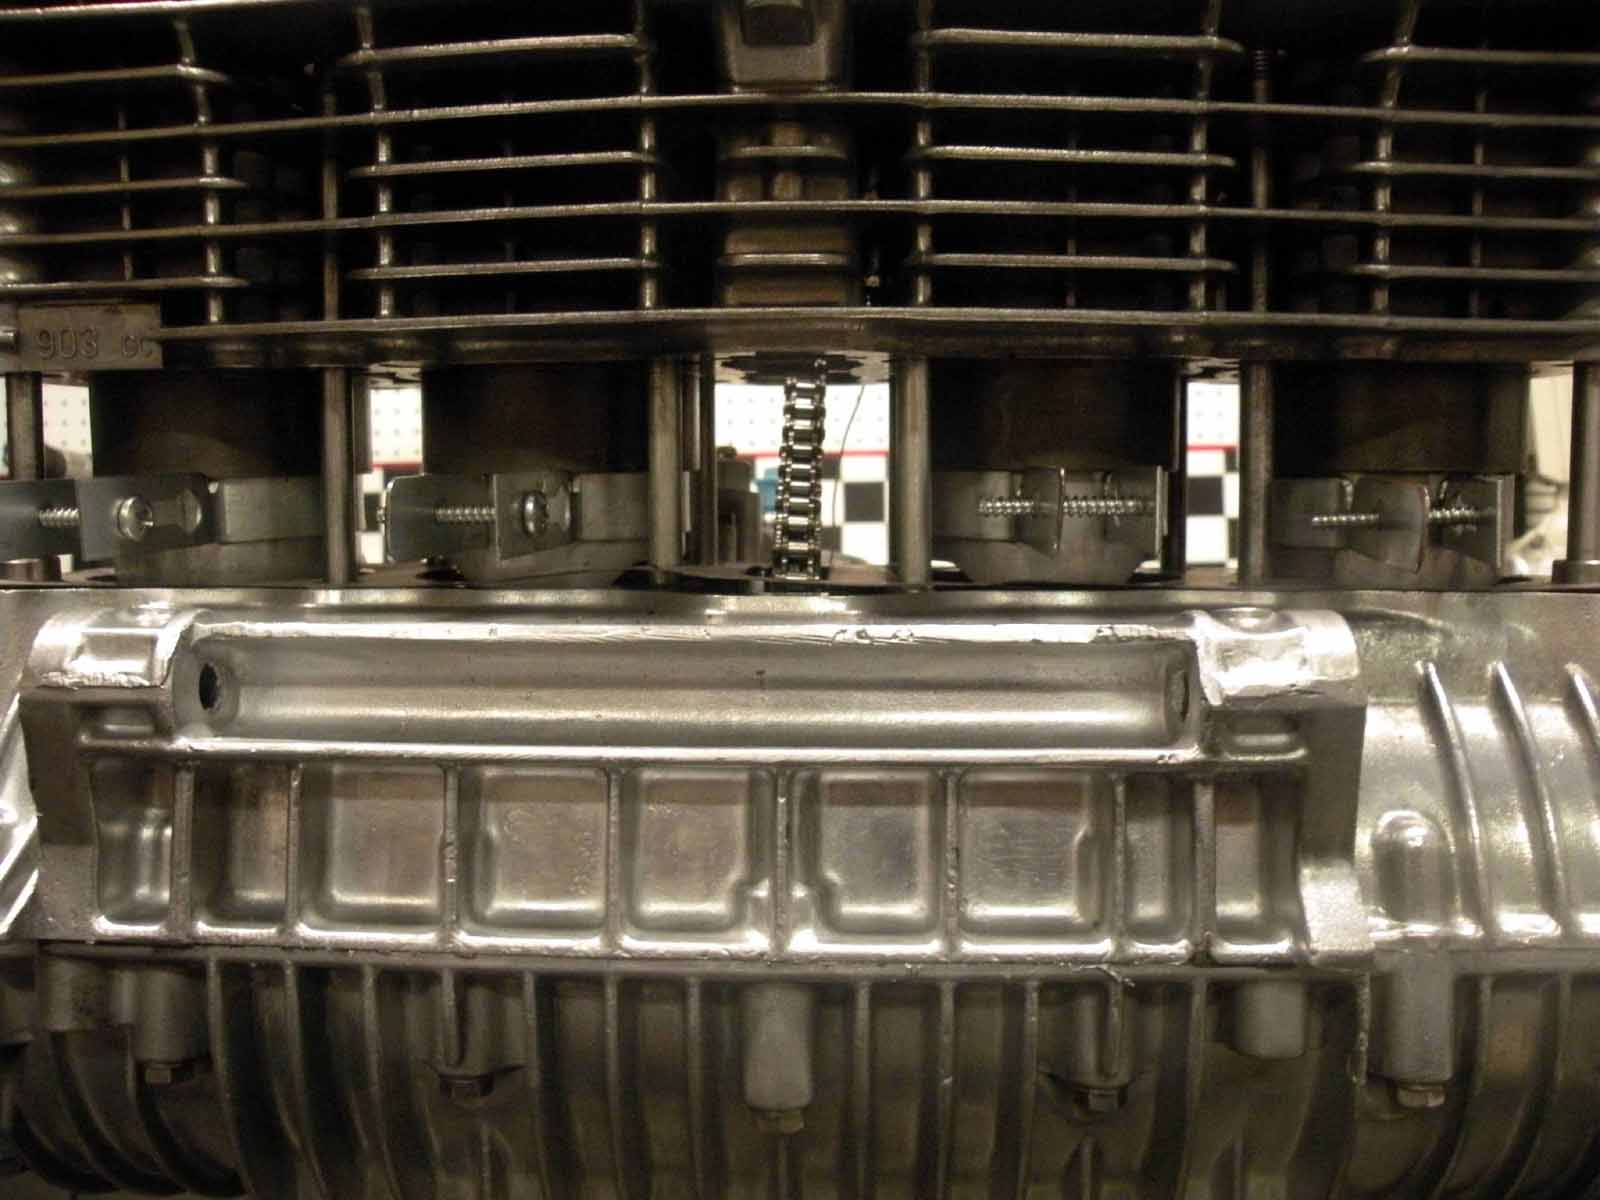
Position the cylinder block over the studs and lower it until bottom of the sleeves make gentle contact with all 4 pistons. You did remember to install the lower cam chain roller didn’t you? Align the pistons square with the cylinder sleeves and apply slight downward pressure on the block. You may need to alternate from side to side when first starting. The chamfers will cause the pistons to naturally center, but check alignment with each push. Stop if you feel any binding. The cylinder sleeve will push the clamp down the pistons. Stop when the bottom of the clamp is approx. ½” from the base gasket.
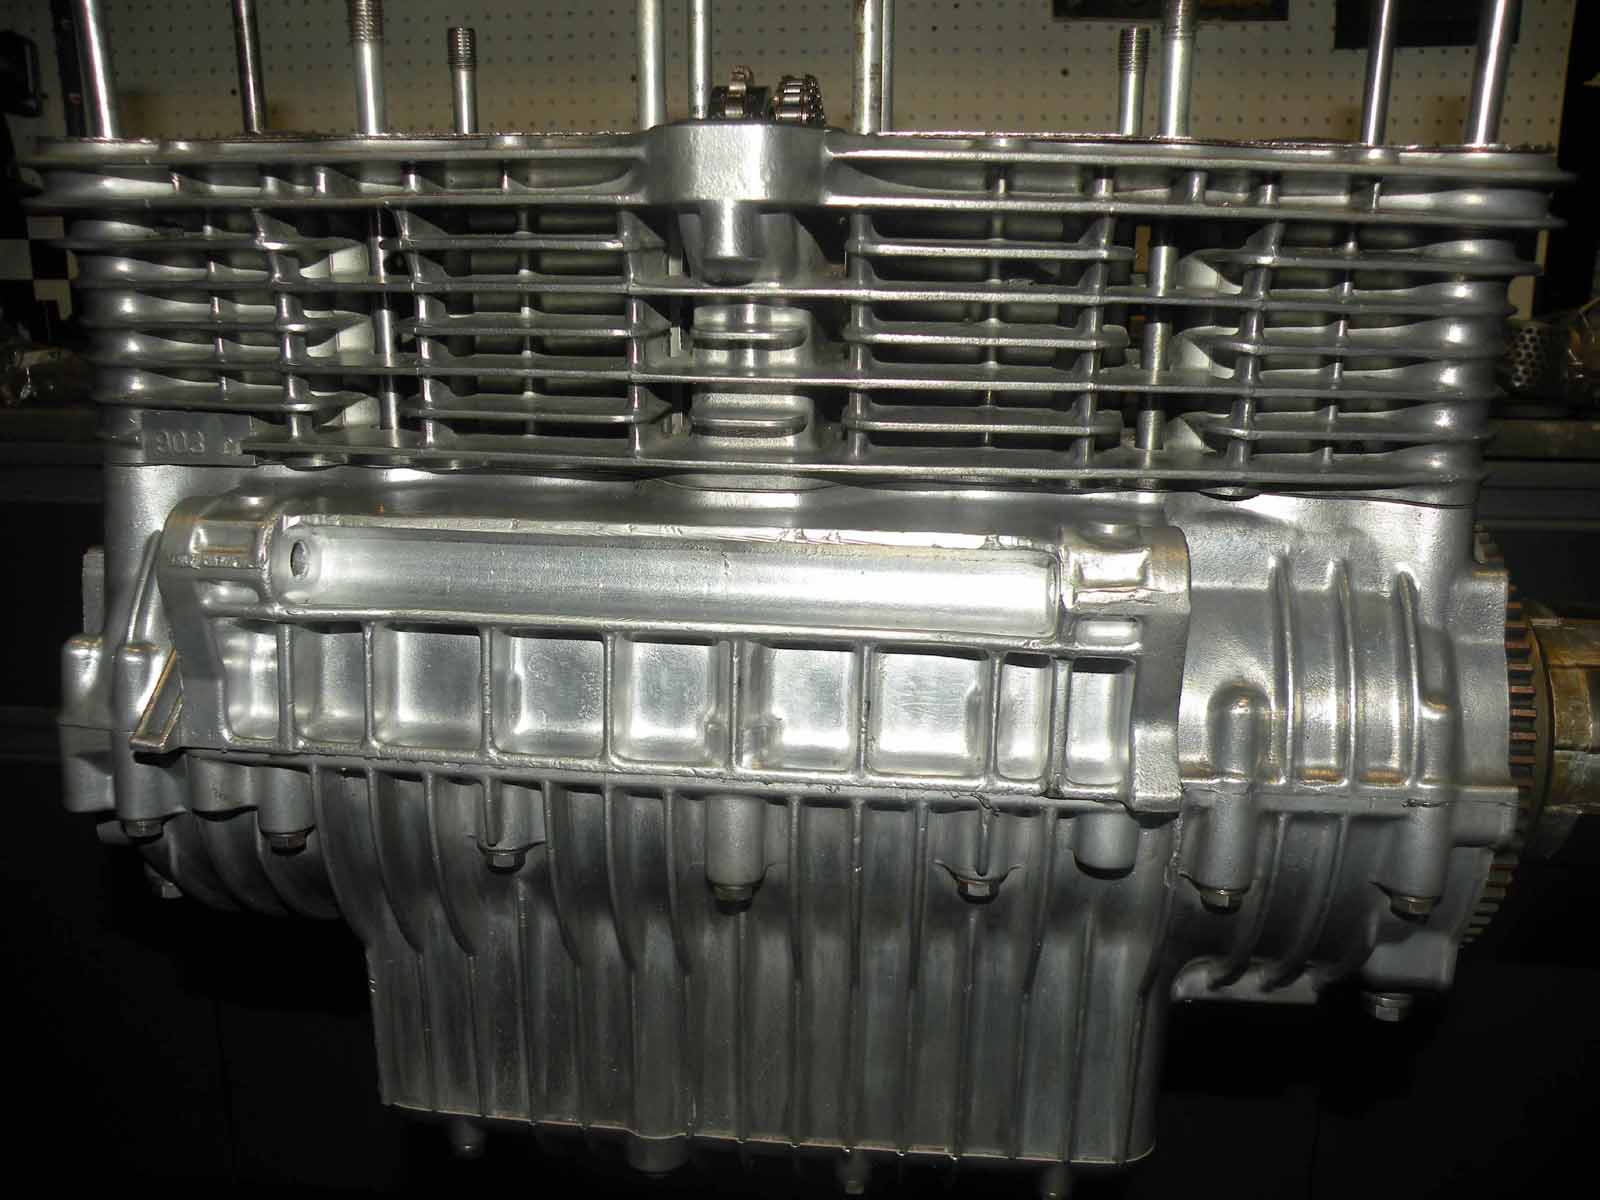
Removing the clamps is probably the hardest part. Remove the screw and expand the clamp, sliding it up and around the cylinder sleeve. This will prevent scratching the piston skirts. Bend the tabs inward so the clamp becomes a “U” shape. The clamp is fairly malleable and can be bent with your fingers. Bend the clamp as necessary to work it out from between the cylinder studs. The nice pretty clamp you just spent an hour making will be a mangled strap by the time you’re done. They’re easily reformed after you get them out. A word of warning…The chamfered top edge of clamp is sharp. It will slice the finger of anyone stupid enough to carelessly grab it. Pull the clamp from the bottom edge. Trust me on this one. With the clamps removed, push the cylinder block the rest of the way down to the case.
Not counting the hour to make the clamps, it took me 30 minutes to install the cylinders by myself. There was only one utterance of profanity, and you’ve been warned about the sharp edge. Otherwise, the whole procedure was quick and painless. It was $6.00 well spent.
The first step was to cut off the hanger strap. If I was doing this over, I would have cut the tabs shorter. Leave approx. ½ to ¼” past the slot/screw hole. The shorter tab will make it easier when removing the clamps later.
Next, I cut a relief notch at the base of the tab and chamfered the top of the clamp area approx 45 degrees. The bottom of stock cylinder sleeve is also chamfered. This will allow the clamp to move up into the cylinder sleeve and minimize the transition gap between the clamp and cylinder. I used a cutoff disk to make the notch and belt sander for the chamfer. You could do the same with hand files, a Dremmel tool or whatever you have available. Again, if I was doing this over I would also flip the notch on two of the clamps so the screw head faces out on the 3 & 4 cylinders. The final step is to go over the inner surface of the clamp area with 400 sandpaper and steel wool. This area needs to be smooth and burr free. The pistons and rings will slide across it. You don’t want anything that could cause a scratch. I spent about 1 hour making the 4 clamps.
My pistons were not on the rods, so I installed the clamps on the bench. You can insert the wrist pin/C-clips with the clamp in place. Don’t forget to install the base gasket before mounting the piston/clamp. It will not fit over the piston with the clamp in place. Coat the inside of the clamp and ring area with engine oil (lot of oil!) and tighten the clamp snug. Make sure the clamp is square with the piston. It should cover all 3 rings with a small amount of the piston exposed at the top.
Position the cylinder block over the studs and lower it until bottom of the sleeves make gentle contact with all 4 pistons. You did remember to install the lower cam chain roller didn’t you? Align the pistons square with the cylinder sleeves and apply slight downward pressure on the block. You may need to alternate from side to side when first starting. The chamfers will cause the pistons to naturally center, but check alignment with each push. Stop if you feel any binding. The cylinder sleeve will push the clamp down the pistons. Stop when the bottom of the clamp is approx. ½” from the base gasket.
Removing the clamps is probably the hardest part. Remove the screw and expand the clamp, sliding it up and around the cylinder sleeve. This will prevent scratching the piston skirts. Bend the tabs inward so the clamp becomes a “U” shape. The clamp is fairly malleable and can be bent with your fingers. Bend the clamp as necessary to work it out from between the cylinder studs. The nice pretty clamp you just spent an hour making will be a mangled strap by the time you’re done. They’re easily reformed after you get them out. A word of warning…The chamfered top edge of clamp is sharp. It will slice the finger of anyone stupid enough to carelessly grab it. Pull the clamp from the bottom edge. Trust me on this one. With the clamps removed, push the cylinder block the rest of the way down to the case.
Not counting the hour to make the clamps, it took me 30 minutes to install the cylinders by myself. There was only one utterance of profanity, and you’ve been warned about the sharp edge. Otherwise, the whole procedure was quick and painless. It was $6.00 well spent.
Last edit: 22 Oct 2014 12:15 by MDZ1rider. Reason: fix a typo
The following user(s) said Thank You: Mcdroid, JR, PLUMMEN, bluej58, !Seymore, 60ratrod, GPzMOD750, Madtrout and 2 other people also said thanks.
Please Log in or Create an account to join the conversation.
- 60ratrod
-

- Offline
- User
-
Registered
- Posts: 44
- Thanks: 1
Re: $6.00 DIY Ring Compresser set
22 Oct 2014 12:32
I would have also ran a bit of sand paper around the sharp edge to blunt it a bit, but excellent ingenuity
Active Duty US Navy Aviation Ordnanceman Petty Officer First Class
81 kz1000m1 csr "Sarge"
81 Suzuki gs650g "Shelah"
81 kz1000m1 csr "Sarge"
81 Suzuki gs650g "Shelah"
Please Log in or Create an account to join the conversation.
- MDZ1rider
-
Topic Author
- Offline
- User
-
Registered
- Posts: 381
- Thanks: 118
Re: $6.00 DIY Ring Compresser set
22 Oct 2014 12:37
I thought I did, but my bleeding finger showed otherwise!
Please Log in or Create an account to join the conversation.
- MDZ1rider
-
Topic Author
- Offline
- User
-
Registered
- Posts: 381
- Thanks: 118
Re: $6.00 DIY Ring Compresser set
06 Nov 2015 10:38
Just a quick update...I'm currently working on Z1-R with standard bore 70mm pistons. The screws were near the end, but these same clamps worked just fine for a 1000 as well.
Please Log in or Create an account to join the conversation.
- GPzMOD750
-

- Offline
- User
-
Registered
- Posts: 1365
- Thanks: 148
Re: $6.00 DIY Ring Compresser set
04 Jun 2016 11:40
Thanks for your write up. I'm about to replace the top end on my '79 shaft (1015 cc).
FYI I just bought the same 5 pack for $1.46 + tax.
FYI I just bought the same 5 pack for $1.46 + tax.
Please Log in or Create an account to join the conversation.
Moderators: Street Fighter LTD