Welcome, Guest
Username: Password: Remember me

TOPIC:

'83 KZ1000R2 - Cafe racer (take two) 21 Jan 2014 11:10 #619461

  • peter1958
  • peter1958's Avatar
  • Offline
  • User is blocked
  • Posts: 1555
  • Thank you received: 198
cr31

Please Log in or Create an account to join the conversation.

'83 KZ1000R2 - Cafe racer (take two) 22 Jan 2014 11:12 #619650

  • tommyboah
  • tommyboah's Avatar Topic Author
  • Offline
  • User
  • Posts: 89
  • Thank you received: 33

peter1958 wrote: - Changing the carbs from stock CV to Mikuni RS36 with K&N pod filters Just re read this again and those carbs are to big for this build


Are you saying it's too big even with the engine bored to 1075ccm? I guess we will find out in not too long, as I already have the RS36s and the engine is being worked on :) I will let you guys know how it works out.
.Tommyboy

Please Log in or Create an account to join the conversation.

'83 KZ1000R2 - Cafe racer (take two) 22 Jan 2014 11:36 #619652

  • tommyboah
  • tommyboah's Avatar Topic Author
  • Offline
  • User
  • Posts: 89
  • Thank you received: 33
Thought I'd continue where I stopped the last time with what has already happened. I am sorry but I don't have too much time to write in details, so this is more of a picture story of what has happened until now. I will try to document better as I go along from here.

After I did the quick conversion of the bike into a cafe racer during the summer, I worked on a cafe seat and started breaking down the bike in the late fall.

Here is the process of making the cafe seat:

I thought I would keep something of the original look on the seat cowl, so I based the new seat on the stock cowl which I had to slightly modify. I narrowed it down by cutting out a piece in the middle and putting it back together with the right width to fit the frame. Then I started to shape the foam:


The shape has been formed in a combo of glass and carbon fibre:


Drained the liquids and started tearing apart the engine


Then removing the clutch hub, valve cover and cams


Got the top end removed


Engine has been running rich :)


I needed to make some sort of platform to raise the cafe seat in order to make i flow with the edge of the gas tank. Mounting some rais which the seat is sitting on was the solution for me:


Welded the rails to the frame and fabbed up an electronics tray and welded on a square hoop in the back along with a plate acting as a battery tray, I am hiding the battery underneath the seat cowl.


I also did something I guess a lot of people don't agree with, and that is wrapping the headers.
.Tommyboy

Please Log in or Create an account to join the conversation.

Last edit: by tommyboah.

'83 KZ1000R2 - Cafe racer (take two) 22 Jan 2014 11:39 #619653

  • crusierlover
  • crusierlover's Avatar
  • Offline
  • User
  • Posts: 164
  • Thank you received: 6
I guess you are doing a good job.You seem to be going to a lot of trouble to chop up a good bike.
Proud owner of 1982 650csr again soon. keeping it this time

Please Log in or Create an account to join the conversation.

'83 KZ1000R2 - Cafe racer (take two) 22 Jan 2014 13:20 #619669

  • zed1015
  • zed1015's Avatar
  • Offline
  • User
  • Posts: 2905
  • Thank you received: 1469

tommyboah wrote:

peter1958 wrote: - Changing the carbs from stock CV to Mikuni RS36 with K&N pod filters Just re read this again and those carbs are to big for this build


Are you saying it's too big even with the engine bored to 1075ccm? I guess we will find out in not too long, as I already have the RS36s and the engine is being worked on :) I will let you guys know how it works out.


36's are way too big for 1075cc.
You want somewhere from 29mm to 32mm max depending on spec, valves, cams etc.
AIR CORRECTOR JETS FOR VM CARBS AND ETHANOL RESISTANT VITON CHOKE PLUNGER SEAL REPLACMENT FOR ALL CLASSIC AND MODERN MOTORCYCLE CARBURETTORS
kzrider.com/forum/23-for-sale/611992-air-corrector-jets-


Please Log in or Create an account to join the conversation.

'83 KZ1000R2 - Cafe racer (take two) 24 Jan 2014 09:18 #619894

  • baldy110
  • baldy110's Avatar
  • Offline
  • User
  • Posts: 2272
  • Thank you received: 510
I am running RS36's with my 1135cc MTC kit, ported heads, WEB #119 cams, pods and a Kerker. It runs great with that combo.

Please Log in or Create an account to join the conversation.

'83 KZ1000R2 - Cafe racer (take two) 30 Jan 2014 13:39 #620646

  • tommyboah
  • tommyboah's Avatar Topic Author
  • Offline
  • User
  • Posts: 89
  • Thank you received: 33
I have been trying to figure out a setup for rear sets on this build, and I got some Tarozzi folding foot pegs that I needed to fix to a proper position on the bike.

I don't really have a workshop where I can easily fabricate new parts, so I thought of a solution where I could get away with modifying the existing stock brackets for the exhaust and pegs. The holes for the exhaust are placed at a position that I think will work out good for the rear sets.

First I cut away the parts that were not goind to be needed of the stock bracket with a grinder. Leaving only the necessary holes and trying to keep a flowing shape.

I had to get a machine shop to make some bushings to fit inside the exhaust mounting holes and weld them onto the stock braket.

This is how it turned out:

I will get them sand blasted and either polished or poweder coated black. Dunno yet.

This is what the hole looks like after welding in a bushing:

Reverse side with new mount for exhaust. Found a generic rubber exhaust mount that fit well.


Well, that's all for now folks. My frame is being sand blasted and powder coated so I won't be able to show any snapshots of them mounted on the fram yet.
.Tommyboy

Please Log in or Create an account to join the conversation.

'83 KZ1000R2 - Cafe racer (take two) 30 Jan 2014 15:13 #620655

  • zed1015
  • zed1015's Avatar
  • Offline
  • User
  • Posts: 2905
  • Thank you received: 1469
Fantastic !
I can hear the rivet counters heads exploding with shock from over here :laugh:
Are you going to shape the brake side bracket around the frame mounting holes to match the gear lever side.
AIR CORRECTOR JETS FOR VM CARBS AND ETHANOL RESISTANT VITON CHOKE PLUNGER SEAL REPLACMENT FOR ALL CLASSIC AND MODERN MOTORCYCLE CARBURETTORS
kzrider.com/forum/23-for-sale/611992-air-corrector-jets-


Please Log in or Create an account to join the conversation.

Last edit: by zed1015.

'83 KZ1000R2 - Cafe racer (take two) 31 Jan 2014 08:50 #620718

  • tommyboah
  • tommyboah's Avatar Topic Author
  • Offline
  • User
  • Posts: 89
  • Thank you received: 33

zed1015 wrote: Are you going to shape the brake side bracket around the frame mounting holes to match the gear lever side.


I was hoping you wouldn't ask that question :ohmy:

I thought about it, but since nobody will be able to look at both sides at the same time I decided to keep the brake lever side shape like this, as that makes for less shaping. I have tried it on the bike before shipping the frame to powder coating and I think it doesn't look all that shabby this way :)
.Tommyboy

Please Log in or Create an account to join the conversation.

'83 KZ1000R2 - Cafe racer (take two) 27 Feb 2014 12:30 #623542

  • tommyboah
  • tommyboah's Avatar Topic Author
  • Offline
  • User
  • Posts: 89
  • Thank you received: 33
After a long wait for getting my frame back from sand blasting and powder coating, I finally picked it up this week :woohoo: 
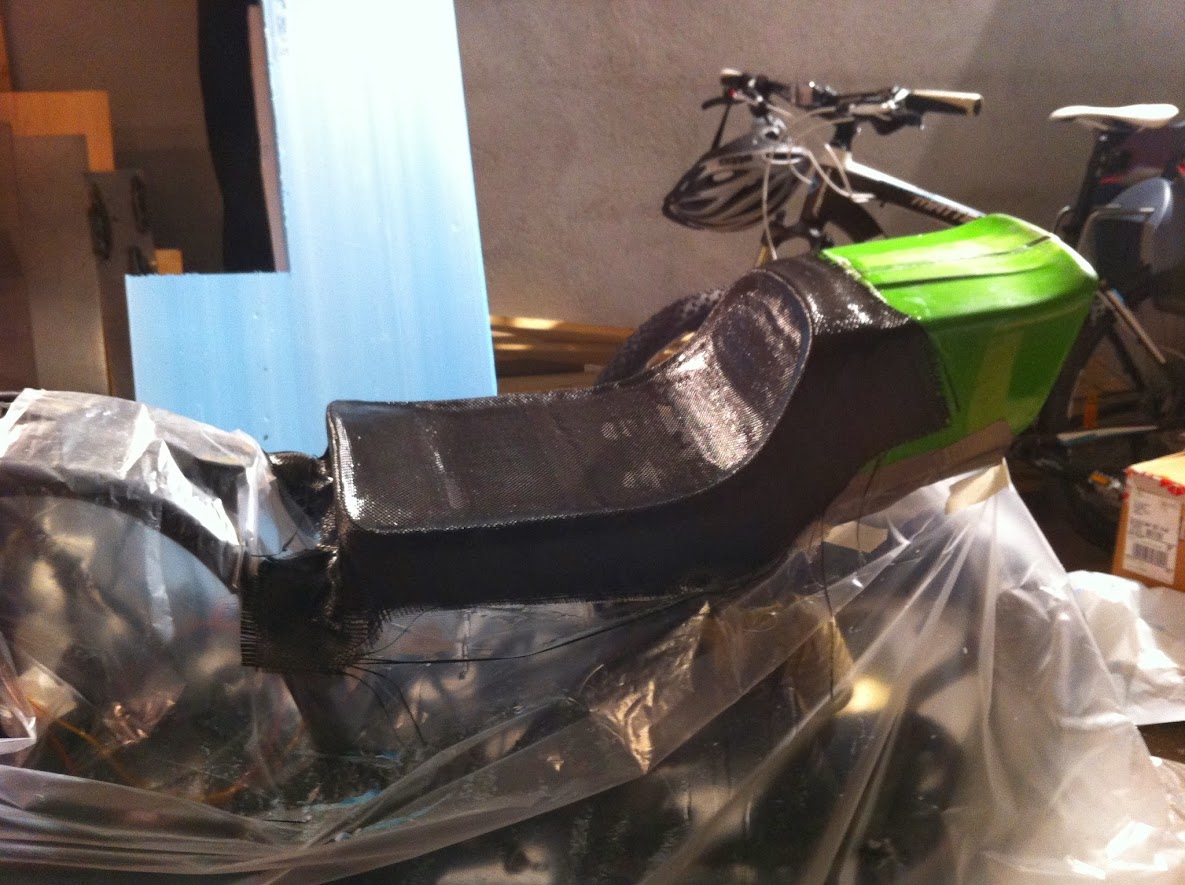
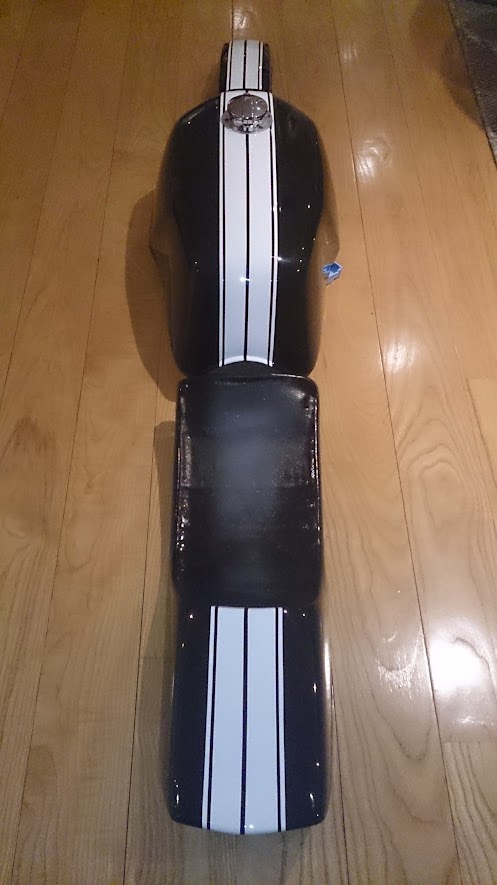
The thing looks sweet..


I also got my tank, seat and fenders back from the paint shop and I like the result:


I am still waiting for my engine to come back from the workshop, as I've had someone help me out with the cylinder boring, valve replacement etc. According to the shop it is about two weeks away. No worries as I have a lot I can fiddle around with on the engineless frame:

- installing steering and swing arm bearings
- laying out the electronics with new harness
- mounting new rear sets and bleeding front and rear brakes

Installing new steering bearing races turned out to be a small hassle. I figured i could just lay them in place and knock them in by using a mallet. Turns out that the lower race was recessed into the steering tube. I had to make my own DIY-tool for this job:

.Tommyboy

Please Log in or Create an account to join the conversation.

Last edit: by tommyboah.

'83 KZ1000R2 - Cafe racer (take two) 06 Mar 2014 21:51 #624391

  • guitargeek
  • guitargeek's Avatar
  • Offline
  • User
  • Elitist, arrogant, intolerant, self absorbed.
  • Posts: 1183
  • Thank you received: 50
GO TOMMY GO!
1980 KZ750-H1 (slightly altered)
1987 KZ1000-P6 "Ponch"
1979 GS1000 "Dadzuki"

Please Log in or Create an account to join the conversation.

'83 KZ1000R2 - Cafe racer (take two) 16 Mar 2014 06:43 #625376

  • tommyboah
  • tommyboah's Avatar Topic Author
  • Offline
  • User
  • Posts: 89
  • Thank you received: 33
I had an issue with moisture that had been trapped inside the frame and created some rusted spots underneath the lower frame. I've had these spots sorted out and the frame is good :) In order to attempt to prevent further rust I decided to rust wash the inside of the frame. I bought some cans of rust rinse (directly translated from Norwegian) and drilled a whole in each side of the frame so that I could pour this stuff into the frame and have it flow into the lower tubings. Don't have a picture of this :( 
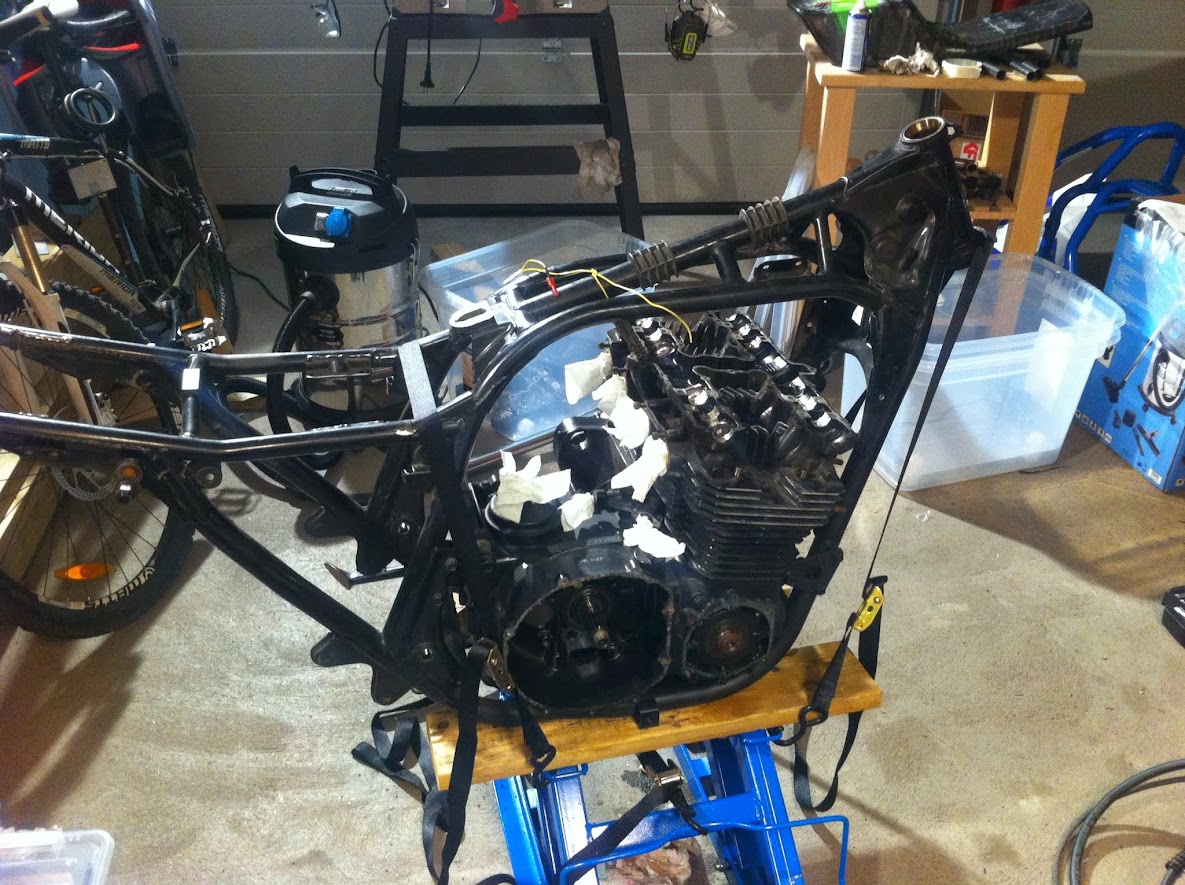
I let the rinse sit in there for 45 minutes and poured it out. A lot of brown sludge coming out. I did a second rust rinse just to be sure, same procedure.

After letting the frame dry out for a couple of days I got me some rust prevention liquid. This is a type of waxy substance that is penetrating and leaves a waxy residue when it dries. I poured this into the same holes that I used for the rinse and slushed it all around in the frame and let it sit and dry. I believe that this treatment will help some with preventing further rust on the inside of the frame, letting my girl have many years left for the road 8)

Right now I am waiting to have my engine back from the shop, as the guy working on it had been injured and could not work for a while. Therefore it has been taking a while. I have now been told that I should get the engine back in about three weeks time. While waiting for the engine, I've started to put everything else back together so that I can slide the engine in when I get it :-)

I've successfully installed new steering races and bearing, along with new needle bearings and assembled the swing arm:


Another shot:


Worked out the linkage for my rear brake. I have made the rear set by modifying the stock brackets, cutting of the parts which are not needed. Put on some Tarozzi foldable pegs. I think the rear set came out ok:


Mounted my newly serviced fork. Changed the stanchions and put in new progressive springs:


I will now rebuild and paint my brake calipers and start hooking up the electrics on the bike while waiting for my engine to get back from the shop.
.Tommyboy

Please Log in or Create an account to join the conversation.

Powered by Kunena Forum