- Posts: 784
- Thank you received: 4
Knee Dents in the stock tank... PHASE TWO CUTTING DONE!!!!
- twowheeledterror
- Topic Author
- Visitor
PHASE 1: TRACING OUT YOUR CUTOUTS FOR KNEE DENTS/TUCKS!
So what do you need?
-Silver Metallic Marker
-Paper (thicker stuff, standard drawing paper works good)
-Scissors
-Pencil
-Ruler
-Masking Tape
Okay, so a quick description. You're gonna lay up a "stencil" on the tank with the masking tape, and then trace the stencil onto the tank itself with the silver marker. This stencil is your cut line, and you'll be chopping this out and then welding in the new panels.
*******KEEP IN MIND THIS IS SOMETHING YOU WILL WANT TO TIG (GTAW) WELD!!! SO IF YOU CANNOT TIG WELD, MAKE PLANS TO TAKE IT TO A FRIEND WITH A SHOP CAUSE ANYTHING ELSE WILL LIKELY WARP YOUR TANK LIKE MAD!*******
EDIT: AFTER MEASURING THE STEEL USED FOR THE TANK I HAVE FOUND THAT I WAS INCORRECT IN MY ESTIMATE. THE STEEL IS ACTUALLY MUCH THINNER THAN I HAD ANTICIPATED. 20-22GA. TO BE EXACT. TIG WELDING WILL WARP THIS MATERIAL IF NOT DONE VERY CAREFULLY... SO I RECOMMEND MIG/WIRE FEED WELDING IT. USE A SMALL MACHINE (135ISH) AND 023 WIRE ON A LOW SETTING. THIS IS WHAT AUTO BODY TECHS ARE REQUIRED TO USE BY THE A.W.S. FOR CAR BODY SKINS. THANKS!
STEP 1:
First, you need to decide how far foward you want your tucks to be. Lay up a horizontal piece across the tank to give this mark. Second, use two long pieces to give you the marks for the upper/inner left and right tucks.
(If you aren't real good at proportions and eyeballing, you can measure this. Run a line down the centre of the tank, and measure out evenly. Dotted line this and tape it off.)
STEP 2:
Now that you have your main marks made, decide what angle you want the front leading cut on the knee dents to be at. I've made these vertical for now, but will mod them later as follows:
Here you can see this point from the top to give you an idea of the proportions.
STEP 4:
This is my favorite part. You need to take your paper and, resting against the marks with the tape, draw up your upper radius. Cut this out with your scissors.
STEP 5:
Now, take that paper and put it aside. Lay up 3 pieces of masking tape, and set the paper on there. Trace this radius onto the tape, and cut it out so that you have a radius of tape to apply to the tank.
Now, reverse that stencil onto another piece of 3 layered tape and do it again for the other side.
At this point you should have this on each side:
After this, it's a piece of cake. Whip out your awesome silver paint marker, and trace these stencils on the tank.
Piece of cake!
Here's a pic from the top.
Now, keep in mind how exactly you plan to deal with the base of the tank... you don't want to get this far, chop it and then realize you are gonna take out your petcock!
Measure and eyeball the hell out of this to make sure everything will work out for ya!
COMING SOON: PART TWO... CUTTING THE PANELS OUT.
Post edited by: twowheeledterror, at: 2005/12/20 02:27
Post edited by: twowheeledterror, at: 2005/12/22 21:06
Post edited by: twowheeledterror, at: 2006/01/20 16:51
Please Log in or Create an account to join the conversation.
- dutchz
-

- Offline
- User
1974 Kawasaki Z1
Stock front hub and rear axle.
Please Log in or Create an account to join the conversation.
- letthegoodtimesroll
-

- Offline
- User
- Posts: 162
- Thank you received: 1
1977 KZ650C1, Kerker Header, Dyna ignition and coils, GPZ 750 oil pan and cooler
Please Log in or Create an account to join the conversation.
- cudaosix
- Offline
- User
- Posts: 67
- Thank you received: 1
Please Log in or Create an account to join the conversation.
- bkitchen
-

- Offline
- User
- Posts: 231
- Thank you received: 0
Please Log in or Create an account to join the conversation.
- fonZee
- Visitor
Please Log in or Create an account to join the conversation.
- guitargeek
-

- Offline
- User
- Elitist, arrogant, intolerant, self absorbed.
- Posts: 1183
- Thank you received: 50
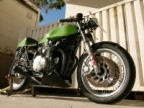
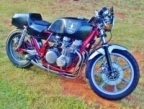
It gives you room for your knees, so you can tuck them in tighter. It's a cafe racer thing...
1980 KZ750-H1 (slightly altered)
1987 KZ1000-P6 "Ponch"
1979 GS1000 "Dadzuki"
Please Log in or Create an account to join the conversation.
- twowheeledterror
- Topic Author
- Visitor
Please Log in or Create an account to join the conversation.
- guitargeek
-

- Offline
- User
- Elitist, arrogant, intolerant, self absorbed.
- Posts: 1183
- Thank you received: 50
fonZee wrote:
Just out of curiousity, why would you do this ?
Because your tank as an expressive form of art is an awesome idea.
FORM FOLLOWS FUNCTION! The art comes in when trying to acheive greater functionality by altering the form of an object. And yes, it is an awesome idea!
1980 KZ750-H1 (slightly altered)
1987 KZ1000-P6 "Ponch"
1979 GS1000 "Dadzuki"
Please Log in or Create an account to join the conversation.
- ibsen22000
- Offline
- User
- Posts: 159
- Thank you received: 1
Like this one:
www.w650shop.de/Cafe_Racer/cafe_racer.html
Also fiber tanks are common on cafe racers.
I don't think you can acchieve the same result with a stock steel tank without using a lot of filling and running the risk of the filling cracking up.
But I could be all wrong.
Btw, if you wan't to study art, take a look at these sites:
www.vd-classic.com/EN/realisation.php#
www.godet-motorcycles.com/egli/egli.htm
Post edited by: ibsen22000, at: 2005/12/20 18:54
Please Log in or Create an account to join the conversation.
- twowheeledterror
- Topic Author
- Visitor
Secondly, the Triton pictured is most definitely a modded tank. If you look at the edges of the knee indents they are rather sharp. You can't get that shape out of a tank without a cut and weld. The top portion is pounded, but the bottom was chopped and welded.
Thirdly, you most definitely CAN get the same appearance and look out of a modded tank. This is welding.. and pretty basic welding at that. Once you have the panels in place, you buildup overlayers so that you can then grind them and file them to smooth corners, assuming you want a polished tank.
If done correctly, you should't really need much filler at all to prep for paint.
And lastly, art is subjective. Those links you posted have nice bikes... but they aren't exactly exceptional. They all look just like the traditional style for cafe racers...
Post edited by: twowheeledterror, at: 2005/12/20 20:14
Please Log in or Create an account to join the conversation.
- hwms
- Offline
- User
- Posts: 263
- Thank you received: 1
I thought the photo's were of Vincents.
Is the Vincent and Triton the same motorcyle ?
Harry
Post edited by: hwms, at: 2005/12/21 14:15
Please Log in or Create an account to join the conversation.


