- Posts: 784
- Thank you received: 4
Less is more... polished cafe triple clamp
- dutchz
-
 Topic Author
- Offline
- User
Less
More
11 Aug 2006 13:40 #68796
by dutchz
1974 Kawasaki Z1
Stock front hub and rear axle.
Less is more... polished cafe triple clamp was created by dutchz
Well, not quite polished I guess, but a lot shinier than the old top clamp. I used good 'ole scotchbrite and WD40, just like I did the engine covers. I'm not a big fan of chrome - or polishing for that matter :sick:
I have clip ons on my bike, so I really don't need the handlebar risers. They were just sitting there making my bike messy. Little bastards. So I decided to clean things up a bit.
I wanted to retain the stock Z1 gauge mounts (two stubs on the front), which complicated the whole thing a lot because they’re one with the handlebar risers. The easy way out would have been to start with a KZ650 or 1000 clamp, because they just have two rings at the front of the clamp for mounting the gauges and are much flatter on the top. This would make taking off the risers on hell of a lot easier. Easy is no fun though right? It’s all about the challenge, man against machine and all that good stuff. Besides, I could always get a 650 clamp if I effed up :lol:
I work in a welding shop on Saturdays, so I have access to air tools and such. This project can probably be done using a disc grinder and some basic hand tools, it will a bit take longer though.
About the only thing we don’t have at the shop is a mill, so I used the drill press with a large bit to drill out as much of the risers as I could without punching through what was going to be the new top surface. Then I took the disc grinder to it to remove the bulk of the material and shape things crudely. After sanding things down to the surface with the air sander, Don welded up the threaded holes, followed by more sanding. He ended up having to weld up the holes three times because the casting on the old aluminum clamp is so porous you get little bubbles that will show every time you sand the welds down. He also backfilled the back edge of the clamp so I could sand it down to a straight edge, seen from the top. This edge has a slight curve where the handlebar riser is, and I wanted it straight for a cleaner look. Shaping the clamp while keeping it symmetric is what took the most time. The finish work was done using 320 and 400 grit, then scotchbrite and wd40.
This job took quite a bit of time and patience, especially on the part of Don dealing with my picky ass, and my wife dealing with my picky ass spending al my quality time with my bike. Don’t get her started :whistle: Many thanks go out to both of them.
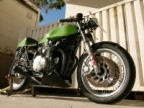
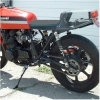
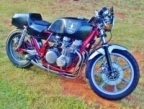
Here’s some pics for y’all… enjoy.
Old
1974 Kawasaki Z1
Stock front hub and rear axle.
Attachments:
Please Log in or Create an account to join the conversation.
- dutchz
-
 Topic Author
- Offline
- User
Less
More
- Posts: 784
- Thank you received: 4
11 Aug 2006 13:40 #68797
by dutchz
1974 Kawasaki Z1
Stock front hub and rear axle.
Replied by dutchz on topic Less is more... polished cafe triple clamp
1974 Kawasaki Z1
Stock front hub and rear axle.
Attachments:
Please Log in or Create an account to join the conversation.
- dutchz
-
 Topic Author
- Offline
- User
Less
More
- Posts: 784
- Thank you received: 4
11 Aug 2006 13:41 #68798
by dutchz
1974 Kawasaki Z1
Stock front hub and rear axle.
Replied by dutchz on topic Less is more... polished cafe triple clamp
1974 Kawasaki Z1
Stock front hub and rear axle.
Attachments:
Please Log in or Create an account to join the conversation.
- dutchz
-
 Topic Author
- Offline
- User
Less
More
- Posts: 784
- Thank you received: 4
11 Aug 2006 13:41 #68799
by dutchz
1974 Kawasaki Z1
Stock front hub and rear axle.
Replied by dutchz on topic Less is more... polished cafe triple clamp
1974 Kawasaki Z1
Stock front hub and rear axle.
Attachments:
Please Log in or Create an account to join the conversation.
- Draco
- Offline
- User
Less
More
- Posts: 150
- Thank you received: 0
11 Aug 2006 13:55 #68804
by Draco
Replied by Draco on topic Less is more... polished cafe triple clamp
Very nice!:woohoo:
That looks great!
Good job!
That looks great!
Good job!
Please Log in or Create an account to join the conversation.
- neilage66
- Offline
- User
Less
More
- Posts: 378
- Thank you received: 5
11 Aug 2006 15:21 #68809
by neilage66
Replied by neilage66 on topic Less is more... polished cafe triple clamp
Nice, creative use of tools and elbow grease.
Looks great!
Looks great!
Please Log in or Create an account to join the conversation.
- lowbuck
- Offline
- User
Less
More
- Posts: 44
- Thank you received: 0
11 Aug 2006 17:35 #68825
by lowbuck
Replied by lowbuck on topic Less is more... polished cafe triple clamp
Wow, is that nice! Your machine just keeps getting better and better.
Please Log in or Create an account to join the conversation.
- Fossil
- Offline
- User
Less
More
- Posts: 542
- Thank you received: 5
11 Aug 2006 19:23 #68844
by Fossil
Replied by Fossil on topic Less is more... polished cafe triple clamp
Sure makes a big difference.
Please Log in or Create an account to join the conversation.
- ltdrider
-

- Offline
- User
Less
More
- Posts: 1232
- Thank you received: 17
12 Aug 2006 05:42 #68892
by ltdrider
'76 KZ900 LTD (Blaze)
'96 Voyager XII (Dark Star)
'79 KZ650 Cafe Project (Dirty Kurt)
Greensboro, NC
Replied by ltdrider on topic Less is more... polished cafe triple clamp
That's a nice piece of customizing. Looks profesionaly made!
'76 KZ900 LTD (Blaze)
'96 Voyager XII (Dark Star)
'79 KZ650 Cafe Project (Dirty Kurt)
Greensboro, NC
Please Log in or Create an account to join the conversation.
- loudhvx
-

- Offline
- KZr Legend
Less
More
- Posts: 10864
- Thank you received: 1615
12 Aug 2006 10:06 #68928
by loudhvx
1981 KZ550 D1 gpz.
Kz550 valve train warning.
Other links.
Replied by loudhvx on topic Less is more... polished cafe triple clamp
Wow, Dutch, that is really nice! Mine came out with some pitting after I sanded and I was too lazy to re-weld. I could body-putty it, I suppose... still too lazy to do that too.
Post edited by: loudhvx, at: 2006/08/12 13:08
Post edited by: loudhvx, at: 2006/08/12 13:08
1981 KZ550 D1 gpz.
Kz550 valve train warning.
Other links.
Attachments:
Please Log in or Create an account to join the conversation.
- guitargeek
-

- Offline
- User
- Elitist, arrogant, intolerant, self absorbed.
Less
More
- Posts: 1183
- Thank you received: 50
12 Aug 2006 20:46 #69043
by guitargeek
1980 KZ750-H1 (slightly altered)
1987 KZ1000-P6 "Ponch"
1979 GS1000 "Dadzuki"
Replied by guitargeek on topic Less is more... polished cafe triple clamp
Dutch, your bike is my favorite on the whole site.
Goed-gedaane baan, mooi resultaat!
Goed-gedaane baan, mooi resultaat!
1980 KZ750-H1 (slightly altered)
1987 KZ1000-P6 "Ponch"
1979 GS1000 "Dadzuki"
Please Log in or Create an account to join the conversation.
- dutchz
-
 Topic Author
- Offline
- User
Less
More
- Posts: 784
- Thank you received: 4
14 Aug 2006 10:06 #69331
by dutchz
1974 Kawasaki Z1
Stock front hub and rear axle.
Replied by dutchz on topic Less is more... polished cafe triple clamp
Dankjewel gg! Looking at that picture I realized the hardware has uhm... patina. I'll be scouring e-beh I guess...
1974 Kawasaki Z1
Stock front hub and rear axle.
Please Log in or Create an account to join the conversation.


