- Posts: 568
- Thank you received: 373
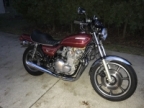
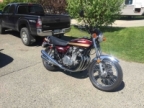
Trying to Rescue a Late 1970s (1977??) Kawasaki KZ1000
- sf4t7
-

- Offline
- Sustaining Member
Scotty
Scotty
1974 Z1A
1015
welded Z1 crank
Andrews 1X Cams
Delkevic 4 into 1
Superbike bars
530 conversion
Please Log in or Create an account to join the conversation.
- wdhewson
-
 Topic Author
- Offline
- User
- Posts: 158
- Thank you received: 52
On the triple clamps, Mikaw, I think they're well assembled but please be specific about your concern regarding order of assembly, which would help me understand.
The front wheel axle caps are just loosely assembled for the moment in case I need to take the wheel out again for the fender, brakes, speedo, etc. There is an arrow on the bottom of the axle caps which I pointed forward.
In fact, I haven't even tightened up the the engine/frame mounting points yet.
So at this point lots of things are at a "test fit" stage.
I like to just snug things initially for the test fit to save wear and tear on the fasteners associated with repeated re- and dis- assembly.......and go slow to make sure the fit is correct.
However the big challenge to this cautious approach is not to forget to torque things up before the test ride. Sometimes I take some notes of what's not yet tight.
Let's see if I can find a picture............ any sort.........
Bid 2k$ on this wee unit yesterday, but the seller politely laughed me off. Which is OK, I'm busy enough!!
Nothing quite like the rip of a Big KZ
Please Log in or Create an account to join the conversation.
- DOHC
-

- Offline
- Sustaining Member
- Those Doe-Hawks really go!
- Posts: 1226
- Thank you received: 535
Mikaw is absolutely correct, and is making a critical point.On the triple clamps, Mikaw, I think they're well assembled but please be specific about your concern regarding order of assembly, which would help me understand.
It's very surprising how much misalignment that you can get between the top and bottom triple clamp. I dropped a bike in a parking lot and the front end was so tweaked it was clearly visible (wheel out of alignment with bars). Raising the wheel off the ground and loosening the triple clamps allowed it to return to normal alignment. I had never realized before that there was that much freedom of movement in the front end.
The internal brace of the front fender along with the front axle, once installed correctly on the fork lowers, align the two main fork tubes. Only once those pieces are installed in the correct order and correctly secured, can the triple clamps be aligned and tightened.
If you do it backwards, the wheel may not be aligned with the clamps, and the tubes may not be parallel. Both bad.
'78 Z1-R in blue , '78 Z1-R in black, '78 Z1-R in pieces
My dad's '74 Z1
'00 ZRX1100
Please Log in or Create an account to join the conversation.
- Wookie58
-
- Offline
- Moderator
- Posts: 4186
- Thank you received: 2389
Not seen you for a while DOHC, good to see you back. If I can I would add that a quick and dirty check of the tree alignment can be completed with a piece of flat board (MDF etc) lay across the front of the two tree's, if they are out it will rock corner to corner
Mikaw is absolutely correct, and is making a critical point.On the triple clamps, Mikaw, I think they're well assembled but please be specific about your concern regarding order of assembly, which would help me understand.
It's very surprising how much misalignment that you can get between the top and bottom triple clamp. I dropped a bike in a parking lot and the front end was so tweaked it was clearly visible (wheel out of alignment with bars). Raising the wheel off the ground and loosening the triple clamps allowed it to return to normal alignment. I had never realized before that there was that much freedom of movement in the front end.
The internal brace of the front fender along with the front axle, once installed correctly on the fork lowers, align the two main fork tubes. Only once those pieces are installed in the correct order and correctly secured, can the triple clamps be aligned and tightened.
If you do it backwards, the wheel may not be aligned with the clamps, and the tubes may not be parallel. Both bad.
Please Log in or Create an account to join the conversation.
- Mikaw
-

- Offline
- Sustaining Member
- Posts: 4831
- Thank you received: 1847
Trying to be practical and without sarcasm or disrespect, read the the manual and follow the procedures within the FSM I linked for you. I’m sure there is a reason KHI listed the process in a specific order. The lower clamp is torqued last. I’m a big fan of “not reinventing the wheel” and following the advice of people at a higher pay grade than I. Plus you have a fall back position, “Yes it was installed per the FSM manual”. No argument there!Thanks Mikaw and sf, for your good advice.
On the triple clamps, Mikaw, I think they're well assembled but please be specific about your concern regarding order of assembly, which would help me understand.
1976 KZ 900 A4 kzrider.com/forum/11-projects/613548-1976-kz-900-a4
1976 KZ 900 B1 LTD
1978 KZ 1000 B2 LTD
1980 KZ 750 E1
Kowledge Speaks, But Wisdom Listens.
Jimi Hendrix.
Please Log in or Create an account to join the conversation.
- Wookie58
-
- Offline
- Moderator
- Posts: 4186
- Thank you received: 2389
Hi Mikaw, not sure where your comments where aimed, you are of course correct and the board test is simply a quick and easy "post assembly" check that "all is good in the world"
Trying to be practical and without sarcasm or disrespect, read the the manual and follow the procedures within the FSM I linked for you. I’m sure there is a reason KHI listed the process in a specific order. The lower clamp is torqued last. I’m a big fan of “not reinventing the wheel” and following the advice of people at a higher pay grade than I. Plus you have a fall back position, “Yes it was installed per the FSM manual”. No argument there!
Please Log in or Create an account to join the conversation.
- Mikaw
-

- Offline
- Sustaining Member
- Posts: 4831
- Thank you received: 1847
The aim was a response to wdhewson. He asked me to be more specific, it would help him. So without rewriting the FSM spec, I simply and politely referred him to follow the manual.
Hi Mikaw, not sure where your comments where aimed, you are of course correct and the board test is simply a quick and easy "post assembly" check that "all is good in the world"
Trying to be practical and without sarcasm or disrespect, read the the manual and follow the procedures within the FSM I linked for you. I’m sure there is a reason KHI listed the process in a specific order. The lower clamp is torqued last. I’m a big fan of “not reinventing the wheel” and following the advice of people at a higher pay grade than I. Plus you have a fall back position, “Yes it was installed per the FSM manual”. No argument there!
1976 KZ 900 A4 kzrider.com/forum/11-projects/613548-1976-kz-900-a4
1976 KZ 900 B1 LTD
1978 KZ 1000 B2 LTD
1980 KZ 750 E1
Kowledge Speaks, But Wisdom Listens.
Jimi Hendrix.
Please Log in or Create an account to join the conversation.
- wdhewson
-
 Topic Author
- Offline
- User
- Posts: 158
- Thank you received: 52
More later.................
Nothing quite like the rip of a Big KZ
Please Log in or Create an account to join the conversation.
- wdhewson
-
 Topic Author
- Offline
- User
- Posts: 158
- Thank you received: 52
They lifted her tail up, allowing the center stand to drop into place. So I'll be able get the rear wheel assembly fitted and have a rolling chassis. And I can start loading bits onto her.
The wooden spacer in place of the rear shock just keeps the swing arm up temporarily, and similarly for the broom stick handlebar!!
Thanks.............more later.........
Nothing quite like the rip of a Big KZ
Please Log in or Create an account to join the conversation.
- sf4t7
-

- Offline
- Sustaining Member
- Posts: 568
- Thank you received: 373
Scotty
1974 Z1A
1015
welded Z1 crank
Andrews 1X Cams
Delkevic 4 into 1
Superbike bars
530 conversion
Please Log in or Create an account to join the conversation.
- wdhewson
-
 Topic Author
- Offline
- User
- Posts: 158
- Thank you received: 52
But it slid into place nicely with the oiled axle a nice slip fit through all the components. Nut on the left as per the parts fiche.
I placed a 40 thou shim washer between the inner side of the rear caliper axle boss and the disc side wheel spacer. Nonstandard part, but it put the disc dead nuts center of the caliper slot. See red arrow.
Set the axles mid-groove in the swing arm chain adjustment slots to check for sprocket alignment. My old wooden arrow is not as straight as an arrow, but suggests that the final drive sprockets are in good alignment, which requires some imagination since the engine sprocket is not yet in place. Since the whole steel frame is a "spring", a rip in the lower gears probably elastically pulls things out of alignment a bit. So close enough.
Next might be the rear shocks and get that brake stay on. Basement work bench is getting lighter.
Nothing quite like the rip of a Big KZ
Please Log in or Create an account to join the conversation.
- hardrockminer
-

- Offline
- Sustaining Member
- Posts: 2954
- Thank you received: 1073
I have several restored bikes along with a 2006 Goldwing with a sidecar. My wife has a 2019 Suzuki DR 650 for on and off road.
Please Log in or Create an account to join the conversation.
