- Posts: 8
- Thank you received: 0
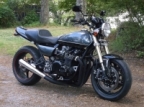
KZ900 Streetfighter
- Brasilcat
- Offline
- User
- Smile for life is good!
Please Log in or Create an account to join the conversation.
- 650mod
-

- Offline
- User
- Posts: 569
- Thank you received: 48
Devin
78 kz 650 custom
Wiseco 720cc big bore
Dynajet stage 3 carb kit with pods
2002 Kawasaki Z750 exhaust
2001 Buell lightning front end
1999 Ninja 600 swingarm with 1999 Ninja 900 rear rim
converted to monoshock rear
Too many goodies to list fully
Please Log in or Create an account to join the conversation.
- DoubleZed
-
 Topic Author
- Offline
- User
- Because one Zed just isn't enough
- Posts: 86
- Thank you received: 9
Attachment 047.JPG not found
The mount itself is a piece of half inch 6061 mated to a piece of 2" 1/4 wall box tubing:
Attachment 002_2013-09-25.JPG not found
Mounted in the bike, the shocks travel is straight upward to clear all sides of the swingarm opening. The shock is pretty tight probably because its from a GSXR600 and the swinger is a ZX636. I read OMR's writeup last year or so to get an idea, I liked the way it looked and followed that almost to the T (it seems that conduit tubing really is just about the right size :silly: ). I pondered the upper mounting for a while before I decided to make it bolt in. For some reason I was worried about it being in the way, perhaps for battery clearance, but I went a different route there as well. I thought about ditching it and welding in a steel mount just to be safe. But it seemed that since most of the load (most of the time) would be upward, distributed across the 1/2" plate to the frame, and therefore the weak spot would be the tabs on the frame. So the mount has four weld passes on it and the frame tabs are made of extruded steel angle and welded on with three passes and then capped with 1/8" sheet to gusset to the lateral support tubes. The lower mount took less engineering. The ears are made from 3/16" steel that came from a.... Wait for it... Case VAC of about mid 50's vintage :lol: I welded the tabs to some DOM and used a pipe clamp to hold it to the frame so I could sit on it and set the ride height. Too bad I don't have pics of that setup, but it made getting it close much easier (but it still sat too high for my liking and I ended up using some Protek lowering links to drop it again :pinch: ). The goal was to have the bottom of the shock knuckle sit parallel to the ground.
I'd like to get some better pics but I think it will be a week or two before I get a chance, work has been killer the past couple weeks. I hope to get some parts cleaned and painted this weekend and hopefully installed.
Corbin Teal
1976 Kz900 project:
Rebuilt engine
Suzuki GSXR750 front end
ZX636 rear with GSXR600 shock
2009 Yamaha R1 wheels
Please Log in or Create an account to join the conversation.
- DoubleZed
-
 Topic Author
- Offline
- User
- Because one Zed just isn't enough
- Posts: 86
- Thank you received: 9
I have pic or two of the bike for reference purposes that may help with the descrip here, but feel free to ask if anything is unclear. I wish I could give some more photos of all this right now, as it ended up being pretty involved and took about three months time to get it all worked out.
Attachment 080_2013-09-25.JPG not found
Attachment 081.JPG not found
Attachment 083.JPG not found
Attachment 078.JPG not found
Corbin Teal
1976 Kz900 project:
Rebuilt engine
Suzuki GSXR750 front end
ZX636 rear with GSXR600 shock
2009 Yamaha R1 wheels
Please Log in or Create an account to join the conversation.
- 650mod
-

- Offline
- User
- Posts: 569
- Thank you received: 48
78 kz 650 custom
Wiseco 720cc big bore
Dynajet stage 3 carb kit with pods
2002 Kawasaki Z750 exhaust
2001 Buell lightning front end
1999 Ninja 600 swingarm with 1999 Ninja 900 rear rim
converted to monoshock rear
Too many goodies to list fully
Please Log in or Create an account to join the conversation.
- DoubleZed
-
 Topic Author
- Offline
- User
- Because one Zed just isn't enough
- Posts: 86
- Thank you received: 9
Attachment 003_2013-11-28.JPG not found
Attachment 009_2013-11-28.JPG not found
Attachment 012_2013-11-28.JPG not found
Attachment 014_2013-11-28.JPG not found
Attachment 104.JPG not found
Most of the cylinders looked okay, one of them had a bad scratch, but the rest seemed superficial; I couldn't snag a nail on any. I decided to swap out the bad sleeve for one out of a set of fleabay jugs. The pistons had a lot of scratches and some dark patches where they galled on the cylinder walls. After going through the trouble of cleaning them up, I just pulled the trigger on a new set with rings etc. from Z1E. Now I can sleep at night :lol:
Corbin Teal
1976 Kz900 project:
Rebuilt engine
Suzuki GSXR750 front end
ZX636 rear with GSXR600 shock
2009 Yamaha R1 wheels
Please Log in or Create an account to join the conversation.
- Patton
-

- Offline
- KZr Legend
- Posts: 18640
- Thank you received: 2099
For reference --DoubleZed wrote: . . . never really looked the engine over very well, but it turns out to be a replacement unit when i compared the numbers. So I have no idea what the back story is on that . . . .
Per Zedder:
Year & Model '76 KZ900-A4
Frame No. Range Japan MFR Z1F-085701 - 117060
USA MFR Z1F-500001 - 510340
Engine No. Range Z1E086001 - 138846
Good Fortune!
1973 Z1
KZ900 LTD
Please Log in or Create an account to join the conversation.
- DoubleZed
-
 Topic Author
- Offline
- User
- Because one Zed just isn't enough
- Posts: 86
- Thank you received: 9
I painted the cases with Duplicolor engine enamel semigloss black, although it looks more or less flat. the rest of the covers are the same semigloss paint but they actually look like semigloss.
Attachment 115.JPG not found
The jugs are gloss black and so are the points and dynamo covers. All the covers were glass-bead blasted and then washed again and again, the jugs and cases were blasted with aluminum oxide.
Attachment 119.JPG not found
Attachment 120.JPG not found
Attachment 128.JPG not found
There is a huge difference that's for sure, I wish I could have just cleared over the glass beaded stuff but I was afraid it would yellow.
After thoroughly cleaning everything, it was all baked at 200* for an hour and allowed to cool to about 100* when I shot the paint.
Attachment 125.JPG not found
I tried to keep as few light coats as possible to avoid a heavy build and make things more prone to chipping. Honestly though, It doesn't matter
Attachment 147.JPG not found
Attachment 131.JPG not found
Now I decided to use Duplicolor paints because I thought about what would happen in the future; if it did get chipped, I could easily repair it, versus if I used a specialty coating like I thought about, and not be able to blend the repair. I would have to strip the entire part and re-coat. When I searched around to see what others used, Duplicolor seemed to be a common one with few bad reports. Just for grins I looked it up again a few months later to see if anything had changed and now see ads for VHT brand "engine case paint".... It must be new, since I didn't see it before or in any of the retailers like O'Reilly's or Autozone, and they kept up with stuff like that where I was working. lol
Corbin Teal
1976 Kz900 project:
Rebuilt engine
Suzuki GSXR750 front end
ZX636 rear with GSXR600 shock
2009 Yamaha R1 wheels
Please Log in or Create an account to join the conversation.
- DoubleZed
-
 Topic Author
- Offline
- User
- Because one Zed just isn't enough
- Posts: 86
- Thank you received: 9
But with the new APE's in, I followed a little bit of advice I read a while back and put heat shrink over the 8 exposed studs. Apparently that will make removing the jugs in the future "easier", but I thought it would do better just to prevent them from crusting in the distant future. So I wiped them down with heavy oil before slipping the shrink on.
Attachment 143.JPG not found
Attachment 145.JPG not found
I also rewired the dynamo, per a few suggestions I read on here. Unfortunately, I missed the part where I should have bought a new grommet from Z1E when I placed the order with the pistons :blush: So I put it together with a copious amount of RTV.....
Attachment 150.JPG not found
Since I am only one man, I found it easier to move the engine without the top end. I slipped the frame over it without a hitch (or scratch) and the heart was once again mated with the body
Attachment 152.JPG not found
Attachment 151.JPG not found
And the rear end installed with a couple temporary bolts. The swinger was repainted with a rattle can paint I brought back from my old job. It looked to be some custom mix from a local shop called "brilliant black" by SEM, black with metallic flake. It matched the original swingarm paint almost perfectly, had I not put clear over it. I will have to see if I can find a place that will mix and fill rattle cans and get some more.... I also repainted the yellow shock spring and upper mount gloss black.
Attachment 165.JPG not found
Attachment 155.JPG not found
For the upper mount, I made a couple steel inserts on the mini lathe (all I got
Corbin Teal
1976 Kz900 project:
Rebuilt engine
Suzuki GSXR750 front end
ZX636 rear with GSXR600 shock
2009 Yamaha R1 wheels
Please Log in or Create an account to join the conversation.
- DoubleZed
-
 Topic Author
- Offline
- User
- Because one Zed just isn't enough
- Posts: 86
- Thank you received: 9
Corbin Teal
1976 Kz900 project:
Rebuilt engine
Suzuki GSXR750 front end
ZX636 rear with GSXR600 shock
2009 Yamaha R1 wheels
Please Log in or Create an account to join the conversation.
- Stazi
- Offline
- User
- Posts: 115
- Thank you received: 11
82 KZ1000-K2 LTD
Please Log in or Create an account to join the conversation.
- spdygon
-

- Offline
- Platinum Member
- Posts: 1013
- Thank you received: 117
1982 GS1000sz Katana ( #15...17K Miles)
1982 GS1000sz Katana ( # 297....7100k Miles)
1978 Kz1000 Z1R. 10K Miles1
1978 kz1000 z1r 27k miles
1977 KZ 1000 A ( Project ) 54K Miles
1976 Kz900A4 (Red)21K miles
1976 Kz900A4 ( Red)7500 miles
1974 Z1 900 project
Please Log in or Create an account to join the conversation.
