
Search Results (Searched for: gs swing arm)
Replied by tk11b40 on topic 1975 KZ 900 , ZRX Swingarm, 89 GSXR front end
01 Sep 2015 21:23 - 01 Sep 2015 21:23
Wow,
Once in a while I go through this thread start to finish.. you forget how much work goes into a project like this.
Thanks for supporting us KZRider!
I have lost so many photo's because of crashed computers, but thanks to this thread, I can review most of them right here.
Once in a while I go through this thread start to finish.. you forget how much work goes into a project like this.
Thanks for supporting us KZRider!
I have lost so many photo's because of crashed computers, but thanks to this thread, I can review most of them right here.
Replied by Zephyrrider on topic What makes a Kawasaki a "KZ"?????
31 Aug 2015 19:02 - 31 Aug 2015 19:03 Zephyrrider
Never liked the 1100 - far too heavy for my liking - my 750 comes in at around low 190 kg dry minus poxy HEAVY twin exhaust (@75 HP) apposed to 242 dry for 1100 and 8 spark plugs and not much more power ! Styling is slightly different. The Z's are worth heaps more of course but i will be staying with the ZR750. I have it to ride - not for what it is valued at. Was offered $10,000 recently at the racetrack for mine - $560 more than what i payed new.Hard to tell from my avatar what shape it is in.Thanks for the Video Steve - very interesting - but magazine reviews etc piss me off - they dont live in the real world ") The 550,750 and 1100 swingarms are all different so you have a chance there fitting one - possibly.
The 550,750 and 1100 swingarms are all different so you have a chance there fitting one - possibly.
The 550,750 and 1100 swingarms are all different so you have a chance there fitting one - possibly. Replied by pete greek1 on topic Need biggest tire for. Ltd550
30 Aug 2015 12:42So right you are, TyrellTyrell Corp wrote: Like an elephant humping a mouse, or putting size 12 feet in size 8 shoes, some things just don't work.
I had a 160 on a 130 rim - not my idea, just the tyre fitted. It looked quite cool and fine in a straight line but the steering was all over the place and the centre tread wore down quick. It was difficult to remove too.
If you really want that look, you should get a swingarm from a more modern bike & wider rim, they' a bit wider & a bit longer
you should give 531 blackbanshee , a P.M. for some suggestions , he can steer you in the right direction
Pete
Attachment 0530141042-2.jpg not found
Attachment 0530141042a-2.jpg not found
Attachment 0531141429-2.jpg not found
Attachment 0531141429a-2.jpg not found
Attachment 0531141456-2.jpg not found
Attachment 0724141135-2.jpg not found
Attachment 0812141111-2.jpg not found
Attachment 0812141142a-2.jpg not found
Attachment 0822141127.jpg not found
Attachment 1216141547a-2.jpg not found
Attachment 1216141547a-2.jpg not found
Attachment 1216141547-2.jpg not found
Attachment 1216141547b-2.jpg not found
Attachment 0103151940-3.jpg not found
Picked up this beauty of Craigslist last summer, been slow going. It appears to have sat in a field for the last 15-20years. I have since getting it: Got it running after installing a dynatek ignition, rebuilt the carbs, rebuilt the starter, replaced and rebuilt/powdercoated and progressive springs installed in the front forks, powder coated the rear swing arm and installed new bearings, powder coated the front and rear rims and installed new rubber, new chain and sprockets. Here are some pictures of the progress.....
1980 KZ750E Cafe build was created by jcs027fly
30 Aug 2015 11:46
Picked up this beauty of Craigslist last summer, been slow going. It appears to have sat in a field for the last 15-20years. I have since getting it: Got it running after installing a dynatek ignition, rebuilt the carbs, rebuilt the starter, replaced and rebuilt/powdercoated and progressive springs installed in the front forks, powder coated the rear swing arm and installed new bearings, powder coated the front and rear rims and installed new rubber, new chain and sprockets. Here are some pictures of the progress.....
Replied by tk11b40 on topic 1975 KZ 900 , ZRX Swingarm, 89 GSXR front end
29 Aug 2015 18:35
I am thinking Harley again!
Replied by timiacobucci on topic clutch actuation pull vs push and lockup questions
29 Aug 2015 14:46 timiacobucci
I see how the standard push system would not need a lomger pushrod if you did not use a spacer for clearance and extemded the cover somehow but you would need it for a pull type how ever you make the space.
Has anyone had experience with both to compare? Puller seems simpler and more efficient, probably better feel with less complexity and the rack and pinion section is on the oil side unlike the pusher screw system being left out in the cold next to the chain. There must be a reason they changed the design.
The APE KZ1000 extra plate clutch setup? This is for a 650, does the 1000 clutch basket fit on the 650? I've also heard of drag issues with the extra plate setup, which was part of the problem I was already fighting with a worn out ungreased pusher and worn cable. Also I'm using a 2006 gsxr 1000 rear swingarm with a 190 tire and likely well over 90 with a bit of boost so the stock 650 clutch is probably going to be a bit out of it's happy zone upgraded clutch pack or no.
Work in progress
Replied by Shdwdrgn on topic 1981 KZ1000 J-to-K build
26 Aug 2015 09:51
Finally found someone else who had a can (and ONLY one can) of the clear rustoleum, so I got some more finish coats done yesterday. The swingarm got two more coats of clear, and I also coated the bar that braces the rear brake to the swingarm. I finished up with a coat on the center stand. I guess one of these days I should also pull out the kickstand and get it cleaned and painted. Anyway, figured it was time for some pics...
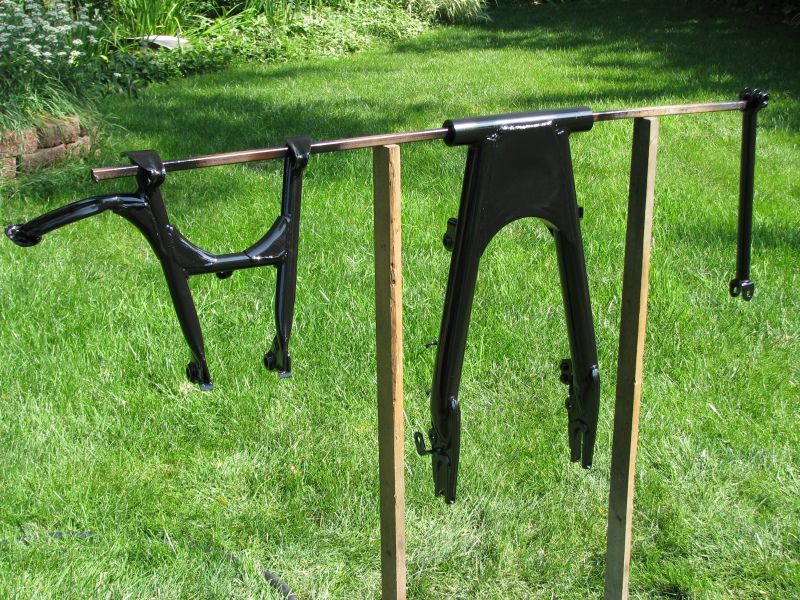
I'm leaving the pieces out on the back patio to bake in the afternoon sun -- we're supposed to be in the 90's for another couple weeks. Should be able to grease up the swingarm bearings and get it bolted into the frame this weekend. I got the front forks torn down a couple nights ago, and started sandblasting some of the smaller pieces. The tough one will be the triple-tree. Lots of old grease buildup under the bearings, so the whole thing will get hosed in brake cleaner before getting taped up so I can blast and paint the bits that need it. I'll finish up with the lower part of the forks, then try to figure out how it all goes back together again.
I'm leaving the pieces out on the back patio to bake in the afternoon sun -- we're supposed to be in the 90's for another couple weeks. Should be able to grease up the swingarm bearings and get it bolted into the frame this weekend. I got the front forks torn down a couple nights ago, and started sandblasting some of the smaller pieces. The tough one will be the triple-tree. Lots of old grease buildup under the bearings, so the whole thing will get hosed in brake cleaner before getting taped up so I can blast and paint the bits that need it. I'll finish up with the lower part of the forks, then try to figure out how it all goes back together again.
Replied by Shdwdrgn on topic 1981 KZ1000 J-to-K build
22 Aug 2015 18:14
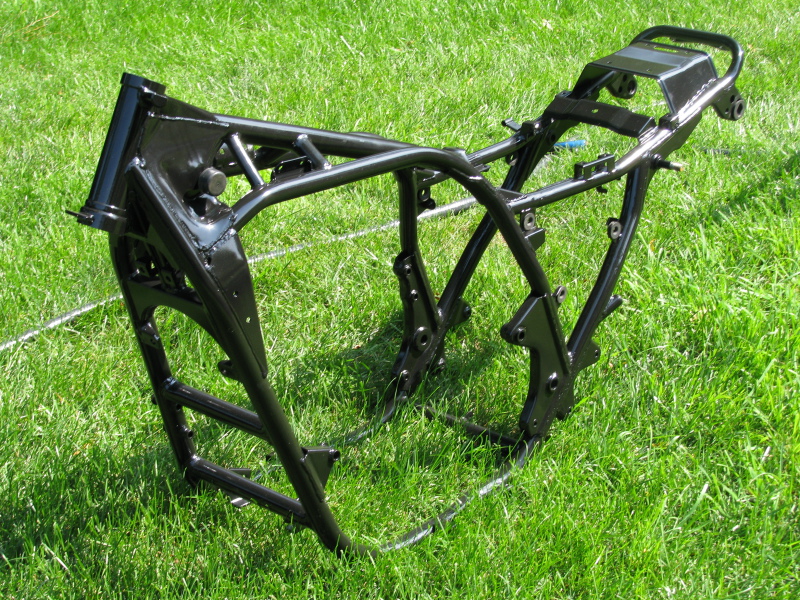
Last coat of paint went on the frame this afternoon. Took a chance with some clearcoat (I've had bad luck in the past) to add UV protection, plus some oil/gas resistance. I coated both the frame and swingarm, and they came out looking real nice, very glossy. Not sure how many weeks I should let it set before polishing it up with a coat of wax, but I may have to wait until next Spring if we don't get any more of those 90-degree days to really bake the paint.
Regardless, I'll be letting it set until next weekend before doing much else to it. Then I can clean out the screw threads and put the rubber grommets back on. In the meantime, I'll start prepping the front forks and rims for paint. Probably need to let the rims sit for at least a couple weeks before I have them put on new tires, or maybe I'll mount the tires before I start to paint. And I guess it's about time to get some new bearings ordered for the wheels. Primary goal is to get the frame standing back on its wheels again before it gets too cold to paint. I *should* still have at least a month before I need to worry.
Regardless, I'll be letting it set until next weekend before doing much else to it. Then I can clean out the screw threads and put the rubber grommets back on. In the meantime, I'll start prepping the front forks and rims for paint. Probably need to let the rims sit for at least a couple weeks before I have them put on new tires, or maybe I'll mount the tires before I start to paint. And I guess it's about time to get some new bearings ordered for the wheels. Primary goal is to get the frame standing back on its wheels again before it gets too cold to paint. I *should* still have at least a month before I need to worry.
Replied by Shdwdrgn on topic Rustoleum musings
22 Aug 2015 17:57
Well I managed to find the last can of the oil-resistant clearcoat today. Tested it on a small piece after wet-sanding, and it was looking good an hour later. So in between final coats of paint on the frame, I wet-sanded and did another light coat of paint on the swingarm, let it dry for about 15 minutes, then hit it with the clearcoat. I let that dry for about half an hour, with no bad results from doing the clear so soon after the paint. By this point the frame had been drying for almost an hour, so I finished off the can of clearcoat to cover the frame.
That was about 45 minutes ago, and it's looking really good. And *really* shiny! Just have to let everything dry for a few hours before I move them back into the garage for the night.
That was about 45 minutes ago, and it's looking really good. And *really* shiny! Just have to let everything dry for a few hours before I move them back into the garage for the night.
Displaying 1381 - 1390 out of 7257 results.