
Search Results (Searched for: gs swing arm)
Replied by davido on topic Wheel size modifications/variations
30 Dec 2015 21:24
Ive done a full front/back conversion on my CSR1000. Ive fitted a complete ZX9R front end and on the back,a GSXR600 swingarm with a Bandit600 wheel. I have the original tyres that came with the wheels when I bought them as Im still busy with the build. I will fit new rubber before hitting the road. Both ends are 17inch.
My geometry has totally changed from the original and I have no idea how its going to behave on the road. Ive been told that Ill have quicker steering!!
and ground clearance is a concern with the upsy dupsy forks.
With the major changes to the geometry from the conversion,I dont think tyre size is going to make a big difference.If youve got a GSXR front,I would say just put the GSXR wheel in it. Itll save you a lot of work.Same with the discs and calipers. If you try to mix and match,youll just be giving yourself more work.
My back tyre size was dictated by chain run and tyre/frame clearance. I think Ive got a 150 or maybe 160. Cant remember off hand.
Replied by johnnymoff on topic Front sprocket boss
28 Dec 2015 19:54
redhawk, you are right - the boss is about 1.5mm. I finally got around to looking at this again today.
It looks like I have clearance either way. I am in the middle of fitting new axle spacers on my GS swingarm swap and it looks like putting the boss to the inside will help me center the wheel so i'll probably go with that.
One thing I noticed is that the stamp indicating the number of sprocket teeth is on the same side as the boss and not visible when the boss is on the inside. While this is not a tragedy, I do wonder why this stamp is not on the other side so you can see it when the sprocket is mounted.
Thanks,
-John
Replied by 650ed on topic cam chain length?
24 Dec 2015 10:05
If you plan to work on it here's some information that should prove helpful....
WARNING! Do not even try to use Phillips screwdrivers on the Kawasaki cross head screws. Despite their appearance they are not Phillips screws. They are Japanese Industrial Standard (JIS) screws. The tips of Phillips screwdrivers are too long & pointed to allow the 4 blades of the screwdriver to properly engage the screws, so when you apply force the screw head slots will deform and look like crap. The fact is that Phillips screws were deliberately designed to have the screwdriver bit "cam out." This was done to prevent production line assembly from over-tightening, stripping, or breaking the screws. JIS screws do not have this problem. A proper fitting JIS bit can tighten a JIS screw to and beyond the torque spec without camming out. Here's the good news - you can easily modify standard Phillips screwdriver tips to fit the JIS screws.
I have ground down the tips of DeWalt #2 and DeWalt #3 Phillips to make them fit JIS screws. The large crosshead screws on the cases take modified #3 bits (or genuine #3 JIS bits). To modify the DeWalt bits you need to grind the very tip a little, then test fit, then grind a little more and test fit, etc. until the bit no longer "rocks" back and forth in the screwhead. Picture 1 below shows how a DeWalt #3 bit fits the case screws of my KZ650 after being ground properly. The #2 DeWalt bits can be modified the same way to fit smaller JIS screws. Pictures 2 and 3 below shows DeWalt #2 and #3 modified bits.
I did find a place that sells authentic JIS bits. They don't list the #3 bit, but if you contact them they can provide the #3 JIS bits even though they are not listed on the website. These folks were very easy to work with, and the authentic bits do work great. Here's their site:
www.rjrcooltools.com/shop_item_detail.cfm?subcat_ID=89
Pictures 4 & 5 below show a comparison between my home made modified bits with the authentic JIS bits.
PICTURE 1

PICTURE 2

PICTURE 3

PICTURE 4

PICTURE 5

Before reaching for that wrench or ratchet consider the following. The bolts are steel, but your engine and front forks are aluminum. The bolts are much tougher than the aluminum and if over tightened will strip the aluminum threads. Although these can be repaired, preventing damage by applying proper torque will save you grief, time, and money. Tightening fasteners properly requires torque wrenches. Various vendors, including Snap-on, CDI, Sears, etc., market torque wrenches. The two most popular types are the bar type and micrometer type. Either will work, but the micrometer type is a bit easier to use, especially if you are tightening several fasteners with the same torque - such as cylinder head covers. You will need a torque wrench calibrated in INCH POUNDS for many of the bolts. You will also need a torque wrench calibrated in FOOT POUNDS for the larger bolts. Don't try to use the foot pounds wrench on the smaller bolts as it will not be sensitive enough at low torque settings to provide accurate torque. There are many fasteners that require low torque. These include such things as 6mm oil pan bolts, cylinder head cover bolts, etc. for which the torque in 61-78 inch pounds. These low torque bolts require a wrench that is accurate at low settings and this wrench should be graduated in inch pounds. In addition, there are numerous high torque fasteners such as the front axle nuts (51 - 65 foot pounds) or swing arm pivot shaft nuts (58 - 87 foot pounds). These require a wrench that is accurate at higher settings; this wrench should be graduated in foot pounds. Using the proper torque wrenches to correctly tighten fasteners will help prevent damage and contribute to a safe bike. The Kawasaki Service Manual will list the various torque specs for the bolts. I suggest you get the manual before buying the torque wrenches so you can decide which wrenches best meet the torque specs.
Consider buying a can of Kroil penetrating oil and use it to soak stubborn fasteners for a couple days before trying to loosen them. Remember, the original screws and bolts were installed on your bike when Jimmy Carter was President, so many of them may be hard to remove. Kroil can be bought online, at guns shows, and at some other venues. Ed
WARNING! Do not even try to use Phillips screwdrivers on the Kawasaki cross head screws. Despite their appearance they are not Phillips screws. They are Japanese Industrial Standard (JIS) screws. The tips of Phillips screwdrivers are too long & pointed to allow the 4 blades of the screwdriver to properly engage the screws, so when you apply force the screw head slots will deform and look like crap. The fact is that Phillips screws were deliberately designed to have the screwdriver bit "cam out." This was done to prevent production line assembly from over-tightening, stripping, or breaking the screws. JIS screws do not have this problem. A proper fitting JIS bit can tighten a JIS screw to and beyond the torque spec without camming out. Here's the good news - you can easily modify standard Phillips screwdriver tips to fit the JIS screws.
I have ground down the tips of DeWalt #2 and DeWalt #3 Phillips to make them fit JIS screws. The large crosshead screws on the cases take modified #3 bits (or genuine #3 JIS bits). To modify the DeWalt bits you need to grind the very tip a little, then test fit, then grind a little more and test fit, etc. until the bit no longer "rocks" back and forth in the screwhead. Picture 1 below shows how a DeWalt #3 bit fits the case screws of my KZ650 after being ground properly. The #2 DeWalt bits can be modified the same way to fit smaller JIS screws. Pictures 2 and 3 below shows DeWalt #2 and #3 modified bits.
I did find a place that sells authentic JIS bits. They don't list the #3 bit, but if you contact them they can provide the #3 JIS bits even though they are not listed on the website. These folks were very easy to work with, and the authentic bits do work great. Here's their site:
www.rjrcooltools.com/shop_item_detail.cfm?subcat_ID=89
Pictures 4 & 5 below show a comparison between my home made modified bits with the authentic JIS bits.
PICTURE 1
PICTURE 2
PICTURE 3
PICTURE 4
PICTURE 5
Before reaching for that wrench or ratchet consider the following. The bolts are steel, but your engine and front forks are aluminum. The bolts are much tougher than the aluminum and if over tightened will strip the aluminum threads. Although these can be repaired, preventing damage by applying proper torque will save you grief, time, and money. Tightening fasteners properly requires torque wrenches. Various vendors, including Snap-on, CDI, Sears, etc., market torque wrenches. The two most popular types are the bar type and micrometer type. Either will work, but the micrometer type is a bit easier to use, especially if you are tightening several fasteners with the same torque - such as cylinder head covers. You will need a torque wrench calibrated in INCH POUNDS for many of the bolts. You will also need a torque wrench calibrated in FOOT POUNDS for the larger bolts. Don't try to use the foot pounds wrench on the smaller bolts as it will not be sensitive enough at low torque settings to provide accurate torque. There are many fasteners that require low torque. These include such things as 6mm oil pan bolts, cylinder head cover bolts, etc. for which the torque in 61-78 inch pounds. These low torque bolts require a wrench that is accurate at low settings and this wrench should be graduated in inch pounds. In addition, there are numerous high torque fasteners such as the front axle nuts (51 - 65 foot pounds) or swing arm pivot shaft nuts (58 - 87 foot pounds). These require a wrench that is accurate at higher settings; this wrench should be graduated in foot pounds. Using the proper torque wrenches to correctly tighten fasteners will help prevent damage and contribute to a safe bike. The Kawasaki Service Manual will list the various torque specs for the bolts. I suggest you get the manual before buying the torque wrenches so you can decide which wrenches best meet the torque specs.
Consider buying a can of Kroil penetrating oil and use it to soak stubborn fasteners for a couple days before trying to loosen them. Remember, the original screws and bolts were installed on your bike when Jimmy Carter was President, so many of them may be hard to remove. Kroil can be bought online, at guns shows, and at some other venues. Ed
Replied by 650ed on topic What did I do wrong with my 81 KZ750?
24 Dec 2015 05:38 - 24 Dec 2015 05:48Nessism wrote: KZ650's and 750's were extensively raced and earned a reputation for excellent handling. Guys put these bikes on race tracks with sticky aftermarket rubber and rarely were there issues with flex in the frame causing instability concerns. Removing the factory gussets and replacing them, along with adding little gussets here and there around the frame, begs the question of WHY? The swingarm mod in particular looks to have added a bunch of extra weight which will detract from the handling, not improve it. The steering head looks less braced than before too.
OP would have been better off spending a little money on some new shocks and fork springs. Such mods are useful.
The above is all absolutely true!
Considering the KZ750 was based on the KZ650, and the fact that the KZ650s beat all the 750cc AMA and FIM records (see image below) using unmodified frames and swing arms, the frame / swing arm mods on this bike were a mistake that very likely made handling worse rather than better. The weakest link on the KZ650 / 750 bikes was the rear shocks. Even when new they were barely adequate. Notice in the video below that the stock shocks were replaced with S&W shocks. Replacing the shocks would be the very first thing to be done to improve handling. At the very least I would try to put the frame back as it was before the mods. If the frame was rigid enough for the record setting bikes, it certainly is rigid enough for a street bike. More research should have been done before making frame changes; more research = less hacksaw.
") Ed
EdAttachment 00003c-23.jpg not found
Replied by Nessism on topic What did I do wrong with my 81 KZ750?
24 Dec 2015 04:27 - 24 Dec 2015 05:09
KZ650's and 750's were extensively raced and earned a reputation for excellent handling. Guys put these bikes on race tracks with sticky aftermarket rubber and rarely were there issues with flex in the frame causing instability concerns. Removing the factory gussets and replacing them, along with adding little gussets here and there around the frame, begs the question of WHY? The swingarm mod in particular looks to have added a bunch of extra weight which will detract from the handling, not improve it. The steering head looks less braced than before too.
OP would have been better off spending a little money on some new shocks and fork springs. Such mods are useful.
OP would have been better off spending a little money on some new shocks and fork springs. Such mods are useful.
Replied by BubbaZ1982 on topic What did I do wrong with my 81 KZ750?
23 Dec 2015 18:49 - 23 Dec 2015 18:52
I knew better than to ask for opinions,if you want to question the handling, Watch the video in the link above. The speed limit is still 55 here and it gets there plenty quick with the sprocket and chain conversion I did. It tops out at about 120. The original frame gussets were removed and replaced, I also added more, reinforced the swingarm and replaced the gussets there too. it is stable as a rock, and even with the shorter pegs, I have no issues putting them on the ground. it's nearly 100 lbs lighter than stock. The wiring is simplified as much as possible and for the most part hidden. The exhaust is straight through with a smaller outlet. If i lost any power it's not noticeable. The steering head bearings were replaced with roller bearings and new races.
Attachment 12360349_434109933448991_1710951634551364814_n.jpg not found
Attachment 12360349_434109933448991_1710951634551364814_n.jpg not found
Attachment 12366355_434109686782349_1432311212606358400_n.jpg not found
Attachment 12369189_434109720115679_8033108453660856583_n.jpg not found
Attachment 12391095_434109693449015_7311926874312482637_n.jpg not found
Attachment 12369264_434109743449010_2907584871687443428_n.jpg not found
Today , swing arm bushings
I'll start over. I have an older post about this 75 i picked a few years ago. As usual it was Americanized and retired to the shed. It took me few years to buy this bike and was finally able to drag it home (great story ). In the previous post after i got it running it is one of the better running Z1's I have owned, so it was shoved in the corner , waiting.
I don;t have heat, and my garage is primitive, so with the unseasonably warm weather the 75 is in the "restore" spot.
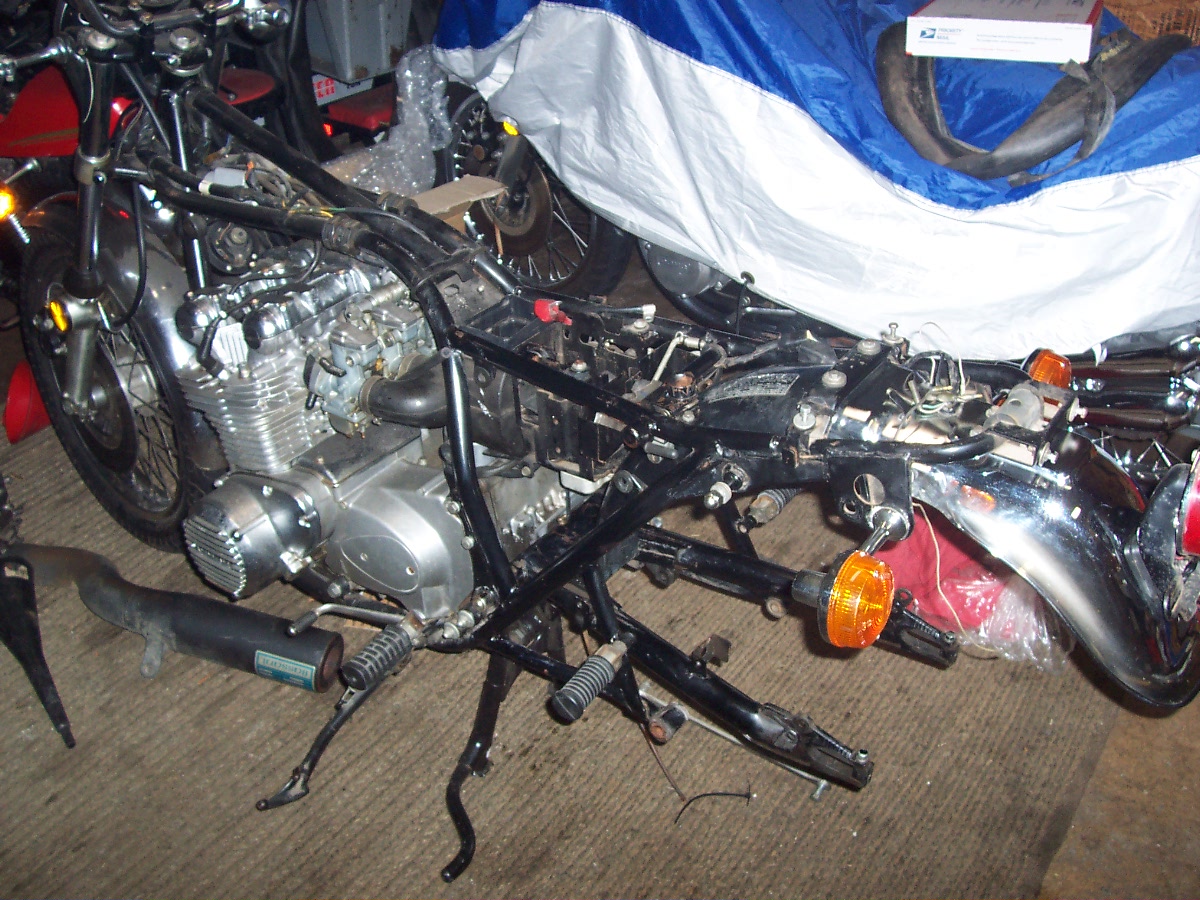
The last couple days, I wrenched. First thing I do is swing arm and this one was bad, completely froze up. Today was install new bushings. It took awhile to get the old old ones without heat,torch , I am not repainting the frame or swing arm. I hate spray paint and powdercoat and this original paint on the frame is nice.
Here we go, this is how I got the bike
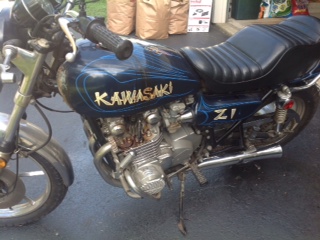
This is 2014 getting it on the road again after a 20 year hibernation
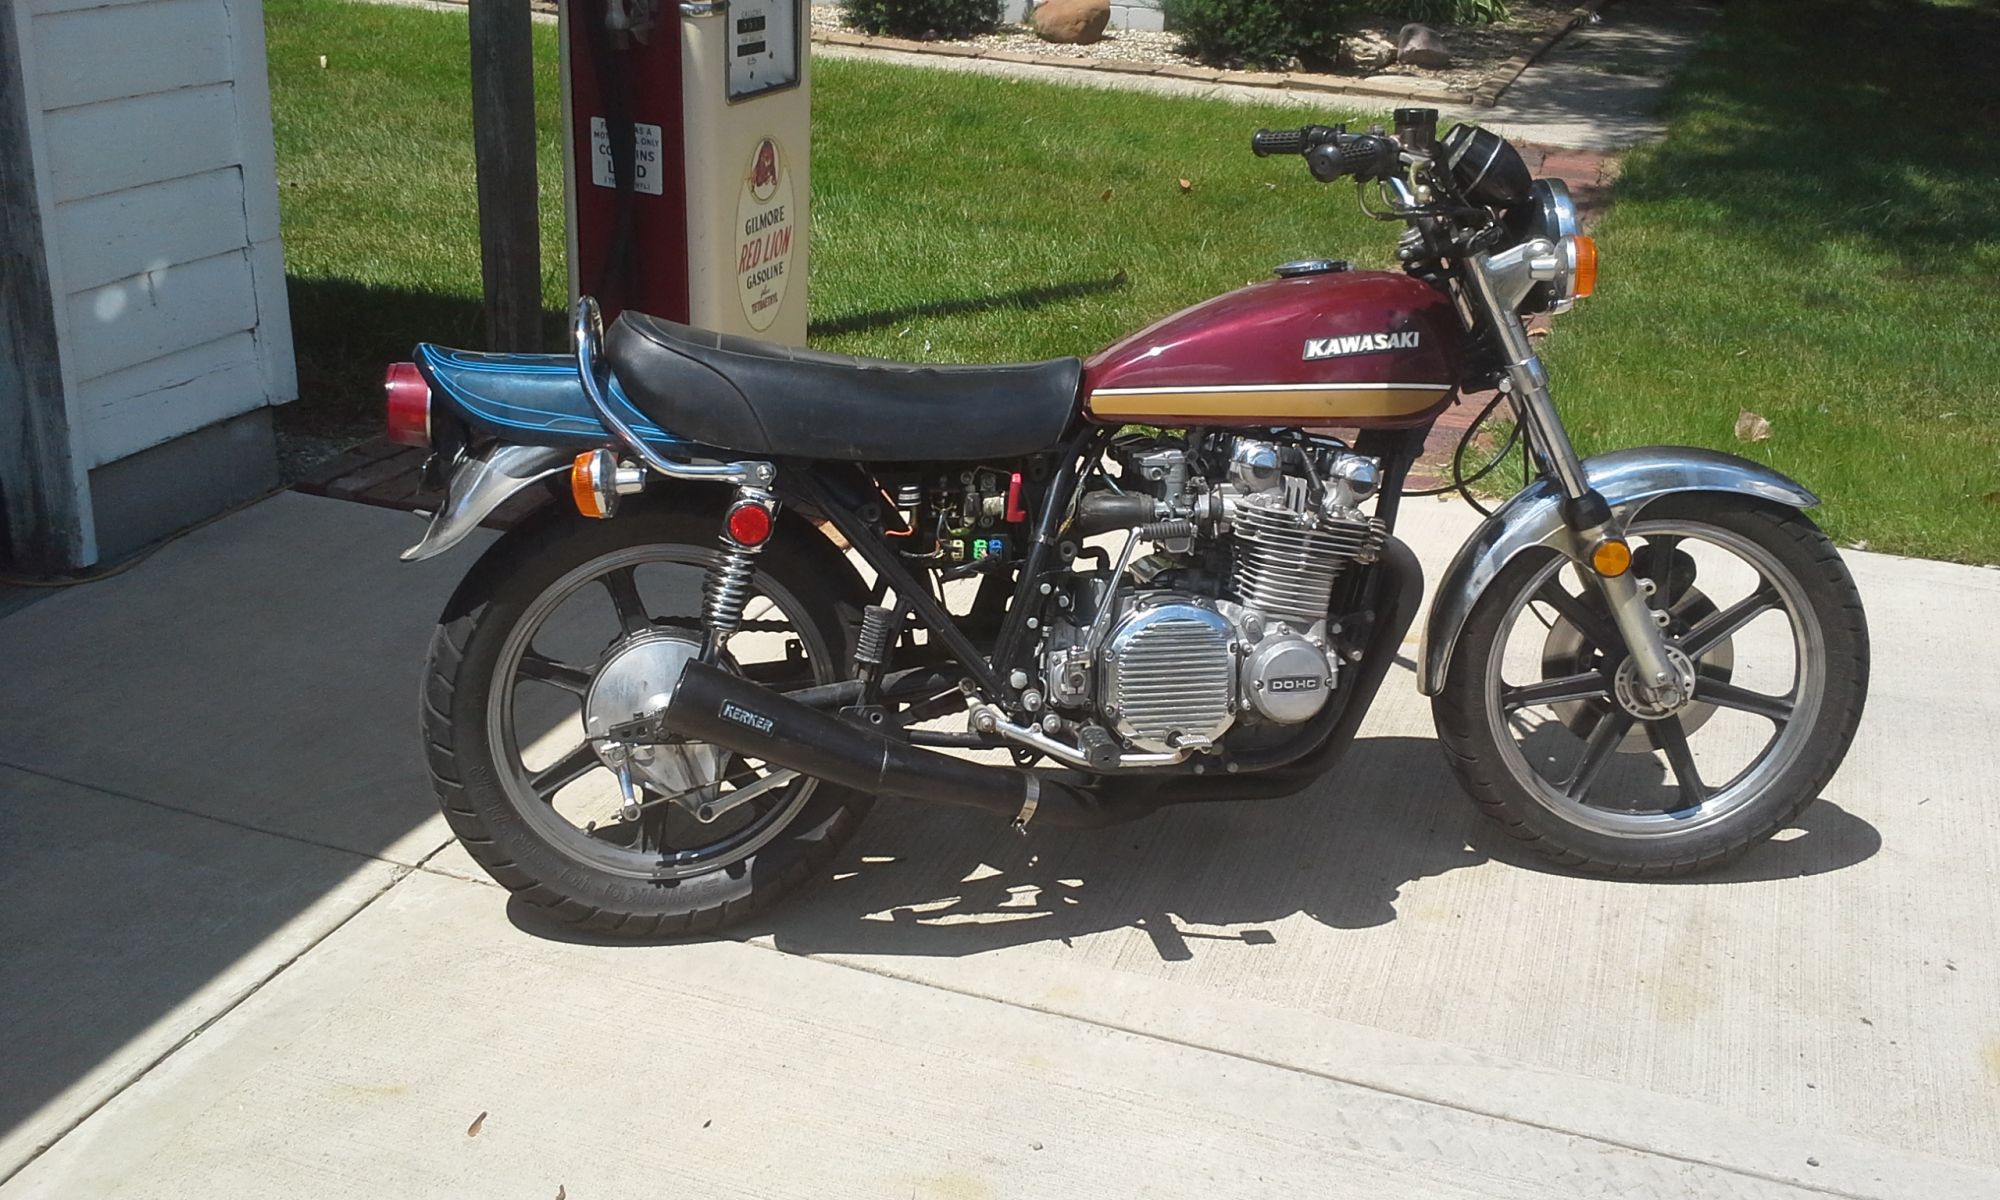
I don;t have heat, and my garage is primitive, so with the unseasonably warm weather the 75 is in the "restore" spot.
The last couple days, I wrenched. First thing I do is swing arm and this one was bad, completely froze up. Today was install new bushings. It took awhile to get the old old ones without heat,torch , I am not repainting the frame or swing arm. I hate spray paint and powdercoat and this original paint on the frame is nice.
Here we go, this is how I got the bike
This is 2014 getting it on the road again after a 20 year hibernation
If you have not changed a drive chain and sprockets before, here are a few things you will need----
An impact wrench. Pneumatic is best, but electric or mechanical can also work.
Without one, you will need a long breaker bar and a willing accomplice to apply the rear brake while you wrestle with the nut that holds the front sprocket on. Yes, it is really tight.
Something to cut the belt with, else remove the swing arm pivot bolt and the left rear shock lower mount.
New high quality chain and sprockets for a chain drive 440. A master link staking tool, unless you get an endless chain in the correct length, in which case you will definitely have to unhook the swing arm and shock.
A can of chain wax or dry Teflon lube.
A grown up torque wrench for installing the new front sprocket.
The most important tool of all is a genuine Kawasaki Factory Service Manual. I think there are some PDF versions floating around, and they come up on FleeceBay now and then.
+ what MartinCSR said.
Just an FYI. From the cross-reference & diagrams at Partzilla for the 1980 Ltd & Ltd Belt, everything is the same. same transmission output shaft n stuff & same Fr chain guide. same Rr hub coupling assy, swing arm, & same chain guard, It should be easy. removing the bolts could be the only hard part.
Rear Brake Shoes. If you don't know the age of the Rr brake shoes, replace them. get oem or vesrah (made in Japan). The adhesive that binds the linings to the shoes can fail from being old & brittle, so a lining can break loose & get jammed between the shoe & drum, locking the rear wheel. It happened to me, so it does happen.")
Rear Brake Shoes. If you don't know the age of the Rr brake shoes, replace them. get oem or vesrah (made in Japan). The adhesive that binds the linings to the shoes can fail from being old & brittle, so a lining can break loose & get jammed between the shoe & drum, locking the rear wheel. It happened to me, so it does happen.
Displaying 1221 - 1230 out of 7257 results.