
how to: repaint your bike
- mykznme
-
 Topic Author
- Offline
- User
-

Registered
- Posts: 276
- Thanks: 1
how to: repaint your bike
25 Aug 2006 20:47
FOREWORD:
ok all, lets give this a go. imma try to explain the basics of a repiant in the attempt to keep people from having to repeat themselves. please....if you have USEFUL info feel free to share it.
THIS IS NOT A GENERAL CHAT, PLEASE KEEP PERSONAL OPINIONS TO YOURSELF.PLEASE FEEL FREE TO ASK QUESTIONS. someone will answer them.
the first chapter will cover basic "rattlecan" repaint.(simply because i already have a writeup for it but if this thread goes ok without any snags i will do a full 2 part repaint write up with pics.)
again my way my not be the best way so if you have info or i missed something please feel free to speak up.(its what this site is for)
i cant stress enough that i would like to keep this thread as unbiased as possible. please keep personal opinions to yourself.
many thanks to steell for taking the time to resize all of my pics.(sry bout that) the mods really do a good job of keeping the forums in line.
Post edited by: mykznme, at: 2006/08/27 23:13
R.I.P. Odd Ivar
Please Log in or Create an account to join the conversation.
- mykznme
-
Topic Author
- Offline
- User
-
Registered
- Posts: 276
- Thanks: 1
Re: how to: repaint your bike
25 Aug 2006 20:50
ok here we go. this write up was done for another site.
hey all, im waiting for paint to dry so i guess ill start the write up.
this is done with rattlecan to show what kind of semi-temporary results you can acheive at home with some time and effort.
i say semi-temporary because as anyone who has painted a bike will tell you, no rattlecan paint is gas/uv resistant. but you can keep a good finish on it for a few years.
in my case the rattlecan job is a means to make the bike look a little bit better until i get things just right. then its down to frame with a new paint scheme. please support your local starving bodyman/painter :wink
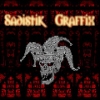
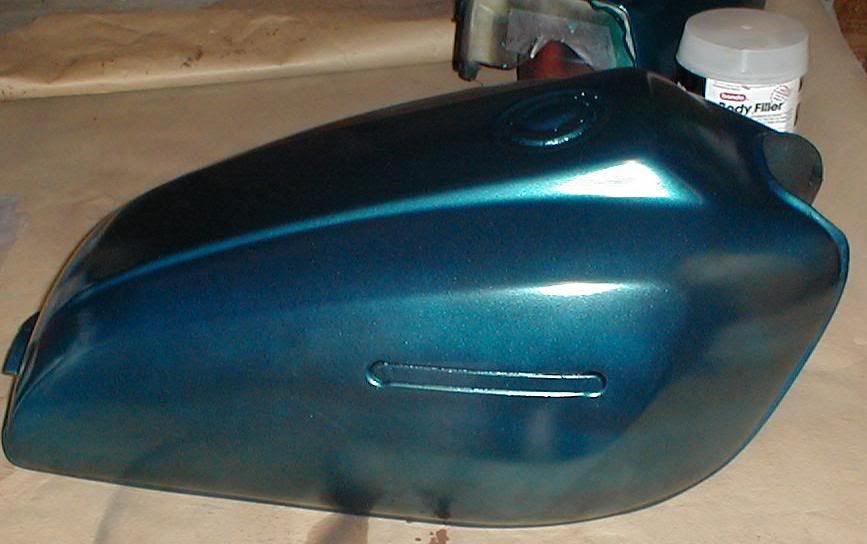
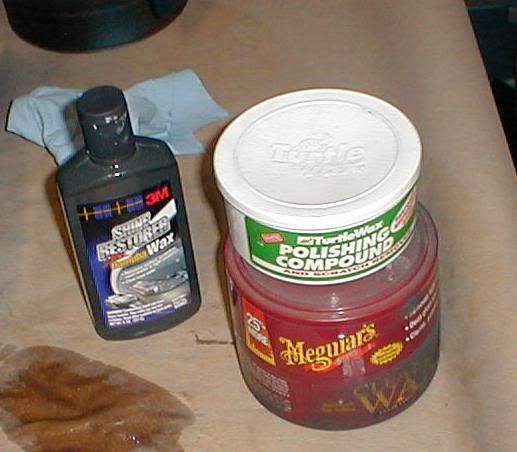
supplies:
this is everything i used minus the body filler.
tack cloth, surface prep, masking tape, 60g,100g,220g,320g,400g,600g,800g,1000g,2000g,sandpaper, filler primer, sandable primer, basecoat, clearcoat
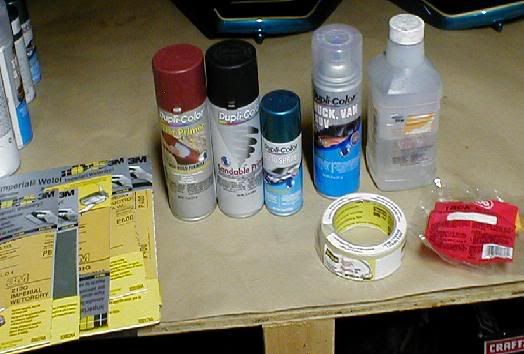
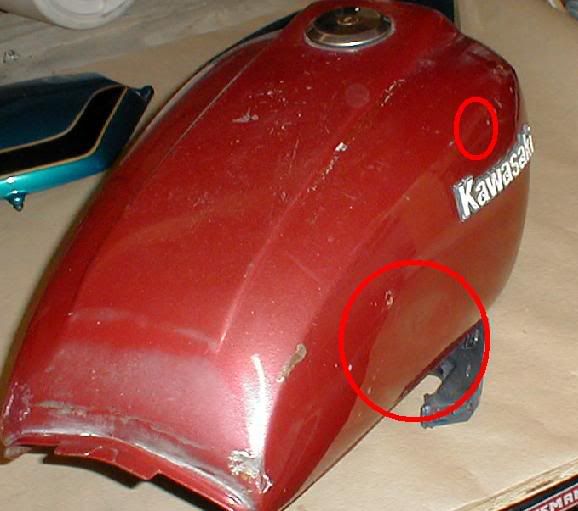
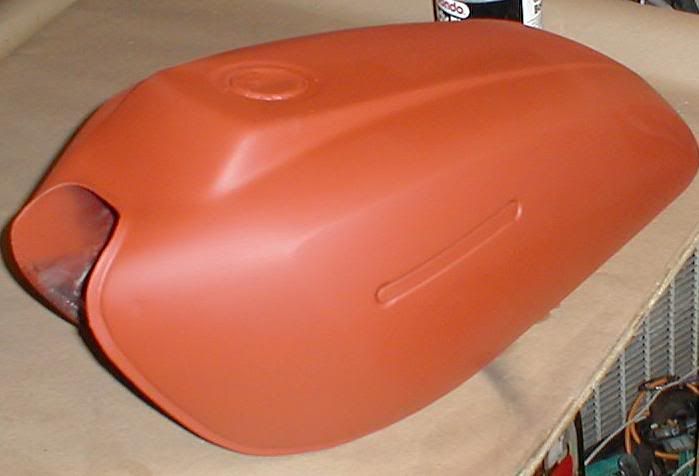
1.you can see in these pictures the tank is in desperate need of a repaint.
2 dents 4 dings and quite a few chips, pits and rust spots. yay....i get to bondo")
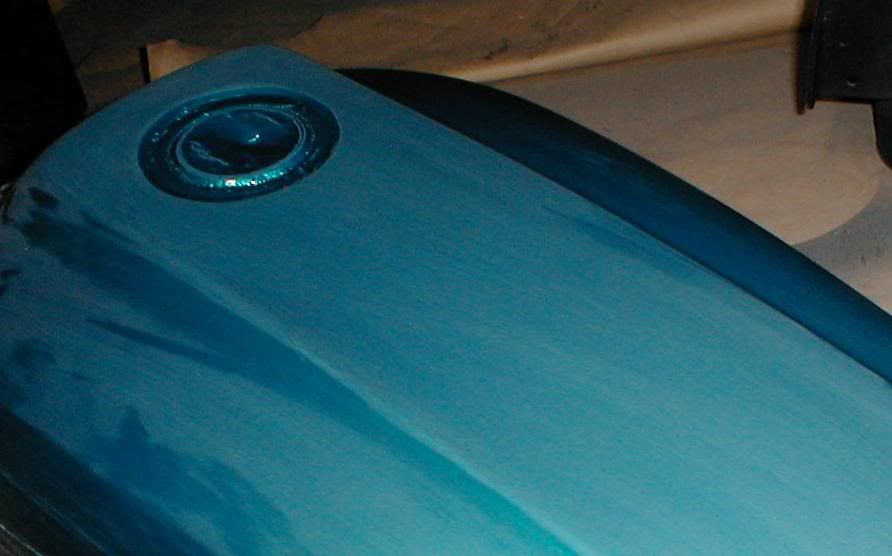
2.remove the petcock/valve and gas cap. let the tank dry out overnight with air moving through it to remove the vapors.this may not sound right but clean the bung.(where the gascap seats) it should be free of paint and dirt.mask it and find something roughly the same size like a paintcan cap to cut the mask around.
this pic shows beneath the petcock. there shouldnt be any paint around where the valve seats.
problem being is gas dissolves paint and then you have a leaky valve.(you can see where it already started below)
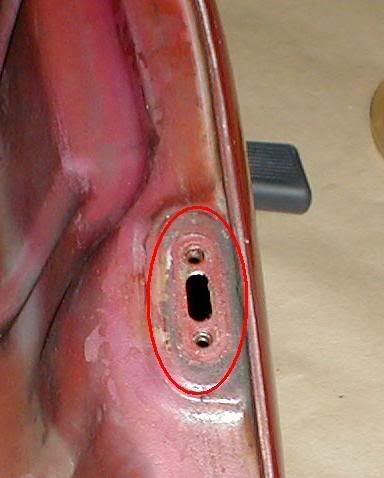
sand the paint off (60g) and use some gasoline and a pipe cleaner to clean the threads. (if need be)
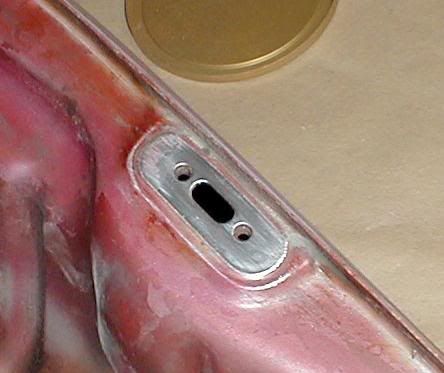
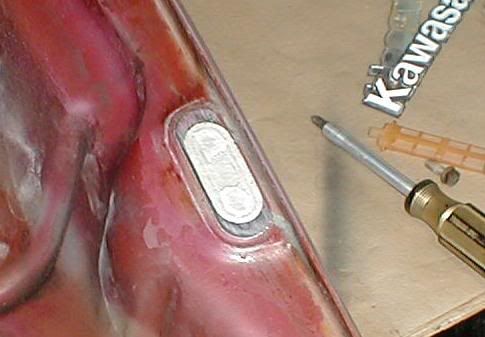
place masking over bare metal, cutout holes, replace petcock,trace around the bottom of petcock,remove petcock,cut trace line, place small strip of masking over holes.put small patches of masking over the mount hole for the emblems.
3. start sanding.sand down all the low spots,chips,and rust until smooth.wipe off the dust with a terrycloth towel, wipedown with suface prep on a paper towel,let dry, wipedown with tackcloth,prime the entire tank with sandable primer.PIC BELOW
(i suggest sanding but some people like to use stripper or wheels. the only time i go down to bare metal is for pits,rust,body fill,metal mods or weak paint. if you do have to completley strip a tank i suggest using stripping wheels, wire wheels or random orbital sander with 60-80g but keep in mind to keep moving. the friction will heat the tank and may cause warping. prime as soon as possible)
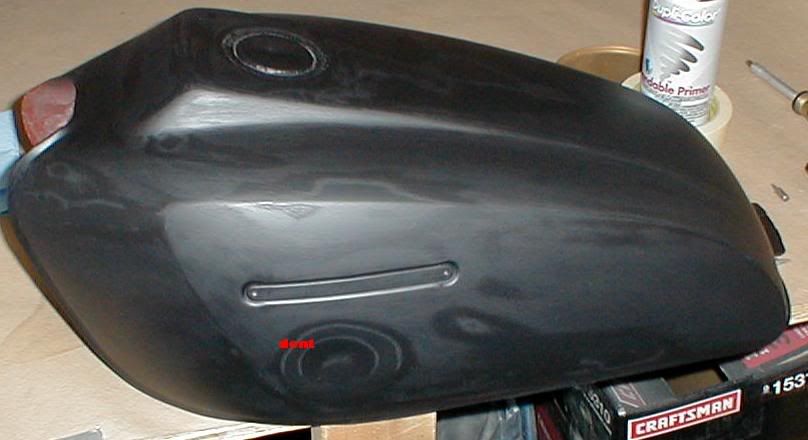
this is a paint writeup so ill skip the bondo and move ahead to the next step.
4. wetsand your sandable primer with 600g to scuff it, clean it,tack it and spray with filler primer(3-4 coats) if you work with the flash times you can lay out 4 coats in about 30-45 minutes.
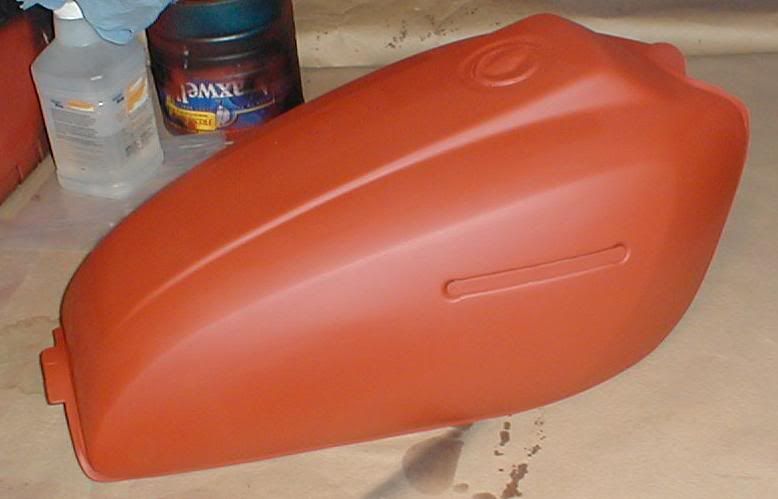
these 2 pics are after the bondo and 4 coats of filler primer.
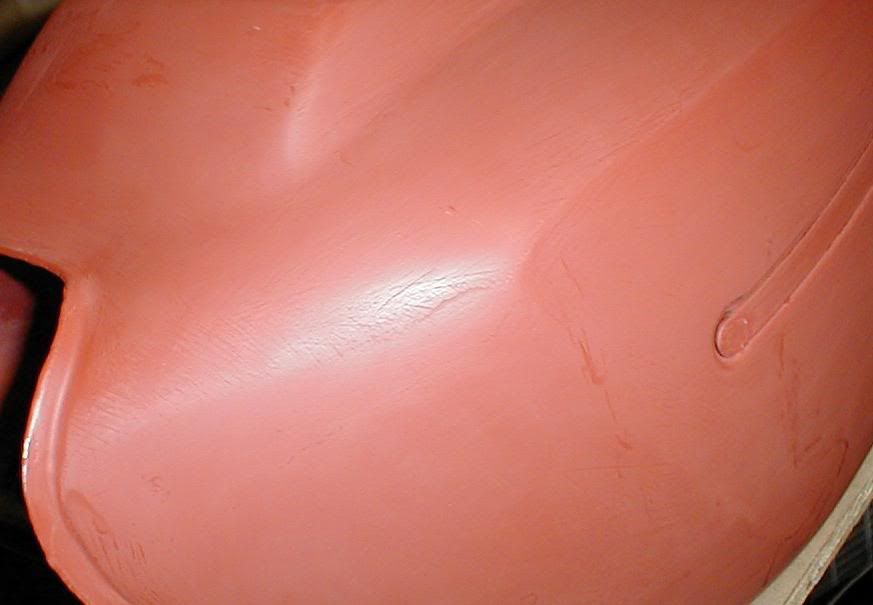
5. wetsand the filler primer with 400g(i use a basin/tub for this wetsand because filler primer makes a godawful mess). feel and listen to the sandpaper, there is a difference in sound and feel between rough and smooth.
when you clean and dry it it should have the appearance of a resin type bowling ball(like the old hammers and rhino's) any low spots will show as darker and shiny. you can see an example below.
well thats what ive got so far until the next filler coatt dries.
:lol:[/quote]
ok phase two. this section will take you to clearcoat
after wetsanding the filler primer with 400g,dry,prep,tack, recoat with filler and wetsand again with 800g to remove the "cut" from the previous sanding and give you a nice smooth surface for basecoat,dry,prep,tack. im using black sandable primer for basecoat but you could shoot your color over the filler primer.
most paints vary in depth and color depending on the color underneath.
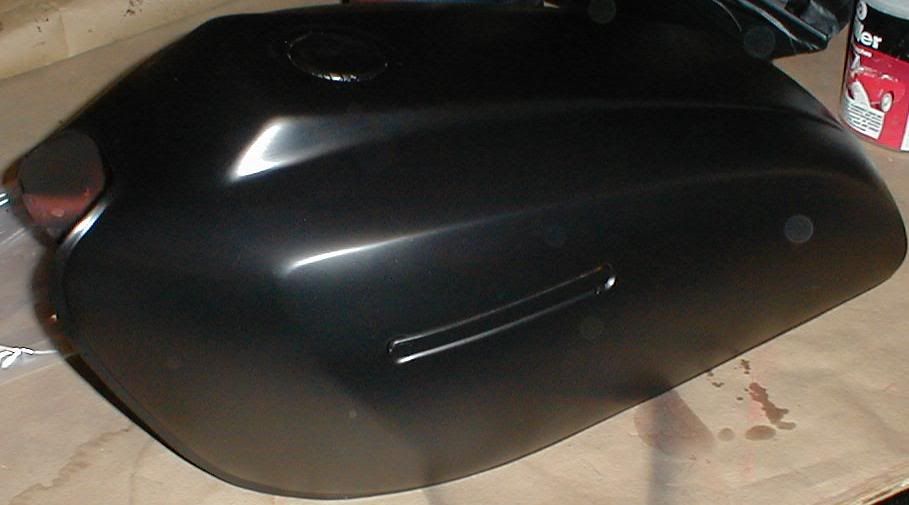
heres the tank with 3 coats of black primer/base color.
wetsand the base with 800g. im using metallic paint so i wetsand againg with 1000g,dry,prep,tack, the reason behind this is metallic paint contains fine flake and the flake being heavier then the paint setlles into the scratches and makes them stand out.
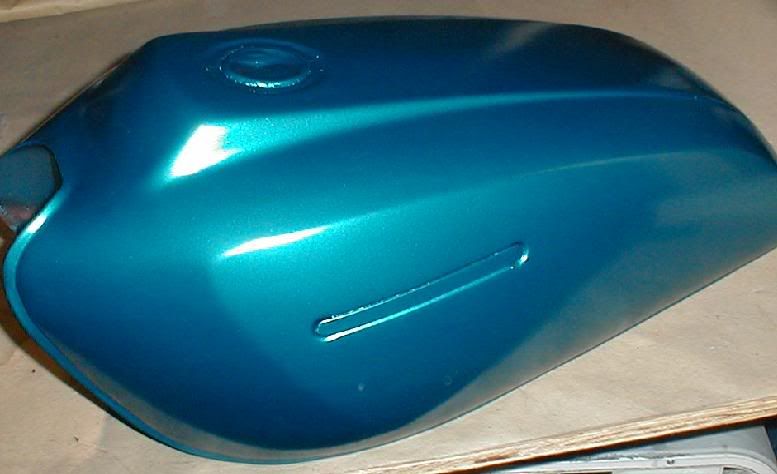
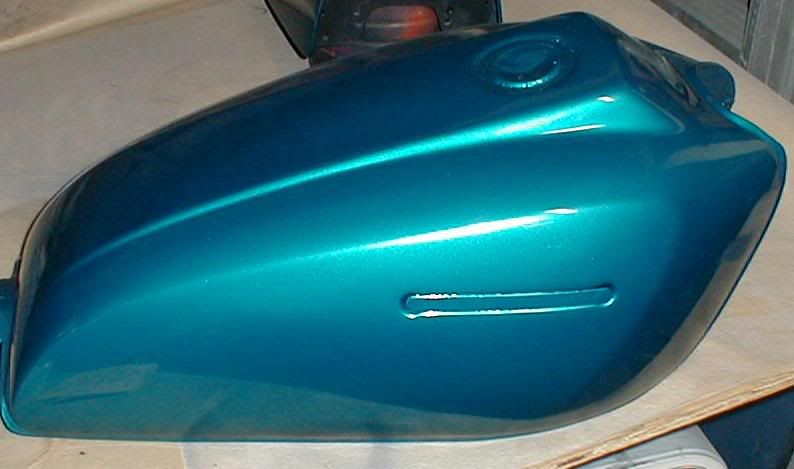
heres one coat of bright aqua metallic.
heres four coats.
now i cure for 4-6 hours (depending on temp and humidity)and wetsand with 800g-1000g,dry,prep,tack.
recoat with 4 more coats.
wetsand with 800g,dry,prep,tack, and shoot four coats of clear.

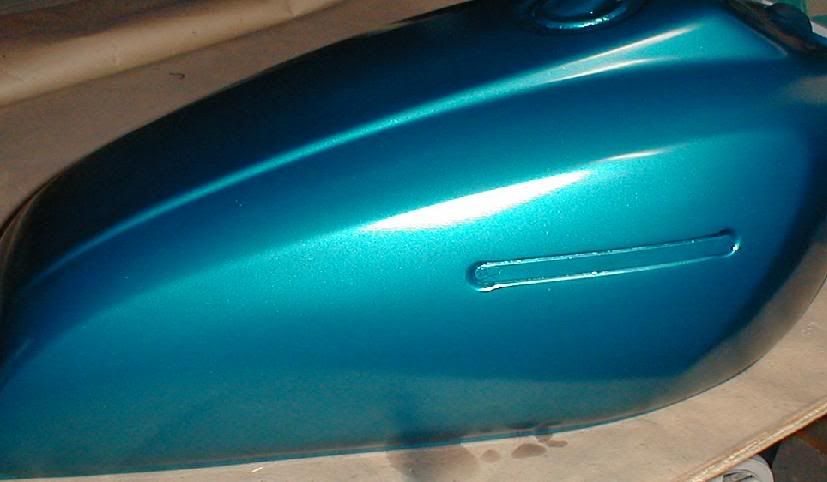
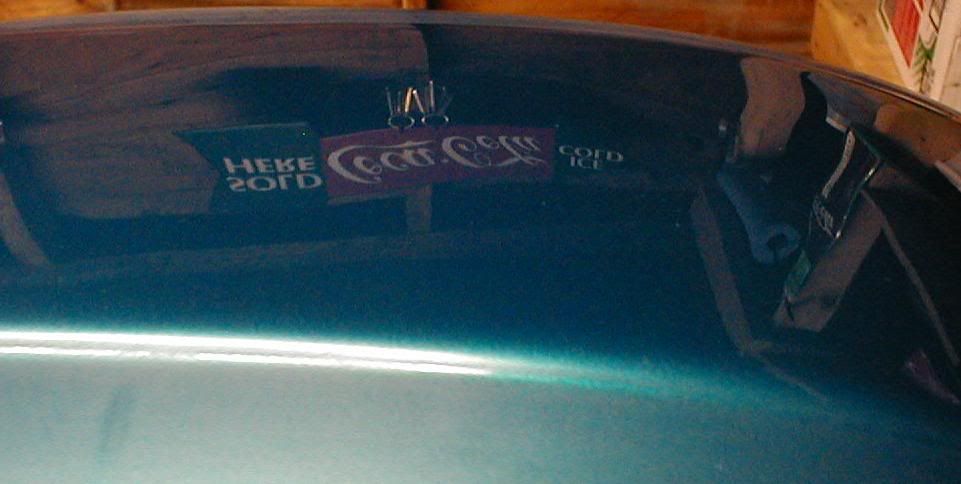
now im waiting for the cure but for comparison heres a pic.
i'll take the same pic again after polishing.
 [/quote]
heres the last phase. i didnt polish the whole tank because i plan on shooting another color and whatever wax i put on i have to take off.but this should give you a pretty good idea.
after four more coats.
now wetsand with graduating 600,800,1000,2000g sandpapers.
now your ready to polish. i use turtlewax medium grade polishing compound followed by 3m shine restorewith carnauba and finnally mequiars wax.
starting with the mid grade on a terrycloth towel or body buffer polish the hell out of it. follow with finer grade compound then wax.i do have to pount out that an electrical buffer will rub the hell out of uncured paint and rattlecan takes along time to fully cure.
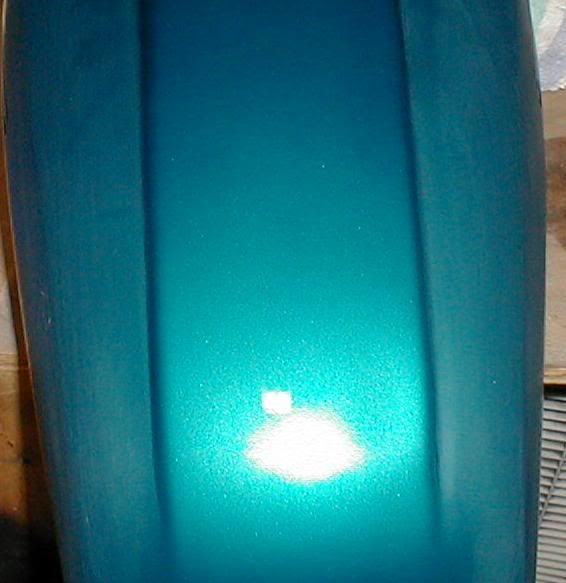
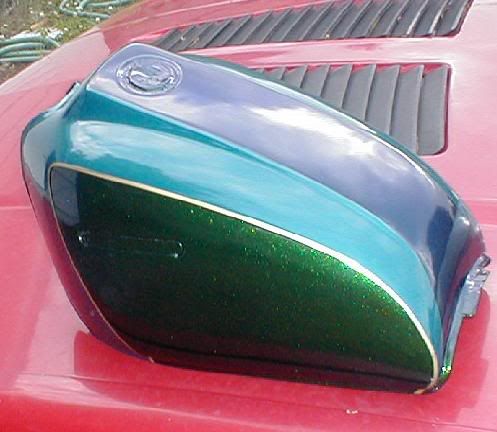
now remember the comparison pic? the first pic was taken after 4 coats of clear with no sanding and well heres the final result.
i really hope that this writeup can be of use to someone.
by no means do i suggest rattlecan for a repaint but i do realise that a profesional repaint can be very expensive and most dont have a large budget for a 30 year old mc. but please support you local "chuck and jim" bodyshop. most smaller bodyshops will allow you to buy the paint and charge you for the work only. this alone could save you at least 100 dollars on a respray.
thanks all for having patience with me and sorry it took so long.
joe, Sadistik Graffix[/quote]
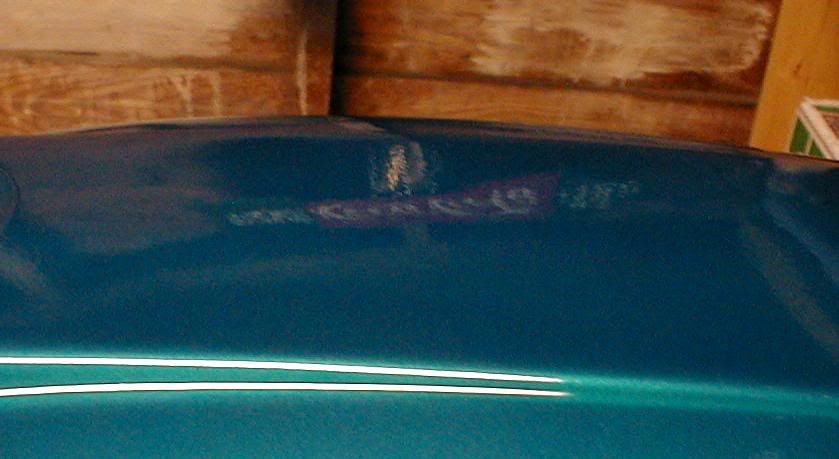
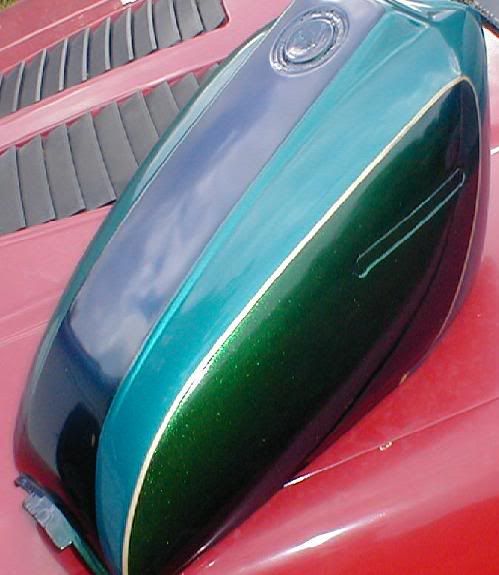
if finaaly gotten around to putting in some more time on this tank.
i still need to clean and paint the emblems and polish it up but its almost done.:mosher
the emblems
 [/quote]
i would also like to add that this tank is up for sale.
it is a 78'400b tank to the best of my knowledge.
Post edited by: steell, at: 2006/08/26 07:07;)
Post edited by: mykznme, at: 2006/08/27 23:22
Post edited by: N0NB, at: 2007/04/26 13:33
hey all, im waiting for paint to dry so i guess ill start the write up.
this is done with rattlecan to show what kind of semi-temporary results you can acheive at home with some time and effort.
i say semi-temporary because as anyone who has painted a bike will tell you, no rattlecan paint is gas/uv resistant. but you can keep a good finish on it for a few years.
in my case the rattlecan job is a means to make the bike look a little bit better until i get things just right. then its down to frame with a new paint scheme. please support your local starving bodyman/painter :wink
supplies:
this is everything i used minus the body filler.
tack cloth, surface prep, masking tape, 60g,100g,220g,320g,400g,600g,800g,1000g,2000g,sandpaper, filler primer, sandable primer, basecoat, clearcoat
1.you can see in these pictures the tank is in desperate need of a repaint.
2 dents 4 dings and quite a few chips, pits and rust spots. yay....i get to bondo
2.remove the petcock/valve and gas cap. let the tank dry out overnight with air moving through it to remove the vapors.this may not sound right but clean the bung.(where the gascap seats) it should be free of paint and dirt.mask it and find something roughly the same size like a paintcan cap to cut the mask around.
this pic shows beneath the petcock. there shouldnt be any paint around where the valve seats.
problem being is gas dissolves paint and then you have a leaky valve.(you can see where it already started below)
sand the paint off (60g) and use some gasoline and a pipe cleaner to clean the threads. (if need be)
place masking over bare metal, cutout holes, replace petcock,trace around the bottom of petcock,remove petcock,cut trace line, place small strip of masking over holes.put small patches of masking over the mount hole for the emblems.
3. start sanding.sand down all the low spots,chips,and rust until smooth.wipe off the dust with a terrycloth towel, wipedown with suface prep on a paper towel,let dry, wipedown with tackcloth,prime the entire tank with sandable primer.PIC BELOW
(i suggest sanding but some people like to use stripper or wheels. the only time i go down to bare metal is for pits,rust,body fill,metal mods or weak paint. if you do have to completley strip a tank i suggest using stripping wheels, wire wheels or random orbital sander with 60-80g but keep in mind to keep moving. the friction will heat the tank and may cause warping. prime as soon as possible)
this is a paint writeup so ill skip the bondo and move ahead to the next step.
4. wetsand your sandable primer with 600g to scuff it, clean it,tack it and spray with filler primer(3-4 coats) if you work with the flash times you can lay out 4 coats in about 30-45 minutes.
these 2 pics are after the bondo and 4 coats of filler primer.
5. wetsand the filler primer with 400g(i use a basin/tub for this wetsand because filler primer makes a godawful mess). feel and listen to the sandpaper, there is a difference in sound and feel between rough and smooth.
when you clean and dry it it should have the appearance of a resin type bowling ball(like the old hammers and rhino's) any low spots will show as darker and shiny. you can see an example below.
well thats what ive got so far until the next filler coatt dries.
:lol:[/quote]
ok phase two. this section will take you to clearcoat
after wetsanding the filler primer with 400g,dry,prep,tack, recoat with filler and wetsand again with 800g to remove the "cut" from the previous sanding and give you a nice smooth surface for basecoat,dry,prep,tack. im using black sandable primer for basecoat but you could shoot your color over the filler primer.
most paints vary in depth and color depending on the color underneath.
heres the tank with 3 coats of black primer/base color.
wetsand the base with 800g. im using metallic paint so i wetsand againg with 1000g,dry,prep,tack, the reason behind this is metallic paint contains fine flake and the flake being heavier then the paint setlles into the scratches and makes them stand out.
heres one coat of bright aqua metallic.
heres four coats.
now i cure for 4-6 hours (depending on temp and humidity)and wetsand with 800g-1000g,dry,prep,tack.
recoat with 4 more coats.
wetsand with 800g,dry,prep,tack, and shoot four coats of clear.
now im waiting for the cure but for comparison heres a pic.
i'll take the same pic again after polishing.
heres the last phase. i didnt polish the whole tank because i plan on shooting another color and whatever wax i put on i have to take off.but this should give you a pretty good idea.
after four more coats.
now wetsand with graduating 600,800,1000,2000g sandpapers.
now your ready to polish. i use turtlewax medium grade polishing compound followed by 3m shine restorewith carnauba and finnally mequiars wax.
starting with the mid grade on a terrycloth towel or body buffer polish the hell out of it. follow with finer grade compound then wax.i do have to pount out that an electrical buffer will rub the hell out of uncured paint and rattlecan takes along time to fully cure.
now remember the comparison pic? the first pic was taken after 4 coats of clear with no sanding and well heres the final result.
i really hope that this writeup can be of use to someone.
by no means do i suggest rattlecan for a repaint but i do realise that a profesional repaint can be very expensive and most dont have a large budget for a 30 year old mc. but please support you local "chuck and jim" bodyshop. most smaller bodyshops will allow you to buy the paint and charge you for the work only. this alone could save you at least 100 dollars on a respray.
thanks all for having patience with me and sorry it took so long.
joe, Sadistik Graffix[/quote]
if finaaly gotten around to putting in some more time on this tank.
i still need to clean and paint the emblems and polish it up but its almost done.:mosher
the emblems
i would also like to add that this tank is up for sale.
it is a 78'400b tank to the best of my knowledge.
Post edited by: steell, at: 2006/08/26 07:07;)
Post edited by: mykznme, at: 2006/08/27 23:22
Post edited by: N0NB, at: 2007/04/26 13:33
R.I.P. Odd Ivar
Please Log in or Create an account to join the conversation.
- 8ball
-

- Offline
- User
-
Registered
- Posts: 7
- Thanks: 0
Re: how to: repaint your bike
28 Aug 2006 13:24
thanks a lot for this info. i'll be rattle canning my KZ soon and i will definitely have a copy of this sitting somewhere between the beer and my bike (that means i'll get a look at it every few minutes)
BTW i think your work looks damn good... if you were closer to raleigh, i'd bring my stuff to your shop.
BTW i think your work looks damn good... if you were closer to raleigh, i'd bring my stuff to your shop.
Please Log in or Create an account to join the conversation.
- nfswift
-
- Offline
- User
-
Registered
- Posts: 92
- Thanks: 0
Re: how to: repaint your bike
31 Aug 2006 00:30
OUTSTANDING WORK.
I hope this info will be of help to me when I take on the painting challenge, but I doubt I could manage something close to that.
Kudos.
I hope this info will be of help to me when I take on the painting challenge, but I doubt I could manage something close to that.
Kudos.
Please Log in or Create an account to join the conversation.
- hmondo
-

- Offline
- User
-
Registered
- Posts: 64
- Thanks: 0
Re: how to: repaint your bike
31 Aug 2006 08:01
Very usefull information, but where can I find info on fixing my dings and dents using bondo?
1989 KZ1000 P-8 (Police)
1987 ZL1000
1986 Concours (Project Bike)
1987 ZL1000
1986 Concours (Project Bike)
Please Log in or Create an account to join the conversation.
- KL250
-
- Offline
- User
-
Registered
- Posts: 70
- Thanks: 0
Re: how to: repaint your bike
31 Aug 2006 13:26
here's a few tips for using bondo.
1. make sure the area needing bondo is stripped to bare metal. and roughed with 36g to allow the bondo somthing to bite into.
2. the area needing to be stripped will be much larger than the area needing bondo. for a small ding in a flat pannel it will turn into about a 6" area
3. use a clean paper towel between your hand and the pannel to "feel" the repair. if it feels funky it will look funky.
4. mix bondo up as directed otherwise it sands like shit.
5. rough in the bondo with 36 grit then move to 80g, and fiish with 180 making sure that all the 36& 80 grit scrathes are removed.
6. Don't use spray can primers, they are complete junk. got to a local paint supply store and get a quart of either OMNI or Shopline 2K primer surfacer. it will be like $30 and it is worth every penny. as an option to this find a local body shop that will prime the tank for you with a 2k primer surfacer. They would prolly do it for all of $20 and it 100's of times better than spray can shit.
7. don't use the laquer spot/ glazing putty, it's junk.
8. final sand your primer with 400-600 grit wet with soapy water.
that should help you out a bit.
Please Log in or Create an account to join the conversation.
- wireman
-
- User
-
Public
- Thanks: 0
Re: how to: repaint your bike
31 Aug 2006 14:38
im pretty good at fabbing and pounding things out,but when it comes to painting i dont even try unless its something like a car frame that wont be seen(yeah,wireman is artistically challenged when it comes to paint! )the thing to remember is bondo is for finetuning,its not for sculpting parts out of!
 these patch panels started out as pieces from some shelves i salvaged from a dumpster,it takes a lot of time but you can make metal do pretty much anything you just need to know how to talk or scream at it sometimes!
Post edited by: wireman, at: 2006/08/31 17:44
)the thing to remember is bondo is for finetuning,its not for sculpting parts out of!
Post edited by: wireman, at: 2006/08/31 17:44
Please Log in or Create an account to join the conversation.
- JMKZHI
-

- Offline
- Platinum Member
-

Registered
- Posts: 2428
- Thanks: 48
Last edit: 03 Dec 2008 17:22 by JMKZHI.
Please Log in or Create an account to join the conversation.
- mykznme
-
Topic Author
- Offline
- User
-
Registered
- Posts: 276
- Thanks: 1
Re: how to: repaint your bike
31 Aug 2006 17:13
hmondo wrote:
john68 went in to a good bit of detail about bondo in this thread.very good read.
Tank and side cover repaint by TwinRotor
JMKZHI wrote:
weak paint is often due to human error.
not prepping the surface properly before painting will almost always result in loss of adhesion.
it helps to wear non-powdered latex gloves because even finger oils will cause ill effects but if you use a clear/scentless mineral spirit rub(surface prep)it should take care of most lightwieght oils.
wireman wrote:
the thing about this is, gas tanks are very hard to pop dings out of. shy of stud weld and slide hammer wich can cause more harm then good if you dont know what your doing.
very nice patch btw.
Post edited by: N0NB, at: 2007/04/26 13:34
Very usefull information, but where can I find info on fixing my dings and dents using bondo?
john68 went in to a good bit of detail about bondo in this thread.very good read.
Tank and side cover repaint by TwinRotor
JMKZHI wrote:
I've used spray can primers with excellent results: my tank came out very shiny & a year later (or has it been two) the primer has not failed. JMK.
weak paint is often due to human error.
not prepping the surface properly before painting will almost always result in loss of adhesion.
it helps to wear non-powdered latex gloves because even finger oils will cause ill effects but if you use a clear/scentless mineral spirit rub(surface prep)it should take care of most lightwieght oils.
wireman wrote:
th
e thing to remember is bondo is for finetuning,its not for sculpting parts out of!
the thing about this is, gas tanks are very hard to pop dings out of. shy of stud weld and slide hammer wich can cause more harm then good if you dont know what your doing.
very nice patch btw.
Post edited by: N0NB, at: 2007/04/26 13:34
R.I.P. Odd Ivar
Please Log in or Create an account to join the conversation.
- heartless
-
- Offline
- User
-
Registered
- Posts: 76
- Thanks: 0
Re: how to: repaint your bike
01 Sep 2006 04:40
have to agree with wireman about the bondo being for fine tuning/smoothing. for larger repairs or rebuilding something not made of metal (fairings, etc) i use fiberglass, which in itself can be a challenge. Bondo does get used, but only as a finish coat...
working on a large fairing off the other half's Voyager right now, and am taking pics as i go so i can attempt a write up for those that may be interested.
nice work on the painting write up, mykznme. some great shots of the before/after polishing.
working on a large fairing off the other half's Voyager right now, and am taking pics as i go so i can attempt a write up for those that may be interested.
nice work on the painting write up, mykznme. some great shots of the before/after polishing.
Please Log in or Create an account to join the conversation.
- therealmithrandir
-
- Offline
- User
-
Registered
- Posts: 4
- Thanks: 0
Re: how to: repaint your bike
05 Sep 2006 17:42
I am very interested in Chapter 2. I am in the process of re-painting my bike and don't plan on using rattle cans. I am not a painter nor can I afford one. I have experience with spraying but not auto/mc.
Would very much like to hear what you have to say on the subject!
Would very much like to hear what you have to say on the subject!
Please Log in or Create an account to join the conversation.
- Robjb84
-
- Offline
- User
-
Registered
- Posts: 182
- Thanks: 1
Re: how to: repaint your bike
05 Sep 2006 19:31
Wow, amazing results man. So how much to get my spare 440 tank looking all nice and shiny? ")
Please Log in or Create an account to join the conversation.
Moderators: Street Fighter LTD