
Custom Paint Tutorial My Way
- ramtough_63
-
 Topic Author
- Offline
- User
-

Registered
- Posts: 2559
- Thanks: 132
Custom Paint Tutorial My Way
30 Mar 2013 19:30
Everyone has their own version of the propper way to paint I am not here to give anyone the text book version I am sure the library has that it is my attempt to show a start to finish
paint job on some usable but crappy parts only problem is some have already been started on
but will do my best to see if I have any before pictures
there are several techniques on prepping which is 99.9% of the battle when painting. A
perfect prep job requires only medocre painting skills to provide a very acceptable
finished product.
I will start this tutorial on my version of prep and what I have learned from the people who are way better thanI .
1st of all you need to assess the object being painted overall looks and condition, has it been painted before? if so when and by whom? Most of us wont have that info unless we bought the stuff from a buddy or we are doing a repaint after having it repainted years ago
so not knowing what our current paint is acrylic enamel mid 80's acrylic eurathane 80/s 90's 2000's base coat clear coat etc.. have the emblems been shaved? if so lightweight bondo? Fiberglass? Welded?
a number of things will affect how you proceed, Alot of people think that stripping to bare metal is the easiest way to and for them it is. assesing your own skills may be a bigger indicator than proffesional preference.
When doing a paint job yourself and the emblems have been shaved do you have the skills to remove the bodywork and reapply as well or better? Are you grindng out and welding up?
the old emblem mounts?
Since I dont have a welder and prefer emblems I use tanks with the emblem bosses in place for
tanks that have been shaved i assess the quality of the previous repair is it cracking? does it look like a balloon does the tank weigh 40lbs? if the tank has light cracking I
will grind out previous work and redo with a 1st coat of kittyhair (fiberglass
reinfoiced body filler) after grind all the previous filler out then a coat of
lightweight bodyfiller.
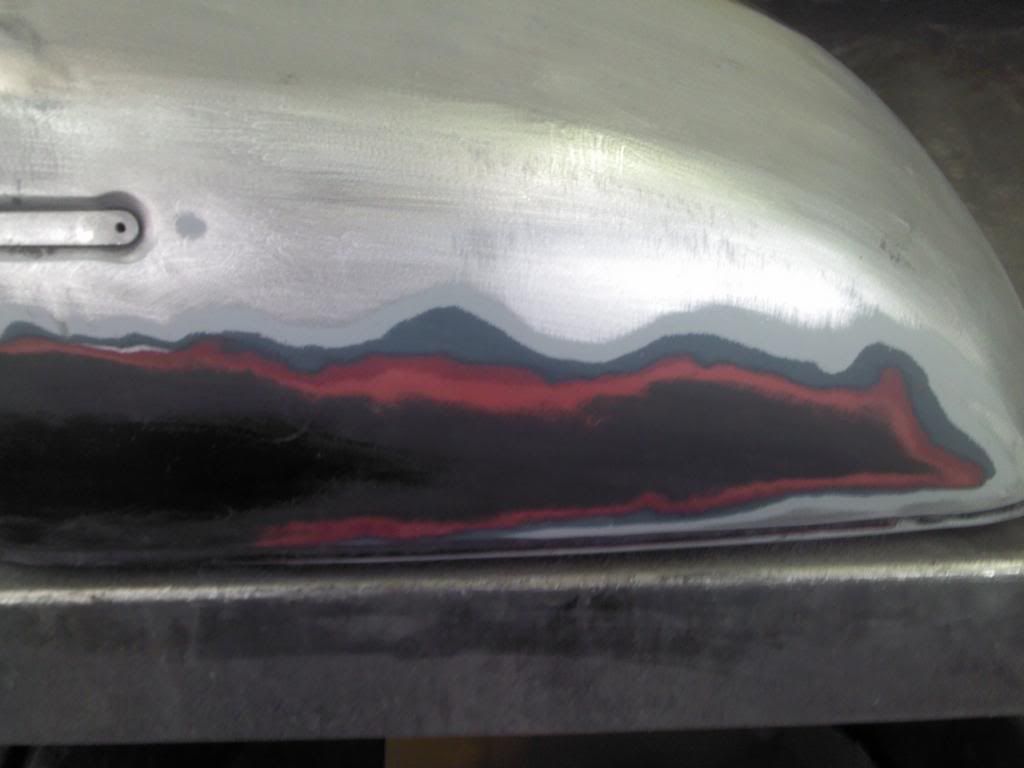
so after assessing our current tank has previously been painted emblems shaved.
Noticeable cracking in the paint around the filler neck looks as if its down through
the primer. Tank has been painted black and the previous body work is flawless with the exception of cracked paint aroung the filler neck.
C:\fakepath\100_7462.JPG
I hit it with some 320 grit on a electric DA you could hand Sand with a block if
you choose I just wrap a piece of sandpaper evenly around a paint stick and sand
in an x patern you could use 180 or 220 I spent a few minute sanding just to the
break through evenly around the tank. So far I Know I have eurathane sealer under the
paint and lightweight filler over the emblem shaving not noticeable in above photo
was taken ealier in assesssment.
side covers have been painted with a cheaper brand of single stage paint and heve little or no damage except the someone else attempted to sand and repaint before I got them
I will block the faces with 220 to get an even and level surface.
tailfin is a horror story
C:\fakepath\100_7470.JPG
There are several coate of good paint bad paint and every combination there of
it would be wise to find a better tail to use but this is a tutorial on pianting a KZ
as we have found it.
remember I am self taught so those of you that do this for a living I welcome
tricks of the trade
b]Total Assesment so far tank does not need ground down all over I will adress the
cracks in the paint around the filler neck spray with a primer surfacer and block back down multiple times until the tank is uniform then hit with a sealer and paint[/b]
Side Cover will be blocked and feathered until its ready for a primer surfacer
Tail fin will be sanded with multiple grit papers until we reach a reasonable
smoothness and levelness to create a paintable surface.
I will be working on several projects at 1 time so this tutorial may have some dead spots
Tools required for intial prep
Wax grease remover (dawn dish soap)
several Paint sticks (a dozen for 2.00 some paint stores)
Sand paper 80-120-220-320-400 grit wet or dry or just dry for now
Sandpaper can be expensive its kind of like the right tool for the right job you can
sand all day with 400 and use 30 sheets or you can sand 20 minutes wit 2 sheets 120
2 eets 220 and 1 sheet of 320
tou will also need
A tank a set of Side covers and a tail section
so if you want to follow allong feel free post your pics and we will work on this together
paint job on some usable but crappy parts only problem is some have already been started on
but will do my best to see if I have any before pictures
there are several techniques on prepping which is 99.9% of the battle when painting. A
perfect prep job requires only medocre painting skills to provide a very acceptable
finished product.
I will start this tutorial on my version of prep and what I have learned from the people who are way better thanI .
1st of all you need to assess the object being painted overall looks and condition, has it been painted before? if so when and by whom? Most of us wont have that info unless we bought the stuff from a buddy or we are doing a repaint after having it repainted years ago
so not knowing what our current paint is acrylic enamel mid 80's acrylic eurathane 80/s 90's 2000's base coat clear coat etc.. have the emblems been shaved? if so lightweight bondo? Fiberglass? Welded?
a number of things will affect how you proceed, Alot of people think that stripping to bare metal is the easiest way to and for them it is. assesing your own skills may be a bigger indicator than proffesional preference.
When doing a paint job yourself and the emblems have been shaved do you have the skills to remove the bodywork and reapply as well or better? Are you grindng out and welding up?
the old emblem mounts?
Since I dont have a welder and prefer emblems I use tanks with the emblem bosses in place for
tanks that have been shaved i assess the quality of the previous repair is it cracking? does it look like a balloon does the tank weigh 40lbs? if the tank has light cracking I
will grind out previous work and redo with a 1st coat of kittyhair (fiberglass
reinfoiced body filler) after grind all the previous filler out then a coat of
lightweight bodyfiller.
so after assessing our current tank has previously been painted emblems shaved.
Noticeable cracking in the paint around the filler neck looks as if its down through
the primer. Tank has been painted black and the previous body work is flawless with the exception of cracked paint aroung the filler neck.
C:\fakepath\100_7462.JPG
I hit it with some 320 grit on a electric DA you could hand Sand with a block if
you choose I just wrap a piece of sandpaper evenly around a paint stick and sand
in an x patern you could use 180 or 220 I spent a few minute sanding just to the
break through evenly around the tank. So far I Know I have eurathane sealer under the
paint and lightweight filler over the emblem shaving not noticeable in above photo
was taken ealier in assesssment.
Attachment 100_7475.JPG not found
side covers have been painted with a cheaper brand of single stage paint and heve little or no damage except the someone else attempted to sand and repaint before I got them
I will block the faces with 220 to get an even and level surface.
tailfin is a horror story
Attachment 100_7469.JPG not found
C:\fakepath\100_7470.JPG
There are several coate of good paint bad paint and every combination there of
it would be wise to find a better tail to use but this is a tutorial on pianting a KZ
as we have found it.
remember I am self taught so those of you that do this for a living I welcome
tricks of the trade
b]Total Assesment so far tank does not need ground down all over I will adress the
cracks in the paint around the filler neck spray with a primer surfacer and block back down multiple times until the tank is uniform then hit with a sealer and paint[/b]
Side Cover will be blocked and feathered until its ready for a primer surfacer
Tail fin will be sanded with multiple grit papers until we reach a reasonable
smoothness and levelness to create a paintable surface.
I will be working on several projects at 1 time so this tutorial may have some dead spots
Tools required for intial prep
Wax grease remover (dawn dish soap)
several Paint sticks (a dozen for 2.00 some paint stores)
Sand paper 80-120-220-320-400 grit wet or dry or just dry for now
Sandpaper can be expensive its kind of like the right tool for the right job you can
sand all day with 400 and use 30 sheets or you can sand 20 minutes wit 2 sheets 120
2 eets 220 and 1 sheet of 320
tou will also need
A tank a set of Side covers and a tail section
so if you want to follow allong feel free post your pics and we will work on this together
1978 KZ1000 A2
Thrown Together To Ride Til Winter
Facebook Page
Free Range Custom Art
1982/83 750R/GPZ
1984 Goldwing 1200 Interstate
1982 Yamahopper QT50
Previous
2 79 HD sporty XLH
02 HD FLSTS Heritage
60's HD Hummer
70's Honda 550 Four
70 Yamaha 100
and various enduros dirtbikes minibikes...
Thrown Together To Ride Til Winter
Facebook Page
Free Range Custom Art
1982/83 750R/GPZ
1984 Goldwing 1200 Interstate
1982 Yamahopper QT50
Previous
2 79 HD sporty XLH
02 HD FLSTS Heritage
60's HD Hummer
70's Honda 550 Four
70 Yamaha 100
and various enduros dirtbikes minibikes...
Attachments:
Please Log in or Create an account to join the conversation.
- ramtough_63
-
Topic Author
- Offline
- User
-
Registered
- Posts: 2559
- Thanks: 132
Re: Custom Paint Tutorial My Way
30 Mar 2013 19:36
double post
1978 KZ1000 A2
Thrown Together To Ride Til Winter
Facebook Page
Free Range Custom Art
1982/83 750R/GPZ
1984 Goldwing 1200 Interstate
1982 Yamahopper QT50
Previous
2 79 HD sporty XLH
02 HD FLSTS Heritage
60's HD Hummer
70's Honda 550 Four
70 Yamaha 100
and various enduros dirtbikes minibikes...
Thrown Together To Ride Til Winter
Facebook Page
Free Range Custom Art
1982/83 750R/GPZ
1984 Goldwing 1200 Interstate
1982 Yamahopper QT50
Previous
2 79 HD sporty XLH
02 HD FLSTS Heritage
60's HD Hummer
70's Honda 550 Four
70 Yamaha 100
and various enduros dirtbikes minibikes...
Please Log in or Create an account to join the conversation.
- mike0537
-
- Offline
- User
-
Registered
- Posts: 103
- Thanks: 6
Re: Custom Paint Tutorial My Way
30 Mar 2013 19:48
If I could "like" this I would!
I'm just starting the body work on my bike so perfect timing!!!
I'm just starting the body work on my bike so perfect timing!!!
1980 KZ750E
Please Log in or Create an account to join the conversation.
- ramtough_63
-
Topic Author
- Offline
- User
-
Registered
- Posts: 2559
- Thanks: 132
Re: Custom Paint Tutorial My Way
30 Mar 2013 20:04
Thanks mike post pics of your bodywork as we go along we can feed off each others progress
and miod can you chjange this to paint and bodywork and delete the other
and miod can you chjange this to paint and bodywork and delete the other
1978 KZ1000 A2
Thrown Together To Ride Til Winter
Facebook Page
Free Range Custom Art
1982/83 750R/GPZ
1984 Goldwing 1200 Interstate
1982 Yamahopper QT50
Previous
2 79 HD sporty XLH
02 HD FLSTS Heritage
60's HD Hummer
70's Honda 550 Four
70 Yamaha 100
and various enduros dirtbikes minibikes...
Thrown Together To Ride Til Winter
Facebook Page
Free Range Custom Art
1982/83 750R/GPZ
1984 Goldwing 1200 Interstate
1982 Yamahopper QT50
Previous
2 79 HD sporty XLH
02 HD FLSTS Heritage
60's HD Hummer
70's Honda 550 Four
70 Yamaha 100
and various enduros dirtbikes minibikes...
Please Log in or Create an account to join the conversation.
- bluej58
-
- Offline
- Sustaining Member
-

Registered
- The chrome don't get you home
- Posts: 2481
- Thanks: 511
")
Please Log in or Create an account to join the conversation.
- ramtough_63
-
Topic Author
- Offline
- User
-
Registered
- Posts: 2559
- Thanks: 132
Re: Custom Paint Tutorial My Way
30 Mar 2013 22:32
happy to help I know having state of the art equipment makes this job tons easier but its nice to know you can get a real quality job without breaking the bank.
bear in mind when using quality paint and materials you will normally have more invested than
a shop would I will reveal all the costs associated the way I buy materials and the way you may buy them
since I plan on doing several paint jobs this year my supply cost will be higher in initial expense but lower per job. Ie just bought a quality sandpaper 25 sheets 28.00 box of da paper 22.00 for 50 sheets and 25 sheets for 25.00 you can get buy with only buying what you need you may pay 5 dollars for 4 or 5 sheets more than you may need but you will need a variety of grits before you are done
You have to remember most shops are full of supplies wax grease remover different sand papers thinners cleaners primers fillers etc... so if you are doing it your self it should be for bragging rights or that you have to fund it as you do it
guy originally offered to paint my tank for 300.00 i had well over that in materials for just a tank was able to have enough leftovers to make my paint job
I also reccommend polyestor filler 12.00 if your not gonna need any filler such as bondo
1978 KZ1000 A2
Thrown Together To Ride Til Winter
Facebook Page
Free Range Custom Art
1982/83 750R/GPZ
1984 Goldwing 1200 Interstate
1982 Yamahopper QT50
Previous
2 79 HD sporty XLH
02 HD FLSTS Heritage
60's HD Hummer
70's Honda 550 Four
70 Yamaha 100
and various enduros dirtbikes minibikes...
Thrown Together To Ride Til Winter
Facebook Page
Free Range Custom Art
1982/83 750R/GPZ
1984 Goldwing 1200 Interstate
1982 Yamahopper QT50
Previous
2 79 HD sporty XLH
02 HD FLSTS Heritage
60's HD Hummer
70's Honda 550 Four
70 Yamaha 100
and various enduros dirtbikes minibikes...
Please Log in or Create an account to join the conversation.
- ramtough_63
-
Topic Author
- Offline
- User
-
Registered
- Posts: 2559
- Thanks: 132
Re: Custom Paint Tutorial My Way
31 Mar 2013 16:30
so you have grabbed some sand paper and found out, or you know the old paint job is enamel or worse rattle can. it will we in your best interest to take it down below the old paint bare in mind using a paint stick and blocking will eventually reveal high sposts (bare metel) low spots
(every thing else is eithe primer or metal and you still have paint color)
not to worry I will post a few pics this week of the variations
once you are sanded down to the high and low areas its time for a surfacer
(every thing else is eithe primer or metal and you still have paint color)
not to worry I will post a few pics this week of the variations
once you are sanded down to the high and low areas its time for a surfacer
1978 KZ1000 A2
Thrown Together To Ride Til Winter
Facebook Page
Free Range Custom Art
1982/83 750R/GPZ
1984 Goldwing 1200 Interstate
1982 Yamahopper QT50
Previous
2 79 HD sporty XLH
02 HD FLSTS Heritage
60's HD Hummer
70's Honda 550 Four
70 Yamaha 100
and various enduros dirtbikes minibikes...
Thrown Together To Ride Til Winter
Facebook Page
Free Range Custom Art
1982/83 750R/GPZ
1984 Goldwing 1200 Interstate
1982 Yamahopper QT50
Previous
2 79 HD sporty XLH
02 HD FLSTS Heritage
60's HD Hummer
70's Honda 550 Four
70 Yamaha 100
and various enduros dirtbikes minibikes...
Please Log in or Create an account to join the conversation.
- mike0537
-
- Offline
- User
-
Registered
- Posts: 103
- Thanks: 6
Re: Custom Paint Tutorial My Way
05 Apr 2013 03:41
Here are a couple pics.
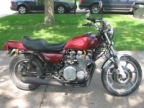
This is the tank. Appears to have been originally blue. Then someone painted it red. Then seems to have 2 different layers of black. I sanded it using an electric sander with 80 grit. I also used and die grinder with a wire wheel for some spots. The sander left deeper swirl marks in it. I think they will fill just fine with a couple layers of primer.
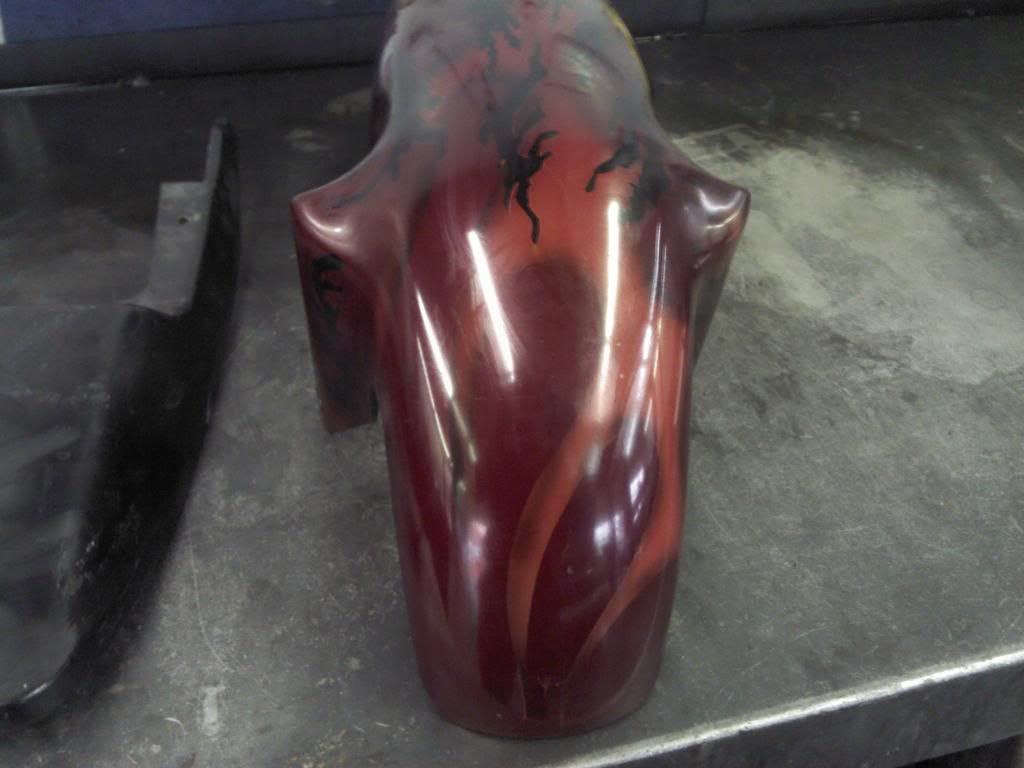
This is the front fender I have modified slightly. It is from a 1997 GSXR750. Someone spent some money on an ugly paint job! Paint doesn't want to come off. Best luck has been in a media cabinet but that is slow going at best. I'm a little scared on all the plastics. I don't want to disfigure them or scar them at all. I have also tried acetone, dot3 and laquer thinner to no avail.
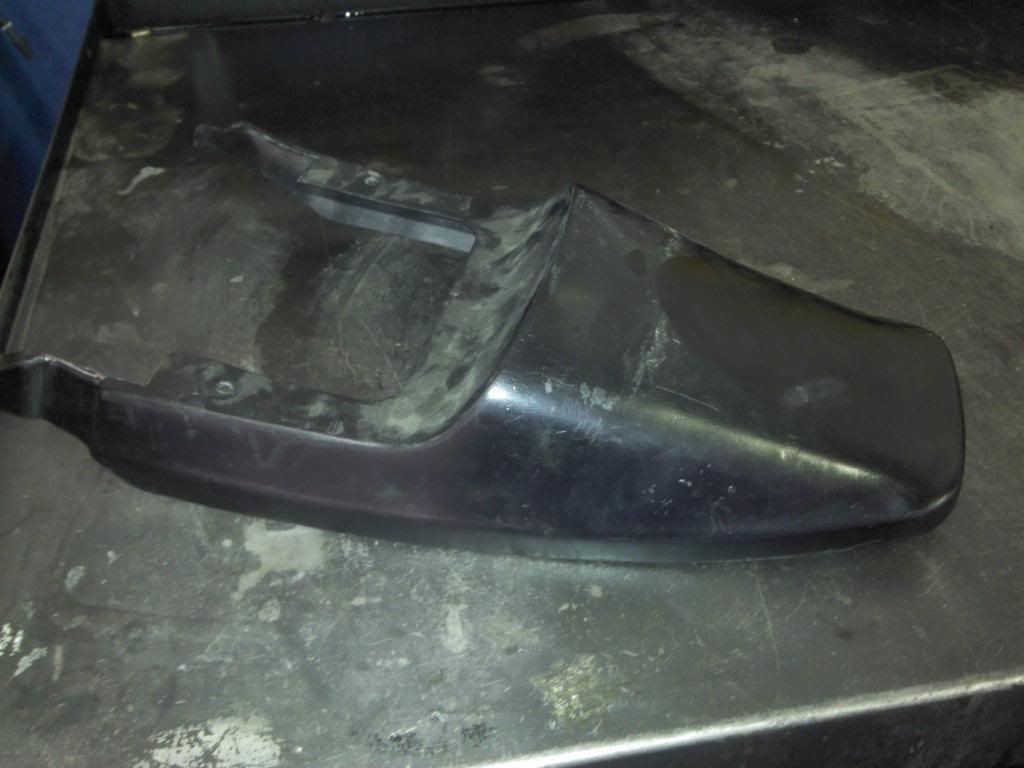
Basically same story on rear fender without the high dollar paint job. It is also slightly modified but came off of a 1978 KZ650.
All pointers are appreciated
This is the tank. Appears to have been originally blue. Then someone painted it red. Then seems to have 2 different layers of black. I sanded it using an electric sander with 80 grit. I also used and die grinder with a wire wheel for some spots. The sander left deeper swirl marks in it. I think they will fill just fine with a couple layers of primer.
This is the front fender I have modified slightly. It is from a 1997 GSXR750. Someone spent some money on an ugly paint job! Paint doesn't want to come off. Best luck has been in a media cabinet but that is slow going at best. I'm a little scared on all the plastics. I don't want to disfigure them or scar them at all. I have also tried acetone, dot3 and laquer thinner to no avail.
Basically same story on rear fender without the high dollar paint job. It is also slightly modified but came off of a 1978 KZ650.
All pointers are appreciated
1980 KZ750E
Please Log in or Create an account to join the conversation.
- Hawkeyenfo
-
- Offline
- User
-
Registered
- Posts: 34
- Thanks: 0
Re: Custom Paint Tutorial My Way
09 Apr 2013 21:40
Great thread!!! Looking forward to watching the progress and learning something along the way ")
Fly Navy !!!!!
1997 ATK 605
1990 DR250S - Sold
1983 YZ 250 - Sold
1982 CR 480R
1980 PE 175 - Sold
1978.5 RM 250C2
1977 KZ1000-B1
1977 FXE
2005.5 KTM 950 Adventure
1997 ATK 605
1990 DR250S - Sold
1983 YZ 250 - Sold
1982 CR 480R
1980 PE 175 - Sold
1978.5 RM 250C2
1977 KZ1000-B1
1977 FXE
2005.5 KTM 950 Adventure
Please Log in or Create an account to join the conversation.
- ramtough_63
-
Topic Author
- Offline
- User
-
Registered
- Posts: 2559
- Thanks: 132
Re: Custom Paint Tutorial My Way
09 Apr 2013 23:35
Lookin good so far Mike
Sorry Guys got a real job and just getting acclimated to getting up and having to be somewhere til dark
Stripping the tank is good especially with all the layers of paint I tend to get through a couple block it and use a surfacer but like I said everyone has their way good start
on plastic I 220 wet until i am evenly sanded use a surfacer and 320 then 400 seal and paint
I have tried a few different ways to strip plastic and time and sandpaper have seemed to give me the best results
any current pros want to chime in would love to hear your input
my black tank so for was red, then sanded primed sealed painted blue, sanded primed and black base with clear I dont plan on stripping the entire tank just down to the filler with my interest in keepeing it level feathered and not lumpy when painted
using a cross hatch sanding techniques I have revealed the high and low spots pretty quickly
back in the day the guys would use 2 different color surfacers (primer) now days guide coat elimates the expense
working on Kawimans and my set at the same time so hopefully I can get used to working again so I'm not in so much pain when I get home my foot still isn't a 100% and standing at the parts counter for 10 hours has me thinking asbout some cheese cause I do plenty of whining
1978 KZ1000 A2
Thrown Together To Ride Til Winter
Facebook Page
Free Range Custom Art
1982/83 750R/GPZ
1984 Goldwing 1200 Interstate
1982 Yamahopper QT50
Previous
2 79 HD sporty XLH
02 HD FLSTS Heritage
60's HD Hummer
70's Honda 550 Four
70 Yamaha 100
and various enduros dirtbikes minibikes...
Thrown Together To Ride Til Winter
Facebook Page
Free Range Custom Art
1982/83 750R/GPZ
1984 Goldwing 1200 Interstate
1982 Yamahopper QT50
Previous
2 79 HD sporty XLH
02 HD FLSTS Heritage
60's HD Hummer
70's Honda 550 Four
70 Yamaha 100
and various enduros dirtbikes minibikes...
Please Log in or Create an account to join the conversation.
- mike0537
-
- Offline
- User
-
Registered
- Posts: 103
- Thanks: 6
Re: Custom Paint Tutorial My Way
24 Apr 2013 03:01
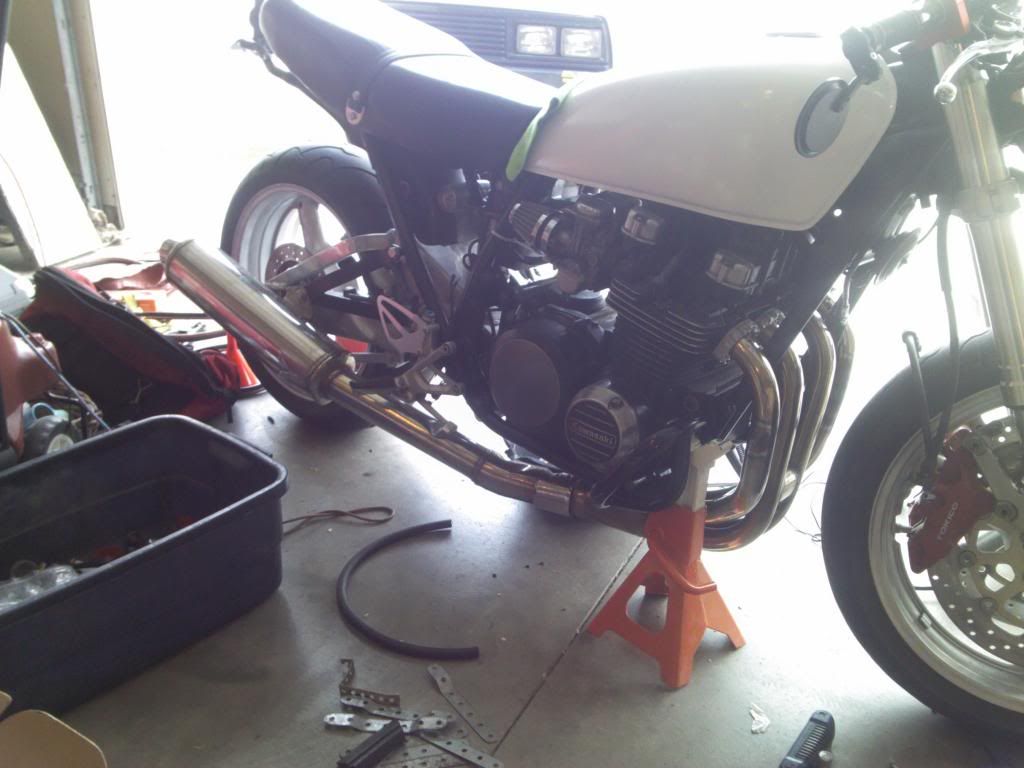
I'll get some better pics soon. I was torn between red or white. I have the intentions to vinyl wrap this bike but needed some good paint to stick it to so I thought I'd spray it to look good! I'm loving the white so far. This is rattle canned 5 layers of white rustoleum auto paint. Then wet sanded 800 and 2000. Then shot 4-5 layers of rustoleum auto clear coat. Paint only could have turned out better if I had used and booth and if it wasn't rattle canned. I'm very pleased though!

1980 KZ750E
Please Log in or Create an account to join the conversation.
Moderators: Street Fighter LTD