
KZ400 fork seals
- Phebus
-
 Topic Author
- Offline
- User
-

Registered
- Posts: 8
- Thanks: 1
KZ400 fork seals
24 Jul 2019 19:54
Hi gang,
I have new fork seals ready to go, but I'm dreading replacing them. I've searched how to do it but I don't think I've heard anything specific to the KZ400 (mines a 1977). Is there any way the forks can stay on? Do I need special tools? (I heard someone describe how to modify a broom handle but I don't know if that pertains to my bike)
Anyway, what I really want to know is, does anyone have good easy to follow step by step instructions or a video on how to do it to my bike?
Thank you
Please Log in or Create an account to join the conversation.
- TexasKZ
-

- Offline
- Platinum Member
-

Registered
- Posts: 8201
- Thanks: 2680
Re: KZ400 fork seals
24 Jul 2019 20:09
Instructions here
www.kzrider.com/modules/ServiceManuals/7...chablefullmanual.pdf
www.kzrider.com/modules/ServiceManuals/7...chablefullmanual.pdf
1982 KZ1000 LTD parts donor
1981 KZ1000 LTD awaiting resurrection
2000 ZRX1100 not ridden enough
www.kzrider.com/11-projects/620336-anoth...uild-thread?start=24
1981 KZ1000 LTD awaiting resurrection
2000 ZRX1100 not ridden enough
www.kzrider.com/11-projects/620336-anoth...uild-thread?start=24
The following user(s) said Thank You: loudhvx, Phebus
Please Log in or Create an account to join the conversation.
- martin_csr
-

- Offline
- User
-
Registered
- Posts: 7994
- Thanks: 1644
Re: KZ400 fork seals
25 Jul 2019 06:11 - 25 Jul 2019 06:29
Doing the fork seals involves a series of steps, some hard, some easy. You almost have to remove the forks from the motorcycle. I wouldn't do them in situ. You'll need to support the front of the motorcycle to remove the front wheel. I made a simple engine block stand >> two 2x4 scrap pieces of wood sandwiched together & attached to a 2x6 base. pretty simple & it works.
After removing the front wheel, put a wedge between the brake pads. I use carpentry shims.
Fork caps. The top fork cap plugs can be stuck. Before removing the front wheel, loosen the top triple tree clamp bolts, then try to loosen the fork plugs. Mine were stuck, so I applied heat with a propane torch >> Do this with the forks off the motorcycle & outside away from the fuel tank. After removing the fork caps, dump out the old fork oil. It will be nasty. I dumped the old goop without dumping the forks springs n stuff, then poured in some solvent, inverted a few times to rinse the innards, then dumped that out & proceeded with the job. It's a messy job, so have plenty of rags at hand. Old newspapers are handy.
Bottom allen bolts. The bottom allen bolts can be stuck. heat can help. Try removing the bottom allen bolts before removing the top fork cap plugs or reinstall the top plugs beforehand. Some guys use an air impact wrench to remove the bottom allen bolts or take the forks somewhere to get it done. If the bottom allen bolts spin without coming out, then you'll have to use a fork removal tool that you fit down into the upper fork tubes & jam against the head of the inner cylinder to keep the cylinder from spinning. A broom handle or rake handle with the end shaved to a point might work, but a metal tool with pointed end will probably bite into the inner cylinder better. The manual has a pic of the fork tool.
Fork seals. I used an off the shelf seal puller from the auto parts store to pull the seals & used a piece of milk jug plastic to protect the lower fork tubes. The fork seals have an inner metal ring incased in the rubber, so when pulling the seals you have to hook the metal ring. Some guys use a big screwdriver, but a seal puller is probably preferable. To drive the new seals I made a seal driver from 1-1/2 pvc pipe & fittings. I used an old good seal as a protector while driving the new. probably not necessary, but it's what I did. lubricate w fork oil beforehand. Your seals are smaller & I don't know if my homemade seal driver will work with yours (the KZ650 upper fork tubes are 36mm, while the 400's are probably 33mm).
....
Last edit: 25 Jul 2019 06:29 by martin_csr.
The following user(s) said Thank You: loudhvx, Phebus
Please Log in or Create an account to join the conversation.
- 650ed
-

- Offline
- User
-
Registered
- Posts: 15334
- Thanks: 2831
Re: KZ400 fork seals
25 Jul 2019 07:13
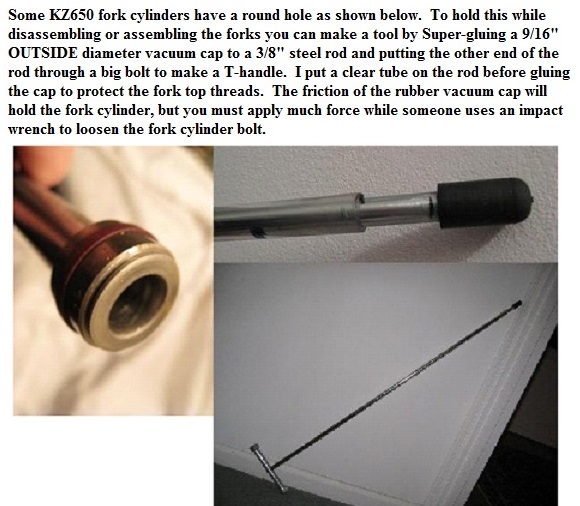
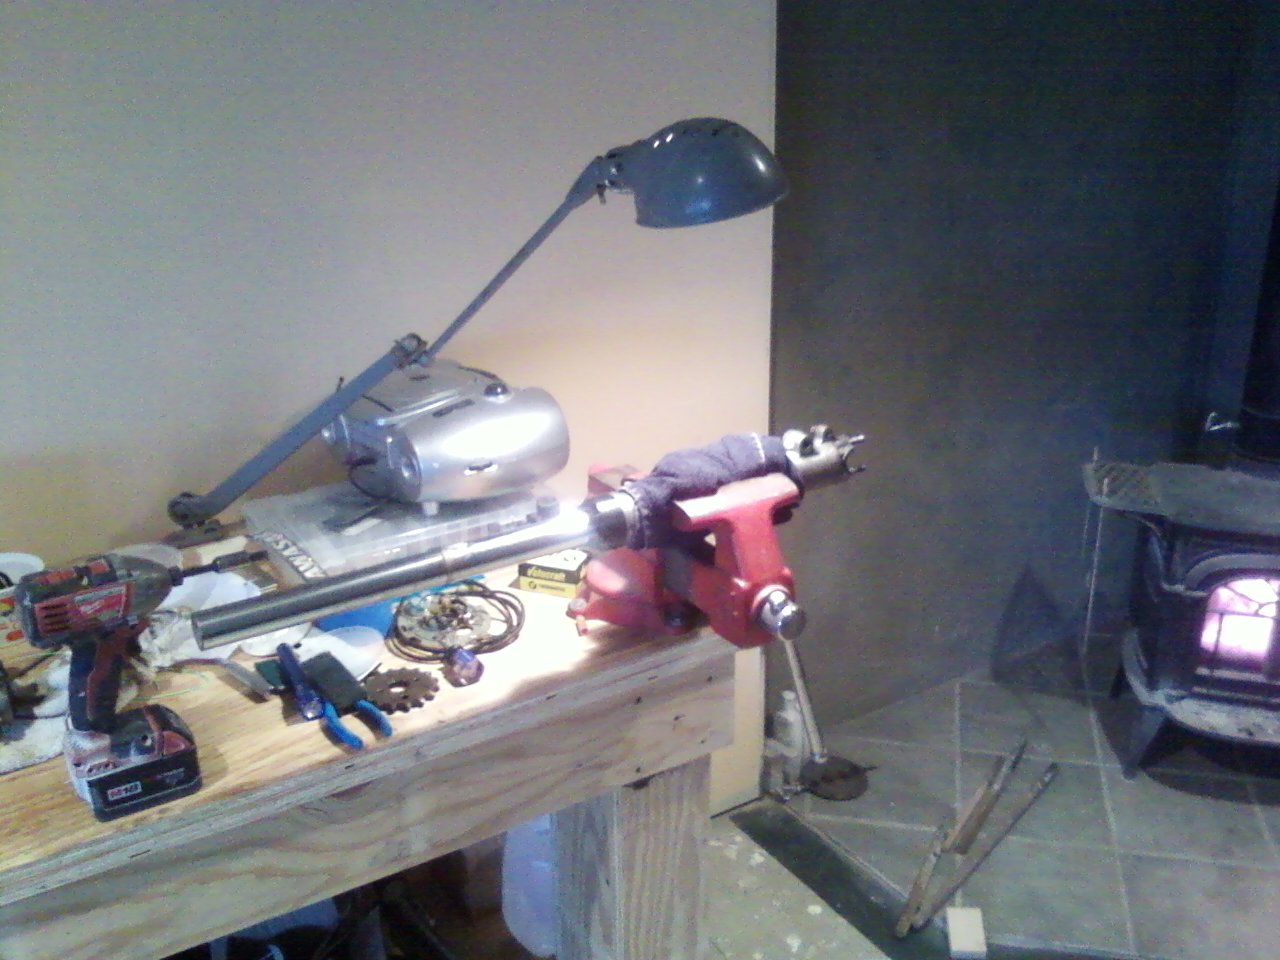
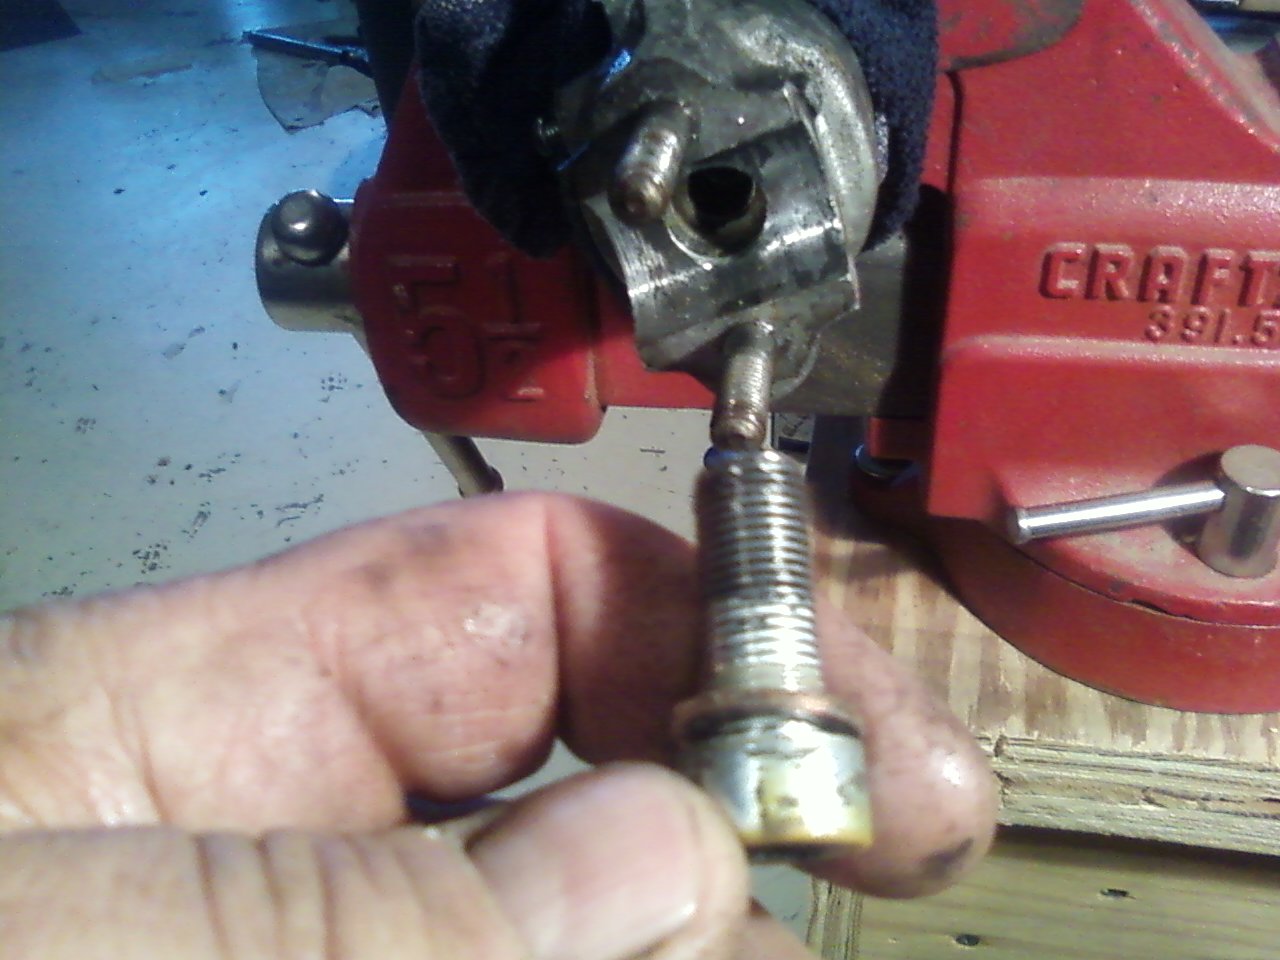
I installed new fork seals on my KZ650 when I installed new fork leg bottoms. It is not too difficult a task, but of course in my case it did involved removing the forks from the bike. BEFORE I removed the forks I removed the bottom fork bolts. I used a home-made tool to prevent them from spinning (see image below). Later I found a company that sells a tool for the task. See
www.racetech.com/page/id/70
. The tool will be needed in order to properly torque the bolts when you replace them. You will need to see if the tops of the fork cylinders are round like those on my KZ650 or if they have a hexagonal depression in them. If they have a hexagonal depression the tools shown won't work, but they will be easier to hold from turning. Ed
1977 KZ650-C1 Original Owner - Stock (with additional invisible FIAMM horn)
The following user(s) said Thank You: loudhvx, Phebus
Please Log in or Create an account to join the conversation.
- Phebus
-
Topic Author
- Offline
- User
-
Registered
- Posts: 8
- Thanks: 1
Re: KZ400 fork seals
13 Aug 2019 18:56
Thanks everyone! Still haven't gotten around to it. I hope it's not too painful.
Please Log in or Create an account to join the conversation.
- martin_csr
-
- Offline
- User
-
Registered
- Posts: 7994
- Thanks: 1644
Re: KZ400 fork seals
14 Aug 2019 05:20 - 14 Aug 2019 05:21
The manual TexasKZ linked should be helpful, especially the exploded fork diagram so you can see what's what. Kawasaki.com & Partzilla also have diagrams. Your forks should have a circlip holding the fork caps in place. When the circlip is removed, a fork cap can go flying, so be prepared. On the other hand, they are often times stuck because of grunge or maybe from hard o-rings, in which case use a spray solvent or something. Heat from a propane torch can help (forks off motorcycle).
....
....
Last edit: 14 Aug 2019 05:21 by martin_csr.
The following user(s) said Thank You: Phebus
Please Log in or Create an account to join the conversation.
- bluej58
-
- Offline
- Sustaining Member
-
Registered
- The chrome don't get you home
- Posts: 2474
- Thanks: 507
Re: KZ400 fork seals
14 Aug 2019 15:09 - 14 Aug 2019 15:11
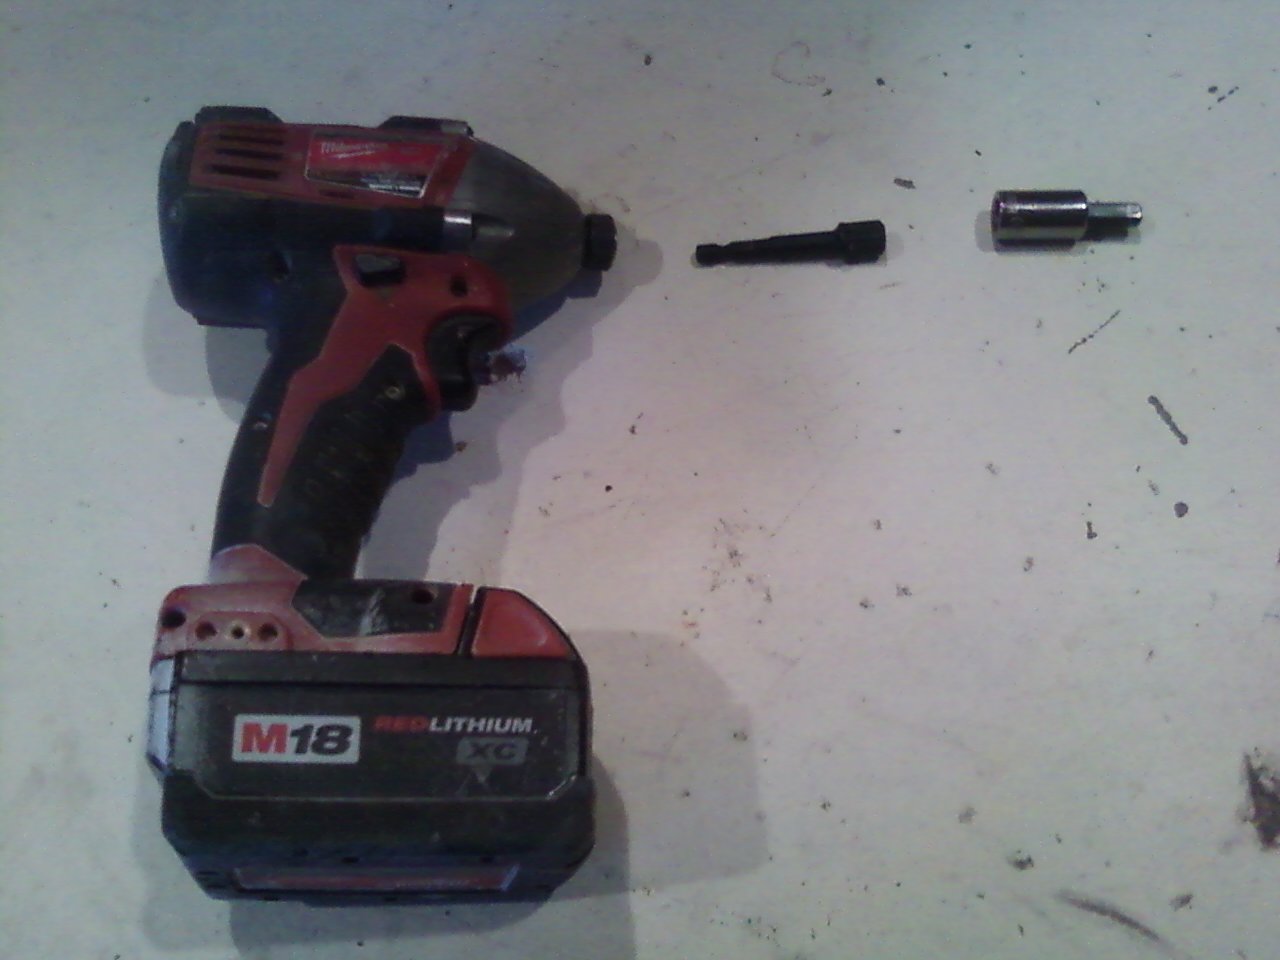
I use heat and a impact driver.
This guy has some good pointers although I thought he should have cleaned the outer tubes first.
This guy has some good pointers although I thought he should have cleaned the outer tubes first.
78 KZ1000 A2A
Last edit: 14 Aug 2019 15:11 by bluej58.
The following user(s) said Thank You: Phebus
Please Log in or Create an account to join the conversation.
- SpecialGreen
-

- Offline
- User
-
Registered
- Posts: 51
- Thanks: 2
Re: KZ400 fork seals
18 Aug 2019 08:13 - 18 Aug 2019 08:19
For removing the bottom bolt, is it: put pressure on springs OR use impact wrench, or do you need both? (and pressure can be any of: do it while the fork is in the bike; or put the cap back on; or use a tool to push on or hold the dampening rod).
I've also seen youtube videos like MC Garage telling people to use blue threadlock when they put that bottom bolt back in, so heating it up (with the oil drained!) is probably a good idea.
I've also seen people use the fork tube like a slide hammer to pull the seal out... I take it that doesn't work with the KZ400, and we need an actual seal puller?
Last edit: 18 Aug 2019 08:19 by SpecialGreen.
Please Log in or Create an account to join the conversation.
- 650ed
-
- Offline
- User
-
Registered
- Posts: 15334
- Thanks: 2831
Re: KZ400 fork seals
18 Aug 2019 15:08
I used a tool to hold the fork cylinder. One big advantage of using a tool is the fact that you can then use the same tool when you reassemble. This is important if you are going to tighten the bolts to the torque spec as specified in the Kawasaki Service Manual. Without a tool to hold the fork cylinder I suspect it is impossible to tighten the bolt to the specified torque. Ed
1977 KZ650-C1 Original Owner - Stock (with additional invisible FIAMM horn)
Please Log in or Create an account to join the conversation.
Moderators: Street Fighter LTD