
Upside-down fork teardown
- testarossa
-
 Topic Author
- Offline
- User
-

Registered
- Attack life, it's only trying to kill you.
- Posts: 3674
- Thanks: 82
Upside-down fork teardown
30 Dec 2009 20:49 - 13 Mar 2010 19:06
After including these two posts in my build thread, I realized that I really had them in the wrong place. Anyway, I decided to move them to the correct category. So here you go.
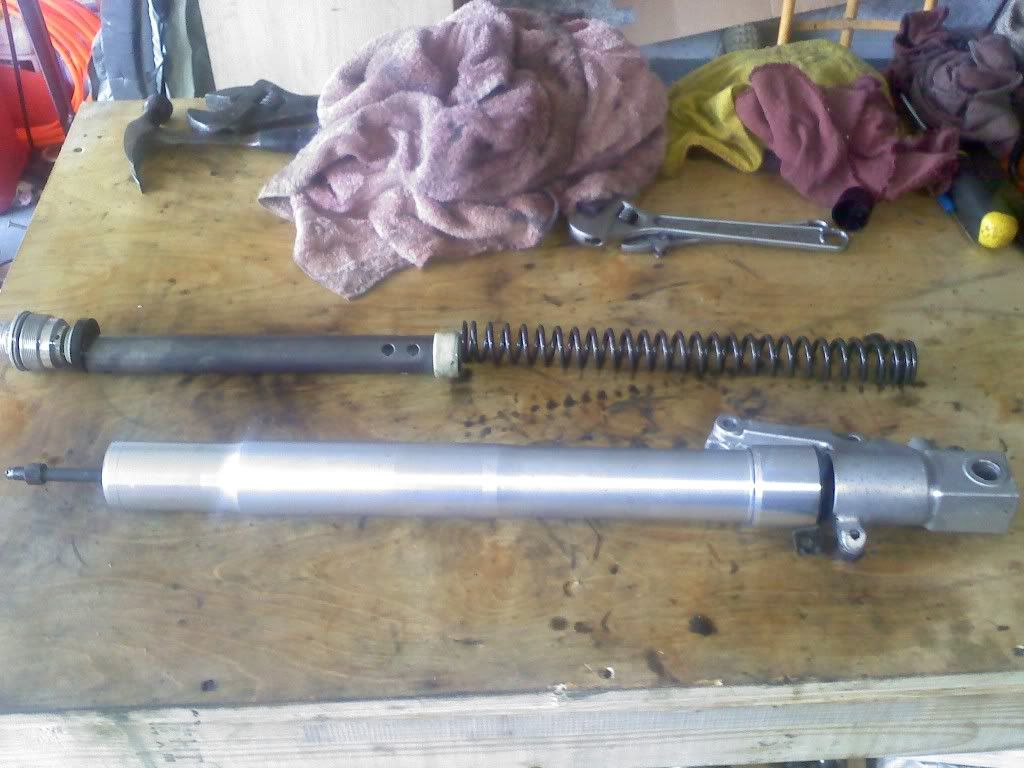
As promised here is the disassembly of one of the fork legs from my donor 1995 GSXR 750. This should be basically the same for any modern upside down fork. Generally speaking these forks need seals and dust covers replaced either from age or from the PO's tendancy to wheelie the bike alot. Unfortunatly, you have to tear the forks completly apart to get the seals out, and this does require special tools - usually.
Let me start with my disclaimer: I post this information for reference only. Please note that these forks have coil springs under compression, which can store a significant amount of potential energy. Anyone who attempts this himself must do so, knowing that a certain risk in inherent in this type of repair. Furthermore, I accept no responsibility for any personal injury or property damage that anyone incurs by attemting this repair themselfs.
I apologise in advance as this post will, necessarily, be lengthy with many pictures. I am assuming that you know how to get the front fork legs out of the triple trees, or you have no business trying this one.
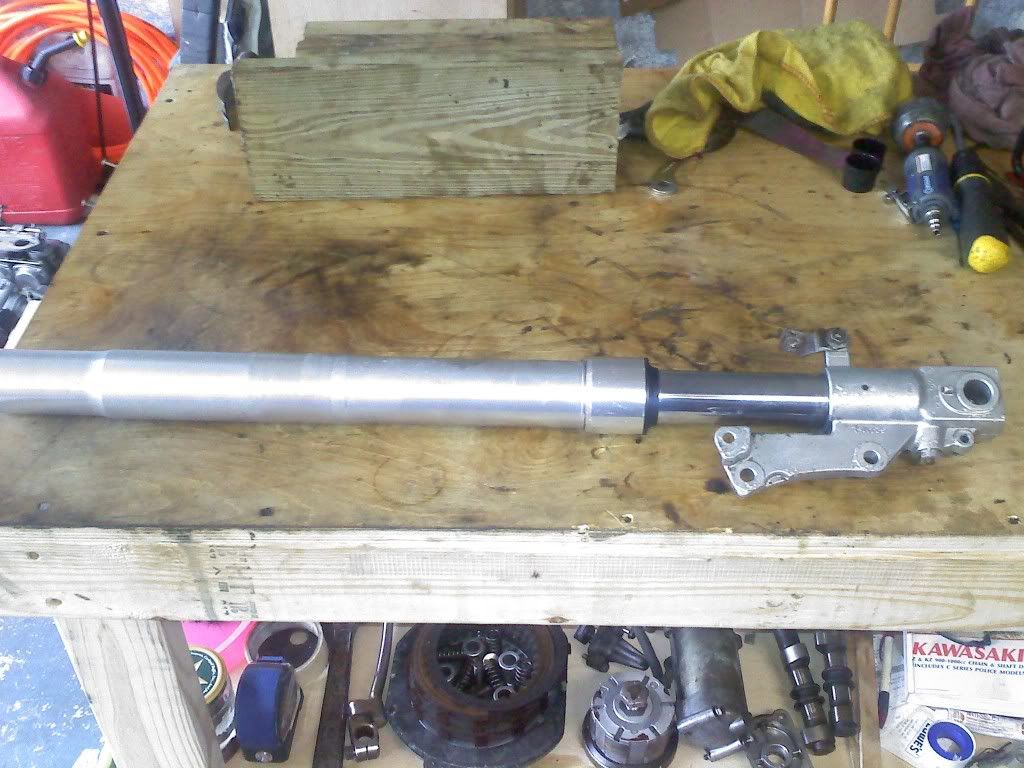
Ok, step 1)
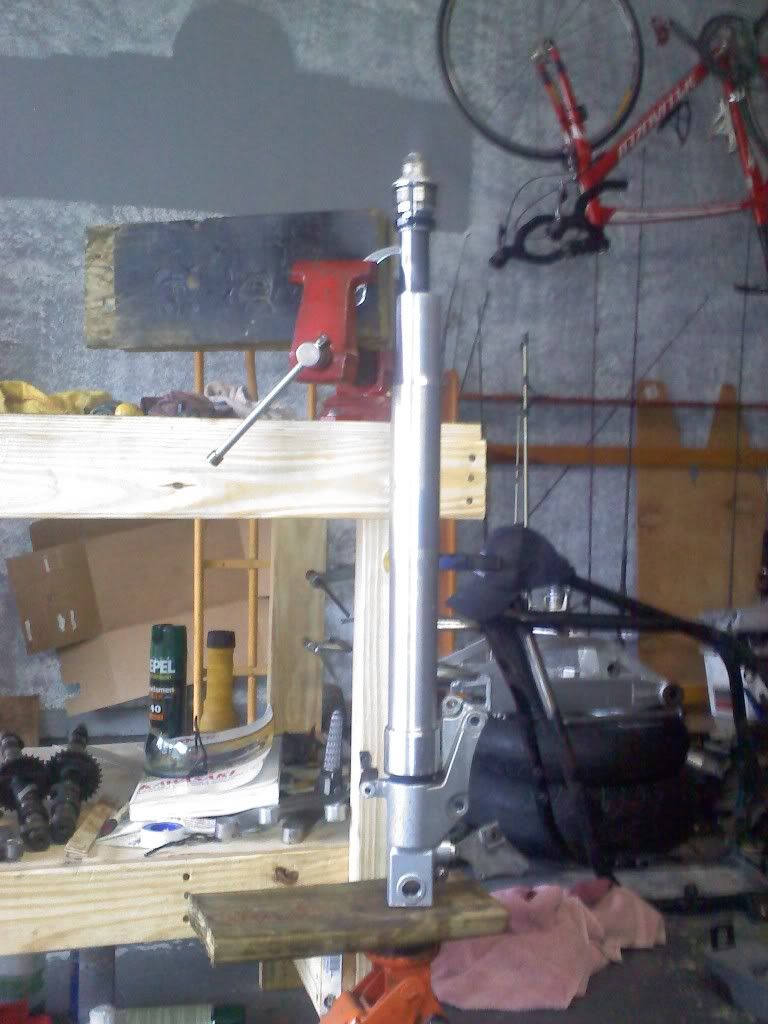
Make sure that you have all of your needed tools at hand, or at least a helper who knows were in the hell all of this stuff will be. I started with three crescent wrenches, (I'll explain why as I go) my trusty workbench with vise, floor jack, various wood scraps to block things up, I used a spanner socket attachment, but you would do well to have a proper fork spring compressor, small flat blade screwdriver, and a scraper.
Step 2)
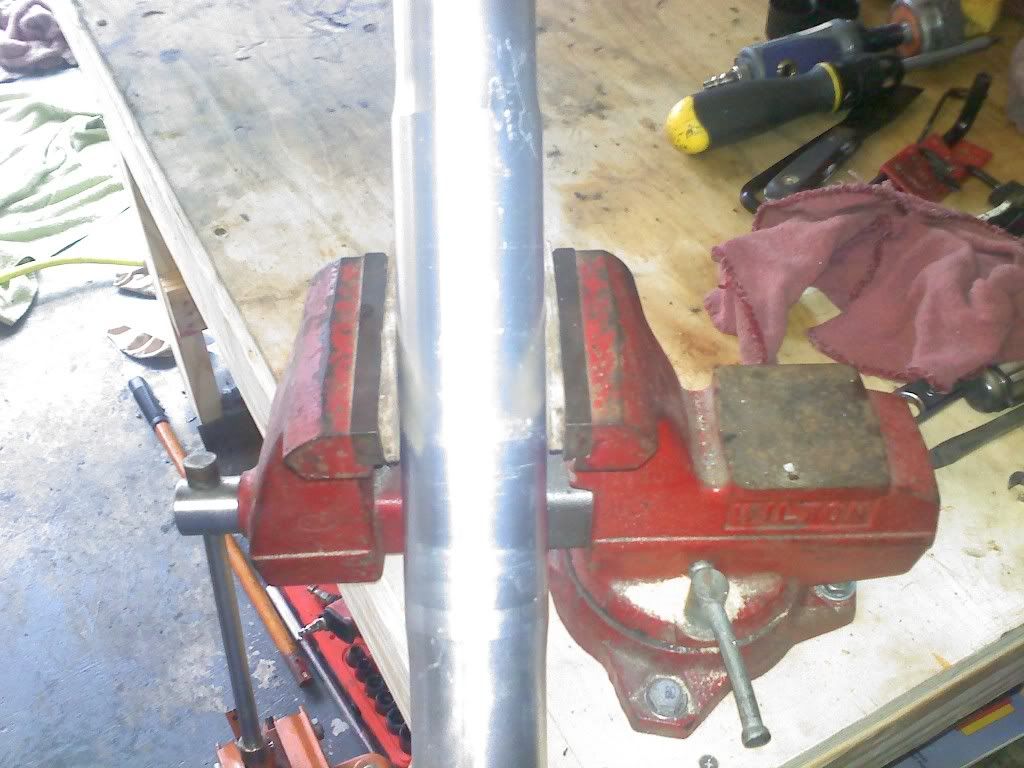
Chuck that fork leg in the vise using some wood scraps to pad the vise jaws, or you'll do some real damage here. Tighten the vise carefully. Not too tight or you'll bend the outer tube. It's a thin wall aluminum tube.
Step 3)
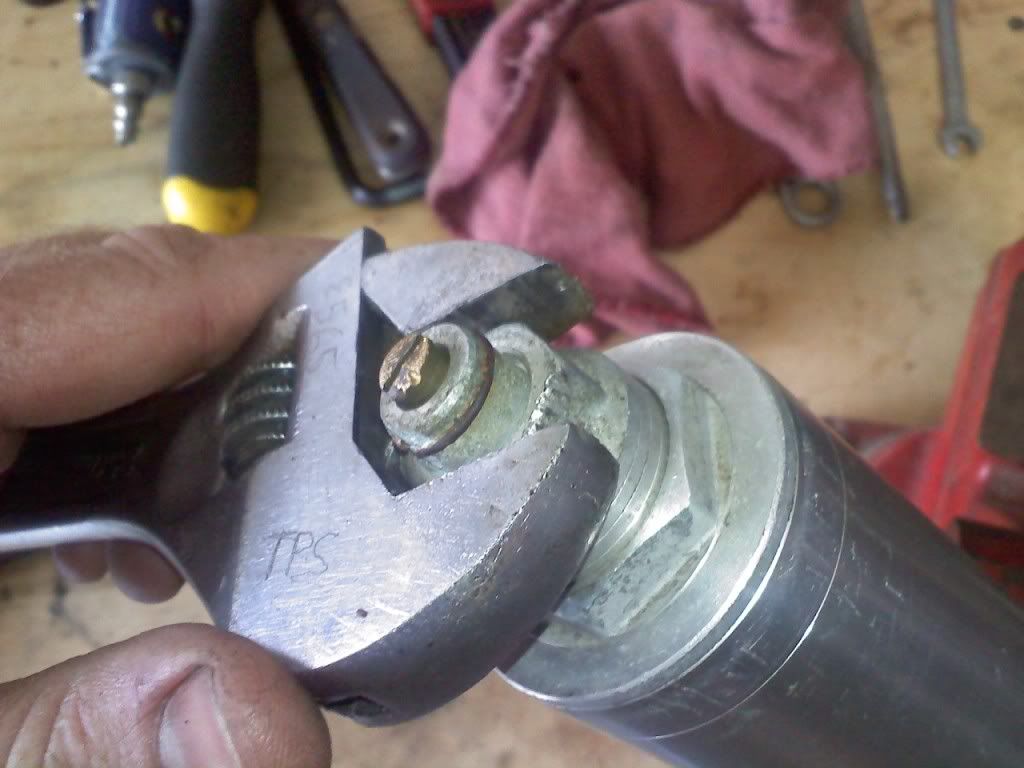
Unscrew the preload adjuster (the smaller hex on top of the fork.) It should stop against a circlip at the top. Don't try to remove it, just back it all the way off. This removes as much tension on the spring as possible.
Step 4)
Now get out your big wrench and undo the big hex which will unscrew the whole top cap from the fork tube.
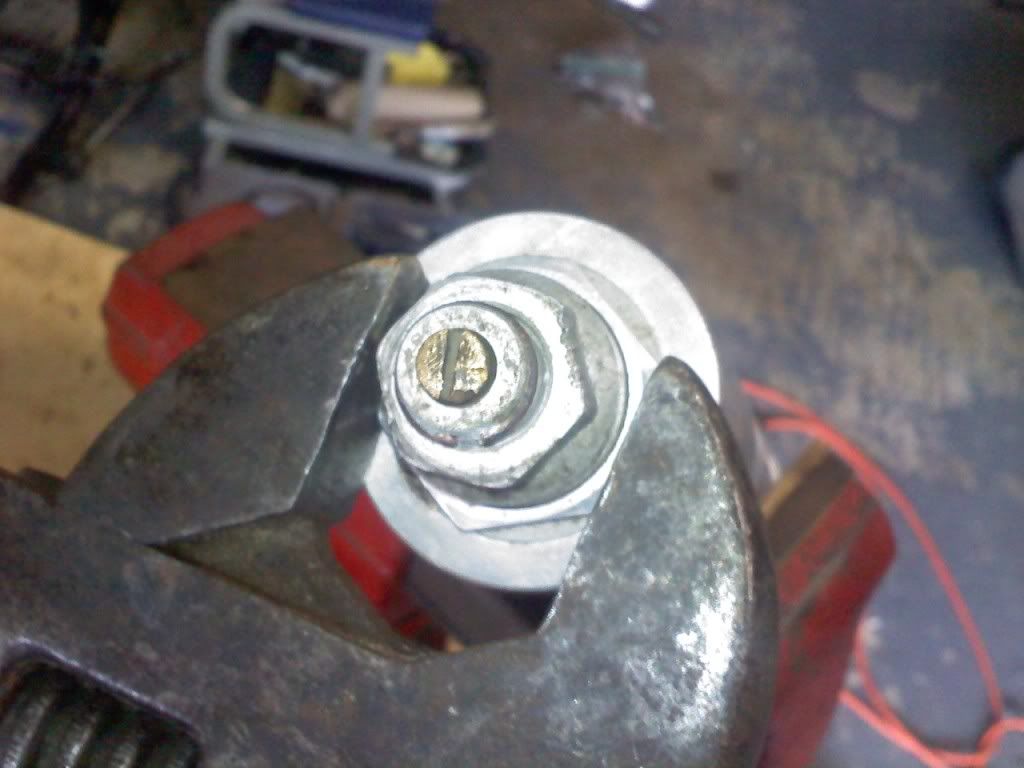
Once it comes loose, you should be able to slide the cap up until you see this:
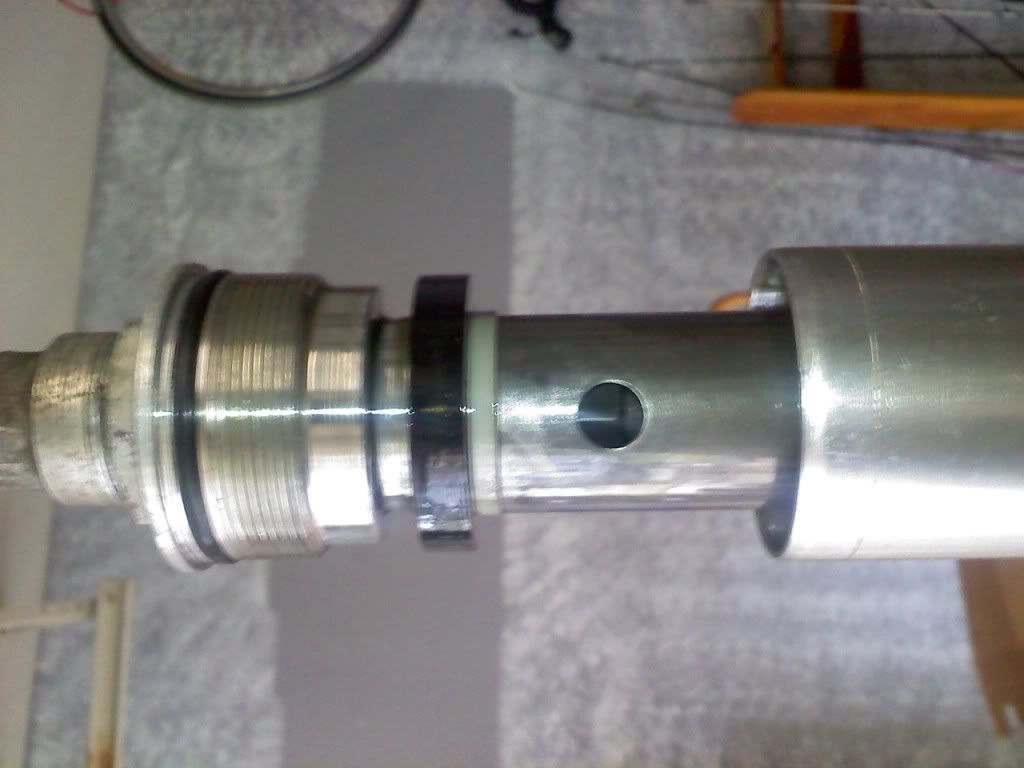
Those holes in the metal sleeve are where you need to hook your sping compressor up to. You should really have a spring compressor here b/c most of the newer forks will have a plasic sleeve here. I am a cheapskate, and I get away with it here since my sleeve is steel.
Step 5)
Compress the spring to expose the jamb-nut pair on the end of the dampner rod. THIS IS THE DANGEROUS PART! I did it by placing my spanner socket hook in the vise. Once hooked through the hole in the steel sleeve, the spring is compressed from the bottom of the fork leg by my floor jack.
Please note that everything needs to be in a straight line, or that spring will shoot your jack out the side. Its best to keep a hand on the tube to keep it all lined up. Now jack that baby up until you see those jamb-nuts.
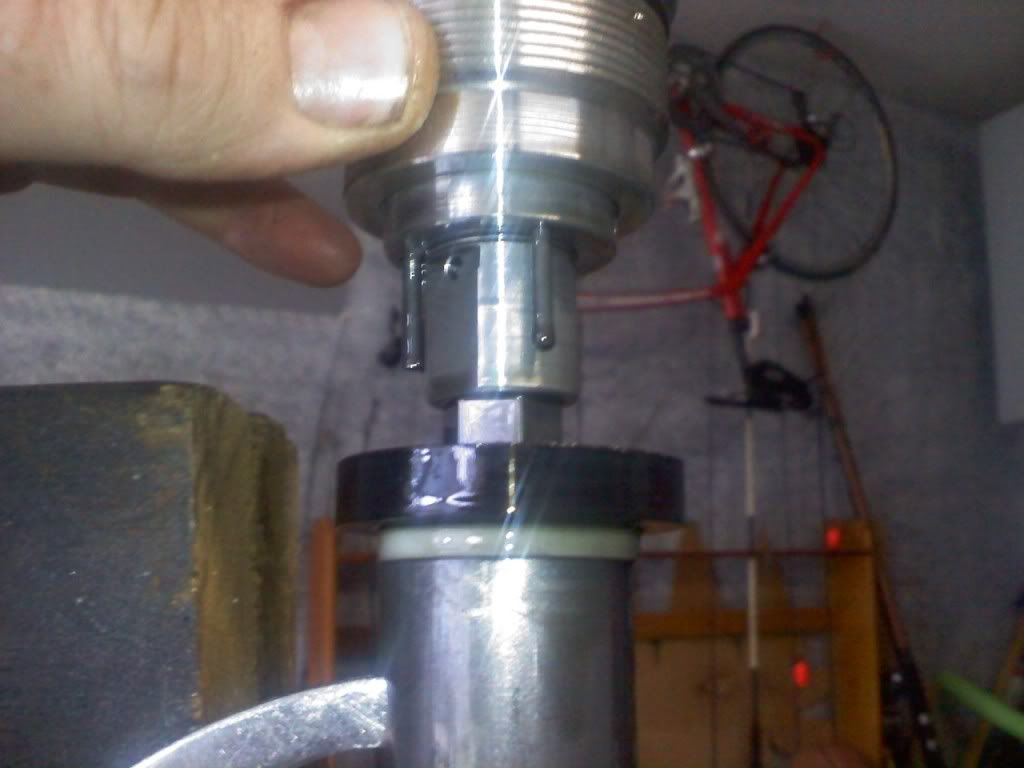
Here's where you really need to have those two crescent wrenches handy. The reason I used crescent wrenches is that I had no prior knowledge of what size the nuts would be. This is no time to be fumbling to find the correct wrench.
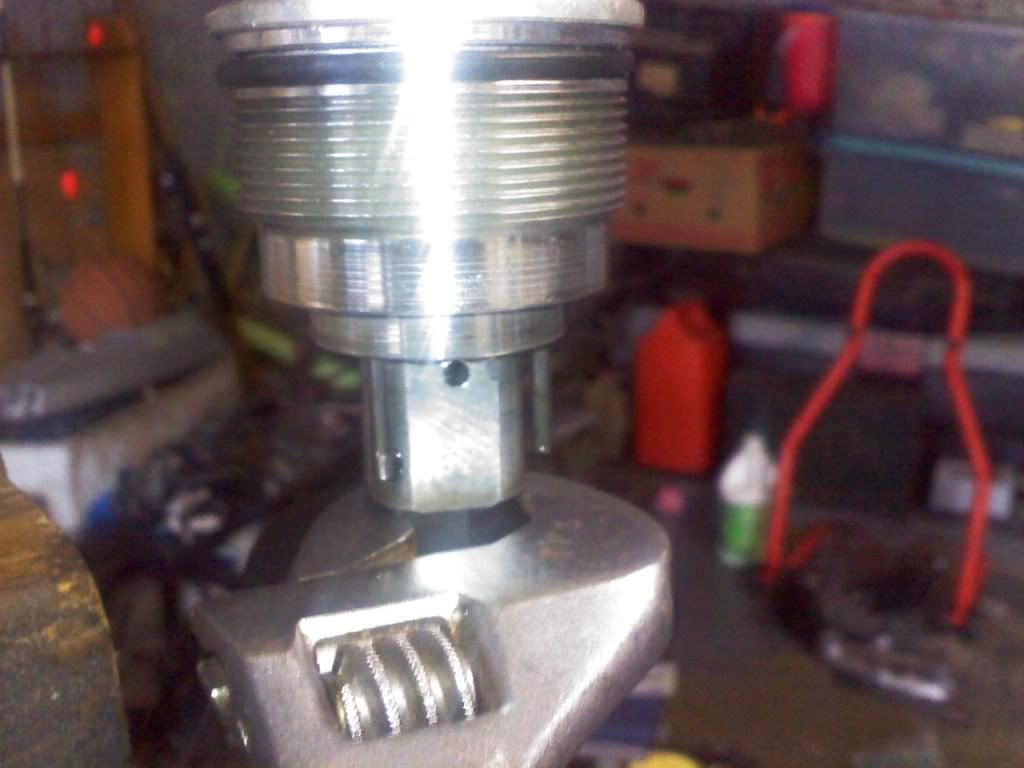
Now undo the jamb-nuts and remove the top cap. This would really be easier with the proper spring compressor, as it should have a clip to hold back the spring while you work.
Next, carefully release the jack or compressor to remove the spring pressure. Now you are safe again.
As promised here is the disassembly of one of the fork legs from my donor 1995 GSXR 750. This should be basically the same for any modern upside down fork. Generally speaking these forks need seals and dust covers replaced either from age or from the PO's tendancy to wheelie the bike alot. Unfortunatly, you have to tear the forks completly apart to get the seals out, and this does require special tools - usually.
Let me start with my disclaimer: I post this information for reference only. Please note that these forks have coil springs under compression, which can store a significant amount of potential energy. Anyone who attempts this himself must do so, knowing that a certain risk in inherent in this type of repair. Furthermore, I accept no responsibility for any personal injury or property damage that anyone incurs by attemting this repair themselfs.
I apologise in advance as this post will, necessarily, be lengthy with many pictures. I am assuming that you know how to get the front fork legs out of the triple trees, or you have no business trying this one.
Ok, step 1)
Make sure that you have all of your needed tools at hand, or at least a helper who knows were in the hell all of this stuff will be. I started with three crescent wrenches, (I'll explain why as I go) my trusty workbench with vise, floor jack, various wood scraps to block things up, I used a spanner socket attachment, but you would do well to have a proper fork spring compressor, small flat blade screwdriver, and a scraper.
Step 2)
Chuck that fork leg in the vise using some wood scraps to pad the vise jaws, or you'll do some real damage here. Tighten the vise carefully. Not too tight or you'll bend the outer tube. It's a thin wall aluminum tube.
Step 3)
Unscrew the preload adjuster (the smaller hex on top of the fork.) It should stop against a circlip at the top. Don't try to remove it, just back it all the way off. This removes as much tension on the spring as possible.
Step 4)
Now get out your big wrench and undo the big hex which will unscrew the whole top cap from the fork tube.
Once it comes loose, you should be able to slide the cap up until you see this:
Those holes in the metal sleeve are where you need to hook your sping compressor up to. You should really have a spring compressor here b/c most of the newer forks will have a plasic sleeve here. I am a cheapskate, and I get away with it here since my sleeve is steel.
Step 5)
Compress the spring to expose the jamb-nut pair on the end of the dampner rod. THIS IS THE DANGEROUS PART! I did it by placing my spanner socket hook in the vise. Once hooked through the hole in the steel sleeve, the spring is compressed from the bottom of the fork leg by my floor jack.
Please note that everything needs to be in a straight line, or that spring will shoot your jack out the side. Its best to keep a hand on the tube to keep it all lined up. Now jack that baby up until you see those jamb-nuts.
Here's where you really need to have those two crescent wrenches handy. The reason I used crescent wrenches is that I had no prior knowledge of what size the nuts would be. This is no time to be fumbling to find the correct wrench.
Now undo the jamb-nuts and remove the top cap. This would really be easier with the proper spring compressor, as it should have a clip to hold back the spring while you work.
Next, carefully release the jack or compressor to remove the spring pressure. Now you are safe again.
1978 KZ1000 A2 Click--->Build Thread
2004 ZX-10R
2007 Harley Sportster 1200
2020 Harley Street Glide Special
Angola, IN
2004 ZX-10R
2007 Harley Sportster 1200
2020 Harley Street Glide Special
Angola, IN
Last edit: 13 Mar 2010 19:06 by testarossa.
Please Log in or Create an account to join the conversation.
- testarossa
-
Topic Author
- Offline
- User
-
Registered
- Attack life, it's only trying to kill you.
- Posts: 3674
- Thanks: 82
Re: Upside-down fork teardown
30 Dec 2009 21:00
Now for part two of fork disassembly:
Step 6)
Dump out as much of that nasty oil as you can. Work the dampner rod back and forth and this will help. You can't get it all here but every bit helps.
Step 7)
Remove the sleeve and the coil spring, being sure to keep this stuff in order. Helps to do one leg at a time, then you have the other as reference. They aren't always exactly the same, but most are.
Step")
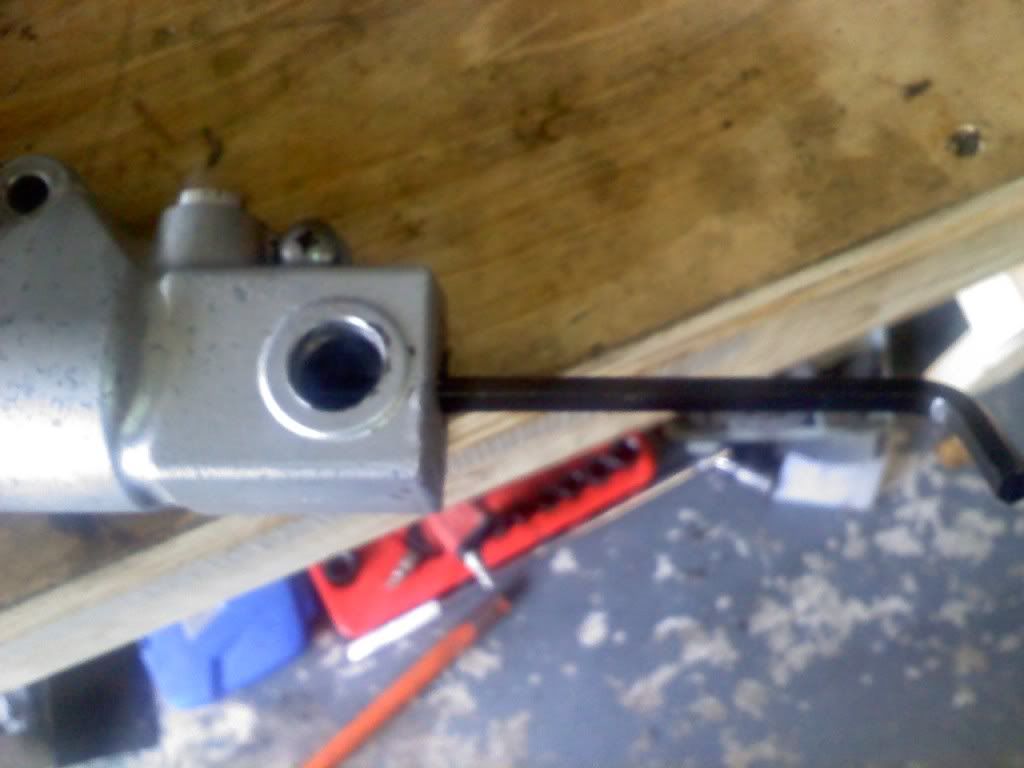
Unscrew the dampner from the bottom of the fork leg. This one took a 8mm allen wrench inserted through the bottom. Sometimes you have to use something to jamb the dampner from the top to get it to unscrew. Sometimes you can use an impact gun to undo the banjo bolt. I got lucky with this one. It was tight, but unscrewed without holding the dampner at all.
Step 9)
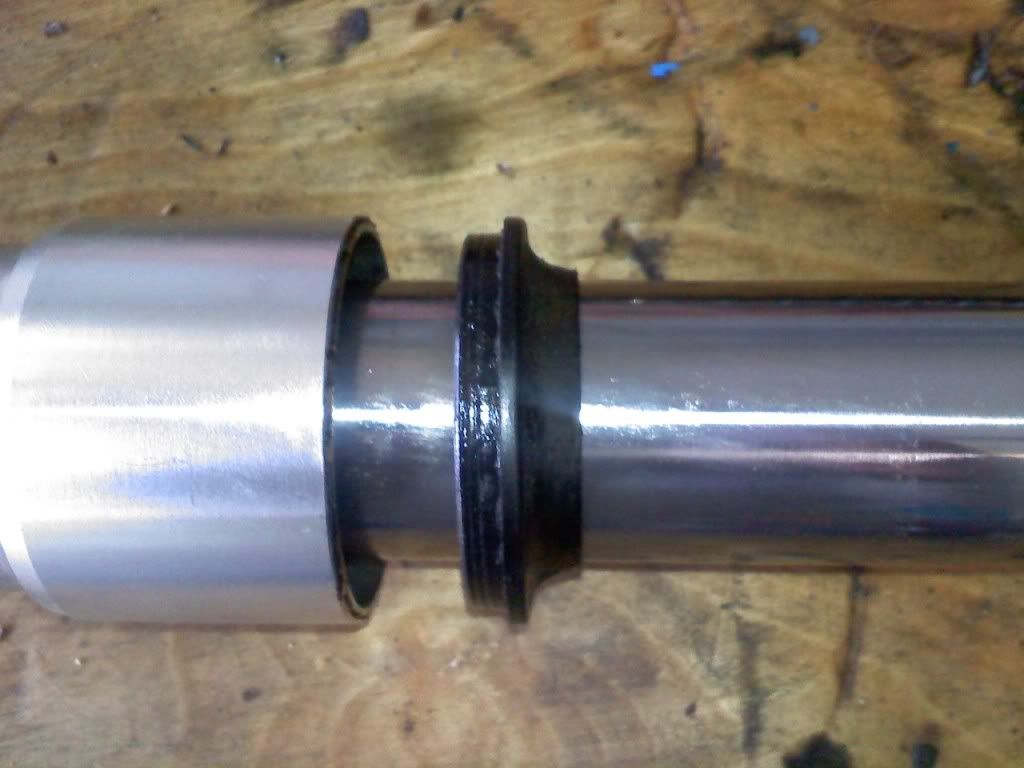
Now pry out the outer dust seal using a scraper with a fairly wide blade. (1") Be careful not to scratch that lower fork leg.
Step 10)
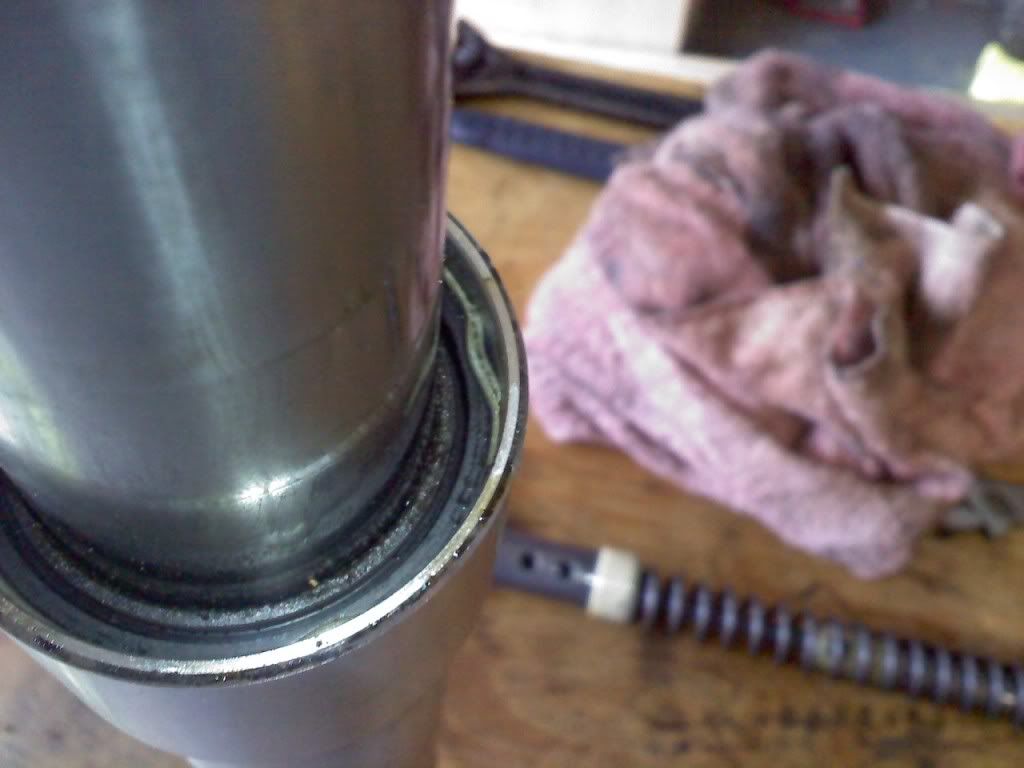
Remove the circlip with the small flat screwdriver.
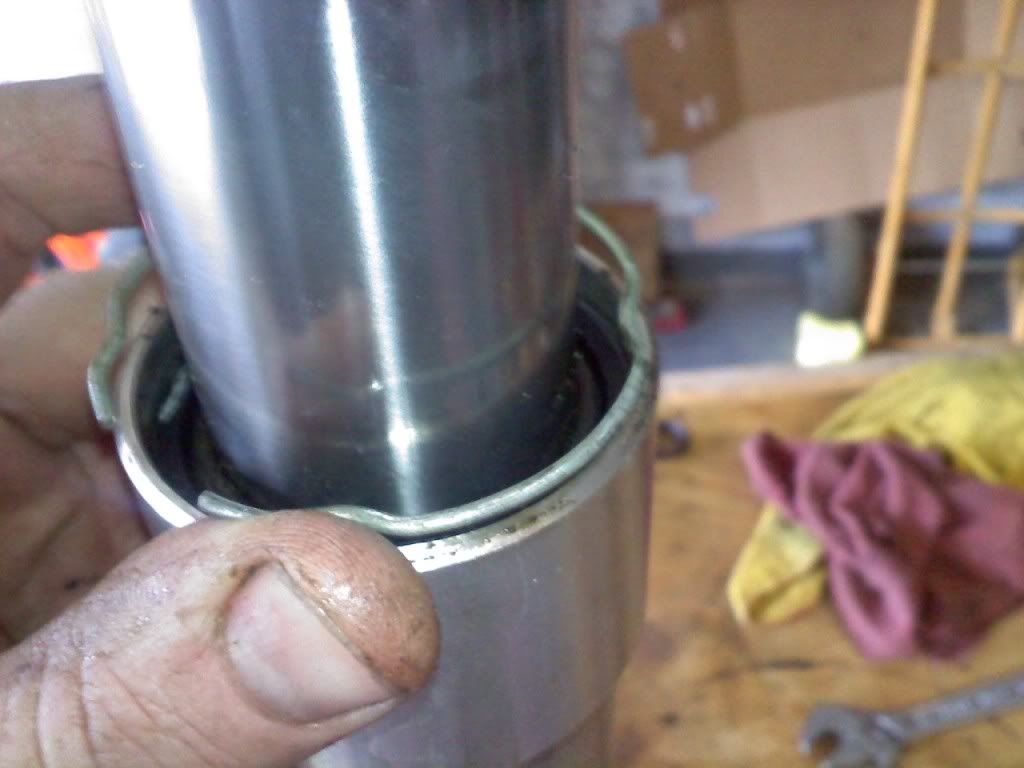
Step 11)
Carefully pull the upper, and lower fork legs apart. This may require some force since the seal is a light press fit in the upper fork leg.
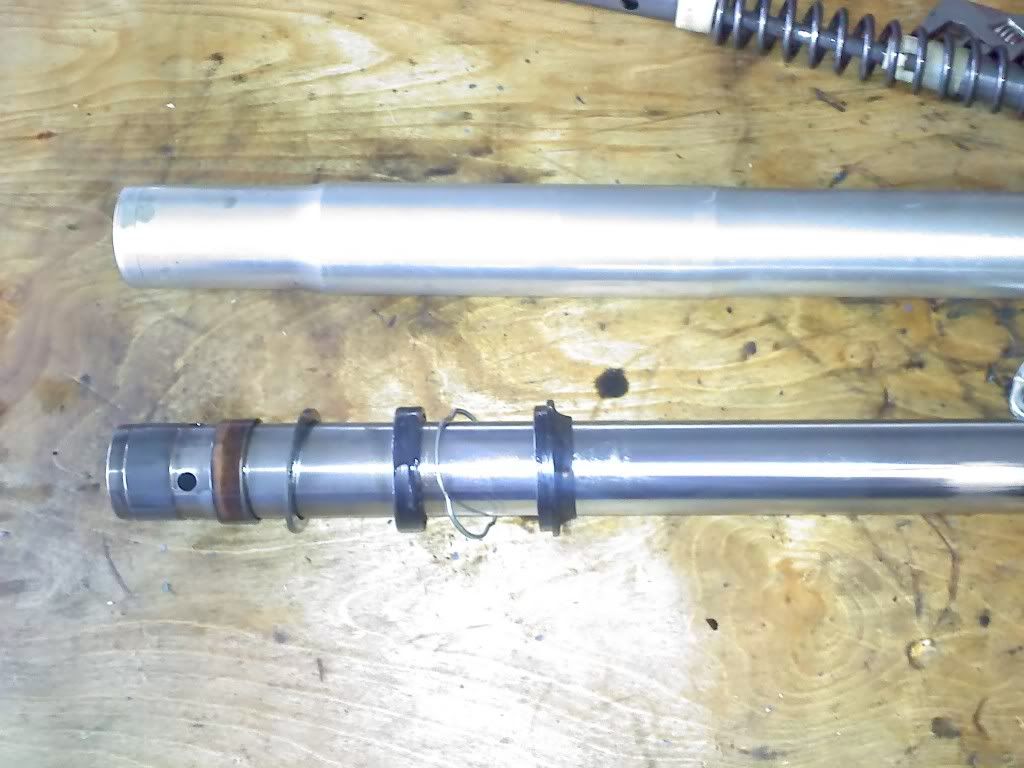
Step 12)
Clean up everything as you are likely quite oily by now.
Step 13)
Have a beer! You are halfway to saving yourself $250!
Step 6)
Dump out as much of that nasty oil as you can. Work the dampner rod back and forth and this will help. You can't get it all here but every bit helps.
Step 7)
Remove the sleeve and the coil spring, being sure to keep this stuff in order. Helps to do one leg at a time, then you have the other as reference. They aren't always exactly the same, but most are.
Step
Unscrew the dampner from the bottom of the fork leg. This one took a 8mm allen wrench inserted through the bottom. Sometimes you have to use something to jamb the dampner from the top to get it to unscrew. Sometimes you can use an impact gun to undo the banjo bolt. I got lucky with this one. It was tight, but unscrewed without holding the dampner at all.
Step 9)
Now pry out the outer dust seal using a scraper with a fairly wide blade. (1") Be careful not to scratch that lower fork leg.
Step 10)
Remove the circlip with the small flat screwdriver.
Step 11)
Carefully pull the upper, and lower fork legs apart. This may require some force since the seal is a light press fit in the upper fork leg.
Step 12)
Clean up everything as you are likely quite oily by now.
Step 13)
Have a beer! You are halfway to saving yourself $250!
1978 KZ1000 A2 Click--->Build Thread
2004 ZX-10R
2007 Harley Sportster 1200
2020 Harley Street Glide Special
Angola, IN
2004 ZX-10R
2007 Harley Sportster 1200
2020 Harley Street Glide Special
Angola, IN
Please Log in or Create an account to join the conversation.
Moderators: Street Fighter LTD