
Ignition timing
- Brandon33W
-
 Topic Author
- Offline
- User
-

Registered
- Posts: 6
- Thanks: 1
Ignition timing
09 Aug 2022 18:50 - 10 Aug 2022 08:08
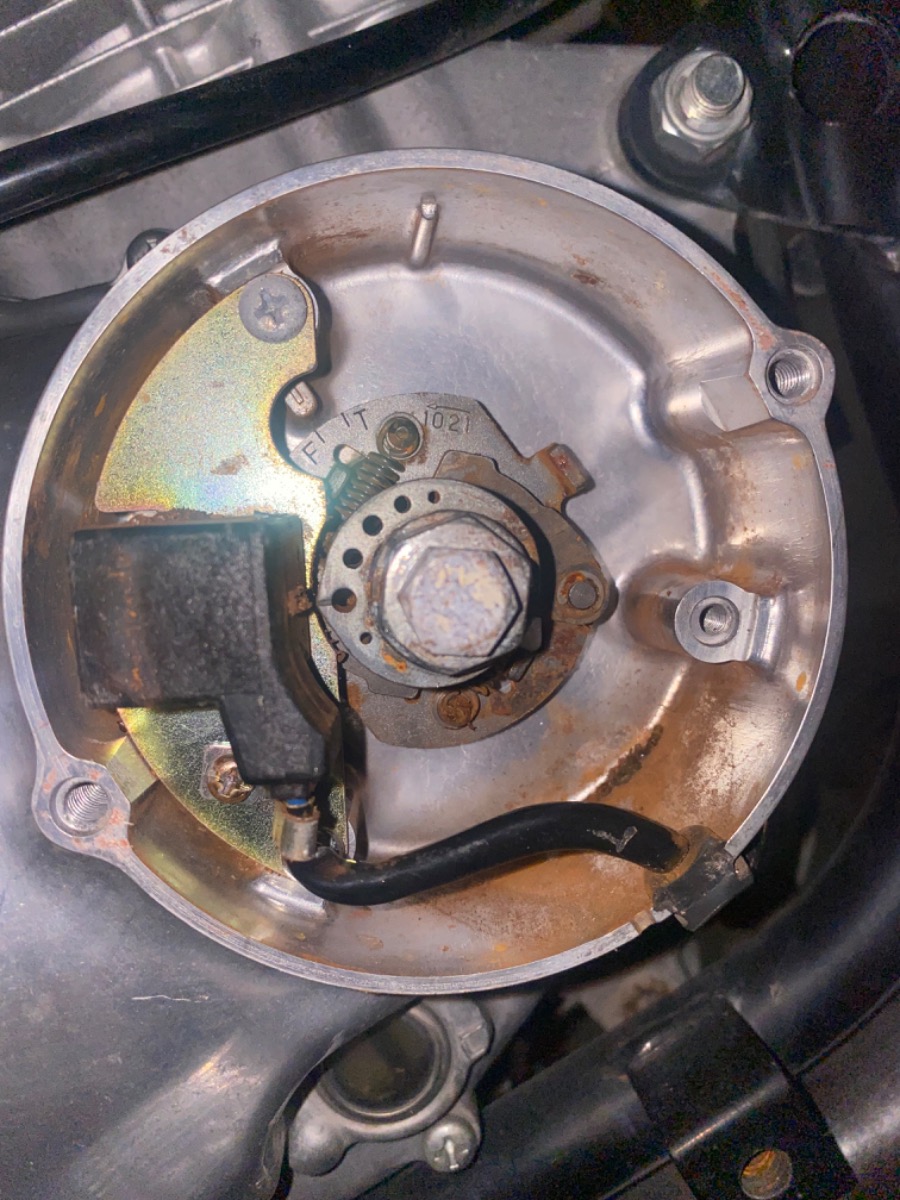
I have 6.8-7 ohms when testing between the spring and a ground from what I understand in the manual I should be around 4 but I do not understand how to make the adjustment because It looks like I have a different style than what the manual shows. Can someone help explain this to me/show a better example of what to do?
Last edit: 10 Aug 2022 08:08 by Street Fighter LTD.
Please Log in or Create an account to join the conversation.
- hardrockminer
-

- Offline
- Sustaining Member
-

Registered
- Posts: 3112
- Thanks: 1229
Re: Ignition timing
09 Aug 2022 19:27
What bike are you asking about? If you want to measure coil impedance you should measure at the coil. Primary should be measured between the two electrical wires on the end of the coil. Secondary should be measured between to two plug wires.
I have several restored bikes along with a 2006 Goldwing with a sidecar.
Please Log in or Create an account to join the conversation.
- Brandon33W
-
Topic Author
- Offline
- User
-
Registered
- Posts: 6
- Thanks: 1
Please Log in or Create an account to join the conversation.
- Scirocco
-

- Offline
- Premium Member
-

Registered
- Never change a running system
- Posts: 4397
- Thanks: 2260
Re: Ignition timing
10 Aug 2022 01:07
The ignition advancer need some lube!
My 1975 Z 1 B 900 Project
www.kzrider.com/forum/11-projects/605133...ears-deep-sleep-mode
www.kzrider.com/forum/11-projects/605133...ears-deep-sleep-mode
Please Log in or Create an account to join the conversation.
- slmjim+Z1BEBE
-

- Offline
- User
-
Registered
- Enjoy Life! IT HAS AN EXPIRATION DATE!
- Posts: 1408
- Thanks: 899
Re: Ignition timing
10 Aug 2022 06:18
When testing very low component resistance (in this case coil primary) using a common DMM, the resistance of the meter leads must be taken into account. Even the best leads will introduce 1.5 ~ 3 Ohms into the reading.
Before testing the component, set the meter to the lowest resistance scale, then touch the lead probes firmly together. Make sure the probes are clean where they touch. You'll probably see a reading in the 1.5 ~ 3 Ohm range. That's normal, and can be considered "native resistance" of the meter leads that must be subtracted from the tested component reading.
So, for example, lets assume you see native resistance of 2 Ohms when the probes are touched together. If the component you're testing has a true resistance of 4 ohms, the meter will read 6 Ohms. We already know the native resistance of the meter leads is 2 Ohms in this example, so subtract the previously-determined native resistance of the leads (2 Ohms) from the meter reading. The result is the component having a true resistance of 4 Ohms.
Good Ridin'
slmjim & Z1BEBE
A biker looks at your engine and chrome.
A Rider looks at your odometer and tags.
1973 ('72 builds) Z1 x2
1974 Z1-A x2
1975 Z1-B x2
1993 CB 750 Nighthawk x2
2009 ST1300A
www.kawasaki-z-classik.com
A Forum tightly focused on all things Z1 and Z2.
A Rider looks at your odometer and tags.
1973 ('72 builds) Z1 x2
1974 Z1-A x2
1975 Z1-B x2
1993 CB 750 Nighthawk x2
2009 ST1300A
www.kawasaki-z-classik.com
A Forum tightly focused on all things Z1 and Z2.
The following user(s) said Thank You: Wookie58
Please Log in or Create an account to join the conversation.
- Wookie58
-

- Offline
- Moderator
-

Registered
- Posts: 5978
- Thanks: 3755
Re: Ignition timing
10 Aug 2022 06:30 - 10 Aug 2022 07:13Those internal resistance readings look a little excessive to me but I won't argue to point as it differs from meter to meter. Most decent meters have the functionality to calibrate (either automatically or with a push of a re-set button.) this is why when you first put the leads together the reading fluctuates before settling at zero. There should be no need to add supplementary calculations to the measurements you take.When testing very low component resistance (in this case coil primary) using a common DMM, the resistance of the meter leads must be taken into account. Even the best leads will introduce 1.5 ~ 3 Ohms into the reading.
Before testing the component, set the meter to the lowest resistance scale, then touch the lead probes firmly together. Make sure the probes are clean where they touch. You'll probably see a reading in the 1.5 ~ 3 Ohm range. That's normal, and can be considered "native resistance" of the meter leads that must be subtracted from the tested component reading.
So, for example, lets assume you see native resistance of 2 Ohms when the probes are touched together. If the component you're testing has a true resistance of 4 ohms, the meter will read 6 Ohms. We already know the native resistance of the meter leads is 2 Ohms in this example, so subtract the previously-determined native resistance of the leads (2 Ohms) from the meter reading. The result is the component having a true resistance of 4 Ohms.
Good Ridin'
slmjim & Z1BEBE
If the meter leads had a resistance this high you would have to manually alter all readings you take as this resistance would also impact voltage and current readings ?
PS: when you zero the meter prior to testing if the meter has manually selected scales you should select the "highest" not the "lowest" to zero the meter
1982 KZ1000 Ltd
www.kzrider.com/forum/11-projects/617631...-82-begins?start=192
kzrider.com/filebase-alias?view=download...d-fault-diagnosis&ca
www.kzrider.com/forum/11-projects/617631...-82-begins?start=192
kzrider.com/filebase-alias?view=download...d-fault-diagnosis&ca
Last edit: 10 Aug 2022 07:13 by Wookie58.
Please Log in or Create an account to join the conversation.
- martin_csr
-

- Offline
- User
-
Registered
- Posts: 7994
- Thanks: 1644
Re: Ignition timing
11 Aug 2022 05:43 - 11 Aug 2022 07:12
Your motorcycle has electronic ignition. A 1980 440 should have had points ignition. you didn't say what model year.
KZ400.com has a Kawasaki manual >> electronic ignition would be covered in the 1981 supplement.
As mentioned by scirocco, the timing advancer needs to be lubricated. The manual has specifics. But remove it so that you can clean, lube & inspect. Separate the rotor from the body & fill the groove w grease. After lubricating, reassemble & operate the advancer by hand >> turn & release the rotor >> it should snap back. Use a torque wrench on the advancer bolt & do not over-tighten. ps: I wouldn't completely disassemble the thing, just separate the rotor from the body. assuming it operates smoothly after lubing.
Last edit: 11 Aug 2022 07:12 by martin_csr.
Please Log in or Create an account to join the conversation.
Moderators: Street Fighter LTD