
Gauge repair
- Bulletkz
-
 Topic Author
- Offline
- Sustaining Member
-

Registered
- Posts: 125
- Thanks: 18
Gauge repair
01 Jan 2020 13:51
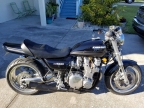
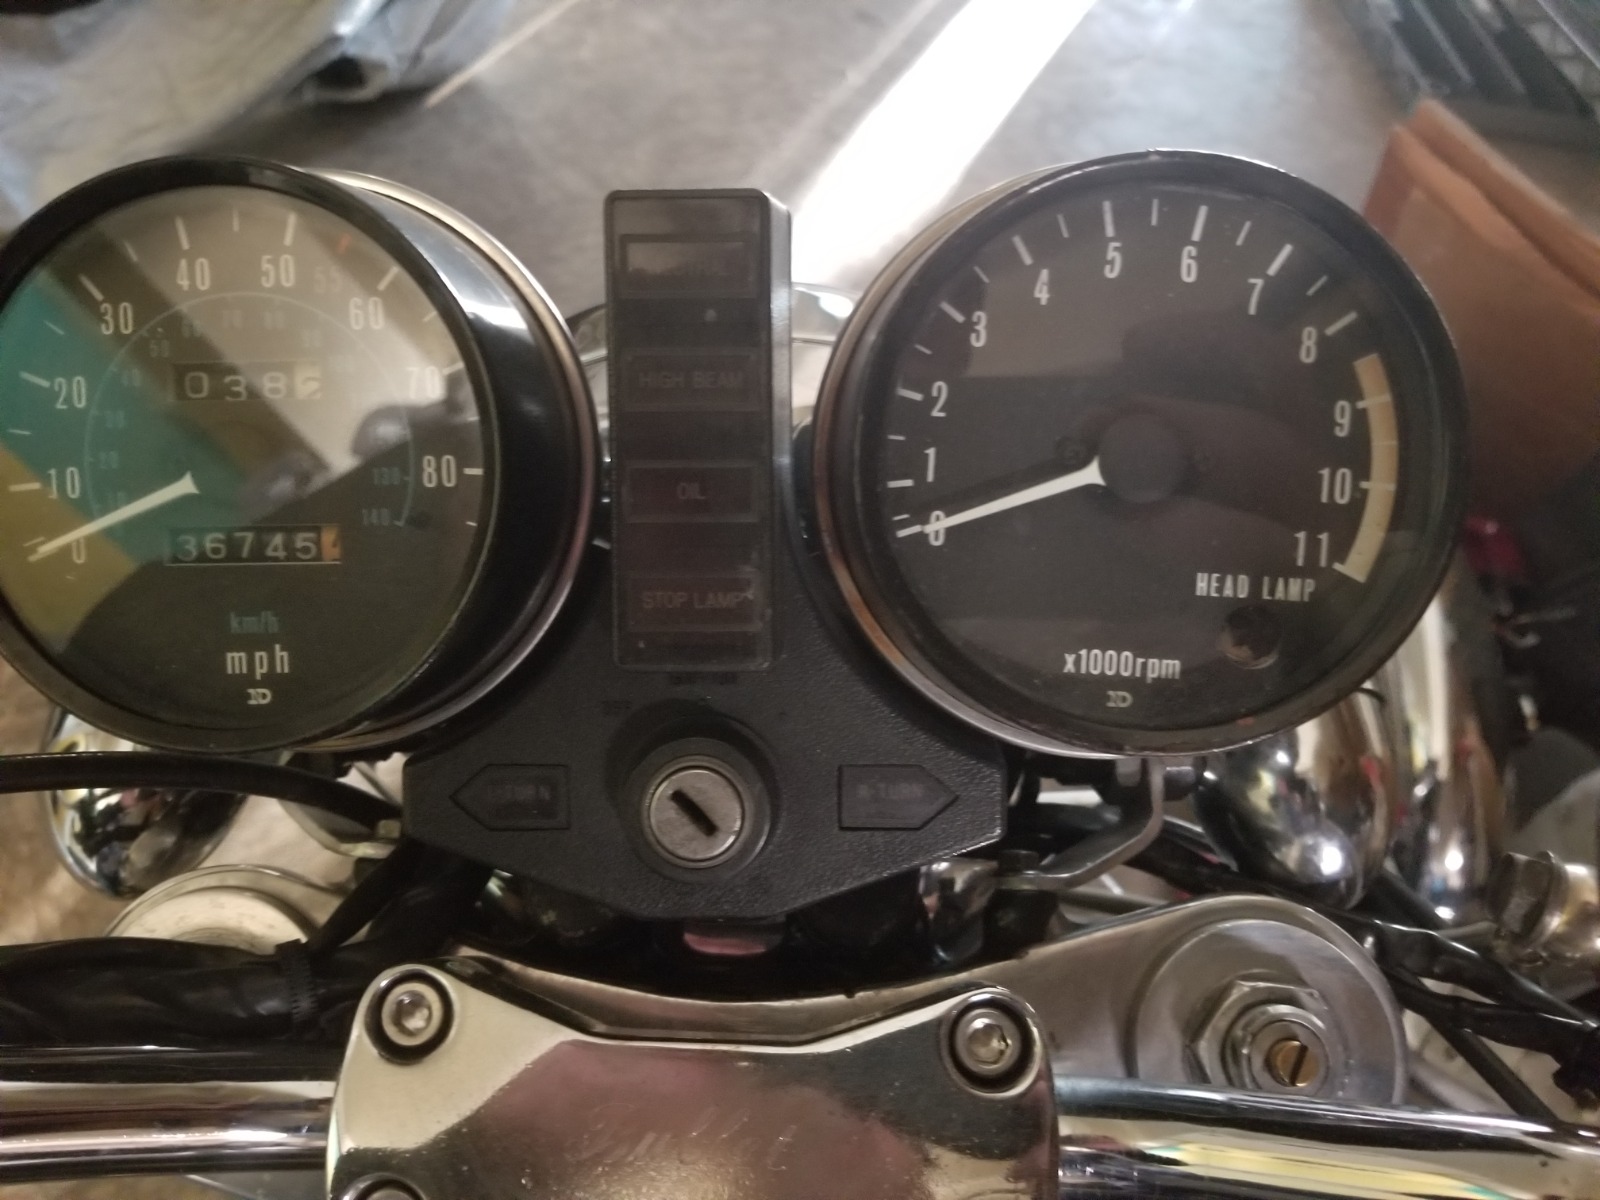
The plastic headlamp light in my tachometer isn't in place.
Is it worth it to take it apart to fix it or should I just ignore it?
Is it worth it to take it apart to fix it or should I just ignore it?
Please Log in or Create an account to join the conversation.
- martin_csr
-

- Offline
- User
-

Registered
- Posts: 7994
- Thanks: 1644
Re: Gauge repair
01 Jan 2020 14:08 - 01 Jan 2020 20:40
I would try doing the repair from the back side by removing the bulb socket, without disassembling the meter. Taking them apart is kind of a pain & the housing o-rings might not be waterproof afterwards. When disassembling the meters, if you have access to a machine shop, it would be handy to fab up a crimp ring jig beforehand >> something to protect & hold the outer edge of the crimp ring so you can pry it from the underside >> this should then result in less damage to the crimp ring when removing it & less damage when re-crimping. However, in your case there are chrome clamp rings available that I think fit over the crimp rings, so protecting the crimp rings isn't necessarily as important on a 70s model as it is on my 81 650-CSR.
Last edit: 01 Jan 2020 20:40 by martin_csr.
The following user(s) said Thank You: Bulletkz
Please Log in or Create an account to join the conversation.
- hardrockminer
-

- Offline
- Sustaining Member
-
Registered
- Posts: 3112
- Thanks: 1229
Re: Gauge repair
01 Jan 2020 14:17
I don't think you need to open up the tach split ring. It looks like the bulb fell down into the back of the tach. It should be an easy fix, about an hour...but you will have to remove your headlight to get at the tach, and then remove the tach bottom shell, held in place by one small black screw in the center, then the tach, which is held in place by two nuts that you will see when you pull the bottom shell off. The light sits in a rubber piece that presses into the hole. You may need a new rubber piece. They are sold by Z1E I think. You may also need to remove the bottom of the idiot light dash, but I don't think that's necessary.
I have several restored bikes along with a 2006 Goldwing with a sidecar.
The following user(s) said Thank You: martin_csr, Bulletkz
Please Log in or Create an account to join the conversation.
- Bulletkz
-
Topic Author
- Offline
- Sustaining Member
-
Registered
- Posts: 125
- Thanks: 18
Re: Gauge repair
02 Jan 2020 05:50
Thanks guys. Just ordered the parts before I even try to take it apart.
Looks easy enough.
Looks easy enough.
Please Log in or Create an account to join the conversation.
- martin_csr
-
- Offline
- User
-
Registered
- Posts: 7994
- Thanks: 1644
Re: Gauge repair
02 Jan 2020 06:54 - 02 Jan 2020 06:55
If you mean the crimp ring, then no it isn't easy. If you mean just removing the sockets, even that can be a pain >> the old old old socket dampers tend to be hard & can be incredibly difficult to remove. Liquid wrench silicone spray lubricant helps, but the job can still be pain.
Last edit: 02 Jan 2020 06:55 by martin_csr.
Please Log in or Create an account to join the conversation.
- Rick H.
-

- Offline
- User
-
Registered
- Posts: 840
- Thanks: 241
Re: Gauge repair
02 Jan 2020 14:22
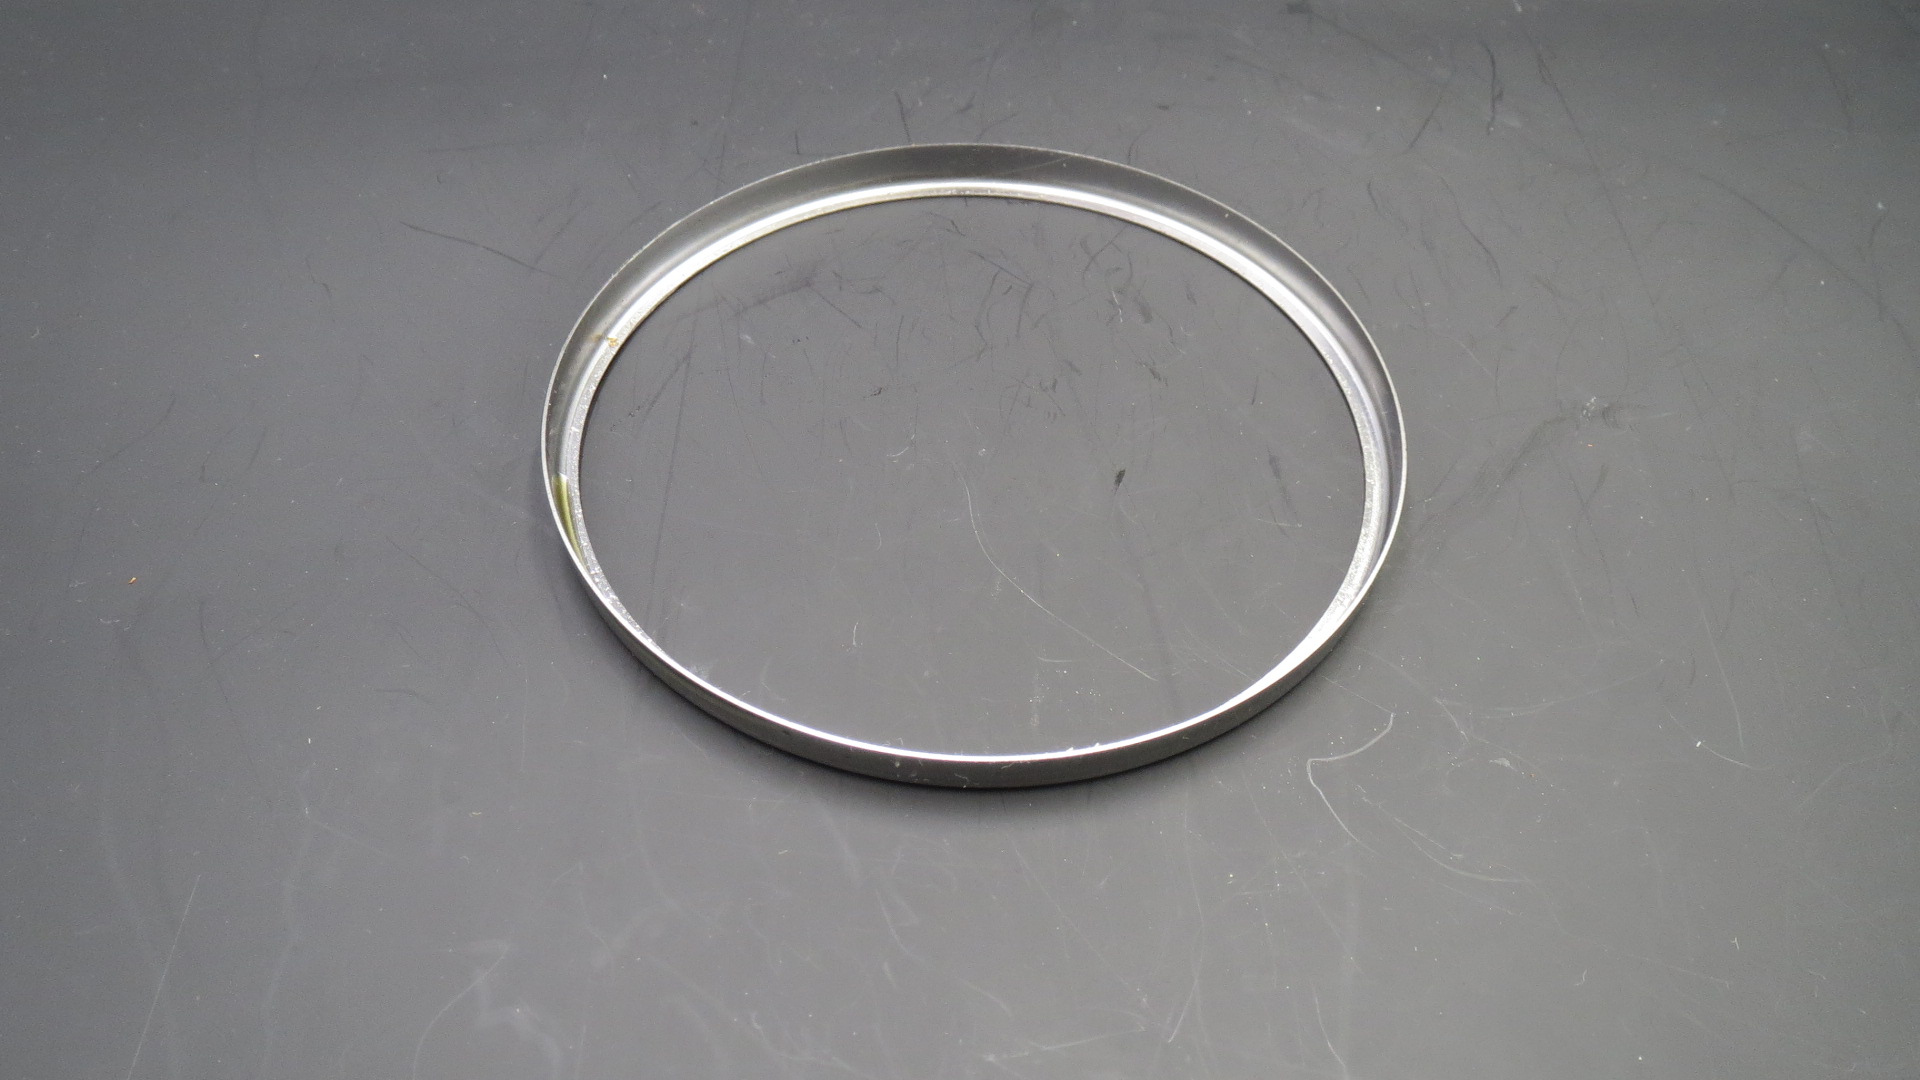
I would like to know what parts you ordered for this project. If it's just the mounting screws and cushions that's one thing, but disassembling the gauge itself could be a real bear especially if you want it to look nice when finished. I don't believe there is much that can be ordered that is inside the gauges themselves, unless someone took on apart to salvage parts. The chrome ring around the gauge is the first real issue as I see it and getting it off to separate the gauge could be an exercise in futility. Getting the ring back on could be a real problem also. Good luck with this...
Rick H.
Rick H.
Rick H.
1977 Kawasaki KZ-1000A1
1977 Kawasaki KZ-1000A1
Please Log in or Create an account to join the conversation.
- Scirocco
-

- Offline
- Premium Member
-

Registered
- Never change a running system
- Posts: 4397
- Thanks: 2260
Re: Gauge repair
02 Jan 2020 15:18 - 02 Jan 2020 15:19
The rings for the gauges are available (stainless steel).
z-fever.de/shop/en/product_info.php?info..._ring-armaturen.html
z-fever.de/shop/en/product_info.php?info..._ring-armaturen.html
My 1975 Z 1 B 900 Project
www.kzrider.com/forum/11-projects/605133...ears-deep-sleep-mode
www.kzrider.com/forum/11-projects/605133...ears-deep-sleep-mode
Last edit: 02 Jan 2020 15:19 by Scirocco.
The following user(s) said Thank You: loudhvx, SWest
Please Log in or Create an account to join the conversation.
- martin_csr
-
- Offline
- User
-
Registered
- Posts: 7994
- Thanks: 1644
Re: Gauge repair
02 Jan 2020 16:54 - 03 Jan 2020 07:01
Here are some links. I don't know anything about these. I would fab up a crimp ring holder or something, so that they can be crimped with minimal damage. Crimp rings. gauge covers. faces. tags: CB750 faces cb750faces cb750faces.com. speedometer repair. meter repair.
Honda CB750 Faces --- Kawasaki parts
www.cb750faces.com/cb750faces.nl/en/48-kawasaki-parts
Honda CB750 Faces --- Kawasaki crimp rings
www.cb750faces.com/cb750faces.nl/en/kawa...-ring-set-2-pcs.html
Honda CB750 Faces --- Kawasaki parts
www.cb750faces.com/cb750faces.nl/en/48-kawasaki-parts
Honda CB750 Faces --- Kawasaki crimp rings
www.cb750faces.com/cb750faces.nl/en/kawa...-ring-set-2-pcs.html
Last edit: 03 Jan 2020 07:01 by martin_csr.
Please Log in or Create an account to join the conversation.
- Rick H.
-
- Offline
- User
-
Registered
- Posts: 840
- Thanks: 241
Re: Gauge repair
02 Jan 2020 17:32
Thanks for the heads up on these parts, didn't know you could get them. Actually there's a whole new source for parts in Germany.
Rick H.
Rick H.
Rick H.
1977 Kawasaki KZ-1000A1
1977 Kawasaki KZ-1000A1
Please Log in or Create an account to join the conversation.
- slmjim+Z1BEBE
-

- Offline
- User
-
Registered
- Enjoy Life! IT HAS AN EXPIRATION DATE!
- Posts: 1409
- Thanks: 899
Re: Gauge repair
04 Jan 2020 06:47^That^martin_csr wrote: ... >> the old old old socket dampers tend to be hard & can be incredibly difficult to remove. Liquid wrench silicone spray lubricant helps, but the job can still be pain.
The rubber socket holders harden with age & becomes somewhat brittle. If one tries to pull the rubber socket holder out forcefully it might tear in half where it enters the tach body. Some lube as mentioned above, along with heat from a hair dryer & taking your time using gentle, friendly persuasion will minimize the risk of damaging the rubber.
Note that there are some silicone sprays that contain solvent that will damage plastics. Read the directions carefully & test on a sacrificial surface.
Good Ridin'
slmjim & Z1BEBE
A biker looks at your engine and chrome.
A Rider looks at your odometer and tags.
1973 ('72 builds) Z1 x2
1974 Z1-A x2
1975 Z1-B x2
1993 CB 750 Nighthawk x2
2009 ST1300A
www.kawasaki-z-classik.com
A Forum tightly focused on all things Z1 and Z2.
A Rider looks at your odometer and tags.
1973 ('72 builds) Z1 x2
1974 Z1-A x2
1975 Z1-B x2
1993 CB 750 Nighthawk x2
2009 ST1300A
www.kawasaki-z-classik.com
A Forum tightly focused on all things Z1 and Z2.
Please Log in or Create an account to join the conversation.
- martin_csr
-
- Offline
- User
-
Registered
- Posts: 7994
- Thanks: 1644
Re: Gauge repair
04 Jan 2020 07:31 - 04 Jan 2020 07:33
By slmjim+Z1BEBE: ... Note that there are some silicone sprays that contain solvent that will damage plastics. Read the directions carefully & test on a sacrificial surface.
+1. I don't know if it will damage plastic, but CRC silicone spray has a lot of acetone, which to me kind of defeats the purpose of the silicone. I even called CRC, thinking that they incorrectly labeled a can of acetone spray solvent. I mentioned the Liquid Wrench product above because it's a good silicone spray >> I use it to clean just about everything on the motorcycle and it seems to be good for rubber & plastic.
+1. I don't know if it will damage plastic, but CRC silicone spray has a lot of acetone, which to me kind of defeats the purpose of the silicone. I even called CRC, thinking that they incorrectly labeled a can of acetone spray solvent. I mentioned the Liquid Wrench product above because it's a good silicone spray >> I use it to clean just about everything on the motorcycle and it seems to be good for rubber & plastic.
Last edit: 04 Jan 2020 07:33 by martin_csr.
Please Log in or Create an account to join the conversation.
- slmjim+Z1BEBE
-
- Offline
- User
-
Registered
- Enjoy Life! IT HAS AN EXPIRATION DATE!
- Posts: 1409
- Thanks: 899
Re: Gauge repair
04 Jan 2020 08:06
Acetone will damage many plastics.
Good Ridin'
slmjim & Z1BEBE
Good Ridin'
slmjim & Z1BEBE
A biker looks at your engine and chrome.
A Rider looks at your odometer and tags.
1973 ('72 builds) Z1 x2
1974 Z1-A x2
1975 Z1-B x2
1993 CB 750 Nighthawk x2
2009 ST1300A
www.kawasaki-z-classik.com
A Forum tightly focused on all things Z1 and Z2.
A Rider looks at your odometer and tags.
1973 ('72 builds) Z1 x2
1974 Z1-A x2
1975 Z1-B x2
1993 CB 750 Nighthawk x2
2009 ST1300A
www.kawasaki-z-classik.com
A Forum tightly focused on all things Z1 and Z2.
Please Log in or Create an account to join the conversation.
Moderators: Street Fighter LTD