
Wiring inside headlight bucket
- Robb2018
-
 Topic Author
- Offline
- User
-

Registered
- 76 KZ900 73 Z1 A
- Posts: 270
- Thanks: 28
Wiring inside headlight bucket
14 May 2018 19:00 - 14 May 2018 19:02
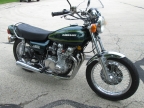
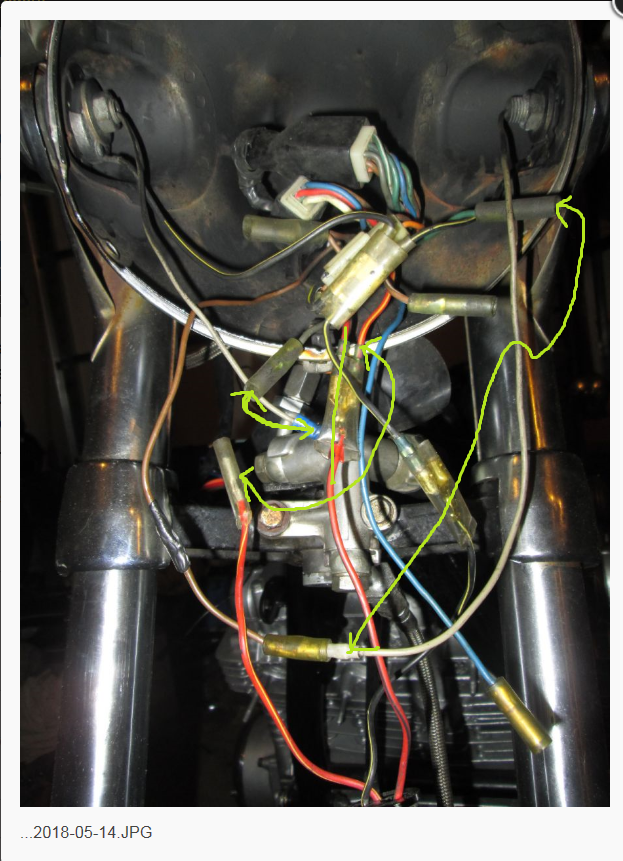
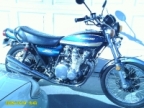
I pulled the harness out of my 76 KZ900 a month ago to paint the frame. Looking back I have to admit I should have marked wires and taken some pictures but with previous bikes it was always a simple matter reconnecting everything, just match the connector and the color wire.. pretty cut and dried. I've been stuck now for two days on this bike however... couple things, I changed out the handlebar controls and although the canon plugs match up with the ones in the harness, there's an extra single blue wire coming out of each control harness that the stock control wiring didn't have. But the big puzzle is the headlight bucket with several unmatched wires. There's a Brown female a blue female, a brown/white female, a two into one brown into a flat female, a blue female, and out of the left turn signal there's what I'm guessing is a grey male, all of which have no mates. I'm thinking maybe some of this may be the wires coming out of the harness in the area of the coils but I don't think they'd be long enough to match up. Any help or suggestions would be appreciated.
KZ900; Z1
Last edit: 14 May 2018 19:02 by Robb2018.
Please Log in or Create an account to join the conversation.
- kz_1000a
-
- Offline
- User
-
Registered
- Posts: 19
- Thanks: 7
Re: Wiring inside headlight bucket
14 May 2018 20:01
Hi Robb, I am going thru a similiar scenario after replacing my kz1000 loom with a kz900 loom and new kz900 controls
I too have an extra brown female and extra brown/white female coming out the top of the loom. and separate blue wires coming from the new controls.
Because my clutch lever bracket does not have the wiring for the "safety lock out switch", I am thinking that these 2 wires "MAY" be a part of that circuit.
I was having a close look at your second picture, and believe that your indicators and headlight wiring "may" need "adjusting"
I totally stand to be corrected on this though.
On my bike, at least, the left hand side indicator positive wiring is green & the right hand side indicator positive wiring is grey.
It would appear that your left (as viewed from the seated position) indicator stalk is wired up to a brown lead.
That male grey wire from the stalk may need to be unplgged from the brown wire and inserted into the female green wire immediately below the stalk.
The grey male wire from your right indicator stalk (currently unconnected) may need to be inserted into the female grey wire in the center of the picture.
It also appears that your headlight hi/lo beam wiring are connected together, instead of being separate. I will try attaching a modified image.
The red/yellow male wire attached to the double female connector (center if picture) should be unplugged and go to the red/yellow female connector on the lower left of picture.
The red/black wire from your headlight should theoretically go to another red/black from your harness.
Please ensure that your bike is fused, just incase your wiring has been modified over the years.
Its crap weather here at the moment, so i cant work on my bike.
Best of luck.
The following user(s) said Thank You: Robb2018
Please Log in or Create an account to join the conversation.
- Robb2018
-
Topic Author
- Offline
- User
-
Registered
- 76 KZ900 73 Z1 A
- Posts: 270
- Thanks: 28
Re: Wiring inside headlight bucket
14 May 2018 20:47
Thanks KC, that will give me something to go on tomorrow. I've got the rear tail light and turn signals working.. I'll try your suggestions and then will get a handful of fuses and start trial and error if nothing else works. Damn I wish I had marked these wires or at least taken a picture of the bucket before I undid it. I never learn.
KZ900; Z1
Please Log in or Create an account to join the conversation.
- davido
-
- Offline
- User
-
Registered
- Posts: 1578
- Thanks: 291
Re: Wiring inside headlight bucket
14 May 2018 23:11
I also changed my handelbar controls on my project (and a lot of other things electric). I had to pull the spade connectors out of the connection blocks and swap them around to fit the connecting blocks on the original loom. I made a special tool to do this as a shop bought one was too expensive for what it is.
I also downloaded the wiring diagram for my bike (from this site) and for the donor bike where the switches came from (somewhere else on the interweb) and worked it all out on paper before hacking anything up. It was a real head scratcher but I got there in the end.
I also downloaded the wiring diagram for my bike (from this site) and for the donor bike where the switches came from (somewhere else on the interweb) and worked it all out on paper before hacking anything up. It was a real head scratcher but I got there in the end.
www.kzrider.com/forum/11-projects/594313-csr1000-project-build
CB550 (1978)
CB500/4 (1972)*
KZ1000CSR (1981)
XT 600E (1999)
TDM900 (2003)
CB550 (1978)
CB500/4 (1972)*
KZ1000CSR (1981)
XT 600E (1999)
TDM900 (2003)
The following user(s) said Thank You: Robb2018
Please Log in or Create an account to join the conversation.
- Nessism
-

- Offline
- Sustaining Member
-

Registered
- Posts: 8063
- Thanks: 3449
Re: Wiring inside headlight bucket
15 May 2018 07:43
Have you looked at the wiring diagram? Most of the time that clears up the confusion. For example, the turn signal wire color may not match the harness, and there may be a couple of accessory wires that don't hook up to anything.
Ed
Carb O-ring Kits : www.kzrider.com/forum/14-vendor-forum/62...rburetor-o-ring-kits
www.kzrider.com/forum/faq-wiki/618026-new-owner-things-to-know
1981 KZ750E2
www.kzrider.com/forum/11-projects/604901...z750e-project-thread
Carb O-ring Kits : www.kzrider.com/forum/14-vendor-forum/62...rburetor-o-ring-kits
www.kzrider.com/forum/faq-wiki/618026-new-owner-things-to-know
1981 KZ750E2
www.kzrider.com/forum/11-projects/604901...z750e-project-thread
The following user(s) said Thank You: Robb2018
Please Log in or Create an account to join the conversation.
- Z1Driver
-
- Offline
- User
-
Registered
- love the smell of triple smoke
- Posts: 301
- Thanks: 55
Re: Wiring inside headlight bucket
15 May 2018 10:57
Boy isn't Nessism advice spot on. I took the turn signals off the front when I pulled the forks for oil seals. I blew several fuses trying to get the right turn signal plugged into the right wire and no the wire colors do not match. They do on most everything else though.
Blue 1975 Z1B
Red 2009 Concours 14
Red 2009 Concours 14
Please Log in or Create an account to join the conversation.
Moderators: Street Fighter LTD