
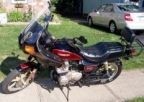
KZ750 Spectre Ignition Problem
- zdc28
-
 Topic Author
- Offline
- User
-

Registered
- Posts: 5
- Thanks: 0
KZ750 Spectre Ignition Problem
07 Aug 2016 11:51
Hi Guys, so I’ve been having some trouble with my 1983 kz750. I am very new with bikes so please forgive my lack of knowledge. So my issue is that it seems to me that only one cylinder is firing. After running for a while only one exhaust pipe is hot and it just doesn’t sound right. I wasn’t sure what to do so I replaced the sparkplugs and ignition coils with no luck. Any advice or thoughts are much appreciated. Thanks!
Please Log in or Create an account to join the conversation.
- MFolks
-

- Offline
- User
-
Registered
- Posts: 6650
- Thanks: 541
Re: KZ750 Spectre Ignition Problem
07 Aug 2016 14:00
How's the battery condition? New,or a few years old? Can you remove it from the bike,and take it to a motorcycle shop,where they can load test it for you. This will determine if the cells are good or bad.
If the battery checks out good,see if the Negative (-)cable from the frame is clean and tight,also see if the Positive (+) cable is "Crunchy" when flexed. If it is,then there's corrosion inside,and the cable needs replacing.
Testing Kawasaki Ignition Coils For Input Voltage
When voltage testing Kawasaki Ignition Coils, the following needs to be done:
1. Remove the fuel/gas tank to access the coils.
2. Fully charge the battery.
3. Using a multimeter, set it up for VDC(Volts, Direct Current), range of 20.
4. Turn on the ignition switch and the run/stop switch to “Run”.
5. Put the multimeter’s RED probe on where the red or red/yellow wire goes on the ignition coil.
6. Put the multimeter’s BLACK probe on either the battery Negative(-) post/terminal or a good frame ground.
7. You should be able to see battery voltage at the ignition coil connection, but this depends on the current draw of other items in the same circuit.
8. If the tested voltage is down to 8-9 volts, you probably need to clean the many and various electrical connectors.
1982 GPZ1100 B2
General Dynamics/Convair 1983-1993
GLCM BGM-109 Tomahawk, AGM-129A Advanced Cruise Missile (ACM)
General Dynamics/Convair 1983-1993
GLCM BGM-109 Tomahawk, AGM-129A Advanced Cruise Missile (ACM)
The following user(s) said Thank You: GPz550D1
Please Log in or Create an account to join the conversation.
- MFolks
-
- Offline
- User
-
Registered
- Posts: 6650
- Thanks: 541
Re: KZ750 Spectre Ignition Problem
07 Aug 2016 14:06
Cleaning Motorcycle Electrics
Get some of the De-Oxit electrical contact cleaner and figure on spending a good day going from the front of the bike to the back. It’s a plastic safe cleaner/preservative. www.deoxit.com is their website.
On the older Kawasaki's, a majority of electrical connectors are inside the headlight housing requiring removal of the headlight, then the fun begins.
Do one set of electrical connectors at a time to avoid mixing up what connects to where. Usually disconnecting, spraying with De-Oxit and reconnecting is about all you'll need.
However, when encountering the green crud of corrosion, a brass wire brush may be needed on the pins you can reach.
Some 400-600 grit wet and dry sandpaper strips rolled into a tube should reach the male and female pins in the more difficult to clean connectors.
Smoker’s pipe cleaners, cotton swabs and wooden toothpicks work as cleaning aids.
Really small electrical connectors may require the use of a welders tip cleaning tool assortment.
Most pins in the connectors are coated with a thin plating of tin, and others may be nothing more than copper or brass.
If moisture is added, the resulting corrosion lowers the voltage/current being carried causing dim lights, slow engine cranking, slow turn signal response and lower input voltage to the ignition coils resulting in weak spark.
The left and right handlebar switch pods will need attention too as they have circuit functions like turn, horn, run/stop, and start.
Usually a spritz or two with actuation of the switch is about all needed for these switches unless corrosion is detected and then careful disassembly is required.
The ignition switch may or may be not sealed to allow spraying the internal contacts. I urge caution if attempting to open this up as springs, and ball bearings may fly out never to be seen again!
If your bike has the older style glass tubed fuses, I suggest replacing them as vibration can cause internal failure. AGX is the type used, and most auto parts stores can get them for you.
Clean the fuse holder clips, looking for signs of overheating(discolored insulation, signs of melting).
I use metal polish on a cotton swab, followed by spraying another clean swab with the De-Oxit and then rubbing the inside of the fuse clip.
All battery cables must be clean and tight for maximum current transfer. Check the cables going from the Negative(-) battery terminal/post to the engine mounting bolt
Also the one going from the Positive(+) terminal to the starter solenoid and from there to the starter motor.
If any battery cable feels ”Crunchy” when flexed, replace it as possible corrosion is inside the insulation.
Each "Bullet Connector" will have to be sprayed to ensure good connectivity, especially the ones going to the energizing coil of the starter solenoid.
The alternator output “Bullet Connectors” are usually behind the engine sprocket cover and will need inspecting and cleaning too.
The turn signal light sockets will benefit from a spritz from the contact cleaner along with the tail light/brake light socket.
Some brake light switches can be sprayed on the actuating rod, with the spray running down inside to the electrical contacts, others may be sealed requiring replacement if the switch is intermittent in operation.
Some people put the Di-Electric Grease on cleaned terminations/connectors, I don’t, as I’ve read/heard it can cause problems when it gets hot, actually insulating the connections, so the choice is yours to use or not.
I think I've covered about all of the electrical systems on the bike.........
“I spent a weekend going through every electrical connection and switch on the bike with a little scotchbrite pad and DeOxit - what a difference! Everything was brighter, gauge backlights, indicator lights, turn signals, I was getting a nicer spark, it fired up quicker, etc. Well worth my time. WELL worth it! “
From a forum member at www.kzrider.com
Re: Cleaning the many and various Motorcycle electrics.
I used the De-oxit D-5 spray on all the electrical connections of my 78 Kz1000 that had sat for twenty years .
When I parked the bike in 92 I was starting to have troubles with some of the electrical system, but after pulling everything apart and giving it a spray , reconnecting the connectors and working them back and forth a few times, then gave them another shot of spray to wash them off before the final reconnection.
Everything still works perfectly and has for over 7000 miles this year.
I am extremely happy with the results , a lot of the connectors were green when I started and after the cleaning they looked new ( shiny gold )
I found the Deoxit D-series, D-5 spray in a 4 oz can at a big electronics store called Frys in Illinois, don't get the small cans at Radio Shack , they are different and meant for computer type stuff.
store.caig.com/s.nl/sc.2/category.188/.f
Recommendations:
Excellent contact cleaner from audio to ac power contacts
I've been an A/V Tech-Roadie for over 30 years and have used Deoxit since it was first introduced. I've cleaned /rejuvenated volume controls,switches and audio connections on everything from guitar amps to full blown recording consoles. It not only cleans mild to excessive corrosion but the lubricant keeps the part in good working order months afterwards. Much easier than replacing a hard to replace part. I also spray it on all the audio connectors periodically to insure good connectivity. Along with my A.C. power plugs and quad boxes that are used outside for live shows to prevent corrosion from the elements.
Good stuff. Obviously highly recommended.
Great Stuff
I used this stuff on my 35 year old Kenwood KA-7300 amp which had not been used in more than 10 years and it was fantastic. When I first tried to use the amp, all of the switches only worked sometimes and the static and intermittent sound was unbearable. I thought that my left channel was not working because it had such a low output compared to the right channel no matter where the balance was set. After cleaning all the input/ and output jacks and the switches along with vacuuming out the inside of the amp, the amp works great and sounds like it did back in the day! I was more than pleasantly surprised!!
I've used DeoxIT for years. My first use was on a BMW instrument cluster that an $800 "reno" hadn't fixed. I sprayed the several connectors and mates, dozens and dozens of connectors, let it sit overnight and reinstalled it in the car. That cured every problem. Years after manufacture one or more of those connections could get iffy, and they do. Since then I've fixed several instrument clusters, engine and transmission computer problems caused by the same thing, connections, and no telling how many other electrical connection problems in cars.
An Effective cleaner-rejuvinator!
I used this to clean the pots, switches, and faders on my old Allen & Heath SR416 mixer. Everything is working top-notch again and everything moves/slides with ease. DeoxIT is a great product and it always improves sound quality and equipment life. This is the only cleaner you need!
Trust MFolks , the guy's a true rocket scientist and really knows what he's talking about.
JD
1982 GPZ1100 B2
General Dynamics/Convair 1983-1993
GLCM BGM-109 Tomahawk, AGM-129A Advanced Cruise Missile (ACM)
General Dynamics/Convair 1983-1993
GLCM BGM-109 Tomahawk, AGM-129A Advanced Cruise Missile (ACM)
The following user(s) said Thank You: GPz550D1
Please Log in or Create an account to join the conversation.
- MFolks
-
- Offline
- User
-
Registered
- Posts: 6650
- Thanks: 541
Re: KZ750 Spectre Ignition Problem
07 Aug 2016 14:09
Some of the older Kawasaki's, and possibly the other brands of motorcycles may be experiencing crumbled or failed switch and light bulb factory soldering jobs. Here's a repair procedure:
Repairing Motorcycle Soldered Connections
When repairing soldered wires on motorcycle switches or light bulbs sockets, have the following on hand:
1. A 25 Watt soldering iron or one that the wattage can be adjusted.
2. Rosin core solder.
3. Rosin flux or soldering paste (Never use solder or soldering paste designed for plumbing work, as it contains an acid that will corrode the electrical joint, ruining it).
4. 91% rubbing Alcohol, or 70%. The lower percentage will clean up flux residue, but not as good as the higher percentage stuff.
5. A cut down ½” paint brush, or acid brush for scrubbing the repaired solder joint.
6. Clean rags or paper towels
7. A damp sponge to keep the soldering iron tip clean.
8. Some “Solder Wick” a braided bare copper wire designed to collect heated excess solder, aiding in joint preperation, available at electronic supply stores.
9. Some wooden toothpicks.
10. Small Hemostats or clip on heatsinks.
A. Before soldering, “Tin” the soldering iron tip by plugging it in or turning the iron on, allowing it to get to operating temperature(2-3 minutes).
B. Unroll about 3” of solder from the roll of rosin core solder & then using a clean rag or paper towel moistened with Alcohol, wipe the unrolled solder, removing the finger print oils that will create a poor solder joint.
C. Apply a small amount of solder to the now heated soldering iron tip, wiping the excess off with the wet sponge or rag, keeping a thin layer of solder on the soldering iron.
D. The soldering iron is now ready for use, but before applying the heated tip to a wire, wipe the tip on the damp sponge or rag, this removes any oxidized solder and makes for a much better connection.
E. If the joint to be repaired is grey in color or appears “Crumbled”, apply some rosin soldering paste or flux to the joint with a small toothpick of screwdriver, and then apply the soldering iron tip for a few seconds.
G. The fluxed joint should clean up, allowing for a better connection. If no luck, use the solder wick to remove all traces of the old solder by apply in it between the soldering iron tip and the bad joint.
H. Hemostats and clip on heatsinks will be used to prevent the wire insulation from burning, overheating & pulling away from the connection.
I. Apply a small amount of flux to the joint to be repaired & then a very short duration of heated soldering iron tip & solder(like a few seconds or so).
J. Clean off the repaired joint with the brush & rubbing Alcohol, the newly repaired joint should appear clean and bright, almost as if it were polished, with no voids or holes.
This information comes from years of missile test cable and equipment assembly, when I worked at General Dynamics/Convair division in San Diego California, on the BGM-109 Tomahawk and later on the AGM-129 Advanced Cruise Missile. This was from 1983-1993.
1982 GPZ1100 B2
General Dynamics/Convair 1983-1993
GLCM BGM-109 Tomahawk, AGM-129A Advanced Cruise Missile (ACM)
General Dynamics/Convair 1983-1993
GLCM BGM-109 Tomahawk, AGM-129A Advanced Cruise Missile (ACM)
The following user(s) said Thank You: GPz550D1
Please Log in or Create an account to join the conversation.
- martin_csr
-

- Offline
- User
-
Registered
- Posts: 8018
- Thanks: 1645
Re: KZ750 Spectre Ignition Problem
07 Aug 2016 15:08 - 07 Aug 2016 15:15
Is this a new problem or did you get it like this? An easy thing to try is to redo all of the spark plug wire connections. Unscrew the ribbed compression boots at the coils & untwist the wires at the spark plug caps. If the plug wires have the white crusty oxidation, nip off the ends a tad. or get new spark plug wires. probably 7mm copper core.
You have to remove the fuel fuel tank, so that part can be a pain.
Check the spark plugs to make sure they're good/correct. properly gapped & not damaged. note their condition & color.
make certain the plug wires are routed to the correct spark plugs & also make sure the igniter wires are connected correctly.
Typically on a 750-4. RH coil = 1-4 w black & red wires. LH coil = 2-3 w green & red wires.
Battery. the bike needs a good, properly charged battery to run right. so make certain the battery is good by testing it. don't assume it's good. I have a Scorpion AGM from batterystuff.com. It seems like a good one & holds its charge better than a wet cell. and I use a Ctek US 0.8 smart charger & VC97 digital multimeter.
Last edit: 07 Aug 2016 15:15 by martin_csr.
Please Log in or Create an account to join the conversation.
- Nessism
-

- Offline
- Sustaining Member
-

Registered
- Posts: 7793
- Thanks: 3171
Re: KZ750 Spectre Ignition Problem
07 Aug 2016 15:45
First of all, check spark on each of the four spark plug caps to verify we are talking about a spark issue. Pull the cap, install a new plug into the cap, lay the metal portion of the plug against the engine and then hit the starter while watching for spark. Reason for saying is that the problem you describe could be a carb issue.
Ed
Carb O-ring Kits : www.kzrider.com/forum/3-carburetor/61807...-o-ring-kits?start=0
www.kzrider.com/forum/faq-wiki/618026-new-owner-things-to-know
1981 KZ750E2
www.kzrider.com/forum/11-projects/604901...z750e-project-thread
Carb O-ring Kits : www.kzrider.com/forum/3-carburetor/61807...-o-ring-kits?start=0
www.kzrider.com/forum/faq-wiki/618026-new-owner-things-to-know
1981 KZ750E2
www.kzrider.com/forum/11-projects/604901...z750e-project-thread
Please Log in or Create an account to join the conversation.
- jimgcastle
-
- Offline
- User
-
Registered
- Posts: 7
- Thanks: 1
Re: KZ750 Spectre Ignition Problem
11 Aug 2016 12:43
Wow. Let's start a bit simpler before you go cleaning the entire electrical system. Nessism is right. Let's find out if this is a spark issue or a carb issue. Check the spark as he describes. Since you state you are new to bikes i would assume you just bought this bike? If you did, i would take to a good bike repair that works on these bikes and get the carbs cleaned irregardless of whether you have good spark or not.. A lot of running issues tend to be carb related when the bike is this old.
Please Log in or Create an account to join the conversation.
Moderators: Street Fighter LTD