
soldering wire back on to switch plate 82 GPZ750
- woodman
-
 Topic Author
- Offline
- User
-

Registered
- Posts: 51
- Thanks: 4
soldering wire back on to switch plate 82 GPZ750
24 Jul 2014 15:51 - 24 Jul 2014 15:52
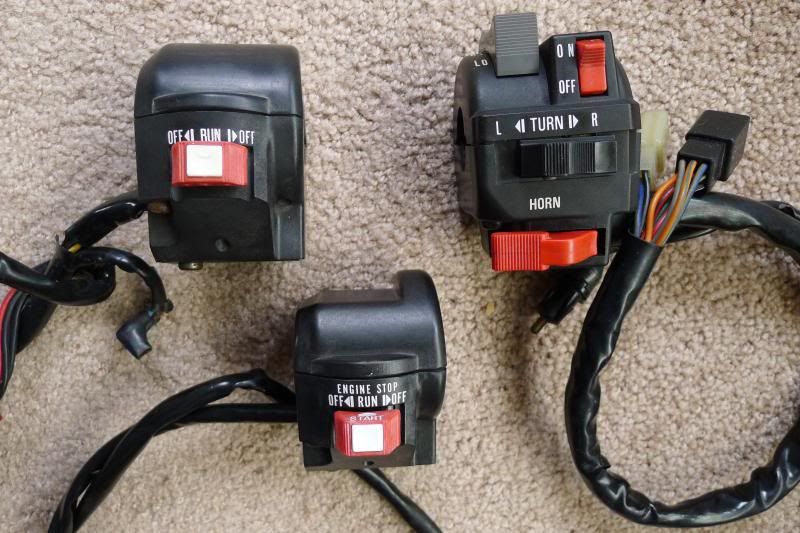
Wire broke off the back of my switch button on my 82 GPZ750. Dealers are all backordered on part too. It just sits on in a small hole. Has anyone had any luck soldering it back on, it broke at that solder joint ? Im open to any and all ideas even changing it over to a bolt on starter button but prefer to leave it original
Last edit: 24 Jul 2014 15:52 by woodman. Reason: mistake, didnt need to
Please Log in or Create an account to join the conversation.
- jakedude
-

- Offline
- User
-
Registered
- Posts: 201
- Thanks: 30
Re: soldering wire back on to switch plate 82 GPZ750
24 Jul 2014 16:26
post a picture.
Nothing lasts, nothing is finished, and nothing is perfect.
Please Log in or Create an account to join the conversation.
- woodman
-
Topic Author
- Offline
- User
-
Registered
- Posts: 51
- Thanks: 4
Re: soldering wire back on to switch plate 82 GPZ750
24 Jul 2014 16:56
I don't know how to do that but if you email me at wwmtlineman@aol.com, I can send you one or maybe you could post it for me
Please Log in or Create an account to join the conversation.
- Nessism
-

- Online
- Sustaining Member
-

Registered
- Posts: 7889
- Thanks: 3262
Re: soldering wire back on to switch plate 82 GPZ750
24 Jul 2014 17:56 - 24 Jul 2014 18:04
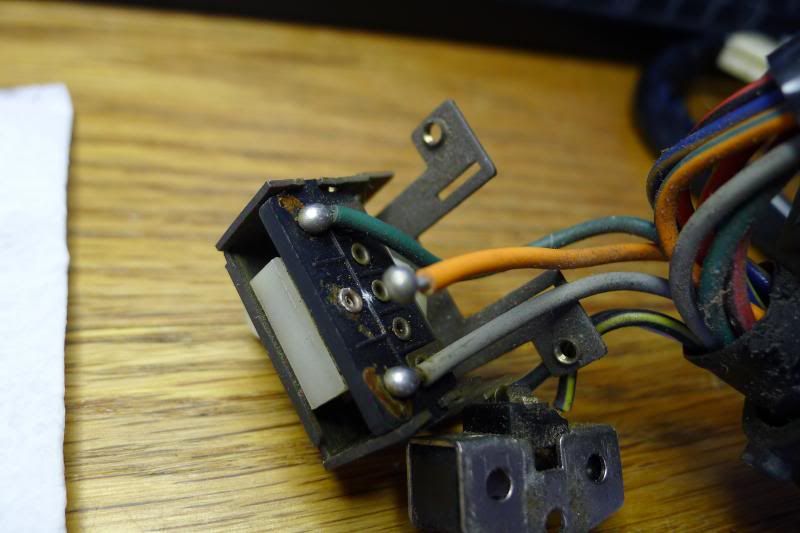
Solder it back. Easy repair. This switch had the same issue on the orange wire...


Ed
Carb O-ring Kits : www.kzrider.com/forum/3-carburetor/61807...-o-ring-kits?start=0
www.kzrider.com/forum/faq-wiki/618026-new-owner-things-to-know
1981 KZ750E2
www.kzrider.com/forum/11-projects/604901...z750e-project-thread
Carb O-ring Kits : www.kzrider.com/forum/3-carburetor/61807...-o-ring-kits?start=0
www.kzrider.com/forum/faq-wiki/618026-new-owner-things-to-know
1981 KZ750E2
www.kzrider.com/forum/11-projects/604901...z750e-project-thread
Last edit: 24 Jul 2014 18:04 by Nessism.
Please Log in or Create an account to join the conversation.
- woodman
-
Topic Author
- Offline
- User
-
Registered
- Posts: 51
- Thanks: 4
Re: soldering wire back on to switch plate 82 GPZ750
24 Jul 2014 18:16
That's exactly what mine looks like, broke the same way only just 2 wires. I just need a third hand or someone to help hold it. That's a pretty cheesy arrangement for Kawasaki but I guess it has worked for 32 years so I cant complain
Please Log in or Create an account to join the conversation.
- Patton
-

- Offline
- KZr Legend
-

Registered
- Posts: 18568
- Thanks: 2103
Re: soldering wire back on to switch plate 82 GPZ750
24 Jul 2014 18:45Good Fortune!
")
1973 Z1
KZ900 LTD
KZ900 LTD
Attachments:
Please Log in or Create an account to join the conversation.
- woodman
-
Topic Author
- Offline
- User
-
Registered
- Posts: 51
- Thanks: 4
Re: soldering wire back on to switch plate 82 GPZ750
25 Jul 2014 16:50Attachment gpz1.jpg not found
Attachments:
Please Log in or Create an account to join the conversation.
- MFolks
-

- Offline
- User
-
Registered
- Posts: 6650
- Thanks: 541
Re: soldering wire back on to switch plate 82 GPZ750
25 Jul 2014 20:51
Repairing crumbled switch and light bulb socket soldering.
Some of the older Kawasaki's, and possibly the other brands of motorcycles may be experiancing crumbled or failed switch and light bulb factory soldering jobs. Here's a repair procedure:
Repairing Motorcycle Soldered Connections
When repairing soldered wires on motorcycle switches or light bulbs sockets, have the following on hand:
1. A 25 Watt soldering iron or one that the wattage can be adjusted.
2. Rosin core solder.
3. Rosin flux or soldering paste (Never use solder or soldering paste designed for plumbing work, as it contains an acid that will corrode the electrical joint, ruining it).
4. 91% rubbing Alcohol, or 70%. The lower percentage will clean up flux residue, but not as good as the higher percentage stuff.
5. A cut down ½” paint brush, or acid brush for scrubbing the repaired solder joint.
6. Clean rags or paper towels
7. A damp sponge to keep the soldering iron tip clean.
8. Some “Solder Wick” a braided bare copper wire designed to collect heated excess solder, aiding in joint preperation, available at electronic supply stores.
9. Some wooden toothpicks.
10. Small Hemostats or clip on heatsinks.
A. Before soldering, “Tin” the soldering iron tip by plugging it in or turning the iron on, allowing it to get to operating temperature(2-3 minutes).
B. Unroll about 3” of solder from the roll of rosin core solder & then using a clean rag or paper towel moistened with Alcohol, wipe the unrolled solder, removing the finger print oils that will create a poor solder joint.
C. Apply a small amount of solder to the now heated soldering iron tip, wiping the excess off with the wet sponge or rag, keeping a thin layer of solder on the soldering iron.
D. The soldering iron is now ready for use, but before applying the heated tip to a wire, wipe the tip on the damp sponge or rag, this removes any oxidized solder and makes for a much better connection.
E. If the joint to be repaired is grey in color or appears “Crumbled”, apply some rosin soldering paste or flux to the joint with a small toothpick of screwdriver, and then apply the soldering iron tip for a few seconds.
G. The fluxed joint should clean up, allowing for a better connection. If no luck, use the solder wick to remove all traces of the old solder by apply in it between the soldering iron tip and the bad joint.
H. Hemostats and clip on heatsinks will be used to prevent the wire insulation from burning, overheating & pulling away from the connection.
I. Apply a small amount of flux to the joint to be repaired & then a very short duration of heated soldering iron tip & solder(like a few seconds or so).
J. Clean off the repaired joint with the brush & rubbing Alcohol, the newly repaired joint should appear clean and bright, almost as if it were polished, with no voids or holes.
1982 GPZ1100 B2
General Dynamics/Convair 1983-1993
GLCM BGM-109 Tomahawk, AGM-129A Advanced Cruise Missile (ACM)
General Dynamics/Convair 1983-1993
GLCM BGM-109 Tomahawk, AGM-129A Advanced Cruise Missile (ACM)
The following user(s) said Thank You: woodman
Please Log in or Create an account to join the conversation.
- woodman
-
Topic Author
- Offline
- User
-
Registered
- Posts: 51
- Thanks: 4
Re: soldering wire back on to switch plate 82 GPZ750
26 Jul 2014 06:35
Fixed it, just wanted to see if I could post the picture, thanks to all for the help
The following user(s) said Thank You: MFolks
Please Log in or Create an account to join the conversation.
Moderators: Street Fighter LTD