
Blowing fuses, battery wont stay charged
- Kitten Tooth
-
 Topic Author
- Offline
- User
-

Registered
- Posts: 743
- Thanks: 10
Blowing fuses, battery wont stay charged
10 Aug 2010 21:32
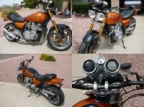
I have a 1981 KZ1000LTD. When i first got it drivable, i installed a way smaller battery just to ride, than what the bike was supposed to have. Very seldom does my bike crank after riding for a while and then being shut off. It has enough juice to crank in the mornings for the first time but not enough to restart after being run for a while and killed. Today, i found that my bike was running with way less power than it had a week ago. i have to ride the hell out of the clutch to go anywhere and it won't get up any hill unless i am in 2nd gear. I heard that too small of a battery will burn up a wiring harness, stator, rectifier/regulator, and the other components on a motorcycle. Is this true? Also, my bike randomly began to pop fuses after a spark test. As soon as the ignition is turned on, the fuse either desolders or pops. Somethings grounding but im not sure what. How do i test a stator on one of these? also, is there a way to test the rectifier/regulator? And, how do i test the coils? I have cleaned the connections on my fuse box with contact cleaner and a wire brush. There is still corrosion and if necessary, i do have another fuse box to install.
Thanks guys,
KT
Thanks guys,
KT
1981 Kawasaki KZ1000-K LTD
1983 Suzuki GS300L-D
1982 Suzuki GS300L-Z sold:(
1976 KZ400D3
1973 Z900... I WISH
DO A BARREL ROLL!!
1983 Suzuki GS300L-D
1982 Suzuki GS300L-Z sold:(
1976 KZ400D3
1973 Z900... I WISH
DO A BARREL ROLL!!
Please Log in or Create an account to join the conversation.
- MFolks
-

- Offline
- User
-
Registered
- Posts: 6650
- Thanks: 541
Re: Blowing fuses, battery wont stay charged
10 Aug 2010 21:53
Alternator Testing For the Older 4’s(Z1’s,Kz 900’s, Kz1000’s,Kz1100’s and GPz1100’s).
To check to see if the alternator is working you need to follow these simple steps:
1. Fully charge the battery as this will be the power source during this test.
2. Disconnect the Regulator/Rectifier at the plug that has the six wires in it.
3. Start the engine and let it warm to operating temperature.
4. If you're worried about overheating, position a large fan for cooling the engine.
5. After the engine has reached operating temperature, have a helper assist you, and using a multi-meter, read the output at the three yellow wires (or the alternator output wires)at the disconnected connector.
6. Raise the engine speed to 4000 rpm, and see what the three YELLOW wire combinations(or any alternator output wires) are(1-3, 2-3 & 1-2). The output will be around 50 Volts A.C.(Alternating Current). BE CAREFUL, AS THERE IS A SHOCK HAZARD HERE!!
7. If any of the combinations are low or non-existent, the stator(wire windings) are bad and must be replaced.
Some of the older Z1’s and KZ900’s were phase sensitive, so check the wire colors carefully.
8. Using an OHMETER, Check the three wire combinations again, looking for a reading of 0.36 - 0.54 OHMS. If the readings are above or below, the stator may be bad and need replacement. Also check from any of the three YELLOW wires to ground, this will show if arcing took place.
9. Before ordering a new stator, check the connections from the stator as there are electrical "Bullet" connectors that may be damaged or dirty.
Inspect the wiring for signs of shorting or overheating too. www.z1enterprises.com sells replacement rubber grommets for the alternator output wiring, they get hard and could leak oil after a while.
10. Check the wiring coming out of the grommet as there have been situations where the wires were damaged causing a short(I.E. twisted together with insulation damage).
11. The sprocket cover will have to be removed to access the electrical connectors coming from the alternator, the left foot peg assembly and shifting lever will have to come off also.
Alternator Stator Replacement On the Older 4’s
Source for replacement Stators
A. www.electrosport.com (They have a trouble shooting page)
B. www.customrewind.com
C. www.rmstator.com
D. www.ricksmotorsportselectrics.com
E. www.regulatorrectifier.com
1. If by testing either by checking the output voltage from the stator or by using and ohmmeter for resistance and the stator is determined to be bad, replacing the stator is not a difficult job.
2. The motorcycle owner should have on hand a replacement alternator gasket as it will tear on removal and leak if reused.
3. Put the bike on the center stand if possible and lean it to the right to minimize the oil volume that could come out when the alternator cover is removed.
4. Have selection of Metric wrenches and sockets along with Metric Allen keys to be able to accomplish this repair. ¼" and 3/8" ratchets and extensions may be needed along with Allen bits.
5. Remove the gear shift lever, the sprocket cover and possibly the left foot peg assembly.
6. A catch pan for what little oil will be lost should be positioned under the alternator on the left side. Newspapers will soak up any oil lost or some kitty litter will do as an absorbent.
7. Remove the alternator cover fasteners, some bikes use a socket head cap screw(Allen type) and others use the Phillips head type, the #3 screwdriver bit fits best for those. Use a small dish or can to collect the removed fasteners from the parts to prevent loss/damage.
8. The alternator stator is secured to the inside of the cover usually with three Allen headed bolts, Some bikes may have Torx style fasteners, Remove them and disconnect the three yellow wires that have bullet connectors on them from the bundled wires inside the sprocket cover.
9. If your bike has some color other than yellow for the alternator output wires, make note of what goes where as the older Kawasaki’s were phase sensitive in regard to the regulator/rectifiers.
10. When installing the replacement stator, clock or position the output wires and grommet so they fit into the small port under the alternator cover without being pinched or damaged.
11. Tighten the three Allen or Torx fasteners, securing the replacement stator to the cover. I like using the BLUE Loctite # 242 for hardware that can be removed with hand tools.
12. Remove the old gasket from the mating surfaces of the alternator cover and engine case by scraping with a piece of sharpened plastic like Lexan or Plexi-glass as these will not gouge the soft Aluminum Cases. Avoid using a metal gasket scraper for this.
13. Position the alternator cover, checking for pinched wiring and install the fasteners with a little silver anti-seize on the threads, tightening to the correct torque.
14. Connect up the output wires to the mating female bullet connectors and while you’re in there, check the routing of the wire bundle that runs through there.
15. Inspect for signs of heat damage to the wire insulation and vibration damage too.
16. The side stand switch, neutral switch, and oil pressure switch wiring are all bundled with the alternator output wiring running above and behind the engine output sprocket. This bundle runs in a channel as it goes up toward the various electrical connections.
17. The regulator/rectifier plug on the 80’s bikes usually has six wires in it:
A. One (1)WHITE with RED stripe, this is the bikes main power wire usually 12 gauge in size.
B. One(1) smaller Brown wire, probably 18 gauge or so, the voltage sense wire for the regulator/rectifier, helps keeping it from overcharging the battery.
C. One(1) BLACK with YELLOW stripe wire, part of the ground circuits, maybe 16 gauge in size.
D. Three(3) YELLOW wires, maybe 14 gauge in size, the alternator output wires going to the regulator/rectifier which converts the Alternating Current(A.C.) to Direct Current(D.C.) using rectification, producing the power to run the motorcycle and charge the battery.
18. Reinstall the sprocket cover, again checking for pinched wires before tightening. Install the shifter on it’s splined shaft checking for proper location, and the left side foot peg assembly.
19. Except for the minor oil spill and reluctant fasteners, it’s not a very difficult job to do.
And for electrical troubleshooting:
The Dreaded Shorting/Intermittent Electrical Problem!
Here is the most basic method I know(Taken from www.kzrider.com by member Patton)
1. Charge your battery and have it load tested if you can. The floating ball hydrometer can be used to check the specific gravity of the charged cells in the battery.
2. Disconnect the Black lead from the (-) Battery terminal... or Red from the (+) Battery terminal, it does not matter which one.
3. Connect one of the following test setups in series with the Battery terminal and lead:
3.1 A 12 V light bulb,
3.2 A 12 V test light,
3.3 A 12 V test buzzer or,
3.4 A 12 V horn... you get the idea.
4. With the Ignition Switch OFF, go through your harness and wiggle the wires while looking/listening for the test setup to go on/start buzzing.
5.With the Ignition Switch ON, repeat the test except this time the looking/listening for the test setup to go off/stop buzzing.
6. Be prepared to open the Ignition switch and check/test for solder joint failure and or circuit board micro breaks (don't ask how I know this ).
7. Be prepared to pull the wires out of the Head Light to test for failures at or near the grommet.
8. Be prepared to open the harness at or near the Steering Neck for failures. This is where wires tend to exhibit fatigue due to repetitive movement.
9. Be prepared to open the left and right switch gear to search for rust and or broken parts. CAUTION: watch out for flying springs, ball bearings and stuff. Do indoors on White sheet (again don't ask ).
10. Be prepared to follow the heavy gauge wire from the Starter Solenoid (Relay) to the starter for bare wire exposure. Especially near bends and grommets.
11. If you can reproduce the fault symptom your are pretty much home free. Be prepare to find and repair/replace any internal wire breaks, insulation break downs, exposed wires, rubber grommet failures, etc. Often, shrink tubing will solve the problem temporarily until something better can be done.
12. I use a very good electrical contact cleaner/preservative called De-oxit made by Caig Labs in San Diego Ca. Their website is www.deoxit.com It can be purchased at Radio Shack and any other electronic supply store. I use it on all of my motorcycle’s electrical connectors , in my home entertainment center’s stereo patch cords and cordless phones charging cradles.
1982 GPZ1100 B2
General Dynamics/Convair 1983-1993
GLCM BGM-109 Tomahawk, AGM-129A Advanced Cruise Missile (ACM)
General Dynamics/Convair 1983-1993
GLCM BGM-109 Tomahawk, AGM-129A Advanced Cruise Missile (ACM)
Please Log in or Create an account to join the conversation.
- Kitten Tooth
-
Topic Author
- Offline
- User
-
Registered
- Posts: 743
- Thanks: 10
Re: Blowing fuses, battery wont stay charged
10 Aug 2010 22:33
omg, you rock:D
1981 Kawasaki KZ1000-K LTD
1983 Suzuki GS300L-D
1982 Suzuki GS300L-Z sold:(
1976 KZ400D3
1973 Z900... I WISH
DO A BARREL ROLL!!
1983 Suzuki GS300L-D
1982 Suzuki GS300L-Z sold:(
1976 KZ400D3
1973 Z900... I WISH
DO A BARREL ROLL!!
Please Log in or Create an account to join the conversation.
- Old Man Rock
-
- Offline
- User
-
Registered
- Posts: 6074
- Thanks: 225
Re: Blowing fuses, battery wont stay charged
11 Aug 2010 04:00
Well we all know what Tim will be doing the next couple of months.... :laugh:
Good, that'll keep you out of trouble now that school is starting back up.... :pinch:
Get after it young man... good info there...")
Good, that'll keep you out of trouble now that school is starting back up.... :pinch:
Get after it young man... good info there...
1976 KZ900-A4
MTC 1075cc.
Camshafts: Kawi GPZ-1100 .375 lift
Head: P&P via Larry Cavanaugh
ZX636 suspension
MIKUNI, RS-34'S...
Kerker 4-1, 1.5" comp baffle.
Dyna-S E.I.
Earls 10 row Oil Cooler
Acewell 2802 Series Speedo/Tach
Innovate LC1 Wideband 02 AFR meter
Phoenix, Az
MTC 1075cc.
Camshafts: Kawi GPZ-1100 .375 lift
Head: P&P via Larry Cavanaugh
ZX636 suspension
MIKUNI, RS-34'S...
Kerker 4-1, 1.5" comp baffle.
Dyna-S E.I.
Earls 10 row Oil Cooler
Acewell 2802 Series Speedo/Tach
Innovate LC1 Wideband 02 AFR meter
Phoenix, Az
Please Log in or Create an account to join the conversation.
- Old Man Rock
-
- Offline
- User
-
Registered
- Posts: 6074
- Thanks: 225
Re: Blowing fuses, battery wont stay charged
11 Aug 2010 05:32 - 11 Aug 2010 05:36
Just my 2 cents...
Junk the fuse box and install these instead...

EDIT: Tim follow the link for the 1981 KZ1000/1100 OEM Service Manual (FREE)... Provides all the electrical test procedures and measurement ranges for your electrical system....
www.kawiworld.com/index.php?option=com_c...icle&id=77&Itemid=99
Junk the fuse box and install these instead...
EDIT: Tim follow the link for the 1981 KZ1000/1100 OEM Service Manual (FREE)... Provides all the electrical test procedures and measurement ranges for your electrical system....
www.kawiworld.com/index.php?option=com_c...icle&id=77&Itemid=99
1976 KZ900-A4
MTC 1075cc.
Camshafts: Kawi GPZ-1100 .375 lift
Head: P&P via Larry Cavanaugh
ZX636 suspension
MIKUNI, RS-34'S...
Kerker 4-1, 1.5" comp baffle.
Dyna-S E.I.
Earls 10 row Oil Cooler
Acewell 2802 Series Speedo/Tach
Innovate LC1 Wideband 02 AFR meter
Phoenix, Az
MTC 1075cc.
Camshafts: Kawi GPZ-1100 .375 lift
Head: P&P via Larry Cavanaugh
ZX636 suspension
MIKUNI, RS-34'S...
Kerker 4-1, 1.5" comp baffle.
Dyna-S E.I.
Earls 10 row Oil Cooler
Acewell 2802 Series Speedo/Tach
Innovate LC1 Wideband 02 AFR meter
Phoenix, Az
Attachments:
Last edit: 11 Aug 2010 05:36 by Old Man Rock.
Please Log in or Create an account to join the conversation.
- otakar
-

- Offline
- User
-
Registered
- Posts: 5073
- Thanks: 29
Re: Blowing fuses, battery wont stay charged
11 Aug 2010 06:11 - 11 Aug 2010 06:18
Actually the fuse box in those is not bad. It is much more advanced than the ones in the 70s. I would suspect a charging problem though. The rule of thumb is that the capacity of the battery should be 1:1 or greater than the capacity of the charging system. The system on that bike is about 18-20A and so should be the battery. I built a fuse box like this to replace mine.


74 Z1-A stock
76 KZ-900 Totaly stock vice MAC pipe
77 KZ-1000A stock
78 Z1-R 100%MINT 500 original Mi.
78 Z1-R Yoshi 1103 kit stage 1 cams Yoshi pipe. Etc
79 KZ-1300 (1400)
80 KZ-1300
81 Scratch built GPz1150R
82 KZ1000
76 KZ-900 Totaly stock vice MAC pipe
77 KZ-1000A stock
78 Z1-R 100%MINT 500 original Mi.
78 Z1-R Yoshi 1103 kit stage 1 cams Yoshi pipe. Etc
79 KZ-1300 (1400)
80 KZ-1300
81 Scratch built GPz1150R
82 KZ1000
Last edit: 11 Aug 2010 06:18 by otakar.
Please Log in or Create an account to join the conversation.
- Motor Head
-
- Offline
- User
-
Registered
- FIX UP YOUR BIKE RIGHT AND CHEAP
- Posts: 5137
- Thanks: 392
Re: Blowing fuses, battery wont stay charged
11 Aug 2010 07:41
This started after the last time you had the stator and rotor off, right? Is it possible that you have a bad connection or have pinched a wire where the sprocket cover goes on? Or maybe when working on the rotor/ starter clutch, you have had some of the magnets in the rotor come loose, as they are gulled to the inside of the rotor. Check the 3 wires where they plug in from the stator to the harness, 3 bullet connectors behind the sprocket cover.
It must be your 30AMP MAIN fuse that is blowing? If so, be sure to find and repair the short before replacing with another fuse box. Me on my 82 1000 LTD, took the main fuse circuit out of the factory box do to those glass AGX fuses never blowing, but un soldering at the cap. I replaced that circuits fuse with the in line pictured earlier in this thread, but the one with the yellow wires, rated at 30AMP max. This goes at where on your fuse panel you have 2 bullet connectors, 1 with a white wire (load) and 1 with a red/white wire (power source). There is a great picture of your fuse panel in this thread.
It must be your 30AMP MAIN fuse that is blowing? If so, be sure to find and repair the short before replacing with another fuse box. Me on my 82 1000 LTD, took the main fuse circuit out of the factory box do to those glass AGX fuses never blowing, but un soldering at the cap. I replaced that circuits fuse with the in line pictured earlier in this thread, but the one with the yellow wires, rated at 30AMP max. This goes at where on your fuse panel you have 2 bullet connectors, 1 with a white wire (load) and 1 with a red/white wire (power source). There is a great picture of your fuse panel in this thread.
1982 KZ1000LTD K2 Vance & Hines 4-1 ACCEL COILS Added Vetter fairing & Bags. FOX Racing rear Shocks, Braced Swing-arm, Fork Brace, Progressive Fork Springs RT Gold Emulators, APE Valve Springs, 1166 Big Bore kit, RS34's, GPZ cams.
1980 KZ550LTD C1 Stock SOLD Miss it
1979 MAZDA RX7 in the works, 13B...
1980 KZ550LTD C1 Stock SOLD Miss it
1979 MAZDA RX7 in the works, 13B...
Please Log in or Create an account to join the conversation.
- MFolks
-
- Offline
- User
-
Registered
- Posts: 6650
- Thanks: 541
Re: Blowing fuses, battery wont stay charged
11 Aug 2010 10:45
I've posted this before, but if you're going to replace the glass tubed fuse holders that came with your bike, read this:
Fuse And Fuse Holder Designations
1. The older Kawasaki’s use a glass tubed fuse with the designation of AGX 1†long. Most good auto parts stores can get them for you. They are ¼†in diameter.
2. The more common AGC is 1 ¼†long and may not fit the smaller fuse clips. Again, ¼†in diameter.
3. To clean and polish the fuse clips, I use a cotton swab(Q- Tip) and some Brasso metal cleaner or Turtle Wax Chrome Polish. I suppose any good metal polish would work.
4. These fuses can fail internally but look good, only by removing them from the clip and electrically continuity checking with either a self powered test light, or a multimeter set on OHMS can they be determined to be in good shape.
5. A physical inspection of the metal end caps for tightness will tell you if the fuse is serviceable.
6. Most modern motorcycles are now using the automobile “Blade†style fuse with the designation of ATC or ATO.
7. The reduced sized “Mini†Blade style fuse holder uses the ATM size of fuses.
8. If the fuse and fuse holder overheat, it could soften or anneal the grip of the clip, it might require squeezing the clip to restore the tightness.
9. A list of where to purchase “Blade†style fuses and holders:
www.waytekwire.com order.waytekwire.com/productdetail2/M50/...20%20%20%208%20FUSE/
www.rallylights.com www.rallylights.com/detail.aspx?ID=765
www.delcity.net www.delcity.net/cartviewitem?item=73805&search=y
1982 GPZ1100 B2
General Dynamics/Convair 1983-1993
GLCM BGM-109 Tomahawk, AGM-129A Advanced Cruise Missile (ACM)
General Dynamics/Convair 1983-1993
GLCM BGM-109 Tomahawk, AGM-129A Advanced Cruise Missile (ACM)
Please Log in or Create an account to join the conversation.
- Kitten Tooth
-
Topic Author
- Offline
- User
-
Registered
- Posts: 743
- Thanks: 10
Re: Blowing fuses, battery wont stay charged
11 Aug 2010 22:16
okay, i pulled out my fuse box and took to the corrosion and nastyness with a wire brush. Im going to go and buy the right battery tomorrow. there is corrosion on everything on the wiring it seems. I found a broken 6 pin connector behind the headlight that has bare wire exposed. I already have the new clip, just have to crimp the new connectors on to pop into the plastic piece. Thanks for all the replys, im gonna try and do all of the tests tomorrow. My fuse box is clean now too.
1981 Kawasaki KZ1000-K LTD
1983 Suzuki GS300L-D
1982 Suzuki GS300L-Z sold:(
1976 KZ400D3
1973 Z900... I WISH
DO A BARREL ROLL!!
1983 Suzuki GS300L-D
1982 Suzuki GS300L-Z sold:(
1976 KZ400D3
1973 Z900... I WISH
DO A BARREL ROLL!!
Please Log in or Create an account to join the conversation.
- Old Man Rock
-
- Offline
- User
-
Registered
- Posts: 6074
- Thanks: 225
Re: Blowing fuses, battery wont stay charged
12 Aug 2010 05:28
Tim... This weekend, go through and accomplish ALL electrical tests/measurements and record your measurements for future t-shooting reference....
This will be important to you later on if & when required....
Plus you'll learn so much more about your KZ....")
OMR
This will be important to you later on if & when required....
Plus you'll learn so much more about your KZ....
OMR
1976 KZ900-A4
MTC 1075cc.
Camshafts: Kawi GPZ-1100 .375 lift
Head: P&P via Larry Cavanaugh
ZX636 suspension
MIKUNI, RS-34'S...
Kerker 4-1, 1.5" comp baffle.
Dyna-S E.I.
Earls 10 row Oil Cooler
Acewell 2802 Series Speedo/Tach
Innovate LC1 Wideband 02 AFR meter
Phoenix, Az
MTC 1075cc.
Camshafts: Kawi GPZ-1100 .375 lift
Head: P&P via Larry Cavanaugh
ZX636 suspension
MIKUNI, RS-34'S...
Kerker 4-1, 1.5" comp baffle.
Dyna-S E.I.
Earls 10 row Oil Cooler
Acewell 2802 Series Speedo/Tach
Innovate LC1 Wideband 02 AFR meter
Phoenix, Az
Please Log in or Create an account to join the conversation.
- TeK9iNe
-

- Offline
- User
-
Registered
- What did you do!?!
- Posts: 2436
- Thanks: 28
Re: Blowing fuses, battery wont stay charged
12 Aug 2010 06:40
Have you purchased the manual yet..??
:laugh:
GL.
")
:laugh:
GL.
Motorcycle Shop Owner/Operator
79 Kawie Z1000 LTD
81 Kawie Z1000 CSR
83 Honda VT750C A
85 Kawie GPZ900 A2
86 Zukie GS1150 EG
93 Yamie XV1100 E
Lucky to have rolled many old bikes through my doors
79 Kawie Z1000 LTD
81 Kawie Z1000 CSR
83 Honda VT750C A
85 Kawie GPZ900 A2
86 Zukie GS1150 EG
93 Yamie XV1100 E
Lucky to have rolled many old bikes through my doors
Please Log in or Create an account to join the conversation.
Moderators: Street Fighter LTD