
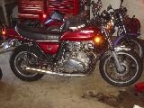
Test ride today. KZ1000 elec. Ign. into a KZ650
- steell
-
- Offline
- User
-

Registered
- Posts: 6849
- Thanks: 208
Re: Kz1000 electronic Ign swap to KZ650
08 Jan 2006 17:37
The springs come off and go back on real easy.
KD9JUR
Please Log in or Create an account to join the conversation.
- loudhvx
-

- Offline
- KZr Legend
-

Registered
- Posts: 10863
- Thanks: 1622
Re: Kz1000 electronic Ign swap to KZ650
09 Jan 2006 04:33
rstnick wrote:
The iron rotor-slug (which has the point) is pressed onto the hub. You can press it off and re-orient it any way you want. This will eliminate the need to elongate the timing plate's mounting holes.
If the rotor's point is not near the center of the pickup (with blue and black wires) when the F mark on the advancer is at the timing mark, you will have to roughly static time it. You do this by removing the hub from the advancer and pressing the rotor-slug off the hub. (Note the little arrow which shows the direction of rotation on the slug.) Use a vice or arbor press with appropriate arbor tools (small tubes etc). Don't try to pry with screwdrivers or any other makeshift pullers.
1. Install the advancer.
2. Mount the timing plate with the screws roughly in the center of the mounting slots.
3. Re-install the hub onto the advancer but without the slug. This takes a little patience . You have to hold both weights open with your hands then install the hub with your third hand. Use a small screwdriver to hold the weights open if you don't have three hands. It's a little juggling act, but once you get the knack , it's easy.
2. Rotate the engine so the advancer's F mark is aligned with the timing mark.
3. Hold the rotor in place and mark the hub to show where the point should be. The iron slug's point will just barely be past the center of the pickup (blue and black wires) in the direction of rotation. The center of the point should be past the center of the pickup by about 1/16" or just under.
4. Remove the hub again.
5. Press the slug back onto the hub so the point is at the same location as the mark you made.
6. Now re-install the hub (now with slug) back onto the advancer. (Point toward black and blue pickup). (Engine is still at the F mark for cylinders 1 and 4.)
That should be it. Now you don't have to worry about the rotor being "out of whack". You will make the final adjustments to the timing plate with a strobe light. Also, I can't tell in the photos (my photo isn't any better), but check to make sure both rubber stops are in place.

I tried the 1000's rotor on to the 650's base.
The 1000's rotor is shorter by approx 1/8 th. of an inch/ 3~4 mm. I could find a washer for that, but I think the position of the rotor to pick up, would be out of whack. I've got to check.
The weights and size of the baseplates of the 650s and 1000s look to be the same, other than a raised ring on the backside of the 650s.
The springs are different. There are two extra windings in the 650's springs. How easy do the springs come off without distorting them? Maybe I just need to swap the springs to get the Timing Advance I need.
The iron rotor-slug (which has the point) is pressed onto the hub. You can press it off and re-orient it any way you want. This will eliminate the need to elongate the timing plate's mounting holes.
If the rotor's point is not near the center of the pickup (with blue and black wires) when the F mark on the advancer is at the timing mark, you will have to roughly static time it. You do this by removing the hub from the advancer and pressing the rotor-slug off the hub. (Note the little arrow which shows the direction of rotation on the slug.) Use a vice or arbor press with appropriate arbor tools (small tubes etc). Don't try to pry with screwdrivers or any other makeshift pullers.
1. Install the advancer.
2. Mount the timing plate with the screws roughly in the center of the mounting slots.
3. Re-install the hub onto the advancer but without the slug. This takes a little patience . You have to hold both weights open with your hands then install the hub with your third hand. Use a small screwdriver to hold the weights open if you don't have three hands. It's a little juggling act, but once you get the knack , it's easy.
2. Rotate the engine so the advancer's F mark is aligned with the timing mark.
3. Hold the rotor in place and mark the hub to show where the point should be. The iron slug's point will just barely be past the center of the pickup (blue and black wires) in the direction of rotation. The center of the point should be past the center of the pickup by about 1/16" or just under.
4. Remove the hub again.
5. Press the slug back onto the hub so the point is at the same location as the mark you made.
6. Now re-install the hub (now with slug) back onto the advancer. (Point toward black and blue pickup). (Engine is still at the F mark for cylinders 1 and 4.)
That should be it. Now you don't have to worry about the rotor being "out of whack". You will make the final adjustments to the timing plate with a strobe light. Also, I can't tell in the photos (my photo isn't any better), but check to make sure both rubber stops are in place.
1981 KZ550 D1 gpz.
Kz550 valve train warning.
Other links.
Kz550 valve train warning.
Other links.
Please Log in or Create an account to join the conversation.
- loudhvx
-
- Offline
- KZr Legend
-
Registered
- Posts: 10863
- Thanks: 1622
Re: Kz1000 electronic Ign swap to KZ650
09 Jan 2006 04:33
Is your iron rotor damaged? It looks welded. It needs to be smooth. Any aberrations cause false triggers and mis-fires or back-fires.
Post edited by: loudhvx, at: 2006/01/09 07:37
Post edited by: loudhvx, at: 2006/01/09 07:37
1981 KZ550 D1 gpz.
Kz550 valve train warning.
Other links.
Kz550 valve train warning.
Other links.
Please Log in or Create an account to join the conversation.
- rstnick
-
 Topic Author
- Offline
- Premium Member
-

Registered
- Posts: 4603
- Thanks: 518
Re: Kz1000 electronic Ign swap to KZ650
14 Jan 2006 15:53No the rotor is not damaged. It has a white spot on it, maybe some white grease?Is your iron rotor damaged? It looks welded
I have switched the springs over to keep the same tension as on a 650.The springs come off and go back on real easy.
I wired up the Pick-ups to the Igniter today. I still have to connect the ground and Hot wires, but will be doing the WG Coil wiring mod next, and will take care of the + and - then.
There is a blue/red wire that goes to the Oil Pressure Switch, in the points cover area, that I needed to remove from the old Point's wiring harness and add to the 1000's pick-up wiring, as there was no wire for this on the 1000's harness.
.

Rob
CANADA
Need a key for your Kawasaki? PM me
1978 KZ650 C2, 130K kms, Delkevic ex, EI, CVK32, PMC easy clutch, ATK fork brace, steering damper, braced swingarm, ZRX shocks, 18" Z1R front wheel.
2000 ZRX1100
2011 Ninja 250R - Wife's
2005 z750s
1978 KZ1000 project
1983 KZ1000R2 Project
CANADA
Need a key for your Kawasaki? PM me
1978 KZ650 C2, 130K kms, Delkevic ex, EI, CVK32, PMC easy clutch, ATK fork brace, steering damper, braced swingarm, ZRX shocks, 18" Z1R front wheel.
2000 ZRX1100
2011 Ninja 250R - Wife's
2005 z750s
1978 KZ1000 project
1983 KZ1000R2 Project
Please Log in or Create an account to join the conversation.
- rstnick
-
Topic Author
- Offline
- Premium Member
-
Registered
- Posts: 4603
- Thanks: 518
Re: Kz1000 electronic Ign swap to KZ650
22 Jan 2006 07:33
A question for WG or others who may know.
I have the 1000 Ign pieces in and have the WG coil wiring mod set up.
What I would like to ask is; there is a power/Red wire coming off the Igniter. I have wired this to one of the #87 connections on my 12v relay. My relay is the 5 prong type with two # 87 connectors. Is this correct?
Also, there is the yellow/red power wire to the coils that is under the tank. It has a dual plug to plug both coils into. For the wiring mod, can I disconnect these wires, have the "trigger" wire (is this the trigger?) run to the #86 prong on the relay, then run a wire from one of the #87 to the coils with a dual plug?
There was a mention to cap/tape off this wire, as "this is where your problems are", in some instructions.
Rob
CANADA
Need a key for your Kawasaki? PM me
1978 KZ650 C2, 130K kms, Delkevic ex, EI, CVK32, PMC easy clutch, ATK fork brace, steering damper, braced swingarm, ZRX shocks, 18" Z1R front wheel.
2000 ZRX1100
2011 Ninja 250R - Wife's
2005 z750s
1978 KZ1000 project
1983 KZ1000R2 Project
CANADA
Need a key for your Kawasaki? PM me
1978 KZ650 C2, 130K kms, Delkevic ex, EI, CVK32, PMC easy clutch, ATK fork brace, steering damper, braced swingarm, ZRX shocks, 18" Z1R front wheel.
2000 ZRX1100
2011 Ninja 250R - Wife's
2005 z750s
1978 KZ1000 project
1983 KZ1000R2 Project
Please Log in or Create an account to join the conversation.
- loudhvx
-
- Offline
- KZr Legend
-
Registered
- Posts: 10863
- Thanks: 1622
Re: Kz1000 electronic Ign swap to KZ650
22 Jan 2006 22:34
I don't know about that relay, but it looks strange to me. The coils should get their 12 volts from the same place as the ignitor. I see you have two terminals marked "87". I guess this means they are getting power from the same connection, but why draw it as two different nodes?
Incidently, the ignitor uses very little power. It sinks a large current to ground, but uses very little power from the positive wire. Therefore, its ground connection is more important than the positive.
Also, I'd rather see dedicated ground wires rather than relying on the frame.
Incidently, the ignitor uses very little power. It sinks a large current to ground, but uses very little power from the positive wire. Therefore, its ground connection is more important than the positive.
Also, I'd rather see dedicated ground wires rather than relying on the frame.
1981 KZ550 D1 gpz.
Kz550 valve train warning.
Other links.
Kz550 valve train warning.
Other links.
Please Log in or Create an account to join the conversation.
- wiredgeorge
-

- Offline
- User
-
Registered
- Posts: 5298
- Thanks: 45
Re: Kz1000 electronic Ign swap to KZ650
23 Jan 2006 05:38
The red wire going into your igniter is power. The dual out connector that used to have the two yellow/red wires is switched DC... it is SUPPOSED to be 12VDC but is degraded but still carries current. Use ONE of the outputs from the dual connector to go to the trigger on the relay. When you turn the key on, it then turns on (closes) the relay. The output wire is coming from #87. On MOST 5 pin relays there will be an #87 and #87B and while these are both power out of the relay, I don't use the second. I bring a wire off #87 and split it THREE ways. One goes to igniter, and the other two wires go to the coils. I use red wire for the power out to keep track of the fact that it is 12VDC from a color standpoint... wish I could find yellow/red striped wire but I can't.
wiredgeorge Motorcycle Carburetors
Mico TX
www.wgcarbs.com
Too many bikes to list!
Mico TX
www.wgcarbs.com
Too many bikes to list!
Please Log in or Create an account to join the conversation.
- rstnick
-
Topic Author
- Offline
- Premium Member
-
Registered
- Posts: 4603
- Thanks: 518
Re: Kz1000 electronic Ign swap to KZ650
23 Jan 2006 14:08
Thanks for the info guys.
Here's the relay I bought, showing the connections on the package. As you can see there are two #87s, in this case labelled "Power to Lamps". I assume either one can be used, or in my case, I should be OK as I've wired it.
.

Post edited by: rstnick, at: 2006/01/23 19:01
Here's the relay I bought, showing the connections on the package. As you can see there are two #87s, in this case labelled "Power to Lamps". I assume either one can be used, or in my case, I should be OK as I've wired it.
.
Post edited by: rstnick, at: 2006/01/23 19:01
Rob
CANADA
Need a key for your Kawasaki? PM me
1978 KZ650 C2, 130K kms, Delkevic ex, EI, CVK32, PMC easy clutch, ATK fork brace, steering damper, braced swingarm, ZRX shocks, 18" Z1R front wheel.
2000 ZRX1100
2011 Ninja 250R - Wife's
2005 z750s
1978 KZ1000 project
1983 KZ1000R2 Project
CANADA
Need a key for your Kawasaki? PM me
1978 KZ650 C2, 130K kms, Delkevic ex, EI, CVK32, PMC easy clutch, ATK fork brace, steering damper, braced swingarm, ZRX shocks, 18" Z1R front wheel.
2000 ZRX1100
2011 Ninja 250R - Wife's
2005 z750s
1978 KZ1000 project
1983 KZ1000R2 Project
Please Log in or Create an account to join the conversation.
- loudhvx
-
- Offline
- KZr Legend
-
Registered
- Posts: 10863
- Thanks: 1622
Re: Kz1000 electronic Ign swap to KZ650
24 Jan 2006 03:41
If both 87's are indeed the same connection, then your drawing should be ok.
1981 KZ550 D1 gpz.
Kz550 valve train warning.
Other links.
Kz550 valve train warning.
Other links.
Please Log in or Create an account to join the conversation.
- rstnick
-
Topic Author
- Offline
- Premium Member
-
Registered
- Posts: 4603
- Thanks: 518
Re: Kz1000 electronic Ign swap to KZ650
07 Mar 2006 20:32
SHE STARTED. :woohoo:
The weather's supposed to get above freezing this weekend so I put some Gas in my tank (been stored with oil), put my battery in, checked timing and tried to start her up.
At first she only fired on a few cylinders. I pulled the plugs and found 1&4 were firing but not 2&3. I spent a few hours checking connections, testing the Ignitor and pick ups, even switched coil feed wires which did end up firing the other set of plugs.
I could start her, but of coarse she sounded terrible.
I looked at the Pick up plate and one thing was bothering me. The gap between the rotor and each pick up was different. The 1&4 gap was smaller than the 2&3 gap. I thought this could be the problem. I needed to remove the mounting plate and adjust the mounting holes to allow me to adjust the gap to be equal. I made the mounting holes and did not make them perfect.
Once adjusted and reinstalled, she fired up on all 4 cylinders and revs beautifully.
Now i'm ready to give her a test ride this weekend and check how well the advance is working. When I rev her up she sounds fine, but will want to feel her in motion.
Thanks to all for the help on this conversion.")
Post edited by: rstnick, at: 2006/03/07 23:34
The weather's supposed to get above freezing this weekend so I put some Gas in my tank (been stored with oil), put my battery in, checked timing and tried to start her up.
At first she only fired on a few cylinders. I pulled the plugs and found 1&4 were firing but not 2&3. I spent a few hours checking connections, testing the Ignitor and pick ups, even switched coil feed wires which did end up firing the other set of plugs.
I could start her, but of coarse she sounded terrible.
I looked at the Pick up plate and one thing was bothering me. The gap between the rotor and each pick up was different. The 1&4 gap was smaller than the 2&3 gap. I thought this could be the problem. I needed to remove the mounting plate and adjust the mounting holes to allow me to adjust the gap to be equal. I made the mounting holes and did not make them perfect.
Once adjusted and reinstalled, she fired up on all 4 cylinders and revs beautifully.
Now i'm ready to give her a test ride this weekend and check how well the advance is working. When I rev her up she sounds fine, but will want to feel her in motion.
Thanks to all for the help on this conversion.
Post edited by: rstnick, at: 2006/03/07 23:34
Rob
CANADA
Need a key for your Kawasaki? PM me
1978 KZ650 C2, 130K kms, Delkevic ex, EI, CVK32, PMC easy clutch, ATK fork brace, steering damper, braced swingarm, ZRX shocks, 18" Z1R front wheel.
2000 ZRX1100
2011 Ninja 250R - Wife's
2005 z750s
1978 KZ1000 project
1983 KZ1000R2 Project
CANADA
Need a key for your Kawasaki? PM me
1978 KZ650 C2, 130K kms, Delkevic ex, EI, CVK32, PMC easy clutch, ATK fork brace, steering damper, braced swingarm, ZRX shocks, 18" Z1R front wheel.
2000 ZRX1100
2011 Ninja 250R - Wife's
2005 z750s
1978 KZ1000 project
1983 KZ1000R2 Project
Please Log in or Create an account to join the conversation.
- oldcoldankles
-
- Offline
- User
-
Registered
- Posts: 234
- Thanks: 3
Re: Kz1000 electronic Ign swap to KZ650
07 Mar 2006 20:55
Great news Rob - with the new ignition, fairing, paint and new bearings it will feel like a whole new bike when the weather breaks for your first spring ride:laugh:
Peachland BC
1981 KZ1000 CSR M1
1983 KZ550 LTD M1 (Shaft)
1989 Corvette coupe
1981 KZ1000 CSR M1
1983 KZ550 LTD M1 (Shaft)
1989 Corvette coupe
Please Log in or Create an account to join the conversation.
- xstreamcanadian
-

- Offline
- User
-
Registered
- Posts: 280
- Thanks: 12
Re: Kz1000 electronic Ign swap to KZ650
07 Mar 2006 20:56
Rob thats awesome, now you can guide me through mine!
What did you cut that plate with?> or did you use the old one somehow
What did you cut that plate with?> or did you use the old one somehow
Please Log in or Create an account to join the conversation.
Moderators: Street Fighter LTD