
Kawasaki Maintenance Video
- LarryC
-
 Topic Author
- Offline
- User
-

Registered
- Posts: 1241
- Thanks: 309
Kawasaki Maintenance Video
09 Mar 2014 08:51 - 09 Mar 2014 08:55
FWIW....I just watched the maintenance video on the main page. In particular, the valve job section is a good example of how NOT to do a valve job.... I don't care if it is official Kawasaki media, it's got several bad bits of advice and process in it.
For starters, never lay the head on the valve cover surface on the workbench to cut the seats. There's only one correct position for it to be in, the valve guide must be pointing up so that the inserted pilot is level & directly in line wit h the cutter. Use a small bubble level to determine when it's correct.
Second, starting with the 45 degree cutter is a mistake. The seats are generally not concentric after engine wear occurs. Cutting the 45 first will pretty well ensure the cutter follows the already non concentric hole. Use a 35 degree cutter first to see how out of square things actually are. You want a good, straight seat? Start with a good, straight reference point")
Third, if you pound on a valve guide as hard as the technician in the video did, there's a good possibility of damaging the guide.
You cannot heat the area around the guide to proper temperature as quickly as it appears in the video.
Those are a few of the poor practices I saw....
For starters, never lay the head on the valve cover surface on the workbench to cut the seats. There's only one correct position for it to be in, the valve guide must be pointing up so that the inserted pilot is level & directly in line wit h the cutter. Use a small bubble level to determine when it's correct.
Second, starting with the 45 degree cutter is a mistake. The seats are generally not concentric after engine wear occurs. Cutting the 45 first will pretty well ensure the cutter follows the already non concentric hole. Use a 35 degree cutter first to see how out of square things actually are. You want a good, straight seat? Start with a good, straight reference point
Third, if you pound on a valve guide as hard as the technician in the video did, there's a good possibility of damaging the guide.
You cannot heat the area around the guide to proper temperature as quickly as it appears in the video.
Those are a few of the poor practices I saw....
Larry C.
Last edit: 09 Mar 2014 08:55 by LarryC.
The following user(s) said Thank You: Mcdroid, Street Fighter LTD, jonarmstrong
Please Log in or Create an account to join the conversation.
- kaw-a-holic
-

- Offline
- User
-
Registered
- Posts: 1808
- Thanks: 249
Re: Kawasaki Maintenance Video
17 May 2014 08:44LarryC wrote: FWIW....I just watched the maintenance video on the main page. In particular, the valve job section is a good example of how NOT to do a valve job.... I don't care if it is official Kawasaki media, it's got several bad bits of advice and process in it.
For starters, never lay the head on the valve cover surface on the workbench to cut the seats. There's only one correct position for it to be in, the valve guide must be pointing up so that the inserted pilot is level & directly in line wit h the cutter. Use a small bubble level to determine when it's correct.
Second, starting with the 45 degree cutter is a mistake. The seats are generally not concentric after engine wear occurs. Cutting the 45 first will pretty well ensure the cutter follows the already non concentric hole. Use a 35 degree cutter first to see how out of square things actually are. You want a good, straight seat? Start with a good, straight reference point
Third, if you pound on a valve guide as hard as the technician in the video did, there's a good possibility of damaging the guide.
You cannot heat the area around the guide to proper temperature as quickly as it appears in the video.
Those are a few of the poor practices I saw....
Larry I have to have my seats re-done. I have never done them but my neighbor has went to school for motorcycle repair. He is a nice guy and offered to show me how to seat valves. As usual I do research online and I read an article saying that cutting new seats can cause issues with shim over bucket engines. My neighbor did suggest replacing the exhaust valves. Any feed back would great.
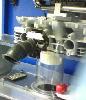
Here is a pic of the combustion chamber, they all look the same. I will pull an exhaust valve later today and post a pic. I'm thinking SS replacements. The intake valve seat area looked good, or should I just replace them also?
Jon
1977 KZ1000a1
Mesa, AZ
Phoenix Fighter Project
1977 KZ1000a1
Mesa, AZ
Phoenix Fighter Project
Attachments:
Please Log in or Create an account to join the conversation.
Moderators: Street Fighter LTD