
KZ650 valve shim replacement
- bluej58
-
 Topic Author
- Offline
- Sustaining Member
-

Registered
- The chrome don't get you home
- Posts: 2474
- Thanks: 507
KZ650 valve shim replacement
21 Jun 2013 18:39 - 21 Jun 2013 18:50
Finally got around to checking the valve clearances and all 4 exhaust valves are at .10mm ")
The intake clearances are .08 .06 .06 .06 :pinch:
It looks like I should end up with .08 .11 .11 .11 when done , hopefully :dry:
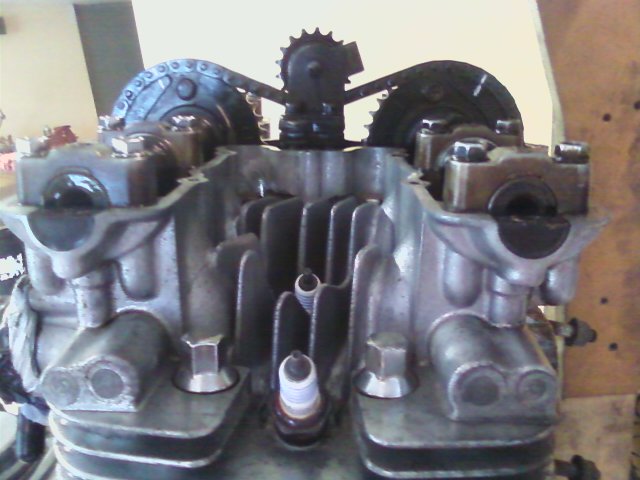
So we will be removing the back cam
I found this in the archives, thanks Ron and I think I know what to do.
When he says remove the "cam chain idler" is that the same thing as the "upper chain guide " ?
Any suggestions would be appreciated
Part of what Ron wrote;
. So then you remove your upper camchain idler, unbolt the cam, remove the caps, then carefully keep all chain slack between the cams and the chain tight going down in the engine and carefully move the cam towards the center of the engine, remove one of the valve buckets needing adjustment, retrieve the shim, note the size and obtain your suitable replacement, reinstall, carefully lift the cam back in position keeping chain tight going down in the engine, torque down the camcaps to 7 ft/lb or so and you're done with that cam. Recheck clearances and move to the other cam. One cam at a time, do the way I say and timing will not be fouled up.
JD
The intake clearances are .08 .06 .06 .06 :pinch:
It looks like I should end up with .08 .11 .11 .11 when done , hopefully :dry:
So we will be removing the back cam
I found this in the archives, thanks Ron and I think I know what to do.
When he says remove the "cam chain idler" is that the same thing as the "upper chain guide " ?
Any suggestions would be appreciated
Part of what Ron wrote;
. So then you remove your upper camchain idler, unbolt the cam, remove the caps, then carefully keep all chain slack between the cams and the chain tight going down in the engine and carefully move the cam towards the center of the engine, remove one of the valve buckets needing adjustment, retrieve the shim, note the size and obtain your suitable replacement, reinstall, carefully lift the cam back in position keeping chain tight going down in the engine, torque down the camcaps to 7 ft/lb or so and you're done with that cam. Recheck clearances and move to the other cam. One cam at a time, do the way I say and timing will not be fouled up.
JD
78 KZ1000 A2A
Last edit: 21 Jun 2013 18:50 by bluej58.
Please Log in or Create an account to join the conversation.
- 650ed
-

- Offline
- User
-

Registered
- Posts: 15334
- Thanks: 2830
Re: KZ650 valve shim replacement
21 Jun 2013 19:11
Yes, the "cam chain idler" is the same thing as the "upper chain guide."
Before removing the cam, use a 17mm wrench on the crankshaft (under the points cover) to set the 1 & 4 pistons to top dead center (TDC) by aligning the timing advancer "T" mark on the 1,4 side with the timing mark.
You may want to take a photo of both cam positions where they align with the cylinder head before removing the intake cam, that way when you put things back together you can see that they are positioned the same as before dis-assembly. Also, you may want to use a yellow grease pencil or white-out to mark a cam chain link and a corresponding spot on the exhaust and input cams. Again, this will help reassure you that the cam timing is set to the original position.
When installing the cam tighten the cam cap screws carefully and evenly to draw the cam down keeping in mind it may be pressing down on at least one valve to some degree. Also, I strongly recommend using a torque wrench calibrated in INCH pounds and not to exceed 96 inch lbs. of torque max. A torque wrench calibrated in FOOT pounds will not be sensitive enough to give a true reading.
Ed
1977 KZ650-C1 Original Owner - Stock (with additional invisible FIAMM horn)
The following user(s) said Thank You: bluej58, bluezbike
Please Log in or Create an account to join the conversation.
- bluej58
-
Topic Author
- Offline
- Sustaining Member
-
Registered
- The chrome don't get you home
- Posts: 2474
- Thanks: 507
")
Please Log in or Create an account to join the conversation.
- bluej58
-
Topic Author
- Offline
- Sustaining Member
-
Registered
- The chrome don't get you home
- Posts: 2474
- Thanks: 507
Re: KZ650 valve shim replacement
23 Jun 2013 12:13 - 23 Jun 2013 12:16
OK, the cam moved out of the way with no surprises, thanks for the confidence boost Ed ")
The right sizes shims have been ordered from KZRon
So We should be running at .11 mm on 2,3,4 but 1 is still at .08 which kinda bugged me, my buddy the mold maker talked me into trying to take .03 mm off the last shim and I gave it a try.
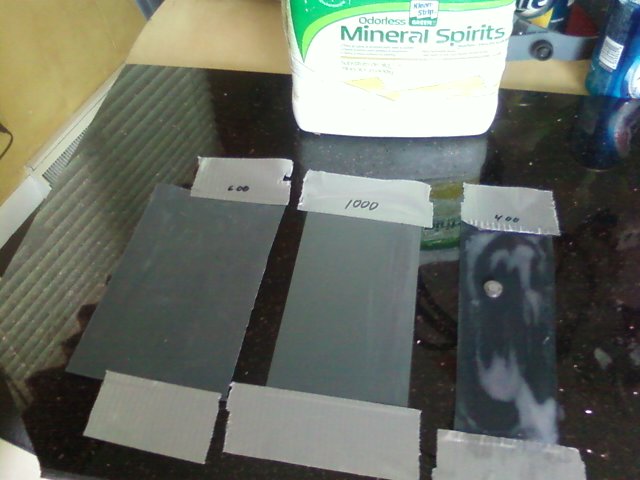
It took a while but I finally got it using 400 then 600 and finishing with 1000 sand paper
I am very happy with the results, it is more polished then the the original.
I know the shims are hardened, does anyone know if it is all the way through the shim or mostly on the surface ? I need to ask my buddy about this.
I concentrated the grinding on one side but also did just enough to the other side to remove the numbers so if there is a next time no one is fooled.

The right sizes shims have been ordered from KZRon
So We should be running at .11 mm on 2,3,4 but 1 is still at .08 which kinda bugged me, my buddy the mold maker talked me into trying to take .03 mm off the last shim and I gave it a try.
It took a while but I finally got it using 400 then 600 and finishing with 1000 sand paper
I am very happy with the results, it is more polished then the the original.
I know the shims are hardened, does anyone know if it is all the way through the shim or mostly on the surface ? I need to ask my buddy about this.
I concentrated the grinding on one side but also did just enough to the other side to remove the numbers so if there is a next time no one is fooled.
78 KZ1000 A2A
Last edit: 23 Jun 2013 12:16 by bluej58.
Please Log in or Create an account to join the conversation.
- 650ed
-
- Offline
- User
-
Registered
- Posts: 15334
- Thanks: 2830
Re: KZ650 valve shim replacement
23 Jun 2013 12:38
Ouch! Grinding or sanding a shim is a huge no no! You really need to replace that one! The shims are surface hardened; when you grind them you remove the hard surface and this can lead to them failing. some will even crack. Also, if after grinding or sanding the two surfaces are not 100% parallel you can run into problems. I know you won't want to hear this, but you really need to replace that shim. I wish you had asked before altering it. Ed
1977 KZ650-C1 Original Owner - Stock (with additional invisible FIAMM horn)
Please Log in or Create an account to join the conversation.
- bluej58
-
Topic Author
- Offline
- Sustaining Member
-
Registered
- The chrome don't get you home
- Posts: 2474
- Thanks: 507
Re: KZ650 valve shim replacement
23 Jun 2013 20:20
No big deal, I have a spare shim that will put it at .13, the rest will be at .11
I got to thinking about that half way through :blush:
Thanks again for the advise Ed.
JD
I got to thinking about that half way through :blush:
Thanks again for the advise Ed.
JD
78 KZ1000 A2A
Please Log in or Create an account to join the conversation.
Moderators: Street Fighter LTD