
KZ1000 Engine Reassembly
- tmerkl
-
 Topic Author
- Offline
- User
-

Registered
- Posts: 9
- Thanks: 0
KZ1000 Engine Reassembly
12 Apr 2013 10:36
Hey guys, I'm about to put some new rings on my 83 kz1000 police bike and I've been trying to gather as much info as I can before I delve into this. I've got the cam cover off, so I think my next step is to mark the cam chain and cam sprockets so I when it comes time to put everything back together the timing is still right. When I take out the cams, what holds the valves in the heads? Will putting them back be as simple as keeping the cams organized, front to back, left to right and laying them back in their respective spots? I've also read about gaping the rings, assembling dry...etc...I've read this document
here
. What I don't quite understand is how I'm supposed to put the cylinder back on all 4 pistons at once. The article I referenced mentions doing the center two, then rotating to install 1 and 4. Wont that screw up my marks? would i just rotate back to my original position after that? What if the chain slips on the crank while im rotating? I think I'm missing something here but not sure what. Anyone close to Montgomery Alabama that would like to swing by? lol. Thanks in advance!
Please Log in or Create an account to join the conversation.
- KZJOE900
-
- Offline
- Administrator
-

Super Users
- Posts: 1972
- Thanks: 445
Re: KZ1000 Engine Reassembly
12 Apr 2013 12:01 - 12 Apr 2013 12:06
The valves are kept in the head by the spring/valve/head assembly (springs, valve keepers, the valve seat, etc). In other words, the tension exerted by the spring against the valve face/seat and the spring retainer at the top of the valve steam (kept in there by the valve keepers). That is why you would need a valve spring compressor to take the valves off the head once the head is off the engine. As far as marking the cam chain and sprockets, you could, but don't need to. You will sync the cams again based on markings on the two sprockets, the timing markings behind the points plate (pickups in your case) and the the amount of links from the front of the head deck to the mark on the intake side sprocket. Read the service manual. Not a Clymer''s manual, but a Kawasaki factory service manual. Make sure you confirm what torque settings you use on assembling the cams back. There are manuals out there with mistakes and you will end up over torquing and stripping cam bolt holes. Here is a link to your bike that may help you with a bit.
Top End Disassemble
But its not for your model year and the cover/tensioner/top idler are a bit different. So use the Kawasaki service manual for your specific bike as your bible. And confirm torque vales before installation with members here. Also, be aware you are using the right torque wrench. If it asks for in-lb use the inch pound torque wrench, ft-lb; the foot pound wrench. That mistake can cost you as well. As for getting the pistons back into the cylinder block, I had all the pistons at around the same height. I used popsicle stike and finer nails to compress the rings for each piston as I went along. Patience finally paid off. Make sure your ring gaps are in the proper position and offset from each other in accordance to the manual. Good luck.
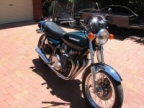
Current project 76 KZ900 (This was a Vetter model)
76 KZ900
81 XJ550H SECA (Current Project)
82 XJ550R SECA
Past:
86 FJ1200
74 Z1900
72 CB450
76 KZ900
81 XJ550H SECA (Current Project)
82 XJ550R SECA
Past:
86 FJ1200
74 Z1900
72 CB450
Last edit: 12 Apr 2013 12:06 by KZJOE900.
Please Log in or Create an account to join the conversation.
- tmerkl
-
Topic Author
- Offline
- User
-
Registered
- Posts: 9
- Thanks: 0
Re: KZ1000 Engine Reassembly
12 Apr 2013 16:50
Excellent info, thanks for that video. I also found the service manual in somebody's signature so I'll print that out asap.
Please Log in or Create an account to join the conversation.
- 3cav84a
-
- Offline
- User
-
Registered
- Posts: 47
- Thanks: 3
Re: KZ1000 Engine Reassembly
14 Apr 2013 21:52
Got a digital camera? take lots of pictures as you go so there is a record you can refer back to. At my age I can no longer rely on memory
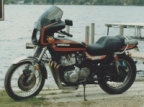
1977 KZ 1000 A1
Please Log in or Create an account to join the conversation.
Moderators: Street Fighter LTD