
- Posts: 1555
- Thank you received: 198
adding a couple bikes too the garrage
- peter1958
-
 Topic Author
- Offline
- Banned
Less
More
18 Sep 2011 08:59 #477608
by peter1958

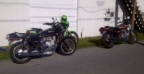
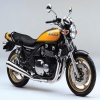
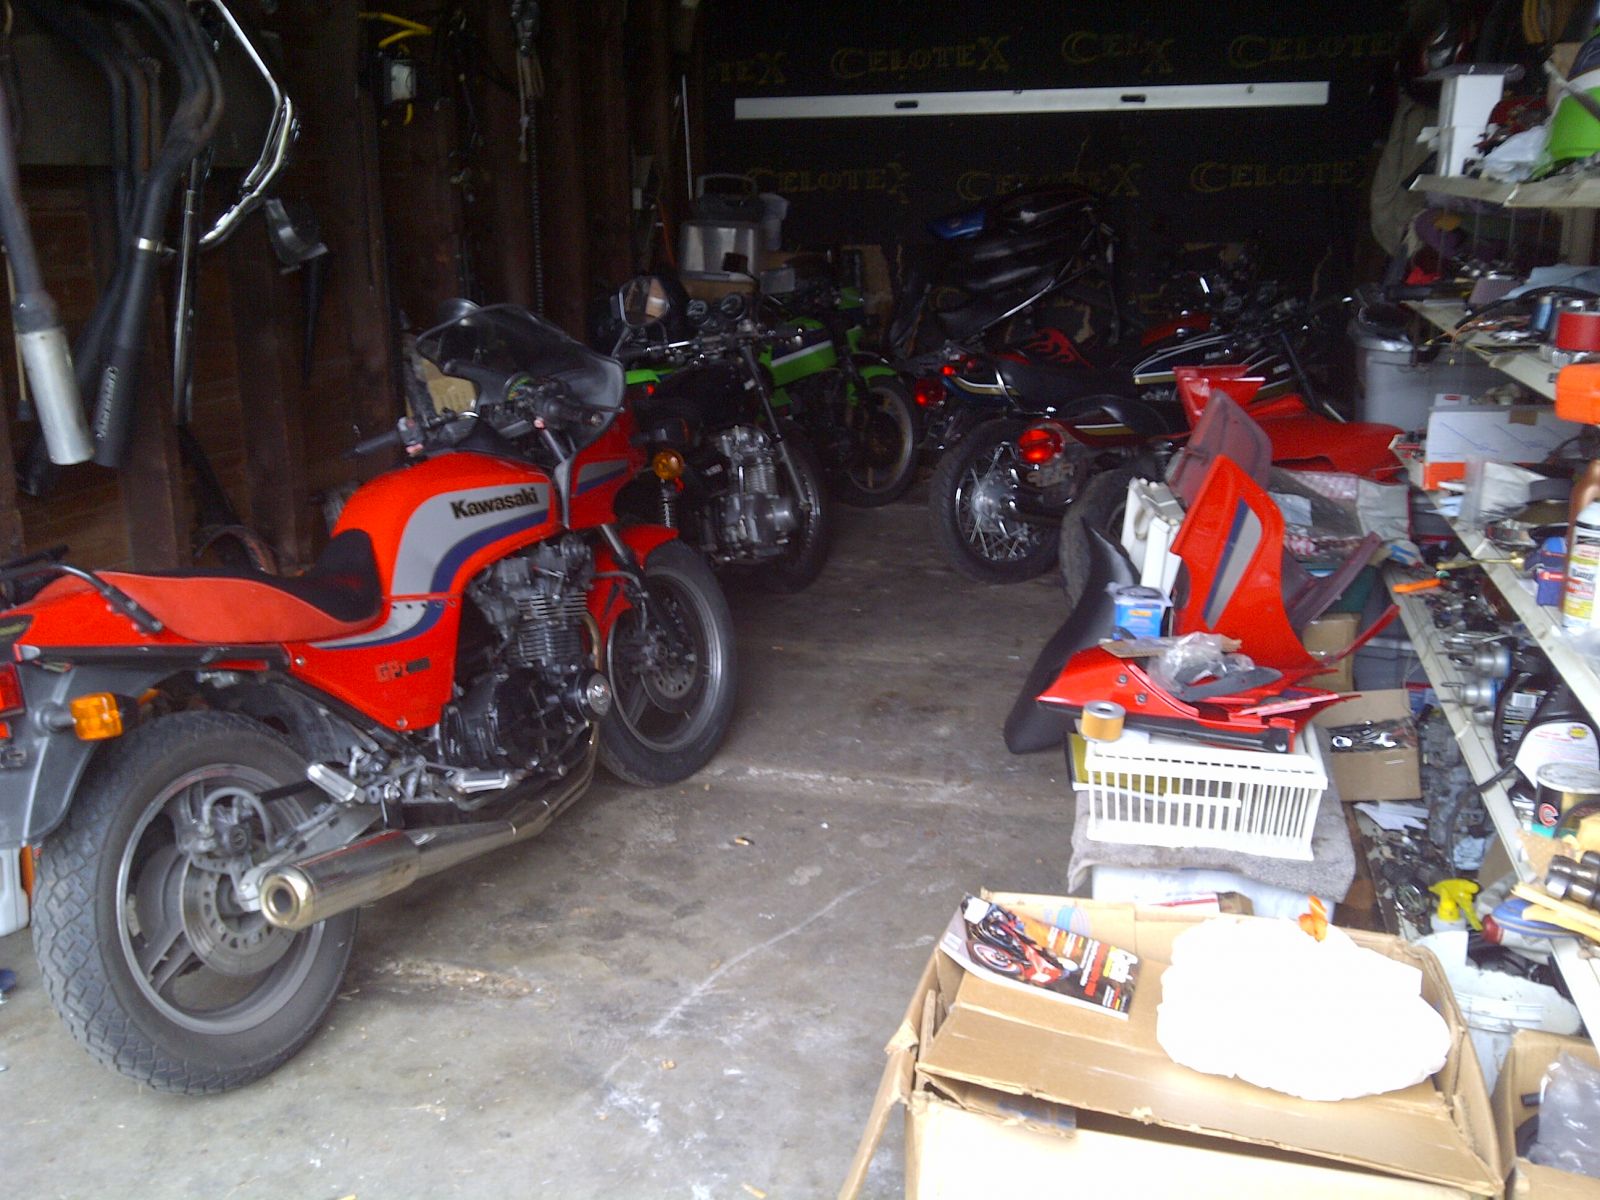
If everything works out I should have these two bikes by the end of the week
adding a couple bikes too the garrage was created by peter1958
If everything works out I should have these two bikes by the end of the week
Please Log in or Create an account to join the conversation.
- wireman
-
- Offline
- User
- The most interesting prick in the world
Less
More
- Posts: 4761
- Thank you received: 299
18 Sep 2011 09:28 #477619
by wireman
")
posting from deep under a non-descript barn in an undisclosed location southwest of Omaha.
Replied by wireman on topic adding a couple bikes too the garrage
Attachment popcorn_2011-09-18-2.jpg not found
posting from deep under a non-descript barn in an undisclosed location southwest of Omaha.
Attachments:
Please Log in or Create an account to join the conversation.
- trianglelaguna
-
- Offline
- User
- New and improved - extra strength
Less
More
- Posts: 8726
- Thank you received: 235
18 Sep 2011 10:13 #477623
by trianglelaguna
1976 KZ900
2003 ZX12R
2007 FZ1000
2004 ninja 250R for wife
Replied by trianglelaguna on topic adding a couple bikes too the garrage
unreal...those are always on my checklist and that red 1100 is a deal...wow
good move...they will be fun and double in price one day
good move...they will be fun and double in price one day
1976 KZ900
2003 ZX12R
2007 FZ1000
2004 ninja 250R for wife
Please Log in or Create an account to join the conversation.
- Bad Kaw
-
- Offline
- User
- Flying Squirell
Less
More
- Posts: 1750
- Thank you received: 13
20 Sep 2011 00:18 - 20 Sep 2011 00:18 #477973
by Bad Kaw
Agreed!!!
")
78 Kawasaki Z1R
81 Kawasaki KZ1000J (mods)
82 Kawasaki ELR Clone (1000 J)
82 Kawasaki KZ750R1/GPz750 ELR-ed
70 Kawasaki KV75
83 Honda CB1100F (few mods)
79 Suzuki GS1000 (rolling frame / project / junk)
84 Suzuki GS1150ES (modified project)
83 Yamaha XJ900R (project / junk)
Replied by Bad Kaw on topic adding a couple bikes too the garrage
trianglelaguna wrote: unreal...those are always on my checklist and that red 1100 is a deal...wow
good move...they will be fun and double in price one day
Agreed!!!
78 Kawasaki Z1R
81 Kawasaki KZ1000J (mods)
82 Kawasaki ELR Clone (1000 J)
82 Kawasaki KZ750R1/GPz750 ELR-ed
70 Kawasaki KV75
83 Honda CB1100F (few mods)
79 Suzuki GS1000 (rolling frame / project / junk)
84 Suzuki GS1150ES (modified project)
83 Yamaha XJ900R (project / junk)
Last edit: 20 Sep 2011 00:18 by Bad Kaw.
Please Log in or Create an account to join the conversation.
- peter1958
-
Topic Author
- Offline
- Banned
Less
More
- Posts: 1555
- Thank you received: 198
21 Sep 2011 11:53 #478296
by peter1958
Replied by peter1958 on topic adding a couple bikes too the garrage
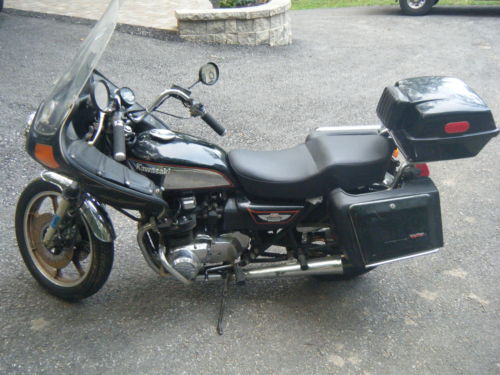
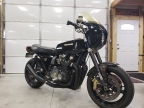
Got the GPZ and the classic will be here in an hour
Please Log in or Create an account to join the conversation.
- 531blackbanshee
-
- Offline
- Vendor
Less
More
- Posts: 7447
- Thank you received: 797
21 Sep 2011 12:29 #478312
by 531blackbanshee
skiatook,oklahoma 1980 z1r,1978 kz 1000 z1r x 3,
1976 kz 900 x 3
i make what i can,and save the rest!
billybiltit.blogspot.com/
www.kzrider.com/forum/5-chassis/325862-triple-tree-custom-work
kzrider.com/forum/5-chassis/294594-frame-bracing?limitstart=0
Replied by 531blackbanshee on topic adding a couple bikes too the garrage
SCORE!!!!!!!!!!!!!!!!!!!!!!!!!!!!
congrats peter.
both look like some nice bikes to start with,i can't wait to see what you do with them.
keep us posted,
leon
congrats peter.
both look like some nice bikes to start with,i can't wait to see what you do with them.
keep us posted,
leon
skiatook,oklahoma 1980 z1r,1978 kz 1000 z1r x 3,
1976 kz 900 x 3
i make what i can,and save the rest!
billybiltit.blogspot.com/
www.kzrider.com/forum/5-chassis/325862-triple-tree-custom-work
kzrider.com/forum/5-chassis/294594-frame-bracing?limitstart=0
Please Log in or Create an account to join the conversation.
- peter1958
-
Topic Author
- Offline
- Banned
Less
More
- Posts: 1555
- Thank you received: 198
21 Sep 2011 17:41 #478381
by peter1958
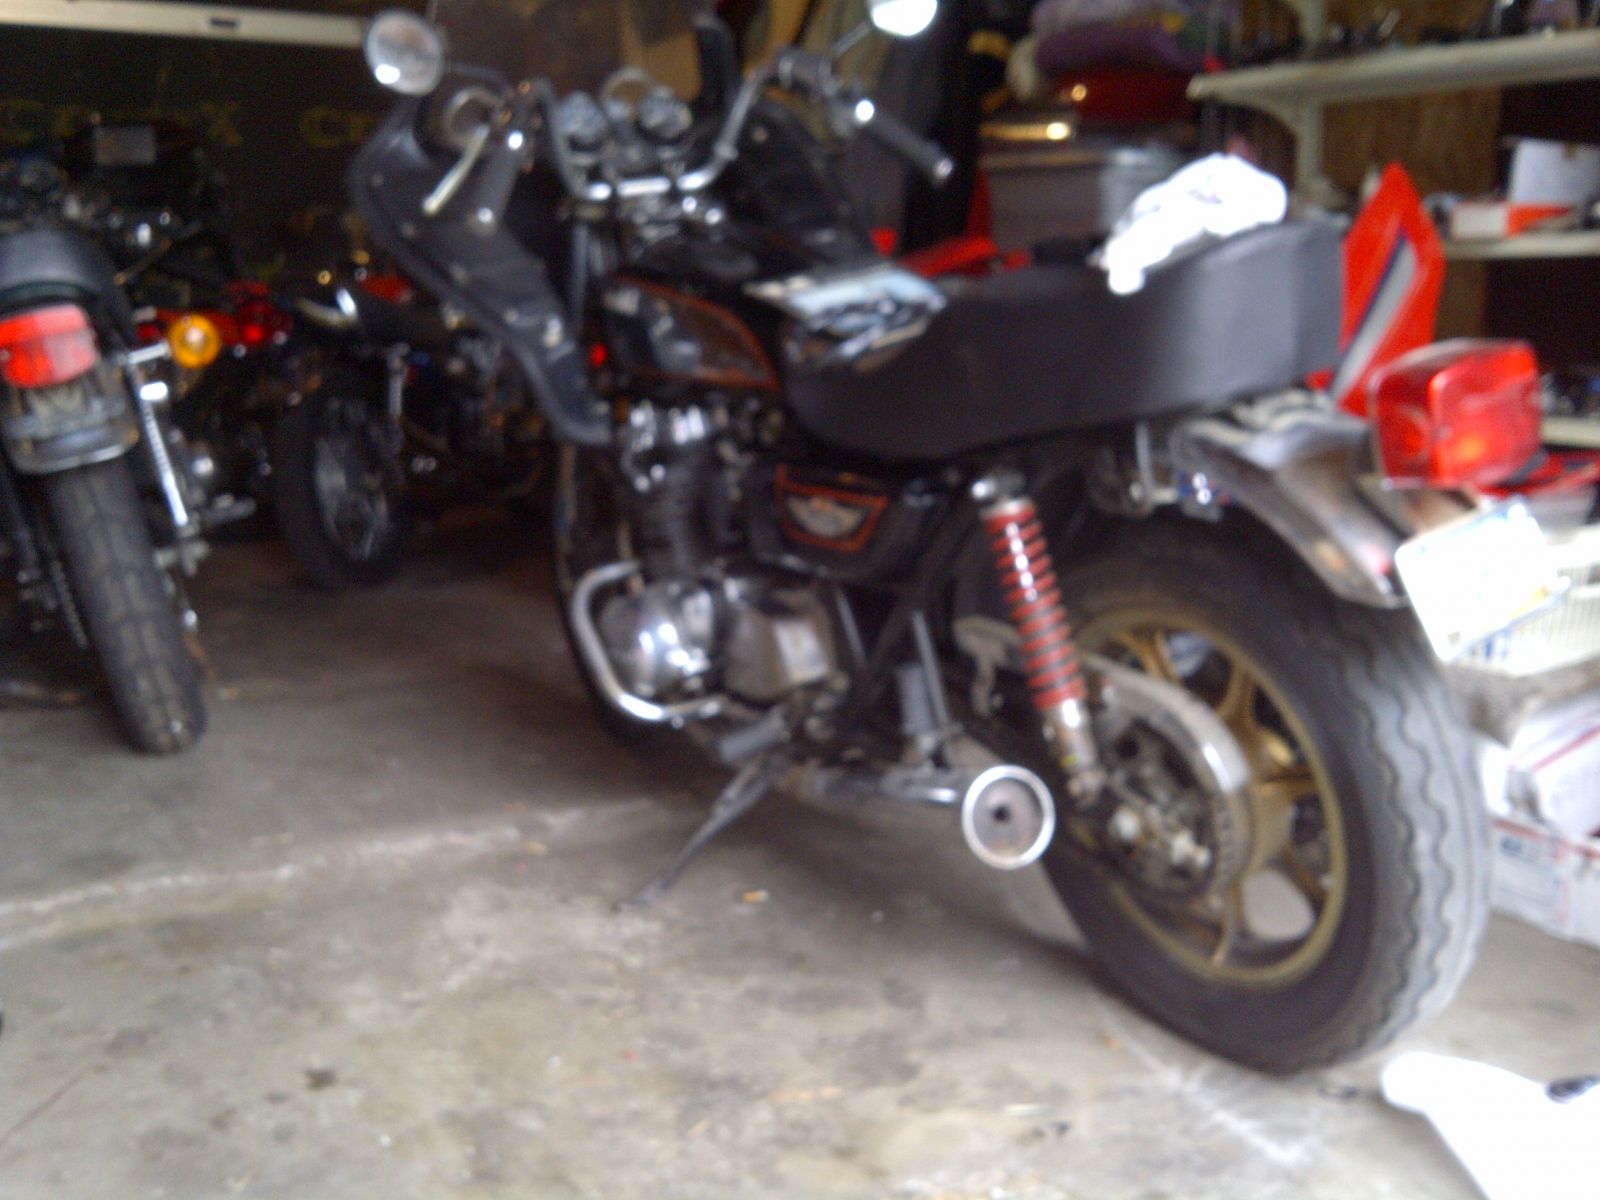
started taking luggage off
Replied by peter1958 on topic adding a couple bikes too the garrage
started taking luggage off
Please Log in or Create an account to join the conversation.
- 531blackbanshee
-
- Offline
- Vendor
Less
More
- Posts: 7447
- Thank you received: 797
21 Sep 2011 17:53 #478383
by 531blackbanshee
skiatook,oklahoma 1980 z1r,1978 kz 1000 z1r x 3,
1976 kz 900 x 3
i make what i can,and save the rest!
billybiltit.blogspot.com/
www.kzrider.com/forum/5-chassis/325862-triple-tree-custom-work
kzrider.com/forum/5-chassis/294594-frame-bracing?limitstart=0
Replied by 531blackbanshee on topic adding a couple bikes too the garrage
that gpz gives me goose bumps. :woohoo:
i can remember the feeling that i got when my dad bought one in 88 and we went and picked it up.
the way it sounded the way it felt to sit down in it.oh my :kiss: !!!!!!!!!!!
glad that you got em peter.
they can keep the rest of your kaws company now.
leon
i can remember the feeling that i got when my dad bought one in 88 and we went and picked it up.
the way it sounded the way it felt to sit down in it.oh my :kiss: !!!!!!!!!!!
glad that you got em peter.
they can keep the rest of your kaws company now.
leon
skiatook,oklahoma 1980 z1r,1978 kz 1000 z1r x 3,
1976 kz 900 x 3
i make what i can,and save the rest!
billybiltit.blogspot.com/
www.kzrider.com/forum/5-chassis/325862-triple-tree-custom-work
kzrider.com/forum/5-chassis/294594-frame-bracing?limitstart=0
Please Log in or Create an account to join the conversation.
- MFolks
-

- Offline
- User
Less
More
- Posts: 6650
- Thank you received: 540
21 Sep 2011 19:08 #478401
by MFolks
1982 GPZ1100 B2
General Dynamics/Convair 1983-1993
GLCM BGM-109 Tomahawk, AGM-129A Advanced Cruise Missile (ACM)
Replied by MFolks on topic adding a couple bikes too the garrage
Kawasaki Fuel Injection Sensor Specs
Here's from my 1982 GPz1100 B2 factory shop manual:
Air temperature sensor spec(probably the one on the air filter housing, or next to it).
Meter at ohms X 1K ohms ( I use ohms X 2K as it works on my meter)
Disconnect the wiring from the harness, one meter probe to one of the connector pins, the other on the last pin.
Should read 2.0K ohms to 3.0 K ohms at 68 F, if your meter won't read this, try the 20K ohm setting.
A footnote says this reading is true when sensor temperature is 20C (68F), 4.7 K ohms to 7.6 K ohms when 0 C (32 F) and 1.4 K ohms to 2.2 K ohms when 30 C (86 F).
Engine temperature sensor spec:
Again, meter to 2K ohm settings, one meter lead to the push on terminal (remove the wire as it may give a false reading) and the other to a chassis ground(any Black with Yellow stripe wire is part of the ground circuit).
The readings will be the same as the air temperature sensor.
The TPS has an electrical connector, only the first three(3) contacts are used, counting from left to right as you face it.
From my factory shop manual I'm making it easier to get the readings, by using shortcuts).
1. Ignition switch off.
2. Remove the small SS clip holding the cable to the TPS.
3. Using a multimeter set on ohms, range of 2K.
4. Measure between the first electrical contact on the left and the third to the right.
5. It should read between 3.3K ohms to 6.8K ohms.
The next test will cover the range between idle and full throttle:
1. Set the meter's probes on the left contact and the one next to it, as this is the idle position check.
2. Readings should be between 2.1K ohms to 4.2 K ohms
Full throttle check:
1. Same electrical contacts used.
2. With the throttle wide open, readings should be between 0.35 K ohms to 0.71 K ohms, see if the resistance changes smoothly, with no fluctuations or wide variations as the throttle is closed down to the idle position.
3. If there are variations, try cleaning the TPS with the De-Oxit electrical contact cleaner/preservative. Open and close it with the throttle while spraying the cleaner up inside.
4. www.deoxit.com is the website for the electrical contact cleaner/preservative. It can be purchased at Radio Shack Stores and other electronic supply places.
Cleaning The Kawasaki TPS
I'd suggest cleaning the Throttle Position Sensor (TPS) too as it's a carbon variable resistor that gets dirty. It's the module with DFI on it below the tank on the right side.
To clean it, first go to Radio Shack or any other electronic supply store and purchase some De-Oxit contact cleaner/preservative.
With the engine off, remove a small SS clip holding the wiring to the TPS and disconnect the cable.Put some newspapers or rags to keep the cleaner off the engine cases. www.deoxit.com is their website.
Spray the De-Oxit up inside the TPS while opening and closing the throttle several times to flush out any carbon residue. Let it dry for a while, then reassemble the TPS cable and retaining clip.
You should notice an improvement in throttle responce.
1982 GPZ1100 B2
General Dynamics/Convair 1983-1993
GLCM BGM-109 Tomahawk, AGM-129A Advanced Cruise Missile (ACM)
The following user(s) said Thank You: peter1958
Please Log in or Create an account to join the conversation.
- MFolks
-
- Offline
- User
Less
More
- Posts: 6650
- Thank you received: 540
21 Sep 2011 19:11 #478402
by MFolks
1982 GPZ1100 B2
General Dynamics/Convair 1983-1993
GLCM BGM-109 Tomahawk, AGM-129A Advanced Cruise Missile (ACM)
Replied by MFolks on topic adding a couple bikes too the garrage
Cleaning Motorcycle Electrics
Get some of the De-Oxit electrical contact cleaner and figure on spending a good day going from the front of the bike to the back. It’s a plastic safe cleaner/preservative. www.deoxit.com is their website.
On the older Kawasaki's, a majority of electrical connectors are inside the headlight housing requiring removal of the headlight, then the fun begins.
Do one set of electrical connectors at a time to avoid mixing up what connects to where. Usually disconnecting, spraying with De-Oxit and reconnecting is about all you'll need.
However, when encountering the green crud of corrosion, a brass wire brush may be needed on the pins you can reach.
Some 400-600 grit wet and dry sandpaper strips rolled into a tube should reach the male and female pins in the more difficult to clean connectors.
Smoker’s pipe cleaners, cotton swabs and wooden toothpicks work as cleaning aids.
Really small electrical connectors may require the use of a welders tip cleaning tool assortment.
Most pins in the connectors are coated with a thin plating of tin, and others may be nothing more than copper or brass.
If moisture is added, the resulting corrosion lowers the voltage/current being carried causing dim lights, slow engine cranking, slow turn signal responce and lower input voltage to the ignition coils resulting in weak spark.
The left and right handlebar switch pods will need attention too as they have circuit functions like turn, horn, run/stop, and start.
Usually a spritz or two with actuation of the switch is about all needed for these switches unless corrosion is detected and then careful disassembly is required.
The ignition switch may or may be not sealed to allow spraying the internal contacts. I urge caution if attempting to open this up as springs, and ball bearings may fly out never to be seen again!
If your bike has the older style glass tubed fuses, I suggest replacing them as vibration can cause internal failure. AGX is the type used, and most auto parts stores can get them for you.
Clean the fuse holder clips, looking for signs of overheating(discolored insulation, signs of melting). I use metal polish on a cotton swab, followed by spraying another clean swab with the De-Oxit and then rubbing the inside of the fuse clip.
All battery cables must be clean and tight for maximum current transfer. Check the cables going from the Negative(-) battery terminal/post to the engine mounting bolt
Also the one going from the Positive(+) terminal to the starter solenoid and from there to the starter motor.
If any battery cable feels ”Crunchy” when flexed, replace it as possible corrosion is inside the insulation.
Each "Bullet Connector" will have to be sprayed to ensure good connectivity, especially the ones going to the energizing coil of the starter solenoid.
The alternator output “Bullet Connectors” are usually behind the engine sprocket cover and will need inspecting and cleaning too.
The turn signal light sockets will benefit from a spritz from the contact cleaner along with the tail light/brake light socket.
Some brake light switches can be sprayed on the actuating rod, with the spray running down inside to the electrical contacts, others may be sealed requiring replacement if the switch is intermittent in operation.
Some people put the Di-Electric Grease on cleaned terminations/connectors, I don’t, as I’ve read/heard it can cause problems when it gets hot, actually insulating the connections, so the choice is yours to use or not.
I think I've covered about all of the electrical systems on the bike.........
Why WD-40 Should Not Be Used On Motorcycle Electrical Items.
For many years, I was proponent of the use of WD-40 on fuse clips, fuses, switches and connectors. After hearing of other peoples experience with intermittent and sporadic activity, I shrugged it off as maybe they did something wrong in the application of the product.
It wasn’t until the time I rode my 1982 GPz1100 B2 model to downtown San Diego that I encountered the problems others had gone through.
After concluding my business downtown, I walked to where my bike was parked, turned the key to unlock the forks, and prepared to start the engine. The key was in the "On" position, yet I had no lights in the dash panel, the fuel pump was not running(I have FI), and the horn and tail light were not working.
Puzzled as to why nothing electrical was happening, I remember my earlier conversations about how WD-40 will over time become a non-conductor(more like an insulator). I had some pieces of 400 and 600 grit sandpaper in my tool kit and with them was able to scratch away the coating from the WD-40 on the fuses and clips.
After removing the insulating film, the bike started and ran like it should. Since that time, I’ve told people about the problem with WD-40. If you must use a contact cleaner, I recommend getting some "De-oxit" from Radio Shack Stores or any good electronic supply store.
1982 GPZ1100 B2
General Dynamics/Convair 1983-1993
GLCM BGM-109 Tomahawk, AGM-129A Advanced Cruise Missile (ACM)
Please Log in or Create an account to join the conversation.
- peter1958
-
Topic Author
- Offline
- Banned
Less
More
- Posts: 1555
- Thank you received: 198
21 Sep 2011 22:45 #478463
by peter1958
The best part lol
Replied by peter1958 on topic adding a couple bikes too the garrage
The best part lol
Please Log in or Create an account to join the conversation.
- testarossa
-
- Offline
- User
- Attack life, it's only trying to kill you.
Less
More
- Posts: 3678
- Thank you received: 82
21 Sep 2011 23:05 #478472
by testarossa
1978 KZ1000 A2 Click--->Build Thread
2004 ZX-10R
2007 Harley Sportster 1200
2020 Harley Street Glide Special
Angola, IN
Replied by testarossa on topic adding a couple bikes too the garrage
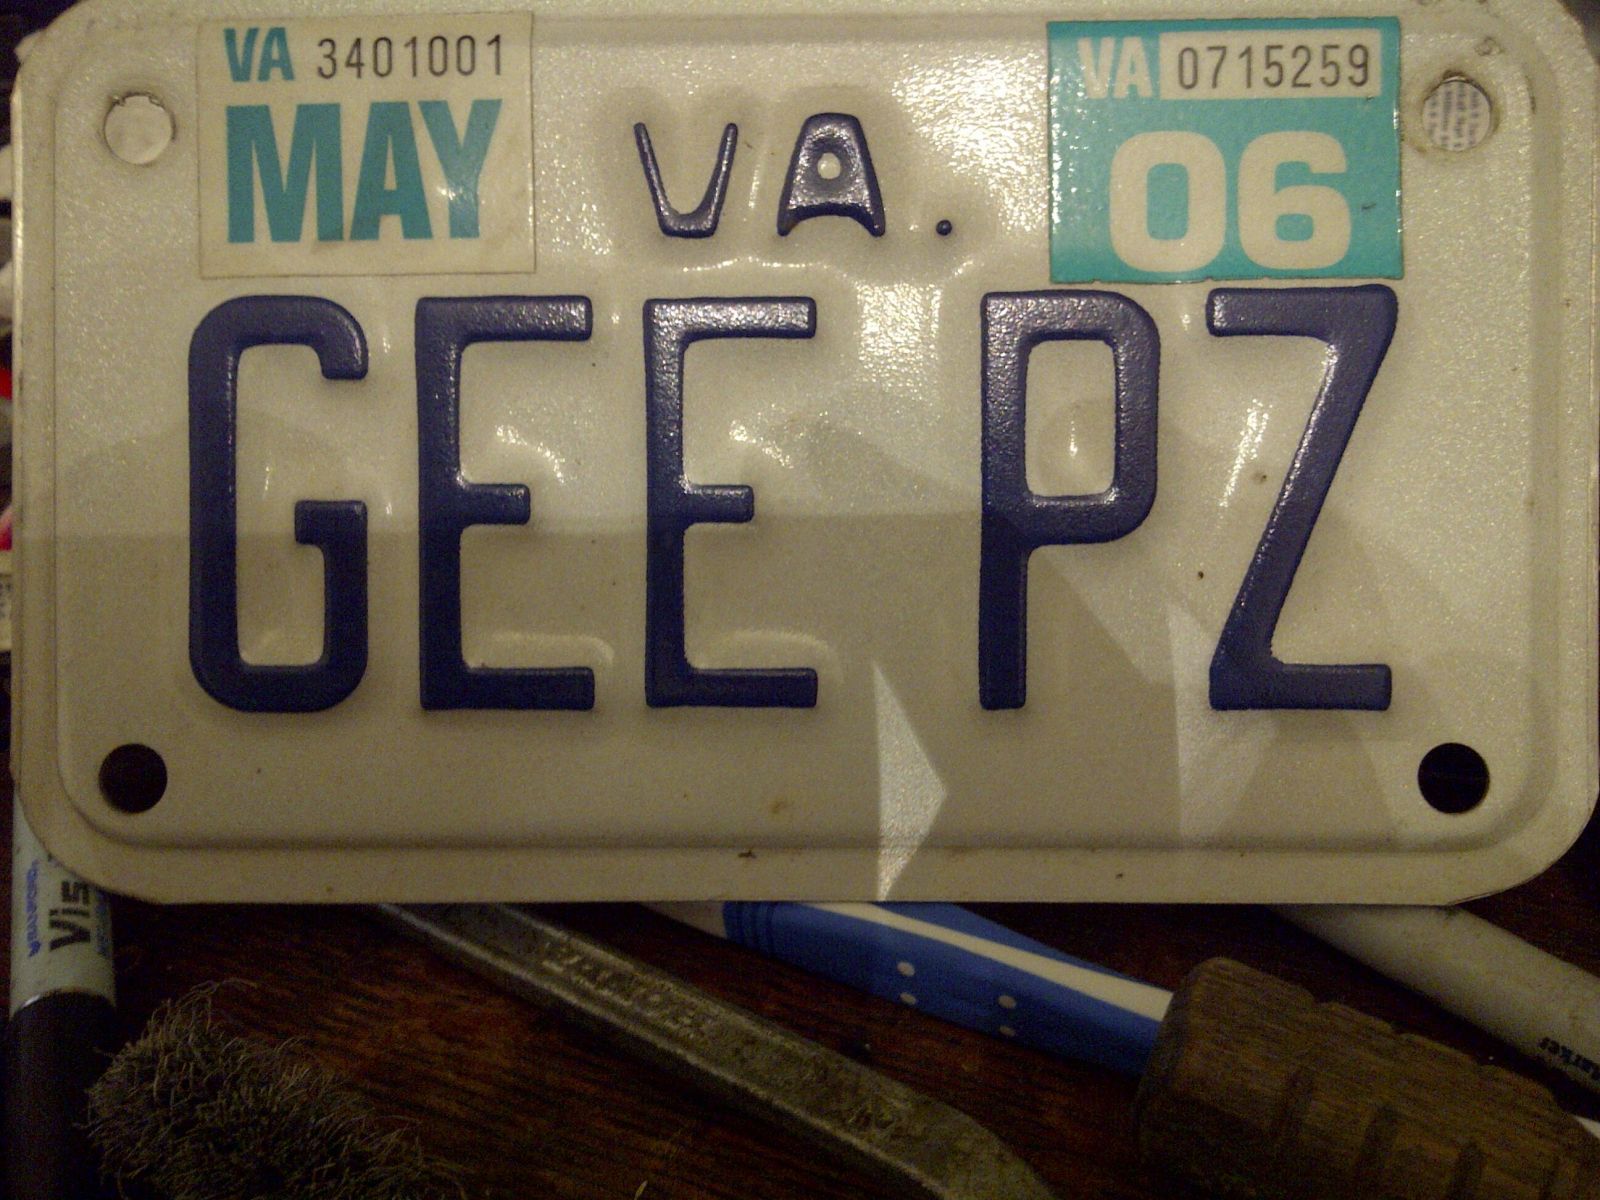
Nice!
Love the plate.
Love the plate.
1978 KZ1000 A2 Click--->Build Thread
2004 ZX-10R
2007 Harley Sportster 1200
2020 Harley Street Glide Special
Angola, IN
Please Log in or Create an account to join the conversation.