
GPZ11 rebuild
- BeemerBoy
-
 Topic Author
- Offline
- User
-

Registered
- Posts: 16
- Thanks: 1
GPZ11 rebuild
05 Dec 2006 00:53
This article I originally wrote for another forum whichyou can read here
bikesa.biz/forum/index.php?topic=2789.0 however, I am adding it here for your
convenience..Any comments are welcome.
This was done over a period of two months, so reading
this as one article may not always make sense.
Ok so firstly thanks to all those who assisted me on my search for a GPz1100.
I finally found one I could work with on Saturday in Cullinan. Shes mechanically
sound and complete, even original with the exception of the DFI which has been
replaced with vaccuum carbs, and the pipe.
Anyway , with your approval I will log a sort of digital diary here as the bike progresses
from what it was to what I want it to be.
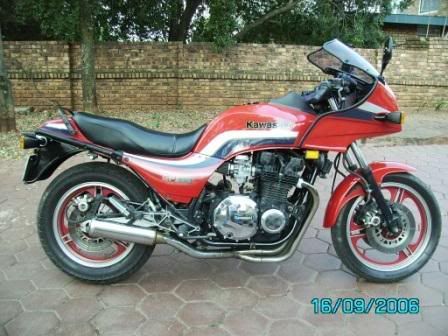
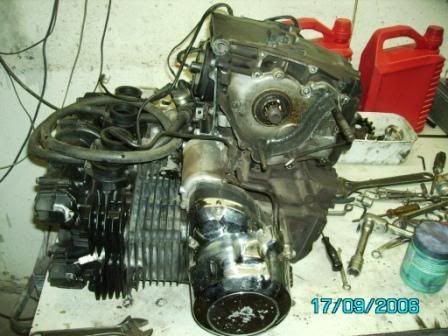
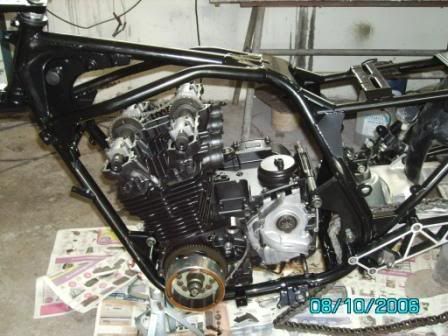
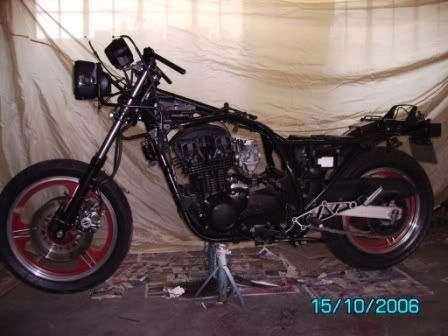
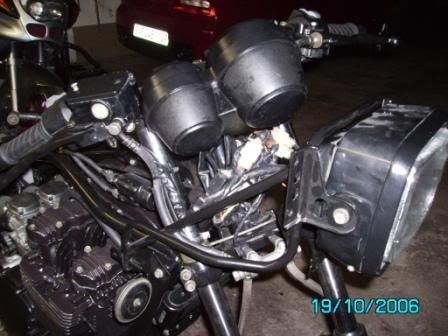
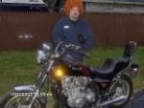
Here is what it looked like when I got it ome yesterday.
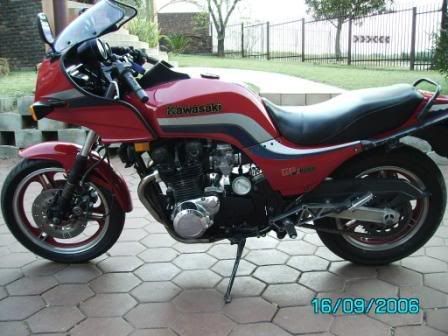
This is last night
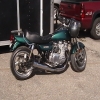
And here she is as of 21:00 tonight.
I'll post more as the project moves forward (read finances become available)
Captains log 19 Sep 2006
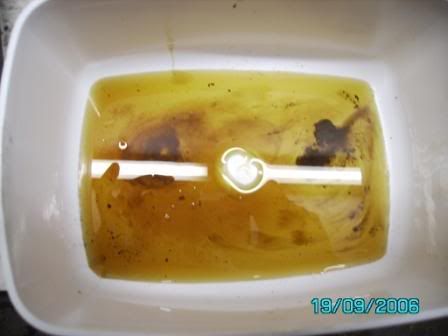
Ok so just to show what brake fluid does if its not changed regularly.
This has been discussed in another thread here.
Rear brake master cylinder (See the brown sludge)

This is the brake fluid that came out the caliper and master cylinder
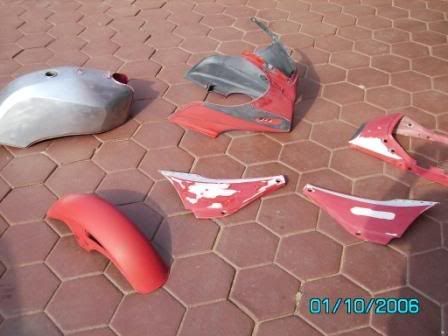
By this stage I have laid out everything that needs to be powder coated
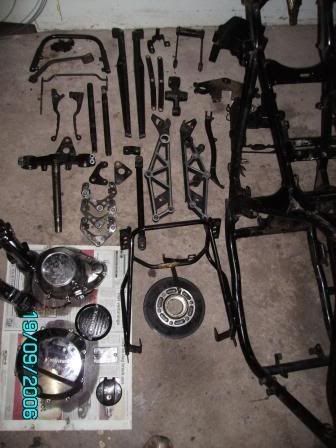
Everything else is ready for cleaning or polishing

All that remains is the tyres on the rims which I will have removed
The rest of the bits n pieces that must be cleaned up and resprayed.
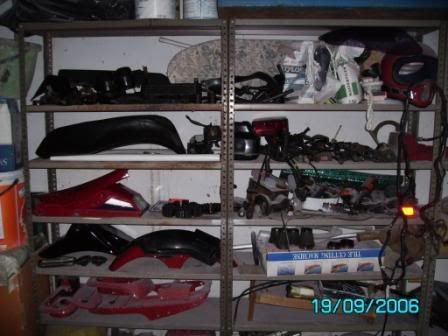
Next step will be to send parts in for powder coating.
While this is being done I will polish the rims and clean remaining parts
as well as stip paint off tank so I can fix minor damage and prepare for paint.
What I have identified so far for replacement is 4 x roller bearings on the
rear uni-track suspension and the front wheel bearings
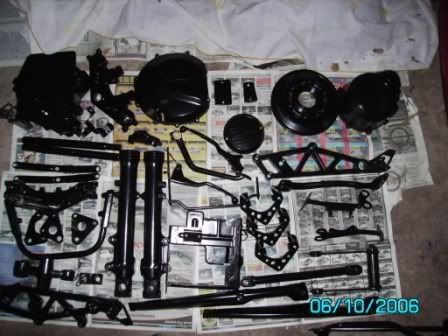
Ok so the next part of the project is rather boring and tiresome.
Yes its the cleaning, polishing, repaireing etc.
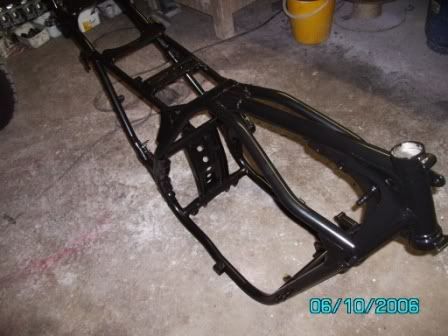
Firstly on Friday I sent in 42 pieces for powder coating. Parts will be done in either satin
or gloss black. Hopefully these will be returned on Friday.
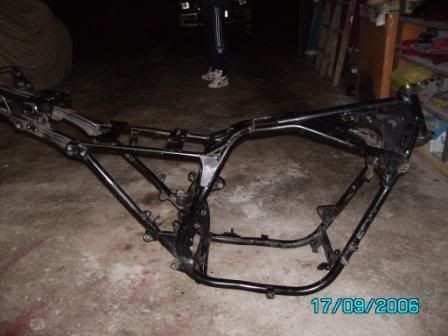
The cleaning can be very tedious and invloves turning this
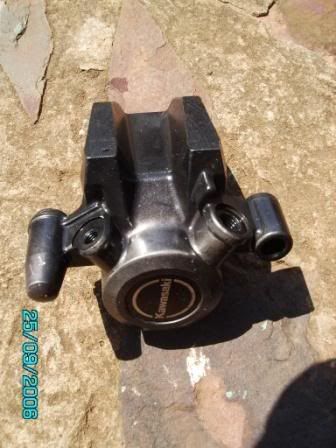
Into this
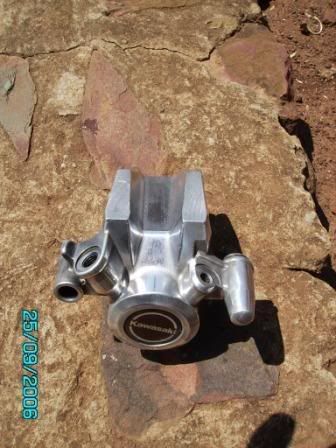
Or this
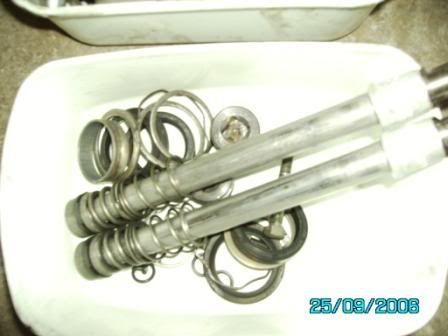
These are all ready to be put back once I have a frame again
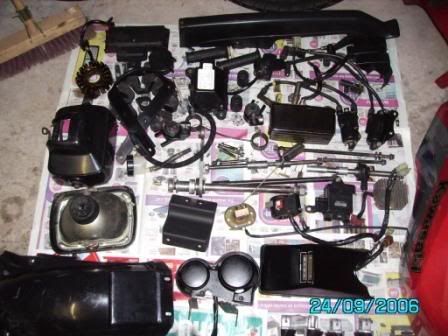
You will note that I keep the parts / bolts etc in seperate containers, this makes it easier
to re-fit. I keep all body work bolts together, front suspention, rear suspention, brakes etc
all apart..makes life a lot simpler
Ok I see you guys are suffering withdrawal symptoms so I'll add a bit here..
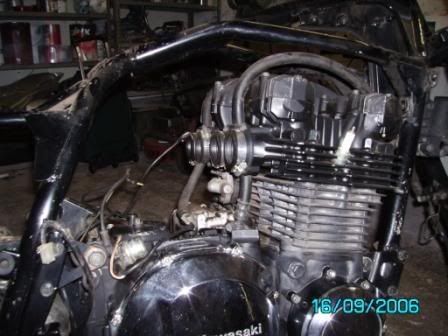
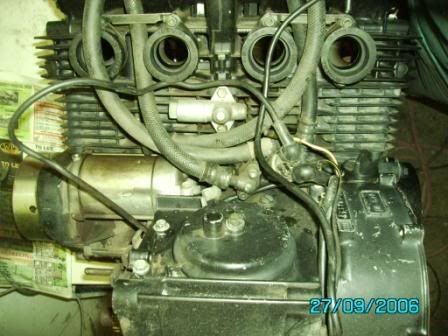
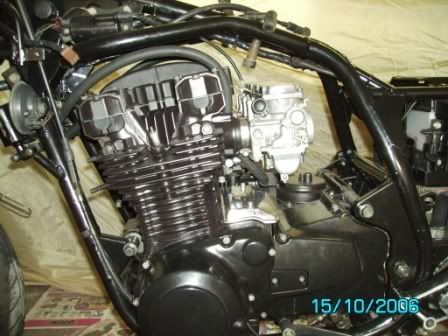
Engine before cleaning

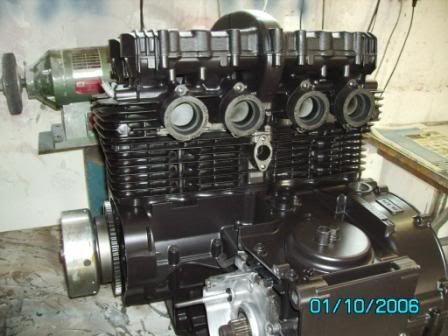
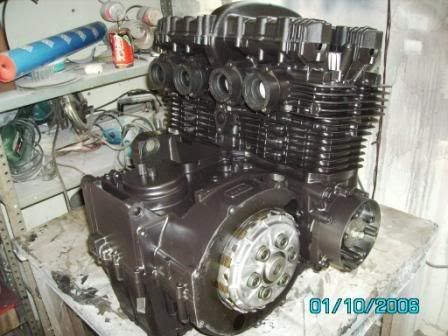
And after a good clean and coat of paint
I used Sprayon high heat (650 deg) ..will see how it works out
And the joyous work of stripping paint off the tank.
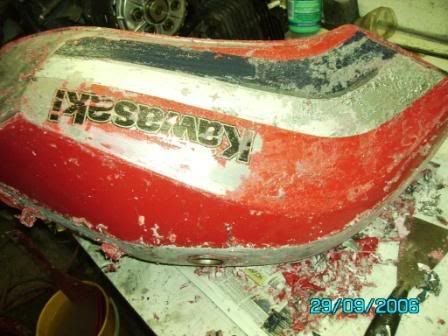
And down to metal
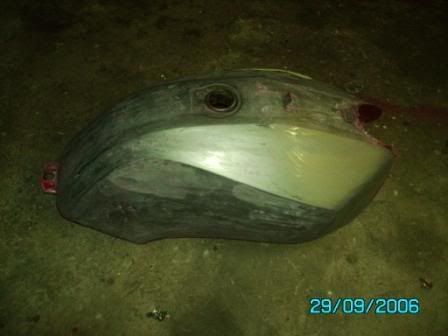
Ready for primer
And just incase I get visitors while I'm busy.
My puppy keeps me company.

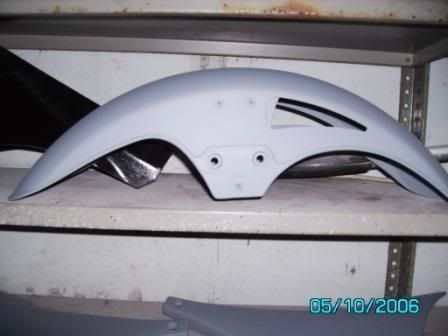
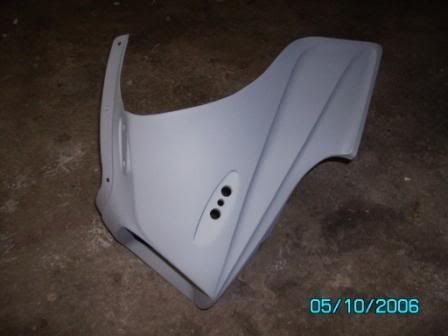
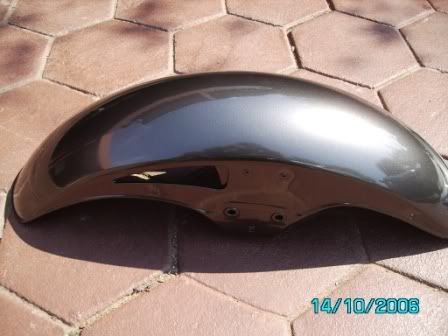
Well its been slow but steady work the past few days.
Did some bodywork on the tank and some
fibreglassing on the fairing.
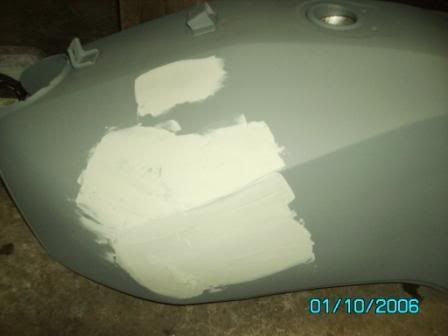
After that evrything was primed and is now ready for paint.
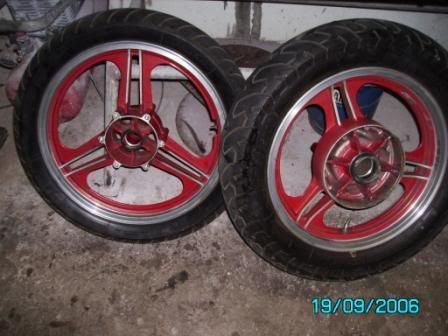
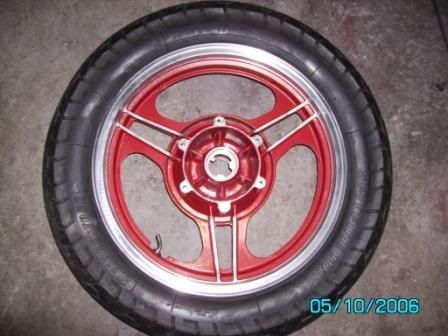
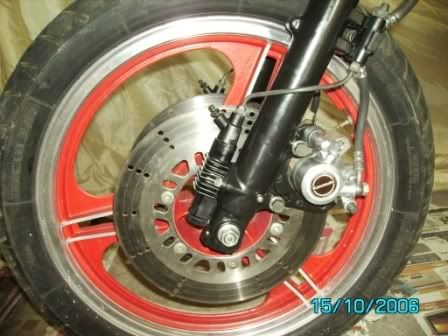
The rims were cleaned and all the exposed aliminium rubbed down and
given a bit of a polishing.

If all goes well I will pickup all the powder coated
parts tomorrow, which means I'll be a busy little body this weekend.
And while everyone else was commuting by scoot on Friday,
I used the bakkie (pickup for you guys) to pick up parts from powder coater.
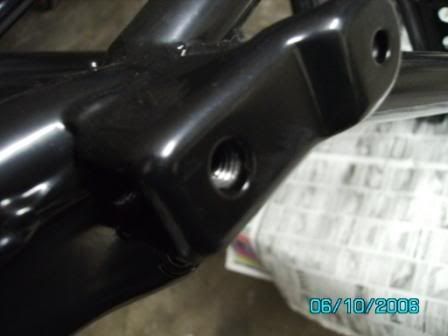
And anyone who's had this done will know that you now have to
clean out every shaft or recess that houses a bearing . Also it
pays to go and tap every thread out. This saves a lot of frustration
with stripped threads and broken bolts
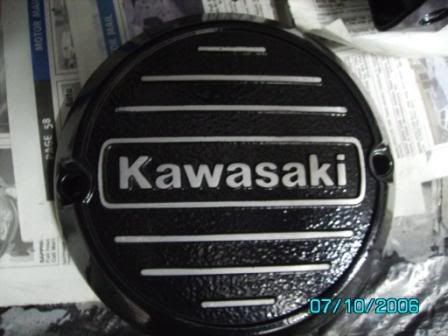
And a bit of filling to bring out the raised bits on the engine covers.
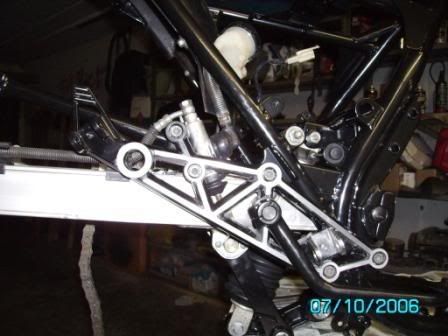
And then its the labourious job of reassembly...

There are still a few parts I need, painting to do etc.
Oh and if anyone knows where I can get a workshop manual for
this, please speak up (1983 GPz1100 (ZX1100 A1). I need some
info such as volume of fork oil,air pressure for forks and rear shock..
And while you were all watching rugby and racing, kippie
here was still sweating away...
This is where I am now...slowly getting there..
PS Thats a shadow on the paving, not oil or dirt !!!
Still have a few things to buy and do, but she should be ready
by the end of the month...
Ok so things moving very slowly at moment..
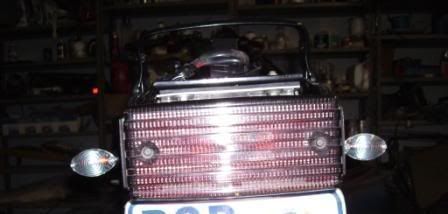
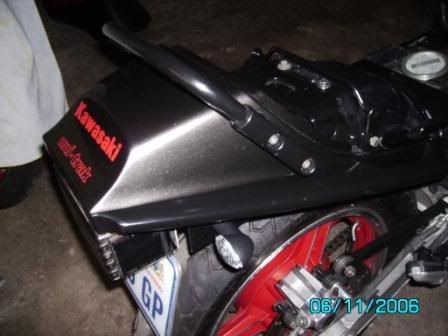
Fitted new rear indicators
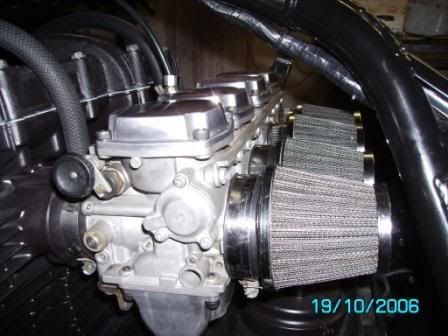
Fitted air filters
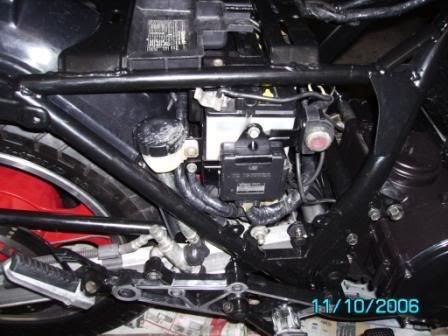
Finished up wiring
A few issues I had to resolve...Hooter button didnt work so stripped down and cleaned out
Rear brake light switch not working..Found wire broken off.Soldered.
And then I hooked up an IV to feed some go juice and fired her up.
I'm sure very few of you have heard a 4 running minus pipes in a garage...
Well its nothing spectacular..Blue flames shooting out the head is cool though.
Just ran for 15 secs or so, didnt wamt to damage my new powder..
So remaining:
Still need one bearing for rear suspension.
Vinals are ready at Custom Worx, must pick up this week
Final few coats of clear after the vinals are on, then rub
down with 2000 grit waterpaper and polish.
Chain tensioning, bleeding brakes etc.
Havent been able to find better mirrors yet so will
probably have to modify existing ones.
Update....
Finished the spray painting on Saturday.. My trusty compressor
gave up on me, motor burnt out so had to resort to an old
home made one with lower pressure, but turned out ok..
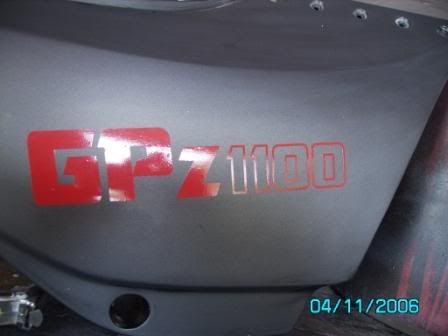
Stickers from Custom Worx applied after flatting with 1200 grit.

After drying, flat down with 2000 grit and lotsa polish..
Dont look as good indoors at night, but the final product will look better.

If I get my bearing this week, I should have her complete over the weekend.
Cant wait...Stay tuned.!
Well no pics tonight..its at that stage where pics at night
in the garage just dont cut it...
Been feverishly polishing at night and have finally finished all the
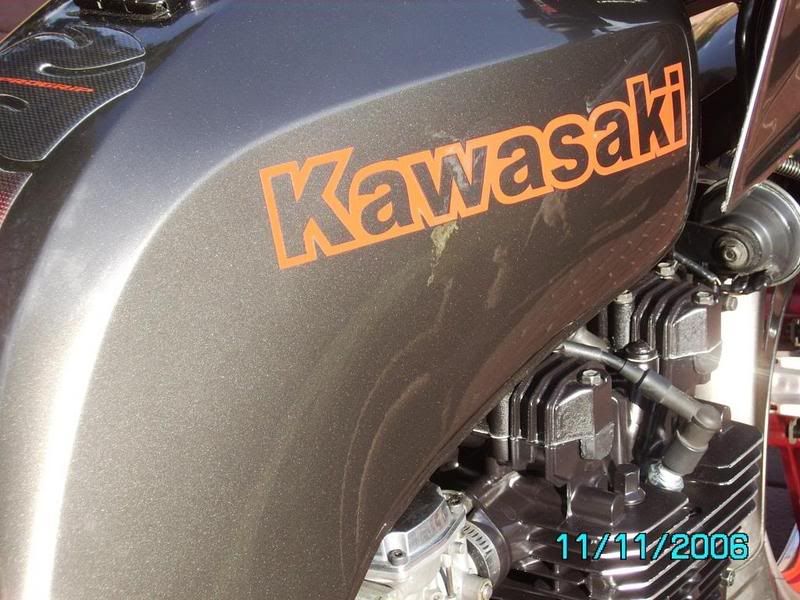
body work. I screwed up with the tank, there was a buildup of
the cutting creme I'm using on the bonnet. It got a bit sticky
and took off the clear coat on some of the lettering on the tank.
Its not very visible so will leave it for now. If it spreads I'll have
to rub it down and redo it.
The fairing is mounted, fitted fuel guage sender unit and petcock to
tank and bolted all into place.
I have replaced all bolts on side covers and fairing with stainless steel
cap bolts..looks better and doesnt rust..
I have noticed that when pushing the bike around, the rear wheel is
very tight, so I decided since I'm now running out of things to do I'd
have a look at that..Turns out I'm not quite as bright as I thought. I swapped
one of the front brake discs with the rear, and it (the front) is ever so slightly
larger diameter, and it was fouling on the caliper. So off came front and back
wheels to fix that. While I was at it, also loosened triple clamps and front
axel and bounced the front end a bit to make sure eveything is aligned and
minimise stiction (yes there is such a word---look it up). Put some go-juice
in the tank and hit the starter to make sure she still runs..
I must say she is looking every bit as good as I had hoped.. I'm sure I'll
find a few more things that need to be tweaked or sorted, but what I know
of is the following.
1. Replace last rear suspention bearing (on order..if Kawasaki is true
to their word I will have it tomorrow)
2. Fit exhaust. This has to wait for the suspention due to access.
3. Replace mirrors with wider ones. I think what I'll do here is buy a set
the same as on my Z1R and weld them to the GPZ fairing mounts.
4. Adjust headlight.
5. Check ignition timing
6. Depending on how she performs, I may need to have the carbs done
by someone who knows somegthing about them..
7. Road worthy and transfer onto my name..
Ok just a sneak preview.
Still dont have bearing (Thanks Kawasaki !!)
So outstanding it mirrors, which I have, just need to
fabricate new mounts for them.
Exhaust can only go on after bearing.
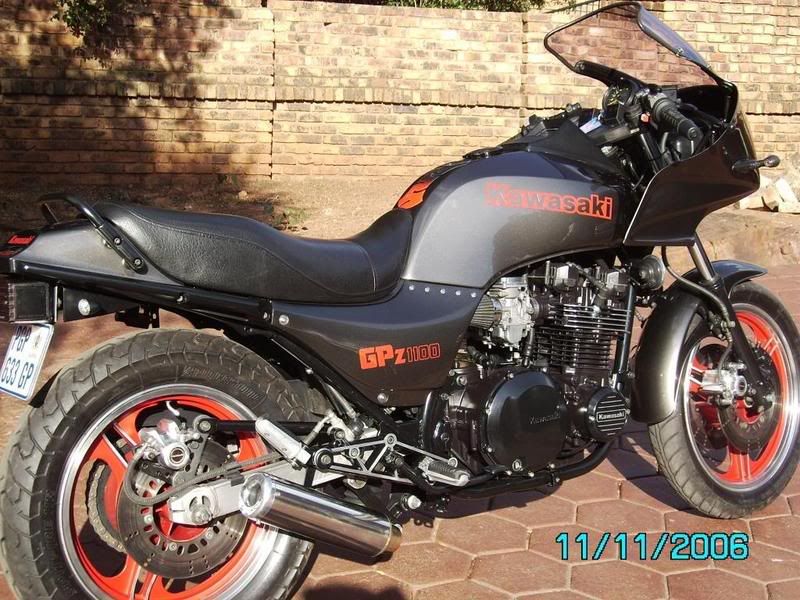
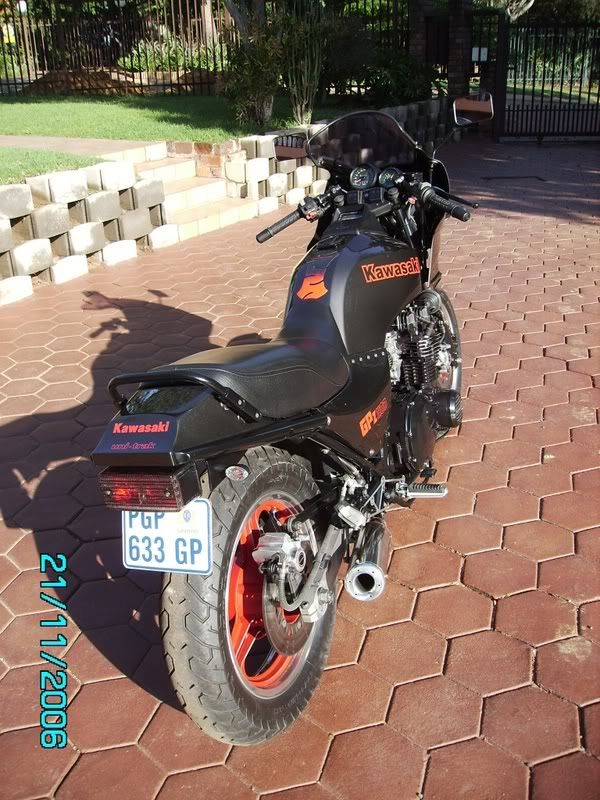
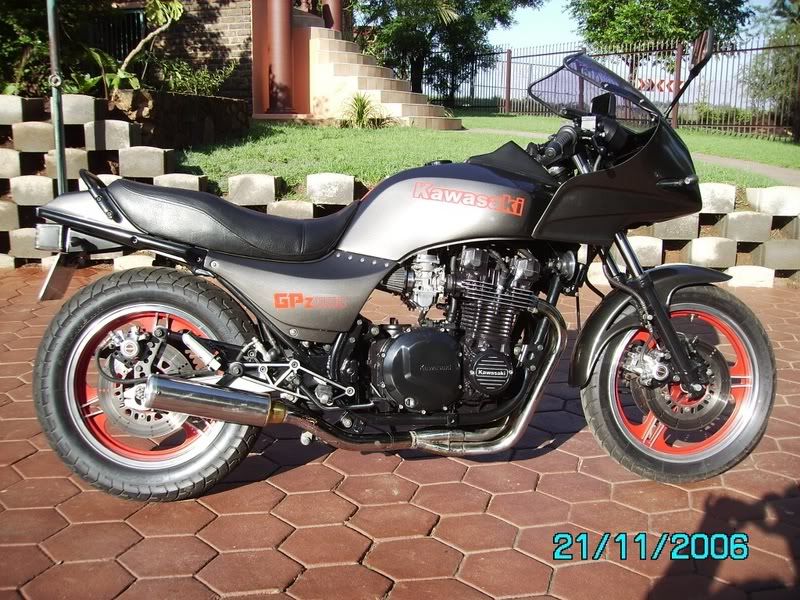
And yes finally 2 months later she is done...well sort of
3 issues to resolve still, but for all intents and purposes
the transformation is complete.
1. Rev counter not working (this was the case when I bought her)
2. Got a niggly vibe at about 2,500 rpm
3. Slight flat spot (have raised needles to middle position, will try lifting
one more slot before playing with mixture screw)

Post edited by: BeemerBoy, at: 2006/12/05 04:01
bikesa.biz/forum/index.php?topic=2789.0 however, I am adding it here for your
convenience..Any comments are welcome.
This was done over a period of two months, so reading
this as one article may not always make sense.
Ok so firstly thanks to all those who assisted me on my search for a GPz1100.
I finally found one I could work with on Saturday in Cullinan. Shes mechanically
sound and complete, even original with the exception of the DFI which has been
replaced with vaccuum carbs, and the pipe.
Anyway , with your approval I will log a sort of digital diary here as the bike progresses
from what it was to what I want it to be.
Here is what it looked like when I got it ome yesterday.
This is last night
And here she is as of 21:00 tonight.
I'll post more as the project moves forward (read finances become available)
Captains log 19 Sep 2006
Ok so just to show what brake fluid does if its not changed regularly.
This has been discussed in another thread here.
Rear brake master cylinder (See the brown sludge)
This is the brake fluid that came out the caliper and master cylinder
By this stage I have laid out everything that needs to be powder coated
Everything else is ready for cleaning or polishing
All that remains is the tyres on the rims which I will have removed
The rest of the bits n pieces that must be cleaned up and resprayed.
Next step will be to send parts in for powder coating.
While this is being done I will polish the rims and clean remaining parts
as well as stip paint off tank so I can fix minor damage and prepare for paint.
What I have identified so far for replacement is 4 x roller bearings on the
rear uni-track suspension and the front wheel bearings
Ok so the next part of the project is rather boring and tiresome.
Yes its the cleaning, polishing, repaireing etc.
Firstly on Friday I sent in 42 pieces for powder coating. Parts will be done in either satin
or gloss black. Hopefully these will be returned on Friday.
The cleaning can be very tedious and invloves turning this
Into this
Or this
These are all ready to be put back once I have a frame again
You will note that I keep the parts / bolts etc in seperate containers, this makes it easier
to re-fit. I keep all body work bolts together, front suspention, rear suspention, brakes etc
all apart..makes life a lot simpler
Ok I see you guys are suffering withdrawal symptoms so I'll add a bit here..
Engine before cleaning
And after a good clean and coat of paint
I used Sprayon high heat (650 deg) ..will see how it works out
And the joyous work of stripping paint off the tank.
And down to metal
Ready for primer
And just incase I get visitors while I'm busy.
My puppy keeps me company.
Well its been slow but steady work the past few days.
Did some bodywork on the tank and some
fibreglassing on the fairing.
After that evrything was primed and is now ready for paint.
The rims were cleaned and all the exposed aliminium rubbed down and
given a bit of a polishing.
If all goes well I will pickup all the powder coated
parts tomorrow, which means I'll be a busy little body this weekend.
And while everyone else was commuting by scoot on Friday,
I used the bakkie (pickup for you guys) to pick up parts from powder coater.
And anyone who's had this done will know that you now have to
clean out every shaft or recess that houses a bearing . Also it
pays to go and tap every thread out. This saves a lot of frustration
with stripped threads and broken bolts
And a bit of filling to bring out the raised bits on the engine covers.
And then its the labourious job of reassembly...
There are still a few parts I need, painting to do etc.
Oh and if anyone knows where I can get a workshop manual for
this, please speak up (1983 GPz1100 (ZX1100 A1). I need some
info such as volume of fork oil,air pressure for forks and rear shock..
And while you were all watching rugby and racing, kippie
here was still sweating away...
This is where I am now...slowly getting there..
PS Thats a shadow on the paving, not oil or dirt !!!
Still have a few things to buy and do, but she should be ready
by the end of the month...
Ok so things moving very slowly at moment..
Fitted new rear indicators
Fitted air filters
Finished up wiring
A few issues I had to resolve...Hooter button didnt work so stripped down and cleaned out
Rear brake light switch not working..Found wire broken off.Soldered.
And then I hooked up an IV to feed some go juice and fired her up.
I'm sure very few of you have heard a 4 running minus pipes in a garage...
Well its nothing spectacular..Blue flames shooting out the head is cool though.
Just ran for 15 secs or so, didnt wamt to damage my new powder..
So remaining:
Still need one bearing for rear suspension.
Vinals are ready at Custom Worx, must pick up this week
Final few coats of clear after the vinals are on, then rub
down with 2000 grit waterpaper and polish.
Chain tensioning, bleeding brakes etc.
Havent been able to find better mirrors yet so will
probably have to modify existing ones.
Update....
Finished the spray painting on Saturday.. My trusty compressor
gave up on me, motor burnt out so had to resort to an old
home made one with lower pressure, but turned out ok..
Stickers from Custom Worx applied after flatting with 1200 grit.
After drying, flat down with 2000 grit and lotsa polish..
Dont look as good indoors at night, but the final product will look better.
If I get my bearing this week, I should have her complete over the weekend.
Cant wait...Stay tuned.!
Well no pics tonight..its at that stage where pics at night
in the garage just dont cut it...
Been feverishly polishing at night and have finally finished all the
body work. I screwed up with the tank, there was a buildup of
the cutting creme I'm using on the bonnet. It got a bit sticky
and took off the clear coat on some of the lettering on the tank.
Its not very visible so will leave it for now. If it spreads I'll have
to rub it down and redo it.
The fairing is mounted, fitted fuel guage sender unit and petcock to
tank and bolted all into place.
I have replaced all bolts on side covers and fairing with stainless steel
cap bolts..looks better and doesnt rust..
I have noticed that when pushing the bike around, the rear wheel is
very tight, so I decided since I'm now running out of things to do I'd
have a look at that..Turns out I'm not quite as bright as I thought. I swapped
one of the front brake discs with the rear, and it (the front) is ever so slightly
larger diameter, and it was fouling on the caliper. So off came front and back
wheels to fix that. While I was at it, also loosened triple clamps and front
axel and bounced the front end a bit to make sure eveything is aligned and
minimise stiction (yes there is such a word---look it up). Put some go-juice
in the tank and hit the starter to make sure she still runs..
I must say she is looking every bit as good as I had hoped.. I'm sure I'll
find a few more things that need to be tweaked or sorted, but what I know
of is the following.
1. Replace last rear suspention bearing (on order..if Kawasaki is true
to their word I will have it tomorrow)
2. Fit exhaust. This has to wait for the suspention due to access.
3. Replace mirrors with wider ones. I think what I'll do here is buy a set
the same as on my Z1R and weld them to the GPZ fairing mounts.
4. Adjust headlight.
5. Check ignition timing
6. Depending on how she performs, I may need to have the carbs done
by someone who knows somegthing about them..
7. Road worthy and transfer onto my name..
Ok just a sneak preview.
Still dont have bearing (Thanks Kawasaki !!)
So outstanding it mirrors, which I have, just need to
fabricate new mounts for them.
Exhaust can only go on after bearing.
And yes finally 2 months later she is done...well sort of
3 issues to resolve still, but for all intents and purposes
the transformation is complete.
1. Rev counter not working (this was the case when I bought her)
2. Got a niggly vibe at about 2,500 rpm
3. Slight flat spot (have raised needles to middle position, will try lifting
one more slot before playing with mixture screw)
Post edited by: BeemerBoy, at: 2006/12/05 04:01
The following user(s) said Thank You: GPz550D1
Please Log in or Create an account to join the conversation.
- scumbag
-
- Offline
- User
-
Registered
- Lewd, Screwed, and Tattooed
- Posts: 247
- Thanks: 5
Re: GPZ11 rebuild
05 Dec 2006 01:00
let me be the first to say...HOLY CRAP...good job
sept.1976 kz650
1980 kz650
1980 kz650
Please Log in or Create an account to join the conversation.
- Mcdroid
-
- Offline
- User
-
Registered
- Gone Kwackers
- Posts: 6857
- Thanks: 491
Re: GPZ11 rebuild
05 Dec 2006 02:40
Now that's a photo essay!
Michael
Victoria, Texas
1982 GPz750
1977 KZ1000A
1978 KZ1000A
1982 GPz1100
1975 Z2A
Victoria, Texas
1982 GPz750
1977 KZ1000A
1978 KZ1000A
1982 GPz1100
1975 Z2A
Please Log in or Create an account to join the conversation.
- harm
-

- Offline
- User
-
Registered
- Tom
- Posts: 681
- Thanks: 13
Re: GPZ11 rebuild
05 Dec 2006 03:52
Very nice job!! Is the powder coated frame more of a satin or a gloss? How is the engine paint working out so far? Again i must say, great job!

Tom
MI
Tom
MI
Tom
Holland, MI
1980 KZ550 ELR
2011 Concours14
2017 KX450 [/color]
Holland, MI
1980 KZ550 ELR
2011 Concours14
2017 KX450 [/color]
The following user(s) said Thank You: GPz550D1
Please Log in or Create an account to join the conversation.
- BeemerBoy
-
Topic Author
- Offline
- User
-
Registered
- Posts: 16
- Thanks: 1
Re: GPZ11 rebuild
05 Dec 2006 03:57
Harm the powder is a semi matt (satin), I prefer it
to a gloss finish, shows off less marks.
Only gone about 10 km's since I finished, but no
probles with paint so far..
to a gloss finish, shows off less marks.
Only gone about 10 km's since I finished, but no
probles with paint so far..
Please Log in or Create an account to join the conversation.
- kawsakiman
-
- Offline
- User
-
Registered
- Posts: 1246
- Thanks: 6
Re: GPZ11 rebuild
05 Dec 2006 05:33
wow! great job! good story, great pictures and a excellent description. excellent post! great bike beemer!
someday i will be able to afford my kz habit.
Please Log in or Create an account to join the conversation.
- JUSTICE114
-
- Offline
- User
-
Registered
- Posts: 194
- Thanks: 1
") Great Job!
Great Job! Please Log in or Create an account to join the conversation.
- Fossil
-
- Offline
- User
-
Registered
- Posts: 542
- Thanks: 5
Please Log in or Create an account to join the conversation.
- rattler
-
- Offline
- User
-
Registered
- Posts: 180
- Thanks: 2
Please Log in or Create an account to join the conversation.
- neilage66
-
- Offline
- User
-
Registered
- Posts: 378
- Thanks: 5
Re: GPZ11 rebuild
06 Dec 2006 20:28
You have the gift of "restoration talent". ")
We could also say "mechanical aptitude"")
My grampa would say: "Handy as a pocket in a shirt" :whistle:
Very nice GPz...well done!
We could also say "mechanical aptitude"
My grampa would say: "Handy as a pocket in a shirt" :whistle:
Very nice GPz...well done!
The following user(s) said Thank You: GPz550D1
Please Log in or Create an account to join the conversation.
- Sandy
-
- Offline
- User
-
Registered
- Fly High,Tony
- Posts: 2448
- Thanks: 13
Please Log in or Create an account to join the conversation.
- KZ250LTD
-

- Offline
- User
-
Registered
- Posts: 1311
- Thanks: 16
Last edit: 04 Aug 2009 11:03 by KZ250LTD.
Please Log in or Create an account to join the conversation.
Moderators: Street Fighter LTD