
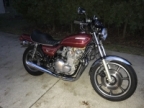
Trying to Rescue a Late 1970s (1977??) Kawasaki KZ1000
- Mikaw
-
- Offline
- Sustaining Member
-

Registered
- Posts: 4825
- Thanks: 1852
Re: Trying to Rescue a Late 1970s (1977??) Kawasaki KZ1000
22 Jan 2023 15:04
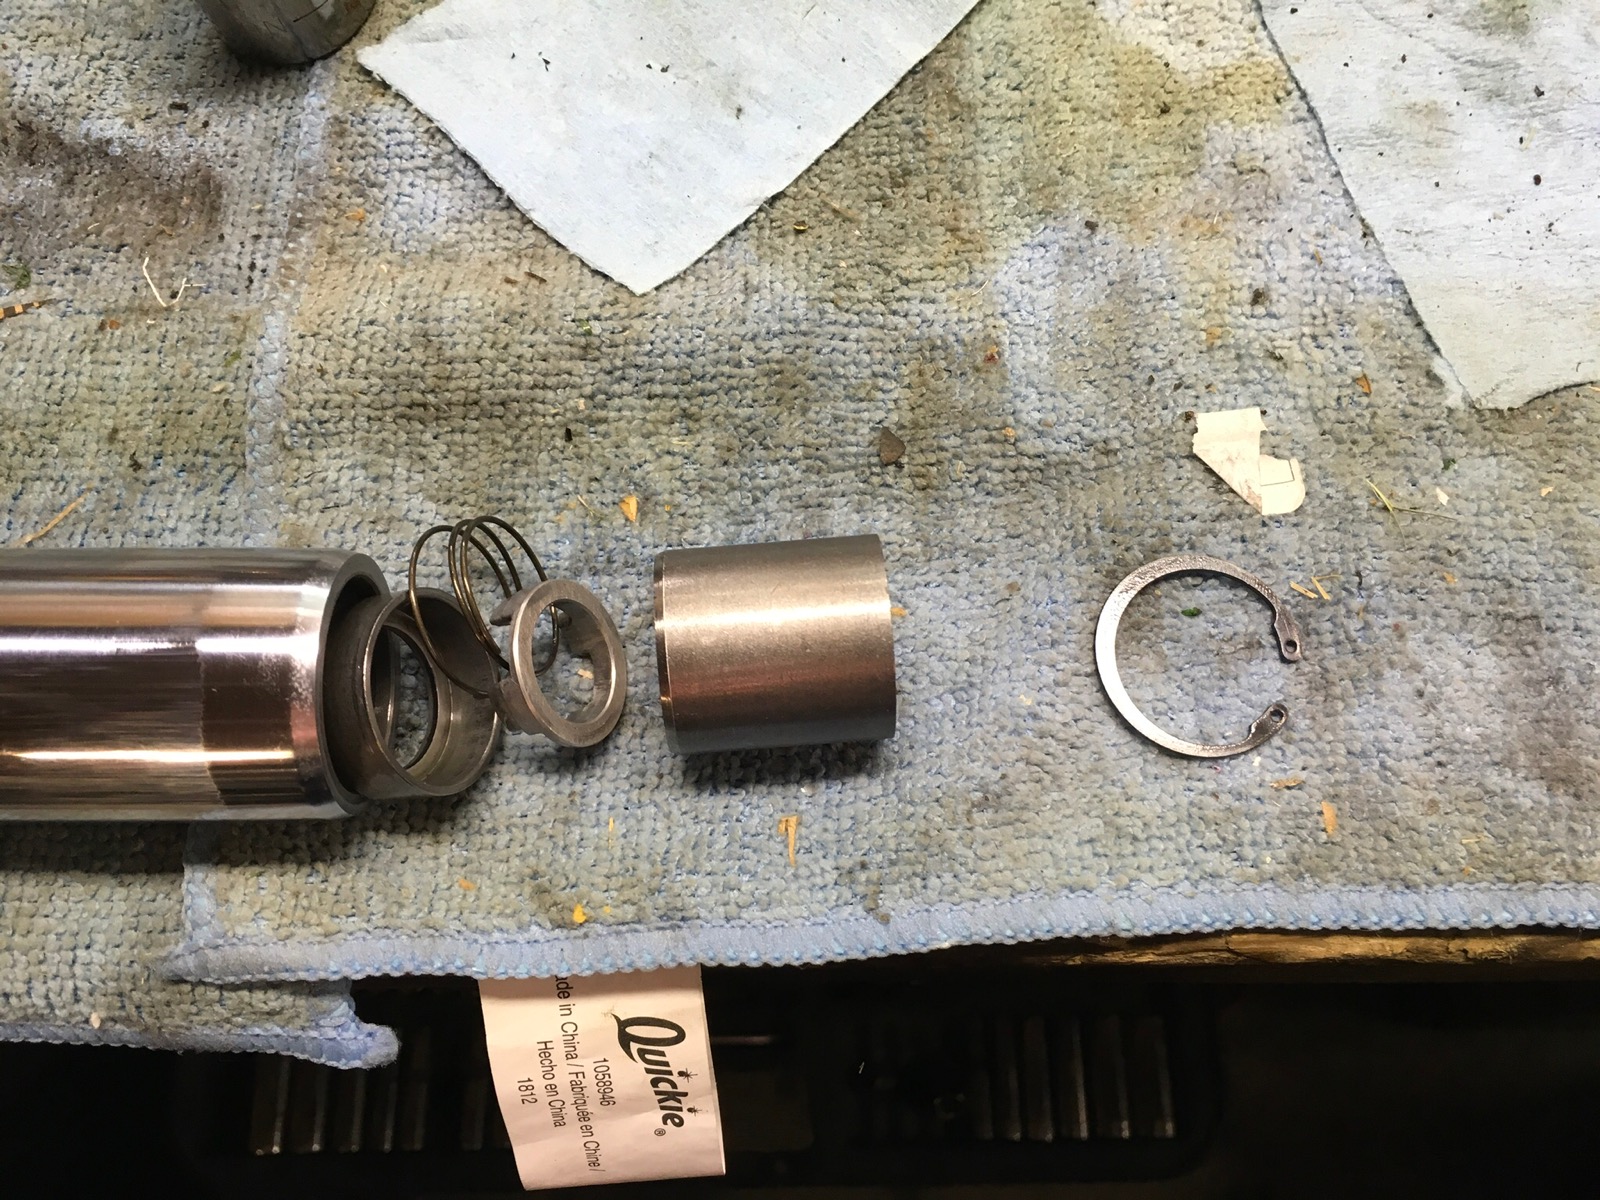
Something unusual looking with the inner damper. I don’t recognize the bearing like item around the lightweight tapered cone. Here is what the fork assembly should look like. first picture is in the lower end of the upper stantion helded in by a E clip. Second is the correct order to drop into the upper stantion. Care needs to be taken when tightening the allen cap bolt. The upper stantion needs to be pushed all the way down into the lower and center the lightweight tapered cone. That cone can get pushed to one side and will cause the upper to get jammed in the lower. I push the upper all the way down with the allen just finger tight. Spin the upper and work it up and down to properly align the cone. Once I feel the movement is free I snug up the allen. Then torque it to 12 ft lbs.
1976 KZ 900 A4
kzrider.com/forum/11-projects/613548-1976-kz-900-a4
1976 KZ 900 B1 LTD
1978 KZ 1000 B2 LTD
1980 KZ 750 E1
Kowledge Speaks, But Wisdom Listens.
Jimi Hendrix.
1976 KZ 900 B1 LTD
1978 KZ 1000 B2 LTD
1980 KZ 750 E1
Kowledge Speaks, But Wisdom Listens.
Jimi Hendrix.
The following user(s) said Thank You: wdhewson
Please Log in or Create an account to join the conversation.
- wdhewson
-
 Topic Author
- Offline
- User
-

Registered
- Posts: 162
- Thanks: 58
Re: Trying to Rescue a Late 1970s (1977??) Kawasaki KZ1000
22 Jan 2023 16:42 - 22 Jan 2023 17:39
Thanks Mikaw.
Yes, I was a bit economical by not replacing the copper washers under those Allen bolts. Let's see what my luck is.
There was thread sealant all over the Allen bolts when I removed them, making removal a nightmare. So I was economical again by not applying some. If those Allens loosen, I'll catch the oil leak, and they can't back out very far before the axle catches them.
There's a nice rounded lip on the lower end of the tube which eased entry into the seal, and I was not economical about oiling the seal prior.
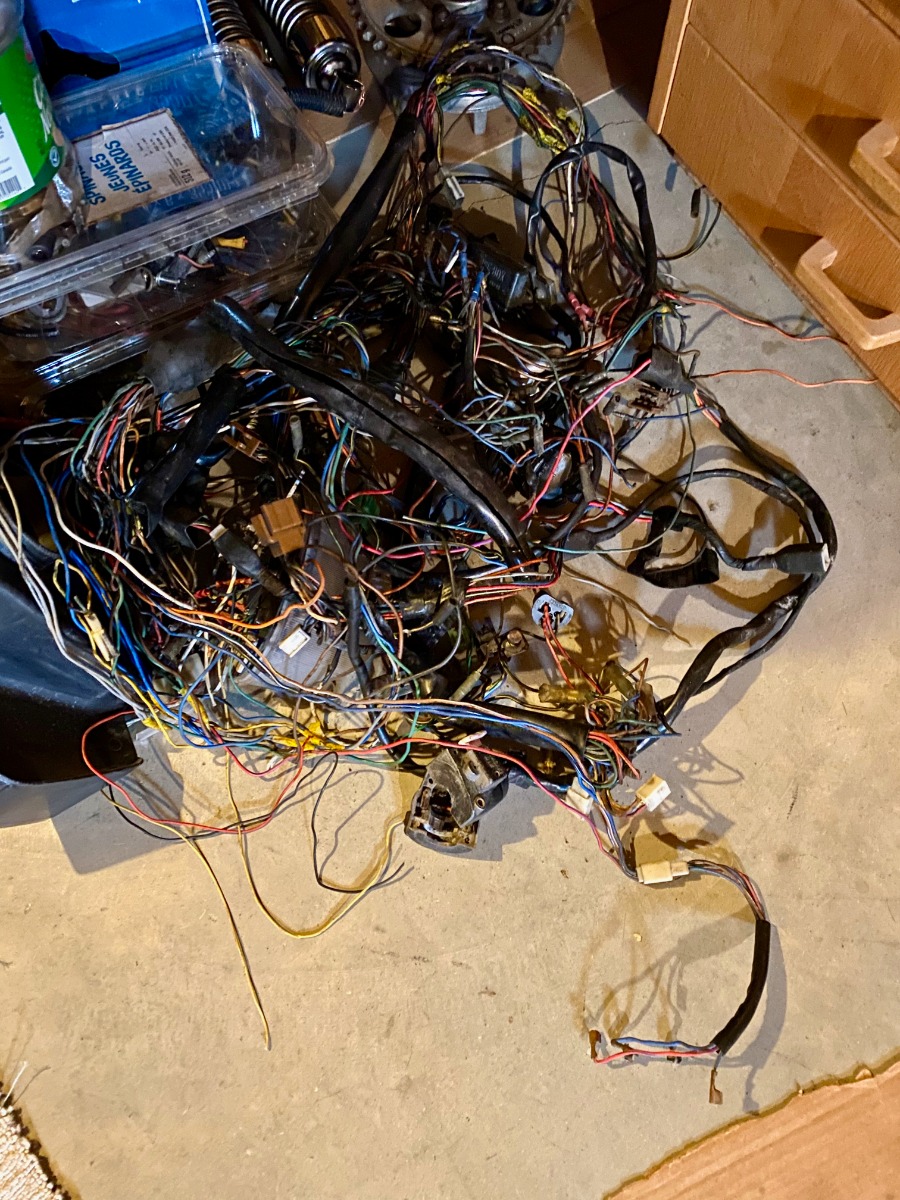
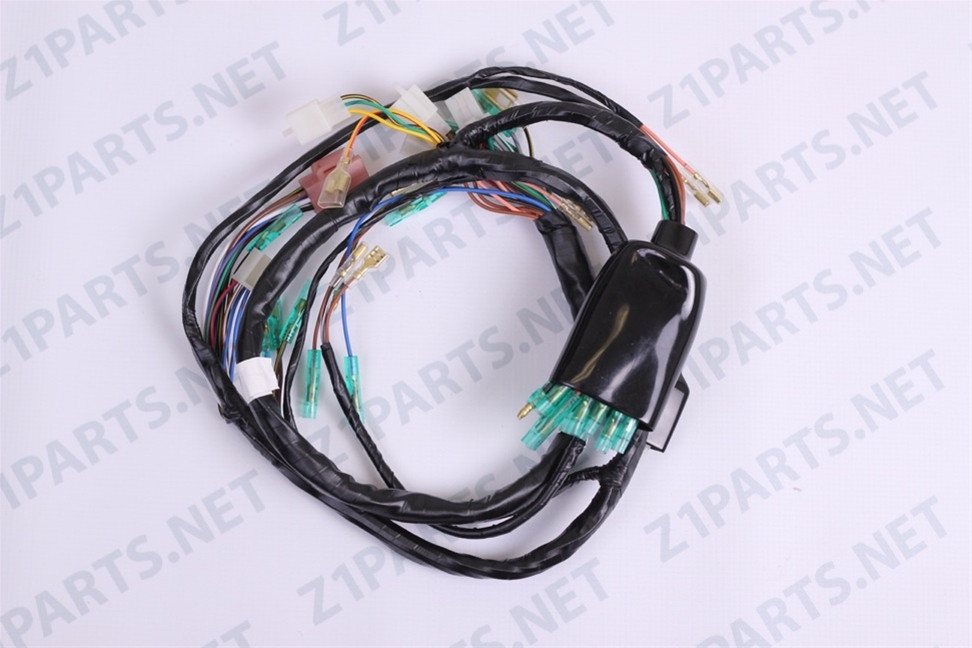
A bare chassis with engine sits on a jack in my unheated garage, so it might be time to sort out some wiring. Look at this rat's nest sitting on my basement floor!! The PO was upfront about the cut and pull method by which the wiring was pruned from the bike..
Yes, I was a bit economical by not replacing the copper washers under those Allen bolts. Let's see what my luck is.
There was thread sealant all over the Allen bolts when I removed them, making removal a nightmare. So I was economical again by not applying some. If those Allens loosen, I'll catch the oil leak, and they can't back out very far before the axle catches them.
There's a nice rounded lip on the lower end of the tube which eased entry into the seal, and I was not economical about oiling the seal prior.
A bare chassis with engine sits on a jack in my unheated garage, so it might be time to sort out some wiring. Look at this rat's nest sitting on my basement floor!! The PO was upfront about the cut and pull method by which the wiring was pruned from the bike..
Nothing quite like the rip of a Big KZ
Last edit: 22 Jan 2023 17:39 by wdhewson.
Please Log in or Create an account to join the conversation.
- wdhewson
-
Topic Author
- Offline
- User
-
Registered
- Posts: 162
- Thanks: 58
Re: Trying to Rescue a Late 1970s (1977??) Kawasaki KZ1000
22 Jan 2023 17:34
Thanks Mikaw, it's just your kind of help I'll need to rescue this bike.
I see your picture also shows the rounded lip on the bottom of the tube which makes seal entry easy with a bit of oil.
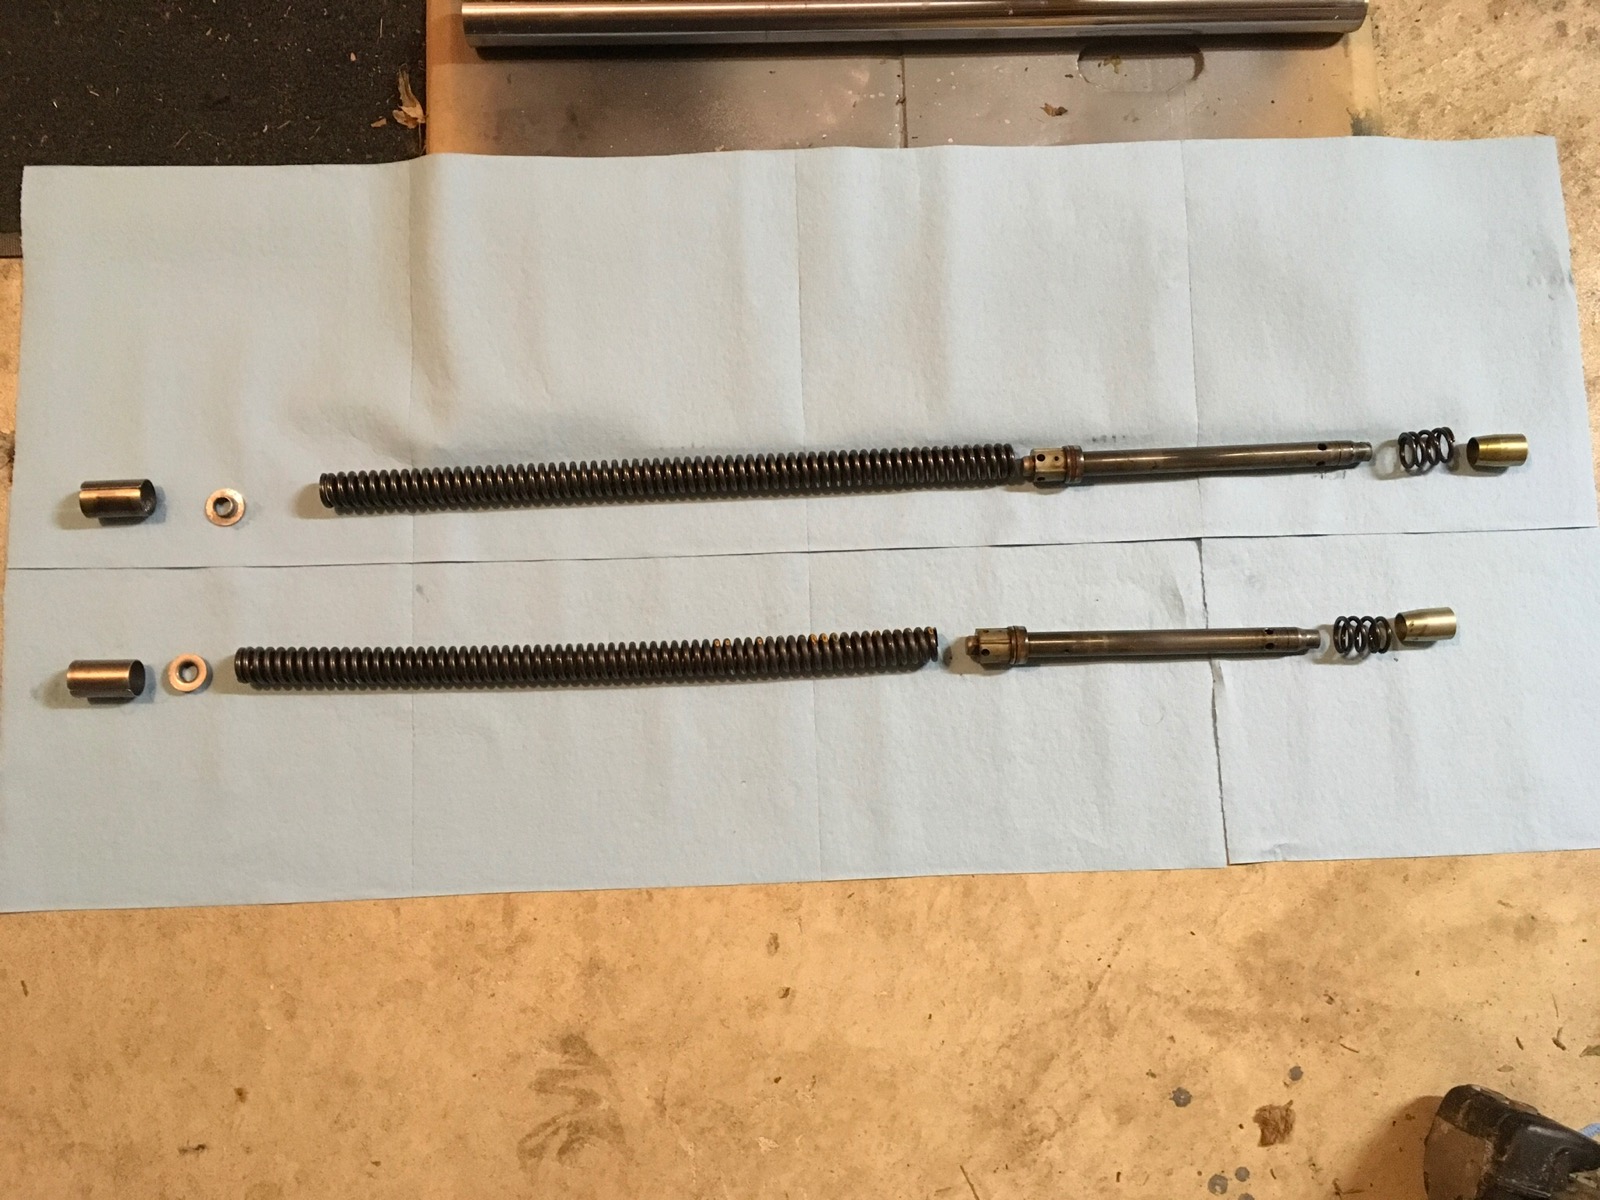
Getting everything positioned concentrically in their correct seats wasn't too bad using my "special service tool". Which is a nice long straight, ball-ended, stainless steel antenna from my junked 1986 Toyota Camry. I just slid everything onto the antenna and things were in position in the slider with the ball end out the Allen bolt hole. I use that old antenna almost monthly for one thing or another.
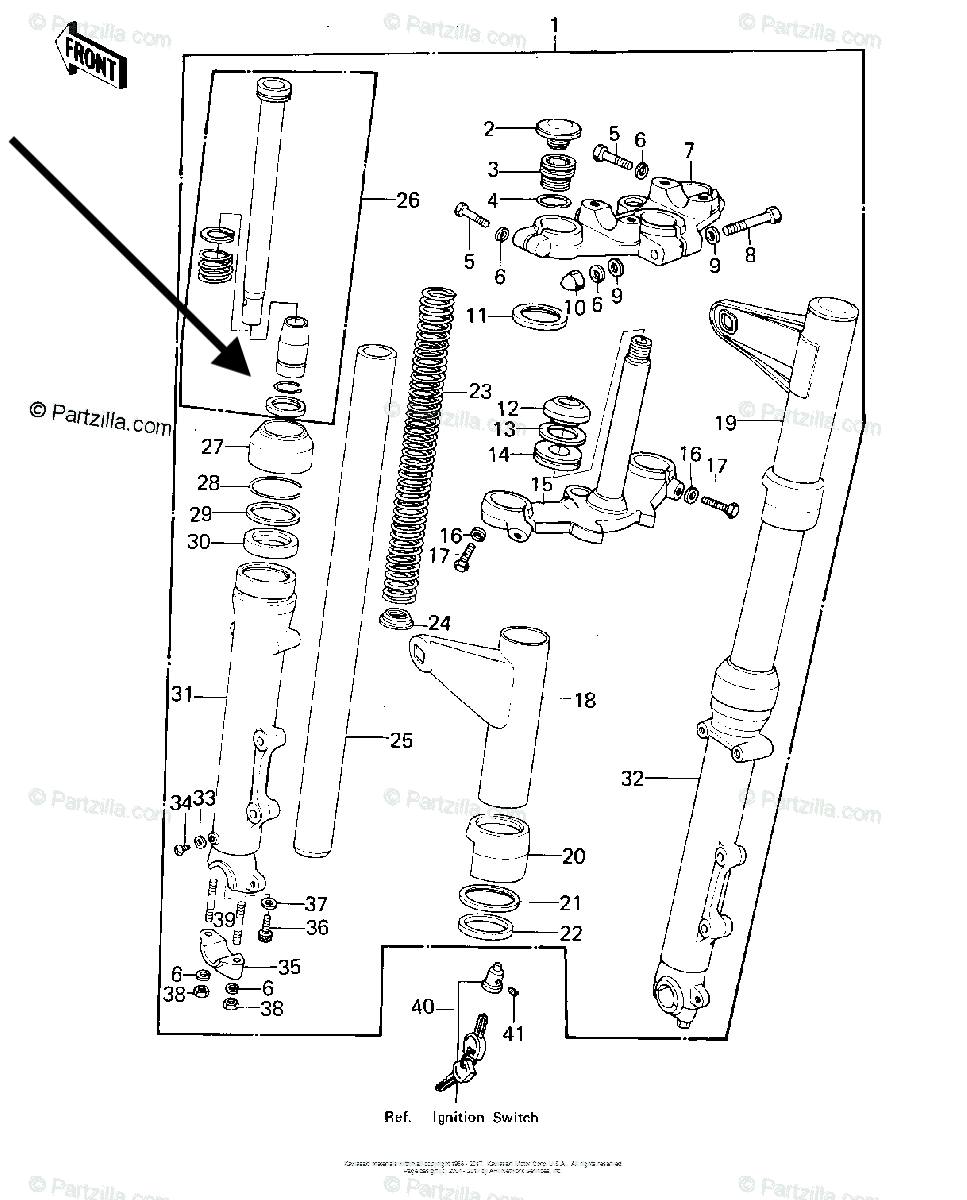
Here's the parts diagram I was comparing with.
I inserted the black arrow pointing to the tapered aluminum piece, its snap ring, and that "bushing" piece that fits the bottom of the tapered aluminum piece. The function of that bushing piece is mysterious to me, but it slides a few millimeters up and down the tapered aluminum piece with its upper limit of travel determined by the snap ring. With that bushing piece in the up position, it covers some ports in the aluminum tapered piece, and when in the down position those ports are open. So it seems to be a valve related to damping on the up or down stroke.
I see your picture also shows the rounded lip on the bottom of the tube which makes seal entry easy with a bit of oil.
Getting everything positioned concentrically in their correct seats wasn't too bad using my "special service tool". Which is a nice long straight, ball-ended, stainless steel antenna from my junked 1986 Toyota Camry. I just slid everything onto the antenna and things were in position in the slider with the ball end out the Allen bolt hole. I use that old antenna almost monthly for one thing or another.
Here's the parts diagram I was comparing with.
I inserted the black arrow pointing to the tapered aluminum piece, its snap ring, and that "bushing" piece that fits the bottom of the tapered aluminum piece. The function of that bushing piece is mysterious to me, but it slides a few millimeters up and down the tapered aluminum piece with its upper limit of travel determined by the snap ring. With that bushing piece in the up position, it covers some ports in the aluminum tapered piece, and when in the down position those ports are open. So it seems to be a valve related to damping on the up or down stroke.
Nothing quite like the rip of a Big KZ
Please Log in or Create an account to join the conversation.
- Mikaw
-
- Offline
- Sustaining Member
-
Registered
- Posts: 4825
- Thanks: 1852
Re: Trying to Rescue a Late 1970s (1977??) Kawasaki KZ1000
22 Jan 2023 17:35
WTF. YIKES. Might want to look into a replacement. Several online store sell aftermarket harnesses. Personally I think the wire gauge is to small but for new wire might carry the amps for a little bit. Doubt they will be around in 40+ years like the OEM.
1976 KZ 900 A4
kzrider.com/forum/11-projects/613548-1976-kz-900-a4
1976 KZ 900 B1 LTD
1978 KZ 1000 B2 LTD
1980 KZ 750 E1
Kowledge Speaks, But Wisdom Listens.
Jimi Hendrix.
1976 KZ 900 B1 LTD
1978 KZ 1000 B2 LTD
1980 KZ 750 E1
Kowledge Speaks, But Wisdom Listens.
Jimi Hendrix.
Please Log in or Create an account to join the conversation.
- Mikaw
-
- Offline
- Sustaining Member
-
Registered
- Posts: 4825
- Thanks: 1852
Re: Trying to Rescue a Late 1970s (1977??) Kawasaki KZ1000
22 Jan 2023 17:40Never seen that configuration on a dampener. What year is that breakdown from. 1977 forks should be like I posted. I see now you have a flush top cap. That 1978 up till 1980 if I’m correct. My 1978 LTD didn’t have that. You might have 1979 forks, that’s why you have tapered steering stem bearings. The plot thickens.Thanks Mikaw, it's just your kind of help I'll need to rescue this bike.
I see your picture also shows the rounded lip on the bottom of the tube which makes seal entry easy with a bit of oil.
Getting everything positioned concentrically in their correct seats wasn't too bad using my "special service tool". Which is a nice long straight, ball-ended, stainless steel antenna from my junked 1986 Toyota Camry. I just slid everything onto the antenna and things were in position in the slider with the ball end out the Allen bolt hole. I use that old antenna almost monthly for one thing or another.
Here's the parts diagram I was comparing with.
I inserted the black arrow pointing to the tapered aluminum piece, its snap ring, and that "bushing" piece that fits the bottom of the tapered aluminum piece. The function of that bushing piece is mysterious to me, but it slides a few millimeters up and down the tapered aluminum piece with its upper limit of travel determined by the snap ring. With that bushing piece in the up position, it covers some ports in the aluminum tapered piece, and when in the down position those ports are open. So it seems to be a valve related to damping on the up or down stroke.
1976 KZ 900 A4
kzrider.com/forum/11-projects/613548-1976-kz-900-a4
1976 KZ 900 B1 LTD
1978 KZ 1000 B2 LTD
1980 KZ 750 E1
Kowledge Speaks, But Wisdom Listens.
Jimi Hendrix.
1976 KZ 900 B1 LTD
1978 KZ 1000 B2 LTD
1980 KZ 750 E1
Kowledge Speaks, But Wisdom Listens.
Jimi Hendrix.
The following user(s) said Thank You: wdhewson
Please Log in or Create an account to join the conversation.
- Mikaw
-
- Offline
- Sustaining Member
-
Registered
- Posts: 4825
- Thanks: 1852
Re: Trying to Rescue a Late 1970s (1977??) Kawasaki KZ1000
22 Jan 2023 18:35
For the future the way to remove the top fork cap is to loosen the top clamp. Leave the bottom clamp tight. Loosen the top cap several turns. Then pull the fork out of the triple
1976 KZ 900 A4
kzrider.com/forum/11-projects/613548-1976-kz-900-a4
1976 KZ 900 B1 LTD
1978 KZ 1000 B2 LTD
1980 KZ 750 E1
Kowledge Speaks, But Wisdom Listens.
Jimi Hendrix.
1976 KZ 900 B1 LTD
1978 KZ 1000 B2 LTD
1980 KZ 750 E1
Kowledge Speaks, But Wisdom Listens.
Jimi Hendrix.
The following user(s) said Thank You: wdhewson
Please Log in or Create an account to join the conversation.
- Dragbike_Mike
-
- Offline
- Sustaining Member
-
Registered
- Posts: 173
- Thanks: 130
Re: Trying to Rescue a Late 1970s (1977??) Kawasaki KZ1000
23 Jan 2023 05:49Those copper washers can be reused! First, take a fine mill file and use it to file down any ridges that you might find on the sealing surfaces. Then, take a propane torch and heat the washer until it's reddish orange. Allow to cool - no need to quench in water. Again take your mill file to remove any scale from the heated surfaces and you're good-to-go. Also, if the washer's been reused many times, you might have to file down the O.D. a little to get it back to spec. I've used this technique many, many times over the years, including on the copper washers used under the cylinder head cap nuts.Yes, I was a bit economical by not replacing the copper washers under those Allen bolts. Let's see what my luck is.
Mike
In a former life - KZ-based dragbike - CrMo car tire chassis, 1395cc, Hahn Racecraft turbo system, VP C16, Orient Express 3-spd auto, 7.80's @ 165-170.
The following user(s) said Thank You: wdhewson, SWest, Wookie58
Please Log in or Create an account to join the conversation.
- wdhewson
-
Topic Author
- Offline
- User
-
Registered
- Posts: 162
- Thanks: 58
Re: Trying to Rescue a Late 1970s (1977??) Kawasaki KZ1000
23 Jan 2023 10:58
Thanks Guys..........
Please help with a fundamental question about the wiring approach I should use.
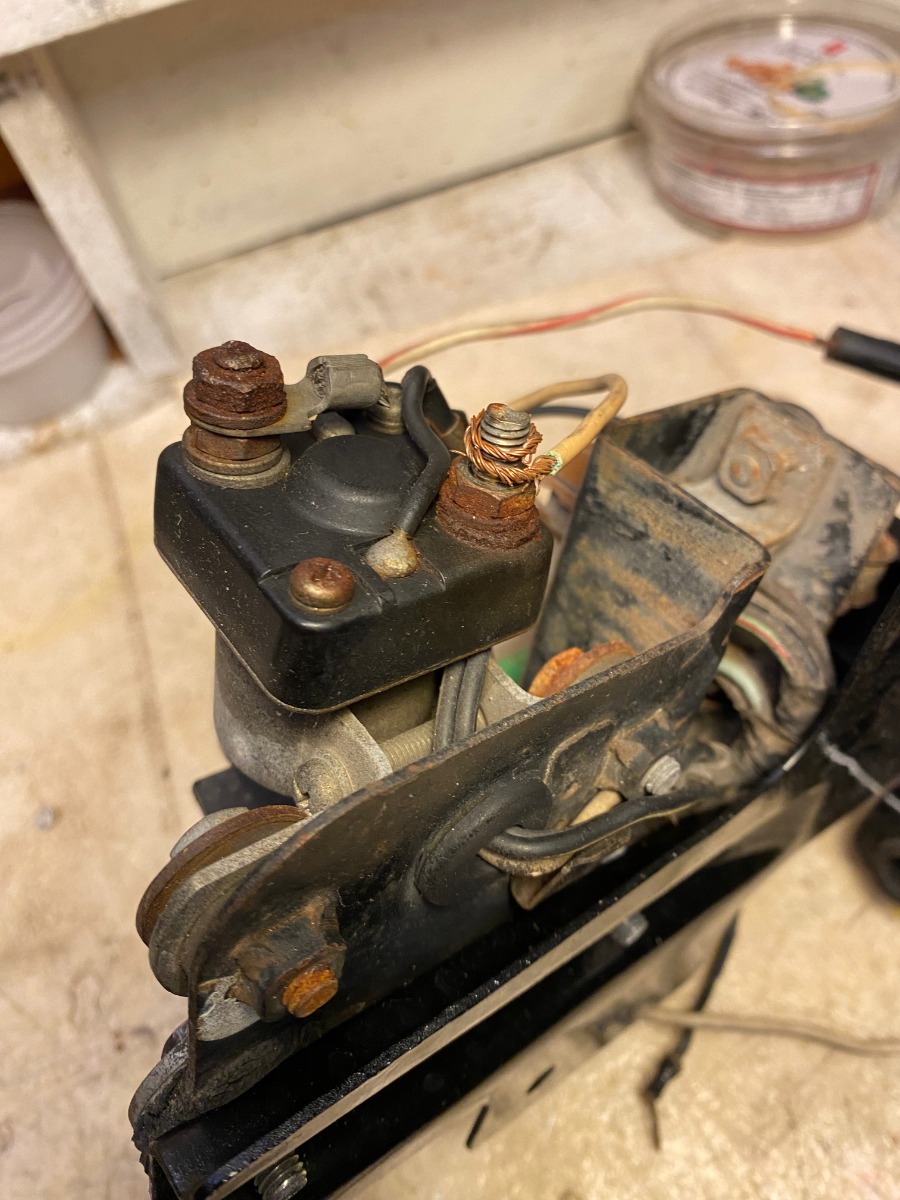
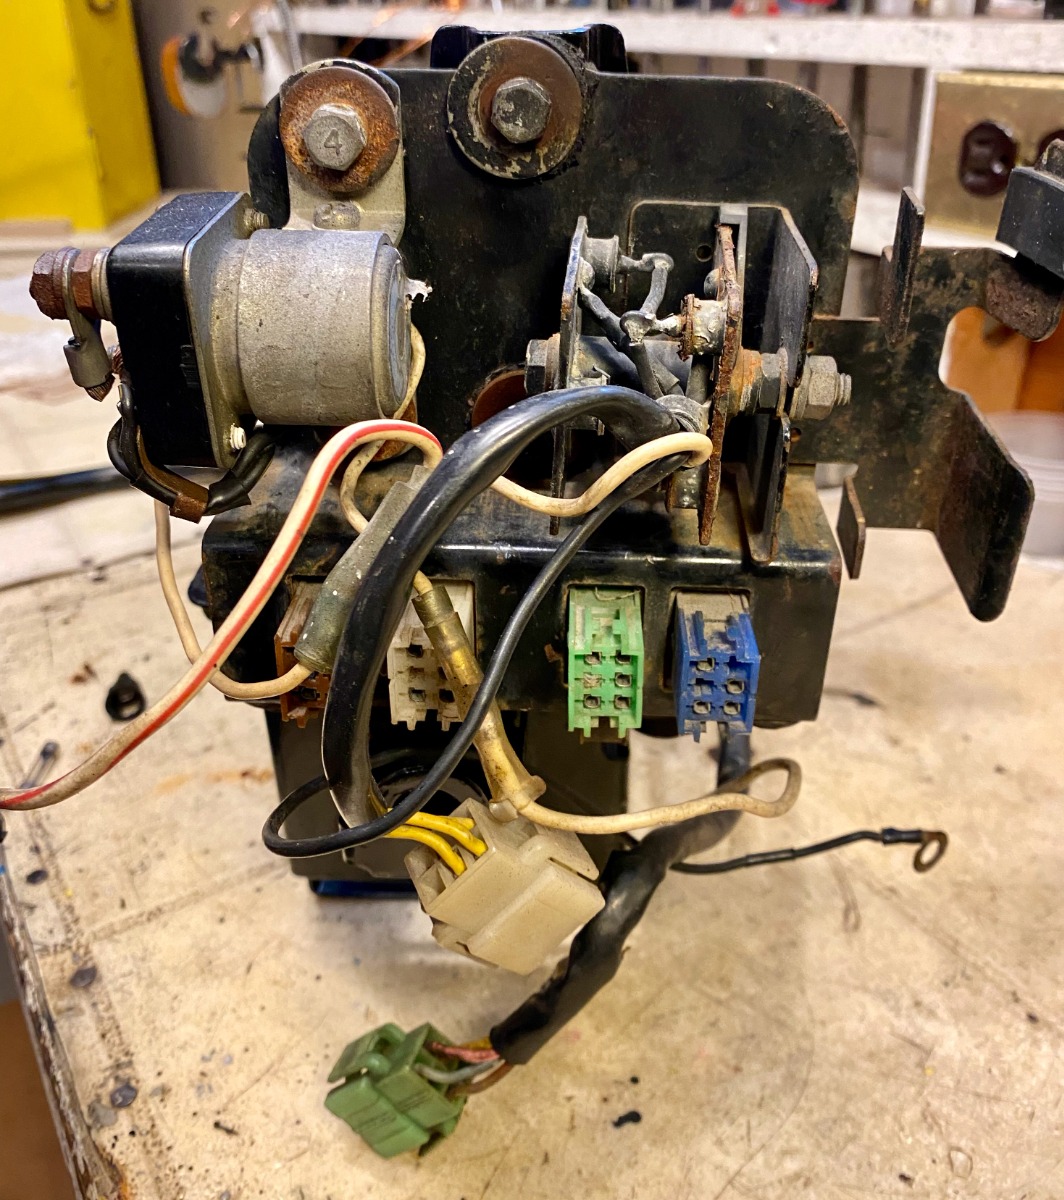
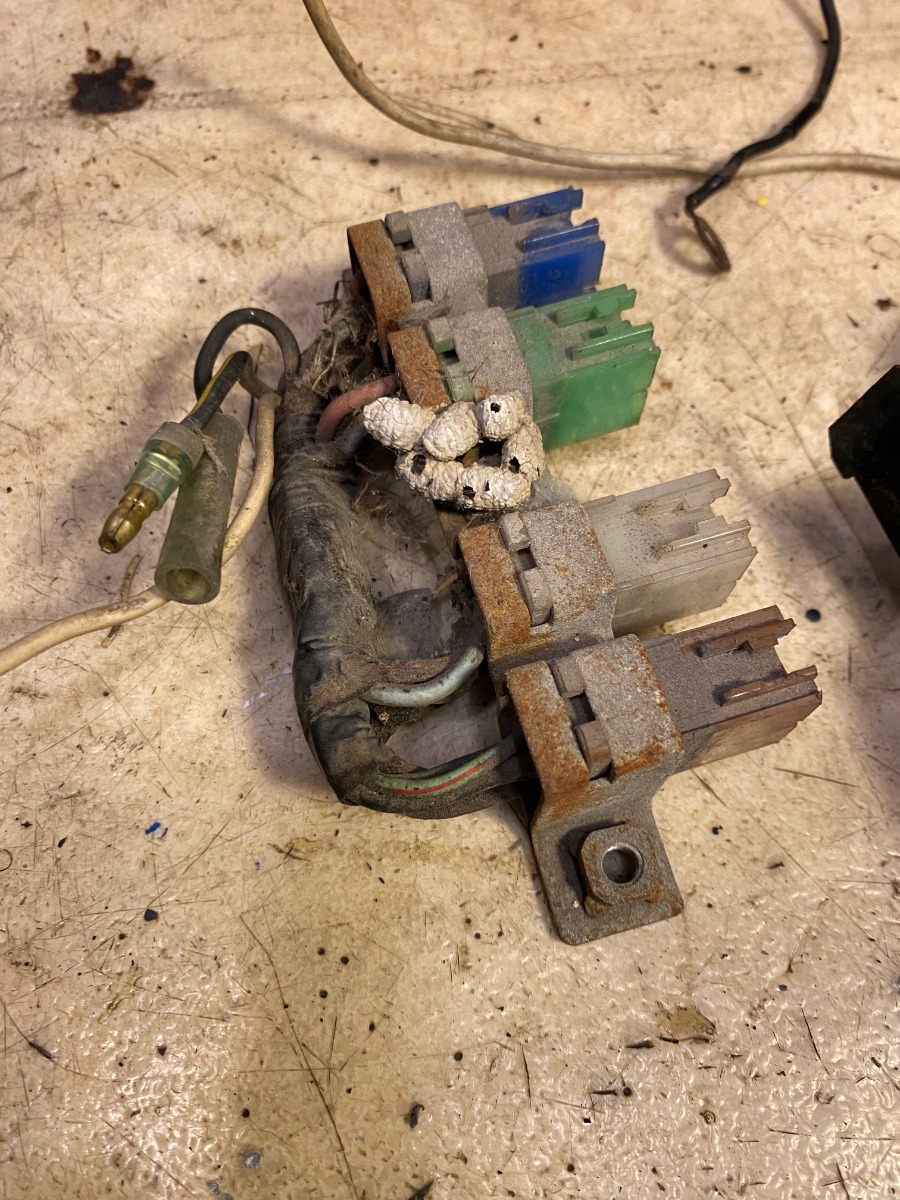
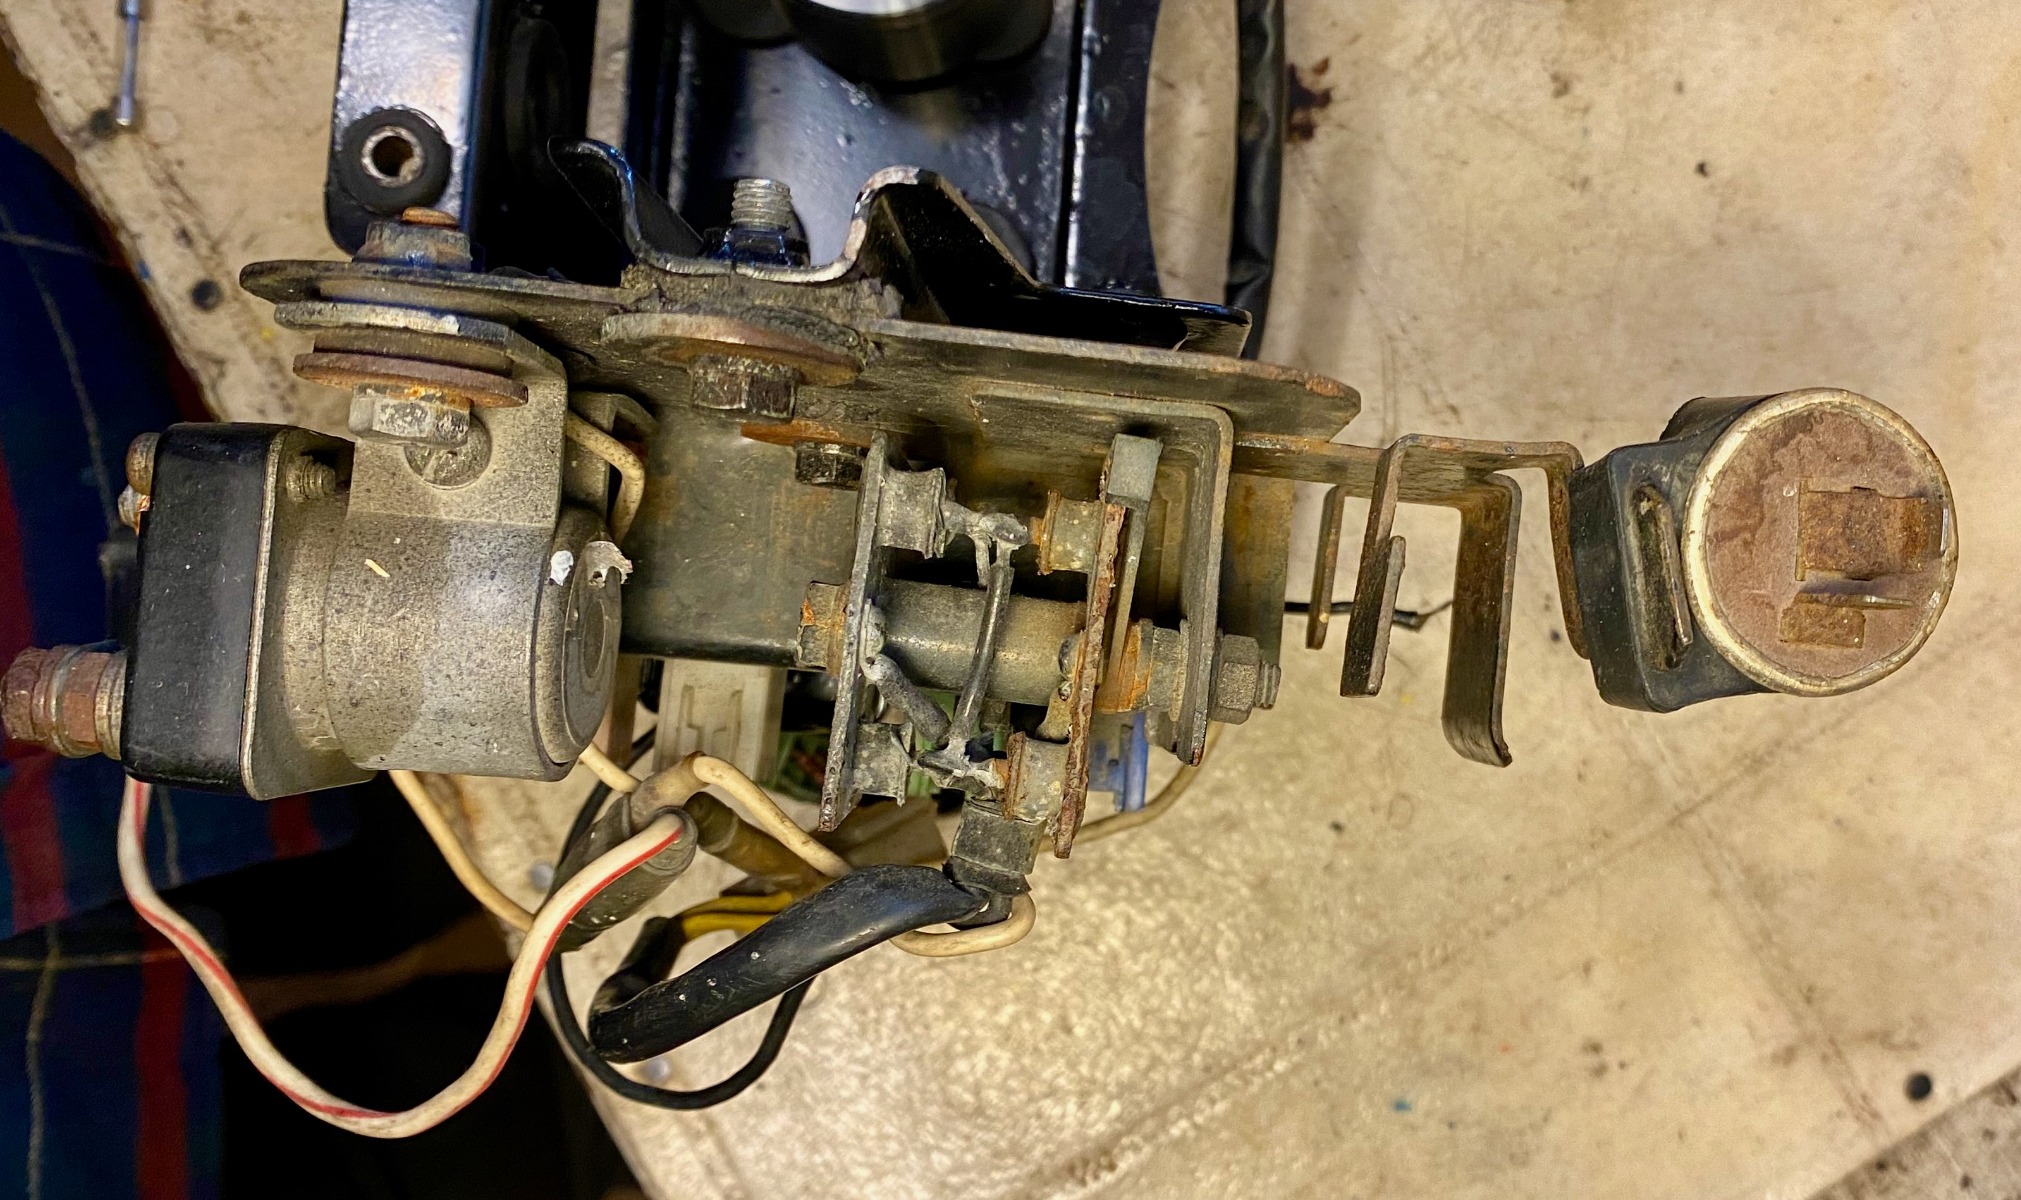
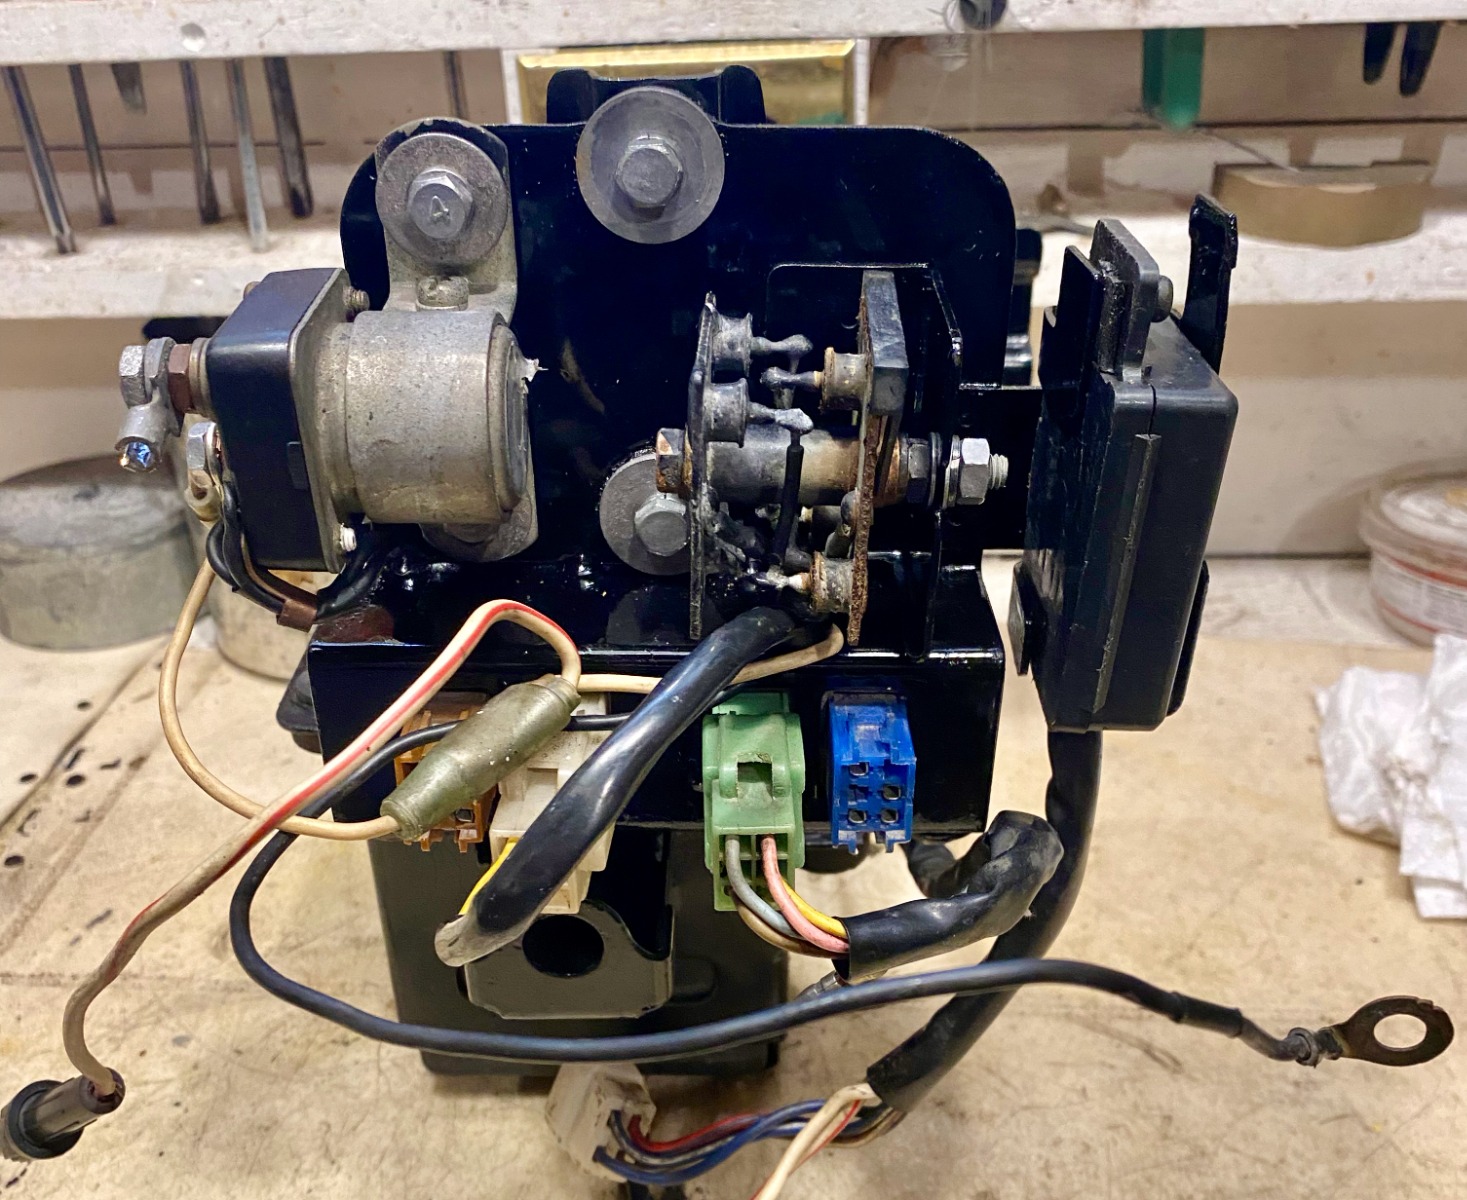
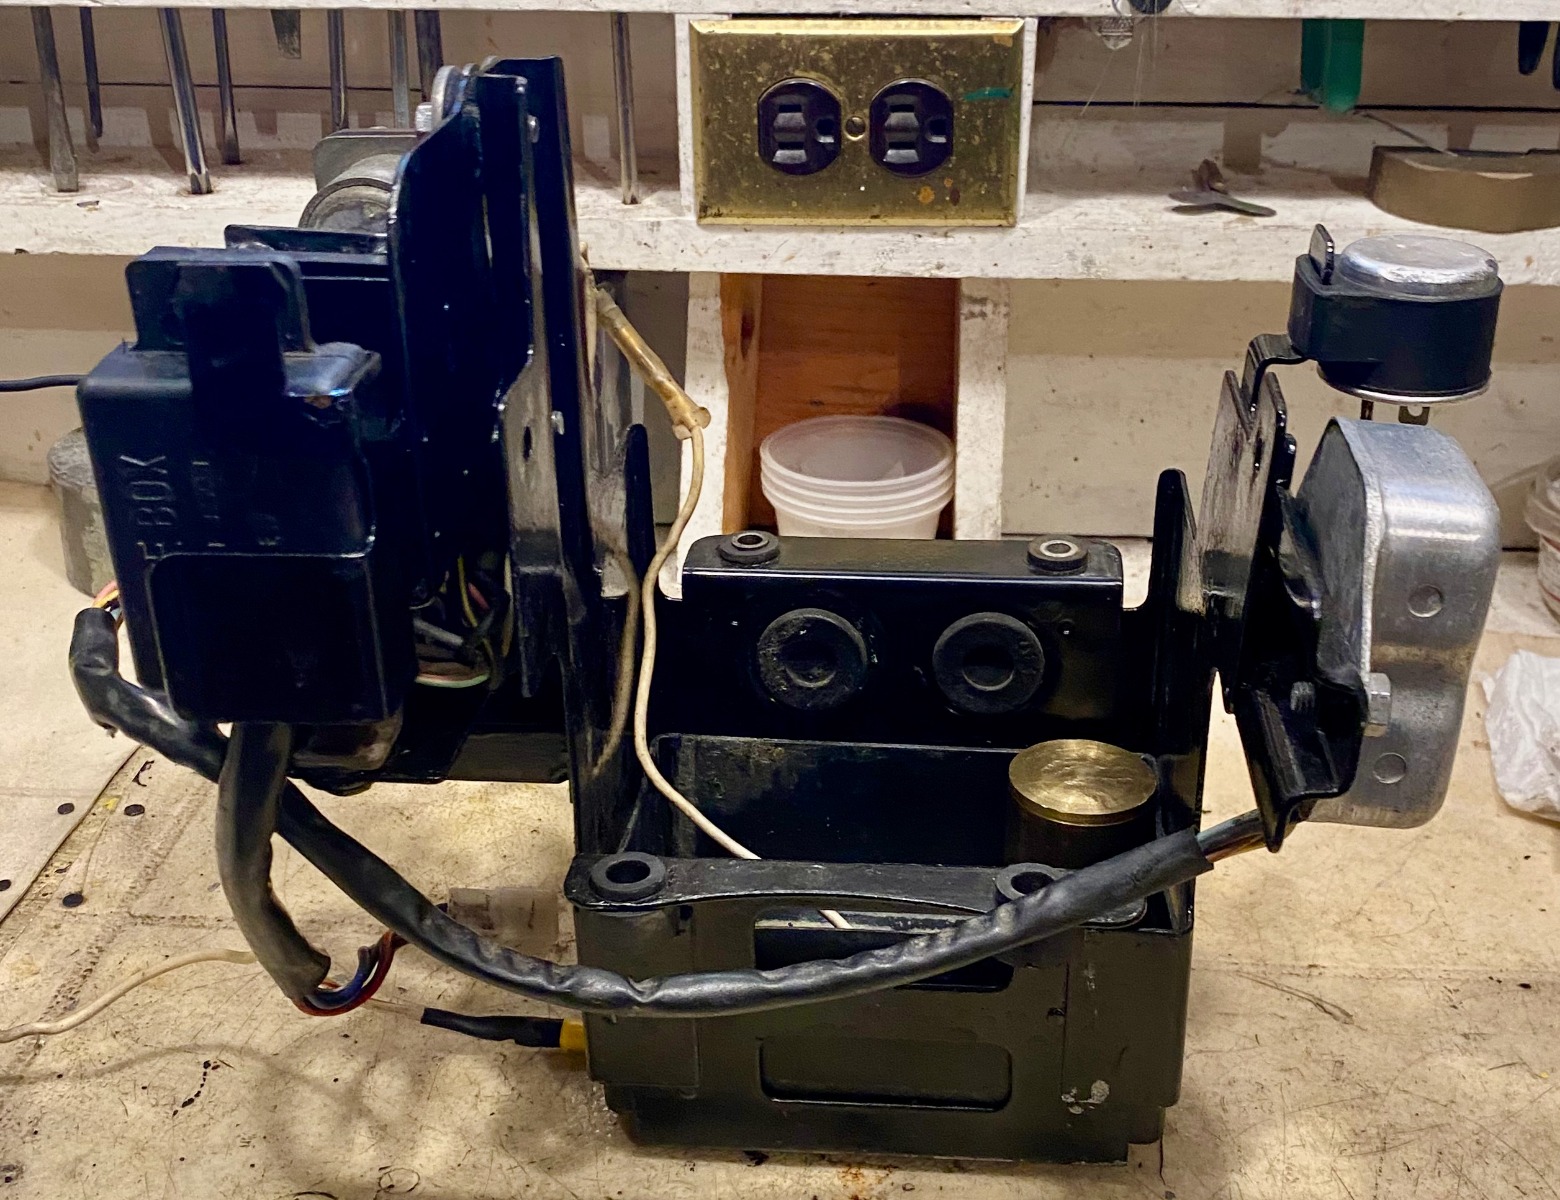
It seems these early KZ1000s have a separate voltage regulator and rectifier, which is my bike. See pictures.
Are these early separate regulators and rectifiers robust and efficient, or should I update to a modern integrated regulator/rectifier?
Note in the pictures the approach to wiring the starter solenoid sometime in her past, and the presence of some mud daubers along the way.

Please help with a fundamental question about the wiring approach I should use.
It seems these early KZ1000s have a separate voltage regulator and rectifier, which is my bike. See pictures.
Are these early separate regulators and rectifiers robust and efficient, or should I update to a modern integrated regulator/rectifier?
Note in the pictures the approach to wiring the starter solenoid sometime in her past, and the presence of some mud daubers along the way.
Nothing quite like the rip of a Big KZ
Please Log in or Create an account to join the conversation.
- Mikaw
-
- Offline
- Sustaining Member
-
Registered
- Posts: 4825
- Thanks: 1852
Re: Trying to Rescue a Late 1970s (1977??) Kawasaki KZ1000
23 Jan 2023 11:16
Consider this upgrade. Nessism is the local expert on them.
www.kzrider.com/forum/4-electrical/61678...-to-get-sh775#857946
www.kzrider.com/forum/4-electrical/61678...-to-get-sh775#857946
1976 KZ 900 A4
kzrider.com/forum/11-projects/613548-1976-kz-900-a4
1976 KZ 900 B1 LTD
1978 KZ 1000 B2 LTD
1980 KZ 750 E1
Kowledge Speaks, But Wisdom Listens.
Jimi Hendrix.
1976 KZ 900 B1 LTD
1978 KZ 1000 B2 LTD
1980 KZ 750 E1
Kowledge Speaks, But Wisdom Listens.
Jimi Hendrix.
The following user(s) said Thank You: wdhewson
Please Log in or Create an account to join the conversation.
- wdhewson
-
Topic Author
- Offline
- User
-
Registered
- Posts: 162
- Thanks: 58
Re: Trying to Rescue a Late 1970s (1977??) Kawasaki KZ1000
25 Jan 2023 08:04
I'll have to keep in mind the old phrase about, "Climbing a flight of stair one step at a time" regarding the wiring nightmare. This mess is going to test me especially as wiring diagrams seem mysterious to me, and I can never predict where electrons are going to flow.
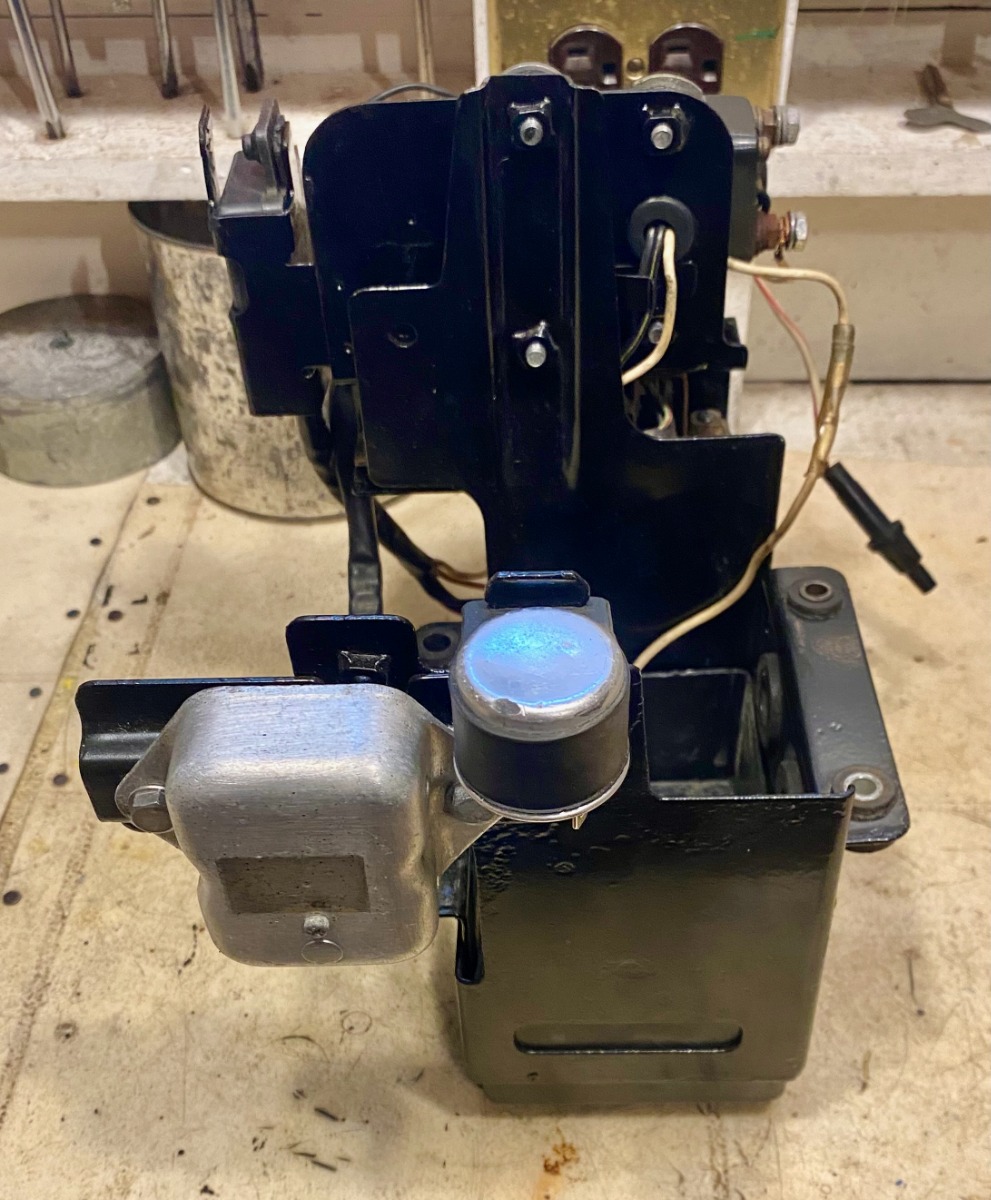
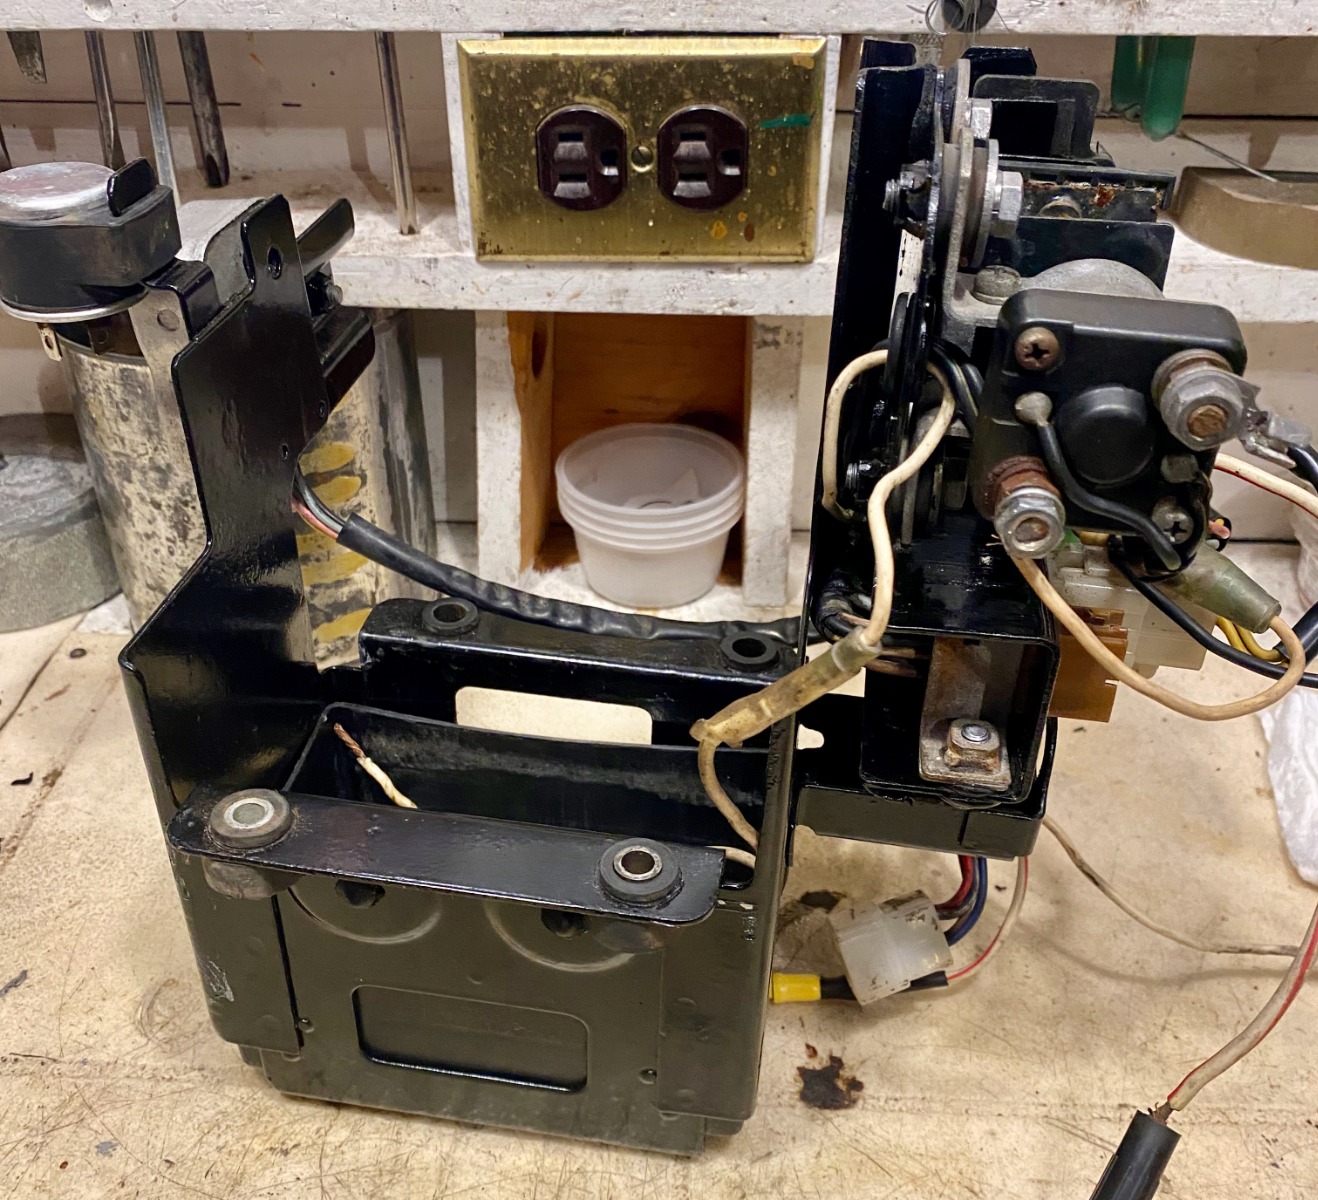
A a first step, that battery box is a bit of a wiring nerve center, so I took it to bits, then cleaned things up, and put it back together. I did test that the starter solenoid works with a good solid clack, but don't know how to bench test the rectifier or the voltage regulator.
On the blue multi-pin connector, I've read that this comes from the alternator and includes a wire for the oil pressure switch and a wire neutral switch.
But I've got no idea what comes into or out of the brown multi-pin connector.
So that's one step up the flight of stairs, and I don't know what the second step looks like.
Nothing quite like the rip of a Big KZ
Please Log in or Create an account to join the conversation.
- SWest
-

- Offline
- Sustaining Member
-
Registered
- 10 22 2014
- Posts: 23751
- Thanks: 3022
Re: Trying to Rescue a Late 1970s (1977??) Kawasaki KZ1000
25 Jan 2023 09:17
I'd start with this then go with a SH775 RR. The old regulator and rectifier were weak at best and not worth replacing with OEM.
z1parts.net/main-wiring-harness-kz1000-77-78/
Steve
z1parts.net/main-wiring-harness-kz1000-77-78/
Steve
Z1b1000 1975 Z1b
kzrider.com/forum/11-projects/598262-kz-...-will-it-live#672882
kzrider.com/forum/2-engine/597654-poser?start=240#704229
kzrider.com/forum/11-projects/598262-kz-...-will-it-live#672882
kzrider.com/forum/2-engine/597654-poser?start=240#704229
Please Log in or Create an account to join the conversation.
- SWest
-
- Offline
- Sustaining Member
-
Registered
- 10 22 2014
- Posts: 23751
- Thanks: 3022
Re: Trying to Rescue a Late 1970s (1977??) Kawasaki KZ1000
25 Jan 2023 09:25
BTW the brown connector is the main in and out harness. Typically the white wire going to the Ign. switch gets hot and fries the connector pins. I suspect that's why they went to blade connectors on the smaller fours.

Steve
Steve
Z1b1000 1975 Z1b
kzrider.com/forum/11-projects/598262-kz-...-will-it-live#672882
kzrider.com/forum/2-engine/597654-poser?start=240#704229
kzrider.com/forum/11-projects/598262-kz-...-will-it-live#672882
kzrider.com/forum/2-engine/597654-poser?start=240#704229
Please Log in or Create an account to join the conversation.
Moderators: Street Fighter LTD