
Euro Lookalike basket case
- slmjim+Z1BEBE
-
 Topic Author
- Offline
- User
-

Registered
- Enjoy Life! IT HAS AN EXPIRATION DATE!
- Posts: 1431
- Thanks: 929
Euro Lookalike basket case
16 Sep 2016 08:40 - 09 Jan 2020 05:19
Hi all,
We just completed this bike a few weeks ago following a 6+ year resto effort.
Life got in the way of concerted, continuous progress, making us (and others) question at times if we would ever finish it. Ironically, spine surgery on the rickety pile, a.k.a. slmjim, resulted in very significant progress, due to being stuck at home during winter months, able to only lie horizontally or stand per Doc.'s orders. No sitting for 6 wks. (except for..., well, you know...). Kneepads made it possible to make significant headway, along with helping hands when necessary.
This is the first bike we've done that we've had a digital camera available to document the project start to finish. Our other Z-1's were done in the film camera era, and few photos exist of those projects.
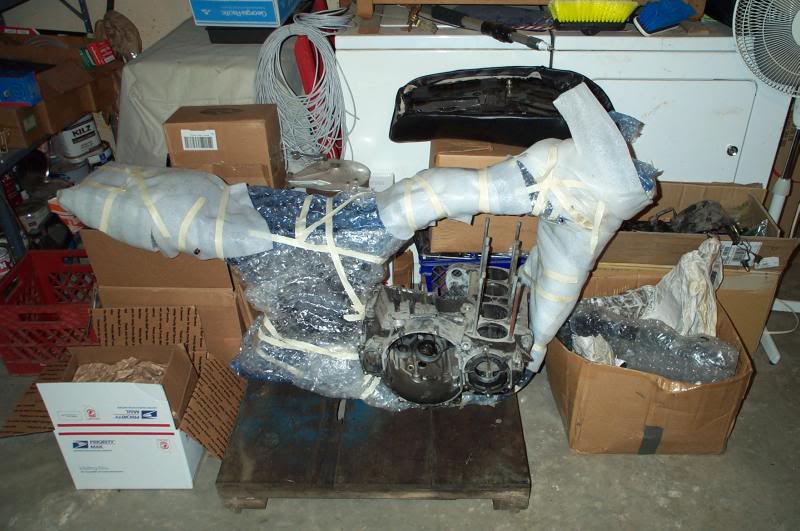
This is the '73 (late '72) Z-1, ser.# 0024xx. after we retrieved it from the seller in 2011. Seller had the frame painted himself years before we first saw it, intending to do the resto himself. It was done in epoxy enamel (we think), not powder coated, leaving the VIN tag intact. That's a nicely re-covered black foam seat in the background, along with a few of the boxes of parts. That's the correct cases for this frame.
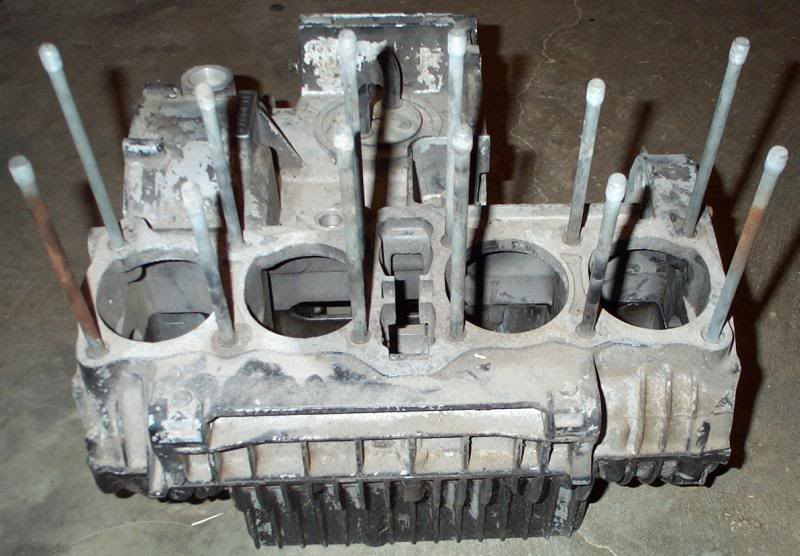
The cases. We had them soda blasted, then had to neutralize the soda residue. In hindsight, chemical stripping would have been more convenient.
Tapered stem bearings in progress.
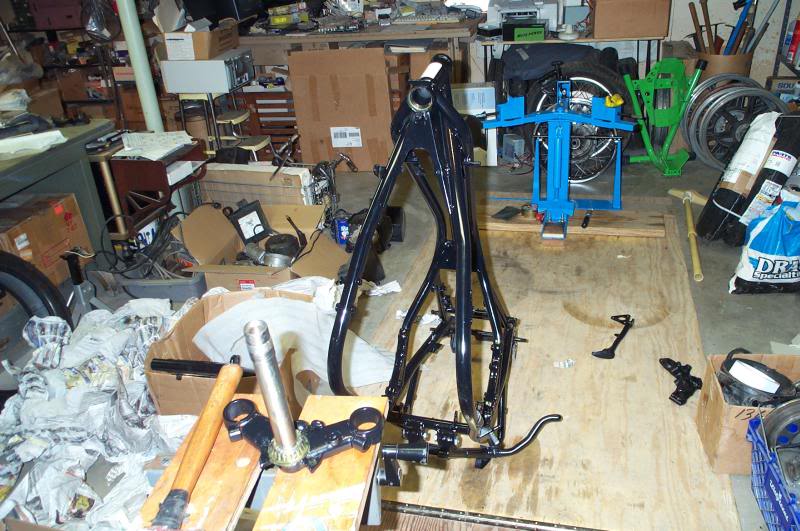
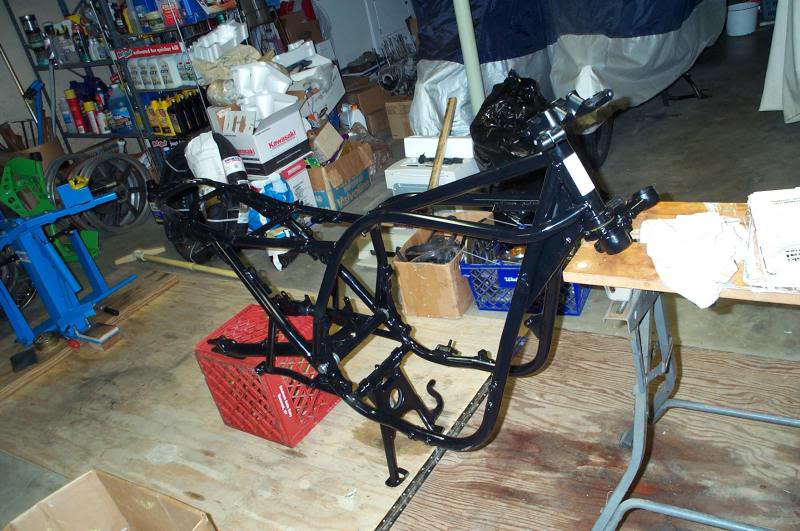
Basic frame complete.
Fast forward a few months. slmjim has primed & painted the cases, and in chasing paint from a few holes discovers a hole that is populated with a piece of broken bolt. (Note to selves: chase all holes before blasting/stripping/priming/painting.). Those two little words have been known to drive otherwise sane men to drink & curse, along with much gnashing of teeth. The bolt was broken off inside one of the motor case holes that houses a tubular dowel, about 5mm below the top of the dowel. Having done damage in the past with an easy-out, we were very reluctant to try, but EDM would run well over $100.00 plus shipping both ways.
So... we decide to proceed. Carefully.
Immediately upon discovering the broken bolt, the hole was filled with Magical Mystery Fluid (MMF), otherwise known as half ATF and half acetone.
Fast forward a couple of months. We've replenished the MMF as needed every few days, just allowing it to soak while we've been doing other things. Every now & then when we'd walk past the case we'd give the bolt a few firm taps with a hammer & punch to shock things loose. Finally patience was at an end. We've done most of the work needed on the chassis and are at the point the bottom end needs to be assembled and mounted in the frame. We decided to give the bolt one gentle try ourselves.
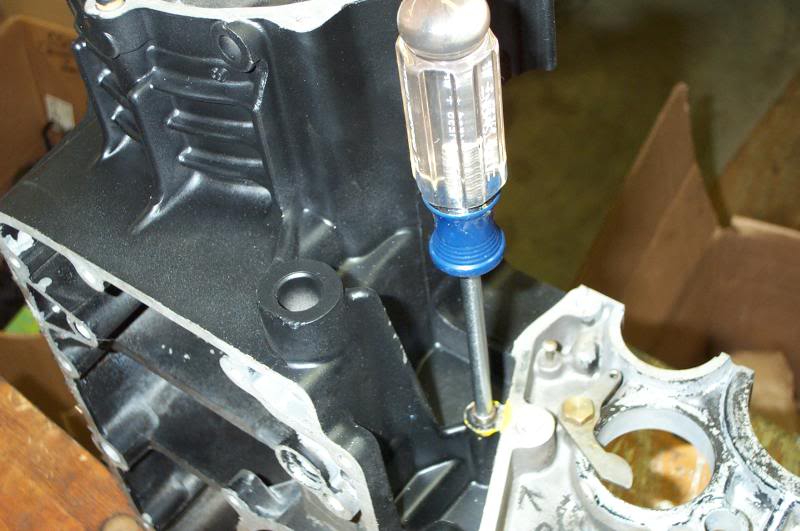
One of the most difficult things about using easy outs is getting the pilot hole drilled in the center and precisely on-axis. slmjim had read somewhere to use clear aquarium tubing pressed into the hole to center the drill bit and keep it on axis. He took his time, running the drill very slowly and stopping often to check progress. After satisfying ourselves that the hole was centered, the remains of the bolt was tapped it a couple more times, the hole refilled with MMF and heat was applied to the boss that the bolt hole is drilled into, using a heat gun from inside the case. It was heated for a long time, probably 20 minutes, to the point the MMF would boil when more was dropped in.
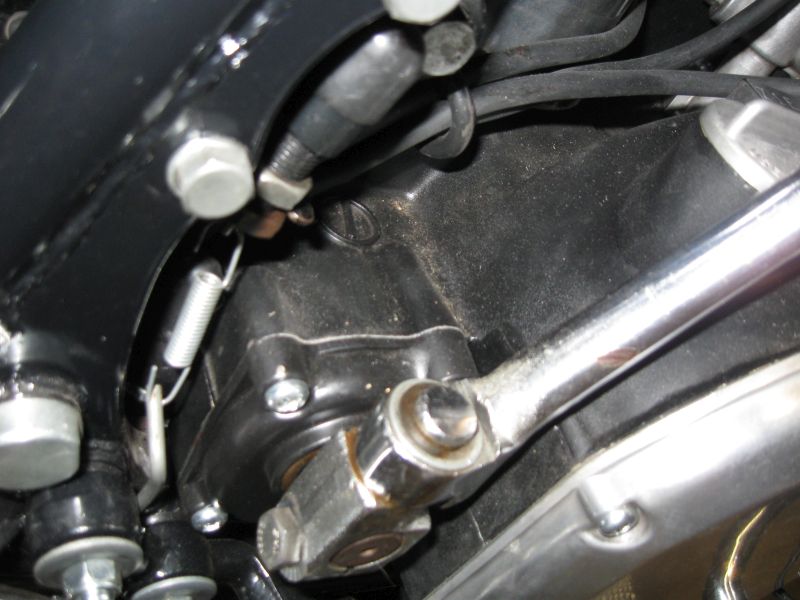
Not knowing exactly what kind of shape the broken end of the bolt was in, we wanted to remove the dowel so it could not possibly interfere with removal of the bolt. It was discovered that a Craftsman #2 Phillips screwdriver is a nice press fit in the dowel, allowing the dowel to be grasped with vise grips without crushing the dowel.
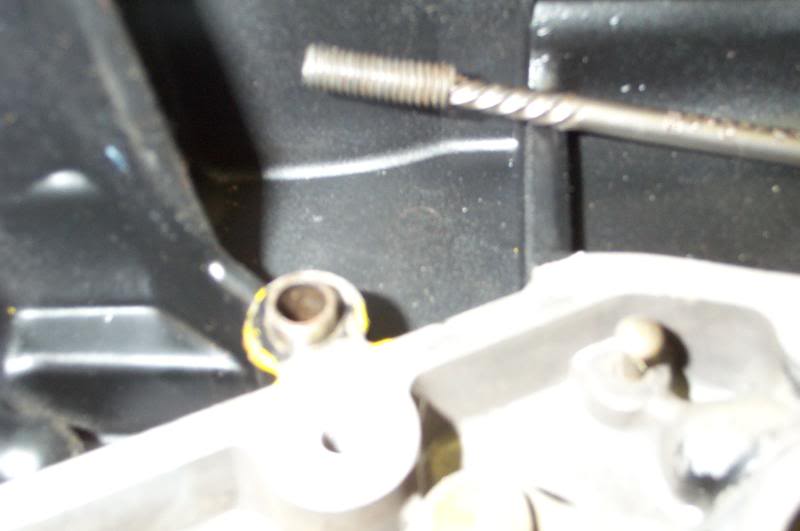
With the dowel out and MMF merrily boiling away inside the hole, the easy out was inserted and started gentle twisting commenced. At first It seemed too easy, as if the easy out out was just spinning in it's hole, and that perhaps the hole had been drilled too large, but then we realized the easy out was rising out of the hole. The bolt piece was just easily unscrewing! It seemed too easy & too simple, but soon the offending piece was out. This was taken after the dowel had been replaced, showing how much bolt was left in the hole.
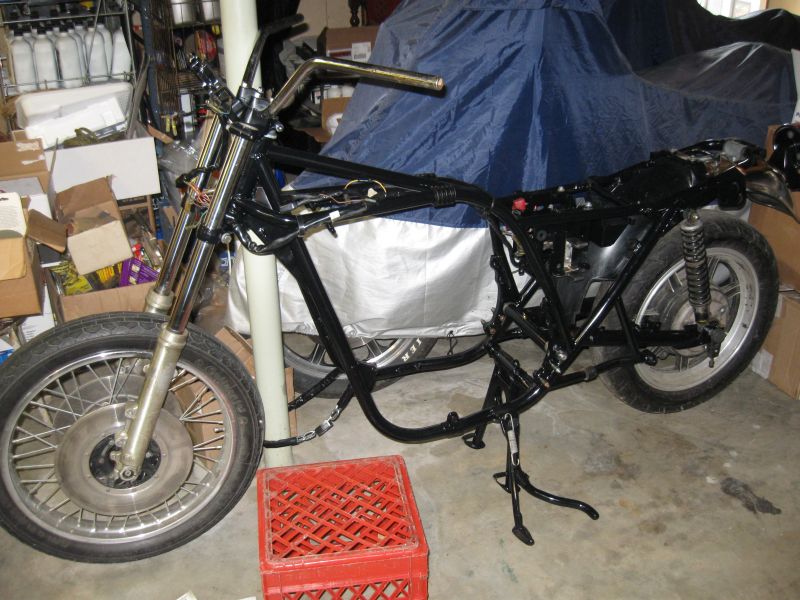
The chassis is rolling now on just enough spare parts to make it easier to move around the shop.
Fast forward a couple of years. Life, deaths & family illnesses have caused this project to be put on hold. Bottom end is together and the jugs are on. I'd shipped the head out to Ward Engineering. Finally got the head back. We knew better than to try to do guides & seats ourselves, 'cause we'd just screw something up and have to pay someone to fix it AND then do the valve job anyway, Ward replaced & reamed the guides, replaced the valves and resurfaced the seats on a Serdi machine. The finish work was done locally by Steve Miles of the old M&M Racing operation from back in the day. While Steve was at it, he miked the bores on the jugs. They're OK as to size & taper. So now it was just a matter of priming & painting the jugs & head.
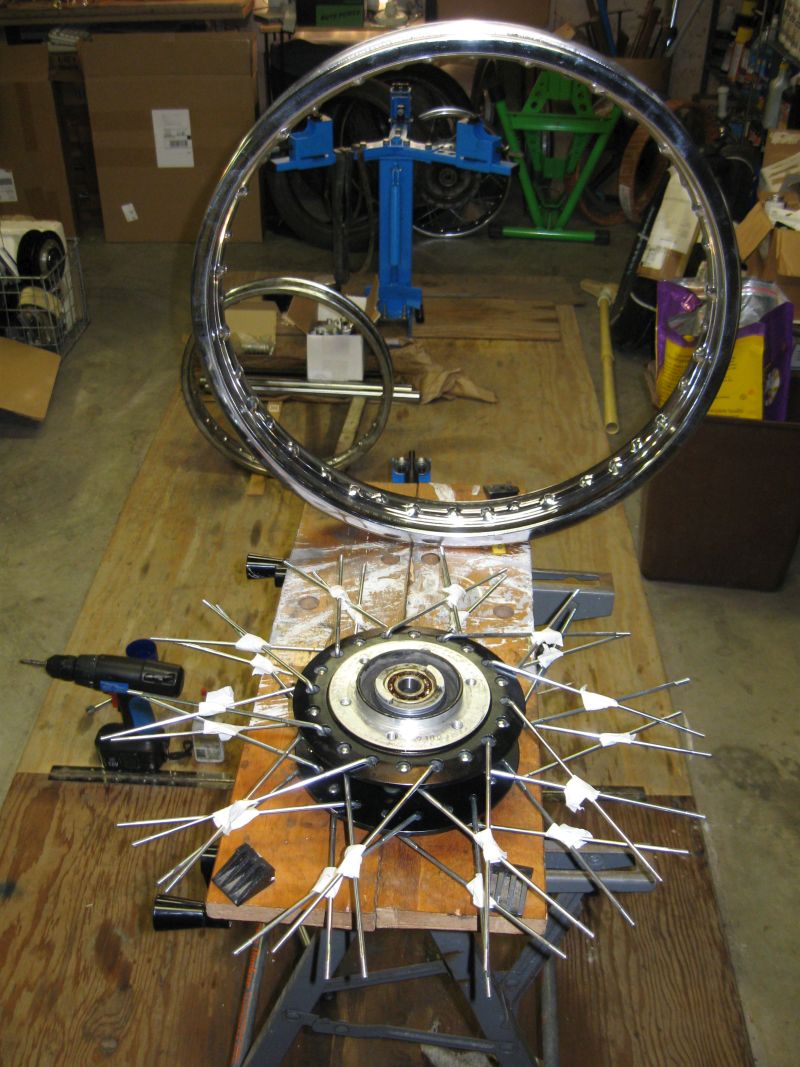
We learned to lace and true wheels. The first one took 40 hrs. or so. the second one took about 8 . Highly recommend a spoke torque wrench if you decide to pursue doing this yourself. And research. Lots of research.
More time warp. More progress. More of that pesky life-thing has been delaying progress. Motor's together and installed, and much of the chassis parts and running gear is installed. There were hundreds of bolts, screws, washers and nuts scattered among the boxes. Everything was sorted as to type to make it easier to (hopefully) find what was needed. Almost everything was there, it was just a matter of finding it. All new JIS case screws from Z-1 Enterprises were used in the motor, with few exceptions.
slmjim is now teetering around on his freshly-hacked spine. Work on the bike is proceeding nicely, with kneepads making it possible to reach the lower portions of the bike. slmjim has come to terms with kneeling at the totem of a basket case Z-1 to work on it and, too, kneeling in the presence of The Lovely Z1BEBE, much to her amusement when she deems it appropriate to honor him by venturing into the service bay. Hilarity ensues and, occasionally, boy/girl-type stuff :woohoo: .
Apply bleach to thoughts here. You know who you are... :evil: .
There were many parts duplicated in the boxes that accompanied the frame, some from later production.
There were three kickstart assemblies. Some discussion on a dedicated Z-1 forum resulted in the consensus that the sandcast boss was correct for this build date.
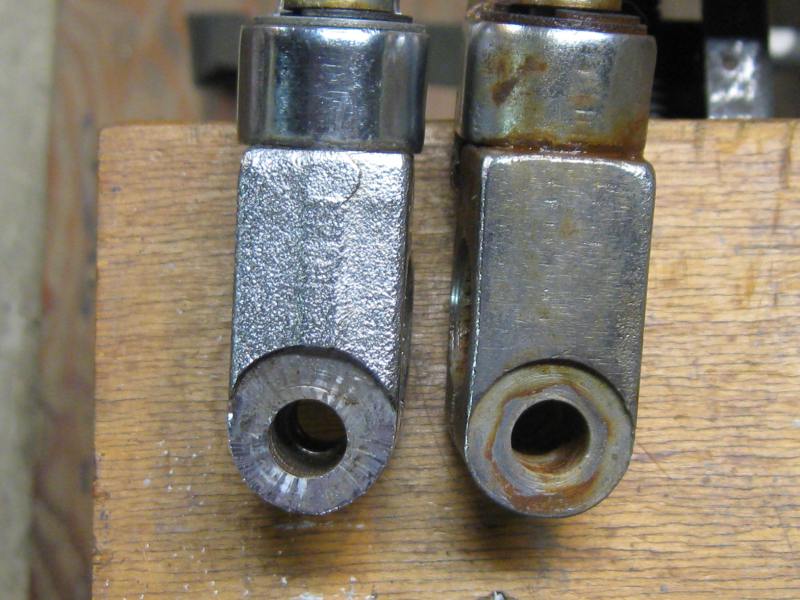
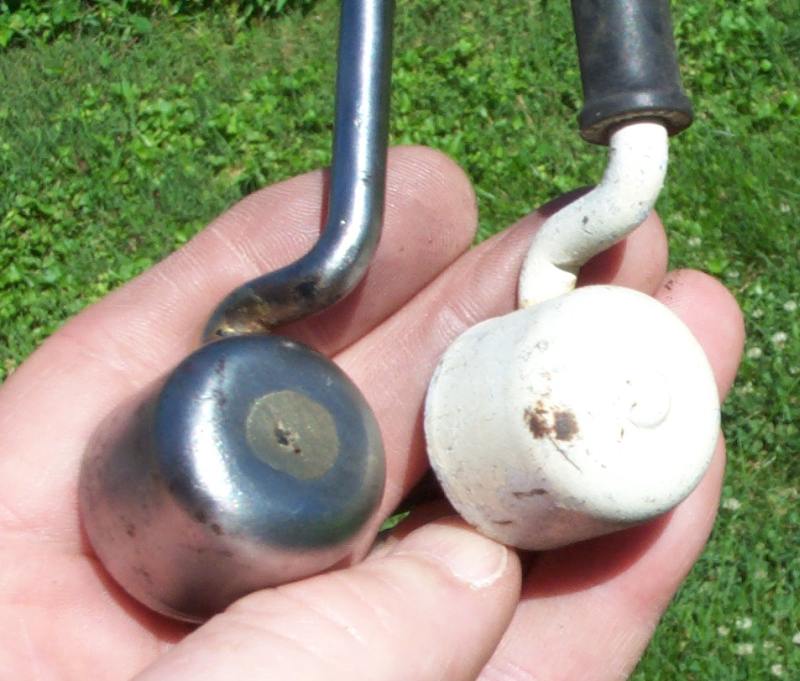
There were three seat latch assenblys including levers. The one on the left is brazed together, and correct for some unknown vintage of '72/'73 Z-1. The angle of the lever is also slightly offset from the rotational axis (not very apparent in the pic). The one on the right is pressed/riveted together (undoubtedly a less expensive method) and the lever is perpendicular the the rotational axis. It seems to be correct for very late '73 (model yr. '74) production. We used the brazed one.
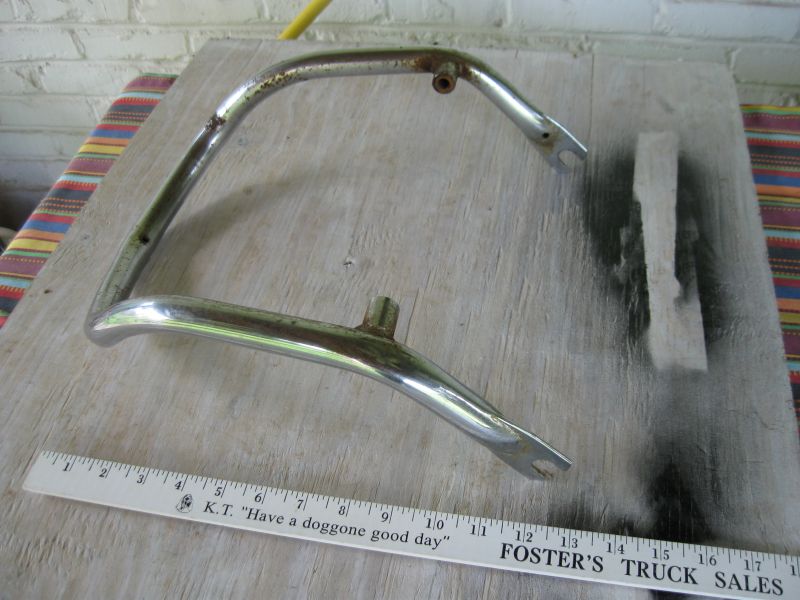
The original grab rail was the only part needing to be re-chromed. Out to Westlund Plating it went.
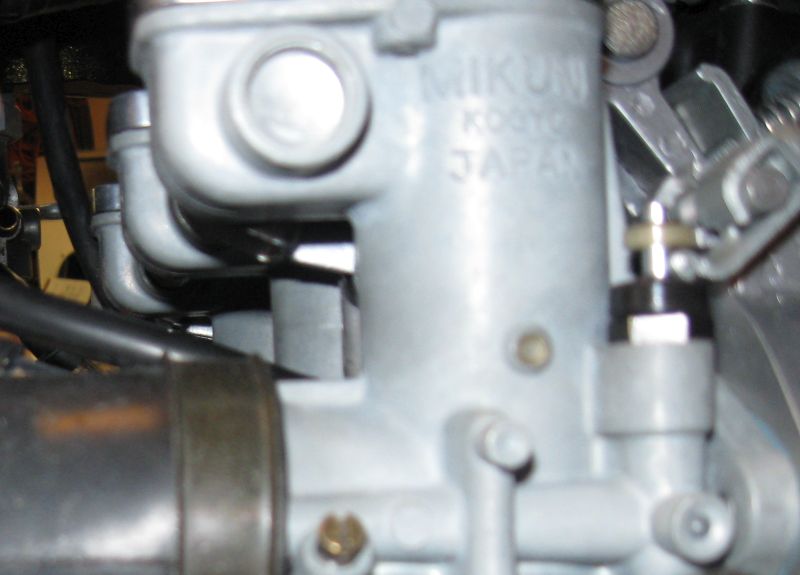
Next was carbs. We cleaned a rack of unknown origin that had been in the collection of Z-1 carbs for years. Yamaha makes a water-based carb dip that works wonders. I'm not a particular fan of Harbor Freight stuff, but they sell a re-branded ultrasonic cleaning unit that is manufactured by one of the largest ultrasonics manufacturers in the world. Between the Yamaha dip and the ultrasonic tank we started here:
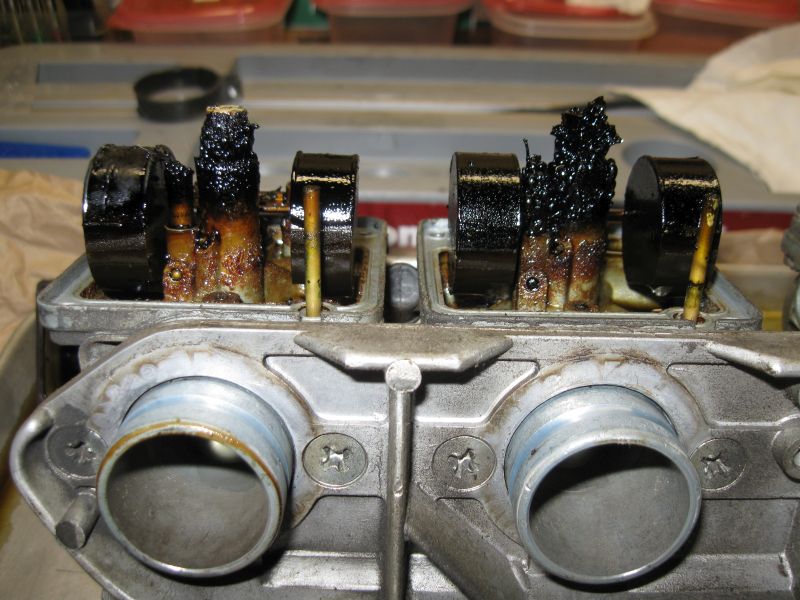
And ended here:
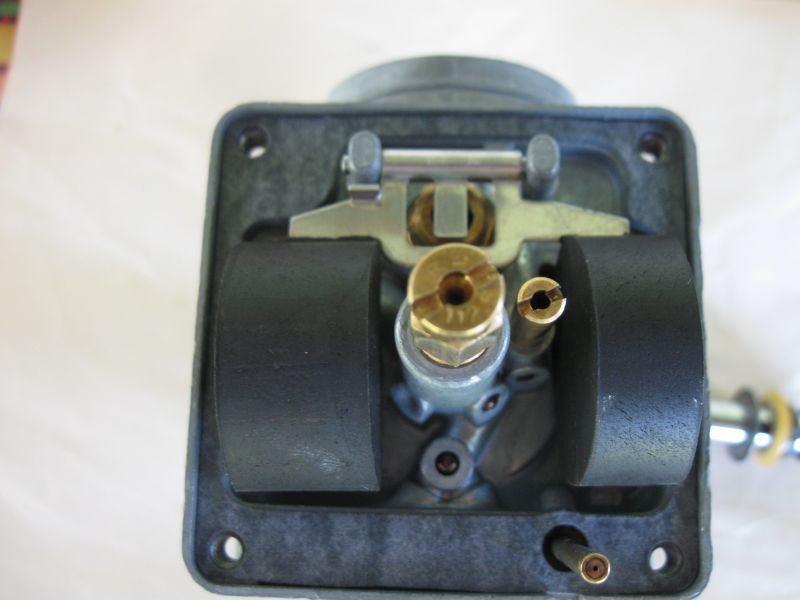
Ended up not using them after all 'cause we found a very nice set of ribless carbs at Mid-Ohio that are correct for this manufacture date.
Over the years we had become increasingly concerned about the way things were going on this project. Hard to believe but, thus far, it had only been a project. However, some time in late May it finally crossed the threshold and became an actual Project (with a capital "P")! Here's proof:
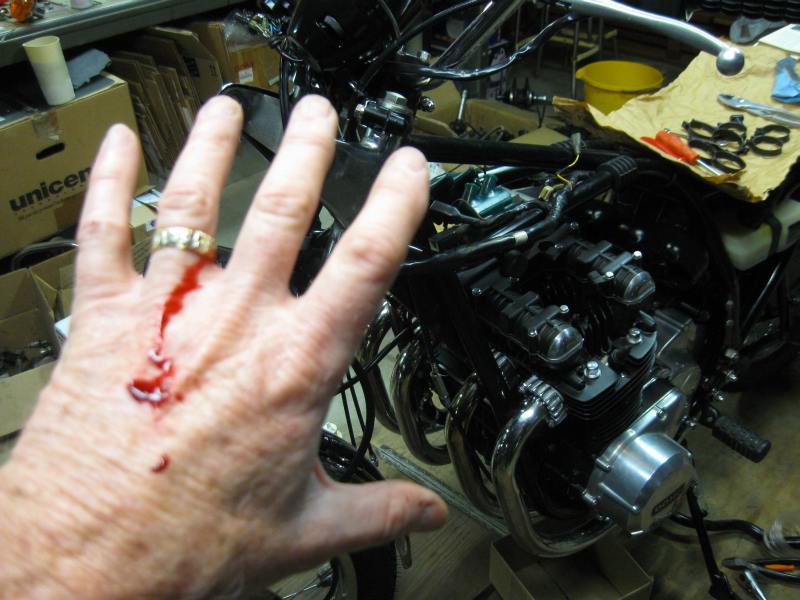
Z1BEBE wasn't home at the time so, wishing to share The Good News, slmjim texted a pic to her. She called, freaked out and asking if she needed to come home. Of course slmjim said no, he was just sharing the transformation of the project into a Project with her, and wanted her to know his good fortune. She was not amused for some reason... :silly: The next day it was noted where slmjim had even left a little blood sacrifice on the motor, so it's really properly christened.
[. philosophical drivel] (Remember being warned about this?)
"experience"
noun
1. a particular instance of personally encountering or undergoing something: My encounter with the bear in the woods was a frightening experience.
2. the process or fact of personally observing, encountering, or undergoing something:
business experience.
3. the observing, encountering, or undergoing of things generally as they occur in the course of time:to learn from experience; the range of human experience.
4. knowledge or practical wisdom gained from what one has observed, encountered, or undergone: a man of experience.
5. Philosophy. the totality of the cognitions given by perception; all that is perceived, understood, and remembered.
Blah blah blah... Yeah, whatever. In our minds, the definition of experience is:
Experience is what ya' get when ya' didn't get what ya' wanted.
[./ end philosophical drivel]
EXAMPLE:
The first time electricity flowed through the bikes' innards in 2 decades or more, nothing melted, sparked or catastrophically misbehaved. We were merrily on our way (we thought) to starting it when, while checking all functions under power it was discovered the R turn signals were dead. Left worked fine. We started doing all the normal troubleshooting stuff, and came to the unfortunate conclusion that there must be an open in the the grey run of the (used) wiring harness where, according to the wiring diagram, 3 grey wires are factory-spliced into the main grey run. So, we proceed to remove the front half of the main harness from it's carefully thought out positions, and begin stripping the wrap from where we knew the splice would be. Once there, no matter how it was tested, we could find no open.
Among other things in the many boxes of parts that came with the bike there were a pair of very nicely refurbed (by parties unknown) handlebar switches. The turn signal functions on the switch statically tested perfectly while out of the circuit, but the R turn signal just would not work. Finally, an old turn signal harnesses was dug out of the cobwebs for comparison. AHA! When the left switchgear was assembled during refurb, someone had transposed the green and orange wires in the pin connector, perfectly mimicking an open in the run of grey wires in the main harness. The two pins were swapped to the proper locations, and everything worked! So then it was time to re-wrap the harness and run it again.
In a previous life slmjim taught copier repair. At the conclusion of a class Instructors were to bug units (one electrical, one mechanical, one copy quality) and allow the student Techs to troubleshoot. Instructors came up with some pretty obscure electrical bugs, but never actually swapped pin locations in connectors. Perhaps they were too kind all those years...
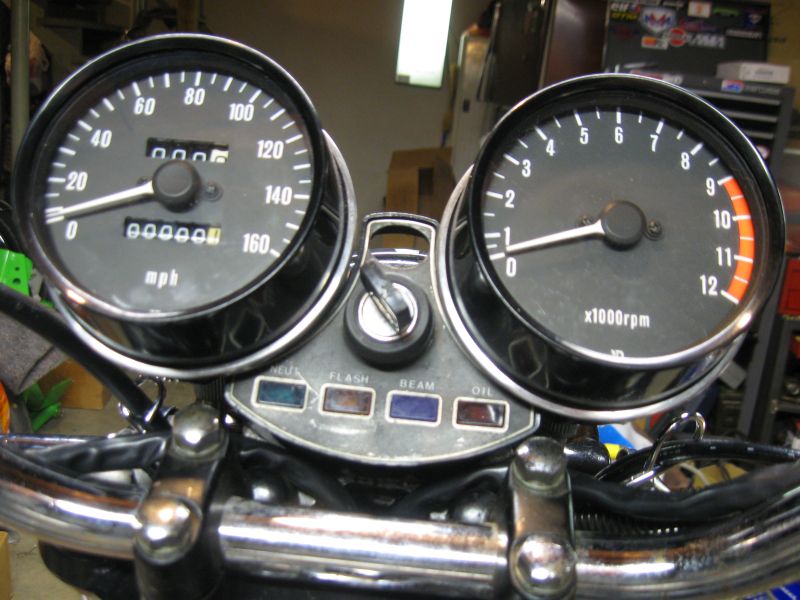
Speaking of refurbs, the gauges came from our own Bob at ZResto. Thanks Bob! He's done good work for us in the past.
Tiny time warp. It's now late July. The first cold crank has happened to check for any possible mechanical issues while not under power, and to get a baseline cold compression. Cylinders 1, 3 and 4 were between 110 and 120 PSI, #2 was 90 PSI. I don't have the tools to do a leakdown, so I'll wait & see if 500 mi. of break-in riding perhaps seats the rings and gets it to come up.
Nothing significant blew up, came apart or otherwise seriously misbehaved on the initial start and warm-up run. The motor sounds fine mechanically, clutches and shifts OK. The head is very quiet. Kudos to Ward Engineering for the fine valve job! There are a couple of oil weeps we need to deal with, but it's not bleeding profusely. We speculate it was sated by the blood sacrifice noted earlier. While we have the cam cover off we'll double check the #2 valve lash.
While idling during the first run, everything was in place to check the charging system (OK), timing (fine tuned from static adjustment), and carb sync. (fine tuned from static adjustment).
So, it merrily idled away for a half hour with large floor fans blasting away in front to keep things from overheating. All the electrics work OK. The carbs carb, the advancer advances, the tranny transmits and the motor, well... it motors, just as it should.
A friend (we'll call him Gary) who owns a '74 Z-1A was present for this initial run, as was The Lovely Z1BEBE. Z1BEBE was so much a part of this Project that it would have been orders of magnitude more difficult without her help and encouragement, not to mention the boy/girl shenanigans when slmjim was relegated to kneepads while in her presence following surgery on his chassis. (re-apply bleach to those thoughts once again. You know who you are... :evil: )
Gary found his Z-1A before we met. Unbeknownst to us, the bike was less than 1/4 mile away from our home, in the same neighborhood! He has a couple of other vintage bikes and lives close. He's watched this Project for the last 3 yrs. or so, and had encouraged slmjim go get moving again after some life had happened.
There were a pair of 900 DOCH sidecover emblems in with the parts that came with the bike. We don't know if they're the originals, but we do believe they're OEM. They have a yellowed paper label on the back of each with three characters (Kanji? Katakana?) on each label. The emblems aren't in perfect condition, but are very presentable, with minor scratching on the chrome where they've been rattling around with other parts. The hardest part of getting them reconditioned was to use a toothpick to remove the solidified wax that had collected in the recesses and knurled black background. They cleaned up nicely and look good at any reasonable viewing distance. We found the right size push nuts to hold them on to the sidecovers at a local hardware store. Small holes were drilled the top front and bottom front sidecover pegs that pop into the rubber grommets, so they can be pinned, in orderthat that they don't blow off or disappear through more nefarious means.
Next step is to carefully remove the paint from the fin edges, something I've been resisting doing 'till the big stuff is done.
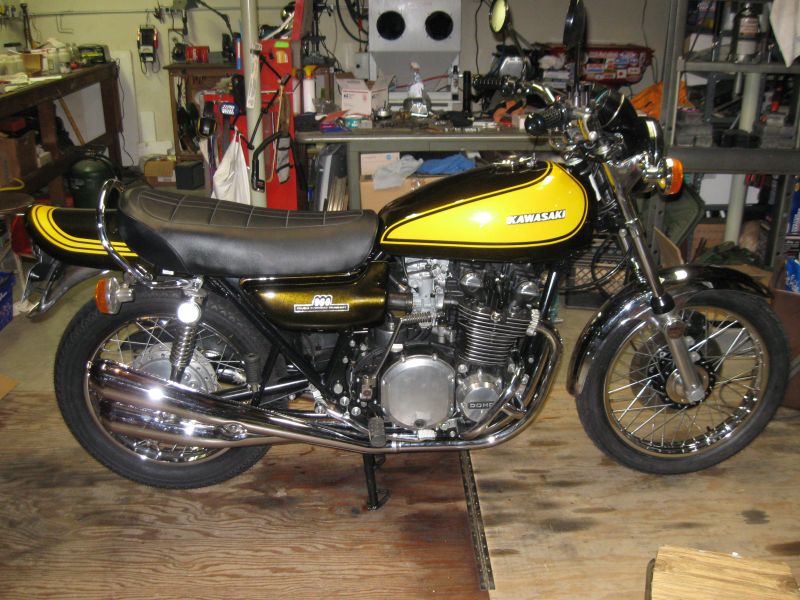
It's rideable now. slmjim's been itching to put a few shakedown miles on it... :woohoo: . In the next few weeks slmjim will ride it to the license branch so that it can be "safety-inspected" (read revenue generated) and the title duly transferred to KY.
We'll post pics when I get the 4-4 pipes and complete green/yellow tank set installed.
Good Ridin'
slmjim & Z1BEBE
We just completed this bike a few weeks ago following a 6+ year resto effort.
Life got in the way of concerted, continuous progress, making us (and others) question at times if we would ever finish it. Ironically, spine surgery on the rickety pile, a.k.a. slmjim, resulted in very significant progress, due to being stuck at home during winter months, able to only lie horizontally or stand per Doc.'s orders. No sitting for 6 wks. (except for..., well, you know...). Kneepads made it possible to make significant headway, along with helping hands when necessary.
This is the first bike we've done that we've had a digital camera available to document the project start to finish. Our other Z-1's were done in the film camera era, and few photos exist of those projects.
This is the '73 (late '72) Z-1, ser.# 0024xx. after we retrieved it from the seller in 2011. Seller had the frame painted himself years before we first saw it, intending to do the resto himself. It was done in epoxy enamel (we think), not powder coated, leaving the VIN tag intact. That's a nicely re-covered black foam seat in the background, along with a few of the boxes of parts. That's the correct cases for this frame.
The cases. We had them soda blasted, then had to neutralize the soda residue. In hindsight, chemical stripping would have been more convenient.
Tapered stem bearings in progress.
Basic frame complete.
Fast forward a few months. slmjim has primed & painted the cases, and in chasing paint from a few holes discovers a hole that is populated with a piece of broken bolt. (Note to selves: chase all holes before blasting/stripping/priming/painting.). Those two little words have been known to drive otherwise sane men to drink & curse, along with much gnashing of teeth. The bolt was broken off inside one of the motor case holes that houses a tubular dowel, about 5mm below the top of the dowel. Having done damage in the past with an easy-out, we were very reluctant to try, but EDM would run well over $100.00 plus shipping both ways.
So... we decide to proceed. Carefully.
Immediately upon discovering the broken bolt, the hole was filled with Magical Mystery Fluid (MMF), otherwise known as half ATF and half acetone.
Fast forward a couple of months. We've replenished the MMF as needed every few days, just allowing it to soak while we've been doing other things. Every now & then when we'd walk past the case we'd give the bolt a few firm taps with a hammer & punch to shock things loose. Finally patience was at an end. We've done most of the work needed on the chassis and are at the point the bottom end needs to be assembled and mounted in the frame. We decided to give the bolt one gentle try ourselves.
One of the most difficult things about using easy outs is getting the pilot hole drilled in the center and precisely on-axis. slmjim had read somewhere to use clear aquarium tubing pressed into the hole to center the drill bit and keep it on axis. He took his time, running the drill very slowly and stopping often to check progress. After satisfying ourselves that the hole was centered, the remains of the bolt was tapped it a couple more times, the hole refilled with MMF and heat was applied to the boss that the bolt hole is drilled into, using a heat gun from inside the case. It was heated for a long time, probably 20 minutes, to the point the MMF would boil when more was dropped in.
Not knowing exactly what kind of shape the broken end of the bolt was in, we wanted to remove the dowel so it could not possibly interfere with removal of the bolt. It was discovered that a Craftsman #2 Phillips screwdriver is a nice press fit in the dowel, allowing the dowel to be grasped with vise grips without crushing the dowel.
With the dowel out and MMF merrily boiling away inside the hole, the easy out was inserted and started gentle twisting commenced. At first It seemed too easy, as if the easy out out was just spinning in it's hole, and that perhaps the hole had been drilled too large, but then we realized the easy out was rising out of the hole. The bolt piece was just easily unscrewing! It seemed too easy & too simple, but soon the offending piece was out. This was taken after the dowel had been replaced, showing how much bolt was left in the hole.
The chassis is rolling now on just enough spare parts to make it easier to move around the shop.
Fast forward a couple of years. Life, deaths & family illnesses have caused this project to be put on hold. Bottom end is together and the jugs are on. I'd shipped the head out to Ward Engineering. Finally got the head back. We knew better than to try to do guides & seats ourselves, 'cause we'd just screw something up and have to pay someone to fix it AND then do the valve job anyway, Ward replaced & reamed the guides, replaced the valves and resurfaced the seats on a Serdi machine. The finish work was done locally by Steve Miles of the old M&M Racing operation from back in the day. While Steve was at it, he miked the bores on the jugs. They're OK as to size & taper. So now it was just a matter of priming & painting the jugs & head.
We learned to lace and true wheels. The first one took 40 hrs. or so. the second one took about 8
. Highly recommend a spoke torque wrench if you decide to pursue doing this yourself. And research. Lots of research.More time warp. More progress. More of that pesky life-thing has been delaying progress. Motor's together and installed, and much of the chassis parts and running gear is installed. There were hundreds of bolts, screws, washers and nuts scattered among the boxes. Everything was sorted as to type to make it easier to (hopefully) find what was needed. Almost everything was there, it was just a matter of finding it. All new JIS case screws from Z-1 Enterprises were used in the motor, with few exceptions.
slmjim is now teetering around on his freshly-hacked spine. Work on the bike is proceeding nicely, with kneepads making it possible to reach the lower portions of the bike. slmjim has come to terms with kneeling at the totem of a basket case Z-1 to work on it and, too, kneeling in the presence of The Lovely Z1BEBE, much to her amusement when she deems it appropriate to honor him by venturing into the service bay. Hilarity ensues and, occasionally, boy/girl-type stuff :woohoo: .
Apply bleach to thoughts here. You know who you are... :evil: .
There were many parts duplicated in the boxes that accompanied the frame, some from later production.
There were three kickstart assemblies. Some discussion on a dedicated Z-1 forum resulted in the consensus that the sandcast boss was correct for this build date.
There were three seat latch assenblys including levers. The one on the left is brazed together, and correct for some unknown vintage of '72/'73 Z-1. The angle of the lever is also slightly offset from the rotational axis (not very apparent in the pic). The one on the right is pressed/riveted together (undoubtedly a less expensive method) and the lever is perpendicular the the rotational axis. It seems to be correct for very late '73 (model yr. '74) production. We used the brazed one.
The original grab rail was the only part needing to be re-chromed. Out to Westlund Plating it went.
Next was carbs. We cleaned a rack of unknown origin that had been in the collection of Z-1 carbs for years. Yamaha makes a water-based carb dip that works wonders. I'm not a particular fan of Harbor Freight stuff, but they sell a re-branded ultrasonic cleaning unit that is manufactured by one of the largest ultrasonics manufacturers in the world. Between the Yamaha dip and the ultrasonic tank we started here:
And ended here:
Ended up not using them after all 'cause we found a very nice set of ribless carbs at Mid-Ohio that are correct for this manufacture date.
Over the years we had become increasingly concerned about the way things were going on this project. Hard to believe but, thus far, it had only been a project. However, some time in late May it finally crossed the threshold and became an actual Project (with a capital "P")! Here's proof:
Z1BEBE wasn't home at the time so, wishing to share The Good News, slmjim texted a pic to her. She called, freaked out and asking if she needed to come home. Of course slmjim said no, he was just sharing the transformation of the project into a Project with her, and wanted her to know his good fortune. She was not amused for some reason... :silly: The next day it was noted where slmjim had even left a little blood sacrifice on the motor, so it's really properly christened.
[. philosophical drivel] (Remember being warned about this?)
"experience"
noun
1. a particular instance of personally encountering or undergoing something: My encounter with the bear in the woods was a frightening experience.
2. the process or fact of personally observing, encountering, or undergoing something:
business experience.
3. the observing, encountering, or undergoing of things generally as they occur in the course of time:to learn from experience; the range of human experience.
4. knowledge or practical wisdom gained from what one has observed, encountered, or undergone: a man of experience.
5. Philosophy. the totality of the cognitions given by perception; all that is perceived, understood, and remembered.
Blah blah blah... Yeah, whatever. In our minds, the definition of experience is:
Experience is what ya' get when ya' didn't get what ya' wanted.
[./ end philosophical drivel]
EXAMPLE:
The first time electricity flowed through the bikes' innards in 2 decades or more, nothing melted, sparked or catastrophically misbehaved. We were merrily on our way (we thought) to starting it when, while checking all functions under power it was discovered the R turn signals were dead. Left worked fine. We started doing all the normal troubleshooting stuff, and came to the unfortunate conclusion that there must be an open in the the grey run of the (used) wiring harness where, according to the wiring diagram, 3 grey wires are factory-spliced into the main grey run. So, we proceed to remove the front half of the main harness from it's carefully thought out positions, and begin stripping the wrap from where we knew the splice would be. Once there, no matter how it was tested, we could find no open.
Among other things in the many boxes of parts that came with the bike there were a pair of very nicely refurbed (by parties unknown) handlebar switches. The turn signal functions on the switch statically tested perfectly while out of the circuit, but the R turn signal just would not work. Finally, an old turn signal harnesses was dug out of the cobwebs for comparison. AHA! When the left switchgear was assembled during refurb, someone had transposed the green and orange wires in the pin connector, perfectly mimicking an open in the run of grey wires in the main harness. The two pins were swapped to the proper locations, and everything worked! So then it was time to re-wrap the harness and run it again.
In a previous life slmjim taught copier repair. At the conclusion of a class Instructors were to bug units (one electrical, one mechanical, one copy quality) and allow the student Techs to troubleshoot. Instructors came up with some pretty obscure electrical bugs, but never actually swapped pin locations in connectors. Perhaps they were too kind all those years...
Speaking of refurbs, the gauges came from our own Bob at ZResto. Thanks Bob! He's done good work for us in the past.
Tiny time warp. It's now late July. The first cold crank has happened to check for any possible mechanical issues while not under power, and to get a baseline cold compression. Cylinders 1, 3 and 4 were between 110 and 120 PSI, #2 was 90 PSI. I don't have the tools to do a leakdown, so I'll wait & see if 500 mi. of break-in riding perhaps seats the rings and gets it to come up.
Nothing significant blew up, came apart or otherwise seriously misbehaved on the initial start and warm-up run. The motor sounds fine mechanically, clutches and shifts OK. The head is very quiet. Kudos to Ward Engineering for the fine valve job! There are a couple of oil weeps we need to deal with, but it's not bleeding profusely. We speculate it was sated by the blood sacrifice noted earlier. While we have the cam cover off we'll double check the #2 valve lash.
While idling during the first run, everything was in place to check the charging system (OK), timing (fine tuned from static adjustment), and carb sync. (fine tuned from static adjustment).
So, it merrily idled away for a half hour with large floor fans blasting away in front to keep things from overheating. All the electrics work OK. The carbs carb, the advancer advances, the tranny transmits and the motor, well... it motors, just as it should.
A friend (we'll call him Gary) who owns a '74 Z-1A was present for this initial run, as was The Lovely Z1BEBE. Z1BEBE was so much a part of this Project that it would have been orders of magnitude more difficult without her help and encouragement, not to mention the boy/girl shenanigans when slmjim was relegated to kneepads while in her presence following surgery on his chassis. (re-apply bleach to those thoughts once again. You know who you are... :evil: )
Gary found his Z-1A before we met. Unbeknownst to us, the bike was less than 1/4 mile away from our home, in the same neighborhood! He has a couple of other vintage bikes and lives close. He's watched this Project for the last 3 yrs. or so, and had encouraged slmjim go get moving again after some life had happened.
There were a pair of 900 DOCH sidecover emblems in with the parts that came with the bike. We don't know if they're the originals, but we do believe they're OEM. They have a yellowed paper label on the back of each with three characters (Kanji? Katakana?) on each label. The emblems aren't in perfect condition, but are very presentable, with minor scratching on the chrome where they've been rattling around with other parts. The hardest part of getting them reconditioned was to use a toothpick to remove the solidified wax that had collected in the recesses and knurled black background. They cleaned up nicely and look good at any reasonable viewing distance. We found the right size push nuts to hold them on to the sidecovers at a local hardware store. Small holes were drilled the top front and bottom front sidecover pegs that pop into the rubber grommets, so they can be pinned, in orderthat that they don't blow off or disappear through more nefarious means.
Next step is to carefully remove the paint from the fin edges, something I've been resisting doing 'till the big stuff is done.
It's rideable now. slmjim's been itching to put a few shakedown miles on it... :woohoo: . In the next few weeks slmjim will ride it to the license branch so that it can be "safety-inspected" (read revenue generated) and the title duly transferred to KY.
We'll post pics when I get the 4-4 pipes and complete green/yellow tank set installed.
Good Ridin'
slmjim & Z1BEBE
A biker looks at your engine and chrome.
A Rider looks at your odometer and tags.
1973 ('72 builds) Z1 x2
1974 Z1-A x2
1975 Z1-B x2
1993 CB 750 Nighthawk x2
2009 ST1300A
www.kawasaki-z-classik.com
A Forum tightly focused on all things Z1 and Z2.
A Rider looks at your odometer and tags.
1973 ('72 builds) Z1 x2
1974 Z1-A x2
1975 Z1-B x2
1993 CB 750 Nighthawk x2
2009 ST1300A
www.kawasaki-z-classik.com
A Forum tightly focused on all things Z1 and Z2.
Last edit: 09 Jan 2020 05:19 by slmjim+Z1BEBE.
Please Log in or Create an account to join the conversation.
- slmjim+Z1BEBE
-
Topic Author
- Offline
- User
-
Registered
- Enjoy Life! IT HAS AN EXPIRATION DATE!
- Posts: 1431
- Thanks: 929
Re: Euro Lookalike basket case - The done deal
16 Sep 2016 09:07 - 09 Jan 2020 05:33
Hi all,
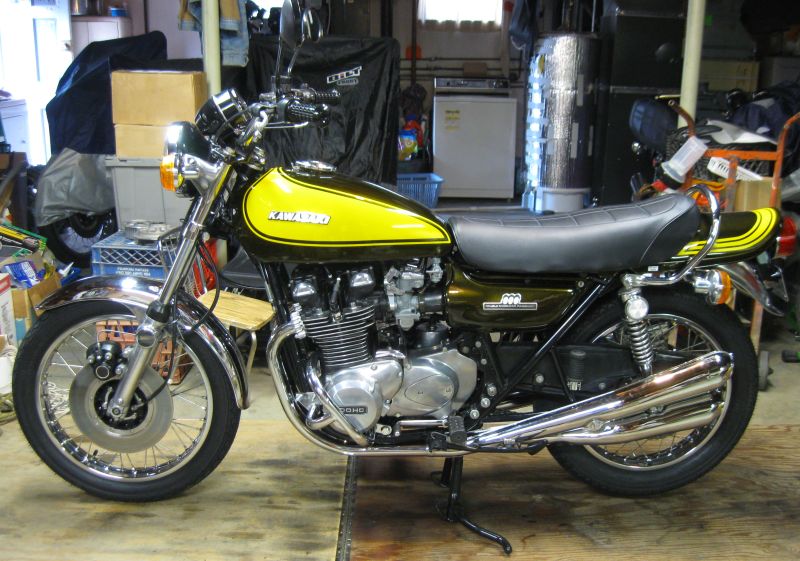
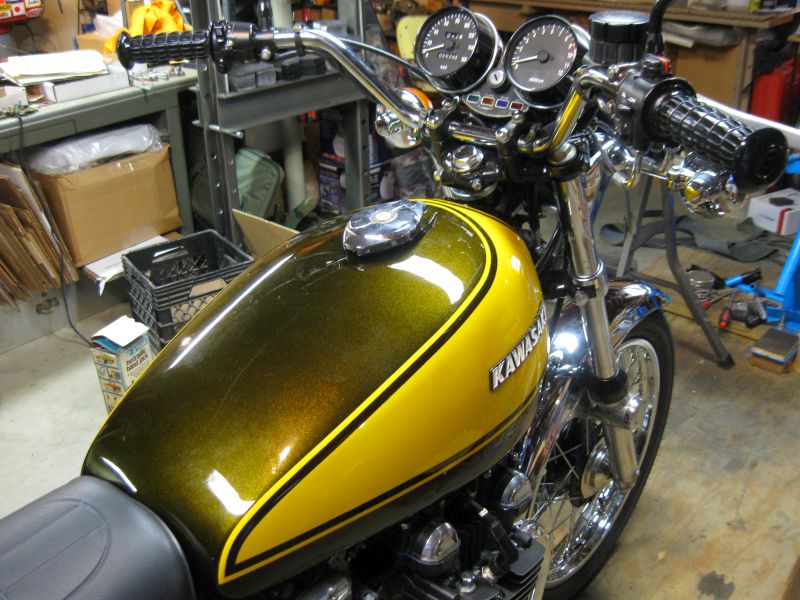
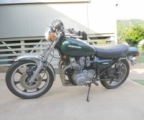
Well, here it is. Ridden to the license branch to be titled & licensed. The lighting in the shop isn't good for photos, and flash leaves its own artifacts. We tried repeatedly to get decent pics of the under seat stickers, plain pipes and other stuff. but the lighting wasn't good enough. We'll get better pics when its outside in natural light.
In editing these for size we suddenly realized slmjim's poor housekeeping is on display too :blush: . You'll see dust in some places that has settled over the six+ years that to took to complete this basket case. And he really needs to get the grooves in kickstart rubber clean :pinch: It'll be washed it soon.
Promise.
(Although... it does now have 28 mi. on it, so it must be road crud. Yeah, that's it! That's the ticket! Road crud! That's our story & we're stickin' to it! Still gonna wash it though...)
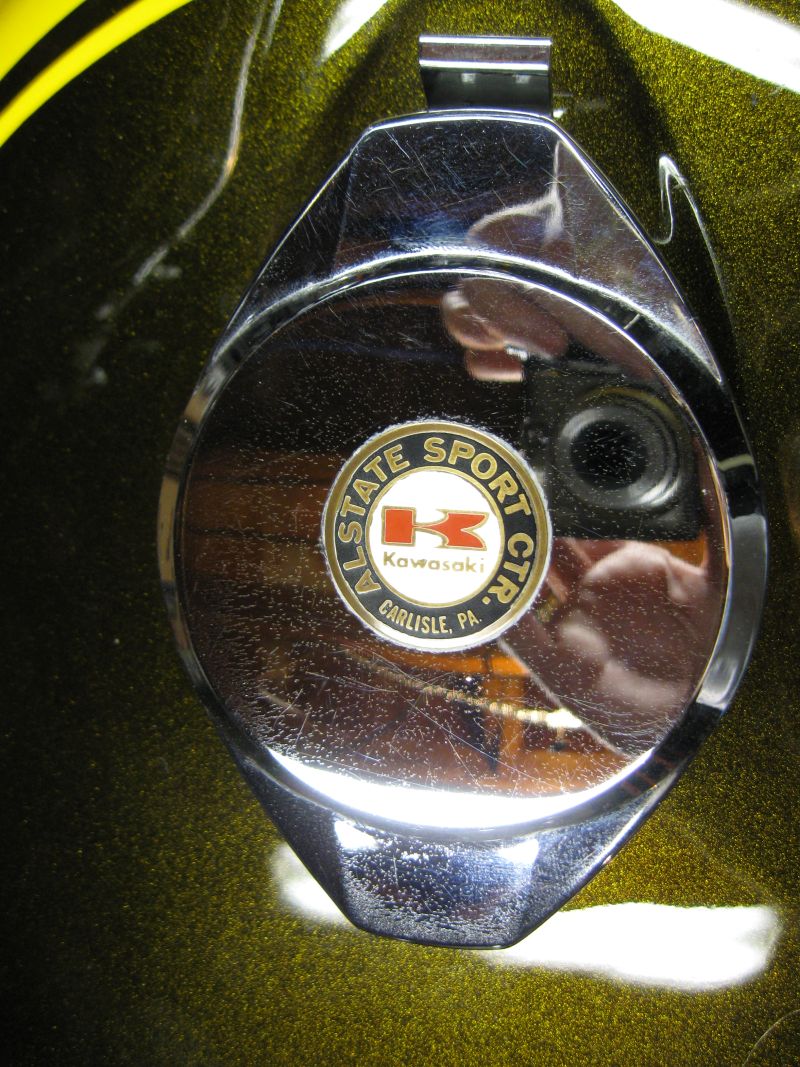
The only presentable gas cap we had has a metal, embossed Kawasaki dealer emblem attached to it. Hard to see in this pic. Dealer is Allstate Sport Center in Carlisle, Pennsylvania. Kinda' cool, and harks back to the period.
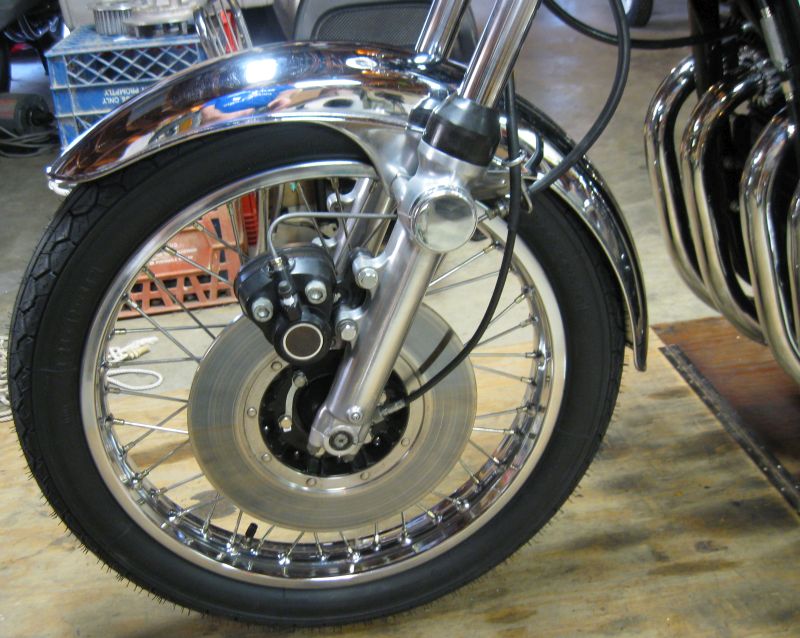
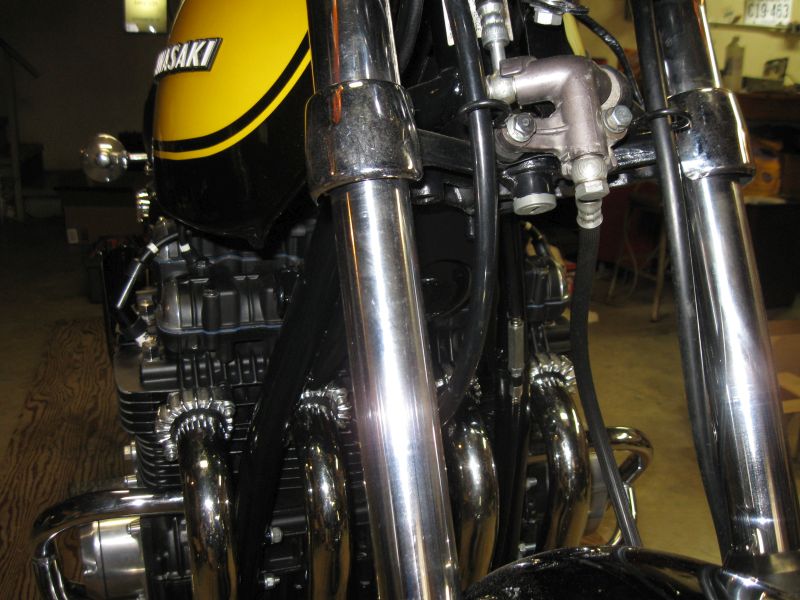
These are the correct fork legs with the bulged bosses and crude internals. Only one boss was chipped, rear and inside where it's not easily visible.
This was one of the tiny treasures in the parts boxes; a small-rib brake block. We're pretty sure it's right...
We looked at a lot of pics prior to polishing the fin edges. Hope we got the wraparound right.
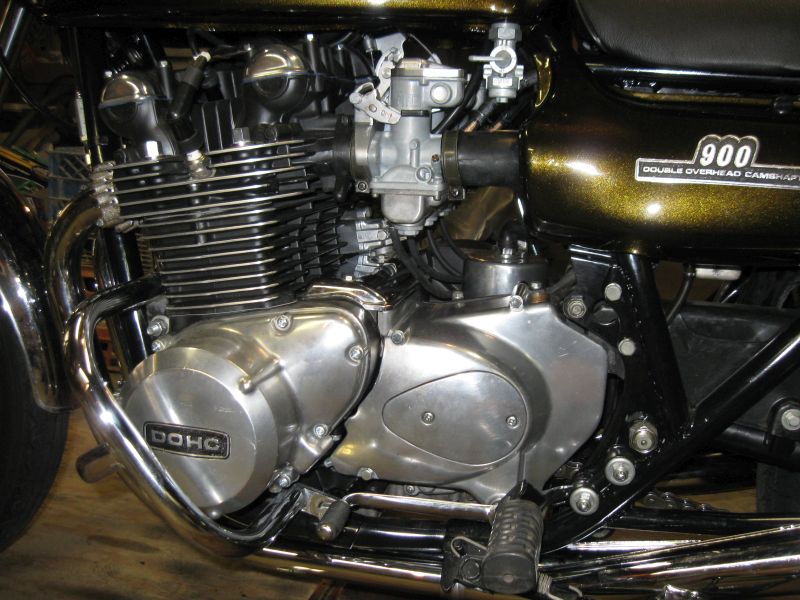
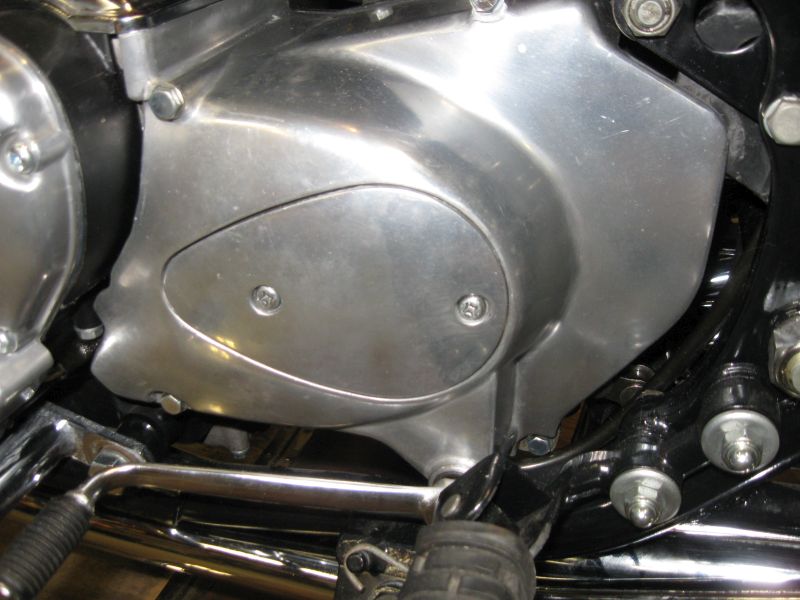
Countershaft cover without shift pattern. An operational chain oiler is underneath. We didn't try to remove every blemish from any of the polished aluminum. There is something to be said for leaving some patina of age. True all over the bike, in keeping with the very nice rider theme instead of concourse-quality resto.
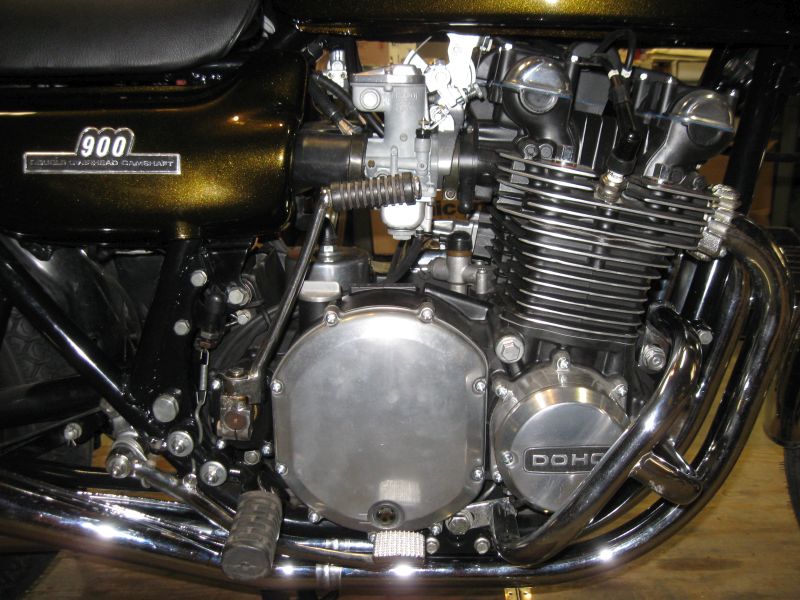
No "kickstart" embossed in the case. Sandcast boss. Poor housekeeping on display too :whistle: .
Stuff that can't be seen 'cause of poor lighting & other reasons:
No stamps on OEM un-stamped pipes.
R brake lever bolt in from the front.
No wear scale cast into the rear brake housing.
Sandcast kickstart boss (appears earlier in this thread).
Hollow cams. Not currently in the motor, but we have them. What we think we understand is that they had a bad habit of breaking in half at the drive sprockets.
Detail left to be done (maybe):
The camchain tensioner is a later heavy/ribbed item. The original small/skinny item was nowhere to be found. Not sure we'd want to run it anyway, as they were modified fairly early in production for strength/reliability reasons.
We'll be Ridin' it to the KY Kickdown event this weekend if the weather cooperates. Will get pics if so.
This bike realizes a long-standing goal of ours. It completes the six bike production set of Z-1's. That has been a goal we've been working toward for over 20 yrs. I wish to thank those of you on the various forums, both past and present, for your assistance and encouragement. Thanks to Jeff and the crew at Z1 Enterprises for the quality parts, good service, patience, and the opportunity to do this Project at all. Thanks to Bob at ZResto for the nice restoration of the gauges.
This bike is also the first time we've ever built a bike from scratch, starting from a bare frame and empty cases, one part at a time. We don't have the knowledge or tools to do complete valve jobs, but that's the only parts we didn't touch. We thought we knew Z-1's well when we started this project. We have been humbled. Would we do a basket case again? Likely we would. Guess we're gluttons for punishment .
Good Ridin'
slmjim & Z1BEBE
P.S.
Comments about road crud (really! true story...!) & poor housekeeping shall be assessed at a cost of U.S. $0.02¢ per occurrence, payable to your favorite charity :silly: .
Well, here it is. Ridden to the license branch to be titled & licensed. The lighting in the shop isn't good for photos, and flash leaves its own artifacts. We tried repeatedly to get decent pics of the under seat stickers, plain pipes and other stuff. but the lighting wasn't good enough. We'll get better pics when its outside in natural light.
In editing these for size we suddenly realized slmjim's poor housekeeping is on display too :blush: . You'll see dust in some places that has settled over the six+ years that to took to complete this basket case. And he really needs to get the grooves in kickstart rubber clean :pinch: It'll be washed it soon.
Promise.
(Although... it does now have 28 mi. on it, so it must be road crud. Yeah, that's it! That's the ticket! Road crud! That's our story & we're stickin' to it! Still gonna wash it though...)
The only presentable gas cap we had has a metal, embossed Kawasaki dealer emblem attached to it. Hard to see in this pic. Dealer is Allstate Sport Center in Carlisle, Pennsylvania. Kinda' cool, and harks back to the period.
These are the correct fork legs with the bulged bosses and crude internals. Only one boss was chipped, rear and inside where it's not easily visible.
This was one of the tiny treasures in the parts boxes; a small-rib brake block. We're pretty sure it's right...
We looked at a lot of pics prior to polishing the fin edges. Hope we got the wraparound right.
Countershaft cover without shift pattern. An operational chain oiler is underneath. We didn't try to remove every blemish from any of the polished aluminum. There is something to be said for leaving some patina of age. True all over the bike, in keeping with the very nice rider theme instead of concourse-quality resto.
No "kickstart" embossed in the case. Sandcast boss. Poor housekeeping on display too :whistle: .
Stuff that can't be seen 'cause of poor lighting & other reasons:
No stamps on OEM un-stamped pipes.
R brake lever bolt in from the front.
No wear scale cast into the rear brake housing.
Sandcast kickstart boss (appears earlier in this thread).
Hollow cams. Not currently in the motor, but we have them. What we think we understand is that they had a bad habit of breaking in half at the drive sprockets.
Detail left to be done (maybe):
The camchain tensioner is a later heavy/ribbed item. The original small/skinny item was nowhere to be found. Not sure we'd want to run it anyway, as they were modified fairly early in production for strength/reliability reasons.
We'll be Ridin' it to the KY Kickdown event this weekend if the weather cooperates. Will get pics if so.
This bike realizes a long-standing goal of ours. It completes the six bike production set of Z-1's. That has been a goal we've been working toward for over 20 yrs. I wish to thank those of you on the various forums, both past and present, for your assistance and encouragement. Thanks to Jeff and the crew at Z1 Enterprises for the quality parts, good service, patience, and the opportunity to do this Project at all. Thanks to Bob at ZResto for the nice restoration of the gauges.
This bike is also the first time we've ever built a bike from scratch, starting from a bare frame and empty cases, one part at a time. We don't have the knowledge or tools to do complete valve jobs, but that's the only parts we didn't touch. We thought we knew Z-1's well when we started this project. We have been humbled. Would we do a basket case again? Likely we would. Guess we're gluttons for punishment
.Good Ridin'
slmjim & Z1BEBE
P.S.
Comments about road crud (really! true story...!) & poor housekeeping shall be assessed at a cost of U.S. $0.02¢ per occurrence, payable to your favorite charity :silly: .
A biker looks at your engine and chrome.
A Rider looks at your odometer and tags.
1973 ('72 builds) Z1 x2
1974 Z1-A x2
1975 Z1-B x2
1993 CB 750 Nighthawk x2
2009 ST1300A
www.kawasaki-z-classik.com
A Forum tightly focused on all things Z1 and Z2.
A Rider looks at your odometer and tags.
1973 ('72 builds) Z1 x2
1974 Z1-A x2
1975 Z1-B x2
1993 CB 750 Nighthawk x2
2009 ST1300A
www.kawasaki-z-classik.com
A Forum tightly focused on all things Z1 and Z2.
Last edit: 09 Jan 2020 05:33 by slmjim+Z1BEBE.
The following user(s) said Thank You: Mcdroid, KZJOE900
Please Log in or Create an account to join the conversation.
- Kidkawie
-

- Offline
- User
-
Registered
- I bleed premix
- Posts: 1911
- Thanks: 243
Re: Euro Lookalike basket case - The done deal
16 Sep 2016 09:53
Nice job!
Are you adding the Euro rear fender and seat strap?
Are you adding the Euro rear fender and seat strap?
1975 Z1 900
1994 KX250 Supermoto
2004 KX125
1994 KX250 Supermoto
2004 KX125
Please Log in or Create an account to join the conversation.
- slmjim+Z1BEBE
-
Topic Author
- Offline
- User
-
Registered
- Enjoy Life! IT HAS AN EXPIRATION DATE!
- Posts: 1431
- Thanks: 929
Re: Euro Lookalike basket case - The done deal
16 Sep 2016 10:03Kidkawie wrote: Nice job!
Are you adding the Euro rear fender and seat strap?
Thanks Kidkawie,
When we can find them. We have the strap, but not the chrome strap clamps or screws. Baby steps at this point. We're just happy to have it running.
If we can find a Euro fender & taillight bracket (the bracket is different, not sure yet about the taillight itself) we do intend to make this as close as possible to a true Euro-spec Z-1. A metirc speedo is in the works too.
Good Ridin'
slmjim & Z1BEB
A biker looks at your engine and chrome.
A Rider looks at your odometer and tags.
1973 ('72 builds) Z1 x2
1974 Z1-A x2
1975 Z1-B x2
1993 CB 750 Nighthawk x2
2009 ST1300A
www.kawasaki-z-classik.com
A Forum tightly focused on all things Z1 and Z2.
A Rider looks at your odometer and tags.
1973 ('72 builds) Z1 x2
1974 Z1-A x2
1975 Z1-B x2
1993 CB 750 Nighthawk x2
2009 ST1300A
www.kawasaki-z-classik.com
A Forum tightly focused on all things Z1 and Z2.
Please Log in or Create an account to join the conversation.
- Mcdroid
-
- Offline
- User
-
Registered
- Gone Kwackers
- Posts: 6838
- Thanks: 479
Re: Euro Lookalike basket case
16 Sep 2016 11:15
Excellent post of the resurrection! Thanks for taking the time.
Michael
Victoria, Texas
1982 GPz750
1977 KZ1000A
1978 KZ1000A
1982 GPz1100
1975 Z2A
Victoria, Texas
1982 GPz750
1977 KZ1000A
1978 KZ1000A
1982 GPz1100
1975 Z2A
Please Log in or Create an account to join the conversation.
- 531blackbanshee
-
- Offline
- Vendor
-

Vendors
- Posts: 7444
- Thanks: 796
Re: Euro Lookalike basket case
19 Sep 2016 13:35
awesome resto! thanks for posting.
leon
leon
skiatook,oklahoma 1980 z1r,1978 kz 1000 z1r x 3,
1976 kz 900 x 3
i make what i can,and save the rest!
billybiltit.blogspot.com/
www.kzrider.com/forum/5-chassis/325862-triple-tree-custom-work
kzrider.com/forum/5-chassis/294594-frame-bracing?limitstart=0
1976 kz 900 x 3
i make what i can,and save the rest!
billybiltit.blogspot.com/
www.kzrider.com/forum/5-chassis/325862-triple-tree-custom-work
kzrider.com/forum/5-chassis/294594-frame-bracing?limitstart=0
Please Log in or Create an account to join the conversation.
- Kapahulu
-
- Offline
- User
-
Registered
- Posts: 564
- Thanks: 41
Re: Euro Lookalike basket case
19 Sep 2016 15:45
Great idea about fitting the socket in the dowel then using vise grips to remove the dowel. I usually use needle nose pliers but they won't pull a really stuck dowel.
1978 KZ1000, 1976 KZ900, 1975 H2, 1973 H1, 1973 H2, 1978 RD400, 1977 RD400, 1974 RD350
2strokeworld.com
2strokeworld.com
Please Log in or Create an account to join the conversation.
- slmjim+Z1BEBE
-
Topic Author
- Offline
- User
-
Registered
- Enjoy Life! IT HAS AN EXPIRATION DATE!
- Posts: 1431
- Thanks: 929
Re: Euro Lookalike basket case
13 Jan 2024 07:16
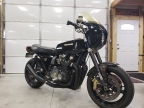
Better pics of the finished bike at Barber.
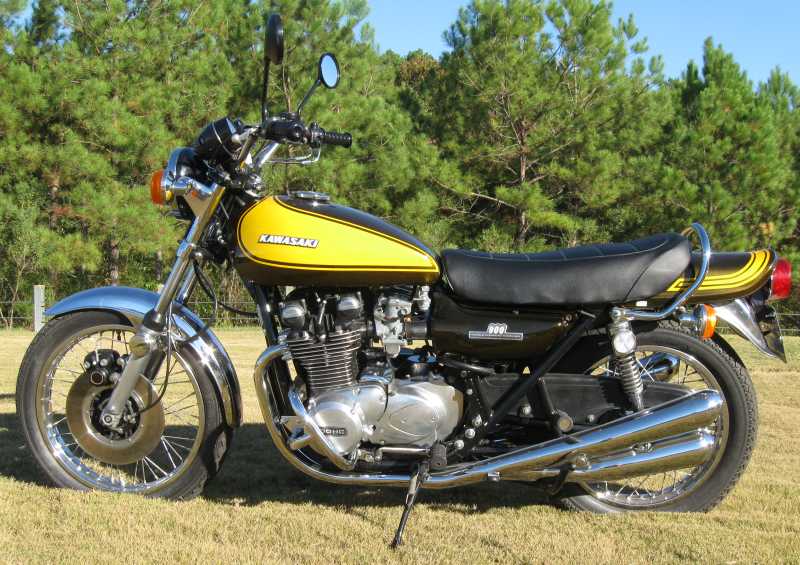
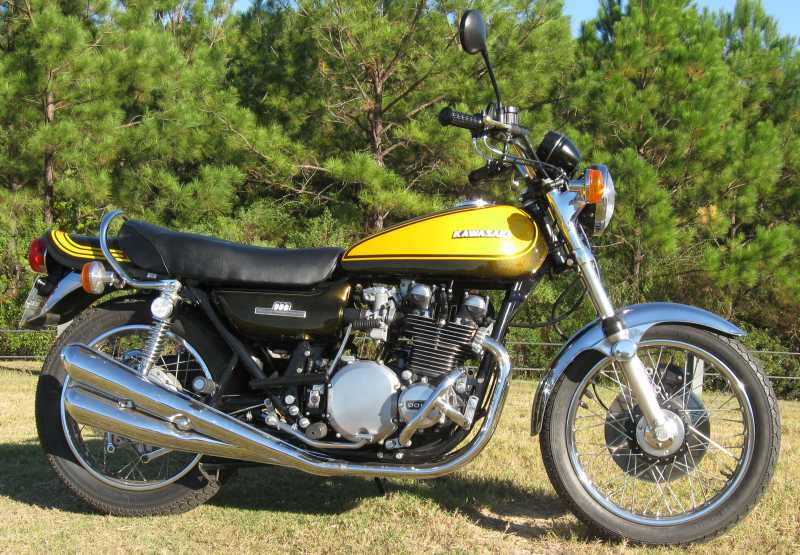
Good Ridin'
slmjim & Z1BEBE
Good Ridin'
slmjim & Z1BEBE
A biker looks at your engine and chrome.
A Rider looks at your odometer and tags.
1973 ('72 builds) Z1 x2
1974 Z1-A x2
1975 Z1-B x2
1993 CB 750 Nighthawk x2
2009 ST1300A
www.kawasaki-z-classik.com
A Forum tightly focused on all things Z1 and Z2.
A Rider looks at your odometer and tags.
1973 ('72 builds) Z1 x2
1974 Z1-A x2
1975 Z1-B x2
1993 CB 750 Nighthawk x2
2009 ST1300A
www.kawasaki-z-classik.com
A Forum tightly focused on all things Z1 and Z2.
The following user(s) said Thank You: ThatGPzGuy
Please Log in or Create an account to join the conversation.
Moderators: Street Fighter LTD