
KZ750LTD Restore thread (pic heavy)
- Seiya
-
 Topic Author
- Offline
- User
-

Registered
- Posts: 7
- Thanks: 0
KZ750LTD Restore thread (pic heavy)
22 May 2013 13:08 - 22 May 2013 13:17
So, as I explained in my introduction thread
here
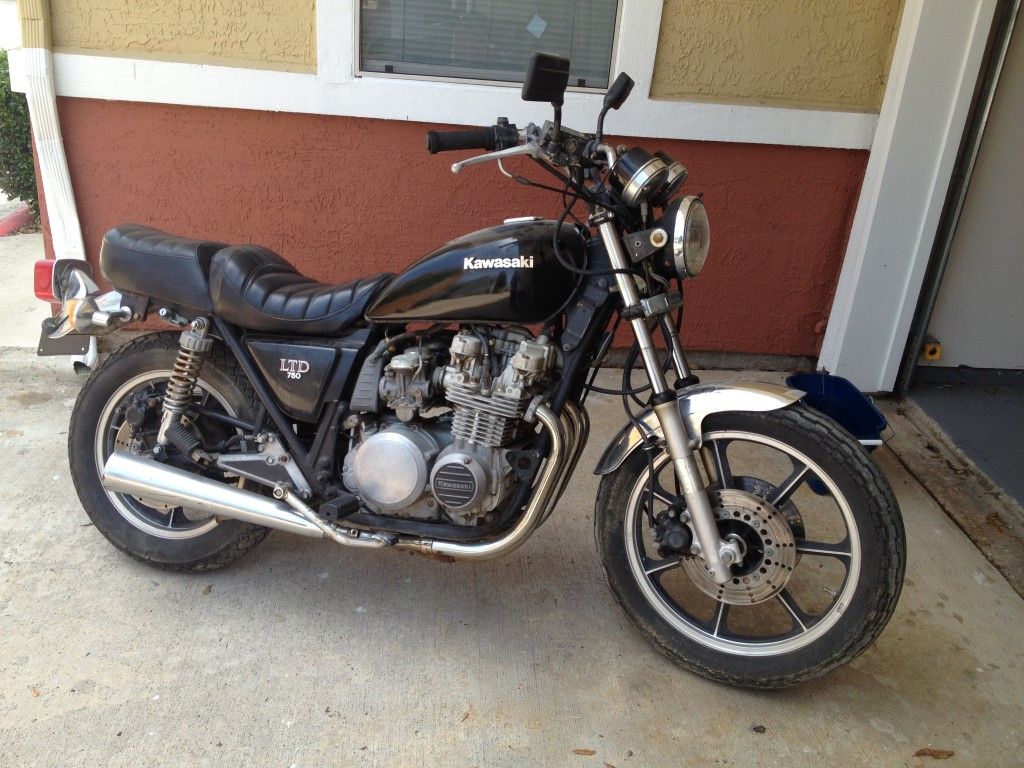
, I recently got a non-running 1981 KZ750 LTD with the intention to restore it and give me a goal to get in shape. This thread will document the process,and hopefully become a resource for pictures and tips as progress is made. I would appreciate any input, suggestions, ideas, comments, etc.
My goal is not to make it showroom-perfect but to make it safe to ride, reliable and decent looking. Money is a factor - I want to be smart about how I spend my money and try to fix existing parts as much as possible instead of replacing them. However, I have identified a few parts that I will absolutely buy new because of safety or practical reasons.
I can turn the engine by hand so at least it´s not frozen. According to the odometer, it has 12,800 miles. It would seem that the last time it ran was in 2008 based on the tags. My impression is that it saw light use until then, and sat in storage after. There were some pretty poor repairs done to it, so it may have had issues that were not properly fixed and it finally stopped running after being neglected for a while.
So, here we go:
 First order of business was to wash it to get a better idea of what was the general condition of the bike. The carbs were not connected to anything and the engine was exposed, so I covered the intakes with plastic, removed the tank, the carbs and the airbox and washed it carefully.
The tank had some rust inside, not too bad. The frame is pretty clean with minor rust at a couple of spots where the paint has peeled off. The swing arm has some rust but it doesn't seem terrible
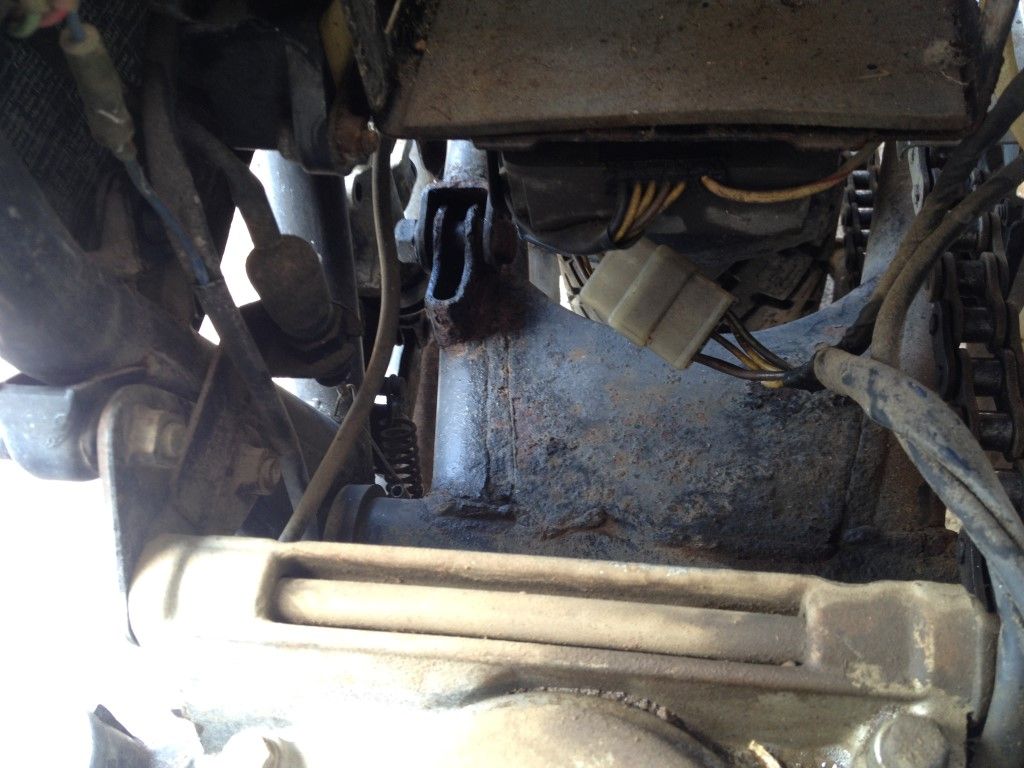
After cleaning, I hooked it up to a battery to see if the starter worked. No such luck, but at least the lamps, turn signals and horn work. There is some corrosion on the battery box but I can fix that easily. Wiring seems mostly complete.
How I'm planning to tackle the project is as follows:
Phase 1 - Ordered initial supplies, Evapo Rust for the tank and assorted bolts and parts, safety supplies, etc. I also ordered a set of JIS screwdrivers. I can't believe I just found out about this a few weeks ago.
Phase 2 - Fuel and air. When this is done, I'll try to get the engine to fire up to identify anything else that may need fixing
Phase 3 - Electric
Phase 4 - Brakes. Will definitely buy a new front master cylinder as the existing one is in terrible shape, and rebuild the calipers and rear cylinder and resurface the rotors.
Phase 5 - Suspension. Rebuild the forks, replace the seals, rebuild or replace the rear shocks (are they even rebuildable?)
Phase 6 - Cosmetic - I hate the current seat and will rebuild it or replace it. Repaint tank and side covers.
I ordered carb rebuild kits as I want to make sure all gaskets and o-rings are fresh and eliminate that as a potential source of trouble. I'll replace all the hoses, the PO made a mess of the hoses and had some creative vacuum hose routing anyway. The airbox lid is missing, I've been keeping an eye on auction sites and there's a lot of airboxes missing the cap. I discovered that the lid from a Del Monte grapefruit container fits perfectly, so I may just fabricate a new lid. We'll worry about that later.
I sealed the tank and put some Evapo Rust on it. The tank has a few dings and dents but is in pretty good condition overall. It was poorly repainted at some point, so I don't feel bad about sanding it down and refinishing it. I will need to replace the rubber cap seal, and I think there are a couple small rubber O rings missing from the gas cap screws.
I thought this bike had Mikuni carbs, turns out they are Keihin CVK34. Parts are a little bit more difficult or expensive to find, but it should be fine. Some screws are missing so I've ordered them as well.
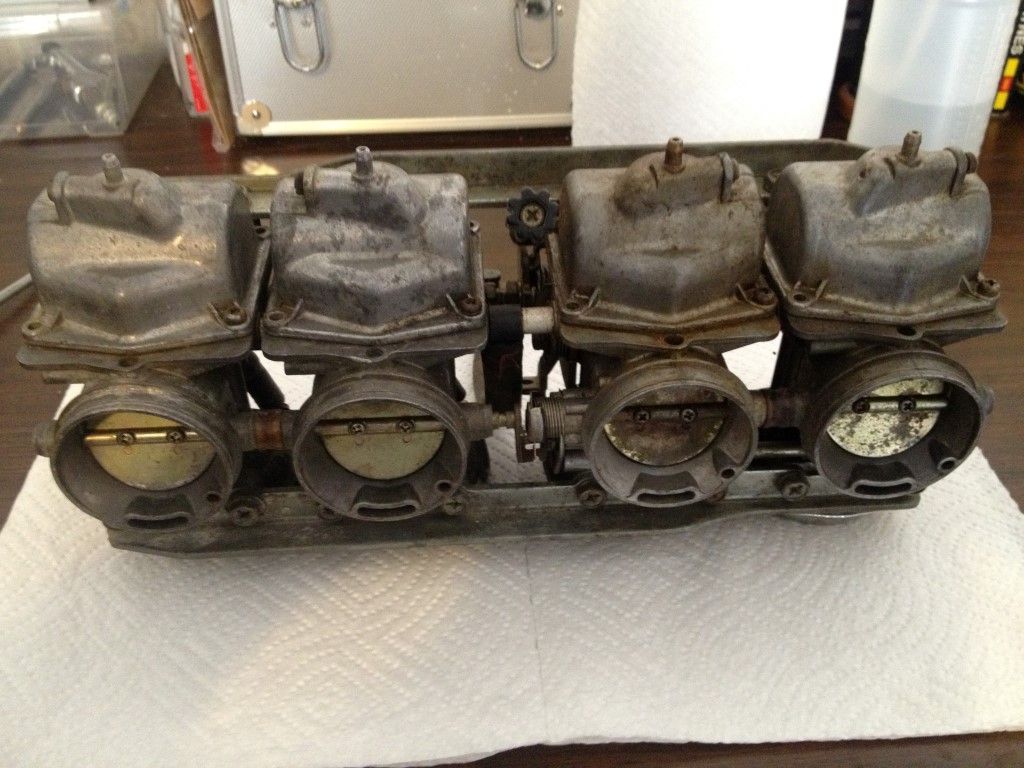
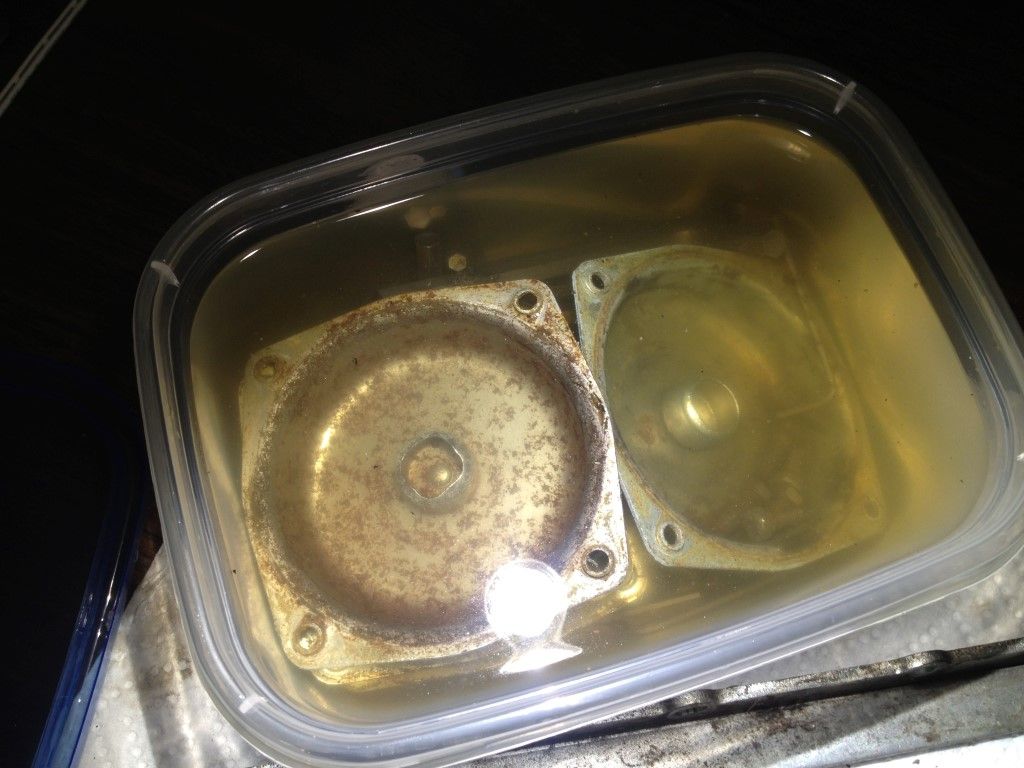
The diaphragm covers were painted by the PO and a couple are in good shape, the other two had significant corrosion and look pretty ugly. I will clean them up and polish the bare metal and clear coat it for protection. The Evapo Rust worked wonders here.
 [/URL]
Thankfully, the diaphragms are in good shape. I'm expecting the carb rebuild kits tomorrow or Friday, so I will be doing that this weekend. I don't really have any experience with carbs so I've been studying and will be extra careful. Hope it's not too difficult.
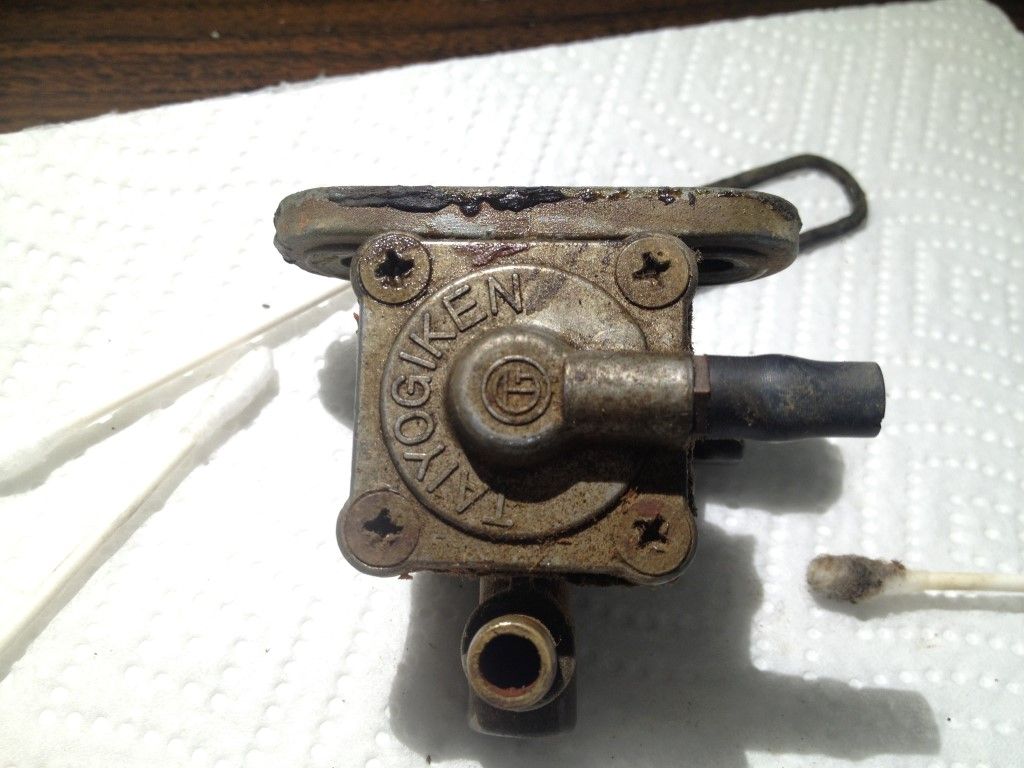
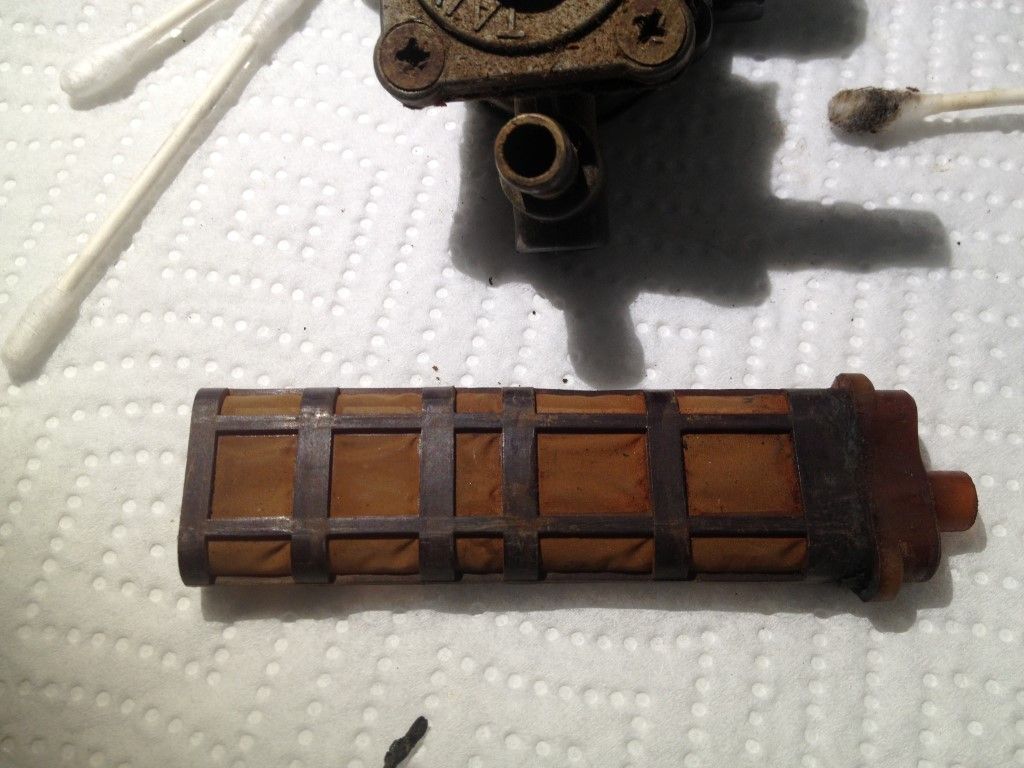
The petcock had been fixed with some sort of RTV sealant, so I'm also going to take that apart and use a proper rebuild kit.
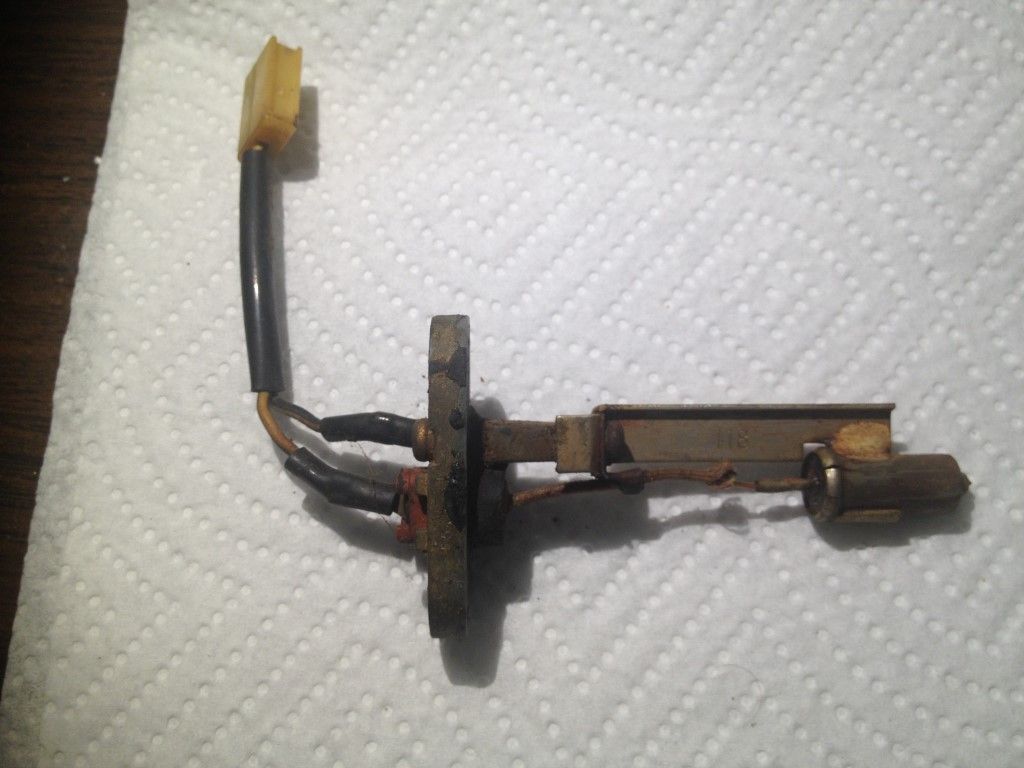
The fuel level switch is in pretty ugly shape, but it may be cosmetic. I need to test it and get a new gasket, the PO had also used RTV sealant around it and I can't imagine that worked too well.
I will post more after this weekend.
My goal is not to make it showroom-perfect but to make it safe to ride, reliable and decent looking. Money is a factor - I want to be smart about how I spend my money and try to fix existing parts as much as possible instead of replacing them. However, I have identified a few parts that I will absolutely buy new because of safety or practical reasons.
I can turn the engine by hand so at least it´s not frozen. According to the odometer, it has 12,800 miles. It would seem that the last time it ran was in 2008 based on the tags. My impression is that it saw light use until then, and sat in storage after. There were some pretty poor repairs done to it, so it may have had issues that were not properly fixed and it finally stopped running after being neglected for a while.
So, here we go:
The tank had some rust inside, not too bad. The frame is pretty clean with minor rust at a couple of spots where the paint has peeled off. The swing arm has some rust but it doesn't seem terrible
After cleaning, I hooked it up to a battery to see if the starter worked. No such luck, but at least the lamps, turn signals and horn work. There is some corrosion on the battery box but I can fix that easily. Wiring seems mostly complete.
How I'm planning to tackle the project is as follows:
Phase 1 - Ordered initial supplies, Evapo Rust for the tank and assorted bolts and parts, safety supplies, etc. I also ordered a set of JIS screwdrivers. I can't believe I just found out about this a few weeks ago.
Phase 2 - Fuel and air. When this is done, I'll try to get the engine to fire up to identify anything else that may need fixing
Phase 3 - Electric
Phase 4 - Brakes. Will definitely buy a new front master cylinder as the existing one is in terrible shape, and rebuild the calipers and rear cylinder and resurface the rotors.
Phase 5 - Suspension. Rebuild the forks, replace the seals, rebuild or replace the rear shocks (are they even rebuildable?)
Phase 6 - Cosmetic - I hate the current seat and will rebuild it or replace it. Repaint tank and side covers.
I ordered carb rebuild kits as I want to make sure all gaskets and o-rings are fresh and eliminate that as a potential source of trouble. I'll replace all the hoses, the PO made a mess of the hoses and had some creative vacuum hose routing anyway. The airbox lid is missing, I've been keeping an eye on auction sites and there's a lot of airboxes missing the cap. I discovered that the lid from a Del Monte grapefruit container fits perfectly, so I may just fabricate a new lid. We'll worry about that later.
I sealed the tank and put some Evapo Rust on it. The tank has a few dings and dents but is in pretty good condition overall. It was poorly repainted at some point, so I don't feel bad about sanding it down and refinishing it. I will need to replace the rubber cap seal, and I think there are a couple small rubber O rings missing from the gas cap screws.
I thought this bike had Mikuni carbs, turns out they are Keihin CVK34. Parts are a little bit more difficult or expensive to find, but it should be fine. Some screws are missing so I've ordered them as well.
The diaphragm covers were painted by the PO and a couple are in good shape, the other two had significant corrosion and look pretty ugly. I will clean them up and polish the bare metal and clear coat it for protection. The Evapo Rust worked wonders here.
Thankfully, the diaphragms are in good shape. I'm expecting the carb rebuild kits tomorrow or Friday, so I will be doing that this weekend. I don't really have any experience with carbs so I've been studying and will be extra careful. Hope it's not too difficult.
The petcock had been fixed with some sort of RTV sealant, so I'm also going to take that apart and use a proper rebuild kit.
The fuel level switch is in pretty ugly shape, but it may be cosmetic. I need to test it and get a new gasket, the PO had also used RTV sealant around it and I can't imagine that worked too well.
I will post more after this weekend.
1981 KZ750 LTD restoration project
Last edit: 22 May 2013 13:17 by Seiya. Reason: added pictures, cleaned up text
Please Log in or Create an account to join the conversation.
- loudhvx
-

- Offline
- KZr Legend
-

Registered
- Posts: 10863
- Thanks: 1622
Re: KZ750LTD Restore thread (pic heavy)
22 May 2013 14:45
I like your approach. Looks like a pretty decent bike.
From the factory, often the outer two carbs are chromed/polished on top, but the inner two were left dull.
From the factory, often the outer two carbs are chromed/polished on top, but the inner two were left dull.
1981 KZ550 D1 gpz.
Kz550 valve train warning.
Other links.
Kz550 valve train warning.
Other links.
Please Log in or Create an account to join the conversation.
- Seiya
-
Topic Author
- Offline
- User
-
Registered
- Posts: 7
- Thanks: 0
Re: KZ750LTD Restore thread (pic heavy)
22 May 2013 15:51
Thanks, I was wondering why two of the covers were chromed and the other two looked so dull. I will have to refinish them all unfortunately, the chrome is pretty badly pitted.
I'm not the most organized person so I figured it's best to limit myself to working on one or two things at a time before moving on to the next. Otherwise it's all going to end up in a bunch of boxes and I will not know how to put it back together.
I'm not the most organized person so I figured it's best to limit myself to working on one or two things at a time before moving on to the next. Otherwise it's all going to end up in a bunch of boxes and I will not know how to put it back together.
1981 KZ750 LTD restoration project
Please Log in or Create an account to join the conversation.
Moderators: Street Fighter LTD