1982 KZ750 E3 Complete Wiring Overhaul
- MFolks
-

- Offline
- User
-

Registered
- Posts: 6650
- Thanks: 541
Re: 1982 KZ750 E3 Complete Wiring Overhaul
30 Sep 2011 02:24
Most auto parts stores carry a selection of metric taps. You'll need a tap holder so the tap is held securely. Put the tap in the holder and keeping it so it's not cutting new threads, turn the tap into the hole. It acts like a screw, but will remove any rust or corrosion from the hole.
Taps come in several types, the more common is the 4 flute, but 3 flute and 2 flute are used more in machine shops. There are "Gun" taps,designed to push the chip away in a through or open hole situation. And then there are "Bottoming Taps", designed to cut threads to the bottom of a hole
Brace one hand to prevent the tap from moving/leaning away from the hole, and turn with the other. If you're using a 4 flute tap, turn about 1/4 of the way & turn the tap backwards. if encountering resistance, stop, as taps can break due to being brittle. Some light oil should be used as a lubricant to reduce the chance ot tap breakage. The oil can be blown out of the holes by using carb or brake cleaner(get a rag to catch the chips and excess oil when cleaning the tapped holes).
If this procedure gives you the risk of tap breakage and you'd rather not do it, see if any of your friends have any knowledge of doing hand tap work.
1982 GPZ1100 B2
General Dynamics/Convair 1983-1993
GLCM BGM-109 Tomahawk, AGM-129A Advanced Cruise Missile (ACM)
General Dynamics/Convair 1983-1993
GLCM BGM-109 Tomahawk, AGM-129A Advanced Cruise Missile (ACM)
Please Log in or Create an account to join the conversation.
- clutch
-
 Topic Author
- Offline
- User
-

Registered
- I wish I had a tad more patience to do it better!
- Posts: 1051
- Thanks: 12
Re: 1982 KZ750 E3 Complete Wiring Overhaul
30 Sep 2011 02:28
That doesn't sound too difficult, I guess I will see if I can find what I need and give it a try. Thanks for the info 
Southern Maryland, USA
1980 KZ250 LTD (traded, but still missed)
1982 KZ750 E3 (Cafe Project) (Dyna-S, Dyna Coils, V&H 4-1, K&N Pods, 6 Sigma Jet Kit, Acewell Computer, Woodcraft Clip-ons, Custom Rewire)
1966 A1 Samurai (Restoration Project)
Wish List:
KZ1000 P (For a "touring" bike)
Z1 (need I...
1980 KZ250 LTD (traded, but still missed)
1982 KZ750 E3 (Cafe Project) (Dyna-S, Dyna Coils, V&H 4-1, K&N Pods, 6 Sigma Jet Kit, Acewell Computer, Woodcraft Clip-ons, Custom Rewire)
1966 A1 Samurai (Restoration Project)
Wish List:
KZ1000 P (For a "touring" bike)
Z1 (need I...
Please Log in or Create an account to join the conversation.
- MFolks
-

- Offline
- User
-

Registered
- Posts: 6650
- Thanks: 541
Re: 1982 KZ750 E3 Complete Wiring Overhaul
30 Sep 2011 02:38
Another thought about your ignition coils, The green, 3 ohm Dyna ignition coils have iron laminations that can quickly rust, on my bike's, I got some high temperature paint used in transformer assembly called "Glyptal" (Glyptol?):
www.electronicplus.com/images/products/10-9002.jpg
to paint and seal them from rust.
A local electronics supply store should be able to get some for you.
A local electronics supply store should be able to get some for you.
1982 GPZ1100 B2
General Dynamics/Convair 1983-1993
GLCM BGM-109 Tomahawk, AGM-129A Advanced Cruise Missile (ACM)
General Dynamics/Convair 1983-1993
GLCM BGM-109 Tomahawk, AGM-129A Advanced Cruise Missile (ACM)
Please Log in or Create an account to join the conversation.
- MFolks
-

- Offline
- User
-

Registered
- Posts: 6650
- Thanks: 541
Re: 1982 KZ750 E3 Complete Wiring Overhaul
30 Sep 2011 02:46
I used to hand tap holes from #4-40 up to 1/2"-13 (broke a few taps over the years)but after a while you develope a certain "Feel" for when the tap stops cutting. Then it's time to find out why if possible.
Taps are brittle, some can be easily removed with special broken tap tools, others have to be broken up with a hammer and punch, making for a lot of noise(depending on where the broken tap is) as some large chassis will ring like a gong when breaking a broken tap out...
Taps are brittle, some can be easily removed with special broken tap tools, others have to be broken up with a hammer and punch, making for a lot of noise(depending on where the broken tap is) as some large chassis will ring like a gong when breaking a broken tap out...
1982 GPZ1100 B2
General Dynamics/Convair 1983-1993
GLCM BGM-109 Tomahawk, AGM-129A Advanced Cruise Missile (ACM)
General Dynamics/Convair 1983-1993
GLCM BGM-109 Tomahawk, AGM-129A Advanced Cruise Missile (ACM)
Please Log in or Create an account to join the conversation.
- martin_csr
-

- Offline
- User
-

Registered
- Posts: 7994
- Thanks: 1644
Last edit: 15 Feb 2013 11:46 by martin_csr.
Please Log in or Create an account to join the conversation.
- clutch
-
 Topic Author
- Offline
- User
-

Registered
- I wish I had a tad more patience to do it better!
- Posts: 1051
- Thanks: 12
Re: 1982 KZ750 E3 Complete Wiring Overhaul
30 Sep 2011 16:31
All good advice. I will look into these things soon. Thanks guys.
I have a question about the on/off "kill" switch. Does anyone know what the ohms should be present when testing? I tested on the 200 ohm range on my meter. At the connector, it read .8-.9 ohms, and at the switch itself, it read .3 ohms. Is this correct? My manual just said that ohms should be present when the switch is on, and not when it is off.
Well I just found this in my other manual, so I'm guessing that replacement of those wires will not be necessary.
Southern Maryland, USA
1980 KZ250 LTD (traded, but still missed)
1982 KZ750 E3 (Cafe Project) (Dyna-S, Dyna Coils, V&H 4-1, K&N Pods, 6 Sigma Jet Kit, Acewell Computer, Woodcraft Clip-ons, Custom Rewire)
1966 A1 Samurai (Restoration Project)
Wish List:
KZ1000 P (For a "touring" bike)
Z1 (need I...
1980 KZ250 LTD (traded, but still missed)
1982 KZ750 E3 (Cafe Project) (Dyna-S, Dyna Coils, V&H 4-1, K&N Pods, 6 Sigma Jet Kit, Acewell Computer, Woodcraft Clip-ons, Custom Rewire)
1966 A1 Samurai (Restoration Project)
Wish List:
KZ1000 P (For a "touring" bike)
Z1 (need I...
Please Log in or Create an account to join the conversation.
- clutch
-
 Topic Author
- Offline
- User
-

Registered
- I wish I had a tad more patience to do it better!
- Posts: 1051
- Thanks: 12
Re: 1982 KZ750 E3 Complete Wiring Overhaul
30 Sep 2011 18:05
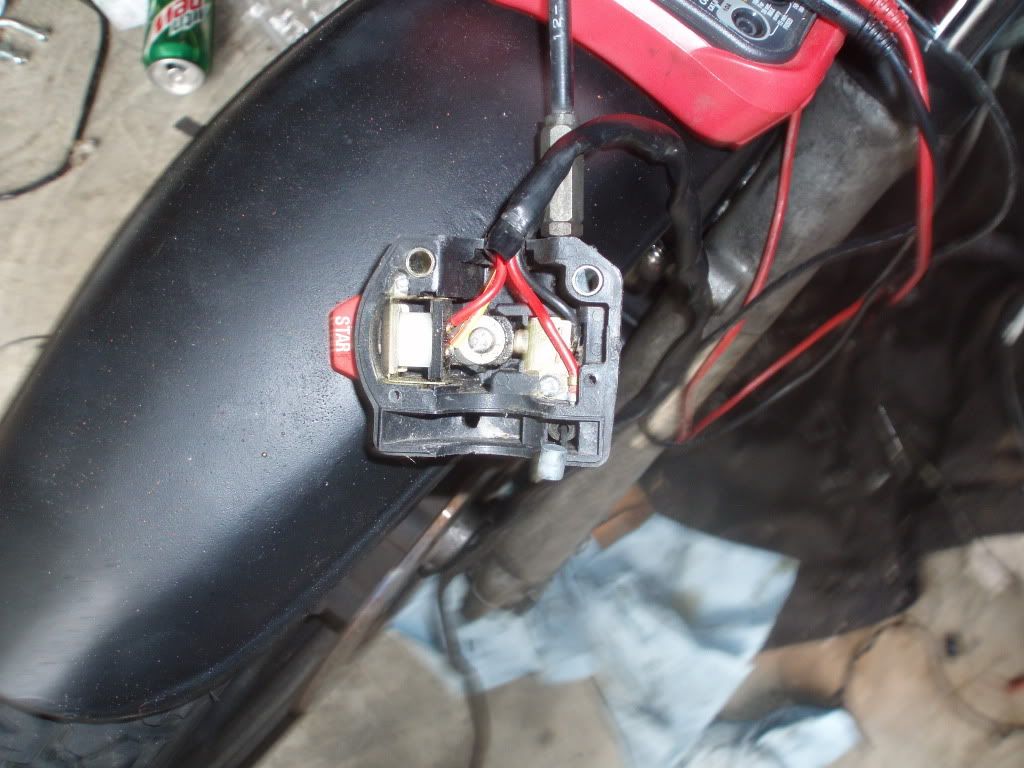
So, after thinking about it, I tested the switch and wires again. This time, I moved the wires while checking the ohms. It changed significantly, so I need to replace those wires. I have some soldering experience, but not sure I trust myself here. Any tips would be appreciated.
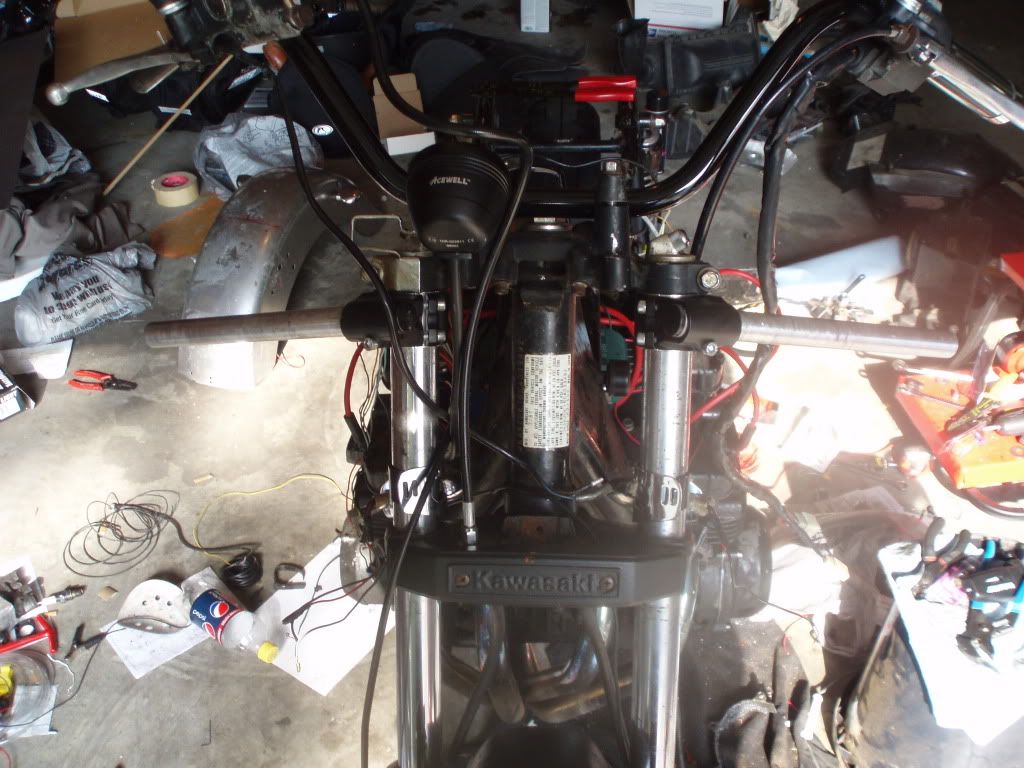
Today, I also switched back to the Woodcraft Clip-ons. I plan to cafe her back out because it's a lot more fun that way. I'm going to leave the stock footpegs for now though to see if I like that better.
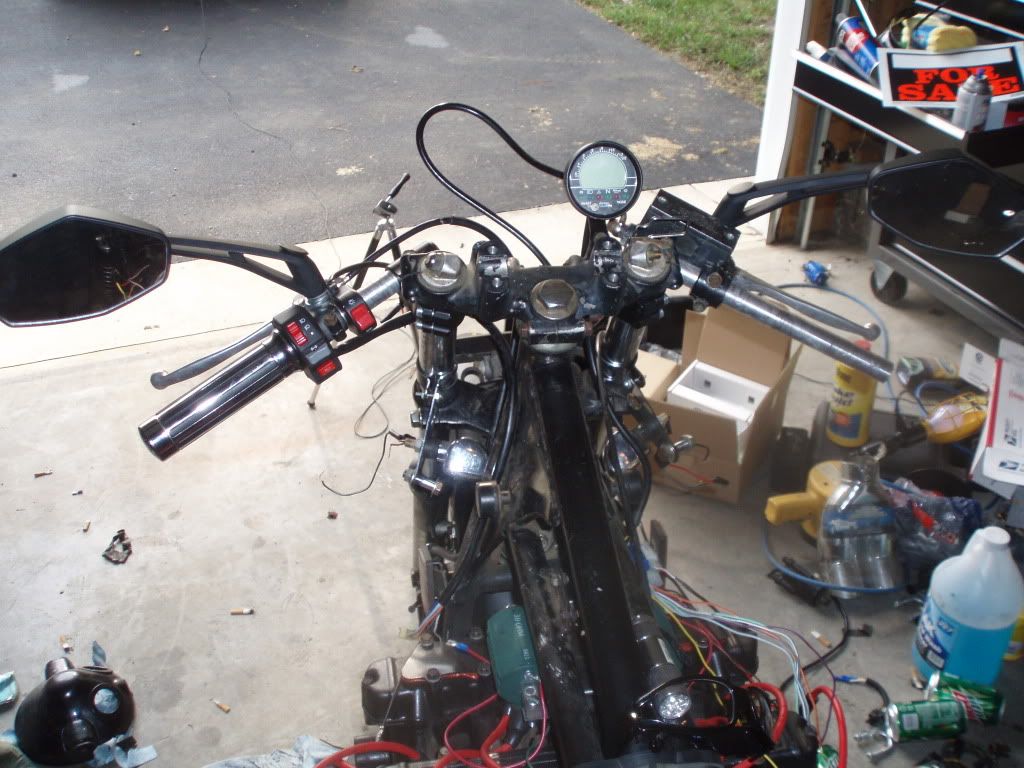
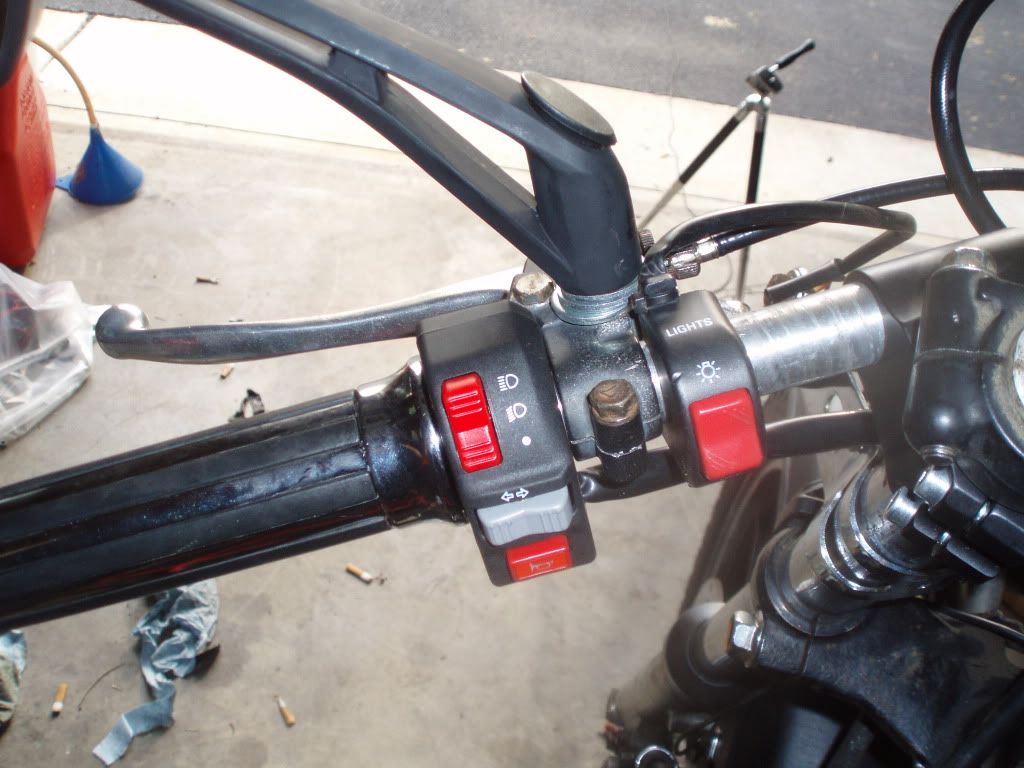
I also am swapping out the stock left hand controls for an aftermarket one. This one allows me to turn the headlight off, which I plan to do when starting the bike up. I also am wiring the "light" switch as a master cutoff for the rest of the lights. I'm doing this by running the ground through the switch wiring. I'm debating whether or not I should do this for the tail/brake light....probably not, but we will see...
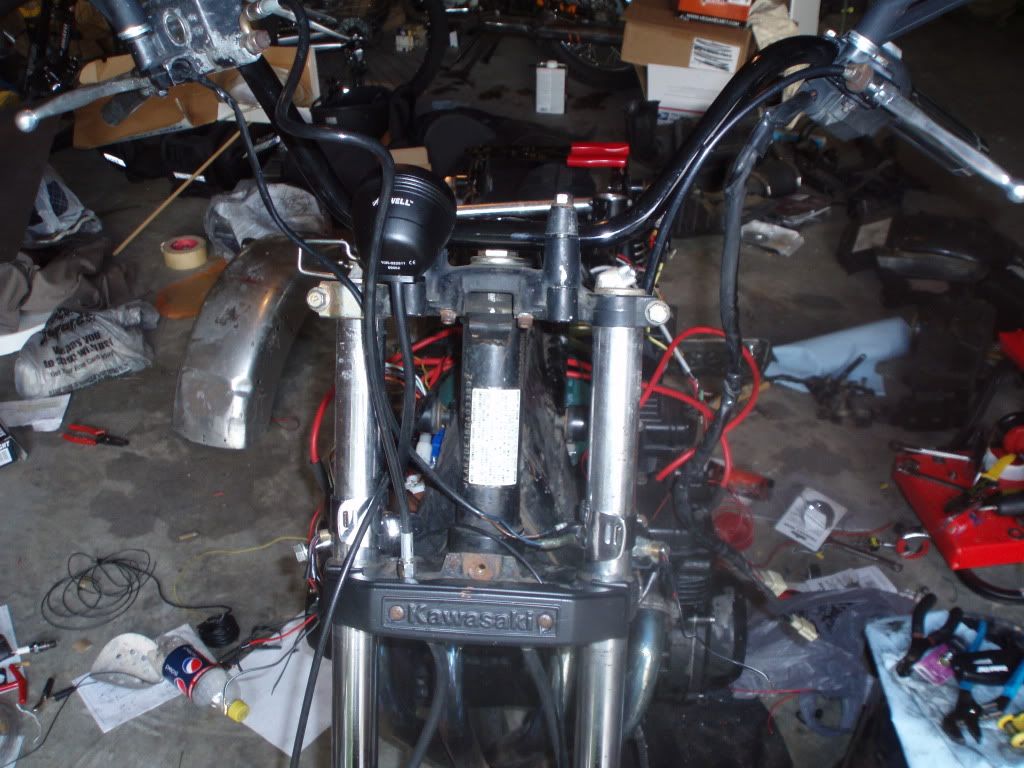
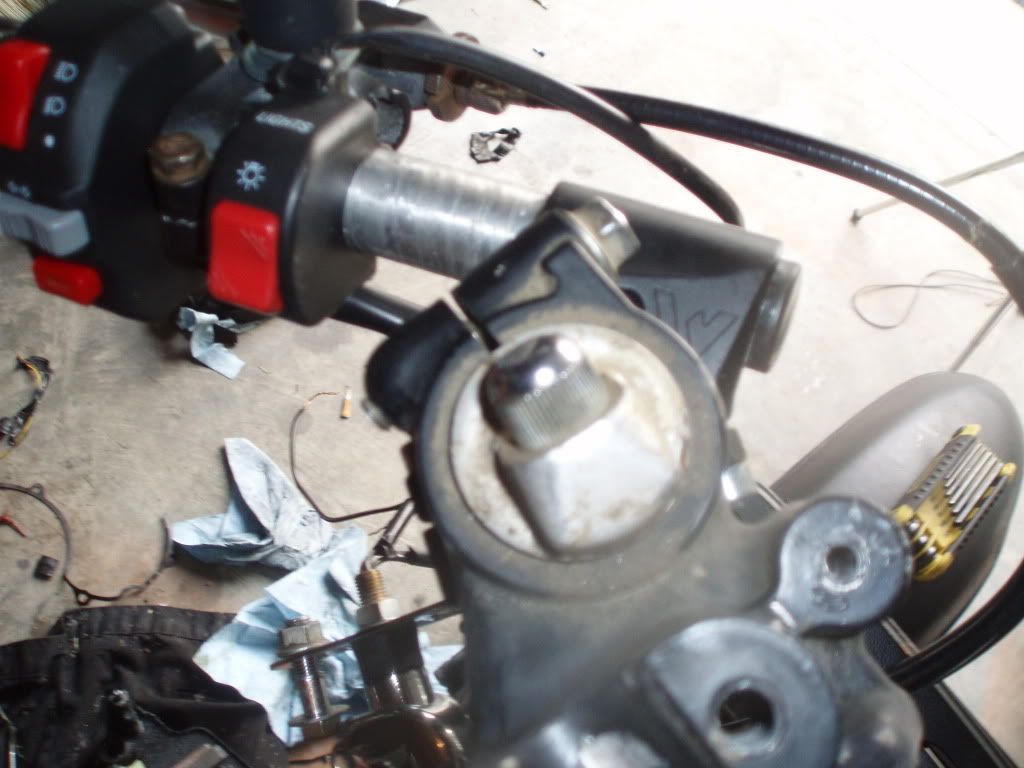
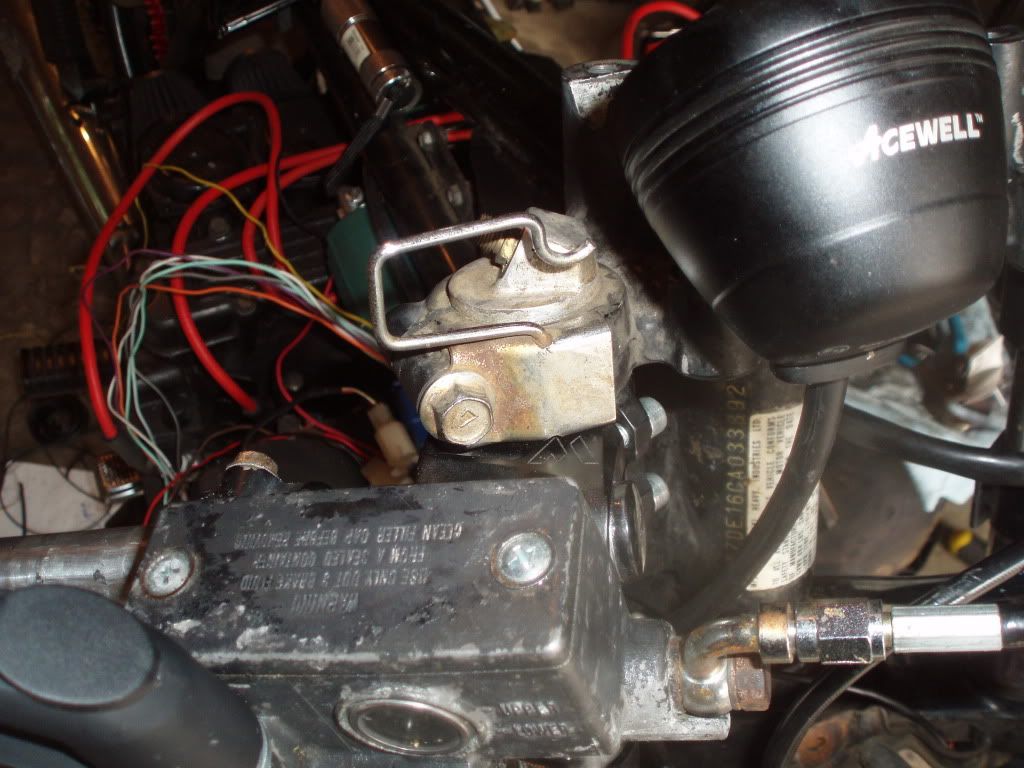
Does anyone know where I might find a replacement cap for this air inlet on my forks? I lost one somehow.
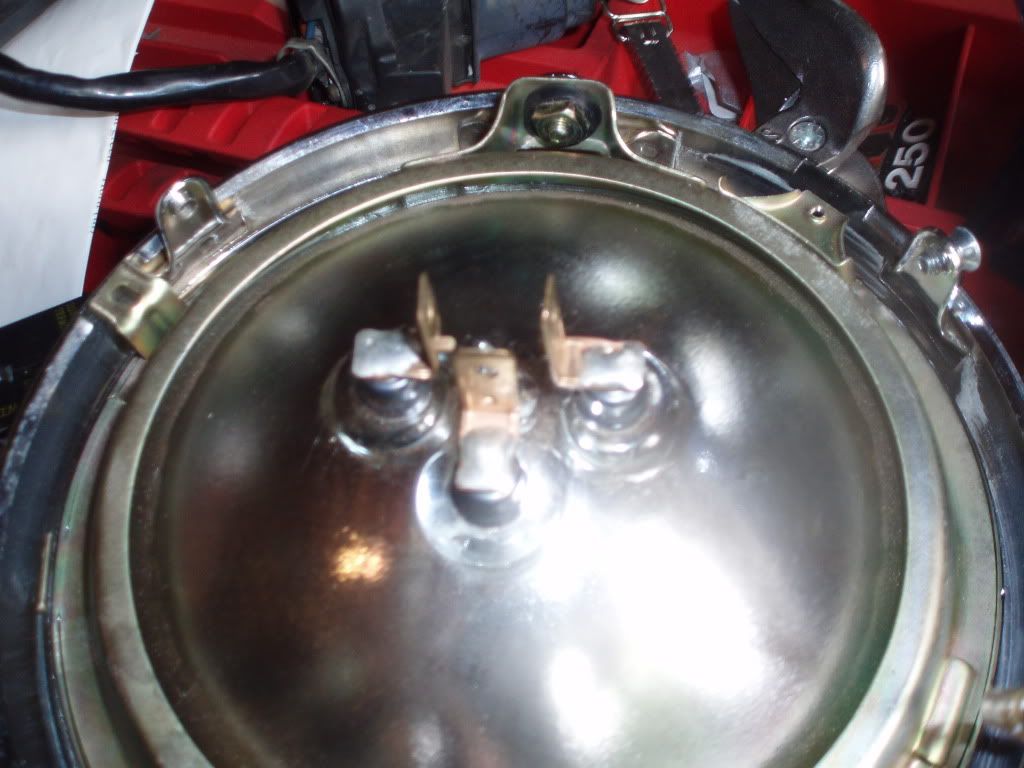
I have a replacement headlight, and I'm not sure which of the three prongs is ground, headlight, highbeam. I think it's an emgo, but don't remember for sure. It actually lights up any way I wire it, so if someone knows and could tell me, that would be awesome.
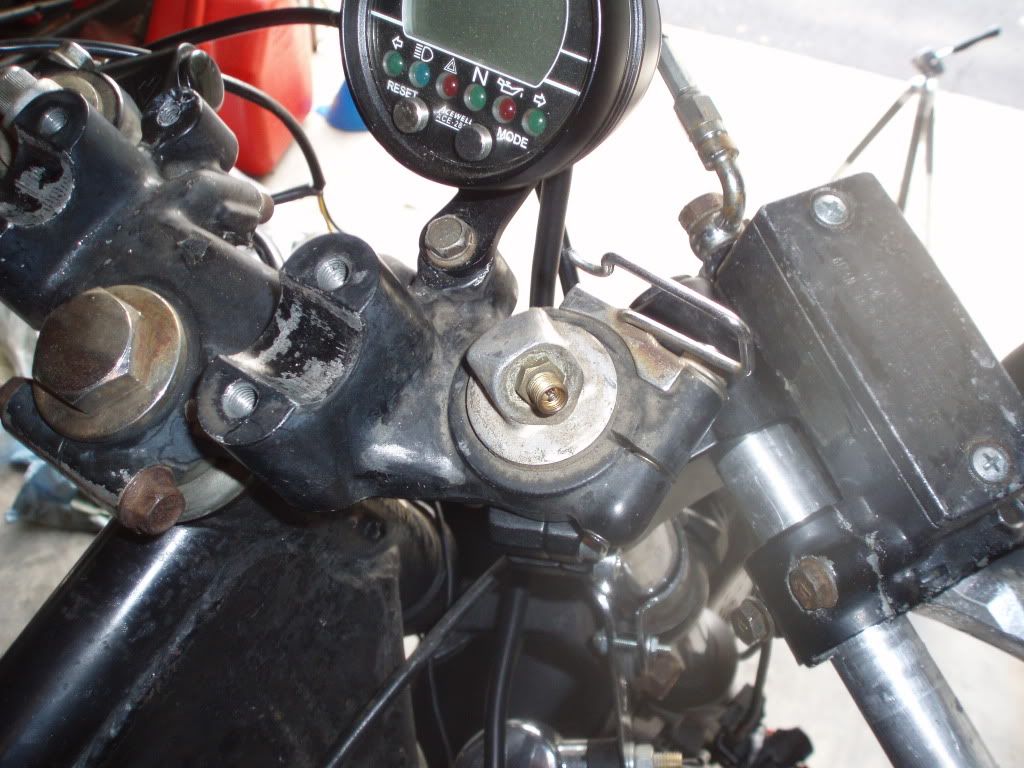
One last item for this post. I have no need for this wire guide anymore and want to remove it. Do I need to lift the front end when removing this bolt to take the thing off, or am I safe just removing it?
I am making more progress than it seems. Once I get the kill switch fixed with new wires, all that is left will be to reinstall that and run all my wires! :woohoo:
Southern Maryland, USA
1980 KZ250 LTD (traded, but still missed)
1982 KZ750 E3 (Cafe Project) (Dyna-S, Dyna Coils, V&H 4-1, K&N Pods, 6 Sigma Jet Kit, Acewell Computer, Woodcraft Clip-ons, Custom Rewire)
1966 A1 Samurai (Restoration Project)
Wish List:
KZ1000 P (For a "touring" bike)
Z1 (need I...
1980 KZ250 LTD (traded, but still missed)
1982 KZ750 E3 (Cafe Project) (Dyna-S, Dyna Coils, V&H 4-1, K&N Pods, 6 Sigma Jet Kit, Acewell Computer, Woodcraft Clip-ons, Custom Rewire)
1966 A1 Samurai (Restoration Project)
Wish List:
KZ1000 P (For a "touring" bike)
Z1 (need I...
Please Log in or Create an account to join the conversation.
- clutch
-
 Topic Author
- Offline
- User
-

Registered
- I wish I had a tad more patience to do it better!
- Posts: 1051
- Thanks: 12
Re: 1982 KZ750 E3 Complete Wiring Overhaul
30 Sep 2011 21:05
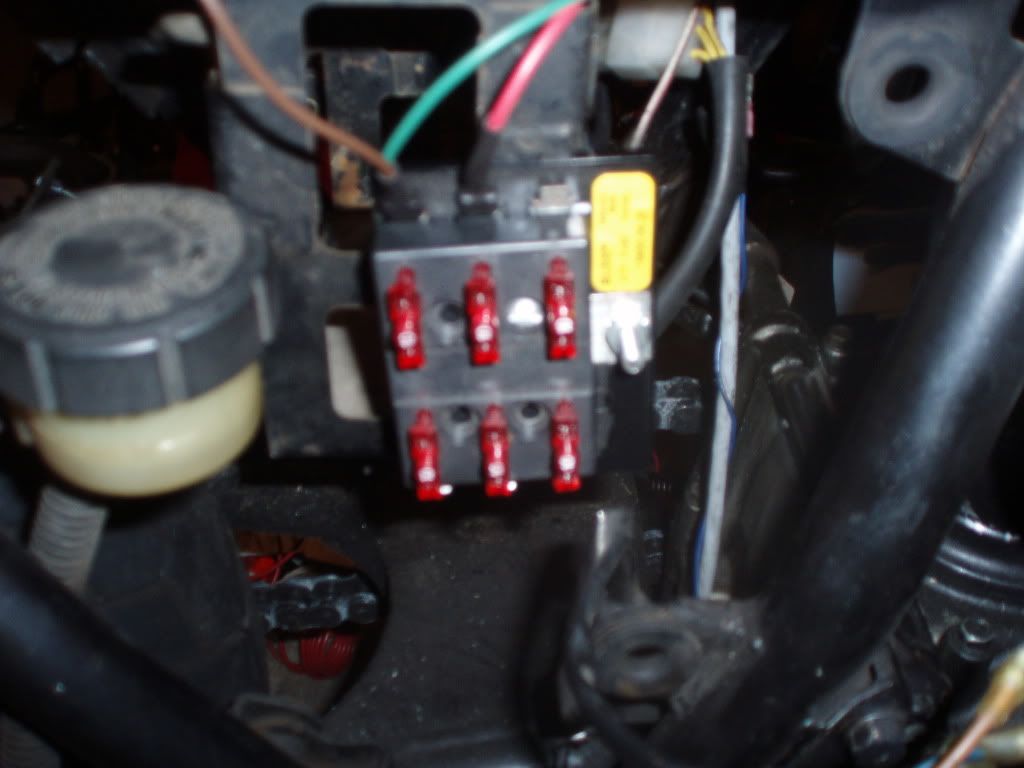
I got a few wires ran while waiting for replies to my last post. The fuse block doesn't look quite so bare now.
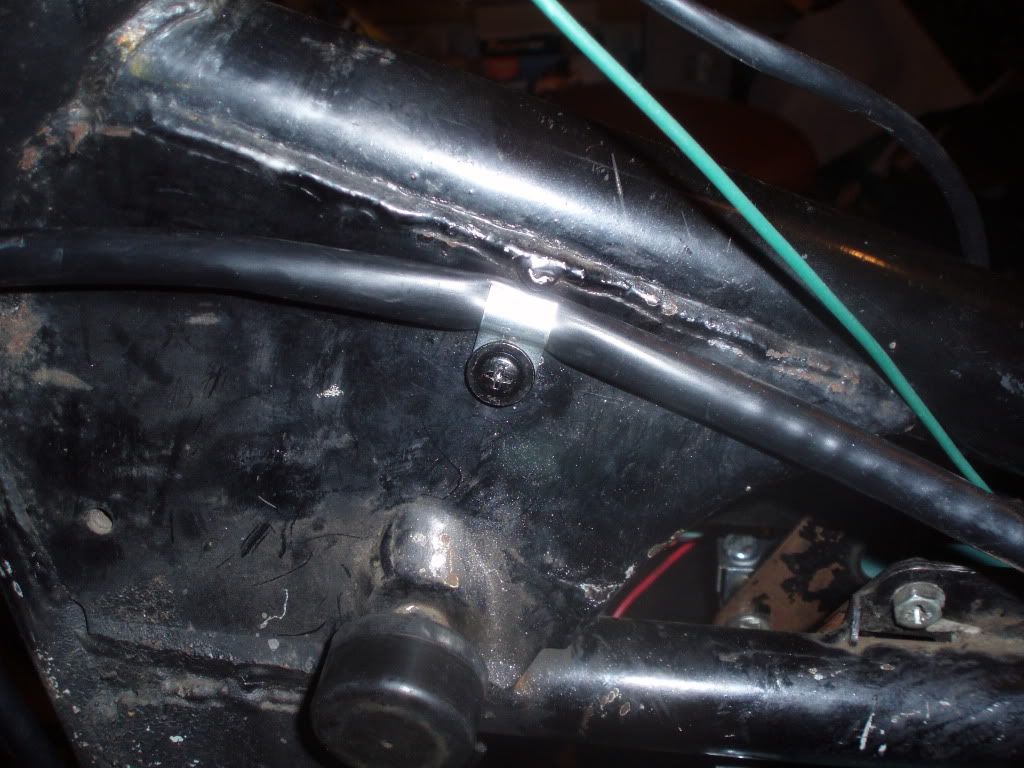
I bought these little cable clamps years ago for a project on my truck. I ended up not using them, and thought I wasted my money. They are coming in handy now. I used one under the engine sprocket cover, and plan to use a few more up on the neck to keep the wires from getting pinched by the gas tank. I think this may be why the kill switch wires tested bad when I moved them around (and could also be why I don't get 12 v to the coils).
So now I am just waiting on advice for repairing the kill switch wiring before I can move on to the ignition wiring.
Southern Maryland, USA
1980 KZ250 LTD (traded, but still missed)
1982 KZ750 E3 (Cafe Project) (Dyna-S, Dyna Coils, V&H 4-1, K&N Pods, 6 Sigma Jet Kit, Acewell Computer, Woodcraft Clip-ons, Custom Rewire)
1966 A1 Samurai (Restoration Project)
Wish List:
KZ1000 P (For a "touring" bike)
Z1 (need I...
1980 KZ250 LTD (traded, but still missed)
1982 KZ750 E3 (Cafe Project) (Dyna-S, Dyna Coils, V&H 4-1, K&N Pods, 6 Sigma Jet Kit, Acewell Computer, Woodcraft Clip-ons, Custom Rewire)
1966 A1 Samurai (Restoration Project)
Wish List:
KZ1000 P (For a "touring" bike)
Z1 (need I...
Please Log in or Create an account to join the conversation.
- kcornell6
-
- Offline
- User
-

Registered
- Posts: 61
- Thanks: 1
Re: 1982 KZ750 E3 Complete Wiring Overhaul
30 Sep 2011 22:56
Using flux during soldering will be your friend. And just don't make any bridges.
V/R
Kev
V/R
Kev
96' KZ1000P Bobbed
81 GS850L
81 GS850L
Please Log in or Create an account to join the conversation.
- MFolks
-

- Offline
- User
-

Registered
- Posts: 6650
- Thanks: 541
Re: 1982 KZ750 E3 Complete Wiring Overhaul
30 Sep 2011 23:16
I'd get some plastic safe electrical contct cleaner(Do not not use brake cleaner or WD-40!), spray the electrical contacts & turn the switch off and on several times and then do a re-test.
1982 GPZ1100 B2
General Dynamics/Convair 1983-1993
GLCM BGM-109 Tomahawk, AGM-129A Advanced Cruise Missile (ACM)
General Dynamics/Convair 1983-1993
GLCM BGM-109 Tomahawk, AGM-129A Advanced Cruise Missile (ACM)
Please Log in or Create an account to join the conversation.
- clutch
-
 Topic Author
- Offline
- User
-

Registered
- I wish I had a tad more patience to do it better!
- Posts: 1051
- Thanks: 12
Re: 1982 KZ750 E3 Complete Wiring Overhaul
30 Sep 2011 23:45 - 30 Sep 2011 23:46MFolks wrote: I'd get some plastic safe electrical contct cleaner(Do not not use brake cleaner or WD-40!), spray the electrical contacts & turn the switch off and on several times and then do a re-test.
Well...I didn't see that post before I went out to the garage a little while ago. I pulled the switch apart completely and soldered all new wires on. It ain't pretty (like most of my soldering :silly: ), but all wires have a nice strong hold. I will take some pictures later tonight or tomorrow before putting it back on the bike and commencing Part III: Ignition System Wiring! :woohoo:
EDIT: I ohm tested the switch after putting it back together, and it seems to have no shorts.
Southern Maryland, USA
1980 KZ250 LTD (traded, but still missed)
1982 KZ750 E3 (Cafe Project) (Dyna-S, Dyna Coils, V&H 4-1, K&N Pods, 6 Sigma Jet Kit, Acewell Computer, Woodcraft Clip-ons, Custom Rewire)
1966 A1 Samurai (Restoration Project)
Wish List:
KZ1000 P (For a "touring" bike)
Z1 (need I...
1980 KZ250 LTD (traded, but still missed)
1982 KZ750 E3 (Cafe Project) (Dyna-S, Dyna Coils, V&H 4-1, K&N Pods, 6 Sigma Jet Kit, Acewell Computer, Woodcraft Clip-ons, Custom Rewire)
1966 A1 Samurai (Restoration Project)
Wish List:
KZ1000 P (For a "touring" bike)
Z1 (need I...
Last edit: 30 Sep 2011 23:46 by clutch. Reason: shown in post
Please Log in or Create an account to join the conversation.
- MFolks
-

- Offline
- User
-

Registered
- Posts: 6650
- Thanks: 541
Re: 1982 KZ750 E3 Complete Wiring Overhaul
30 Sep 2011 23:53
On the older kawasaki's, the soldered connections from the factory seem to be crumbling. Sometimes a little fresh flux and a clean soldering tip to re flow the solder is about all it needs.
1982 GPZ1100 B2
General Dynamics/Convair 1983-1993
GLCM BGM-109 Tomahawk, AGM-129A Advanced Cruise Missile (ACM)
General Dynamics/Convair 1983-1993
GLCM BGM-109 Tomahawk, AGM-129A Advanced Cruise Missile (ACM)
Please Log in or Create an account to join the conversation.
Moderators: Street Fighter LTD


