
Max I am
- Max2022
-
 Topic Author
- Offline
- User
-

Registered
- Posts: 51
- Thanks: 0
Max I am
17 Apr 2006 05:34
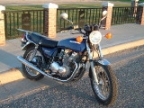
Hey guys, I'm Max. 16 years old and have owned two motorcycles so far, raced a few, and test ridden countless amounts. I had a GS750 that is still in my garage, and now belongs to a new owner(Once he picks it up), and just bought a rusted old KZ750 which I plan to restore(Maybe with an Eddie Lawson motor, I know some people who know some people :laugh: ).
I'm going to post all the little doohickies I did and am doing to my bike here, along with the date, and step by step procedures. Pictures too. I love to ride! I can't stand being boxed up in a car most of the time, even though I love driving/racing/drifting things with 4 wheels.
So the list starts now!
April 17, 2006 . 5:27 AM
Bled the front brakes, took it out for a quick spin in the rain and noticed the immidiate stopping power, no more of that pansy softish feel that only slows me down!
Items required :
10mm wrench
Clear tube
Oil pan of some sort, or just a bottle
Phillips screw driver(May require the hammer type, rusty bolts arnt going to come out with man power, and will most likely break if you try.)
Brake Fluid
Lots of Rags or Tissue like stuff!
Prefered Clamp, or just a couple of small rubber bands will do the trick.
((Brake fluid reservoir is found atop the right brake lever. Brake Bleeding Valve is usualy found atop the caliper near the back, should stick out and look like a valve") )
)
1. Unbolt the Brake fluid holder, and stock a clear tube onto the bleeder tip.
2. Clean out the old brake fluid(Mine was rather rusty), and clean up the interior of the fluid holder, then fill up with fluid!
3. Clamp down the brake, and begin unscrewing the bleeder valve(10mm), liquid along with a few airbubbles is common, check for leaks along the line too!
4. Release brake, and reapply, then clamp, and tighten the bleeder valve all the way.
5. Check for tension on brake lever, if it's soft, try again! Should have nominal amount of pressure to it.
6. Move to the next caliper!
I'm going to post all the little doohickies I did and am doing to my bike here, along with the date, and step by step procedures. Pictures too. I love to ride! I can't stand being boxed up in a car most of the time, even though I love driving/racing/drifting things with 4 wheels.
So the list starts now!
April 17, 2006 . 5:27 AM
Bled the front brakes, took it out for a quick spin in the rain and noticed the immidiate stopping power, no more of that pansy softish feel that only slows me down!
Items required :
10mm wrench
Clear tube
Oil pan of some sort, or just a bottle
Phillips screw driver(May require the hammer type, rusty bolts arnt going to come out with man power, and will most likely break if you try.)
Brake Fluid
Lots of Rags or Tissue like stuff!
Prefered Clamp, or just a couple of small rubber bands will do the trick.
((Brake fluid reservoir is found atop the right brake lever. Brake Bleeding Valve is usualy found atop the caliper near the back, should stick out and look like a valve
)1. Unbolt the Brake fluid holder, and stock a clear tube onto the bleeder tip.
2. Clean out the old brake fluid(Mine was rather rusty), and clean up the interior of the fluid holder, then fill up with fluid!
3. Clamp down the brake, and begin unscrewing the bleeder valve(10mm), liquid along with a few airbubbles is common, check for leaks along the line too!
4. Release brake, and reapply, then clamp, and tighten the bleeder valve all the way.
5. Check for tension on brake lever, if it's soft, try again! Should have nominal amount of pressure to it.
6. Move to the next caliper!
Please Log in or Create an account to join the conversation.
- N0NB
-
- Offline
- User
-
Registered
- Blue handles better
- Posts: 1811
- Thanks: 19
Re: Max I am
17 Apr 2006 13:28
Good post, Max.
Welcome aboard! BTW, write-ups like this can be posted in the articles section as well which may be a more permanent place than the forum.
- Nate >>
Welcome aboard! BTW, write-ups like this can be posted in the articles section as well which may be a more permanent place than the forum.
- Nate >>
Nate
Nates vintage bike axiom: Riding is the reward for time spent wrenching.
Murphys corollary: Wrenching is the result of time spent riding.
1979 KZ650 (Complete!)
1979 KZ650 SR (Sold!)
1979 KL250 (For sale)
1994 Bayou 400 (four wheel peel )
)
Nates vintage bike axiom: Riding is the reward for time spent wrenching.
Murphys corollary: Wrenching is the result of time spent riding.
1979 KZ650 (Complete!)
1979 KZ650 SR (Sold!)
1979 KL250 (For sale)
1994 Bayou 400 (four wheel peel
)
Please Log in or Create an account to join the conversation.
- Max2022
-
Topic Author
- Offline
- User
-
Registered
- Posts: 51
- Thanks: 0
Re: Max I am
22 Apr 2006 06:29
Replaced the stock slipping clutch with a full barnet clutch kit. For steps on how to do see search post : How to replace your clutch, by philcsand.
I'd like to add one more thing to Phil's post however, when you are installing clutches all the metal plates have to be facing one way, the easiest way to tell apart the different sides on a metal plate will be that one side has a wavy pattern, and the other has sort of a grinded pattern which looks like its been rubbed on rocks. Another way is the edge on one side is more curved then the edge on the other. If the plates are facing different directions you will run into trouble! I don't believe this applies to the friction plates, only the metal ones.
Want your KZ to look cooler? Easy how too's.
1. Remove the mirrors to get that old cafe racer look.
2. Find a metal bar of the same diamater as your handlebars, this only applies to tall riders, and is usualy more comfortable for taller riders, replace your handlebar with this bar, and put on all the little gimmicks.
3. Transfer your tail light turn signals inside the tail! Just drill some holes in the support bar inside the tail, make sure your tail lights arnt extending more then an inch past the support bar! Any more then they will break when the tire hits a bump. The easiest solution for taillights longer then 1 inch is go put them at an angle, or farther into the frame, behind the wheel. This pretty much eliminates the use of your tail lights, but if your pulled over for lack of tail lights you can point out you have some, it also looks really cool when you turn on the emergency stop lights.
4. Clean the sludge off the swing arm, makes it look loads better, you can also use sand paper or cutting utensils as well as a metal grinder to change the shape of your chain gaurd.
I'd like to add one more thing to Phil's post however, when you are installing clutches all the metal plates have to be facing one way, the easiest way to tell apart the different sides on a metal plate will be that one side has a wavy pattern, and the other has sort of a grinded pattern which looks like its been rubbed on rocks. Another way is the edge on one side is more curved then the edge on the other. If the plates are facing different directions you will run into trouble! I don't believe this applies to the friction plates, only the metal ones.
Want your KZ to look cooler? Easy how too's.
1. Remove the mirrors to get that old cafe racer look.
2. Find a metal bar of the same diamater as your handlebars, this only applies to tall riders, and is usualy more comfortable for taller riders, replace your handlebar with this bar, and put on all the little gimmicks.
3. Transfer your tail light turn signals inside the tail! Just drill some holes in the support bar inside the tail, make sure your tail lights arnt extending more then an inch past the support bar! Any more then they will break when the tire hits a bump. The easiest solution for taillights longer then 1 inch is go put them at an angle, or farther into the frame, behind the wheel. This pretty much eliminates the use of your tail lights, but if your pulled over for lack of tail lights you can point out you have some, it also looks really cool when you turn on the emergency stop lights
.4. Clean the sludge off the swing arm, makes it look loads better, you can also use sand paper or cutting utensils as well as a metal grinder to change the shape of your chain gaurd.
Please Log in or Create an account to join the conversation.
Moderators: Street Fighter LTD