KZR's Bikes of the Month for 2024

Tank and Side Cover Repaint

More
27 Oct 2005 12:42 #4694 by twin_rotor
Tank and Side Cover Repaint was created by twin_rotor
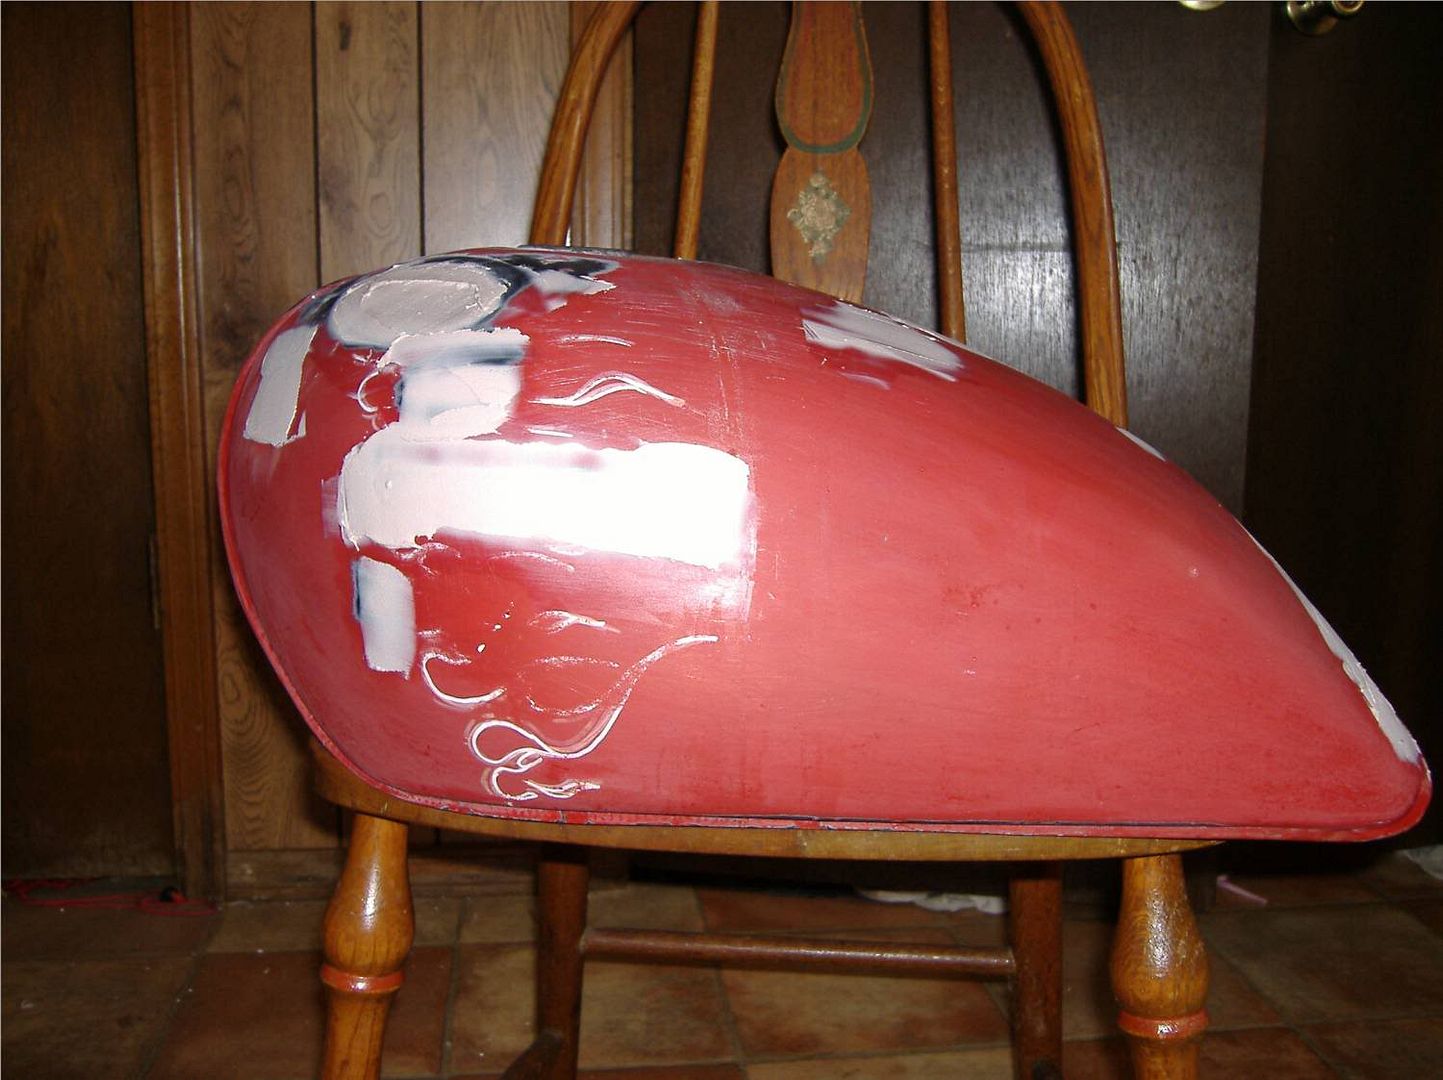
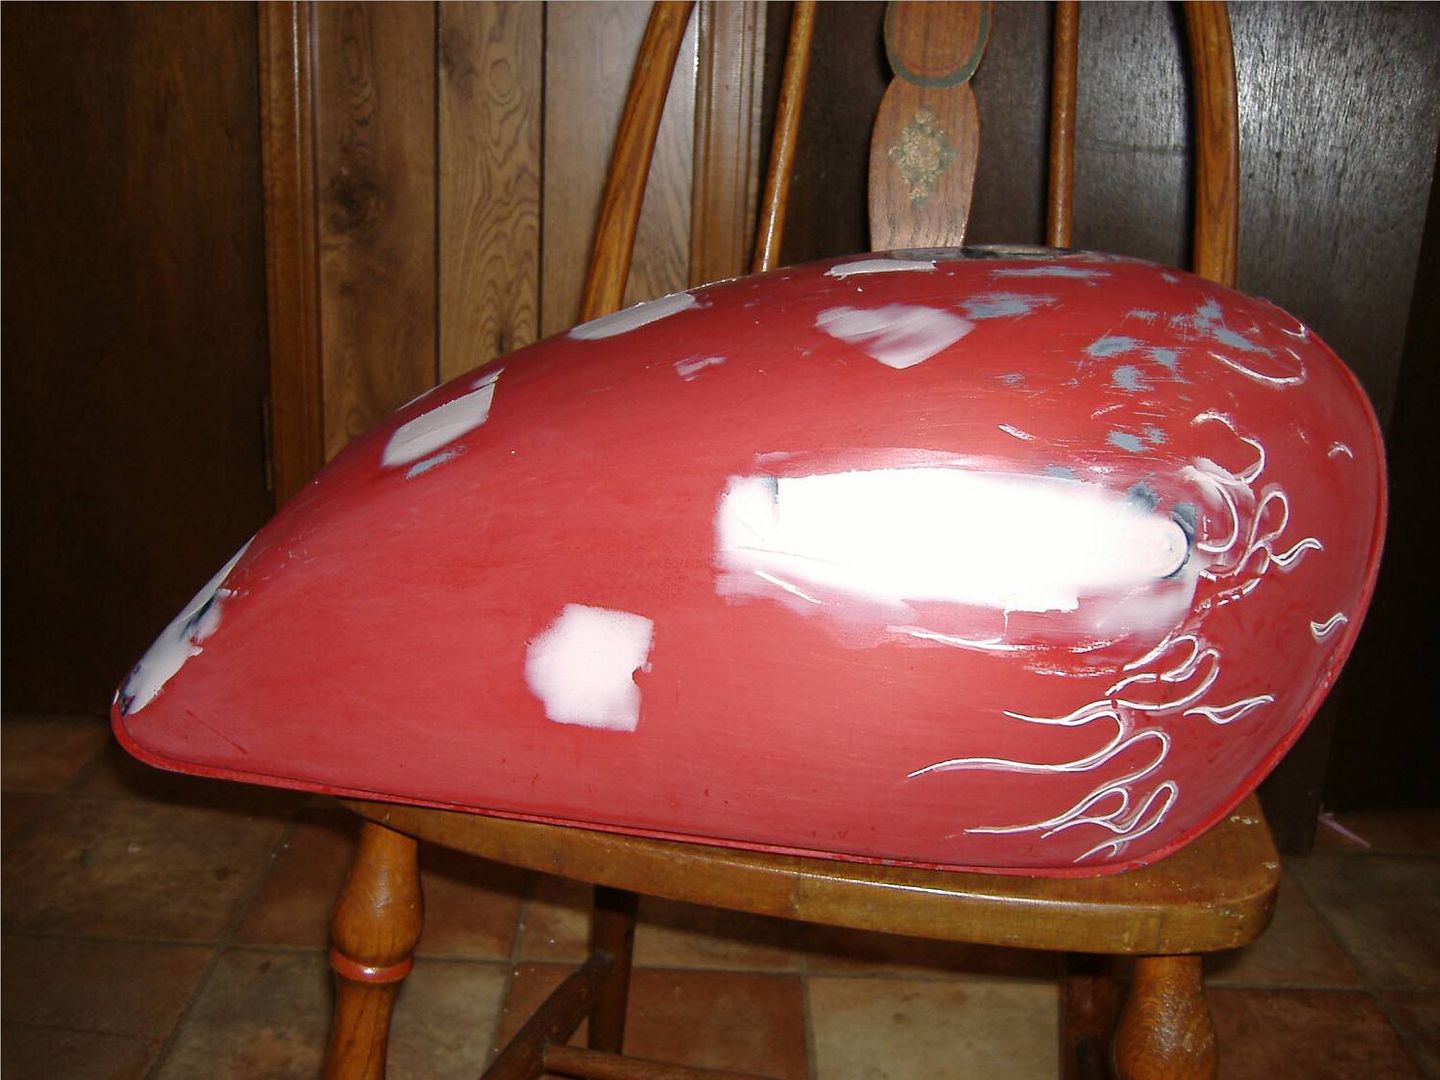
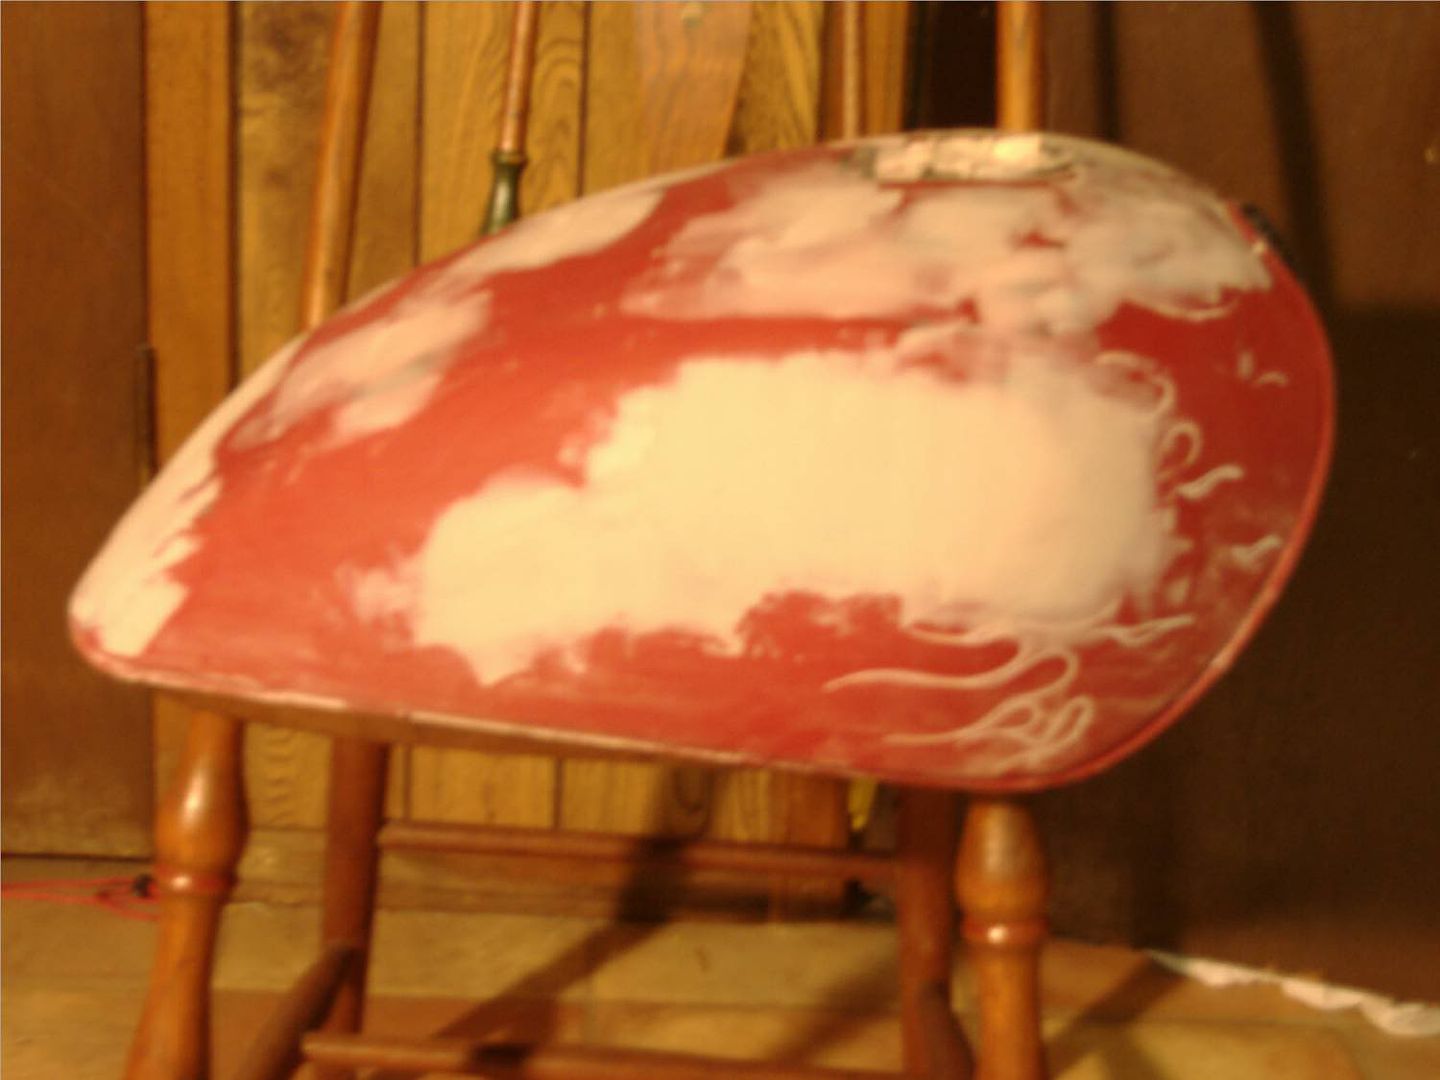
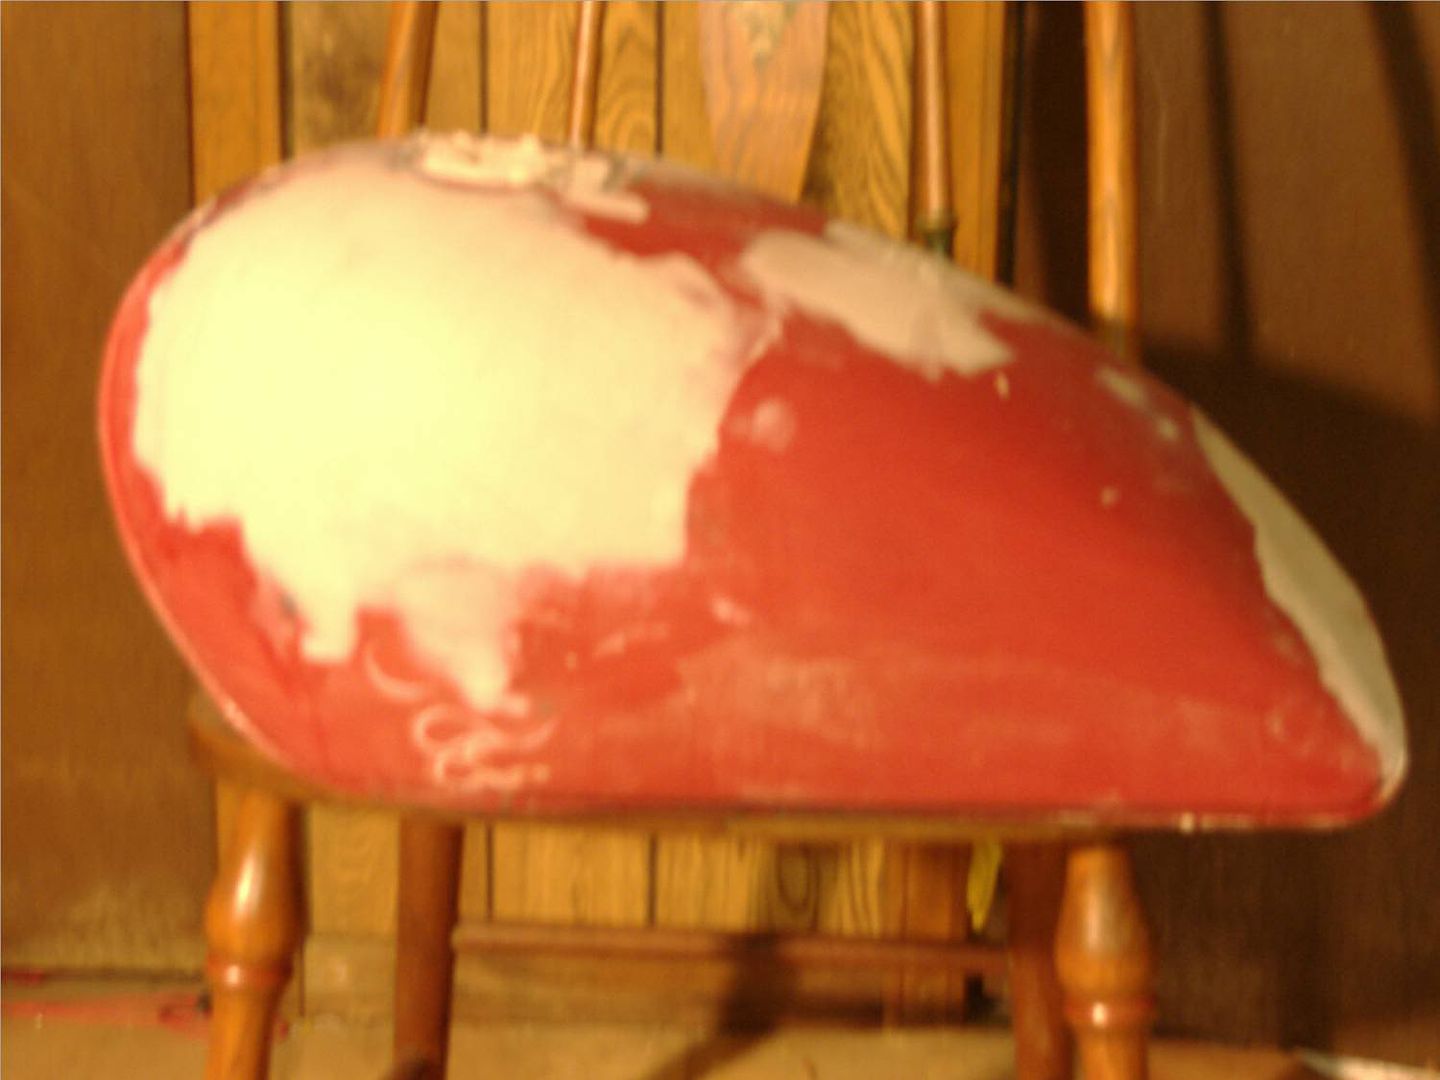
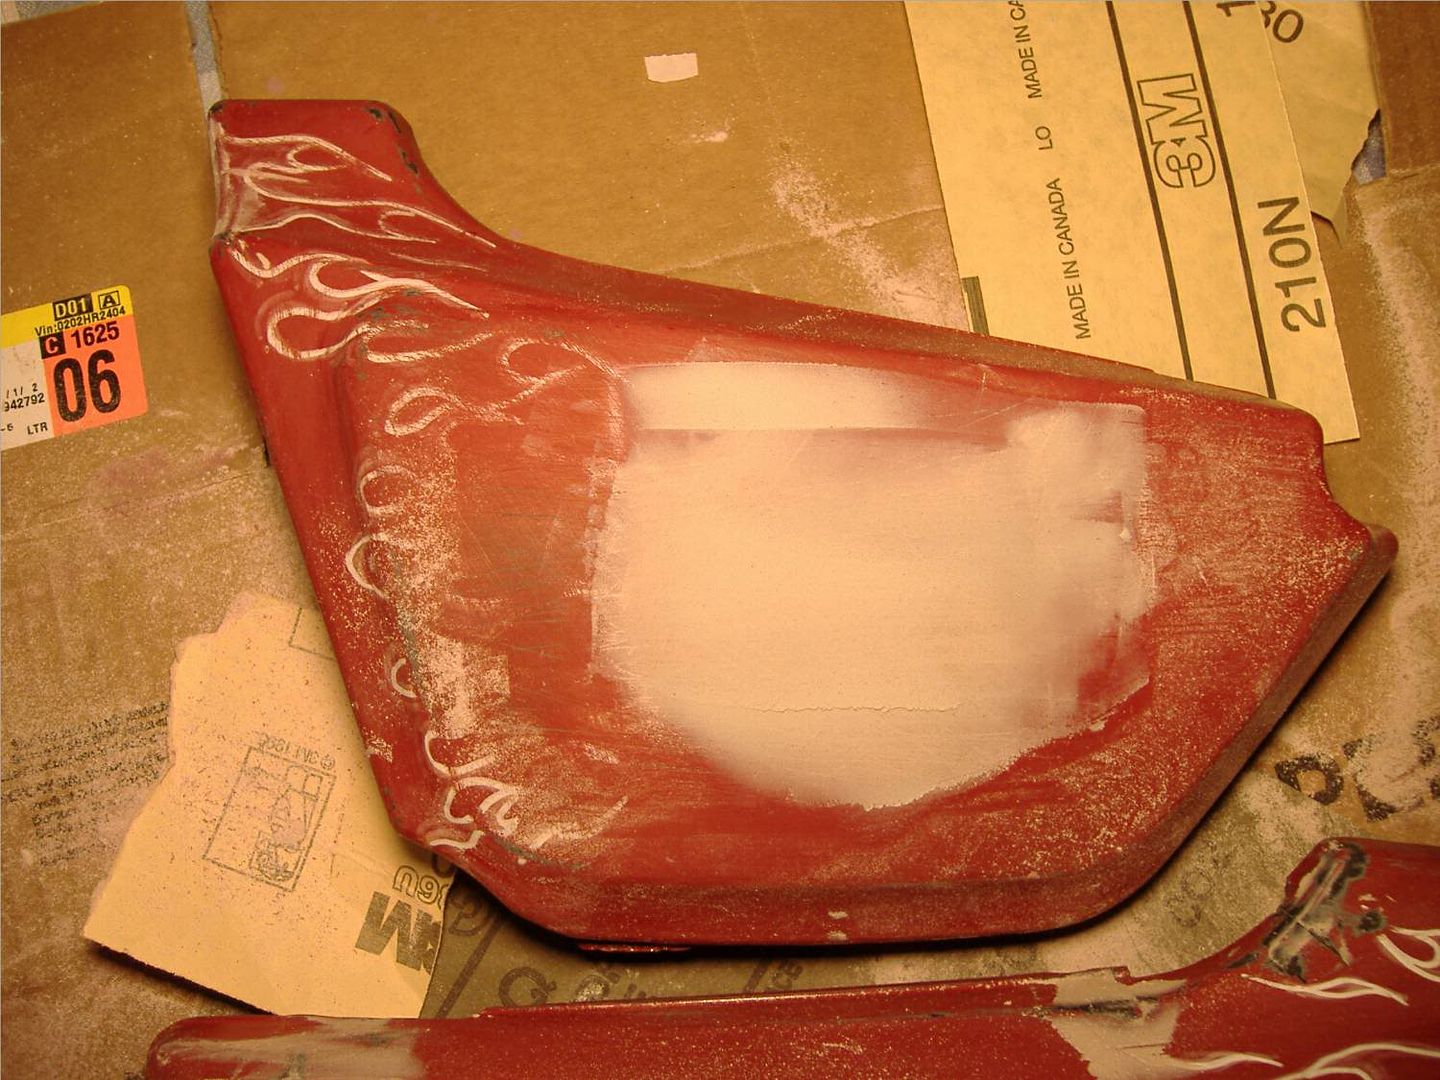
The tank and side covers on my recently purchased 550LTD were in sad shape. So I handed em to my wife and heres what shes done so far. More progress pics will come.

The big bondo patch is were the handle bars put a 3" deep dent into the left side. First set are the first application then the second app. She still has a looong way to go :D


If you have any suggestions or comments, please post! We are both fairly inexsperienced..

Ben

Post edited by: twin_rotor, at: 2005/10/27 15:46

Post edited by: twin_rotor, at: 2005/10/27 15:47

Post edited by: twin_rotor, at: 2005/10/27 15:48

-Ben-
1983 KZ1100A3

Please Log in or Create an account to join the conversation.

More
27 Oct 2005 13:09 #4701 by GargantuChet
Replied by GargantuChet on topic Tank and Side Cover Repaint
Ben,

It's a good start!

It looks like the bondo is maybe still a bit thick. Ideally, you'll have a feathered edge as the low spot "fades" into the normal surface.

Especially in the last tank pic, I see some hard-looking lines to the back of your big patch, the bondo on the top of the tank, and especially that section on the back. The top right section looks like it's almost there.

Don't be afraid to sand off too much. You can always add more later, and it's worth a little practice.

Please Log in or Create an account to join the conversation.

More
27 Oct 2005 13:16 #4704 by John68
Replied by John68 on topic Tank and Side Cover Repaint
Ben,
what application process are you using? Could you give a brief outline and I could give you some tips that will speed the process up a bit. Just tell me how you are mixing the filler, how long you are waiting before sanding it, what grit sandpaper you start with, then the progression you are using, and what you did to prep the dents before applying filler.

The average bodyman could do the tank and both sidecovers in about 3 hours, from start to primering. If you are over 3 hours on the project already, I am sure you'd appreciate some professional advice. I also believe I could explain how to finish it in 2 hours, from where it is right now. Well, I could probably knock it out in 25 minutes, but I have a bit of experience. :P

cheers,

Please Log in or Create an account to join the conversation.

More
27 Oct 2005 14:02 #4719 by twin_rotor
Replied by twin_rotor on topic Tank and Side Cover Repaint
Sorry for the lack of information. Like I said up top, my wife is doing it all.

She actually kinda got mad at me for posting with out telling her :D All these pics I took, without her knowledge, were before any sanding..

We appreciate the help! She will be posting a reply to fill you guys in on whats actually happing here.. :) I just want the nasty red and cheesy flames off! :D

Ben

-Ben-
1983 KZ1100A3

Please Log in or Create an account to join the conversation.

More
27 Oct 2005 15:13 #4728 by quadsheavn
Replied by quadsheavn on topic Tank and Side Cover Repaint
Good Evening, Bens wife here.

Thank you for the help. I can really use ;)

I am mixing the bondo a little at a time, and using a little hardner, about pea size.

I am waiting about an hr or 2 before sanding (thats what the can says :lol: )

As for the sand paper, right now i am using 40 to get the thick stuff off, and hitting it lightly with 60, 80.

Any tips, tricks, or easier way to do things I would love to hear. This is my frist 'real' attempt at doing something like this.

Missy

Please Log in or Create an account to join the conversation.

More
27 Oct 2005 16:17 #4734 by dannyg40
Replied by dannyg40 on topic Tank and Side Cover Repaint
Missy,
Like John68 said... Make sure you do a good job of sanding. Any tiny little imperfection will show up right away when you go to prime the tank and panels. I learned this the hard way when I was younger trying to paint my first car. I sanded the entire car, listened to my brother who told me to "shoot the primer a little dry so the paint sticks". When I primed the car the primer had a few small flaws from the "dryness", and I didnt sand down the little bit of bondo I used around the vinyl top to good. As soon as I went to paint the car... every tiny little mistake seemed to stick out from a mile away. I spent 3 weeks sanding down the mess and ended up selling the car in primer.


John68,
I know I have read your other posts helping people on painting tips. I think it would be really great if you had the time to post on this site, an article on the complete process. Type of paint to use, mixing, thinning, sanding, etc. From start finish. That would be great. I know over the winter I have to paint my tank and Im not sure what color, type of black it is, enamel or laquer, etc. etc.....

Please Log in or Create an account to join the conversation.

More
27 Oct 2005 17:16 #4742 by rstnick
Replied by rstnick on topic Tank and Side Cover Repaint
Good work so far quadsheavn.

I second the request on step by step info on filling dents/scratches etc. Priming, sanding , Painting , clear coat or not.

I'm going to attempt to paint a fiberglass fairing and plastic chin scoop and could use the info too.
.


Post edited by: rstnick, at: 2005/10/27 20:17

Rob
CANADA

Need a key for your Kawasaki? PM me

1978 KZ650 C2, 130K kms, Delkevic ex, EI, CVK32, PMC easy clutch, ATK fork brace, steering damper, braced swingarm, ZRX shocks, 18" Z1R front wheel.
2000 ZRX1100
2011 Ninja 250R - Wife's
2005 z750s (aka GPz750)
1978 KZ1000 project

Please Log in or Create an account to join the conversation.

More
27 Oct 2005 17:40 #4749 by John68
Replied by John68 on topic Tank and Side Cover Repaint
quadsheavn wrote:

Good Evening, Bens wife here.


My deepest sympathy...

I am mixing the bondo a little at a time, and using a little hardner, about pea size.


here's what to do, when you are ready to put more on there. I prefer to use a mixing board, because they have tear-off sheets, so I don't have to spend a lot of time fooling around. You probably are mixing on a piece of cardboard, or something like that. If not, then go dumpster diving and get some cardboard boxes, chop them up, they make great mixing boards. The objective here is to spend as little effort as possible, and do it as quickly as possible. Playing with bodyfiller is a miserable job, no sense in making it any worse.
Hopefully you bought the 1 gallon can, not the quart can. I think a quart of bondo is $8 and a full gallon is $15... major major rip-off... Once you open the can of filler, use a paint stir stick and stir in a vertical circular motion, opposite of stirring a can of paint, bringing the filler from the bottom of the can to the top. This mixes more of the polyester resin into the filler, making it easier to spread. The polyester resin is the black junk laying in the bottom of the can, it's supposed to be all through the filler, not on the bottom. It's a nasty side effect of a long life on a store shelf.

Now that you have your filler stirred good, kneed the tube of hardener, between your fingers, or get someone else to, while they are watching TV. you don't need to kneed it too much, but you want the color to be uniform. I am sure, at this point, you know what I mean. You get that darkly pigmented runny liquid that squirts out, then pale colored thick stuff. It should all be uniform. Once that is all kneeded and stirred and tuned up, cut a piece of cardboard, about 12" X 12" and put a 4" round puddle of filler in the center. now, draw a stright line across the puddle with the hardener. just a thin line, but a straight line, nonetheless. This should give a 50:1 approx. mix ratio. Even if it doesn't give 50:1, it's the best way, speaking from experience. mix it around and apply it liberally. overfill everything, so that you can visually see the dent is full, and not just the center, but out to the edges as well. Get it all in one swipe, or as few as possible. There are some bodymen who think they are gonna get the "perfect swipe" with the spreader, and so they keep sweeping back and forth, back and forth... not good, you are still going to have to sand it, no need to overwork it. Leave the extra on the board in a tight pile.

I am waiting about an hr or 2 before sanding (thats what the can says :lol: )


Nope, way too long. give it 5, maybe 8 minutes, then check it's consistency. While the junk is setting up, it will turn to that "jello" or rubbery consistency, this is when you clean it off of places you don't need it. continue to let it set up, until it doesn't clog up the sandpaper. how will you know? That pile you left on the mixing board, silly. Give it a fingernail every couple of minutes. This is where timing comes into play. By the way, you should already have your sandpaper setup on your sanding block, so you don't have to fumble with it, or miss your "easy sanding" window of opportunity. When the stuff on the mixing board feels like it isn't incredibly tacky, or you can touch it, and you don't get pink stuff or pink color stuck to your finger, then begin sanding.

As for the sand paper, right now i am using 40 to get the thick stuff off, and hitting it lightly with 60, 80.


Good, eliminate the 60, and you are good. I prefer 35 grit, Norton Blue Magnum, to be specific. It's some brutal stuff. Deffinitely makes you think twice about licking it. When sanding, use light pressure, stay in the work zone, but try to keep only half the sanding block on the filler spot. Doing this will level it to the rest of the panel. just straight strokes and hog it all down until it's level and feathered in. The only way to tell if it's level is by running you hand over it. You can't see dents with your eyes (if you can, then you really didn't put enough filler in it, or you sanded way too much out of the center). Eventually, you will begin to see the hard line or edge of the filler begin to feather into the rest. It will have big deep scratches, but it will be flat. (I might be repeatin a lot of things you have already done, I am just going to do this for the benefit of everyone who reads this.) don't rock the sanding block, either. keep it flat, do not try to justify one corner over the other 3, just keep the block flat, not too tight, and eventually you'll learn more muscle memory that will make it easier. [Miyagi] Just stay focus! [/Miyagi]

One of the biggest problems a first timer has is switching down grits too soon, then oversanding with a high grit paper. there is no reason why you should need anything other than 35(40) and 80 for now. Stick with the lowest grit possible for the longest amount of time. Feel the piece often, and sand accordingly. If you run your hand over something, and you have to think, "what was that?" then guess what, something will show up in the final product. If you can feel it with yoru hand now, a critic(Ben) will deffinitely see it when it's done.
So far you are probably doing things correctly, except you should have been more liberal (even if you are a Republican) putting the filler on the first time. Really, 2 applications of filler should take you from start to primer.

Now, the next thing you will want to do, is get a can of cheap-o rattle can spraypaint. flat black is pretty. lightly, lightly, lightly, lightly spray on a coat onto the roughed up filler. no, I take that back. just DUST it. make it have a nice black mist, and don't go overboard. you'd be surprised how little will work for this. We call this a "guidecoat" Once the paint is dried up a bit(couple minutes), begin sanding lightly with 80 on the block. sanding now will reveal all the deep scratches, and the low spots. This will be your guide for more filler. If you have low spots, then give them some filler and repeat the 40 grit. Tip: When adding filler to a spot like this, it is best to let the filler harden completely, before attempting to sand it, as it will make it hard to feather it into the surounding filler. If you don't have any low spots, then just sand out the bulk of the 40 grit scratches. if you have super-deep scratches, let them be. Just knock down the bulk of them. remember keep the block half on, half off the filler spot. You will dig the center out if you don't. Next, blow out all the dust, and check for pinholes. Pinholes are there because satan likes to mess with bodymen. Evil ids have forever plotted to plague man with pinholes in his bodyfiller. They were just waiting for thousands of years for man to invent filler, so they could mess it up for him. Anyhow... if you see pinholes, or any kind of airbubbles, break them open with your fingernail, or a good steak knife out of the neighbor's kitchen (because that's always the best thing to do, you wouldn't want to get bodyfiller on your good steak knives)
Now it's time for the second application of filler. Mix up the filler in the same manner, but much less this time. make a 2" puddle instead of the 4". get it stirred up and then spread the puddle out to an even sheet on the mixing board, with the spreader. now you can cut off an even "roll" onto the spreader. just get a small roll on the tip of the spreader blade, and skim coat the filler spots. Your objective is not to add a lot of thickness to your filler spot, but to fill in those scratches and beelzebub's evil pinholes. don't lay it on so thin that it becomes transparent, but try to match contour with the shape of the exsisting filler. if you hold the spreader real tight to your work, it will usually do alright.

Let that set up solid, and then sand it down with 80 grit. circle it out, stay off the center of the fill spot, don't block with your weight, block with the strokes. It's the strokes that always get it done. Key lesson for life...

guidecoat the filler again, and sand with 80 more, to see where you are at. Feel it with your hands, watch for good feathered edges. You'll be able to feel when it's done. once you get it right where you want it, guidecoat it again, and this time, switch to 150 grit paper. use the 150 grit to knock the bulk of the 80 grit scratches out. If you circled the strokes well enough with the 80, you shouldn't have too many to deal with now. concentrate on only sanding the scratches out, and not reshaping the filler. sand the 40 adn 80 grit scratches out of the paint too. get everything down to 150 grit. reguidcoat and switch down to 220. sand it out carefully in the same manner, and then you shoudl be ready for primer. If you have a random orbital sander, you should be using that for the final 220 grit sanding, and also, while you are there, sand off those 1970's flames, and knock the shine off the rest of the pieces.

I am not sure what you were planning on using for primer, so I'll leave it at this. I think this is a reasonable explaination of what a bodyman would do to your bike.
It took me about an hour longer to type this, than it would have taken me to actually do the work myself. You should be ok, just don't go by the directions on teh can of bondo. Bondo isn't right in the head. If there is anyone reading this who works for Bondo, I'm sure you'd agree that your directions were written by a NASA chimpanzee, and no one is actually expected to folow them verbatim.

Any tips, tricks, or easier way to do things I would love to hear. This is my frist 'real' attempt at doing something like this.

Missy


Well, you picked a good first project. small, portable, the bike will probably be moving too quickly for people to see any amount of detail. :whistle:

Good luck, I'll be waiting to see more pictures.

Post edited by: john68, at: 2005/10/27 20:47
Please Log in or Create an account to join the conversation.

More
27 Oct 2005 17:43 #4750 by John68
Replied by John68 on topic Tank and Side Cover Repaint
I'll see what I can do, as far as writing up a complete process. I don't think I can do it in less than 20,000 words though. If I get around to it, I'll post it in this forum and hopefully someone official will make it sticky.

Please Log in or Create an account to join the conversation.

More
27 Oct 2005 18:16 #4771 by quadsheavn
Replied by quadsheavn on topic Tank and Side Cover Repaint
Thank you John.

I just have a couple other questions if you don't mind.
What are your thoughts on spot filler? Should I use it?

and last but not least.. what would you use to wipe down the tank before you 'dust' it with primer. I have heard and read many different thing.

Missy

Please Log in or Create an account to join the conversation.

More
27 Oct 2005 18:55 #4784 by John68
Replied by John68 on topic Tank and Side Cover Repaint
spot filler.

what type? bondo's spot filler? Nitro-Stan? or polyester spot filler?

If you have that dark red laquer based spot filler, whihc I think is what bondo has, that comes in a toothpaste tube, or if you have Nitro-Stan, then toss it out with the kitty litter. It is great for addin color to spaghetti sauce, but for bodywork, it's outdated and therefore, useless. Basically, any type of spot filler that is not catylized, like polyester, is just a laquer paste. It looks great when you put it on and sand it out, but then it shrinks, and also it will lift laquer based primer, because laquer is non-catylized. I went on a rant about this in another post somewhere.

If you want to do it right, you can go get some USC Icing, which is about the best. Evercoat, my second favorite, makes Easy Sand, which is the same thing. If you really wanna get fancy, USC Half-Time is the way to go. It's not cheap, but it goes on so smooth, it is actually brushable, and it sands down like chalk. I do reccomend using a glaze over the filler, to get a really good final surface for primering. Once you get your filler work done with 80 grit, you can substitute Icing for the final skim coat of body filler(bondo).


Wiping down the tank before dusting it? Are we talking about the guidcoats? guidecoats are relatively unimportant, and I wouldn't spend the time wiping down before a guidecoat. guidecoats are just mist. little paint speckles all over the place are just enough to get a visual of where the sanding block is doing the work, and where low spots remain. I don't guidecoat after every application of filler, but I have quite a bit of experience, so I don't reccomend you to follow what I do, just what I say. :)

For a final wipe down before primering I reccomend solvent based wax and grease remover. 5 Star 5700 wax and grease remover, is probably the easiest to find. Of course, finding this kind of stuff in a walmart is next to impossible. avoid those rattlecans called Prep-Sol and anything that smells strongly like kerosene. those are old outdated formulas that you should chuck out with the Nitro-Stan and the kitty litter. The other thing I reccomend is not getting anything wet during this entire process. you can get as much water on it as you like, once it's in primer, but until then, don't even touch stuff with wet hands. The reasoning behind this is, some polyester fillers absorb water, and they trap it against the steel, then you paint over it, and you are trapping the water further. Not good for stuff...
I mention this only because I was reading on a forum one time, and everyone was doing there bodywork according to a write-up similar to what I am saying, except it was done by a shadetree bodyman, who had no real training, and he told everyone to wetsand their filler before primering it. So, there I am reading all this, and I made a post saying it was bad, and I basically got excommunicated for suggesting their expert was "doing it wrong." Even though there were many on the forum who had problems with filler adhesion, I still was the town idiot. I just hope no one on this forum has run into that guy, or followed his technique. I am making special mention of it, just incase.

Basically, I am not sure what type of primer you are gonna use, whether or not you have any air tools, or if you have any thoughts as to the level of quality and price that you are willing to spend on the paint.

Filling in some blanks will help me, help you.


EDIT: Every product I use (outside of my PPG paints) is available online. The best source for stuff outside of my normal vendors is www.autobodytoolmart.com . the best thing about autobody toolmart is their catalog. I regard it as my Sears Christmas Catalog "wishbook" for grown-ups. It has all the good toys, including paintbooths, incase you get super good at this stuff and want to go pro.

Post edited by: john68, at: 2005/10/27 22:01

Please Log in or Create an account to join the conversation.

More
27 Oct 2005 18:56 #4785 by indykaw77
Replied by indykaw77 on topic Tank and Side Cover Repaint
<in best Horshack voice from "Welcome back, Kotter>...OOH...OOH...pick me Mr kotter...pick me.....:)
But seriously folks....use the 2 part "spot putty"

For some GREAT step-by-step instructions (WITH pics!!!!), look here:
www.a2zautoforums.com/showthread.php?t=936&page=4&pp=10
Good heads-up on the process from start to finish, complete with brand names, quantities, drying times, etc. Thread is 4-5 pages long...good reading, I think. John????

It's on a car, but as I've heard body guys say in the past..."Hey....metal is metal".

Post edited by: indykaw77, at: 2005/10/27 21:59

Kawasaki Motorcycles...because cars lean th wrong way!

Please Log in or Create an account to join the conversation.

Powered by Kunena Forum

If you like KZR Please consider making a donation. Thank you.

KZRider is free, but not without cost.

Please consider chipping in a few bucks to help cover the cost of running the KZR servers.