For October we are continuing the globetrotting with a trip to South Africa and Howards stunning ELR tribute. I don't know if you have seen Howard's build thread (if not you should check it out) but the plethora of self made parts to have this bike right in every detail pay tribute to Howards wide skill set (machining, CAD, 3D printing etc) which includes a stunning paint job.
So here is Howards story:
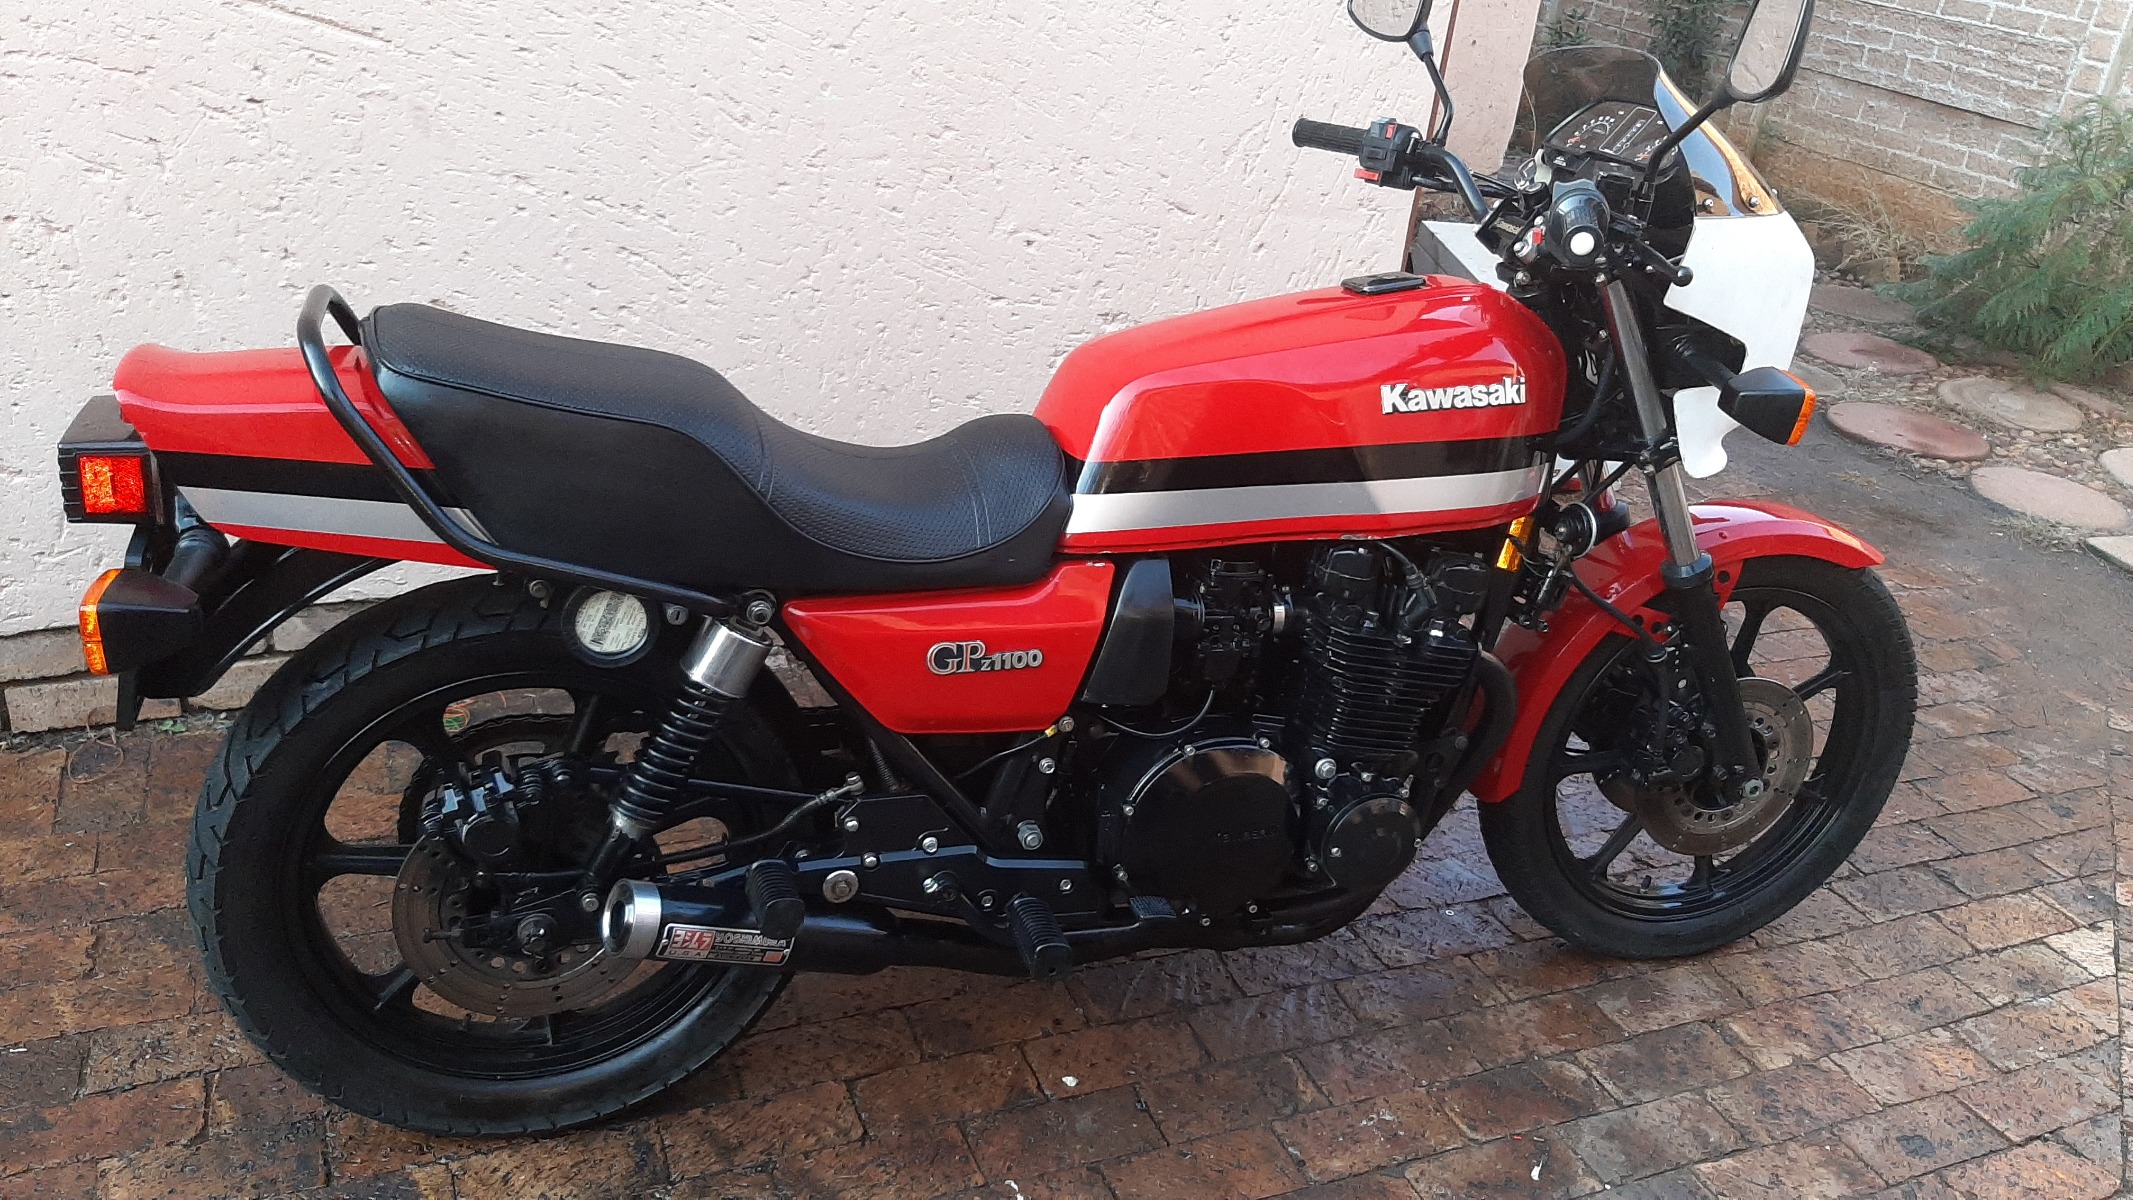
My aim, with this build, was never about producing an exact replica. I chose rather, I suppose, to build a "tribute" to the legendary machine because it would permit a certain amount of freedom to add my own "flavour", knowing that original parts have not been available for decades, and that used, alternative parts would have to suffice. Also, my purview seems to be "designing and making things", so, in some instances, my own "replica" parts would have to suffice. Hence, the title "Tribute" appears on the forum build thread.
From the outset, I intended this bike to be my "daily driver", so it needed to be functionally sound, reliable, and indeed, maintainable, for the years to come. Fortunately though, an actual Lawson Replica is essentially a 1981 GPz 1100 B1 anyway!Primary modifications that the factory performed, to produce the street replicas, are:
1. Replace the B1 cylinder-head and 1098cc cylinders with Kz1000 J-model parts, making it 998cc, but retaining the GPz cam-shafts and higher compression pistons.
2. Replace the Bosch fuel injection system with a bank of Mukuni BS34 CV carburettors.
3. Fit the airbox and air filter from the J-model.
4. Mount the bikini fairing from the 1982 GPz 1100 B2 model.
5. For the '83 Replica they replaced the (unsightly) GPz 1100 B1 speedo / tacho instruments with those from the Kz1000 J-model, and for the '84 1100cc Replica's, instruments similar to the 1982 GPz 1100 B2 were used.
6. Headlight mounting same as the J-models was used
7. Bright green paint with blue and white stripes, and gold painted wheels.
Some months after I had bought the bike I realised that the previous owner had already performed the 998cc cylinder and head modification (for un-known reasons) which was actually a blessing in disguise, as 998cc top end parts seem to be more readily available, compared to1098cc parts. I made a list of items that I needed to purchase, and after enquiring at my local Kawa dealership, I realised that eBay would be my only option for parts. Shipping to, and in Africa is ridiculously slow, so I pulled the trigger on these: '82 GPz1100 B2 instrument cluster, Full gasket set, Fork seals, Stater clutch, Stator, Flywheel (magneto rotor),Clutch plates, Clutch cable, Speedo cable, Speedo drive unit (axle mounted),J-model air-box, Carb. to head boots, Carb. to air-box boots, Air-filter, Shift-shaft oil seal, Handle-bar grips, Side-cover emblems, Tank emblems, Turn signals, Rider foot-pegs, Passenger foot-pegs, Fork brace, Lawson replica seat-cover, Carburettor rebuild kits ,Oh, and some really nice, fully adjustable rear shocks!
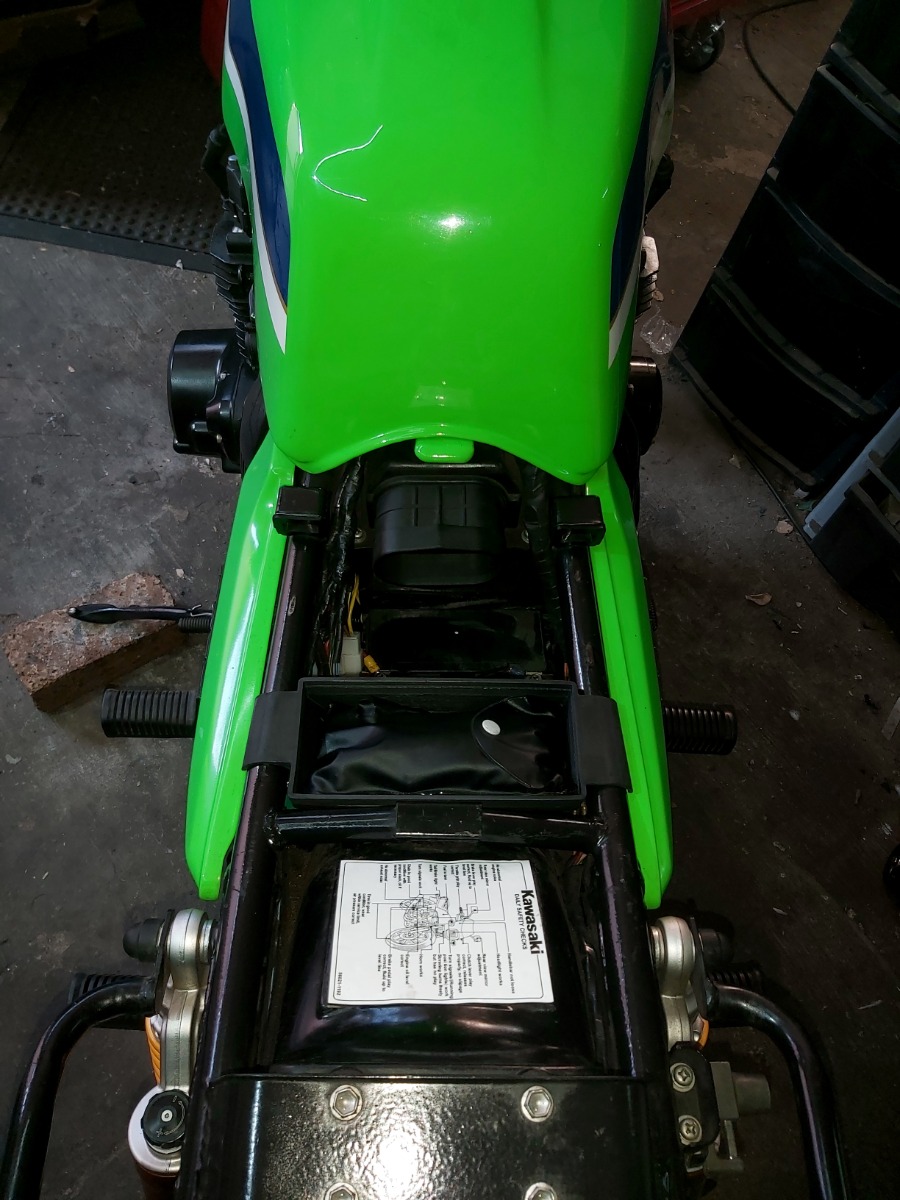
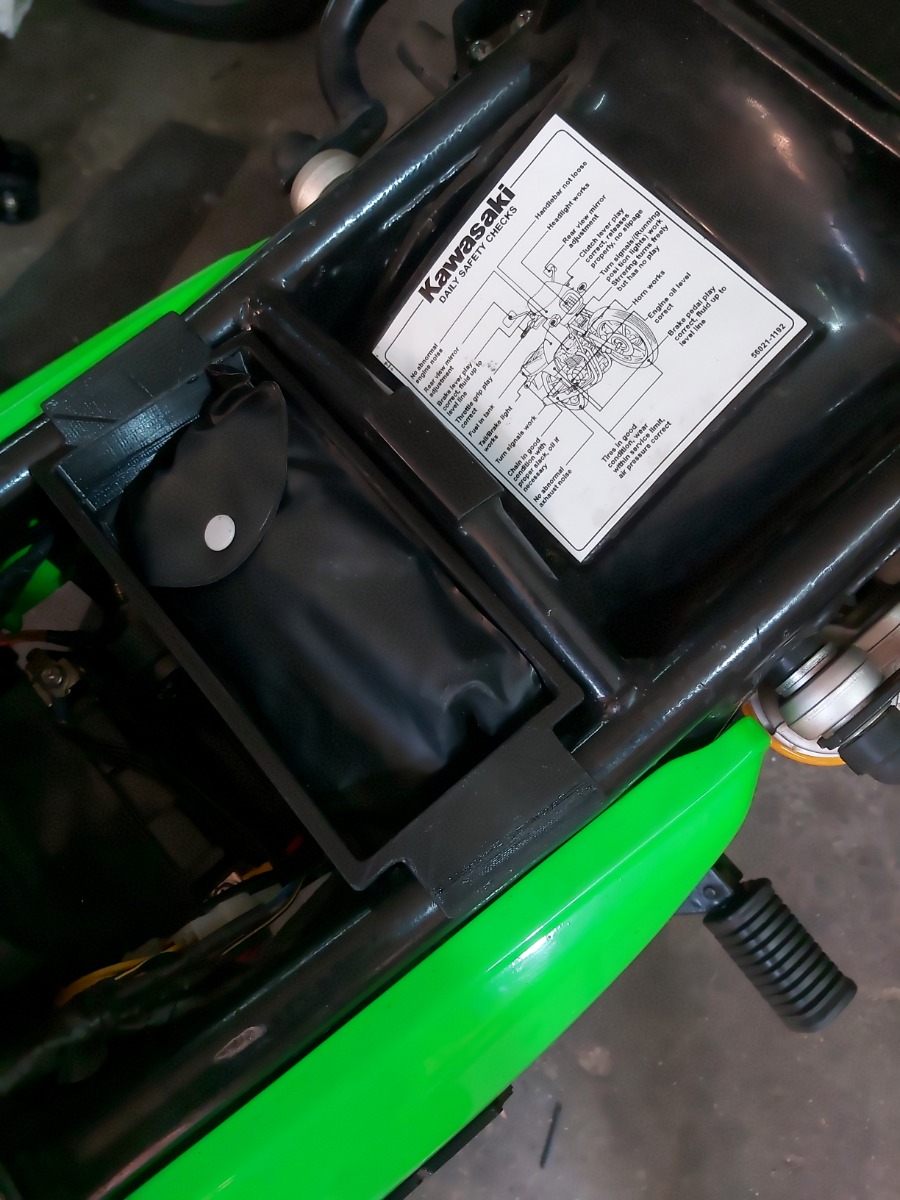
Most of the wiring had been severely molested, so I ordered suitable multi-pin plugs and 'bullet' type in-line connectors to correct the carnage. Last but not least, (and NOT cheap either) a full Lawson Replica painting decal set and repro warning decals, which in my opinion, finish off the restoration to a "T". Some months later, a top-end re-build was required, for which I ordered 4 sets of standard piston rings .I initially planned on re-producing the sheet-metal fairing mounting brackets, but concluded that3D-printed parts would be more than adequate, and I was itching to put my new printer to work. The resulting brackets are somewhat thicker than the original items, but fully functional, no less. There are 9 unique parts that make up the mounting hardware kit alone, all of which I designed to closely mimic the actual items that I saw in the parts diagrams. Even the rubber strip between the fairing and screen was printed. Once the fairing was mounted, I could position and mount the B2 instruments, with accompanying rubber ant-vibration parts, also 3D-printed. I also designed a central dash cover to imitate the 'real' cover as far as possible, given that the B1 ignition switch is offset left of centre. The final result surprised me! I bought a good quality crimping tool which produces reliable 'factory equivalent' crimps, for replacement of the in-line bullet connectors and multi-pin, main harness plugs. I spent a lot of time correcting the wiring: finding and deleting the irksome 'twisted together' red-neck wiring nonsense! While replacing the plugs and connectors in the head-light bucket, I adapted the B2 instrument cluster wiring to suit my B1's wiring, which was straight-forward, except for the low oil-pressure signal which needed to be inverted. The 3D-printed chain-guard that I designed had me busy for quite some time, but turned out quite well. Some other printed parts that I designed and printed are: White, replica bar-ends, under-seat tool tray, air-filter cap "snorkel", under-seat mounting blocks, turn-signal anti-vibration mounts, turn-signal lense seals, tail-light lense seal ,left side-cover mounting lug, side-cover and tail-piece emblems, float-bowl gaskets, pilot jet caps, choke plunger tip-seals ,rear tank mount pad .I also fabricated a gear lever and the chain-guard bracket that mounts on the left lower shock bolt. Deleting the B1 dual fuel outlets under the tank, and properly adapting a pattern pet-cock was also necessary before I could perform the colour-change operation. Thinking about it, painting and decal application were probably the most challenging aspects, for me anyway. However, much to my surprise, the final result ended up being a rather close "replica" of the Replica. Go figure!I ride every day, and get compliments from "old guys” (like me), wherever I park!I must thank my Dad, for teaching my brother and I, all the valuable skills which we use every day! Thanks Pa! A huge shout-out must go to all the members of this awesome forum, whom freely contributed their most valuable insight and opinions! Hey!


")


