
KZ750H Restoration
- calum
-
 Topic Author
- Offline
- User
-

Registered
- Posts: 1144
- Thanks: 415
KZ750H Restoration
05 Jan 2020 14:19 - 05 Jan 2020 15:58
I've been putting this off for a while, but I'm finally getting around to documenting my progress over the last 8 months.
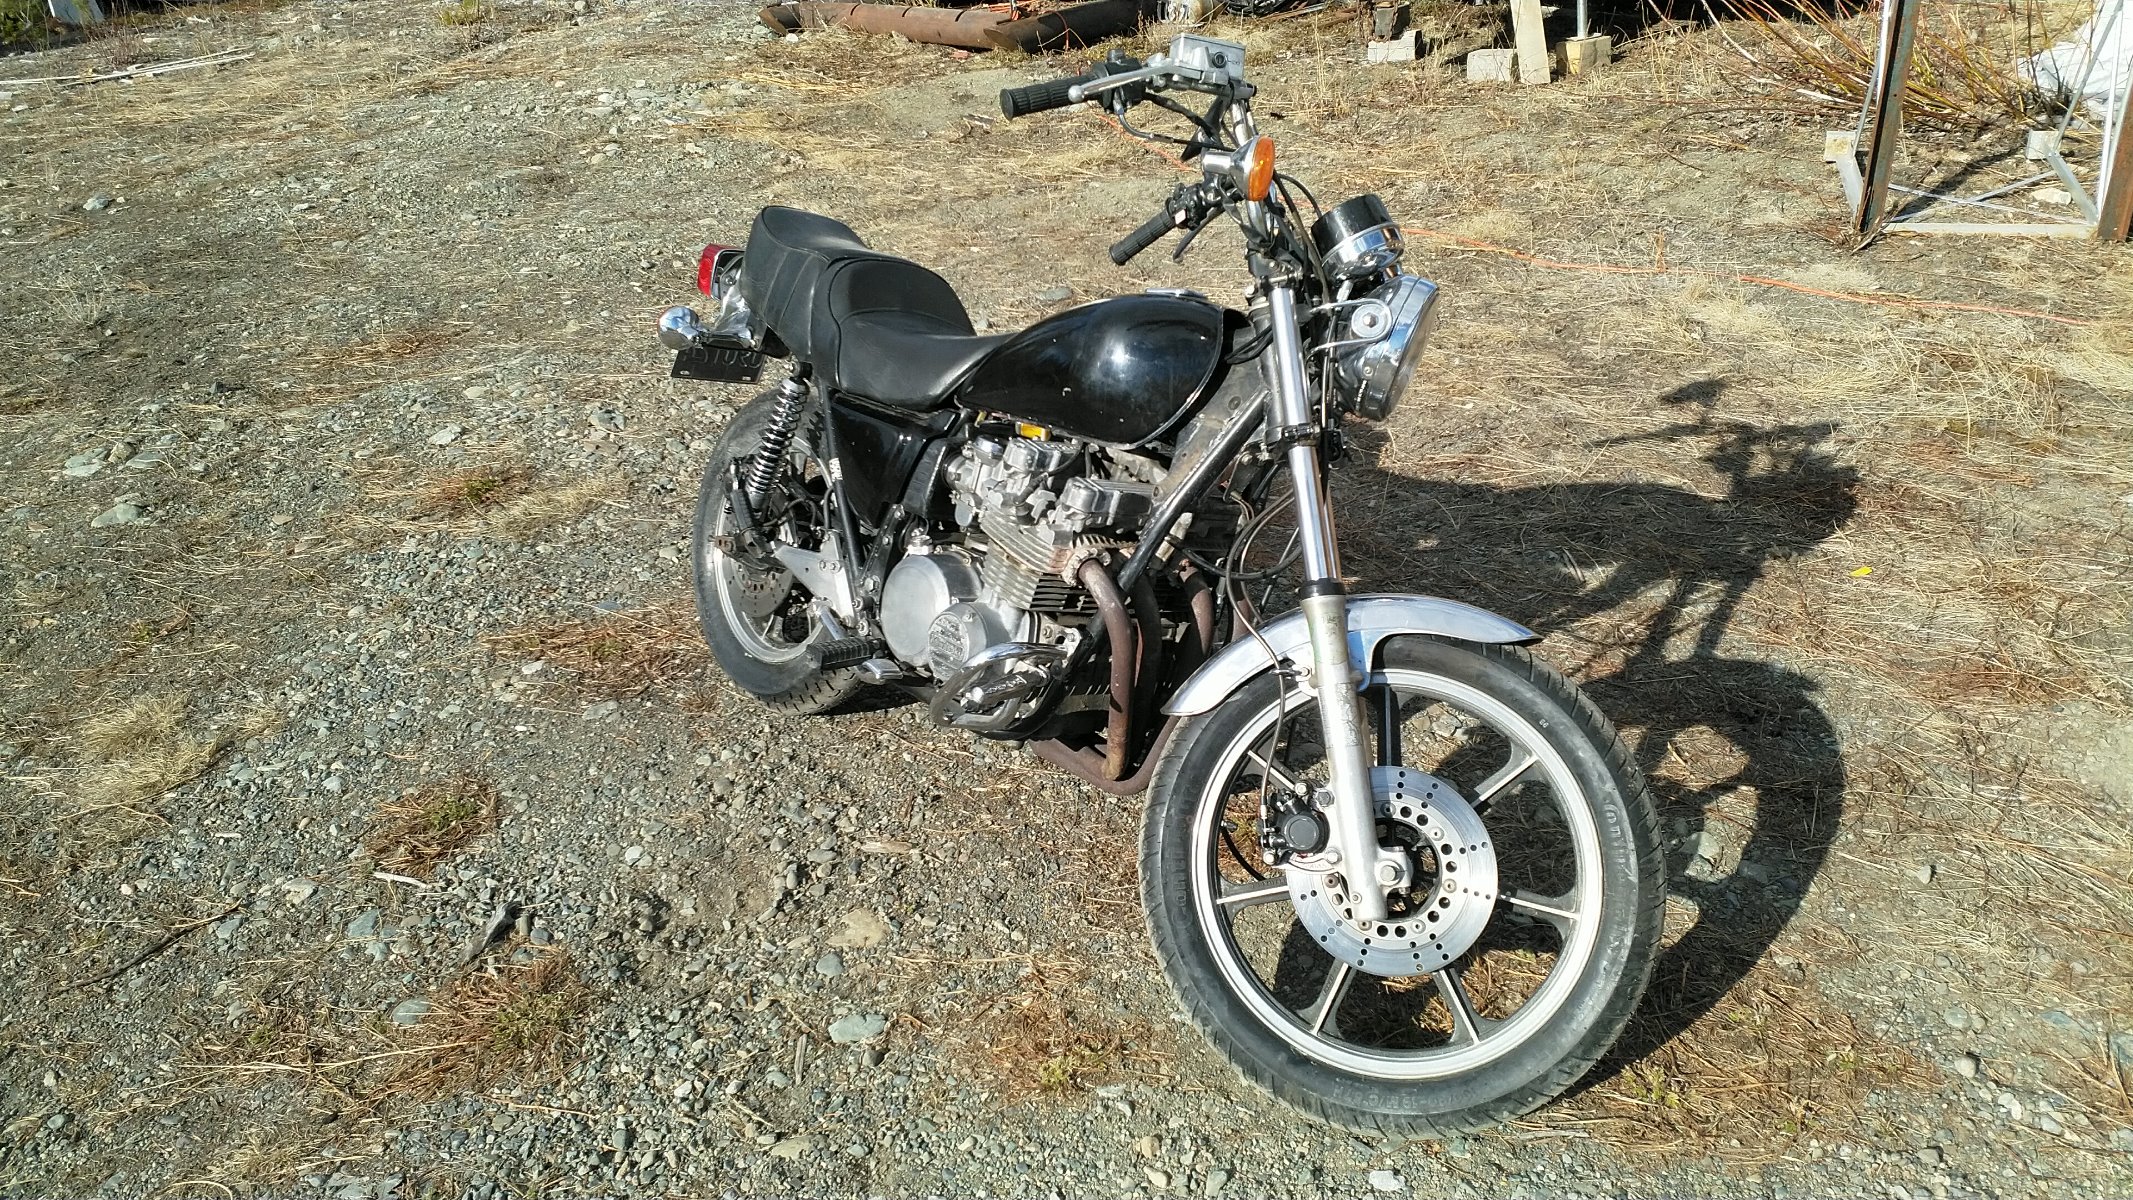
First off, a bit of background info: I went over to Canada last year to visit the old man and spent a lot of time staring at the old KZ750 he had collecting rust in the shed. We made a deal that I could have the bike and he would pay for freight, all I had to do was take care of customs and "make it look like a new bike". No worries!? It also had to be as close to original as possible, so no chopping tails off!
This is my first restoration job and my goal is to get the bike looking as good as I can without going crazy (for example, I didn't go crazy when polishing the engine covers as I can always go back to them) and to have the bike running well. I don't want to optimise anything or eek out every last bit of power out of it. Stock jets and stock airbox and just making sure everything is in spec. I figured that there would still be enough to do")
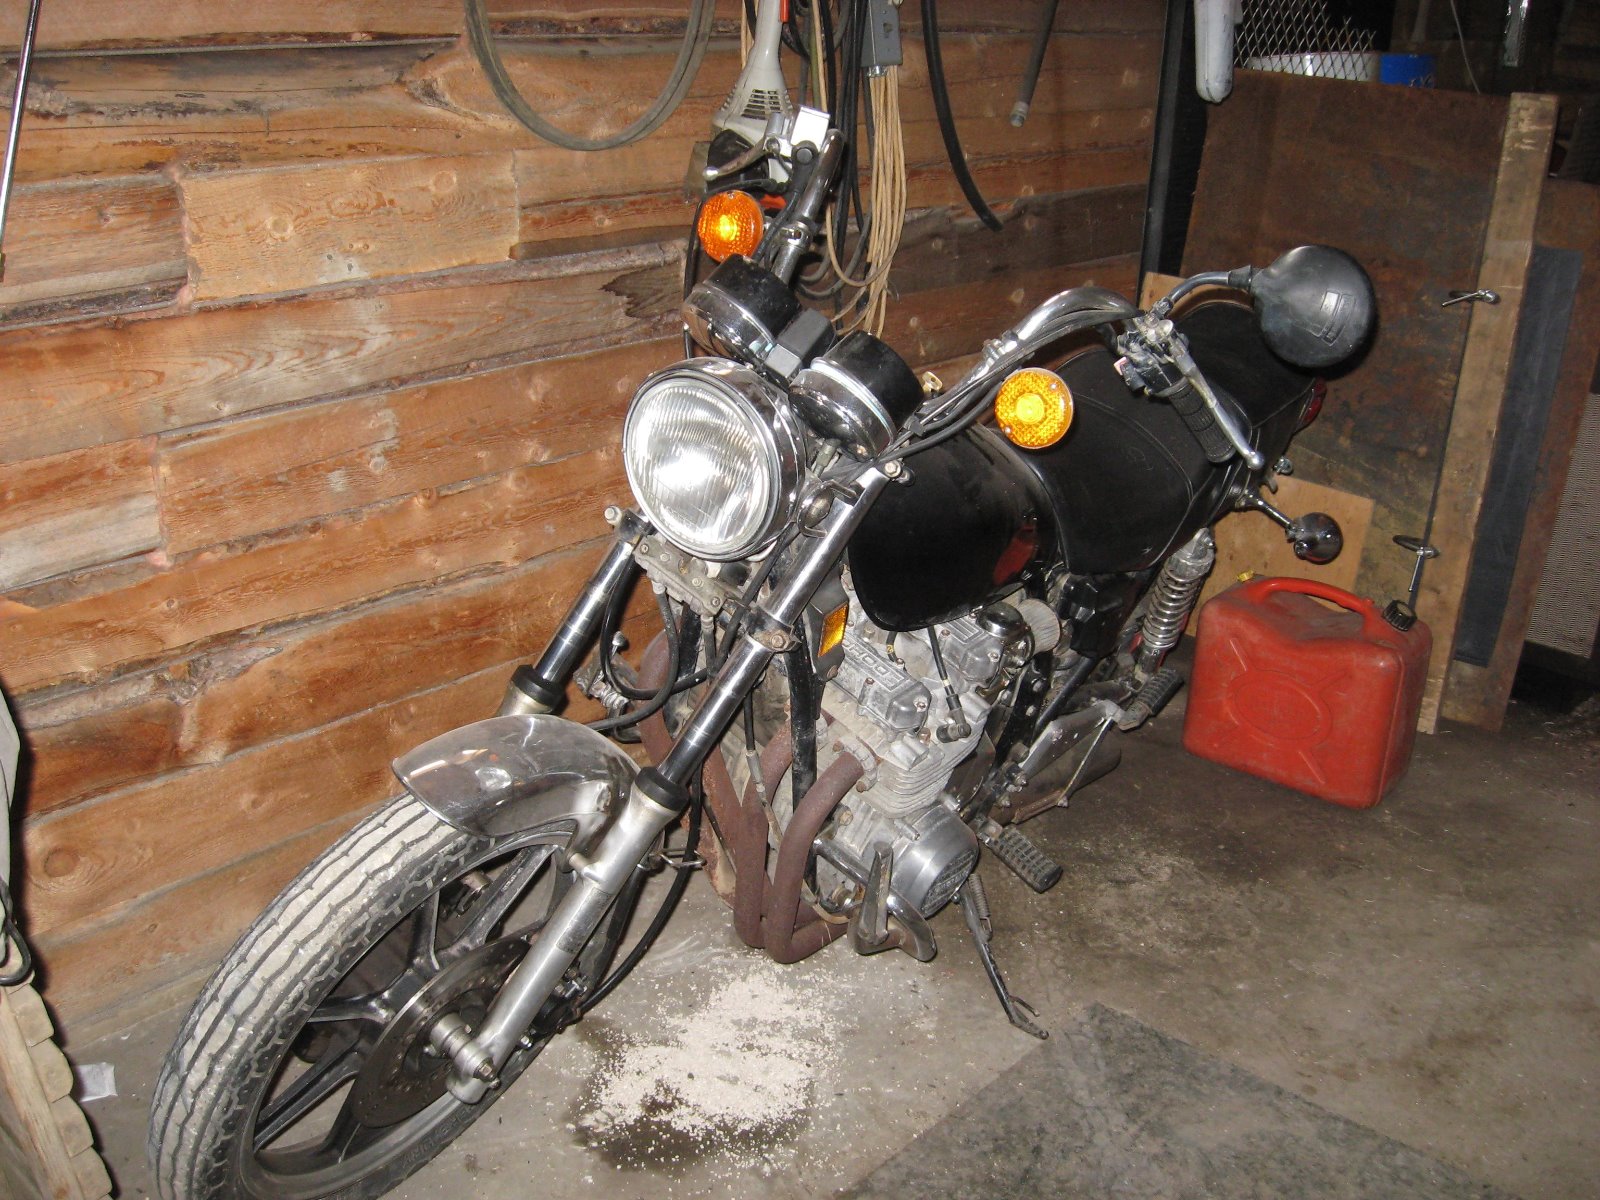
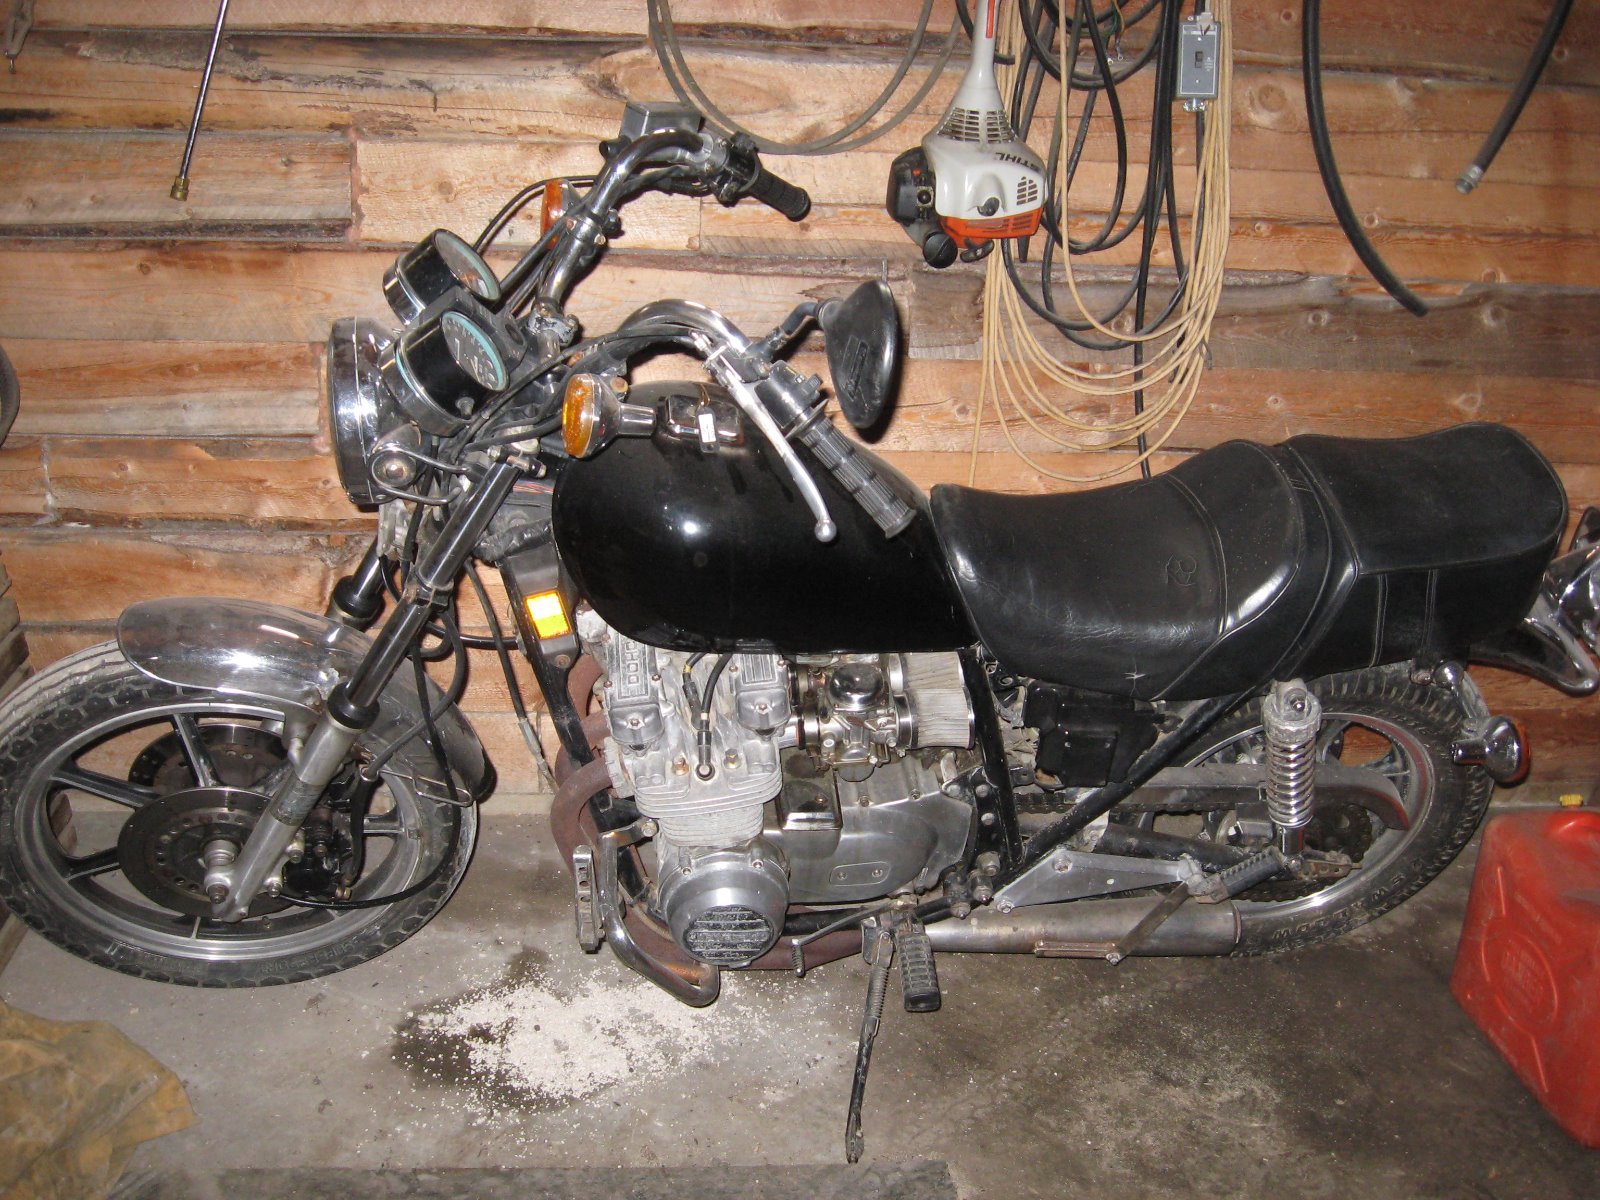
Here was the state of things back in February:
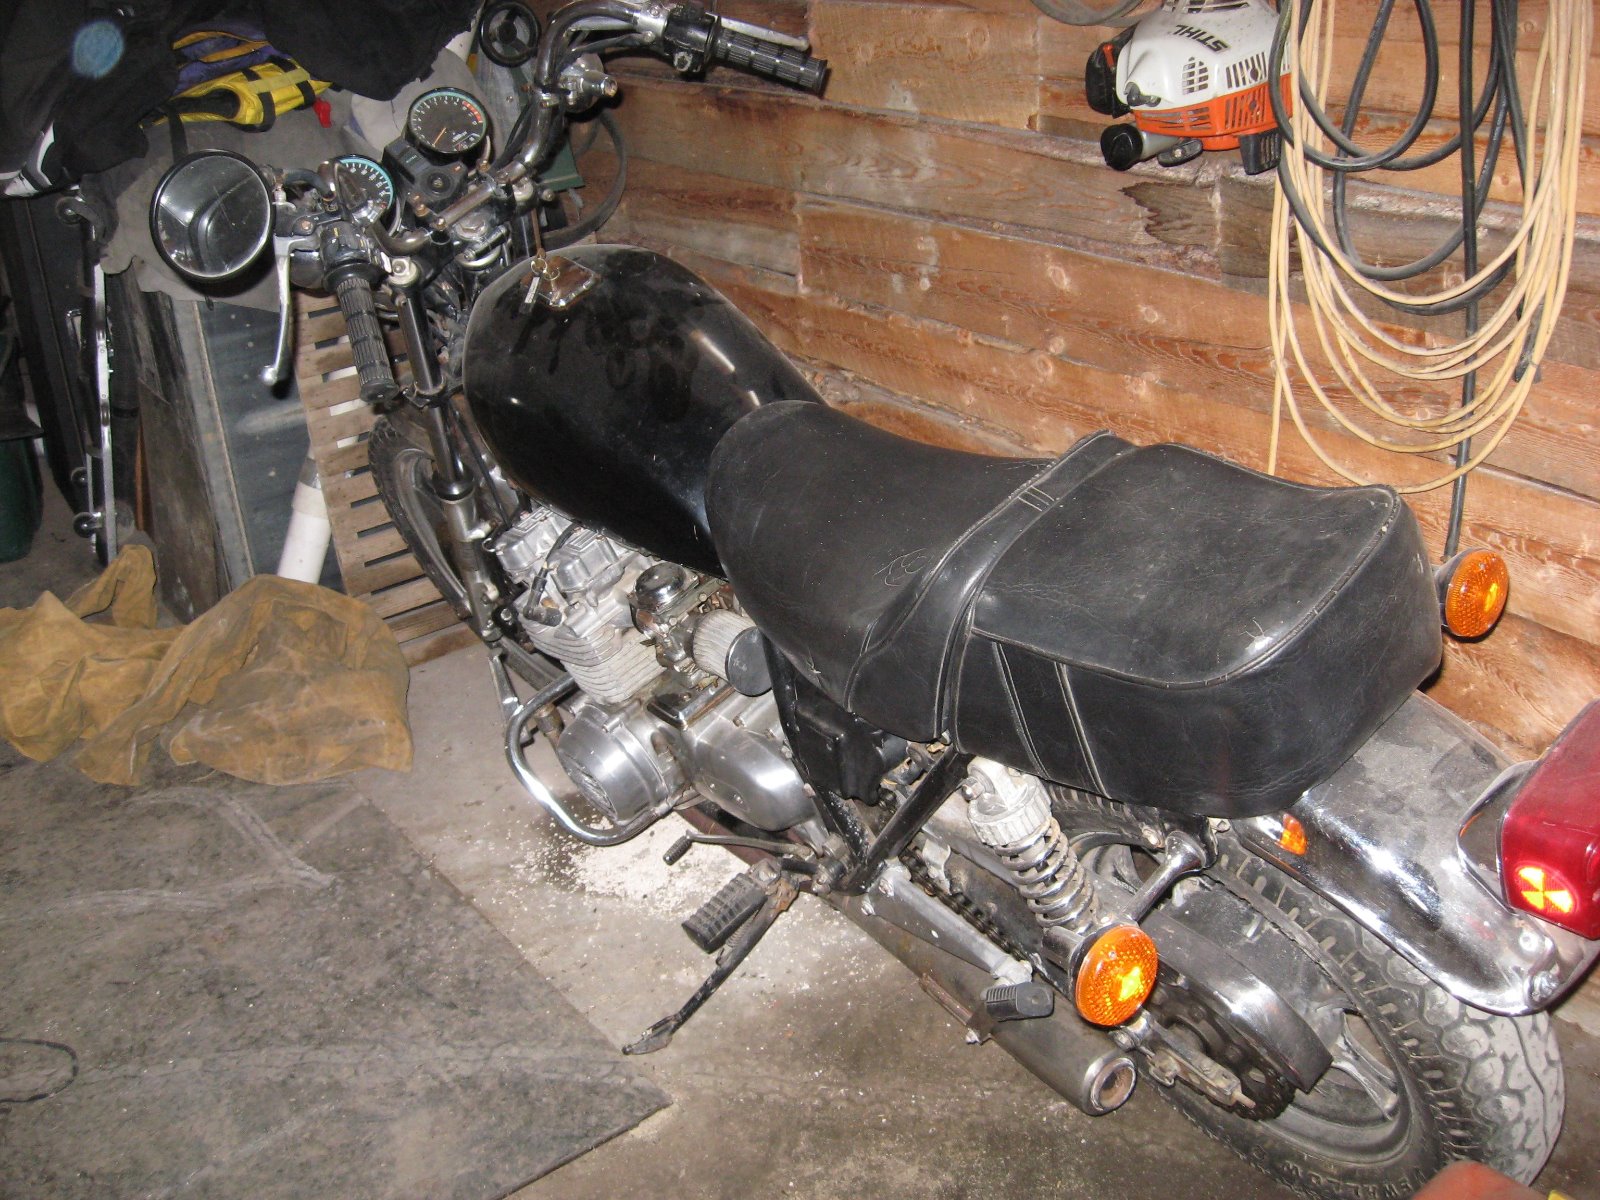
First off, a bit of background info: I went over to Canada last year to visit the old man and spent a lot of time staring at the old KZ750 he had collecting rust in the shed. We made a deal that I could have the bike and he would pay for freight, all I had to do was take care of customs and "make it look like a new bike". No worries!? It also had to be as close to original as possible, so no chopping tails off!
This is my first restoration job and my goal is to get the bike looking as good as I can without going crazy (for example, I didn't go crazy when polishing the engine covers as I can always go back to them) and to have the bike running well. I don't want to optimise anything or eek out every last bit of power out of it. Stock jets and stock airbox and just making sure everything is in spec. I figured that there would still be enough to do
Here was the state of things back in February:
KZ1000 Restomod (
www.kzrider.com/forum/11-projects/614517-1977-kz1000-restomod
)
1977 KZ1000A1 ( www.kzrider.com/forum/11-projects/616901...-spare-parts-project )
1980 KZ750H ( kzrider.com/forum/11-projects/612054-kz750h-restoration )
2000 BMW F650GS
1977 KZ1000A1 ( www.kzrider.com/forum/11-projects/616901...-spare-parts-project )
1980 KZ750H ( kzrider.com/forum/11-projects/612054-kz750h-restoration )
2000 BMW F650GS
Last edit: 05 Jan 2020 15:58 by calum.
Please Log in or Create an account to join the conversation.
- calum
-
Topic Author
- Offline
- User
-
Registered
- Posts: 1144
- Thanks: 415
Re: KZ750H Restoration
05 Jan 2020 14:25 - 05 Jan 2020 16:00
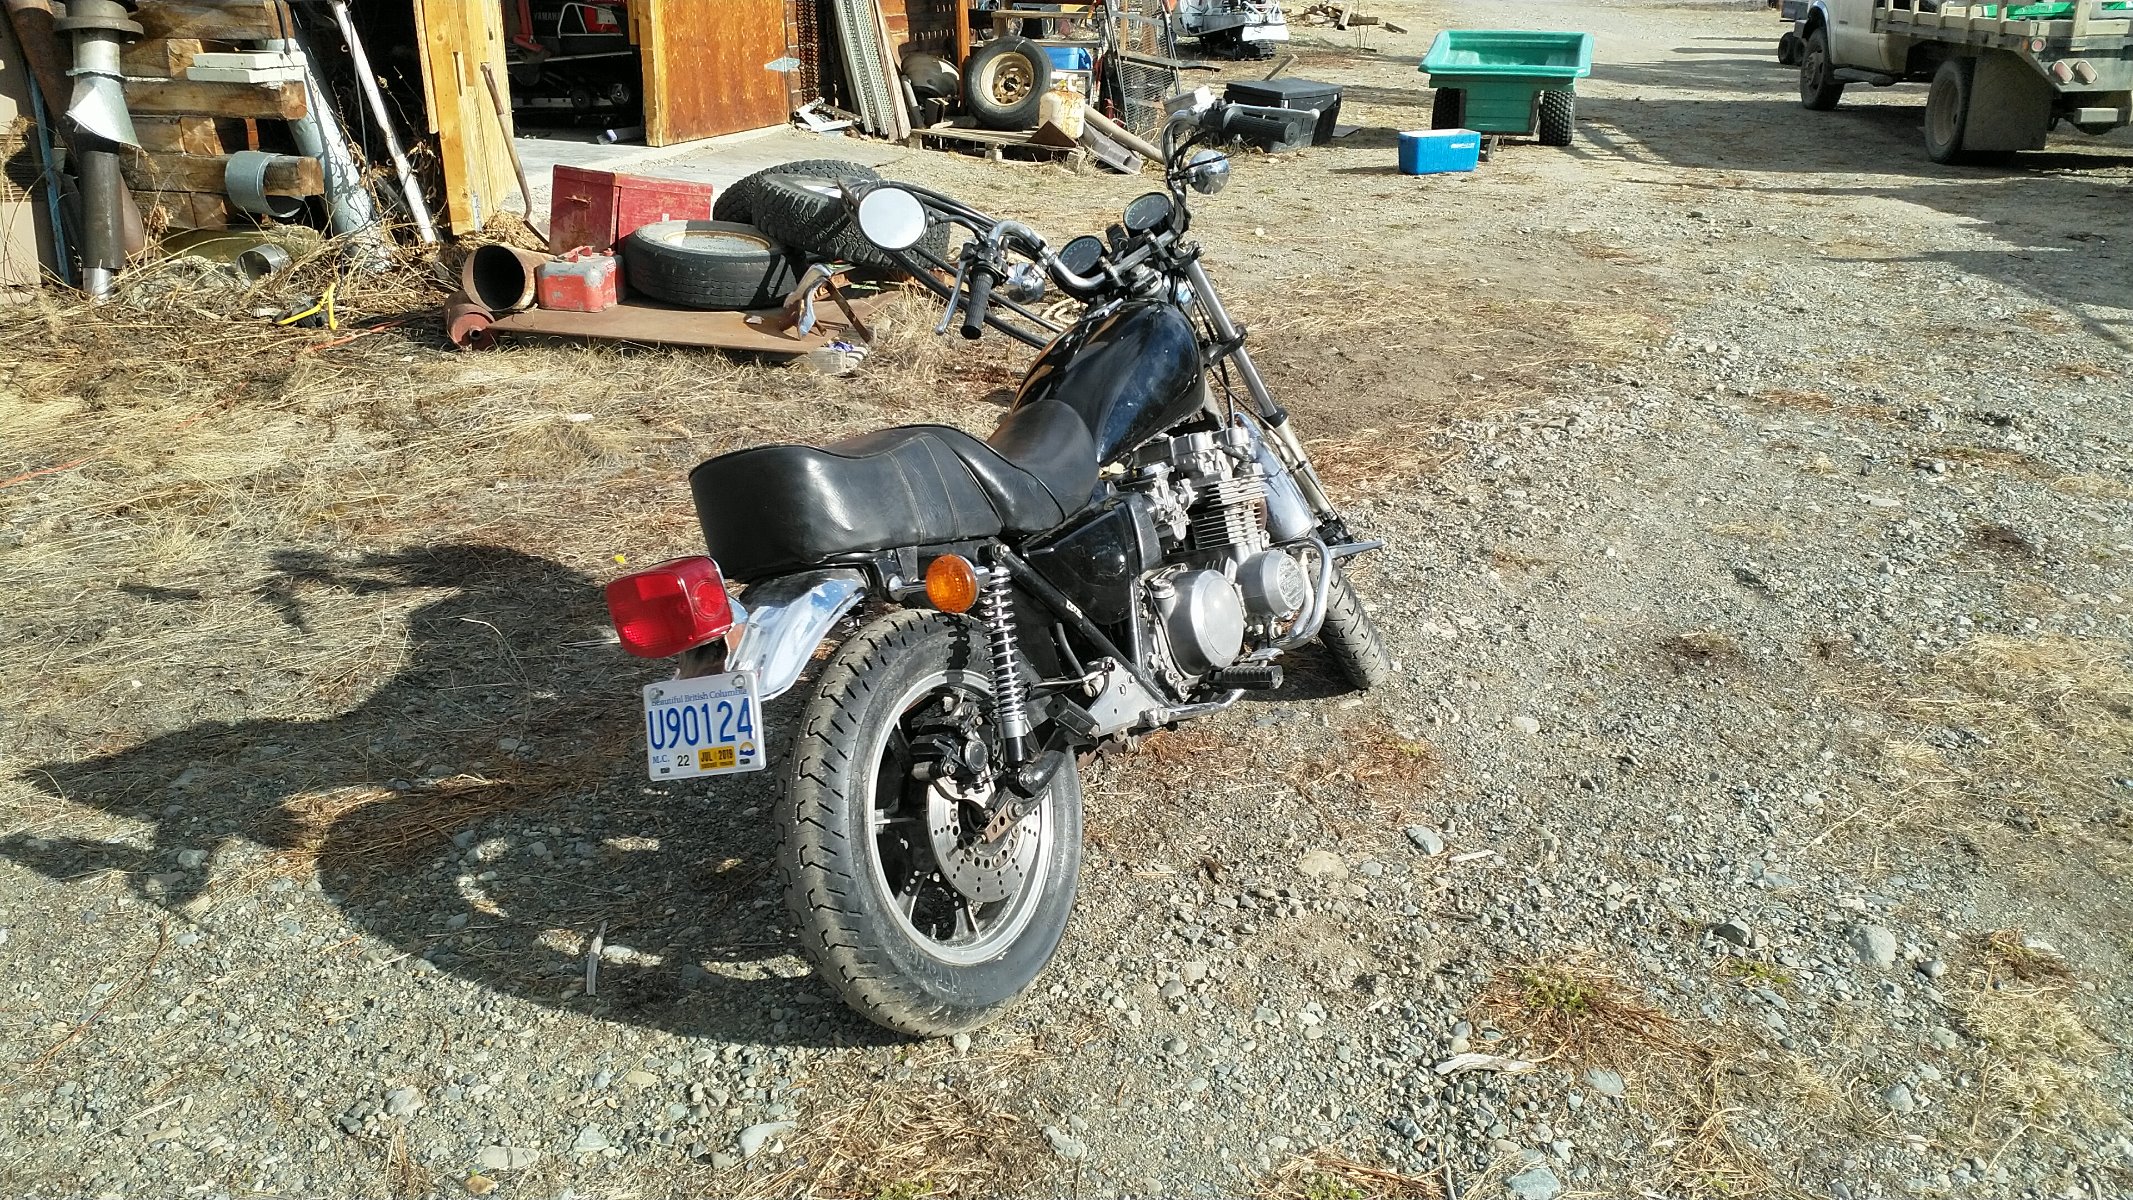
I went back to Canada over Easter and got the bike "roadworthy" for the trip back. Thankfully Canada doesn't have anything like an WOF or MOT so it didn't matter that I had no first gear or rea brakes and second gear only went in when the bike was rolling. It was an interesting (and pretty slow) 800 km down to Vancouver and back home from Frankfurt. One of the idle jets was blocked as well so it idled like a pig but it ran well on the highway.
KZ1000 Restomod (
www.kzrider.com/forum/11-projects/614517-1977-kz1000-restomod
)
1977 KZ1000A1 ( www.kzrider.com/forum/11-projects/616901...-spare-parts-project )
1980 KZ750H ( kzrider.com/forum/11-projects/612054-kz750h-restoration )
2000 BMW F650GS
1977 KZ1000A1 ( www.kzrider.com/forum/11-projects/616901...-spare-parts-project )
1980 KZ750H ( kzrider.com/forum/11-projects/612054-kz750h-restoration )
2000 BMW F650GS
Last edit: 05 Jan 2020 16:00 by calum. Reason: Fixing picture layout
Please Log in or Create an account to join the conversation.
- calum
-
Topic Author
- Offline
- User
-
Registered
- Posts: 1144
- Thanks: 415
Re: KZ750H Restoration
05 Jan 2020 14:39 - 06 Jan 2020 04:55
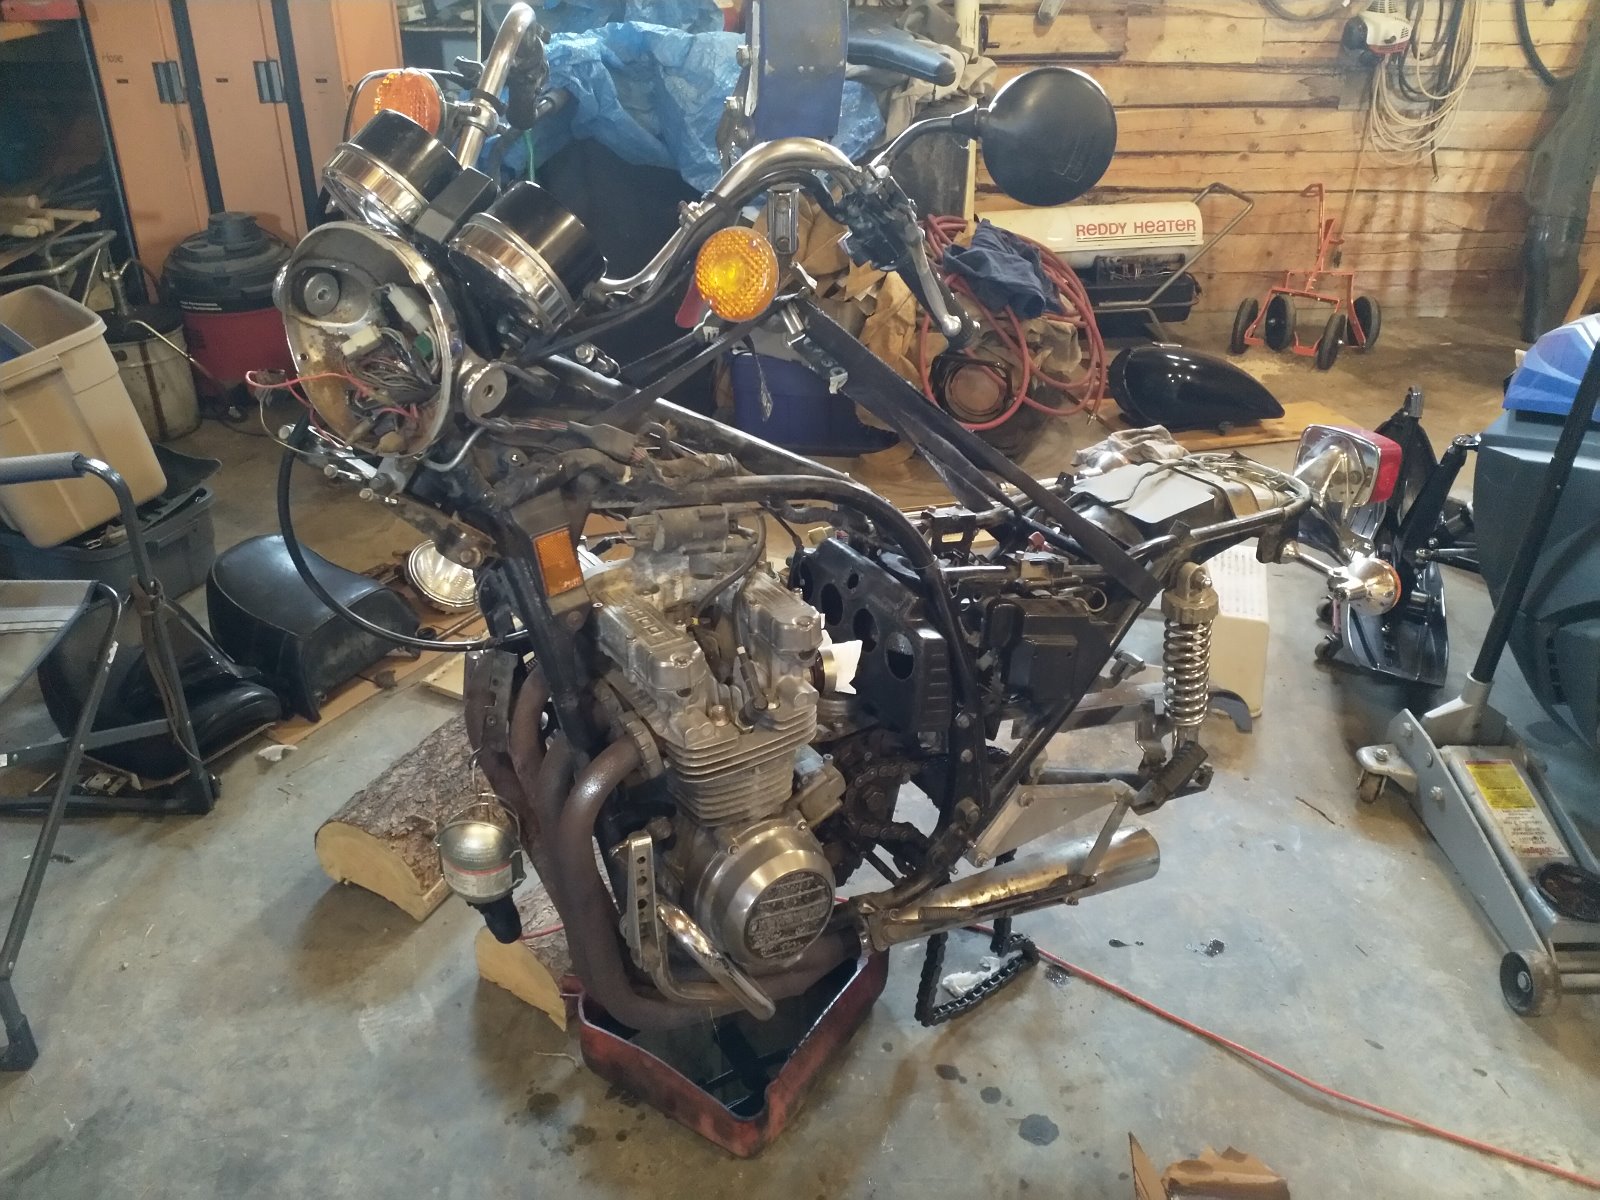
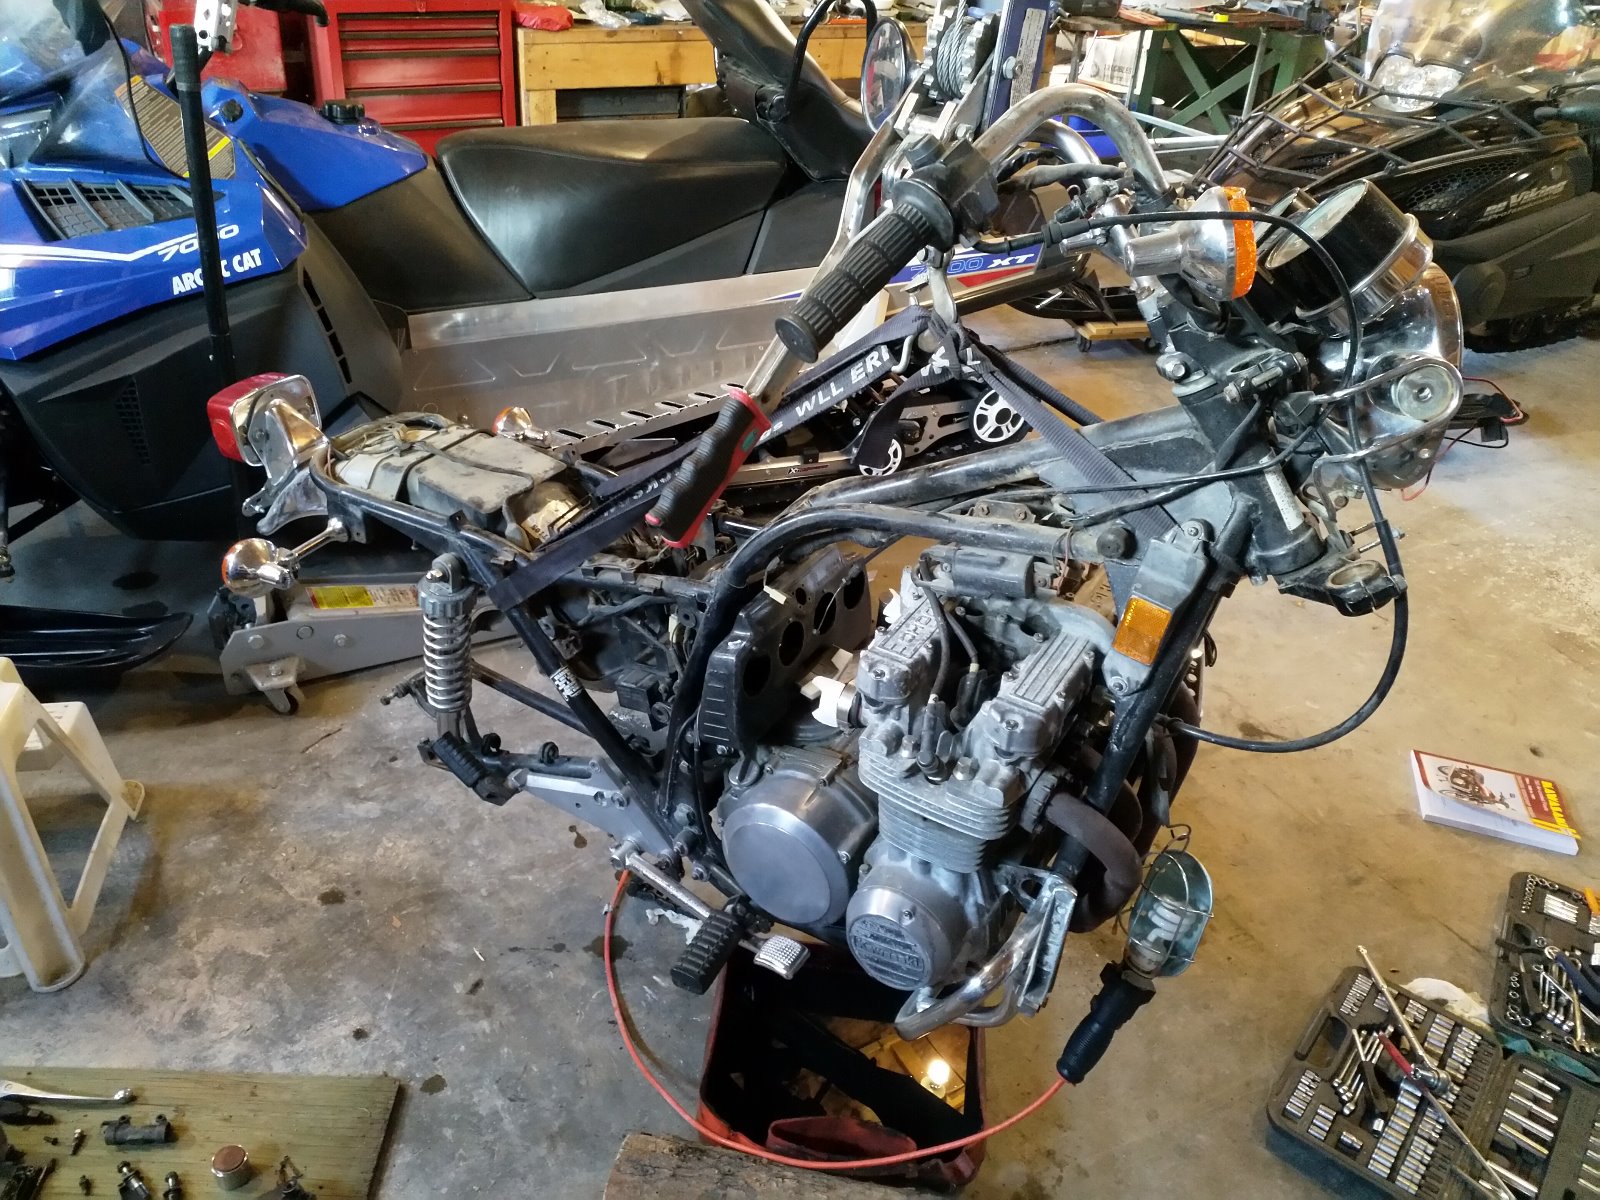
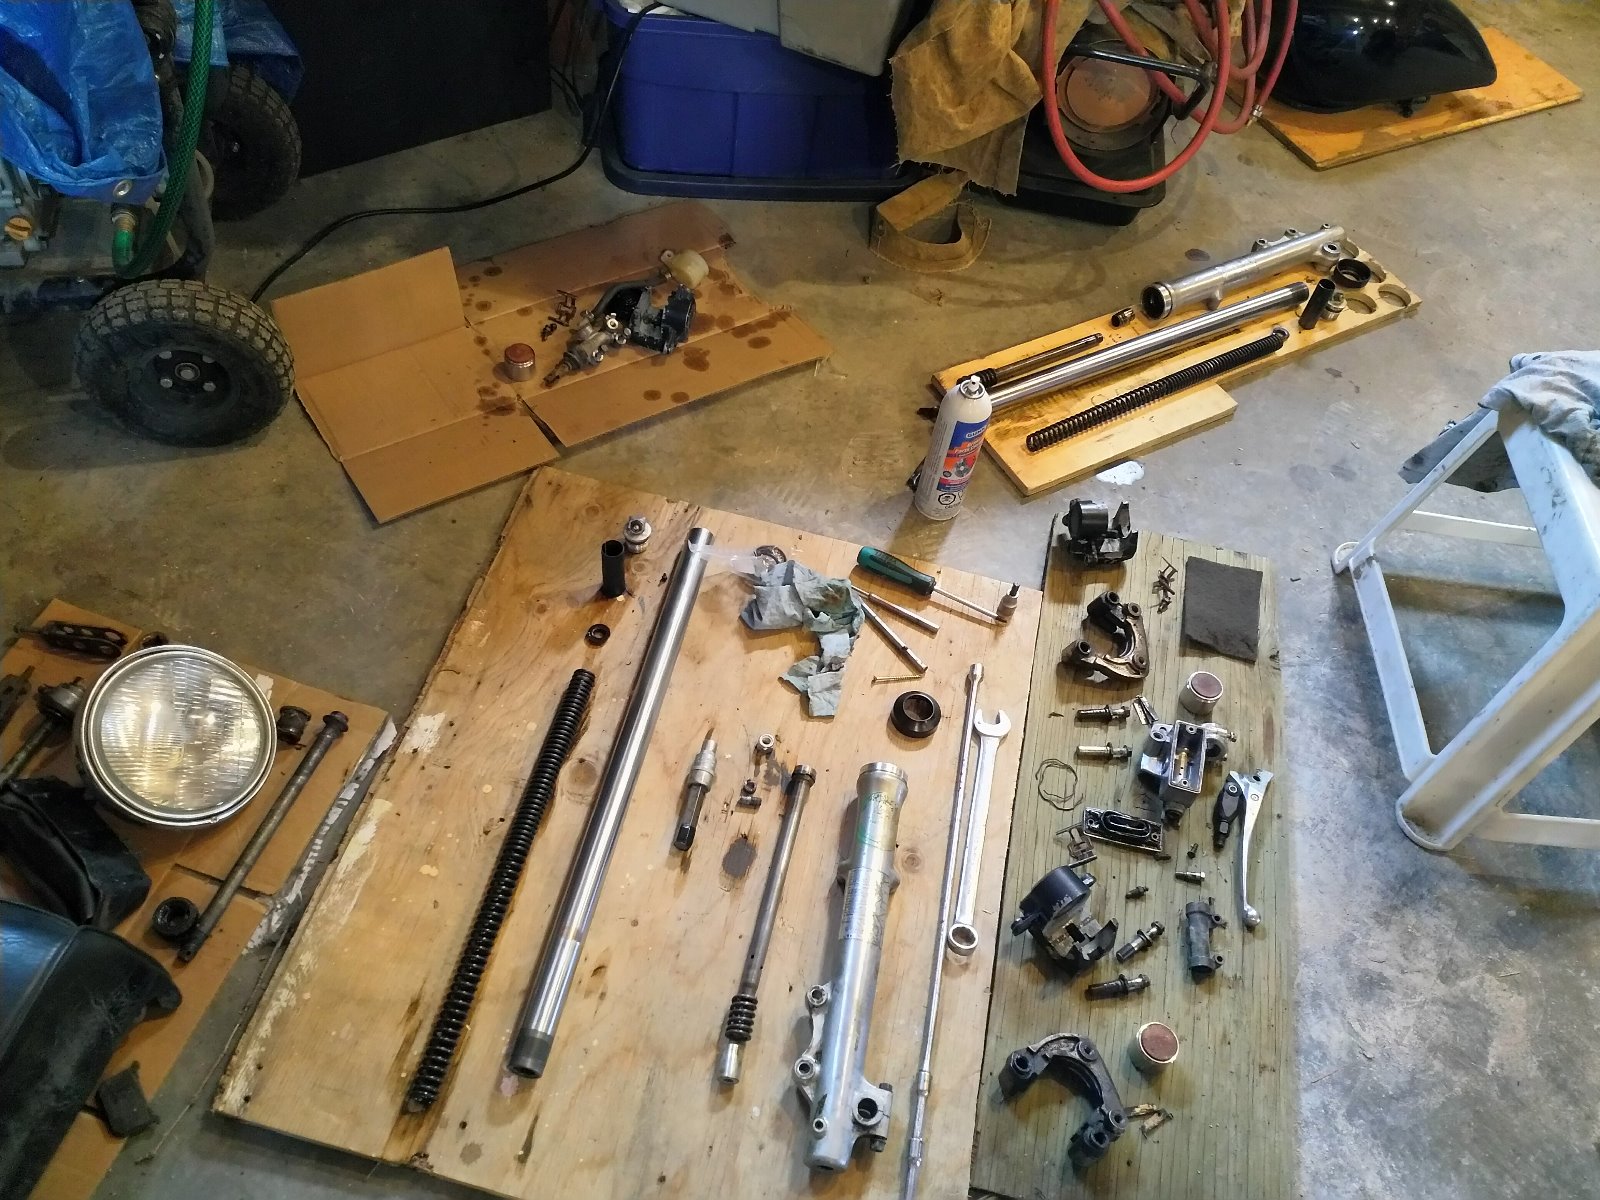
Once I got the bike back to Germany in May I stripped it down and started blasting. I got most of the parts in my blasting cabinet but took the frame, wheels and tank to a local guy. The tank had been in the wars and needed some repair work.
By the time I got to the engine I couldn't deal with any more blasting and just bolted it all together and got it blasted by the same guy that did the frame etc. I thought I'd sealed up the engine well, but I guess he used a bit more pressure than I was using so I got to spend an age cleaning busted up glass beads out of everything

Look what I found in the cooling fins on the head! Was a bitch to drill out - must have been granite or something similar.
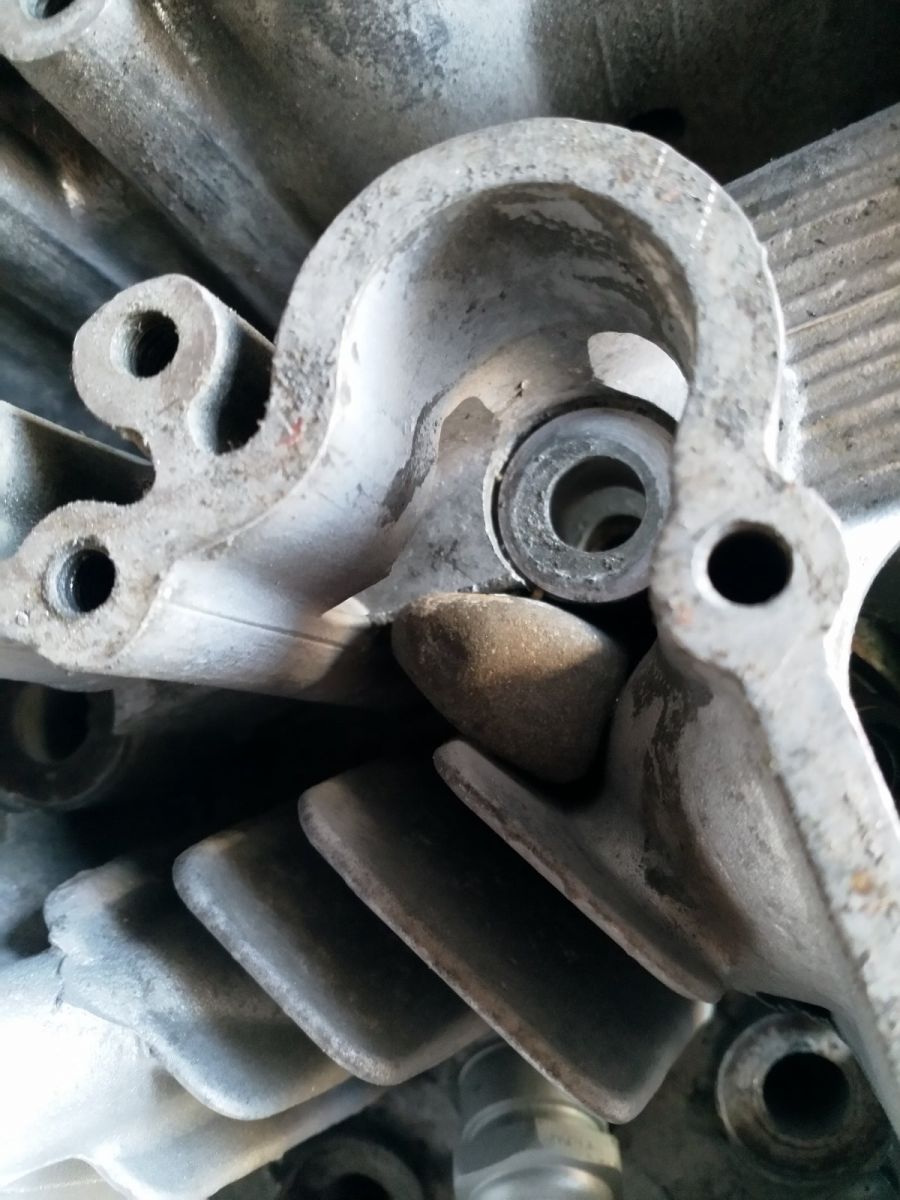
By the time I got to the engine I couldn't deal with any more blasting and just bolted it all together and got it blasted by the same guy that did the frame etc. I thought I'd sealed up the engine well, but I guess he used a bit more pressure than I was using so I got to spend an age cleaning busted up glass beads out of everything
Look what I found in the cooling fins on the head! Was a bitch to drill out - must have been granite or something similar.
KZ1000 Restomod (
www.kzrider.com/forum/11-projects/614517-1977-kz1000-restomod
)
1977 KZ1000A1 ( www.kzrider.com/forum/11-projects/616901...-spare-parts-project )
1980 KZ750H ( kzrider.com/forum/11-projects/612054-kz750h-restoration )
2000 BMW F650GS
1977 KZ1000A1 ( www.kzrider.com/forum/11-projects/616901...-spare-parts-project )
1980 KZ750H ( kzrider.com/forum/11-projects/612054-kz750h-restoration )
2000 BMW F650GS
Last edit: 06 Jan 2020 04:55 by calum. Reason: Added picture of stone in head
Please Log in or Create an account to join the conversation.
- calum
-
Topic Author
- Offline
- User
-
Registered
- Posts: 1144
- Thanks: 415
Re: KZ750H Restoration
05 Jan 2020 14:42 - 06 Jan 2020 04:22
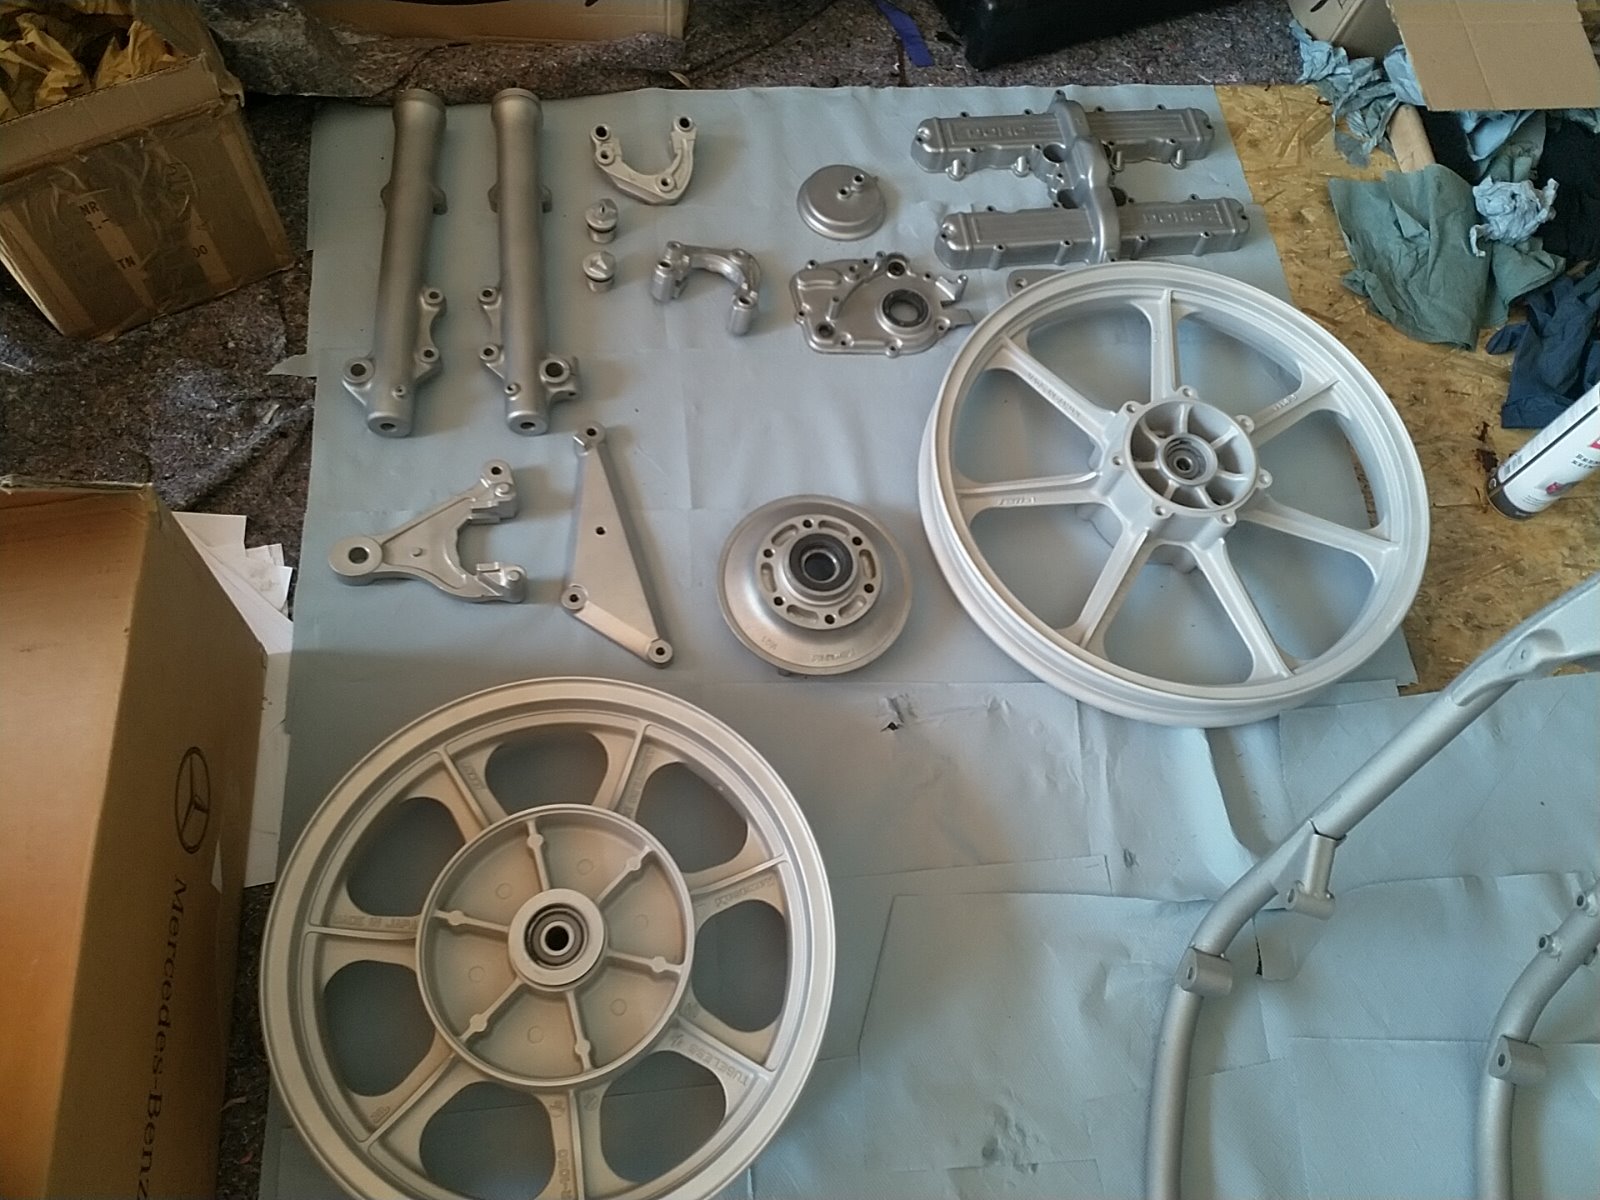
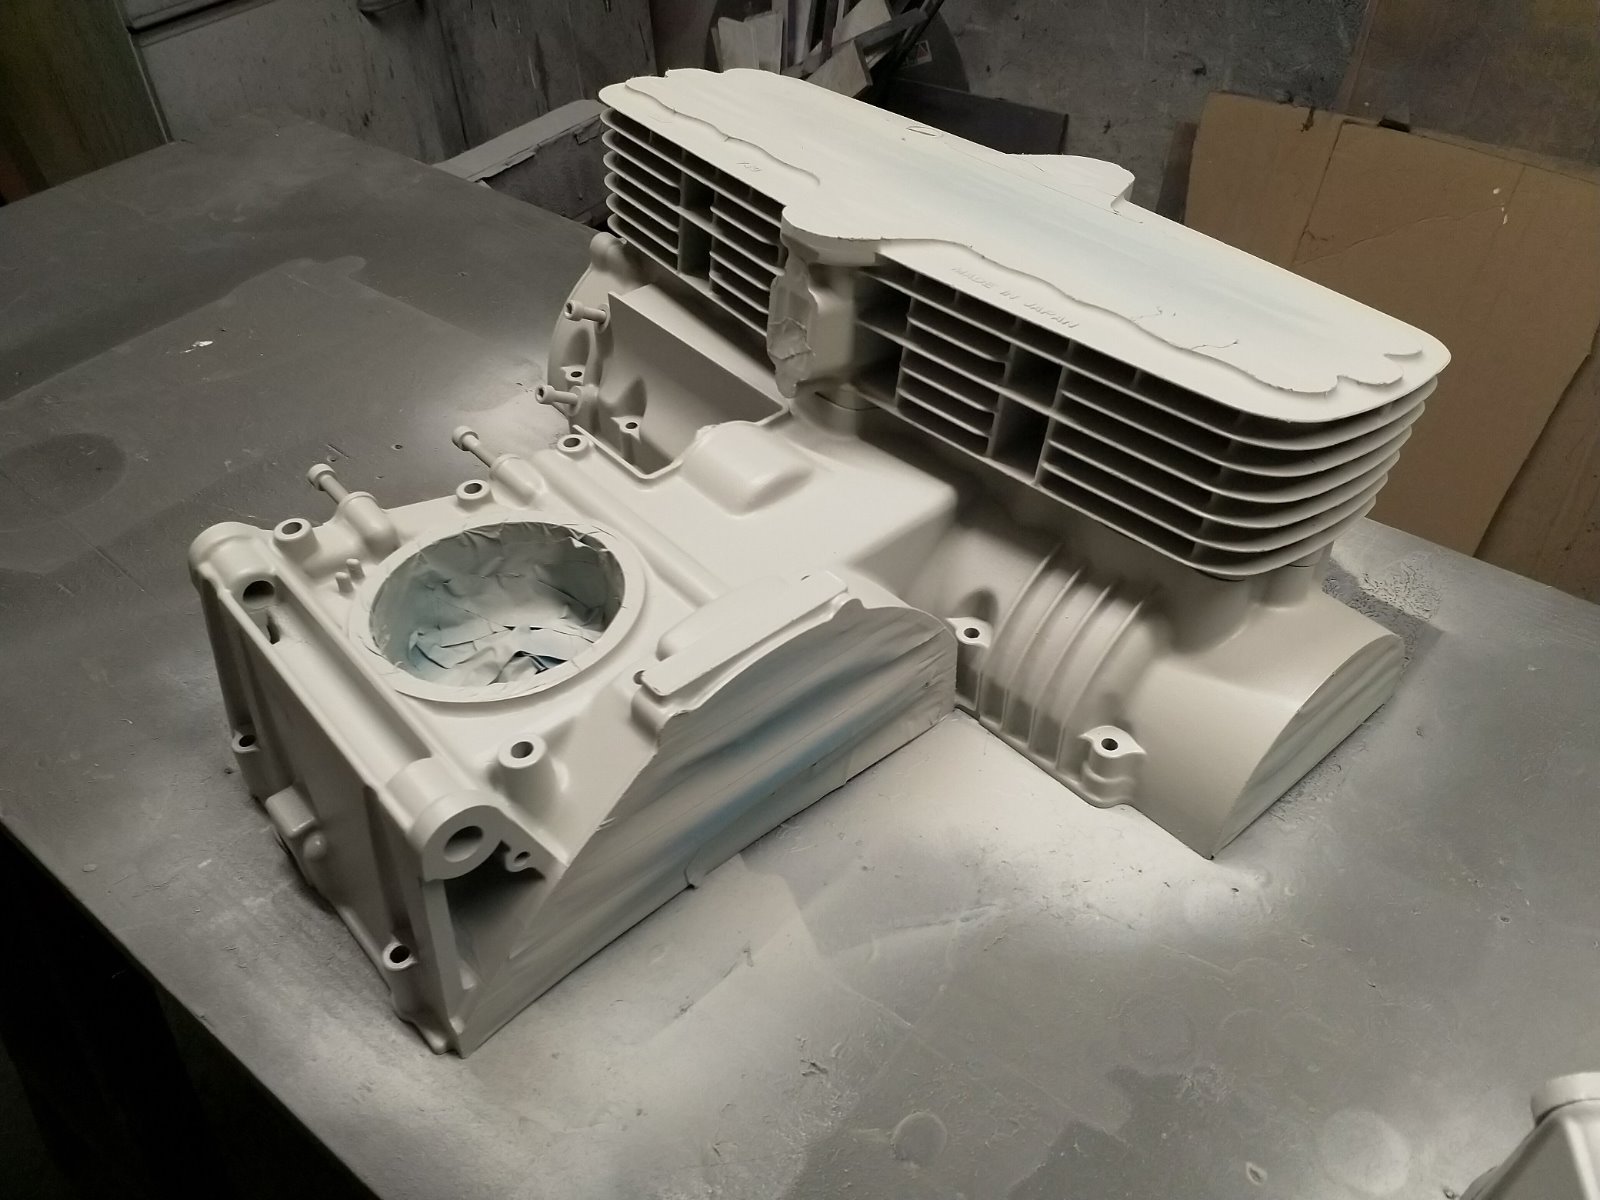
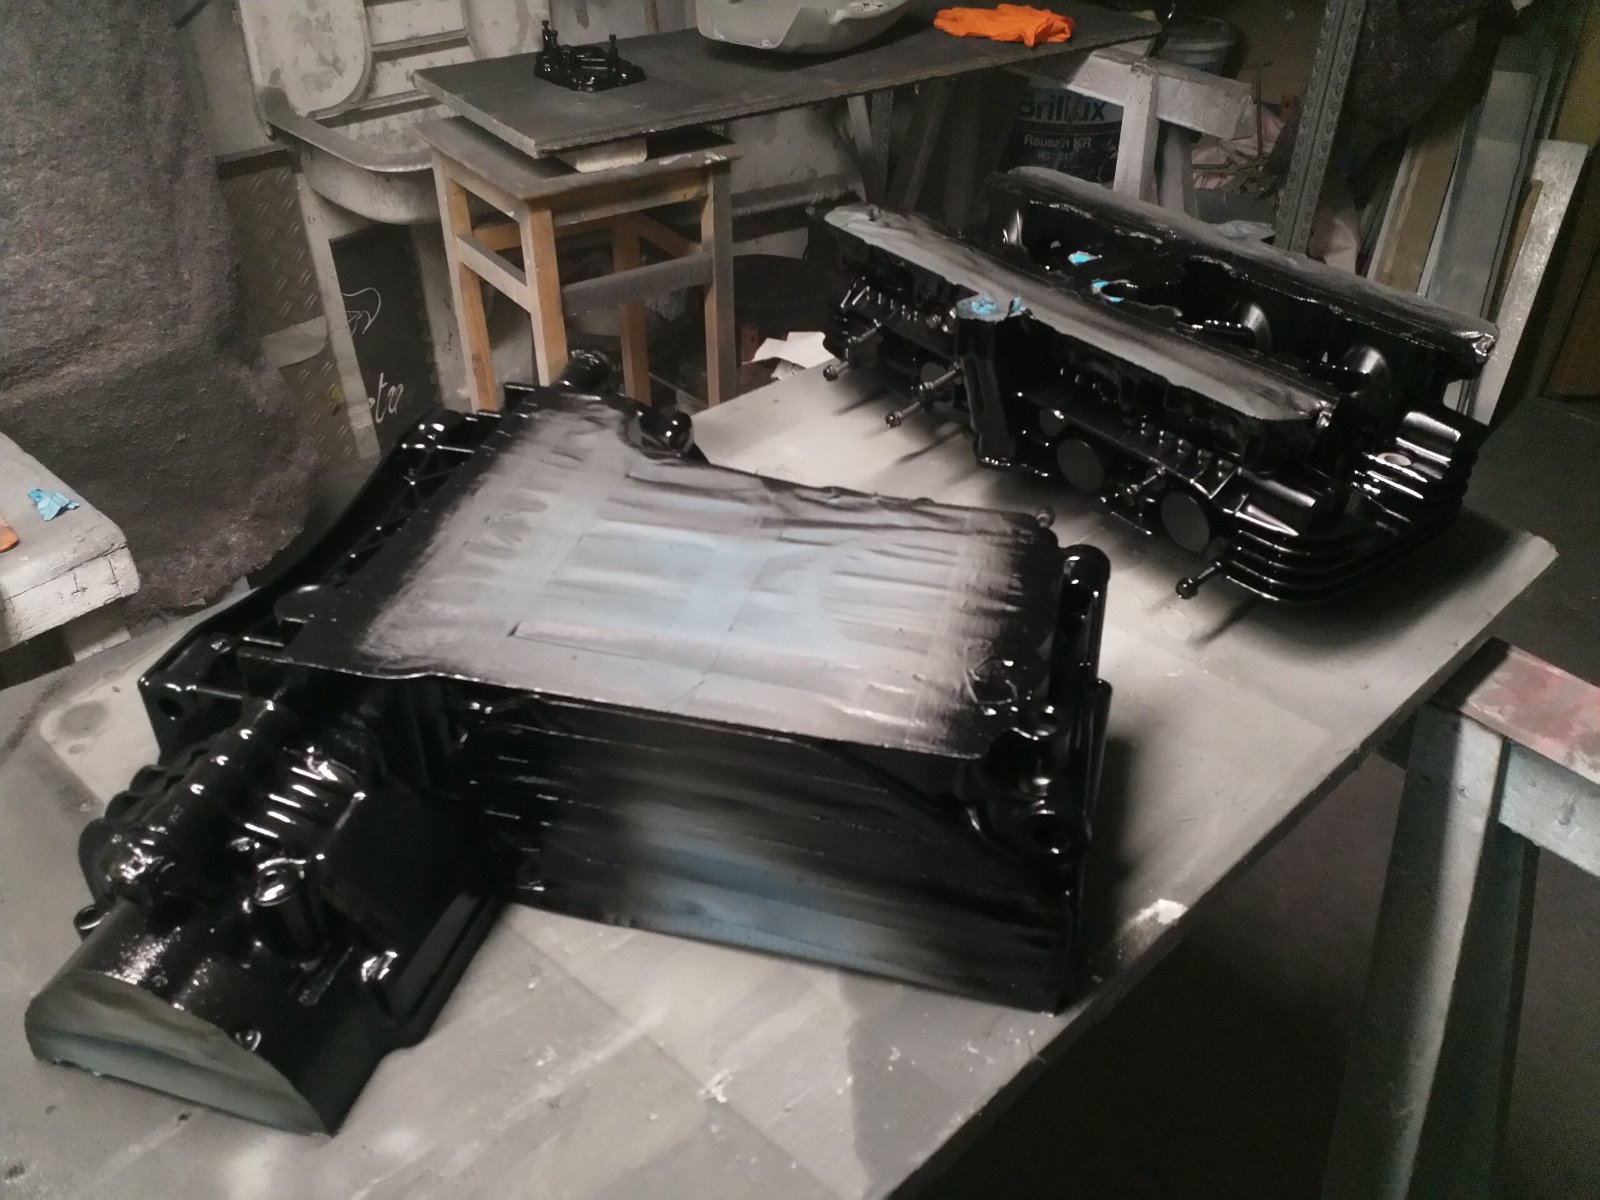
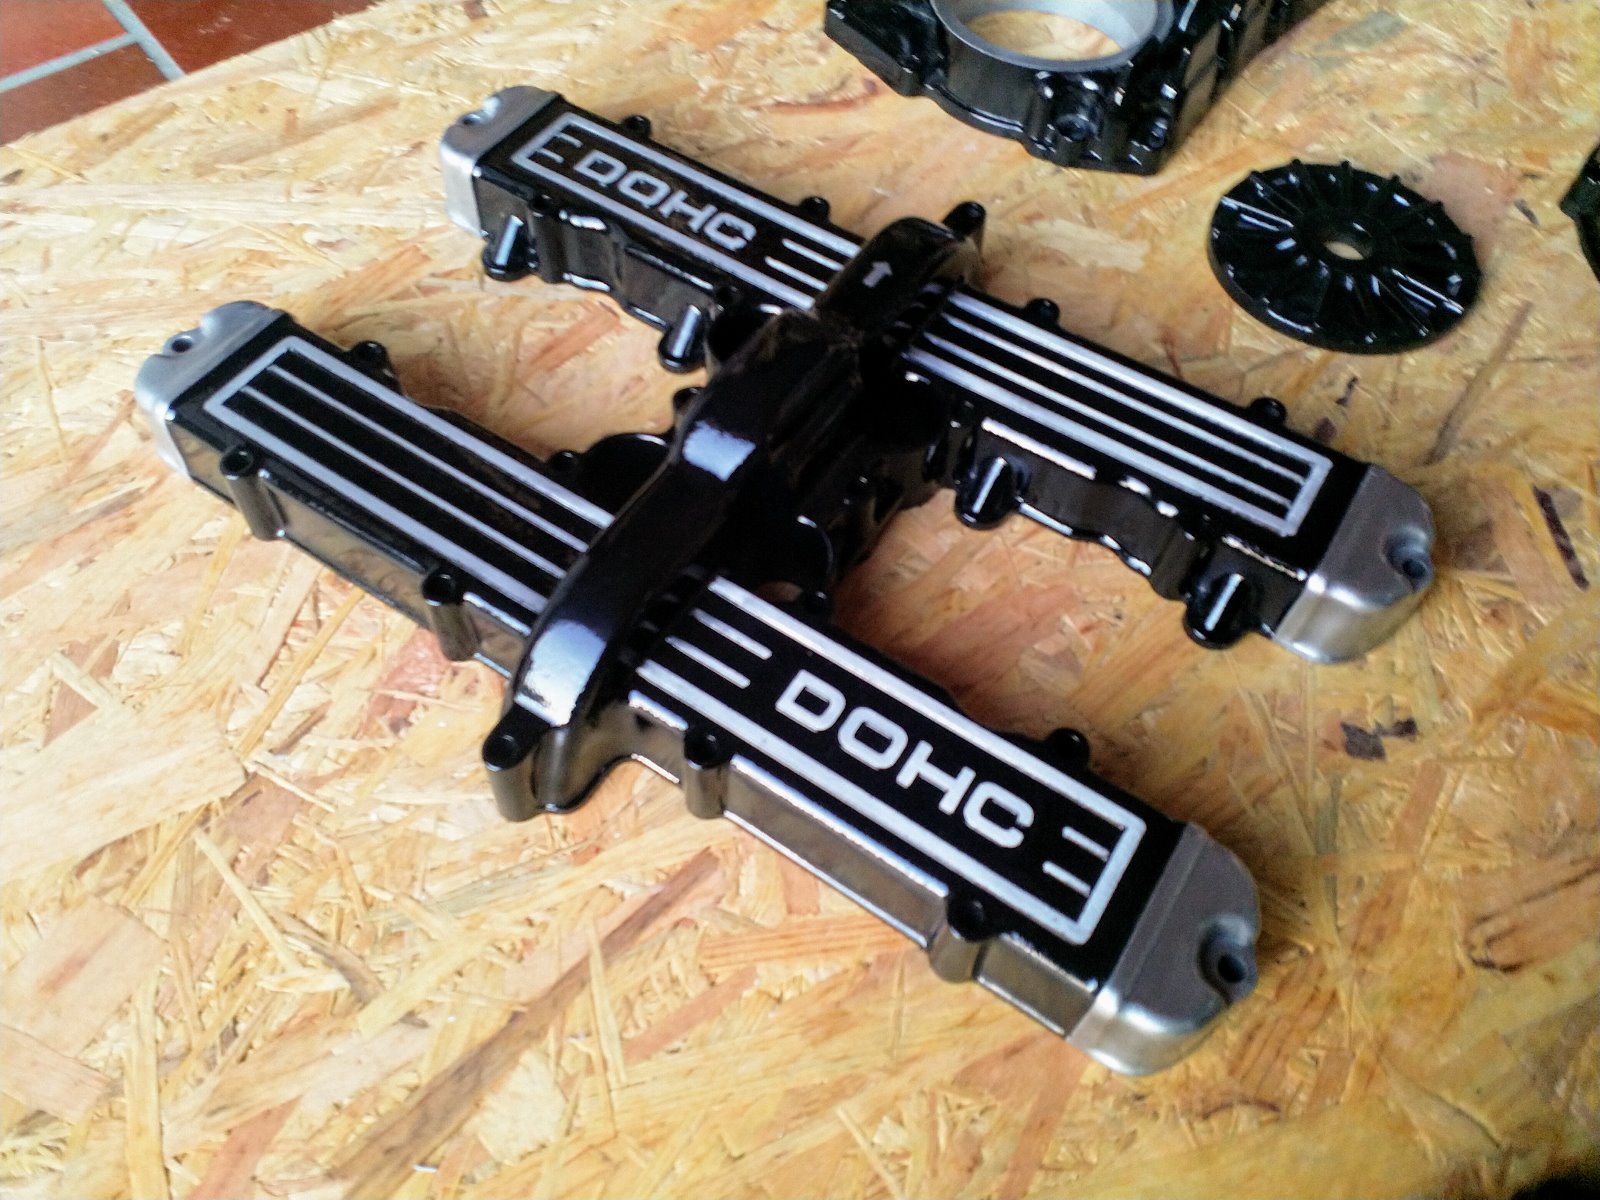
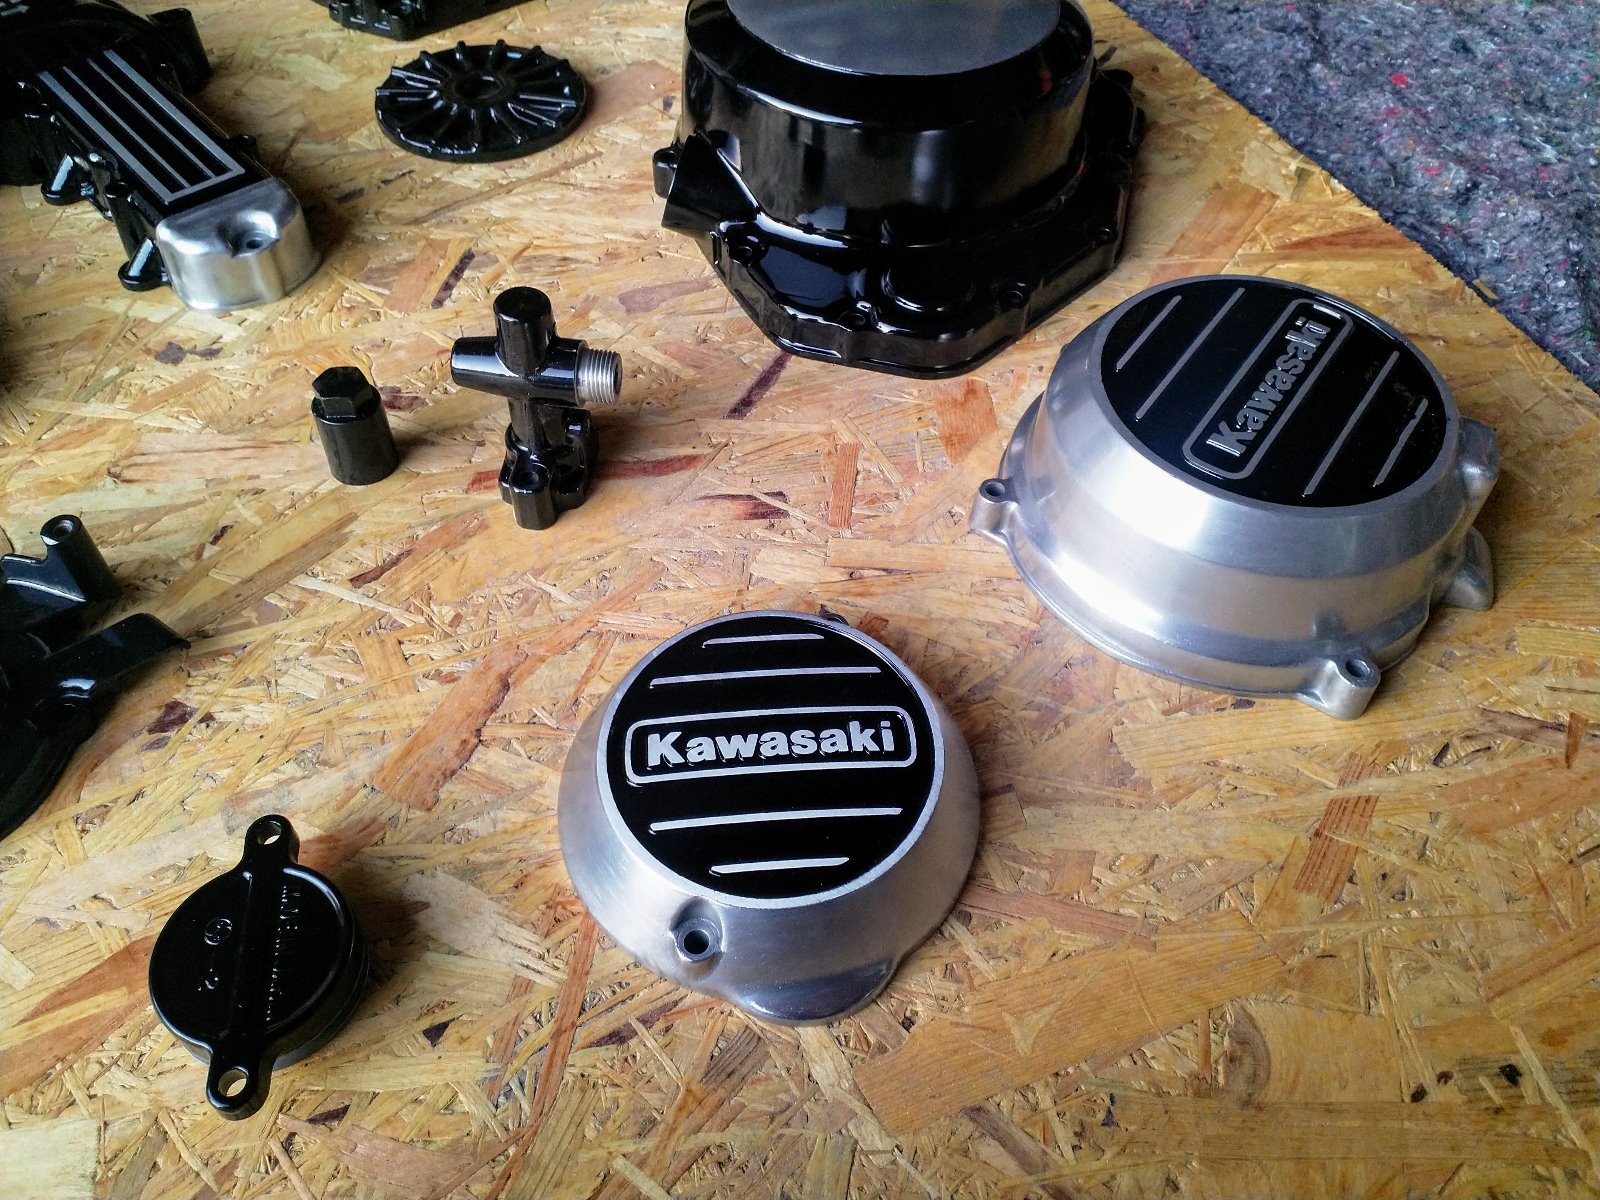
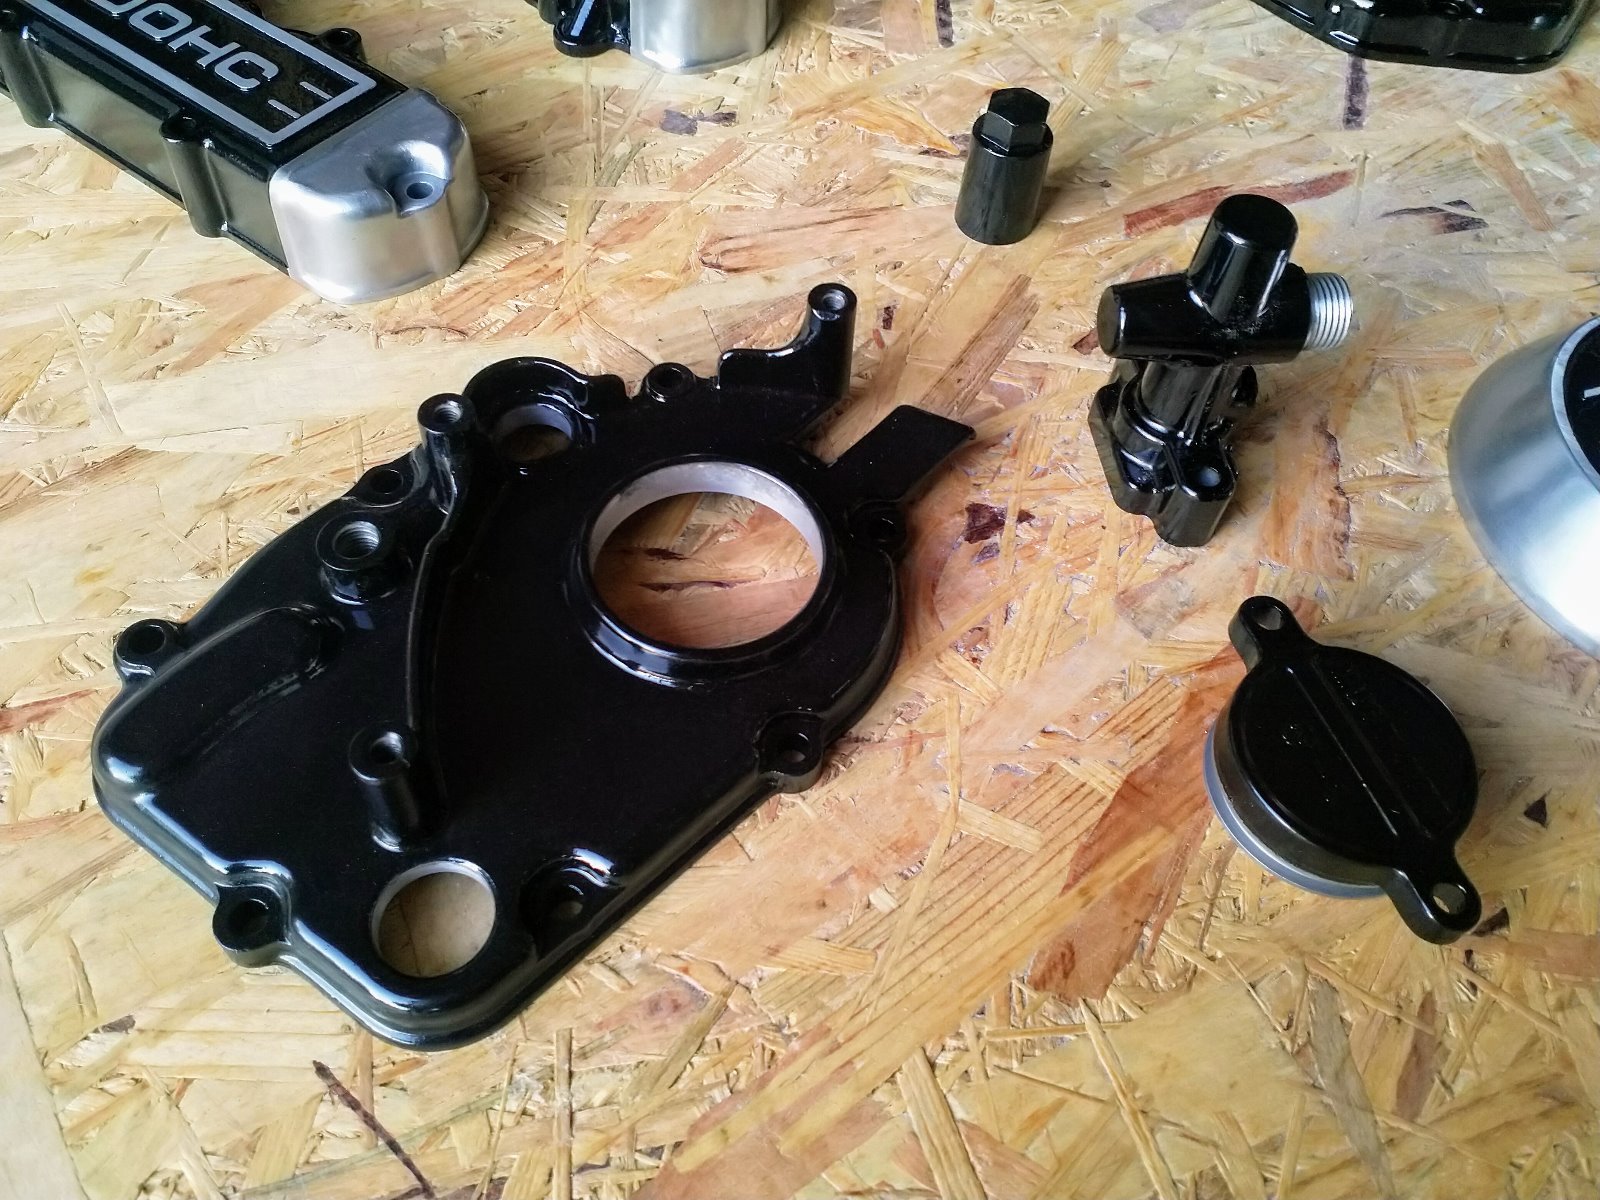
Let the spraying begin...
All the black parts were done with 2k epoxy primer, 2k base coat and a 2k satin clear.
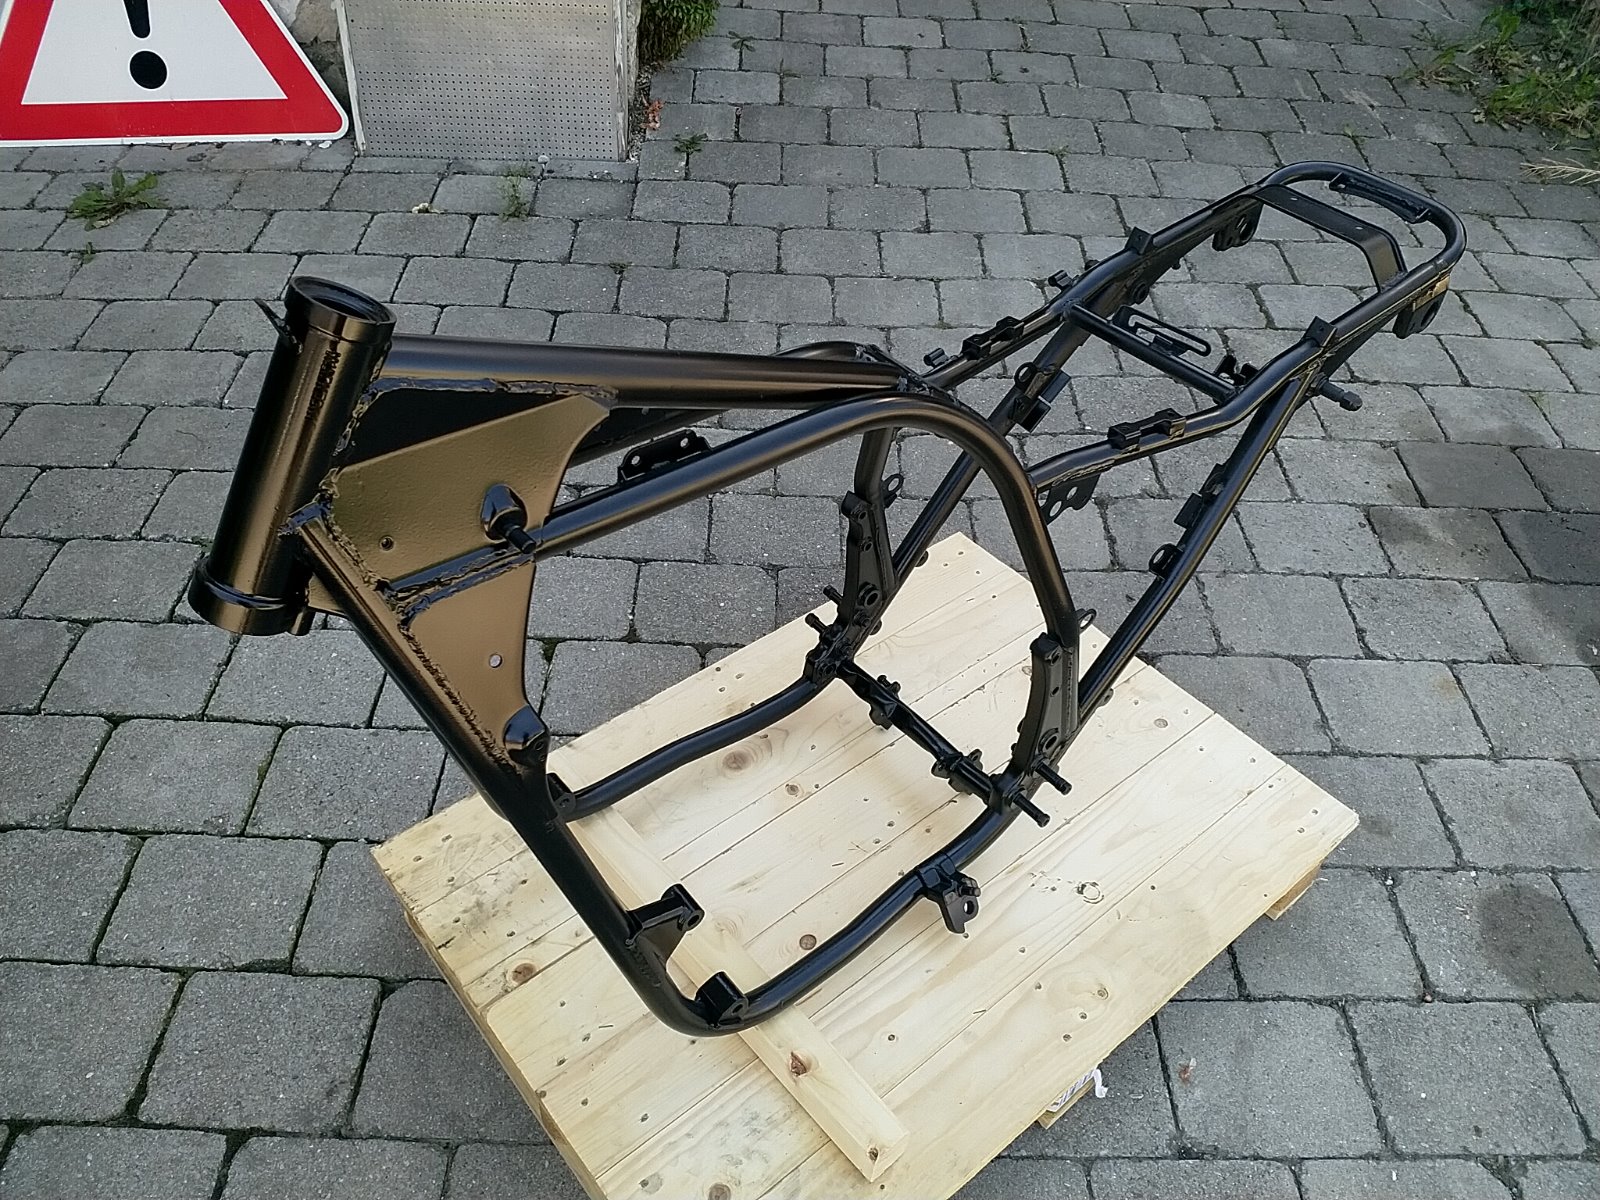
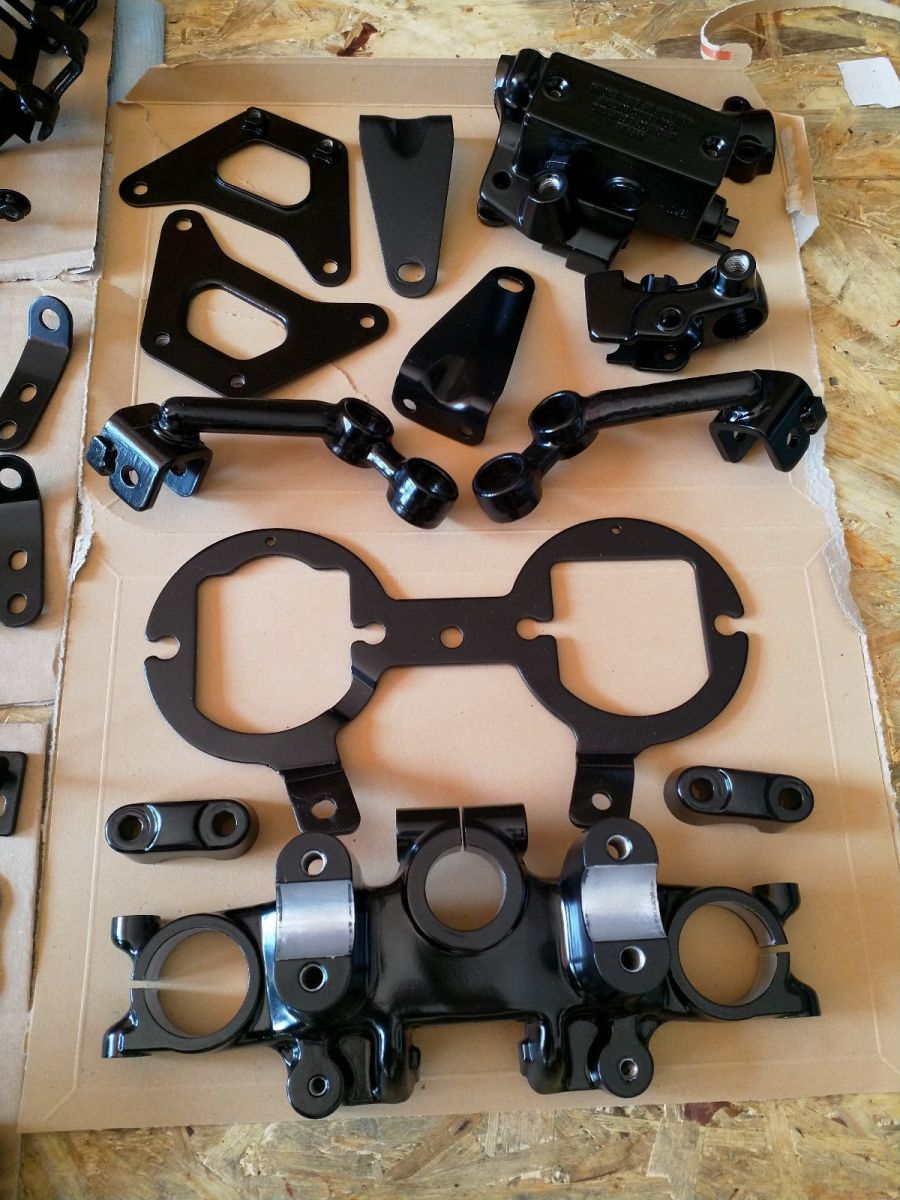
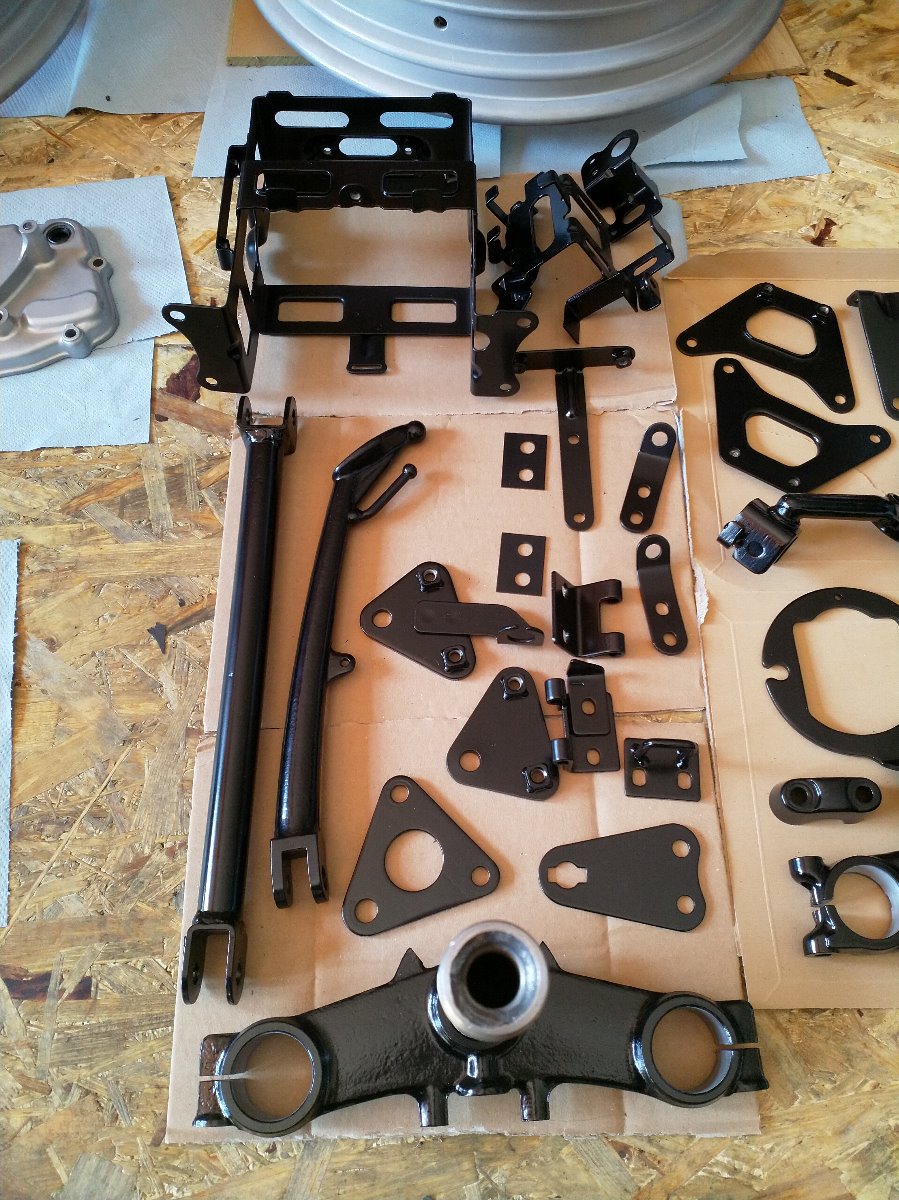
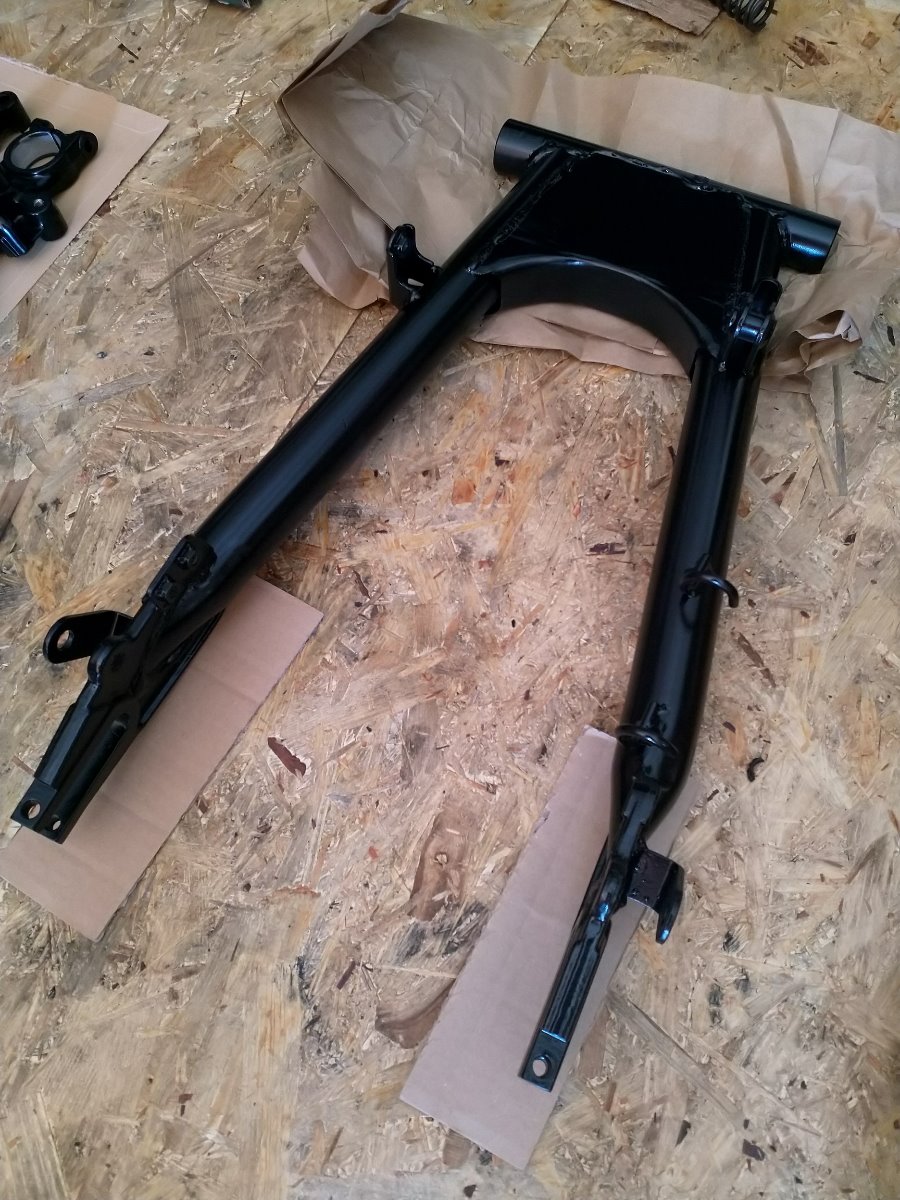
Aluminium parts were rubbed down with scotch-brite and then hit with a thin coat of gloss clear. Since then I have removed the paint from the levers and polished them properly.

All the black parts were done with 2k epoxy primer, 2k base coat and a 2k satin clear.
Aluminium parts were rubbed down with scotch-brite and then hit with a thin coat of gloss clear. Since then I have removed the paint from the levers and polished them properly.
KZ1000 Restomod (
www.kzrider.com/forum/11-projects/614517-1977-kz1000-restomod
)
1977 KZ1000A1 ( www.kzrider.com/forum/11-projects/616901...-spare-parts-project )
1980 KZ750H ( kzrider.com/forum/11-projects/612054-kz750h-restoration )
2000 BMW F650GS
1977 KZ1000A1 ( www.kzrider.com/forum/11-projects/616901...-spare-parts-project )
1980 KZ750H ( kzrider.com/forum/11-projects/612054-kz750h-restoration )
2000 BMW F650GS
Last edit: 06 Jan 2020 04:22 by calum. Reason: Added photo of aluminium parts
Please Log in or Create an account to join the conversation.
- calum
-
Topic Author
- Offline
- User
-
Registered
- Posts: 1144
- Thanks: 415
Re: KZ750H Restoration
05 Jan 2020 14:45 - 05 Jan 2020 18:35
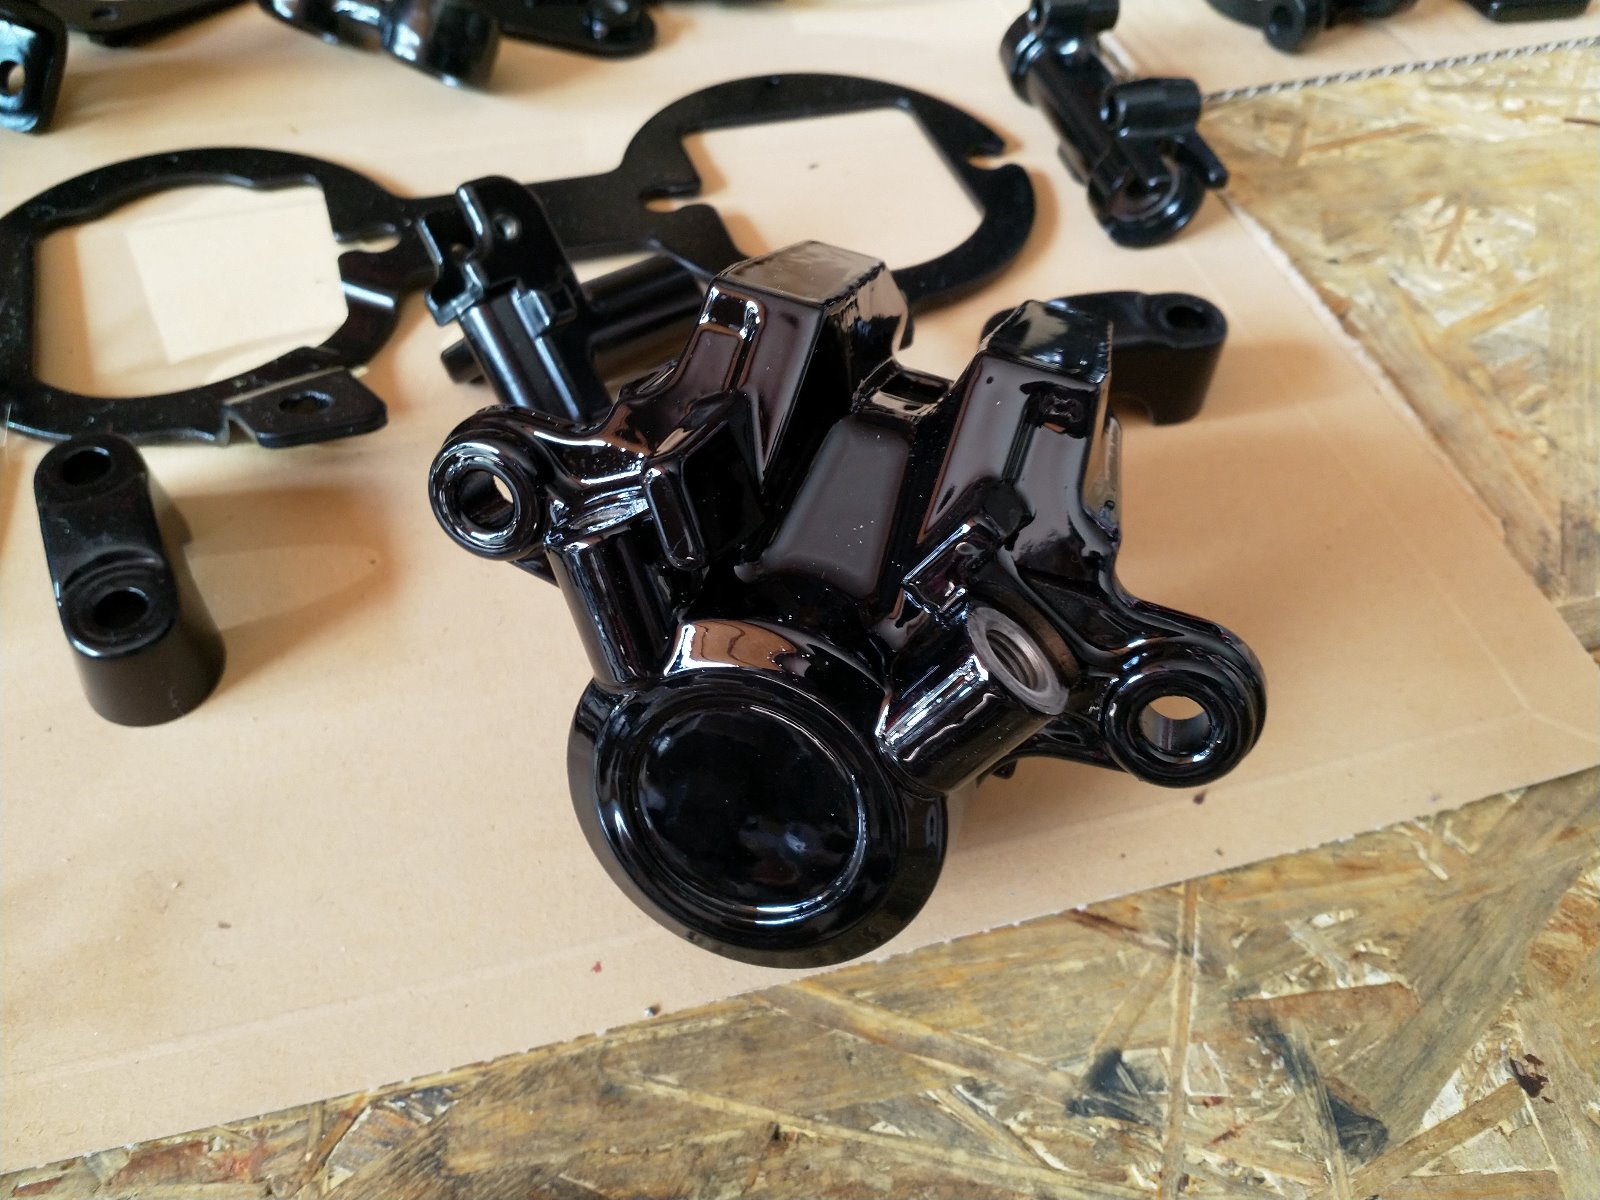
The wheels and brake callipers were done with Kawasaki "Ebony" and gloss clear. Took all of my patience to sand the highlights in the wheels.
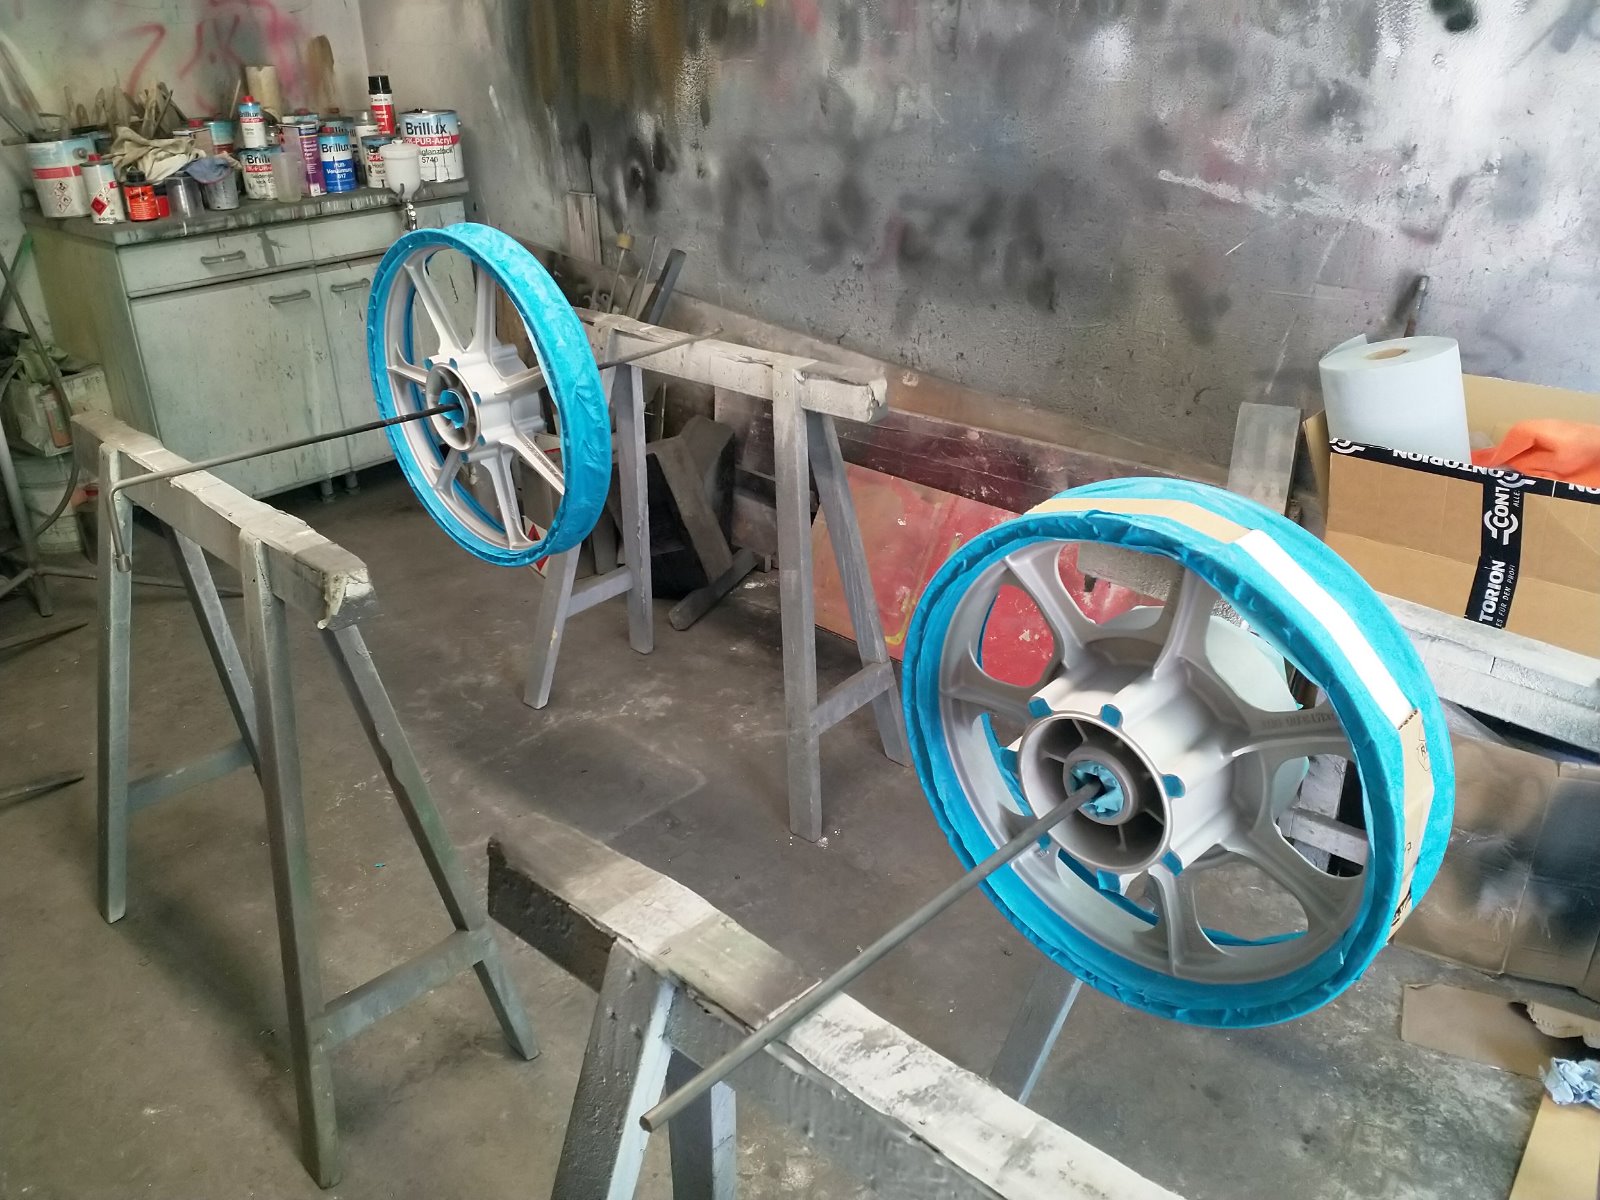
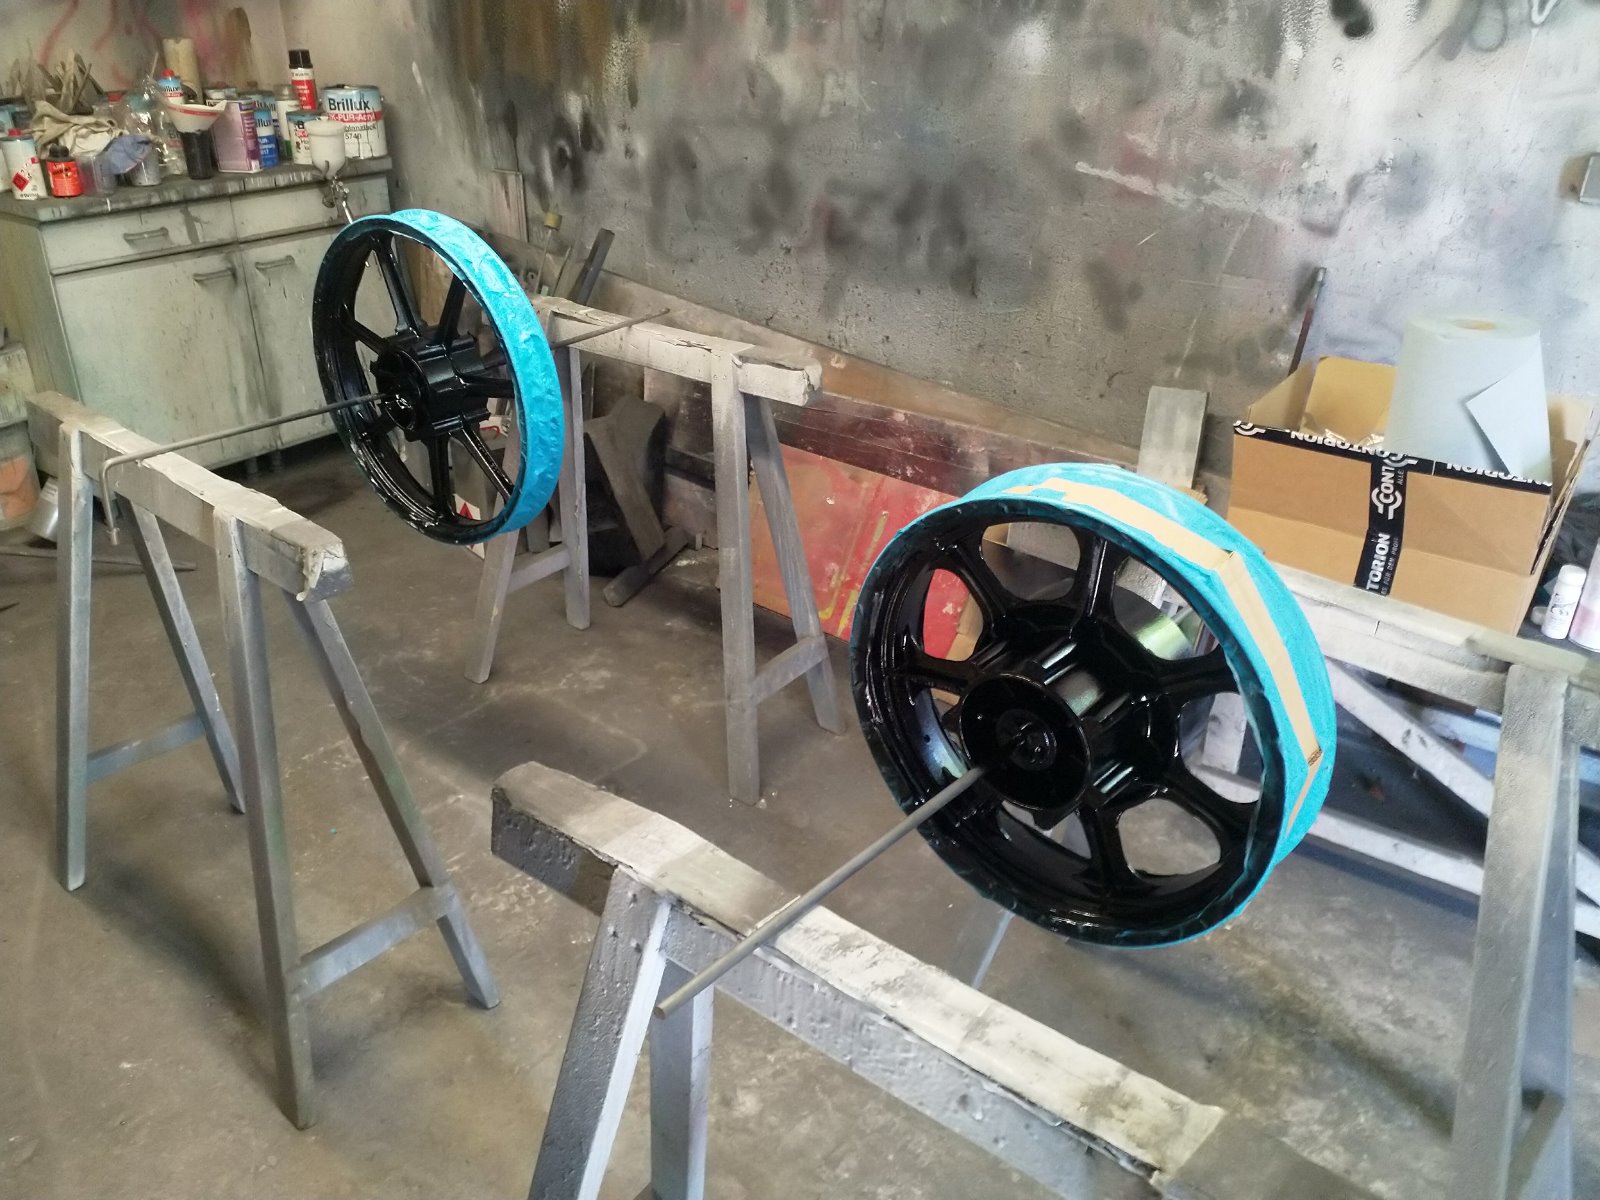
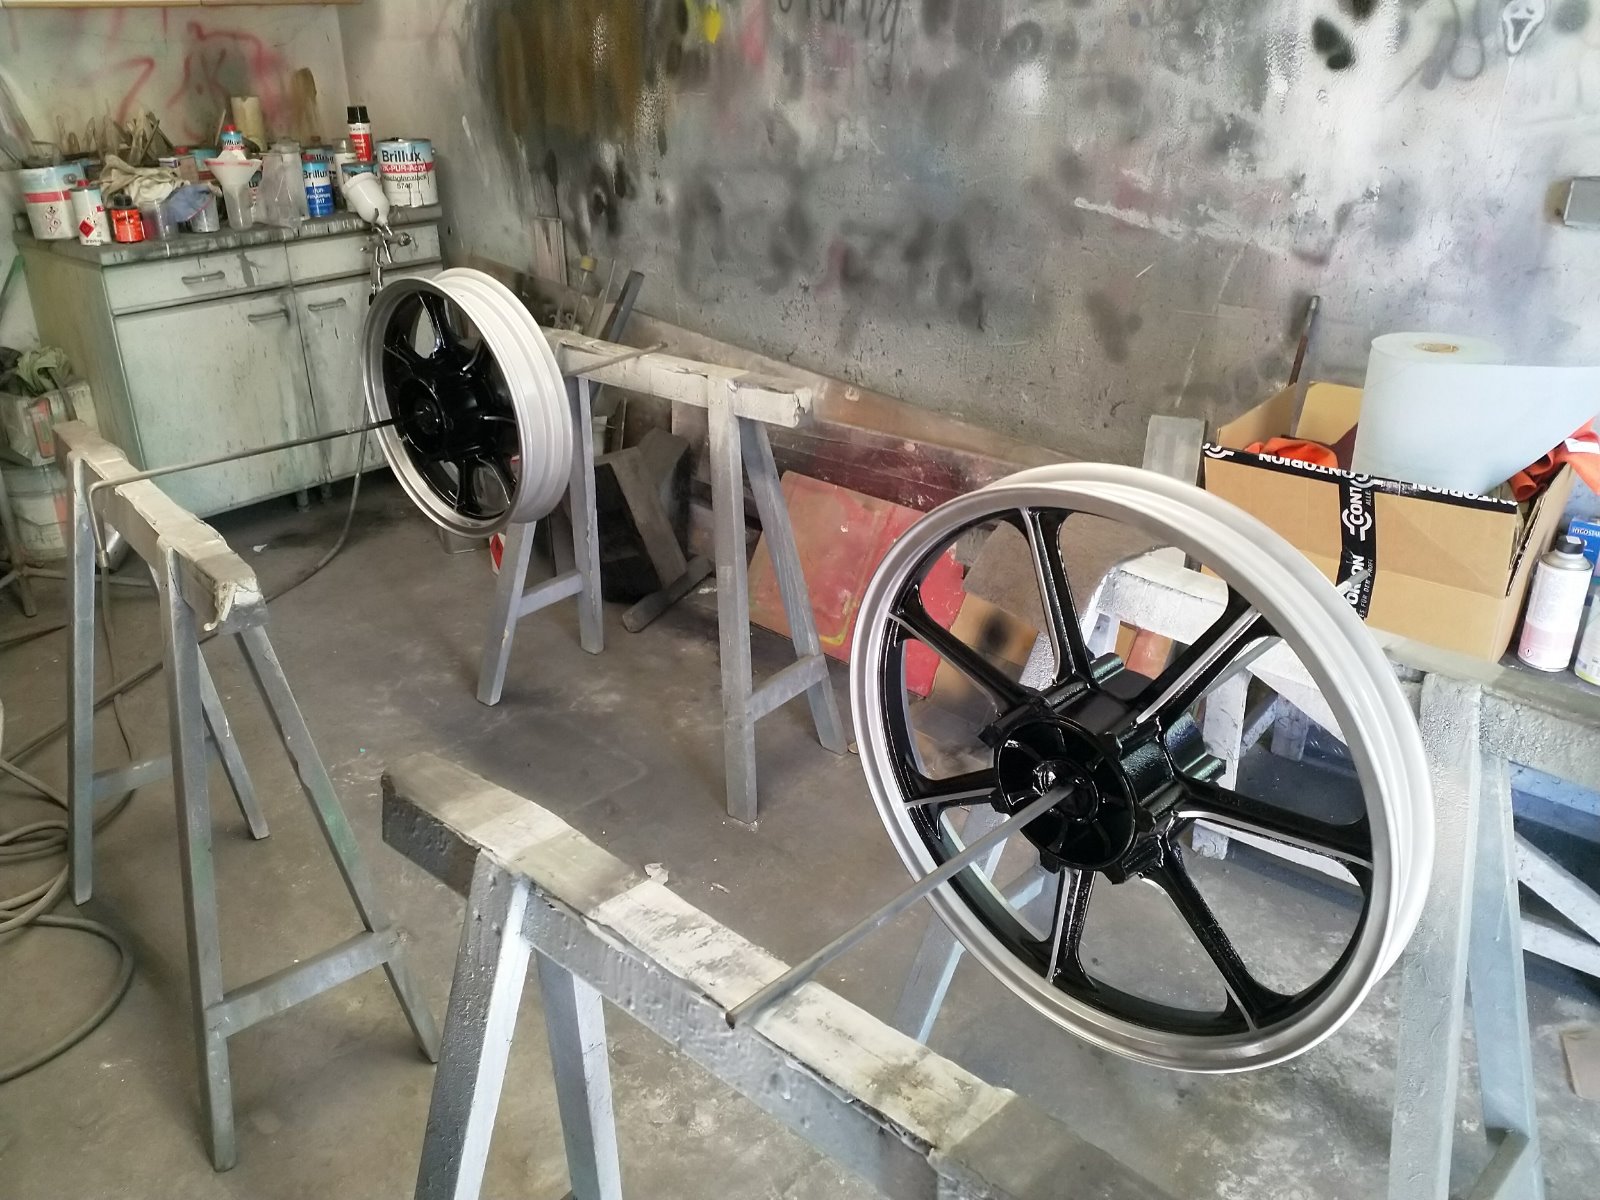
I did remove the paint from the brake disc surface after this photo was taken:
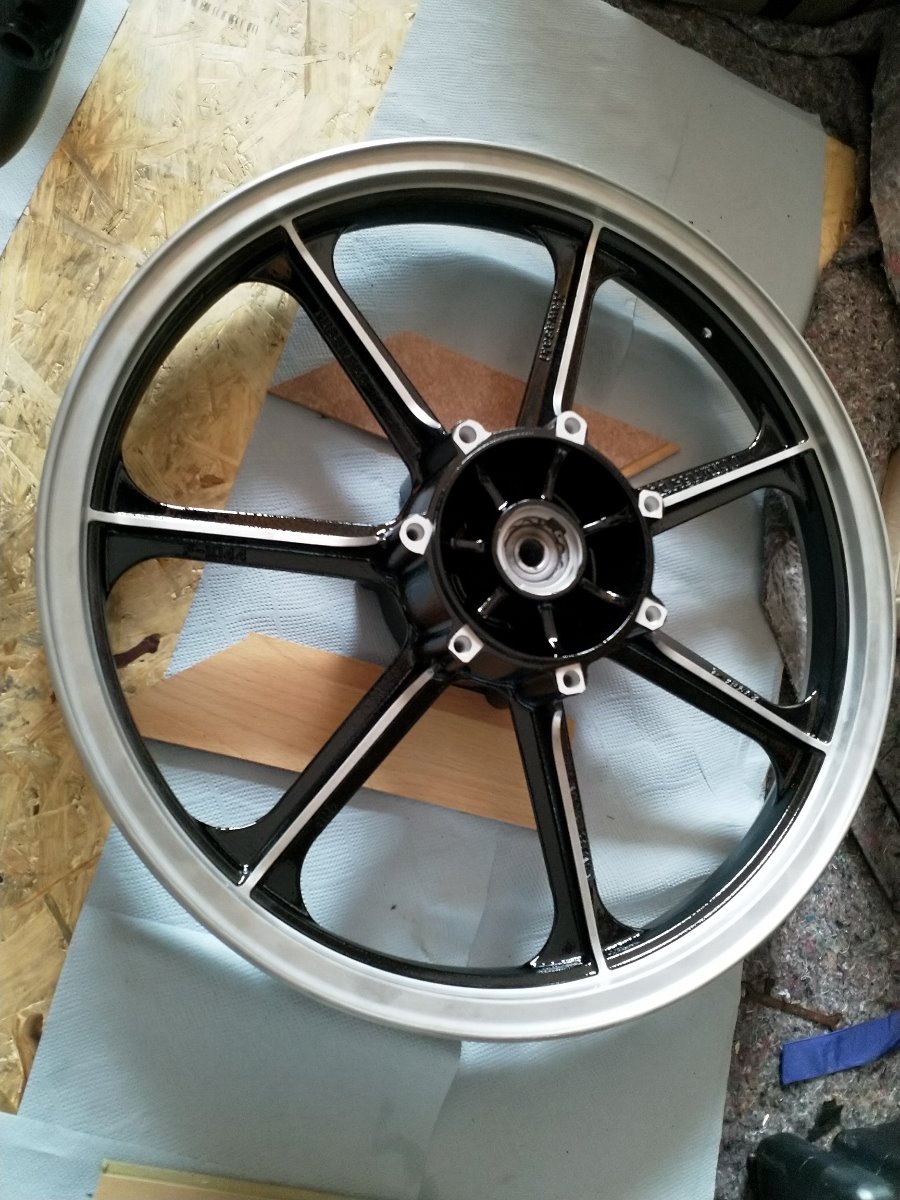
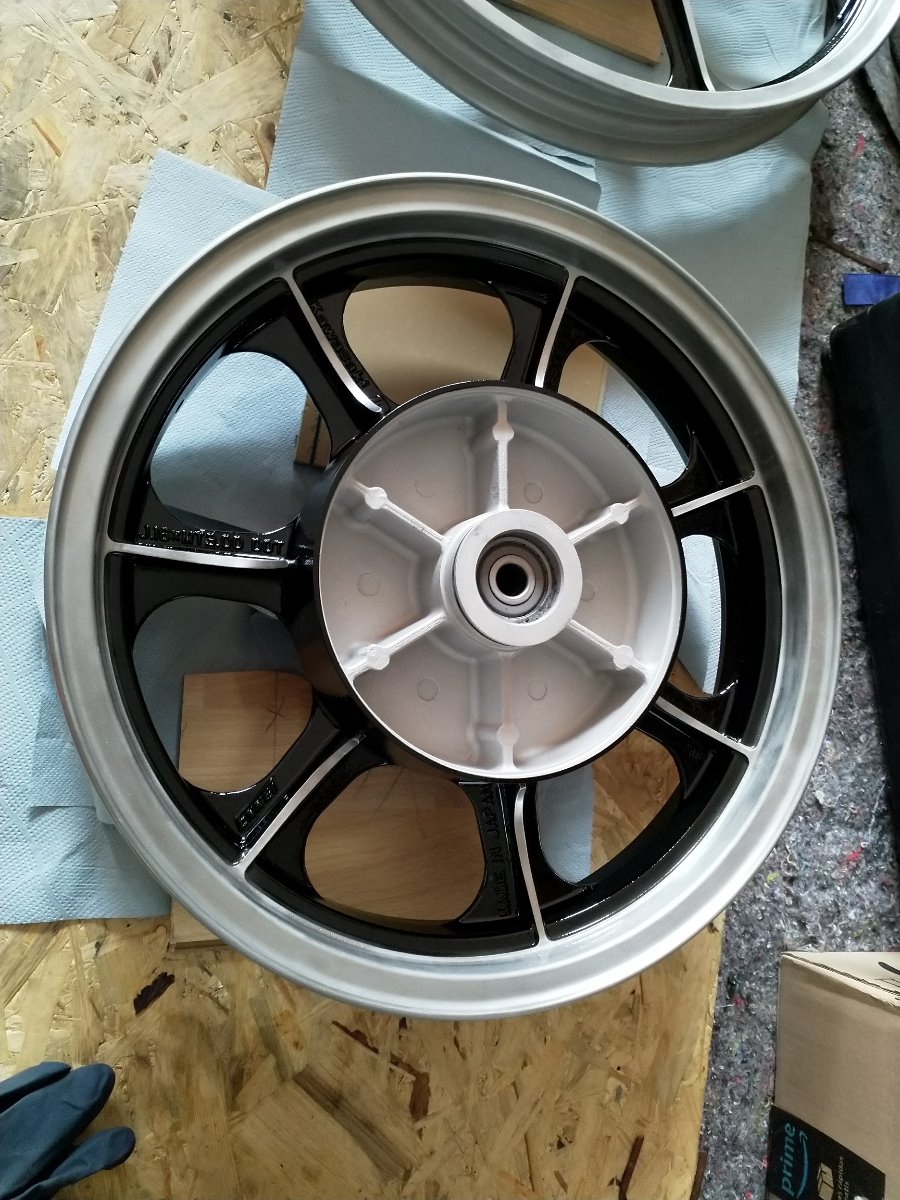
I did remove the paint from the brake disc surface after this photo was taken:
KZ1000 Restomod (
www.kzrider.com/forum/11-projects/614517-1977-kz1000-restomod
)
1977 KZ1000A1 ( www.kzrider.com/forum/11-projects/616901...-spare-parts-project )
1980 KZ750H ( kzrider.com/forum/11-projects/612054-kz750h-restoration )
2000 BMW F650GS
1977 KZ1000A1 ( www.kzrider.com/forum/11-projects/616901...-spare-parts-project )
1980 KZ750H ( kzrider.com/forum/11-projects/612054-kz750h-restoration )
2000 BMW F650GS
Last edit: 05 Jan 2020 18:35 by calum. Reason: Fixing picture layout
Please Log in or Create an account to join the conversation.
- calum
-
Topic Author
- Offline
- User
-
Registered
- Posts: 1144
- Thanks: 415
Re: KZ750H Restoration
05 Jan 2020 14:53 - 05 Jan 2020 16:01
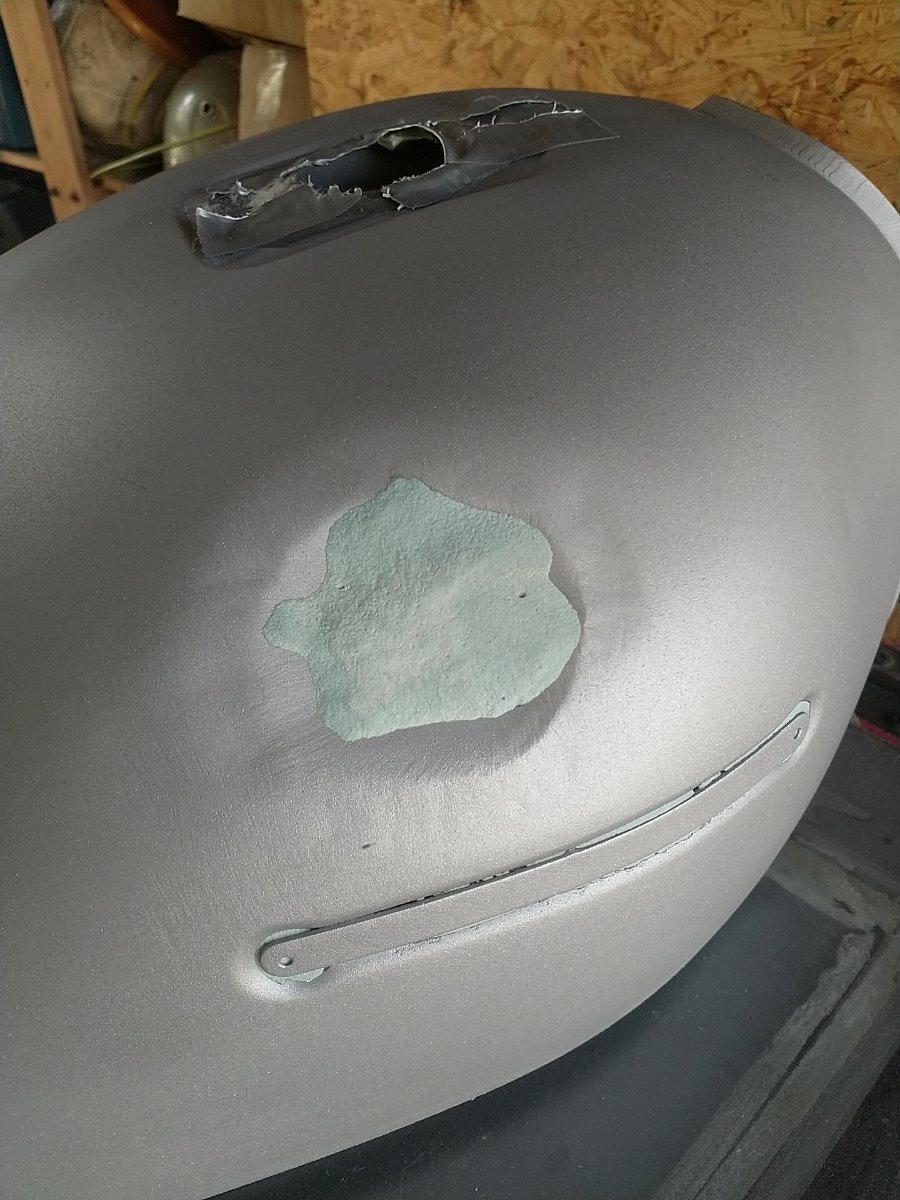
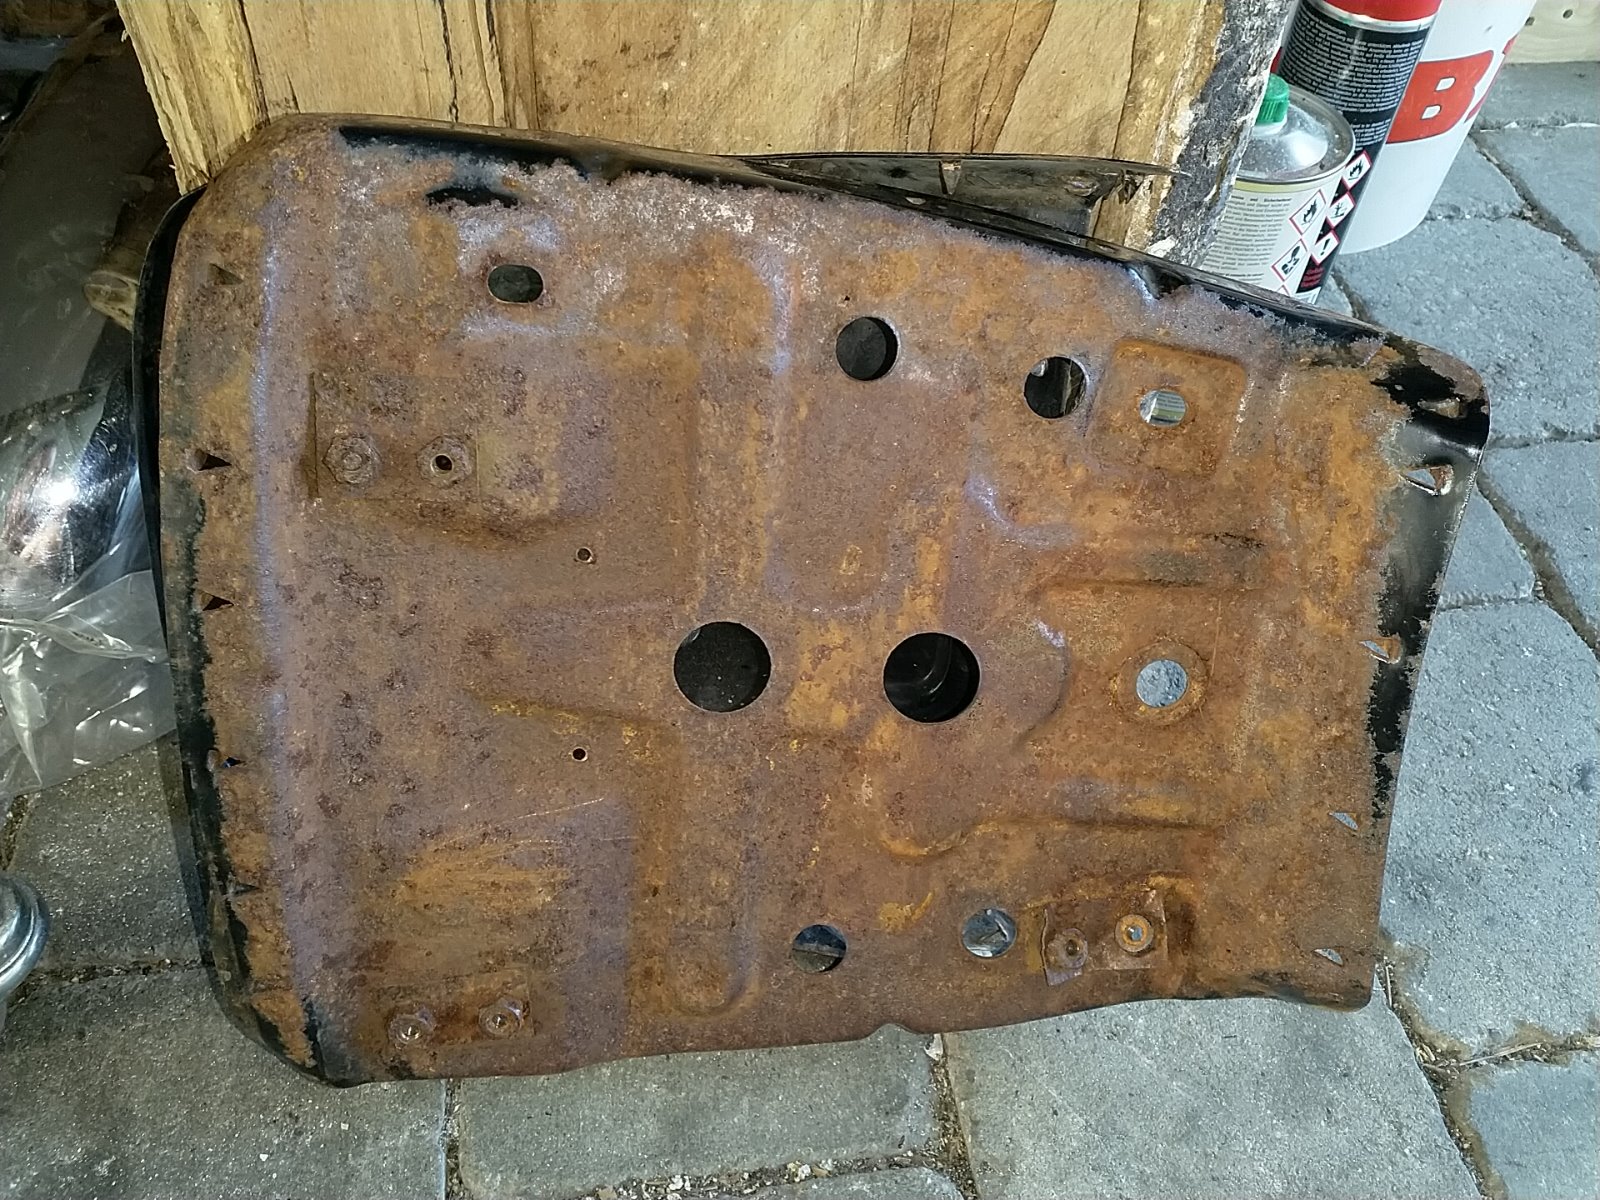
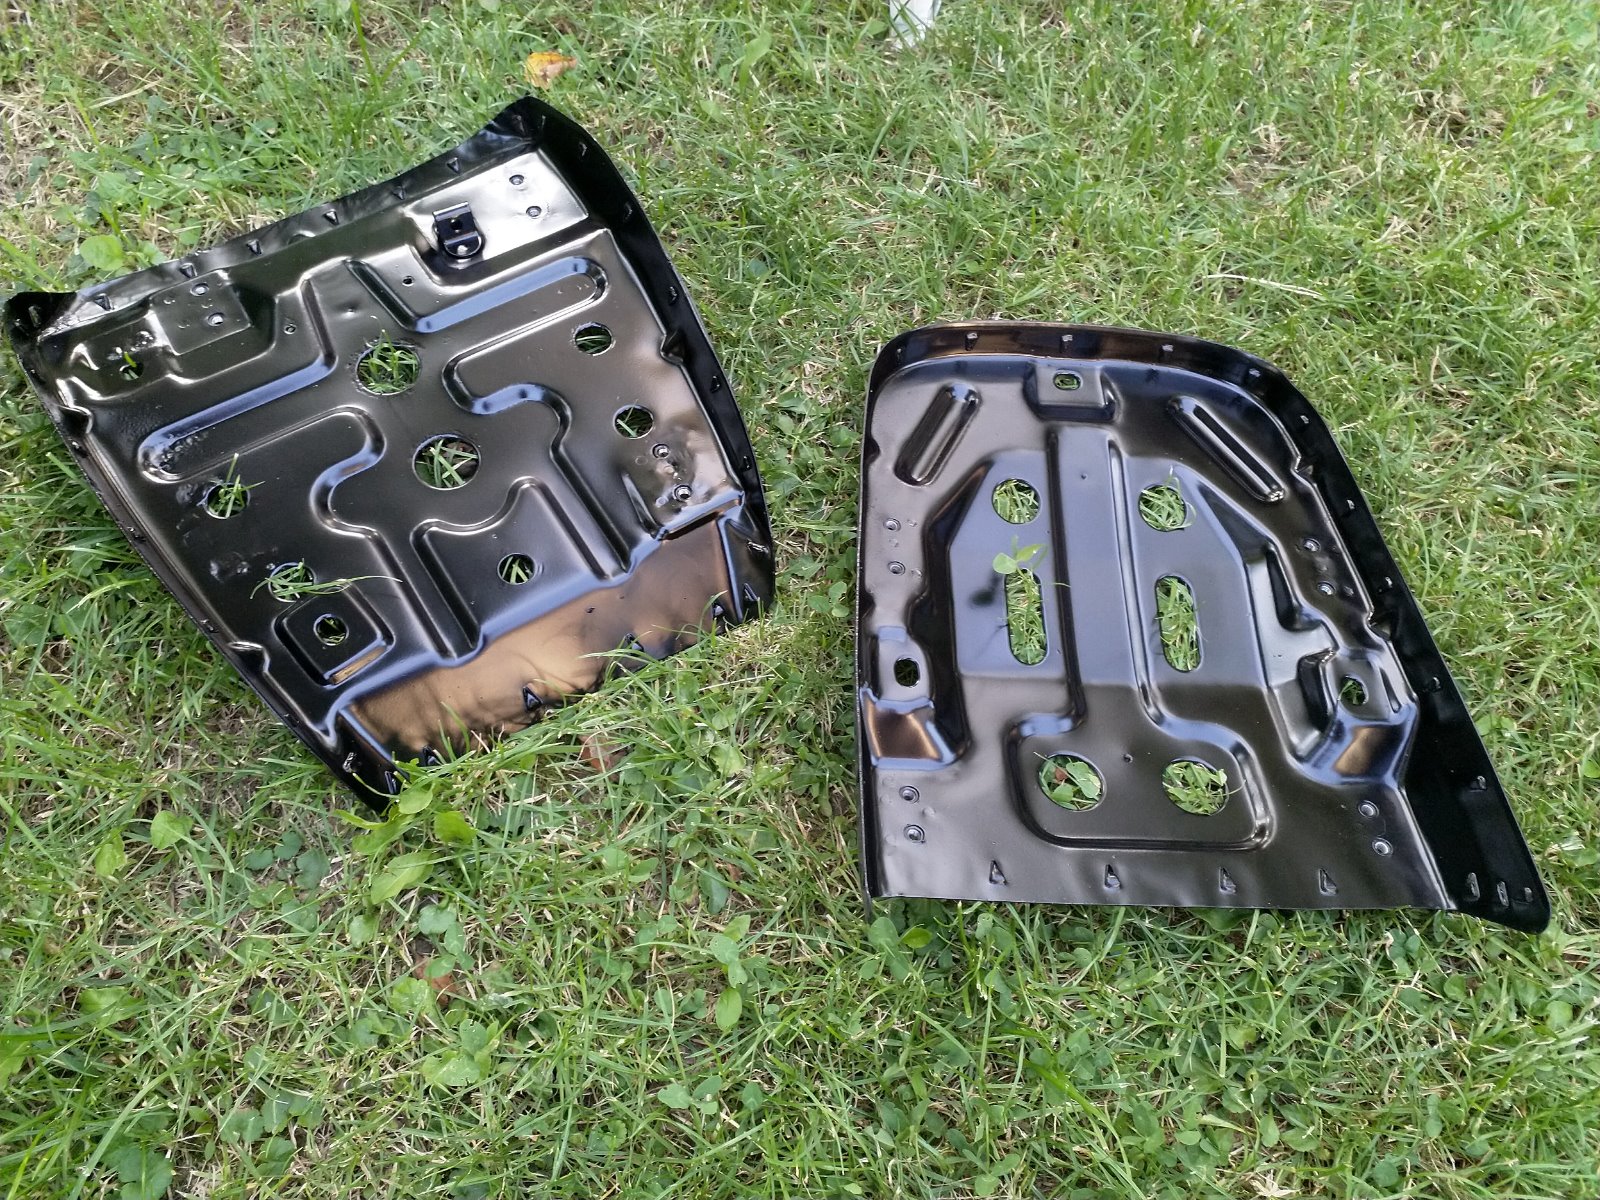
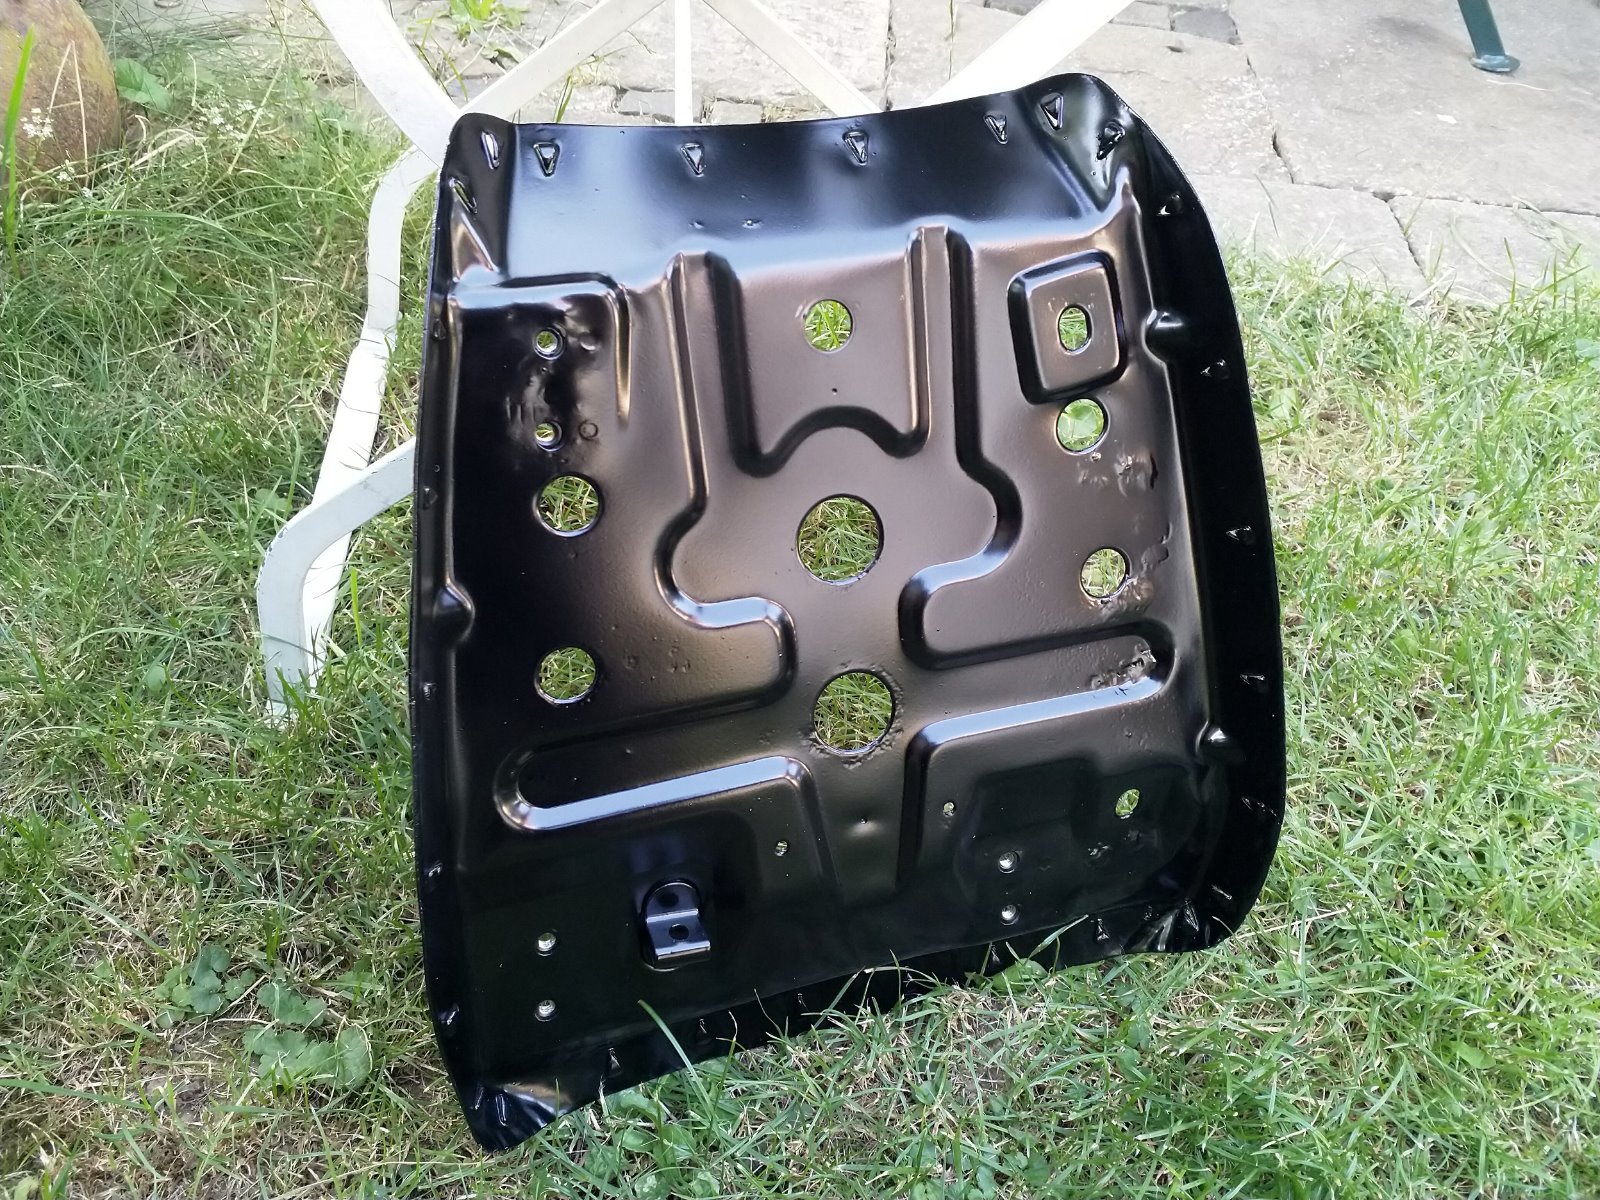
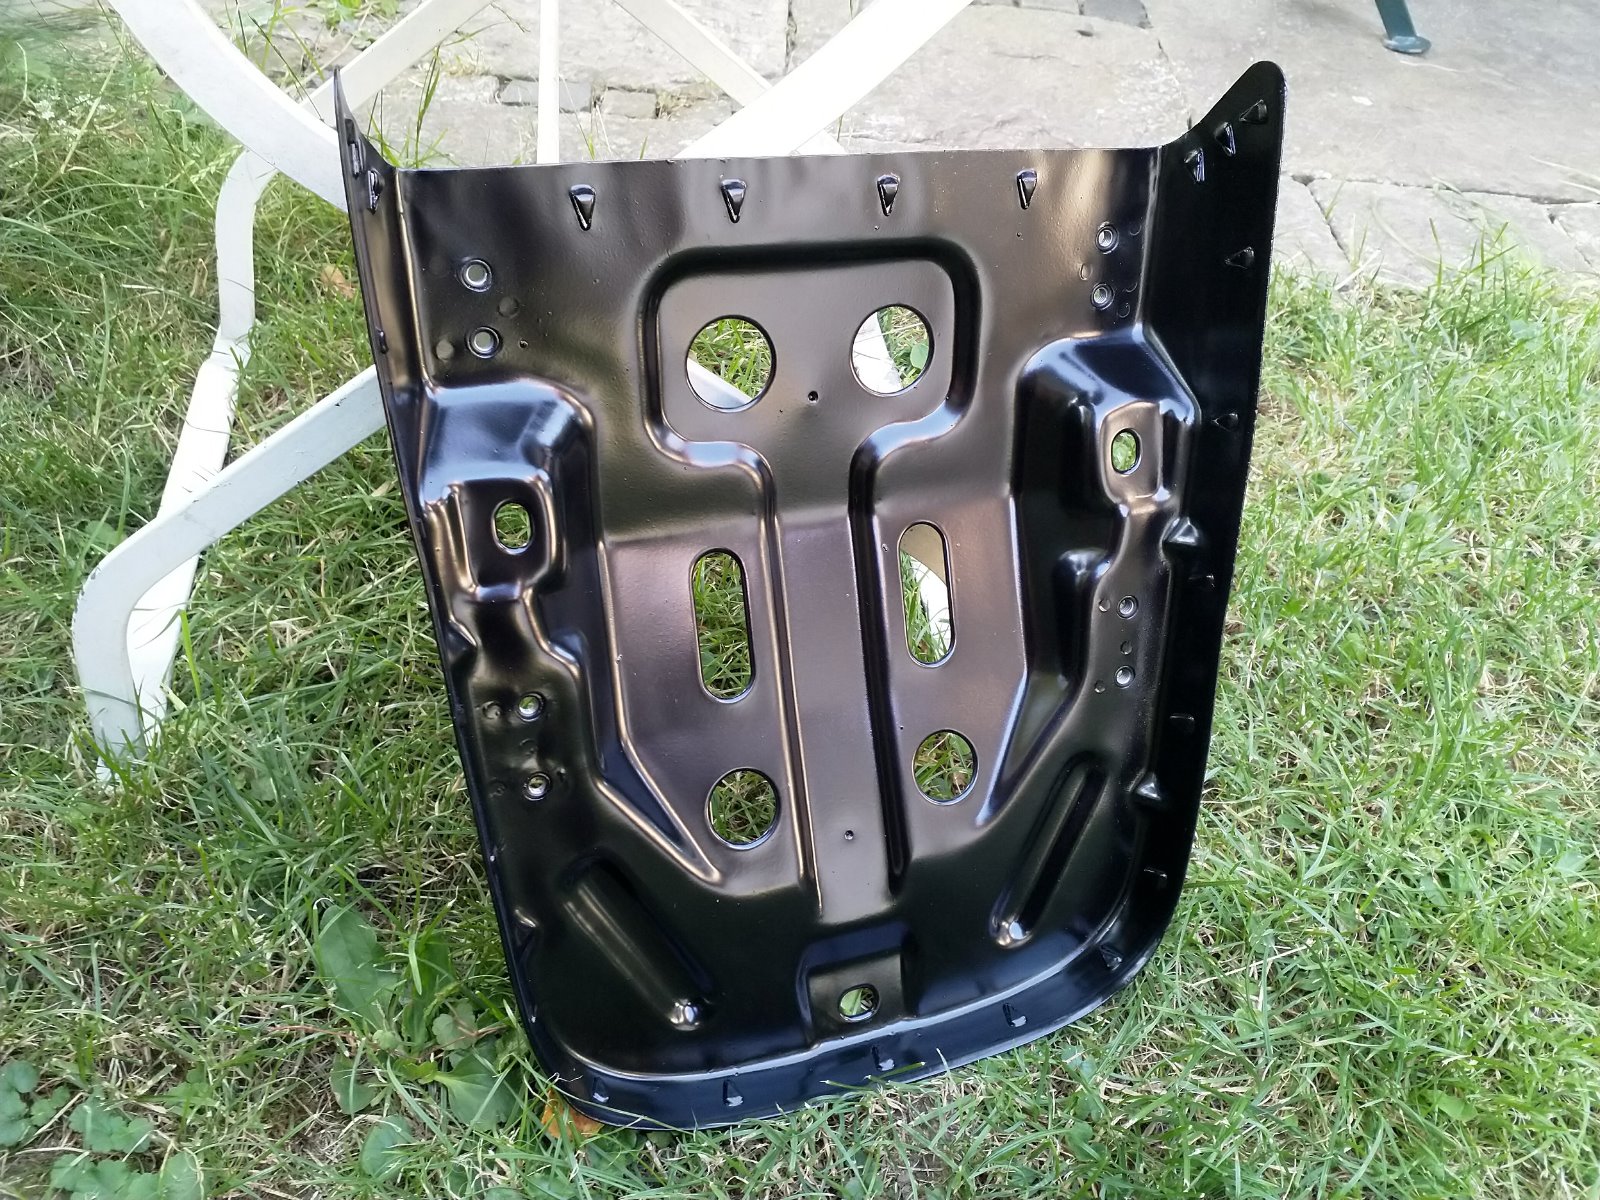
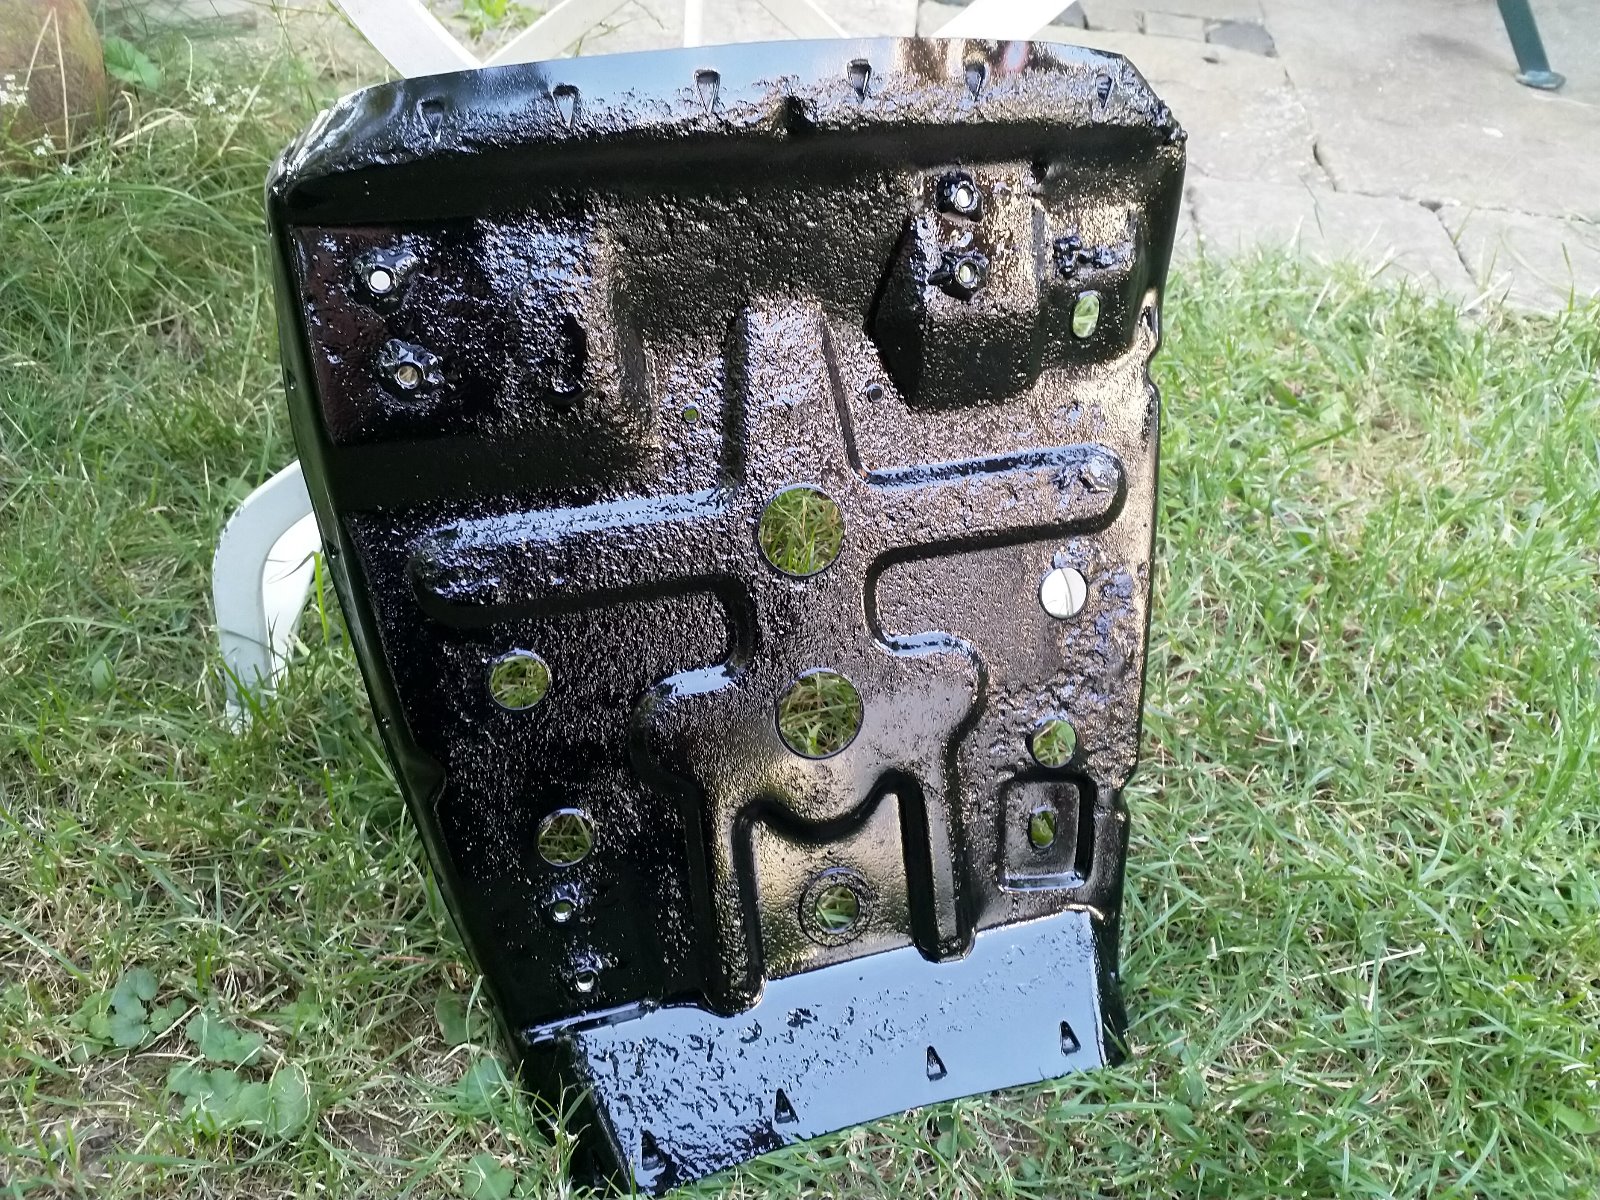
Before I could get the seats done (definitely wasn't going to do that myself), I needed to sort out the seat pans. The front one had a lot of rust as there was a rip in the seat cover so it had been wet a lot. Once it had been blasted it needed a bit of spot welding (the neighbours job) and some bog. It doesn't look the best but it was still stable and will hopefully hold my weight :laugh:
KZ1000 Restomod (
www.kzrider.com/forum/11-projects/614517-1977-kz1000-restomod
)
1977 KZ1000A1 ( www.kzrider.com/forum/11-projects/616901...-spare-parts-project )
1980 KZ750H ( kzrider.com/forum/11-projects/612054-kz750h-restoration )
2000 BMW F650GS
1977 KZ1000A1 ( www.kzrider.com/forum/11-projects/616901...-spare-parts-project )
1980 KZ750H ( kzrider.com/forum/11-projects/612054-kz750h-restoration )
2000 BMW F650GS
Last edit: 05 Jan 2020 16:01 by calum. Reason: Fixing picture layout
Please Log in or Create an account to join the conversation.
- calum
-
Topic Author
- Offline
- User
-
Registered
- Posts: 1144
- Thanks: 415
Re: KZ750H Restoration
05 Jan 2020 14:55 - 05 Jan 2020 16:02
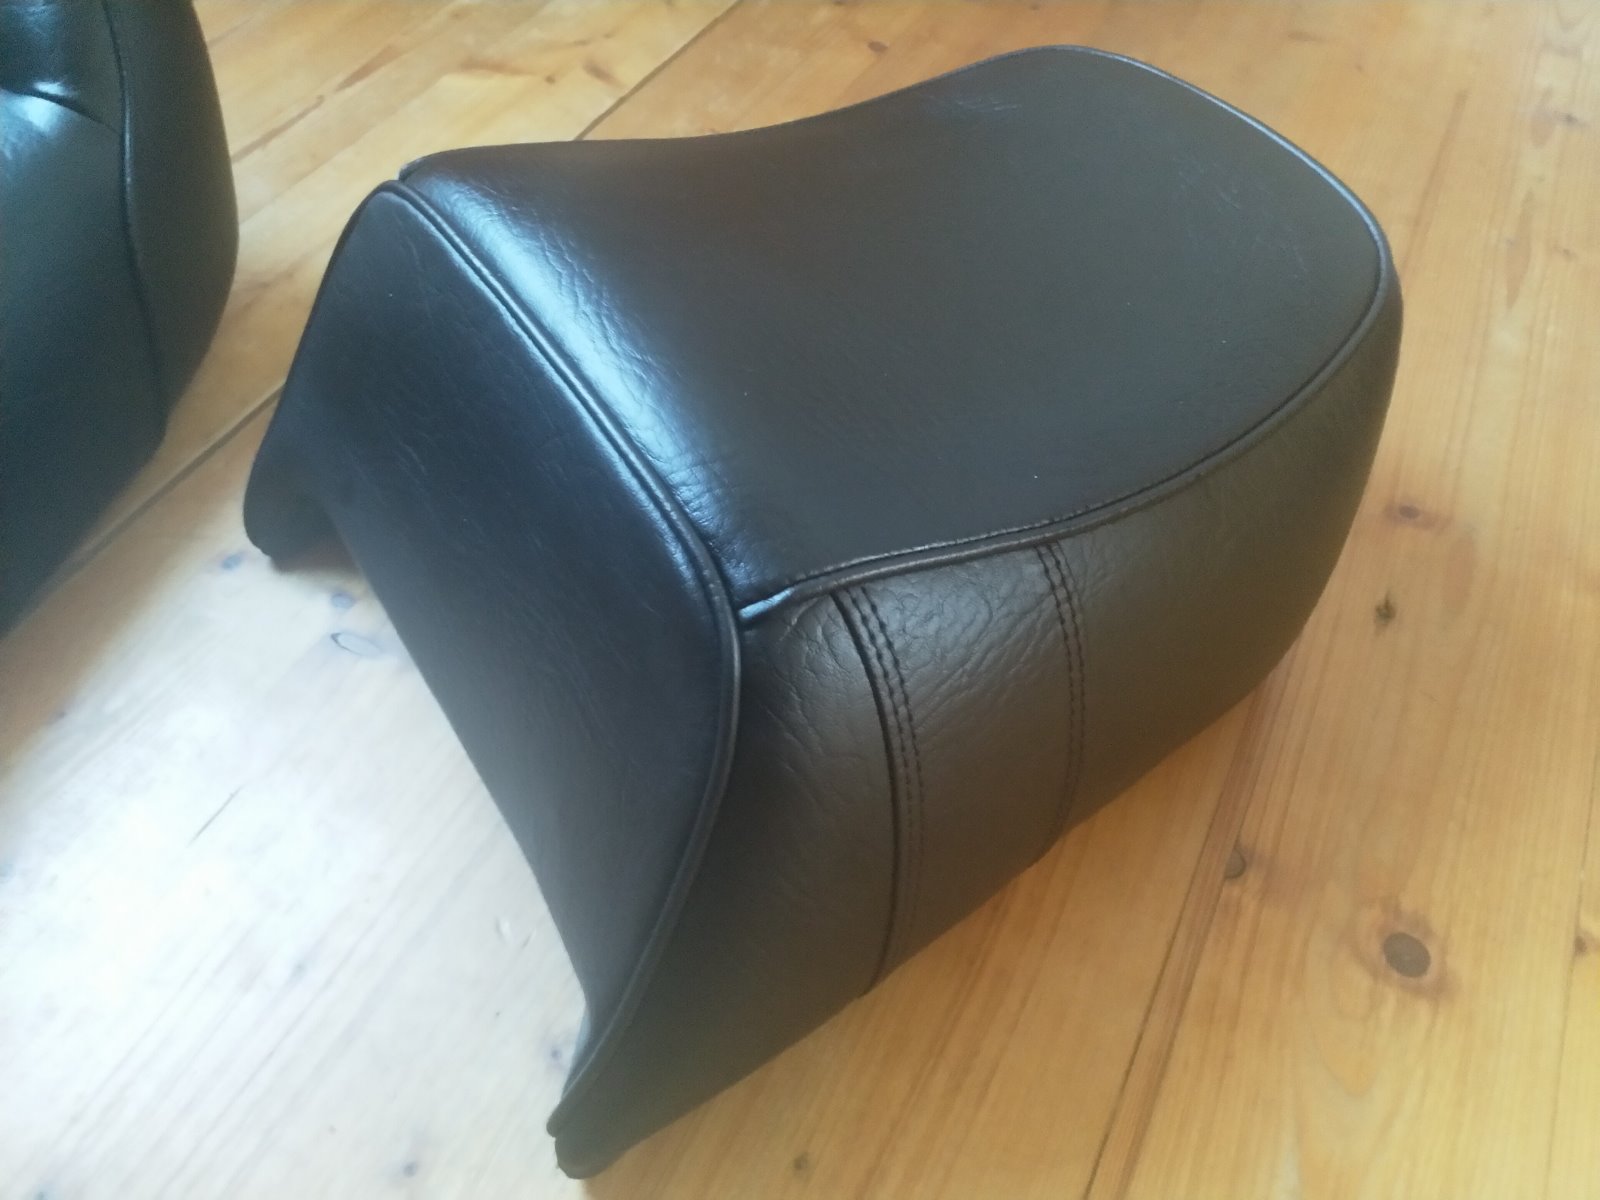
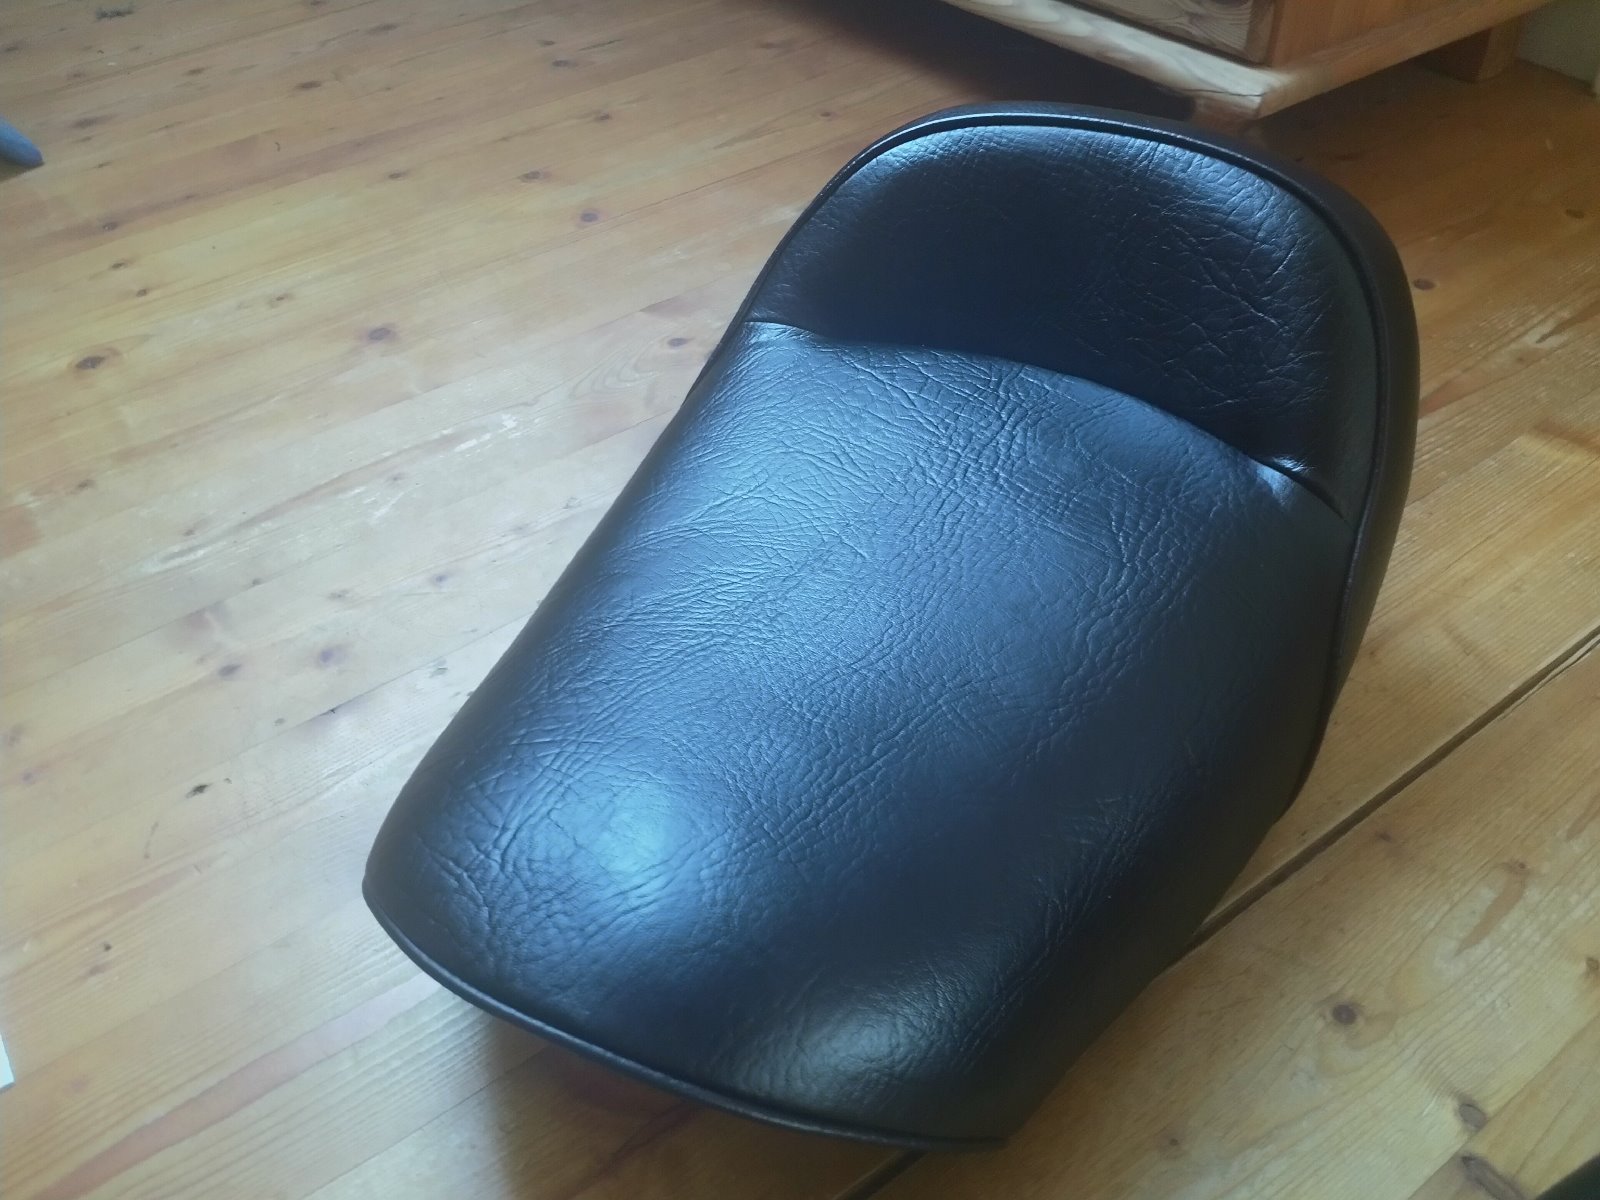
The seats after reupholstering:
KZ1000 Restomod (
www.kzrider.com/forum/11-projects/614517-1977-kz1000-restomod
)
1977 KZ1000A1 ( www.kzrider.com/forum/11-projects/616901...-spare-parts-project )
1980 KZ750H ( kzrider.com/forum/11-projects/612054-kz750h-restoration )
2000 BMW F650GS
1977 KZ1000A1 ( www.kzrider.com/forum/11-projects/616901...-spare-parts-project )
1980 KZ750H ( kzrider.com/forum/11-projects/612054-kz750h-restoration )
2000 BMW F650GS
Last edit: 05 Jan 2020 16:02 by calum. Reason: Fixing picture layout
Please Log in or Create an account to join the conversation.
- calum
-
Topic Author
- Offline
- User
-
Registered
- Posts: 1144
- Thanks: 415
Re: KZ750H Restoration
05 Jan 2020 15:01 - 05 Jan 2020 16:02
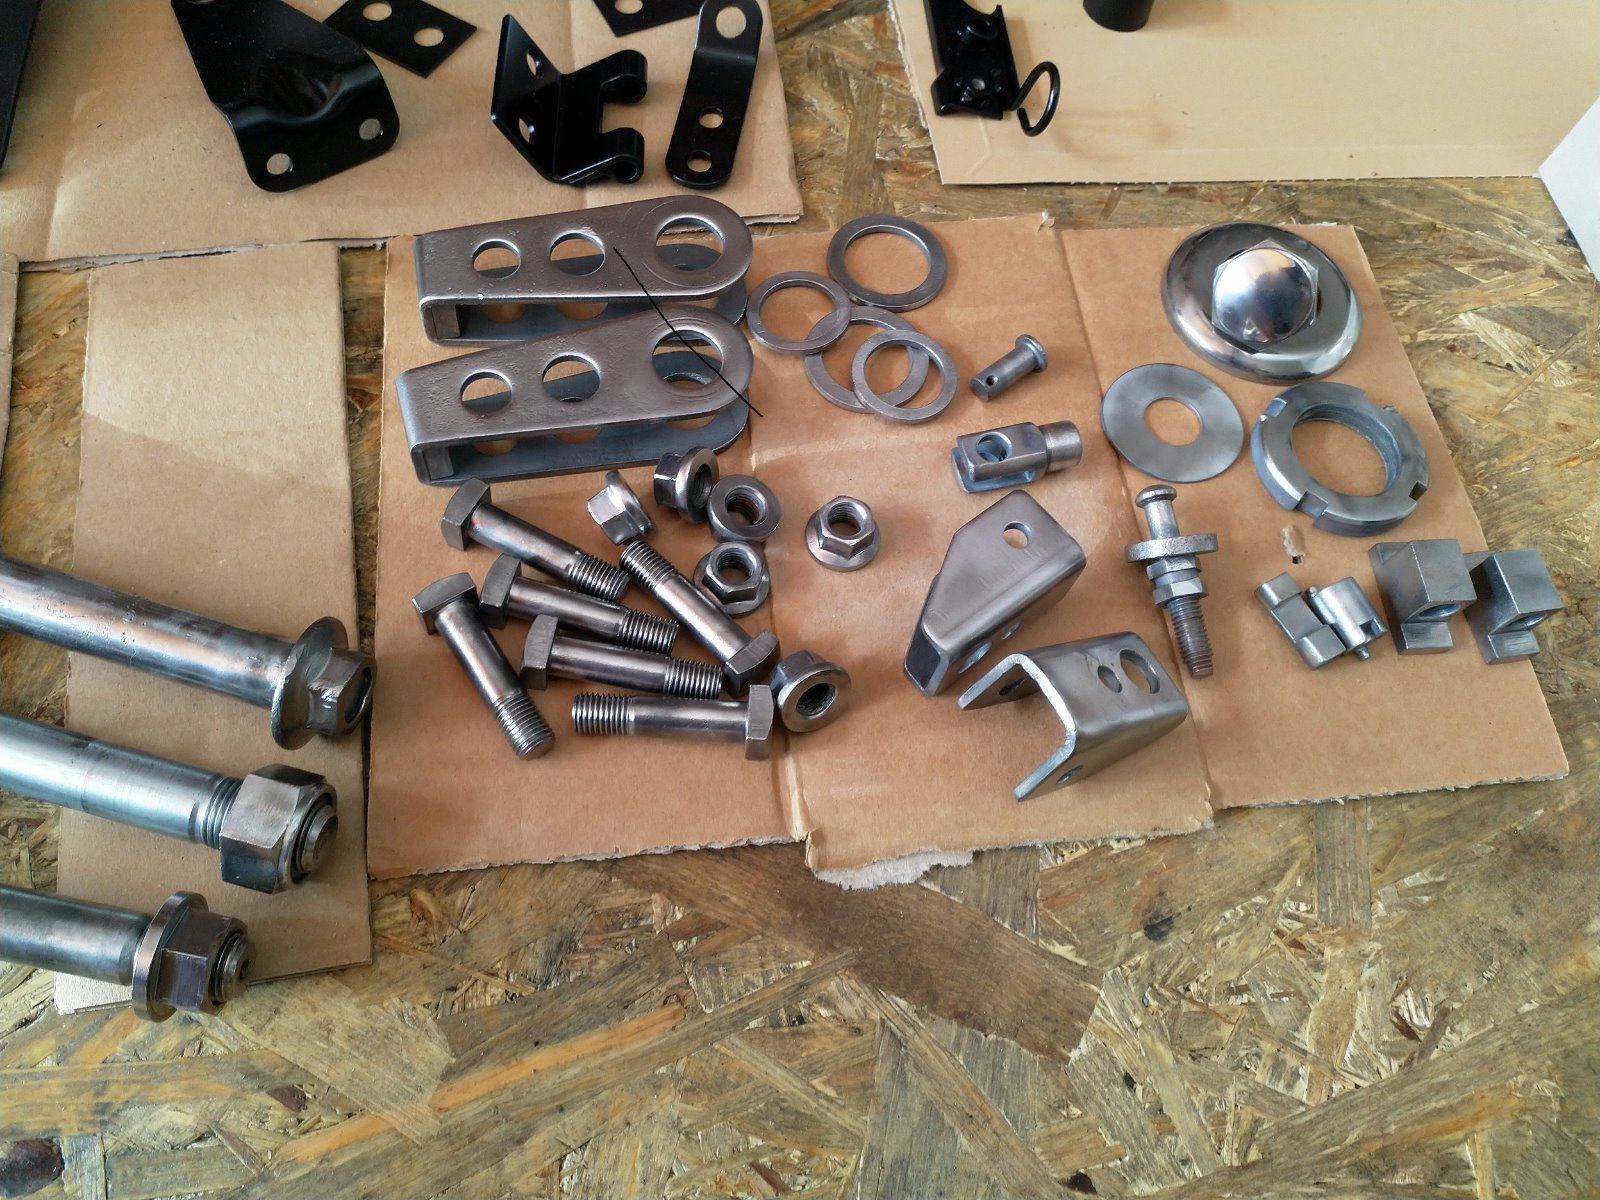
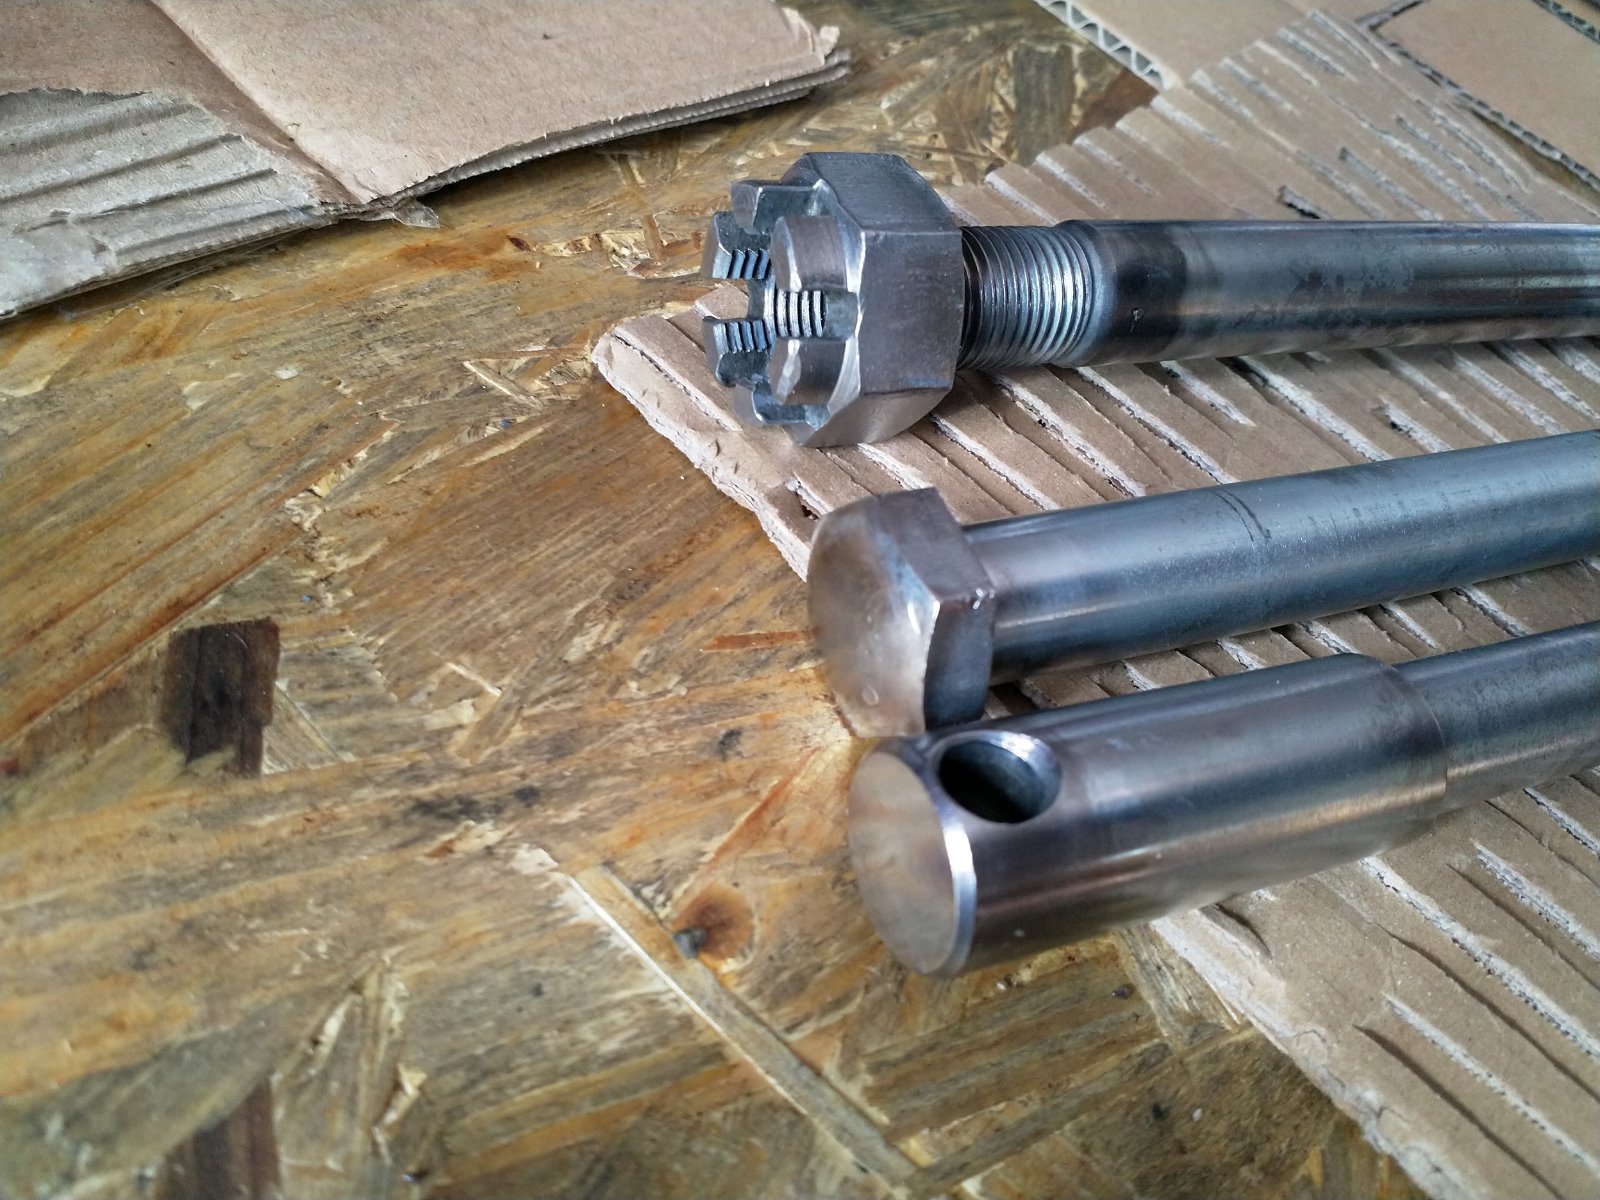
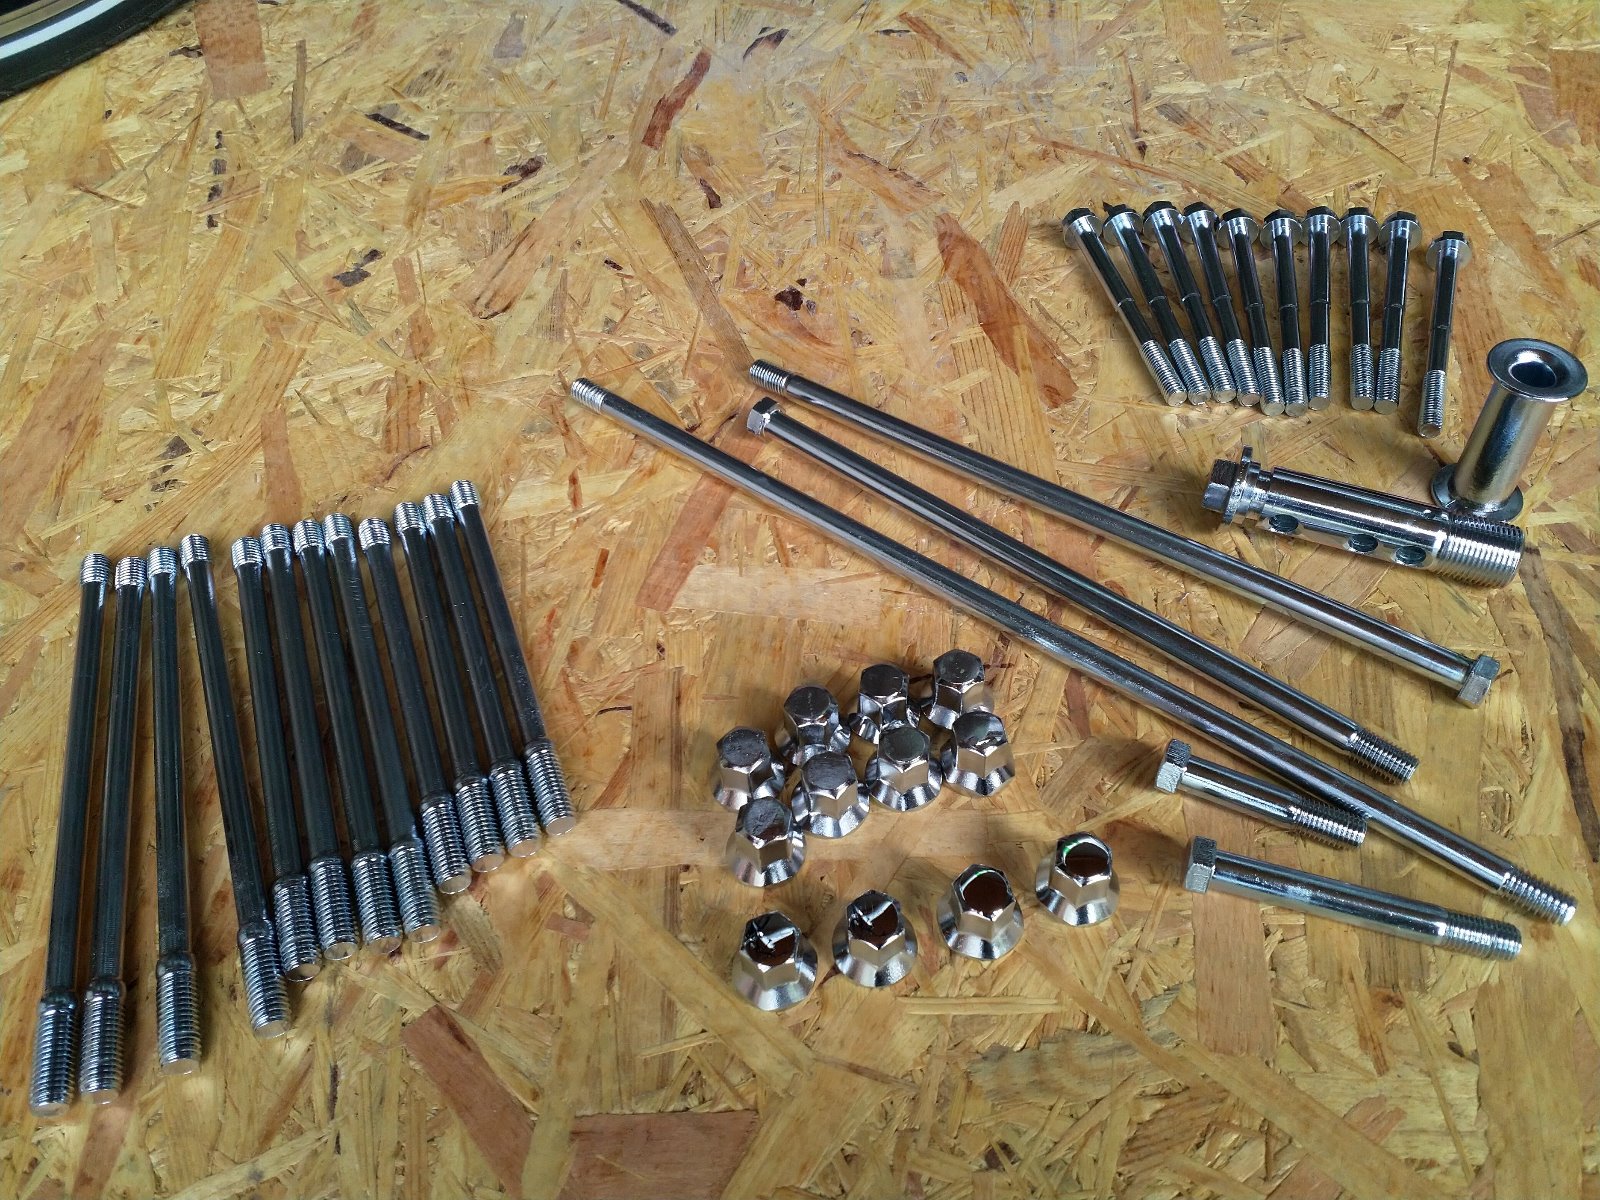
Tried my hand at zinc-plating. looks OK in the photos, some small spots of rust have developed over time, though. This led me to get the engine studs and bolts as well as the carb parts done properly.
KZ1000 Restomod (
www.kzrider.com/forum/11-projects/614517-1977-kz1000-restomod
)
1977 KZ1000A1 ( www.kzrider.com/forum/11-projects/616901...-spare-parts-project )
1980 KZ750H ( kzrider.com/forum/11-projects/612054-kz750h-restoration )
2000 BMW F650GS
1977 KZ1000A1 ( www.kzrider.com/forum/11-projects/616901...-spare-parts-project )
1980 KZ750H ( kzrider.com/forum/11-projects/612054-kz750h-restoration )
2000 BMW F650GS
Last edit: 05 Jan 2020 16:02 by calum. Reason: Fixing picture layout
Please Log in or Create an account to join the conversation.
- calum
-
Topic Author
- Offline
- User
-
Registered
- Posts: 1144
- Thanks: 415
Re: KZ750H Restoration
05 Jan 2020 15:04 - 05 Jan 2020 16:03
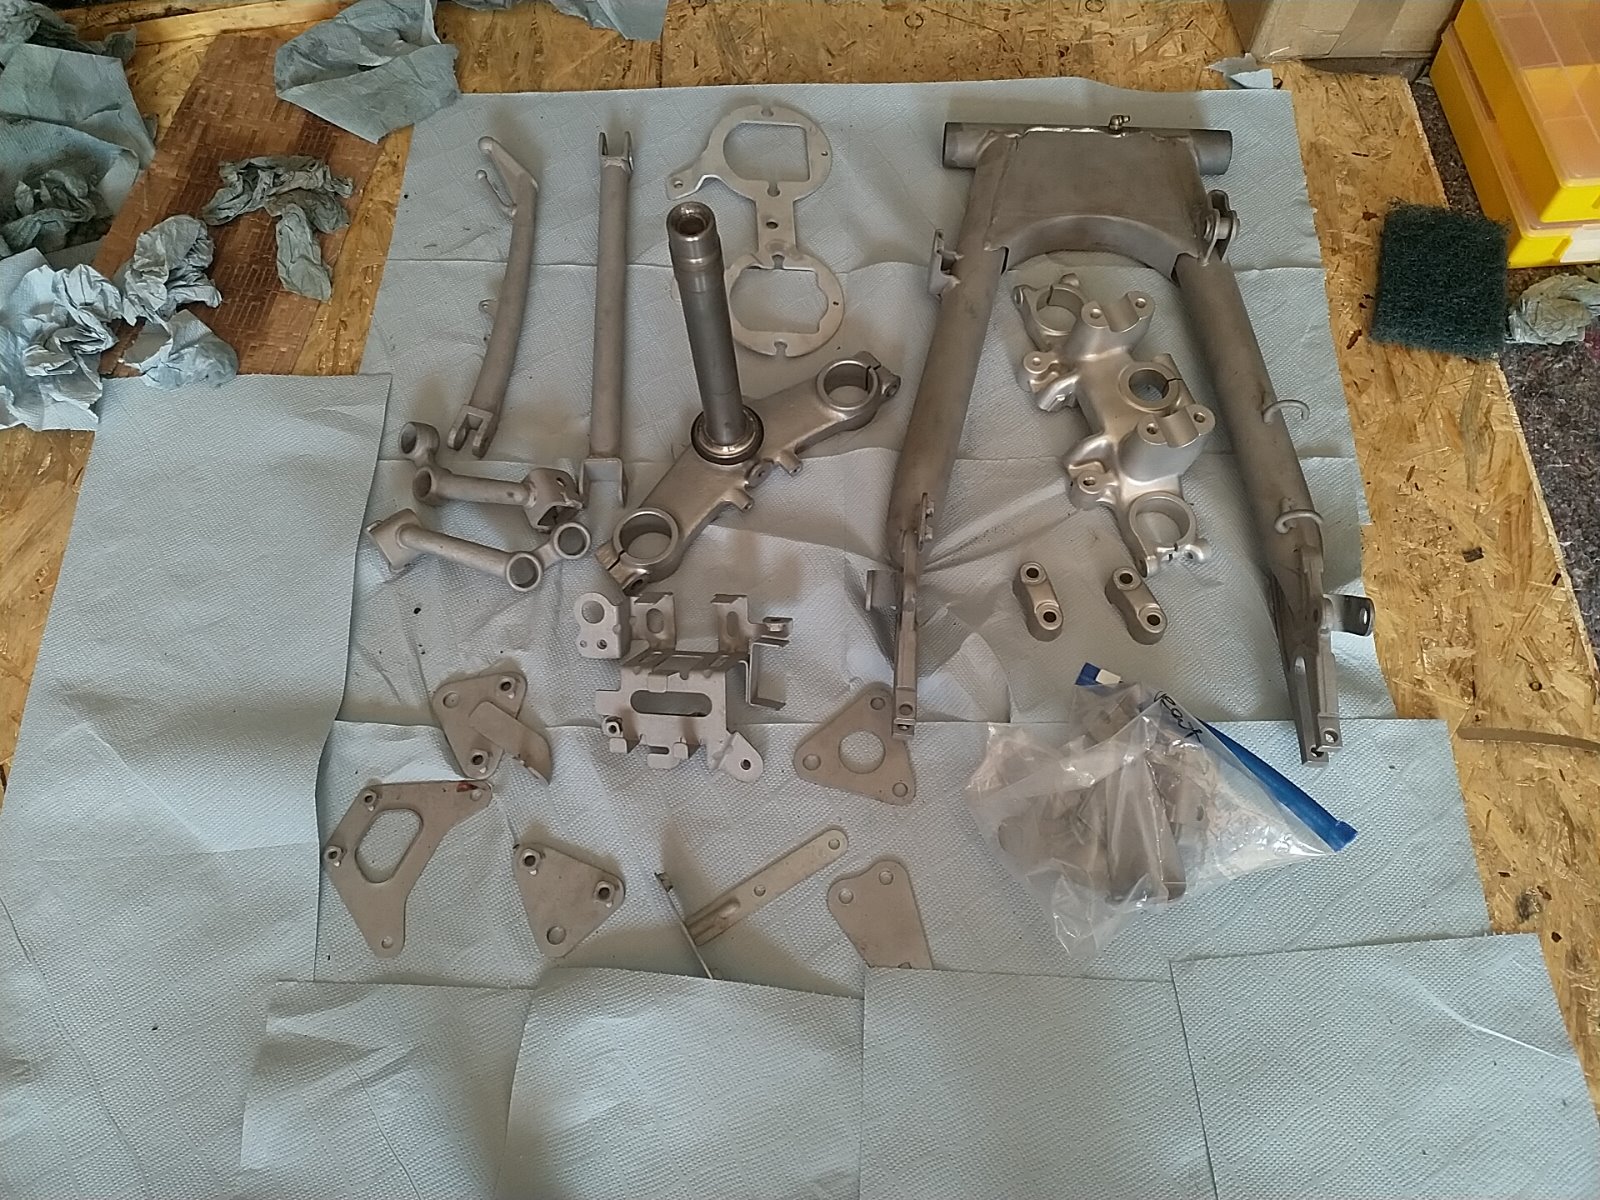
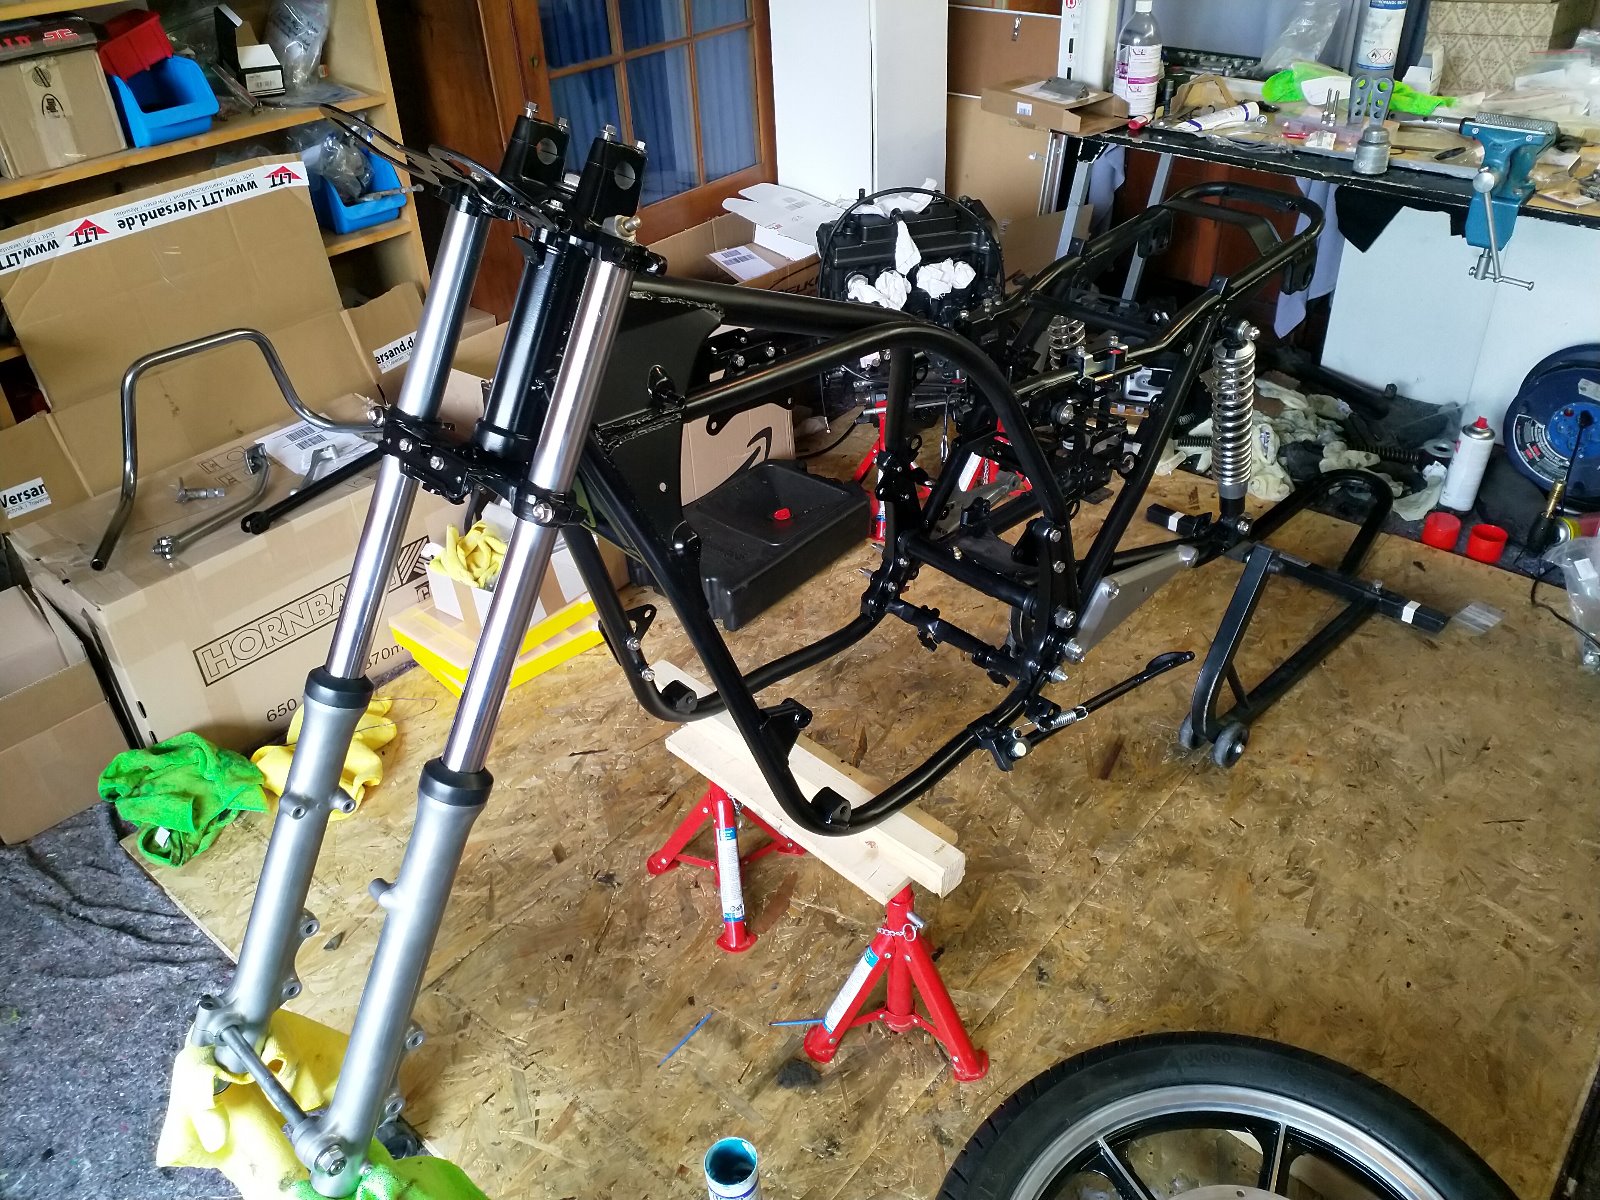
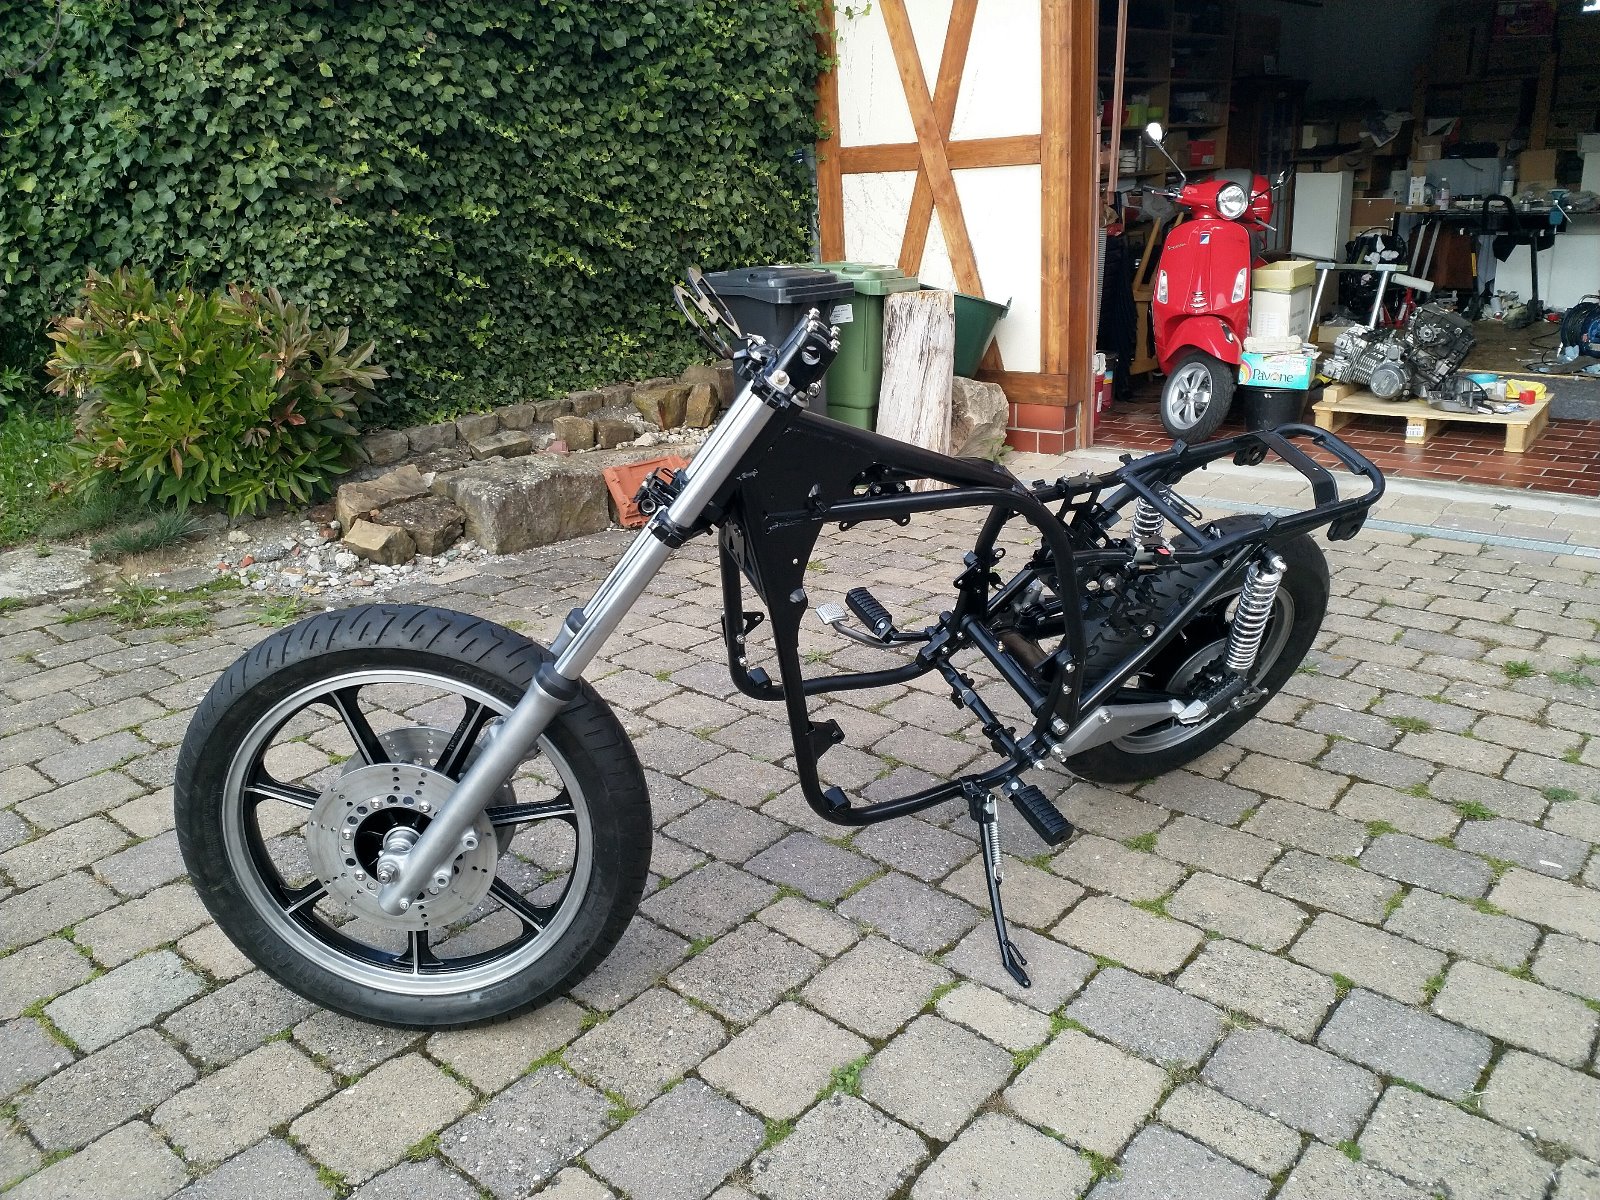
Before I started work on the motor I wanted to bolt something together again! Decided to get a rolling chassis together before I painted and assembled the engine.
KZ1000 Restomod (
www.kzrider.com/forum/11-projects/614517-1977-kz1000-restomod
)
1977 KZ1000A1 ( www.kzrider.com/forum/11-projects/616901...-spare-parts-project )
1980 KZ750H ( kzrider.com/forum/11-projects/612054-kz750h-restoration )
2000 BMW F650GS
1977 KZ1000A1 ( www.kzrider.com/forum/11-projects/616901...-spare-parts-project )
1980 KZ750H ( kzrider.com/forum/11-projects/612054-kz750h-restoration )
2000 BMW F650GS
Last edit: 05 Jan 2020 16:03 by calum. Reason: Fixing picture layout
Please Log in or Create an account to join the conversation.
- calum
-
Topic Author
- Offline
- User
-
Registered
- Posts: 1144
- Thanks: 415
Re: KZ750H Restoration
05 Jan 2020 15:09 - 05 Jan 2020 16:33
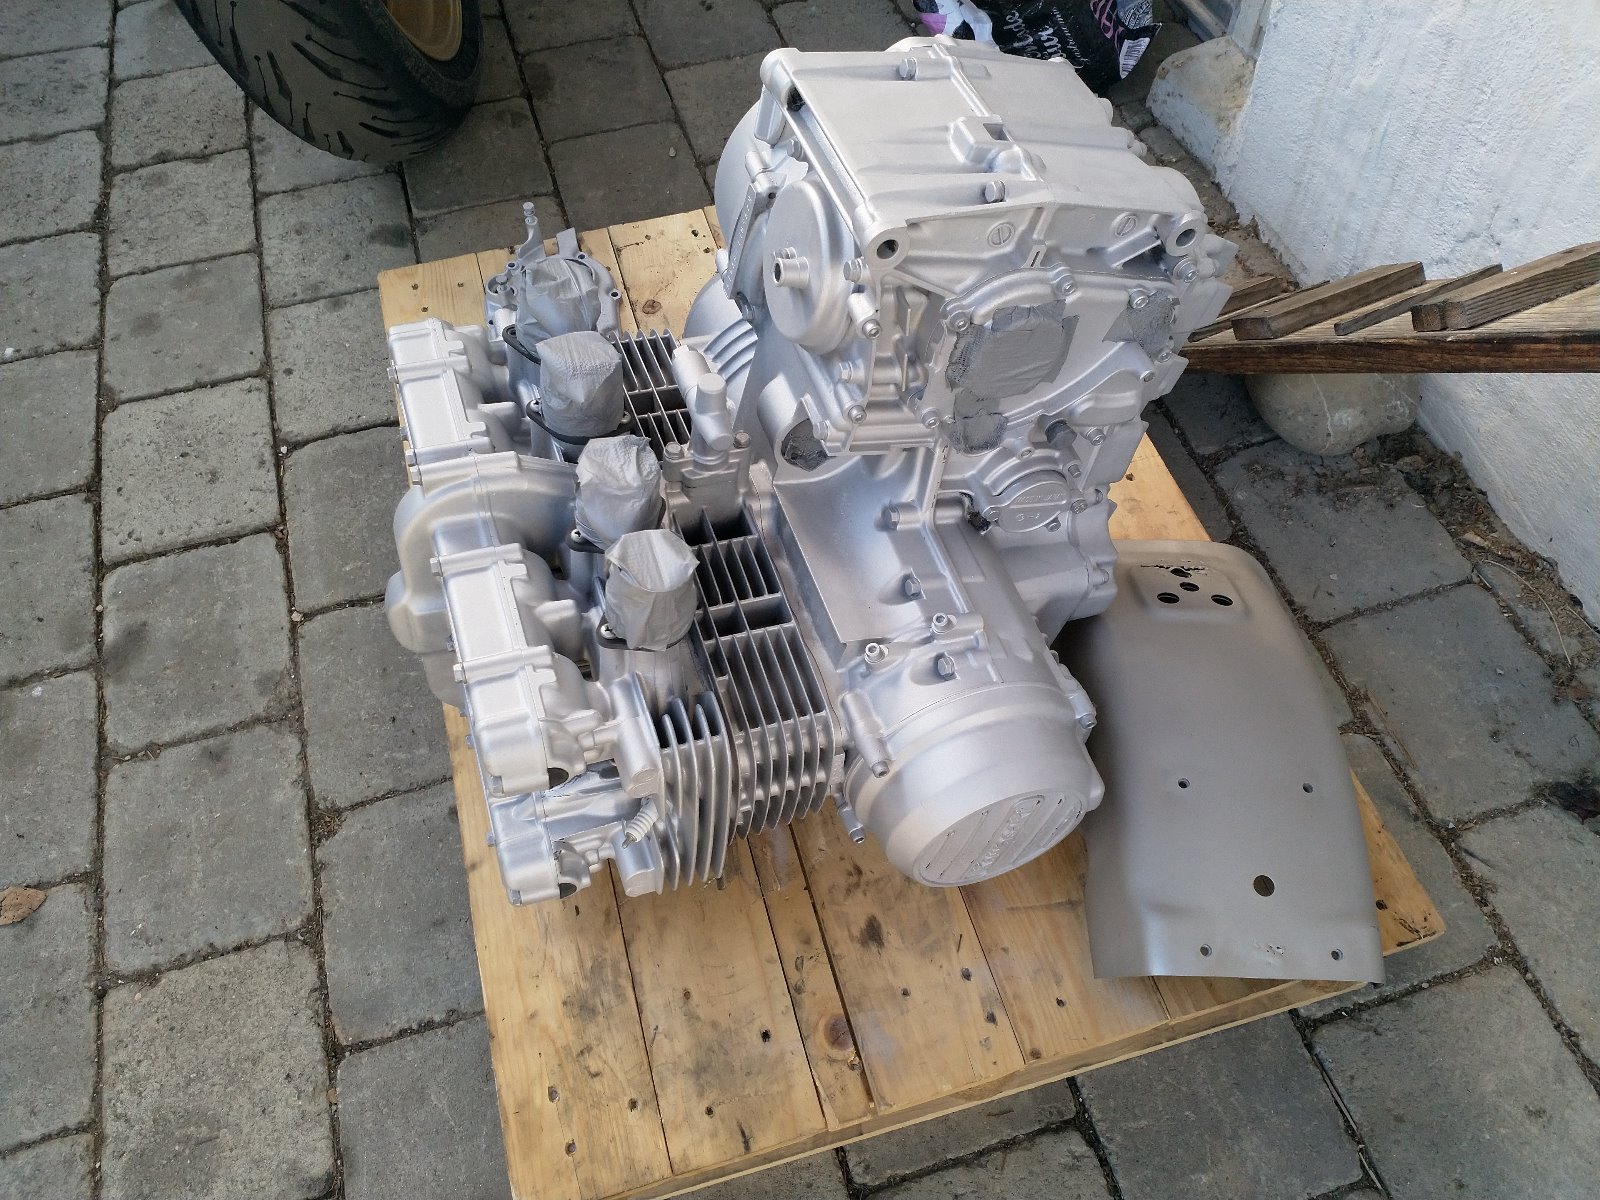
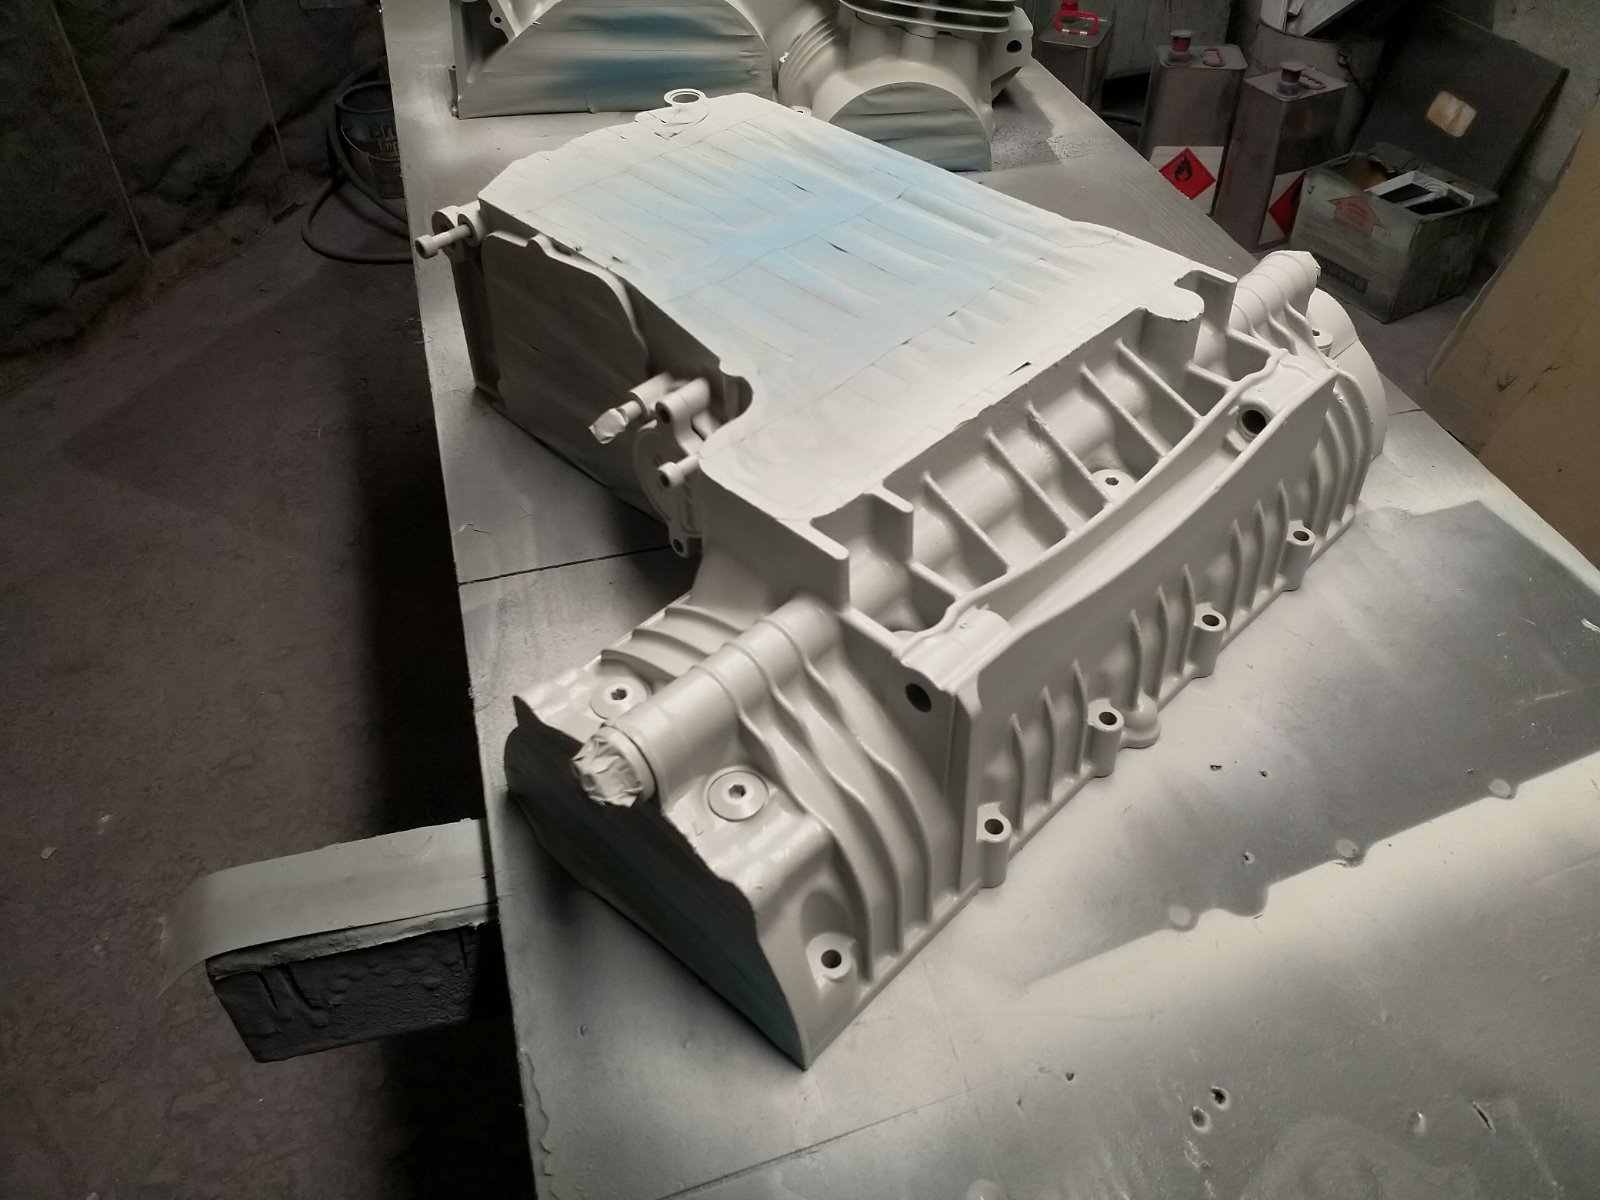
Time to paint the engine. Originally the 750H had an aluminium block but there was so much pitting in the crankcases that I would never have been able to keep it clean. I decided to comprimise and go with the black engine found in some of the 750E models.
I figured that the engine ran pretty well before and as this was my first restoration I'd just check a few things like crankshaft bearing clearance and ring gap, lap the valves and hope for the best, figuring it wouldn't be a problem if I painted the engine before it got too cold. I would later find out that this was a bit hopeful! By then, however, I had to work on a painted engine.
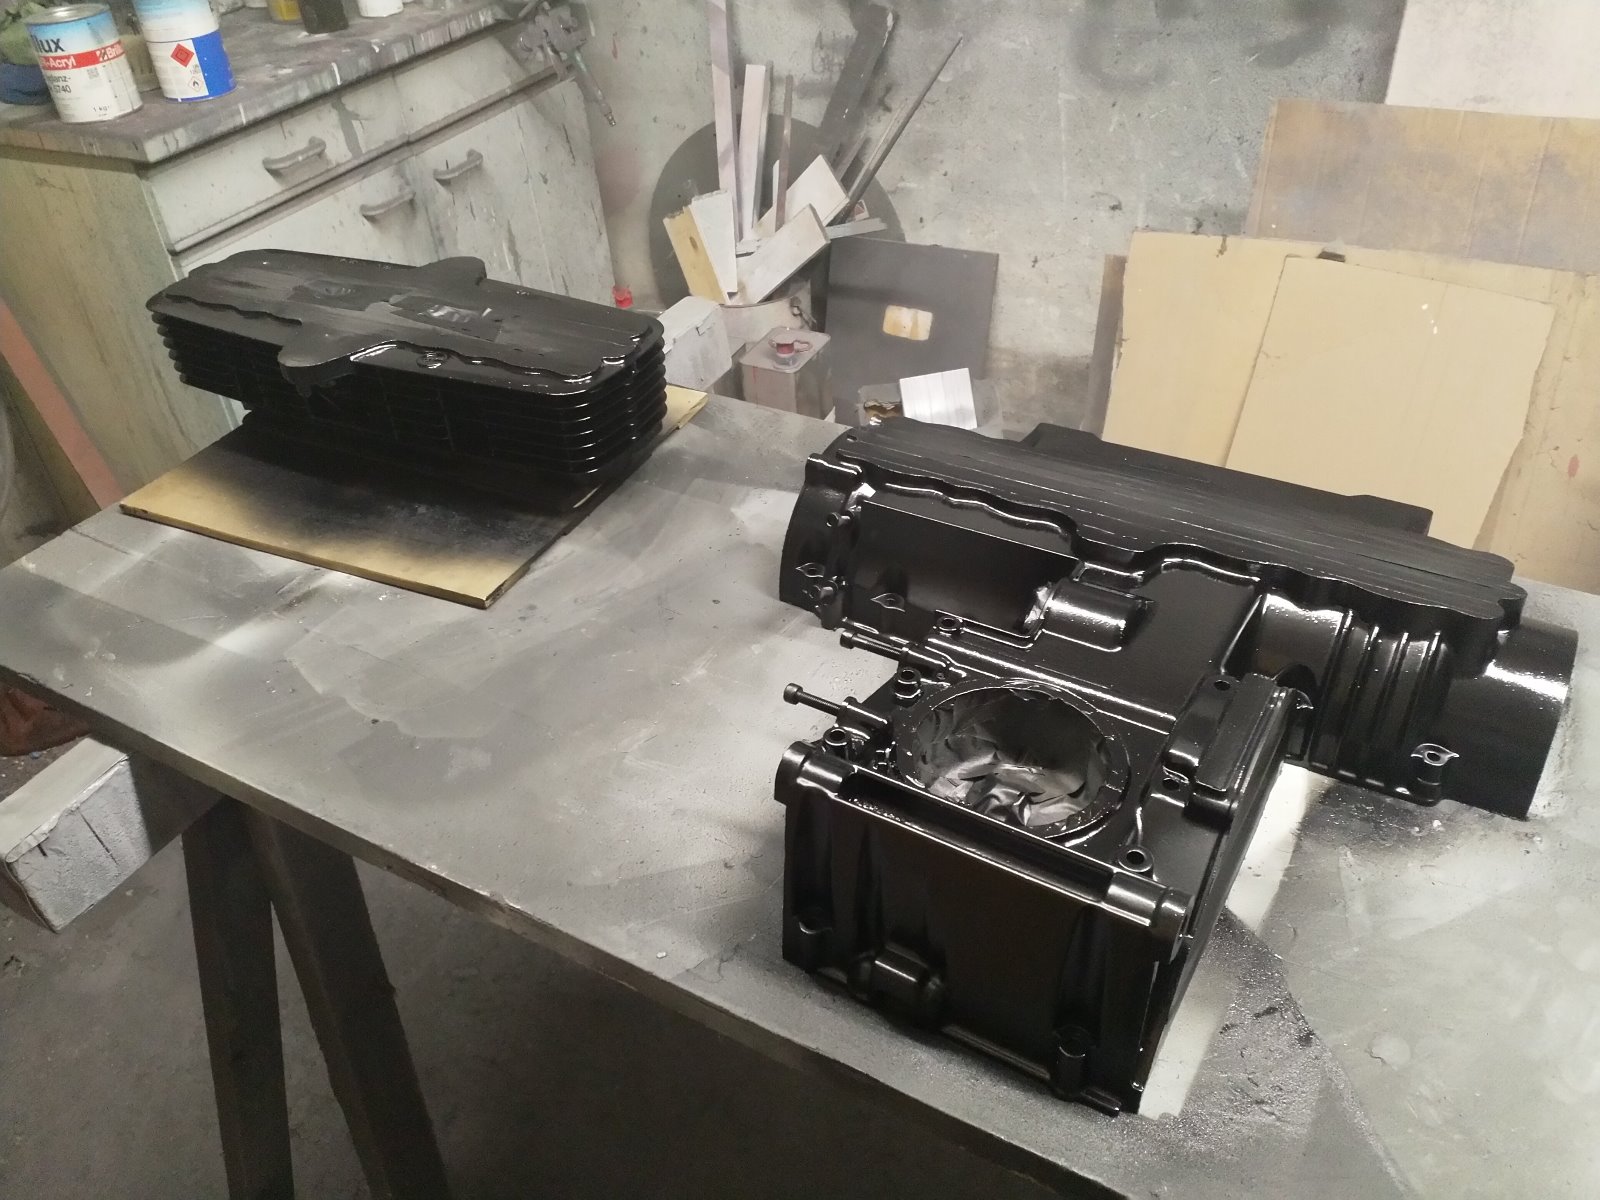
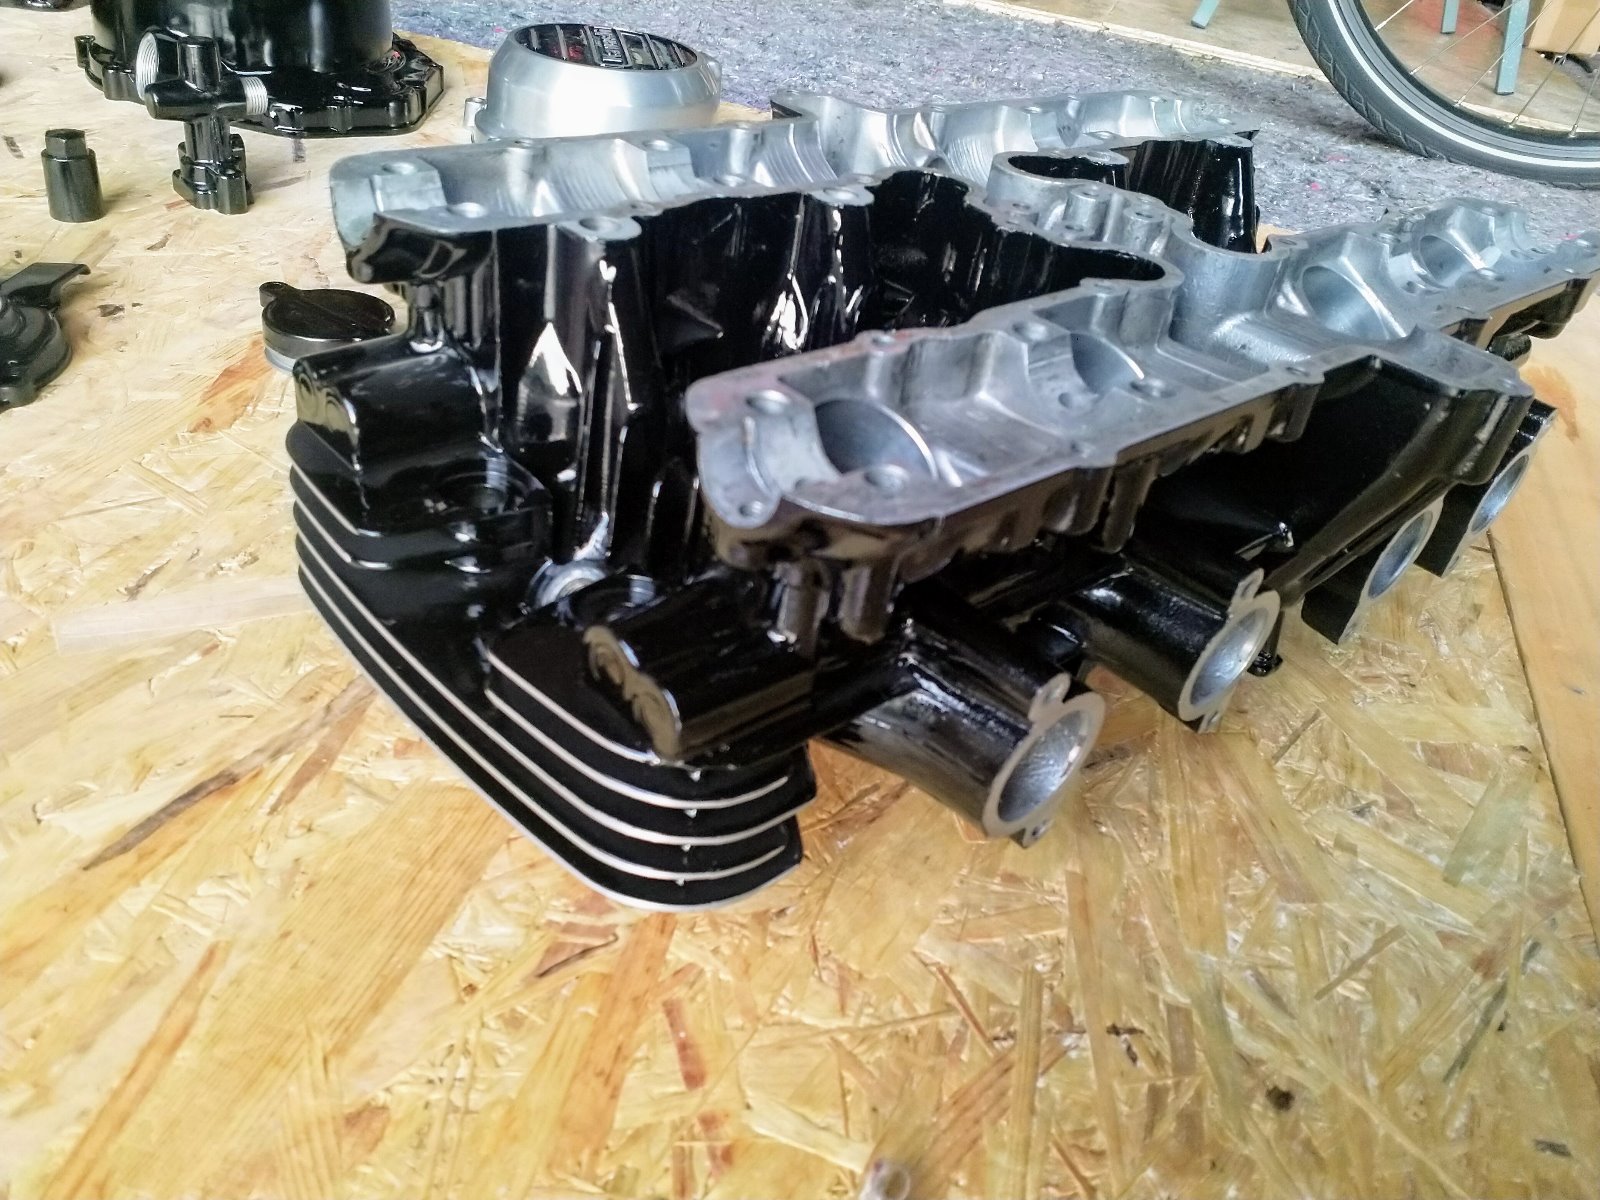
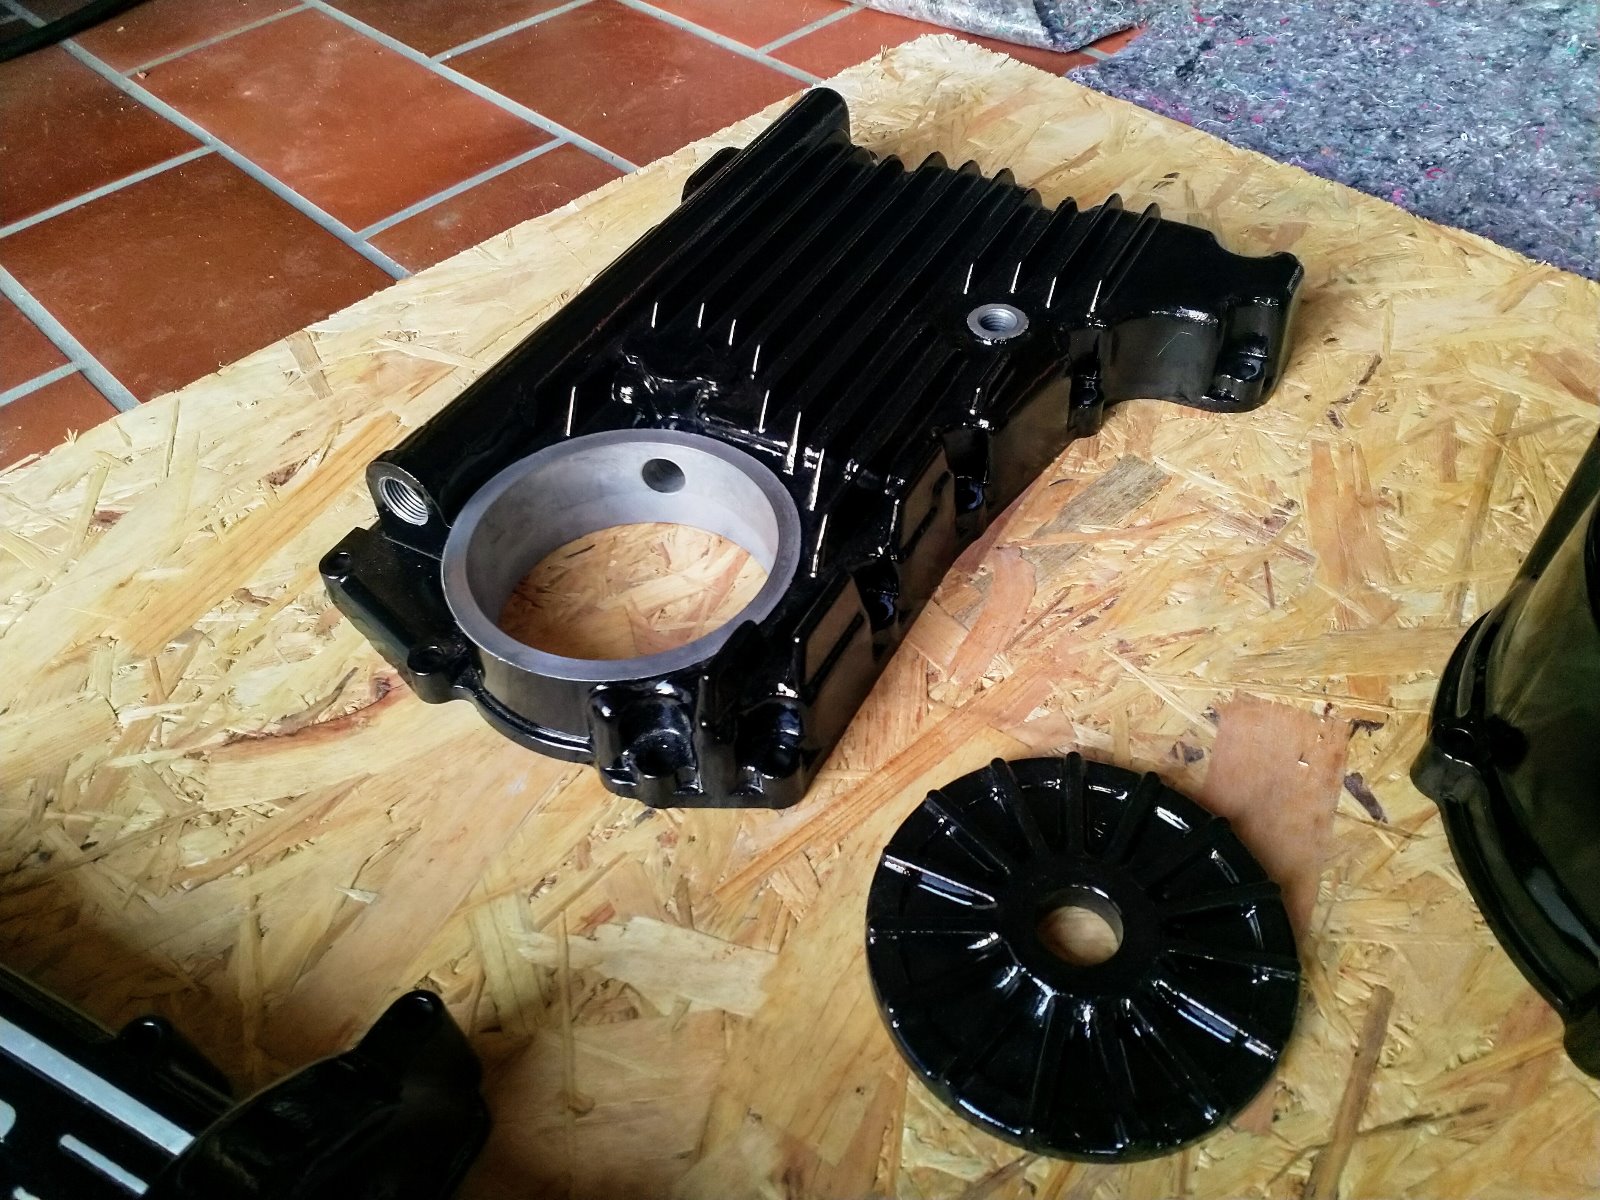
I figured that the engine ran pretty well before and as this was my first restoration I'd just check a few things like crankshaft bearing clearance and ring gap, lap the valves and hope for the best, figuring it wouldn't be a problem if I painted the engine before it got too cold. I would later find out that this was a bit hopeful! By then, however, I had to work on a painted engine.
KZ1000 Restomod (
www.kzrider.com/forum/11-projects/614517-1977-kz1000-restomod
)
1977 KZ1000A1 ( www.kzrider.com/forum/11-projects/616901...-spare-parts-project )
1980 KZ750H ( kzrider.com/forum/11-projects/612054-kz750h-restoration )
2000 BMW F650GS
1977 KZ1000A1 ( www.kzrider.com/forum/11-projects/616901...-spare-parts-project )
1980 KZ750H ( kzrider.com/forum/11-projects/612054-kz750h-restoration )
2000 BMW F650GS
Last edit: 05 Jan 2020 16:33 by calum. Reason: Fixing picture layout
The following user(s) said Thank You: Nessism, Scirocco
Please Log in or Create an account to join the conversation.
- baldy110
-
- Offline
- User
-
Registered
- Posts: 2272
- Thanks: 512
The following user(s) said Thank You: calum
Please Log in or Create an account to join the conversation.
- calum
-
Topic Author
- Offline
- User
-
Registered
- Posts: 1144
- Thanks: 415
Re: KZ750H Restoration
05 Jan 2020 15:23 - 06 Jan 2020 07:31
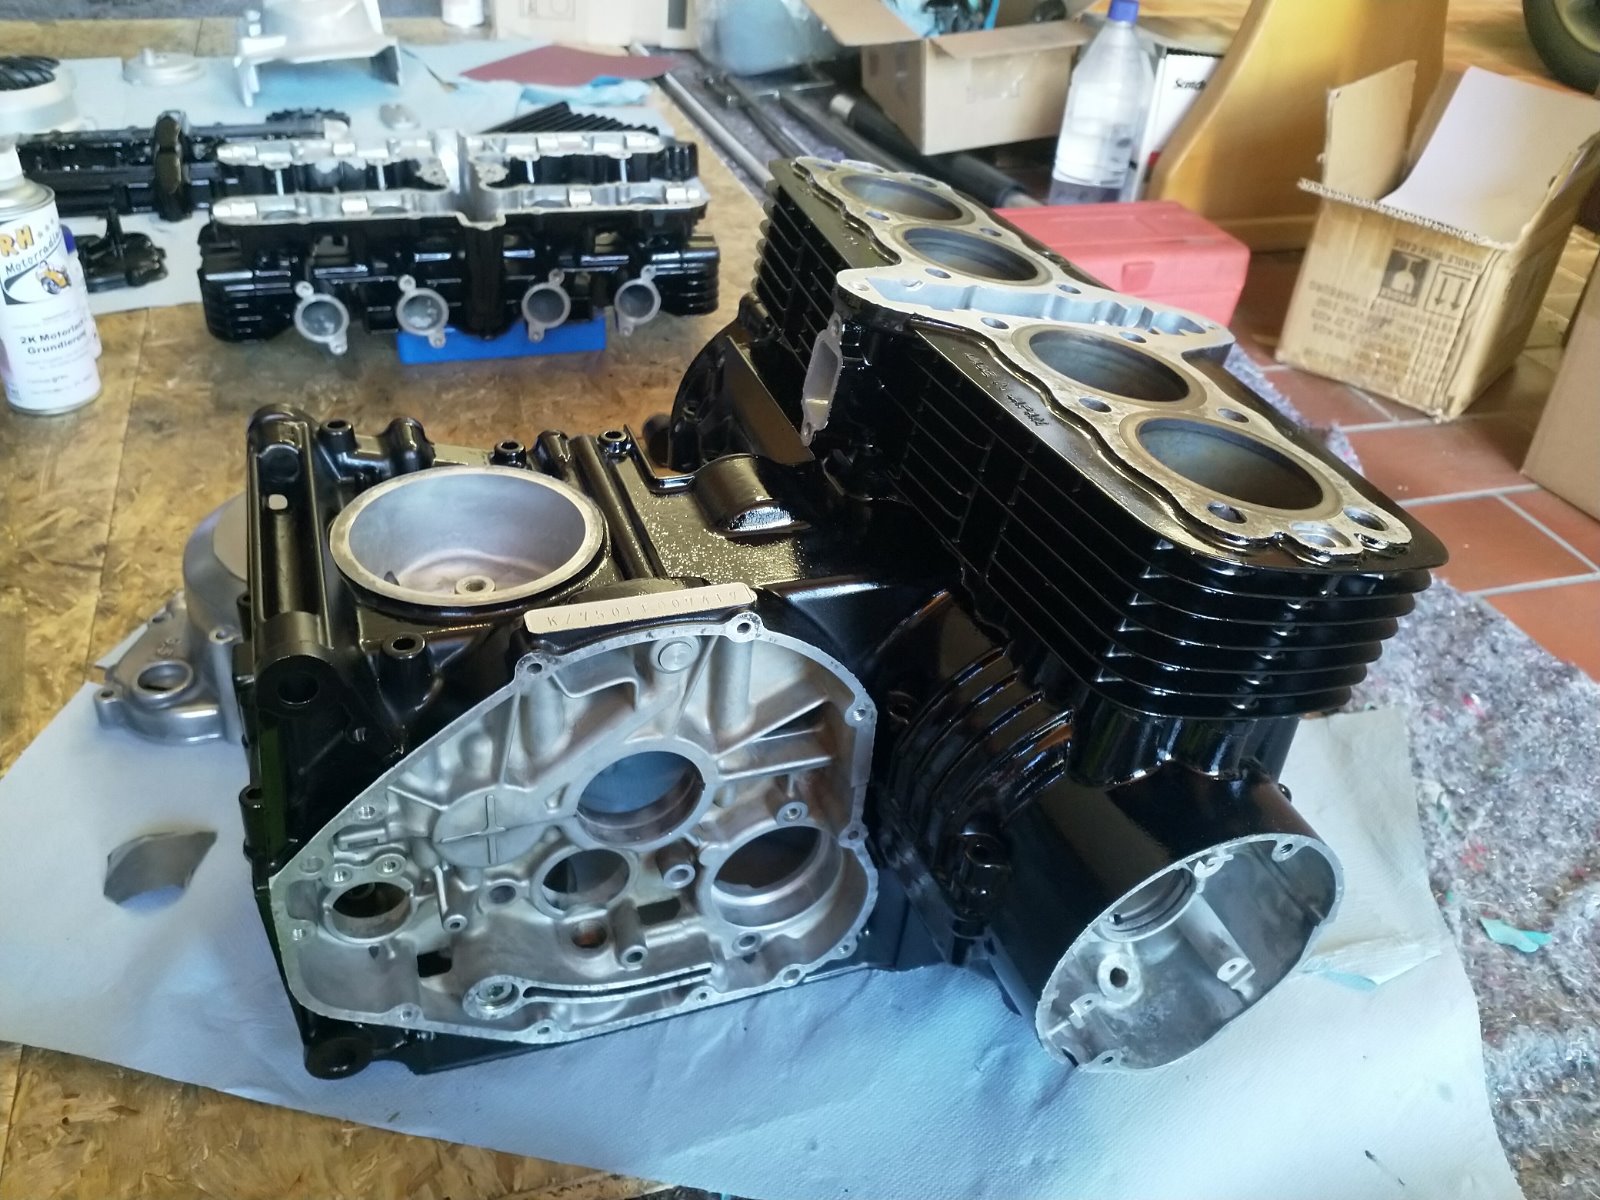
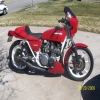
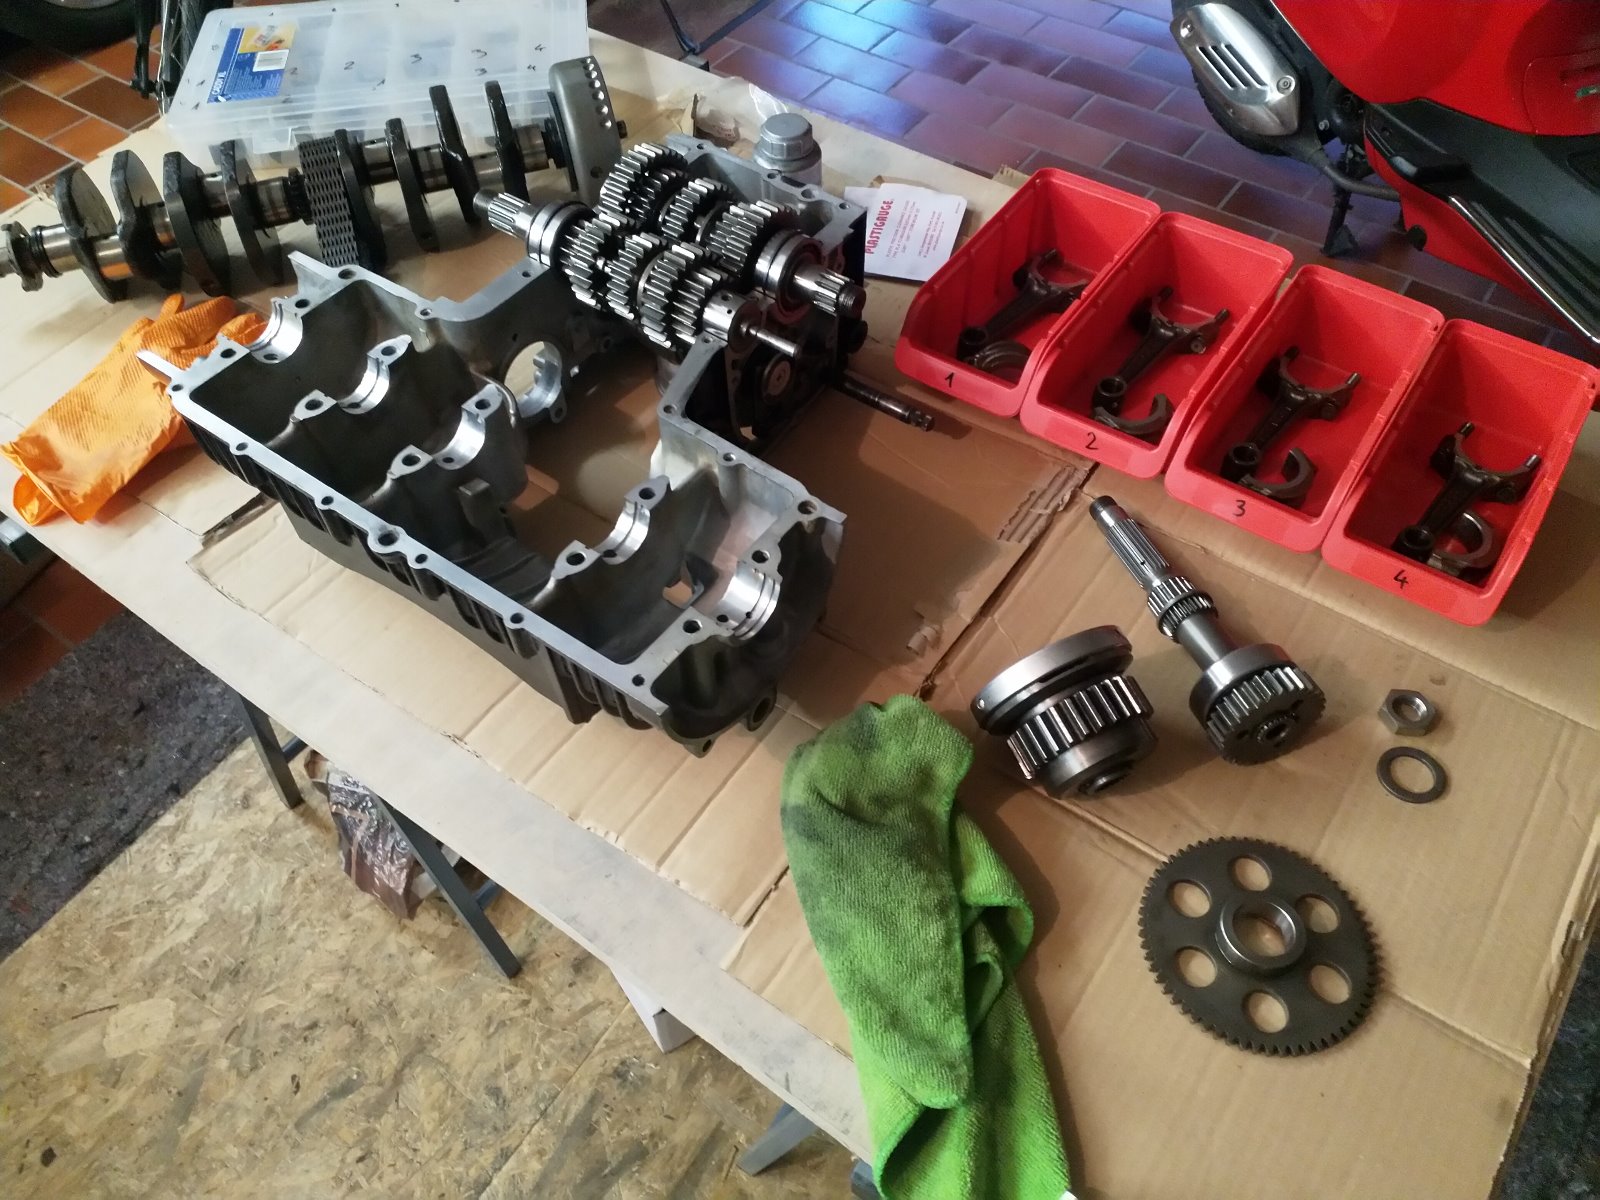
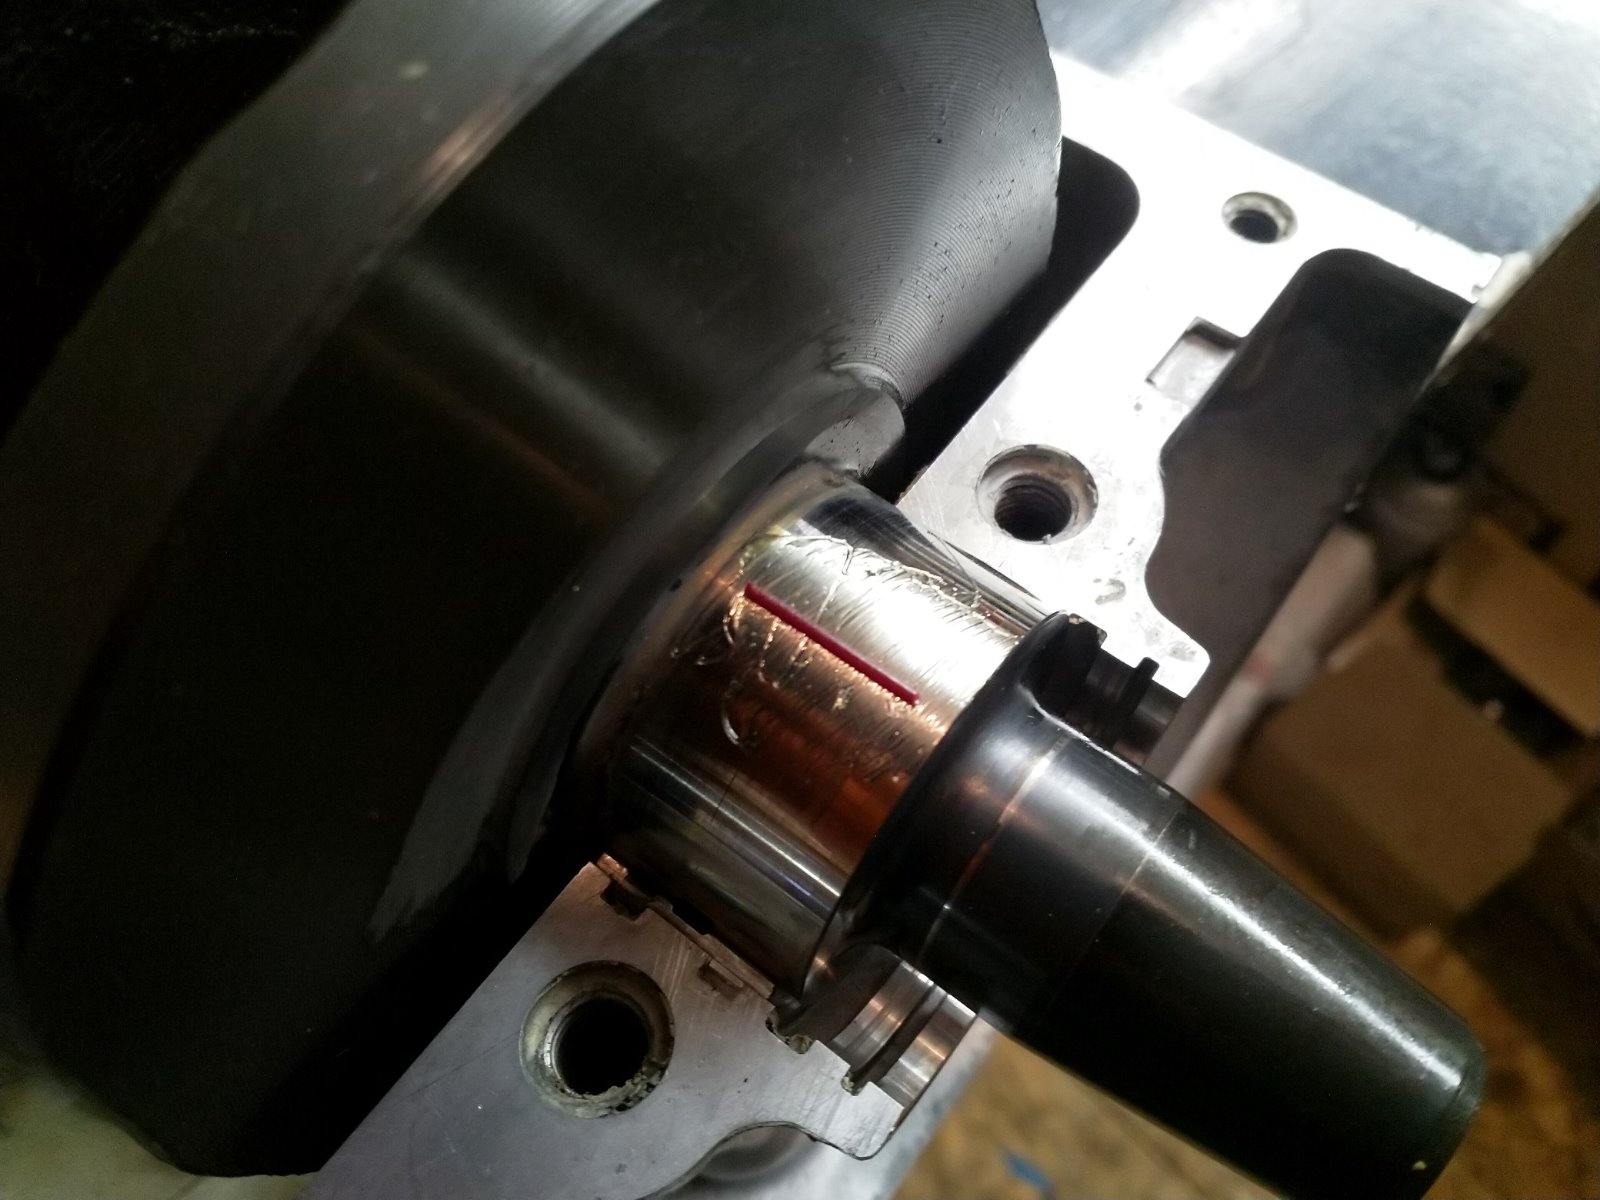
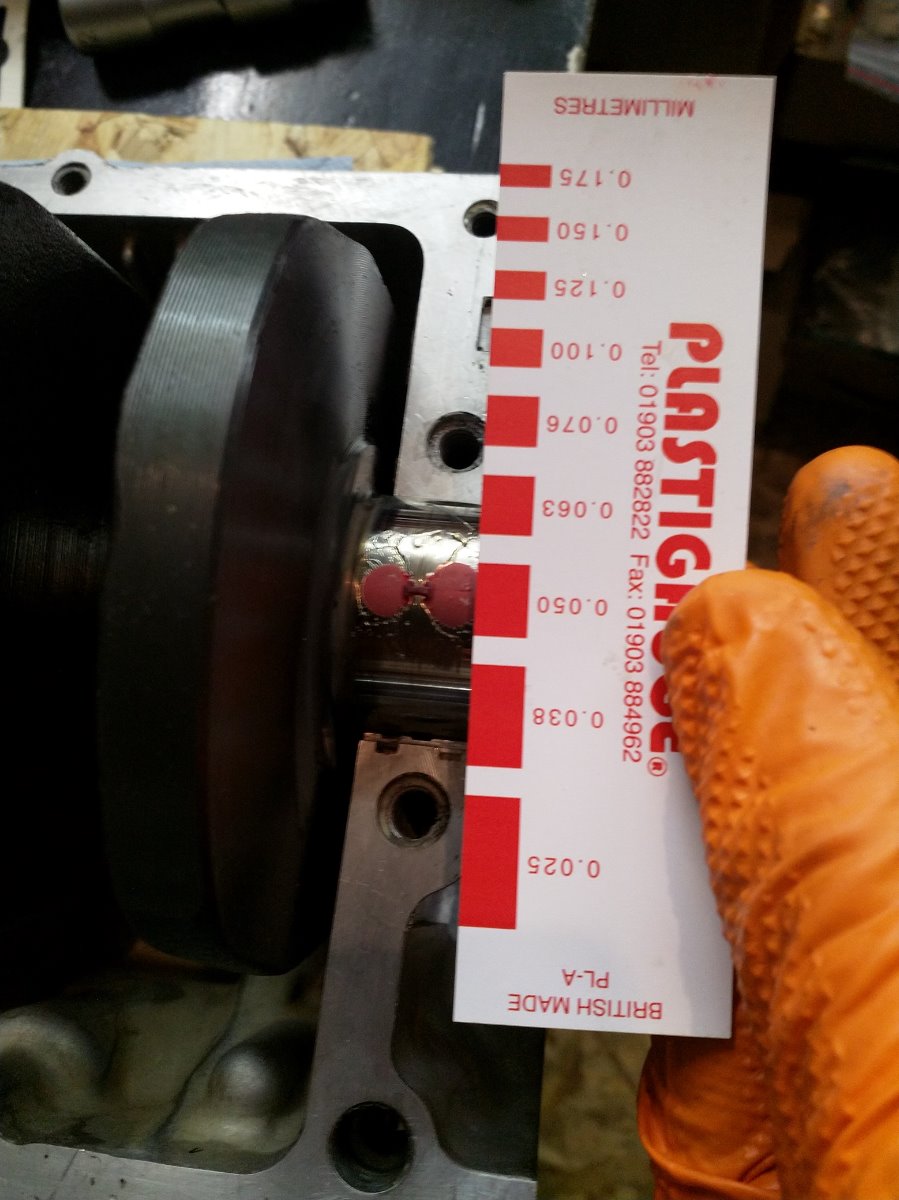
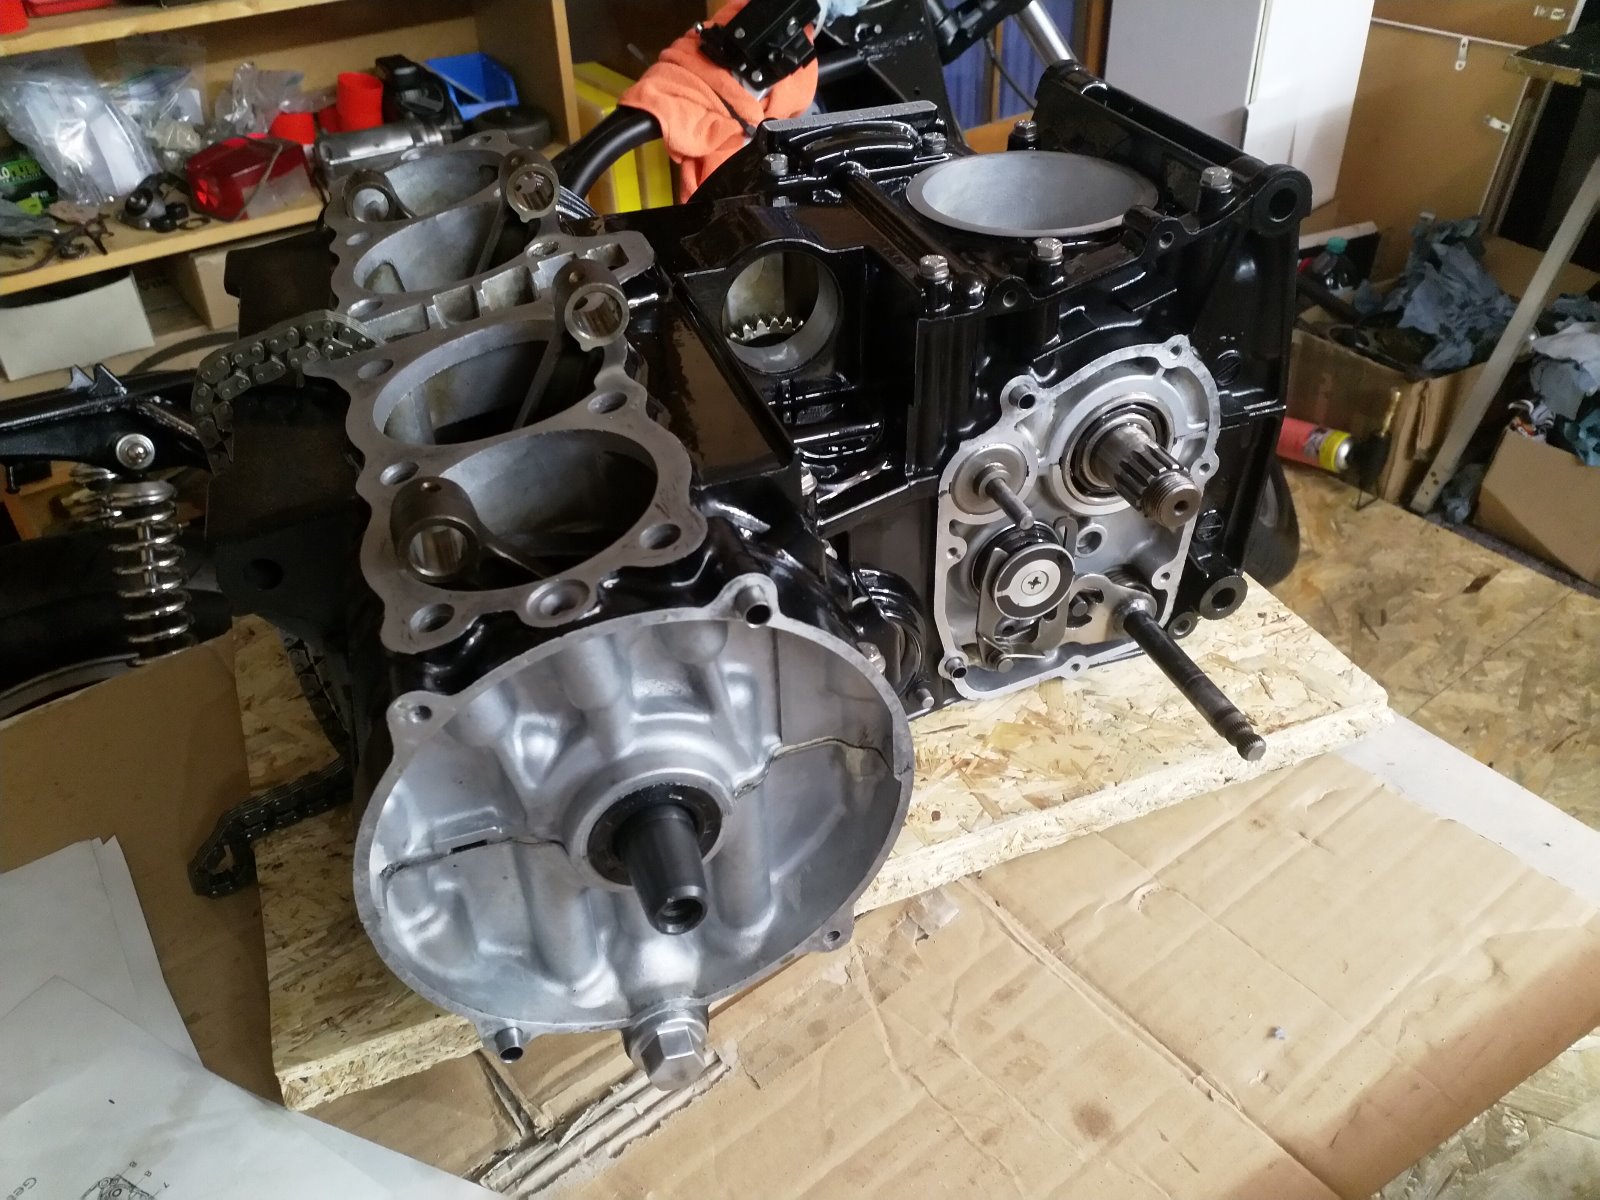
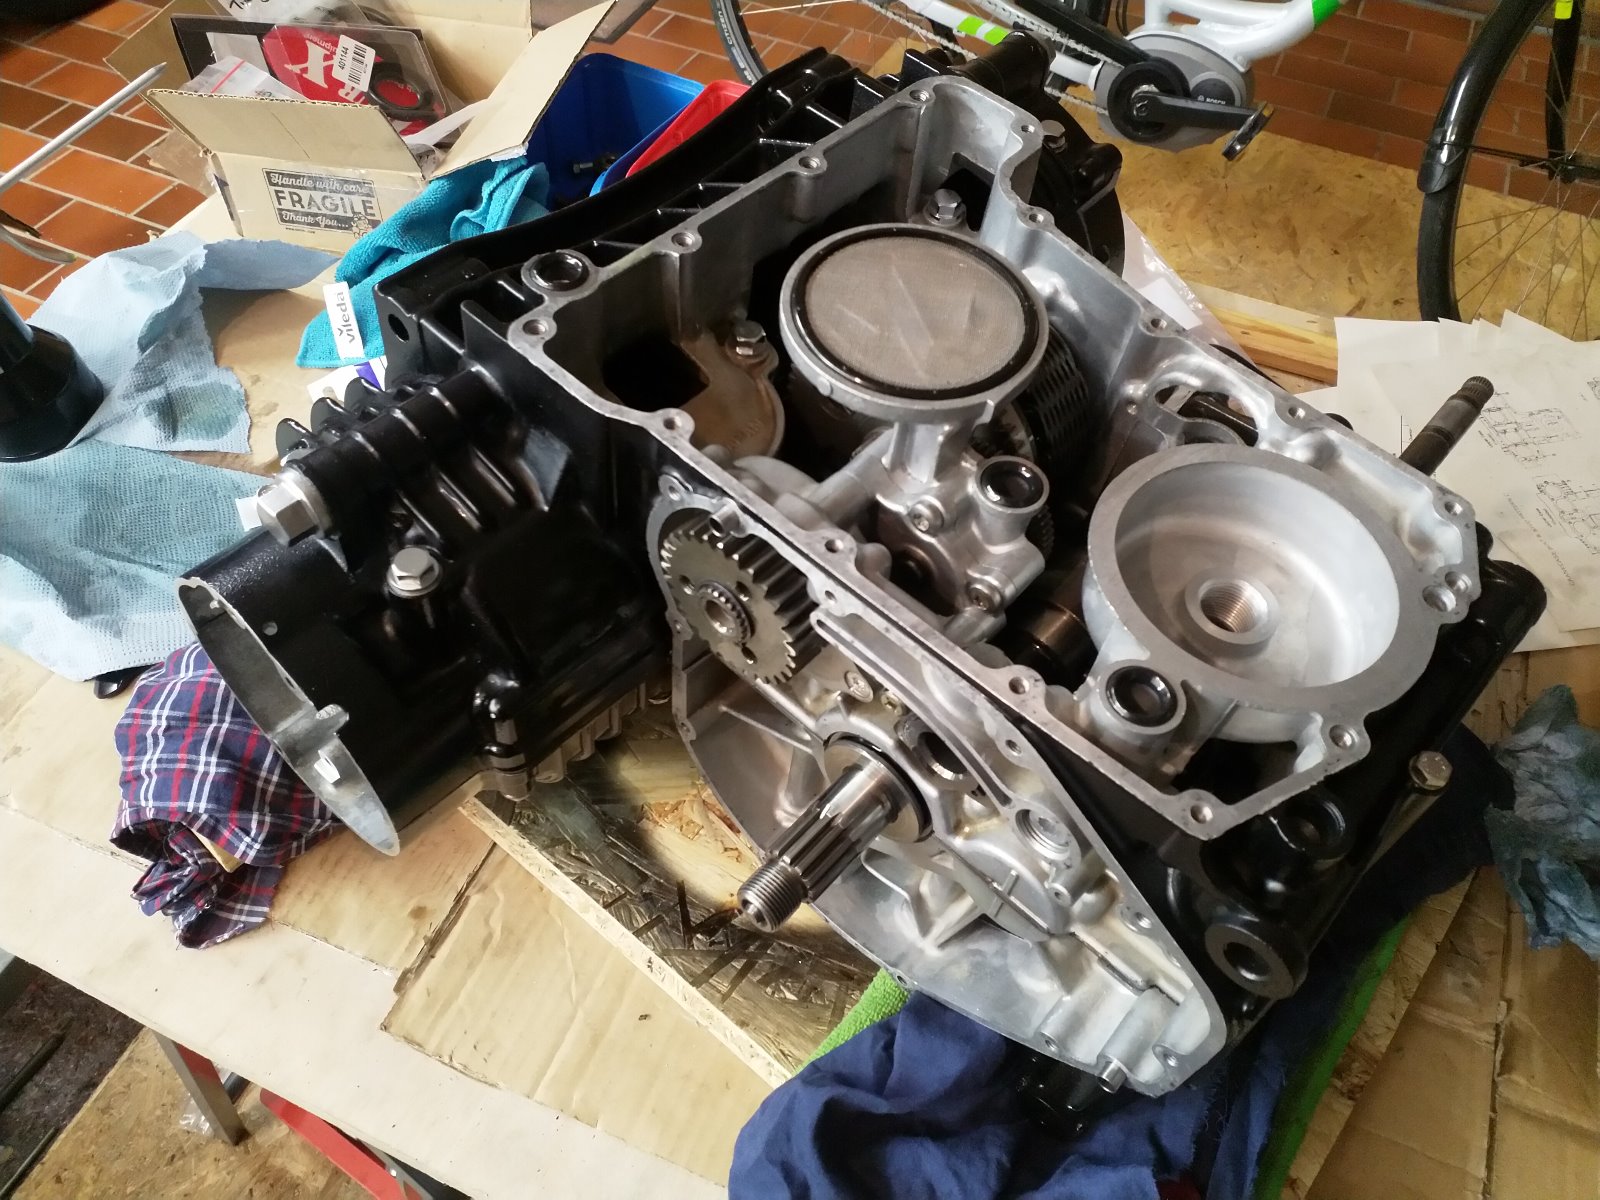
Getting the bottom end back together.
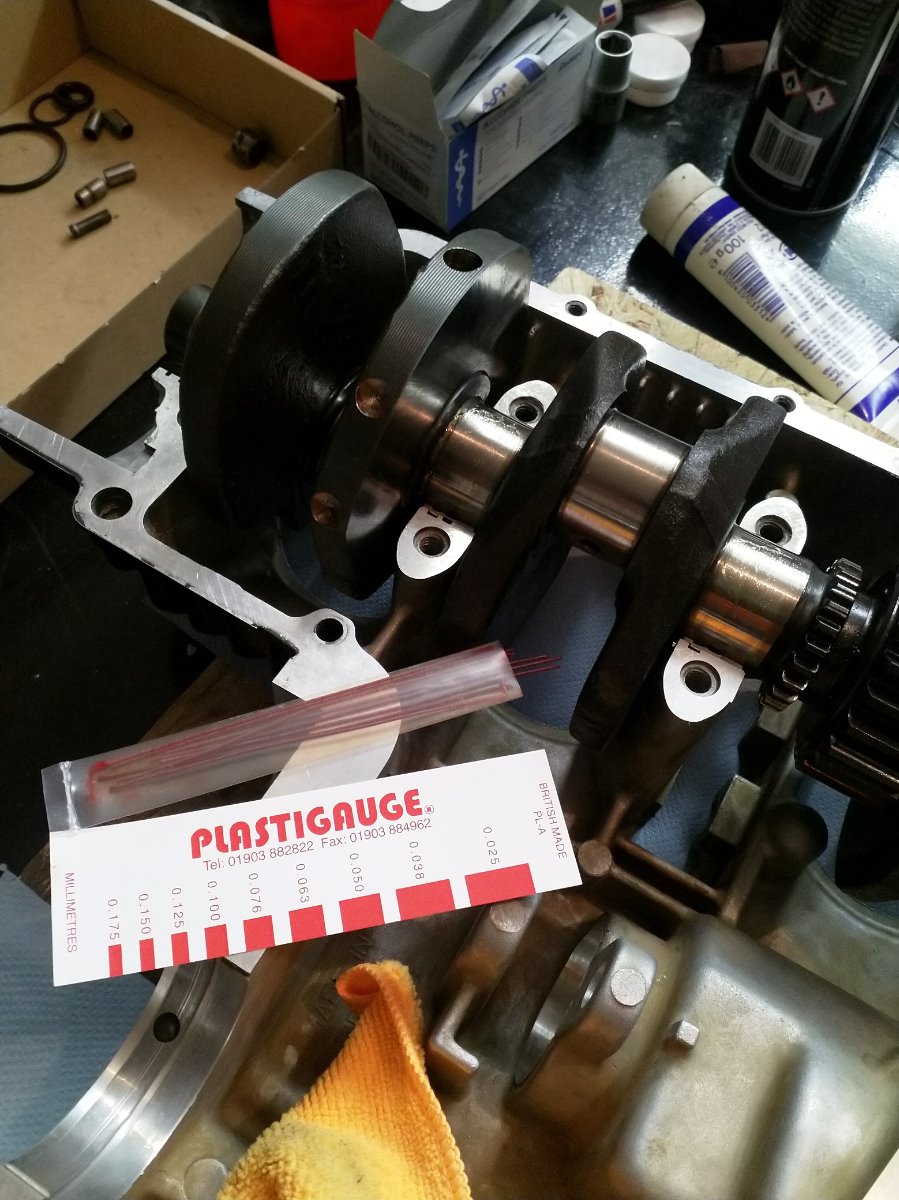
Replaced all the bearings (except on the transmission shafts - they were fine and way too much work to swap out). Measured the crankshaft and conrod bearing clearance with plastigauge and checked the lateral clearance of the conrods. Also checked the gap between second gear and the washer next to it. All the values were well within spec.
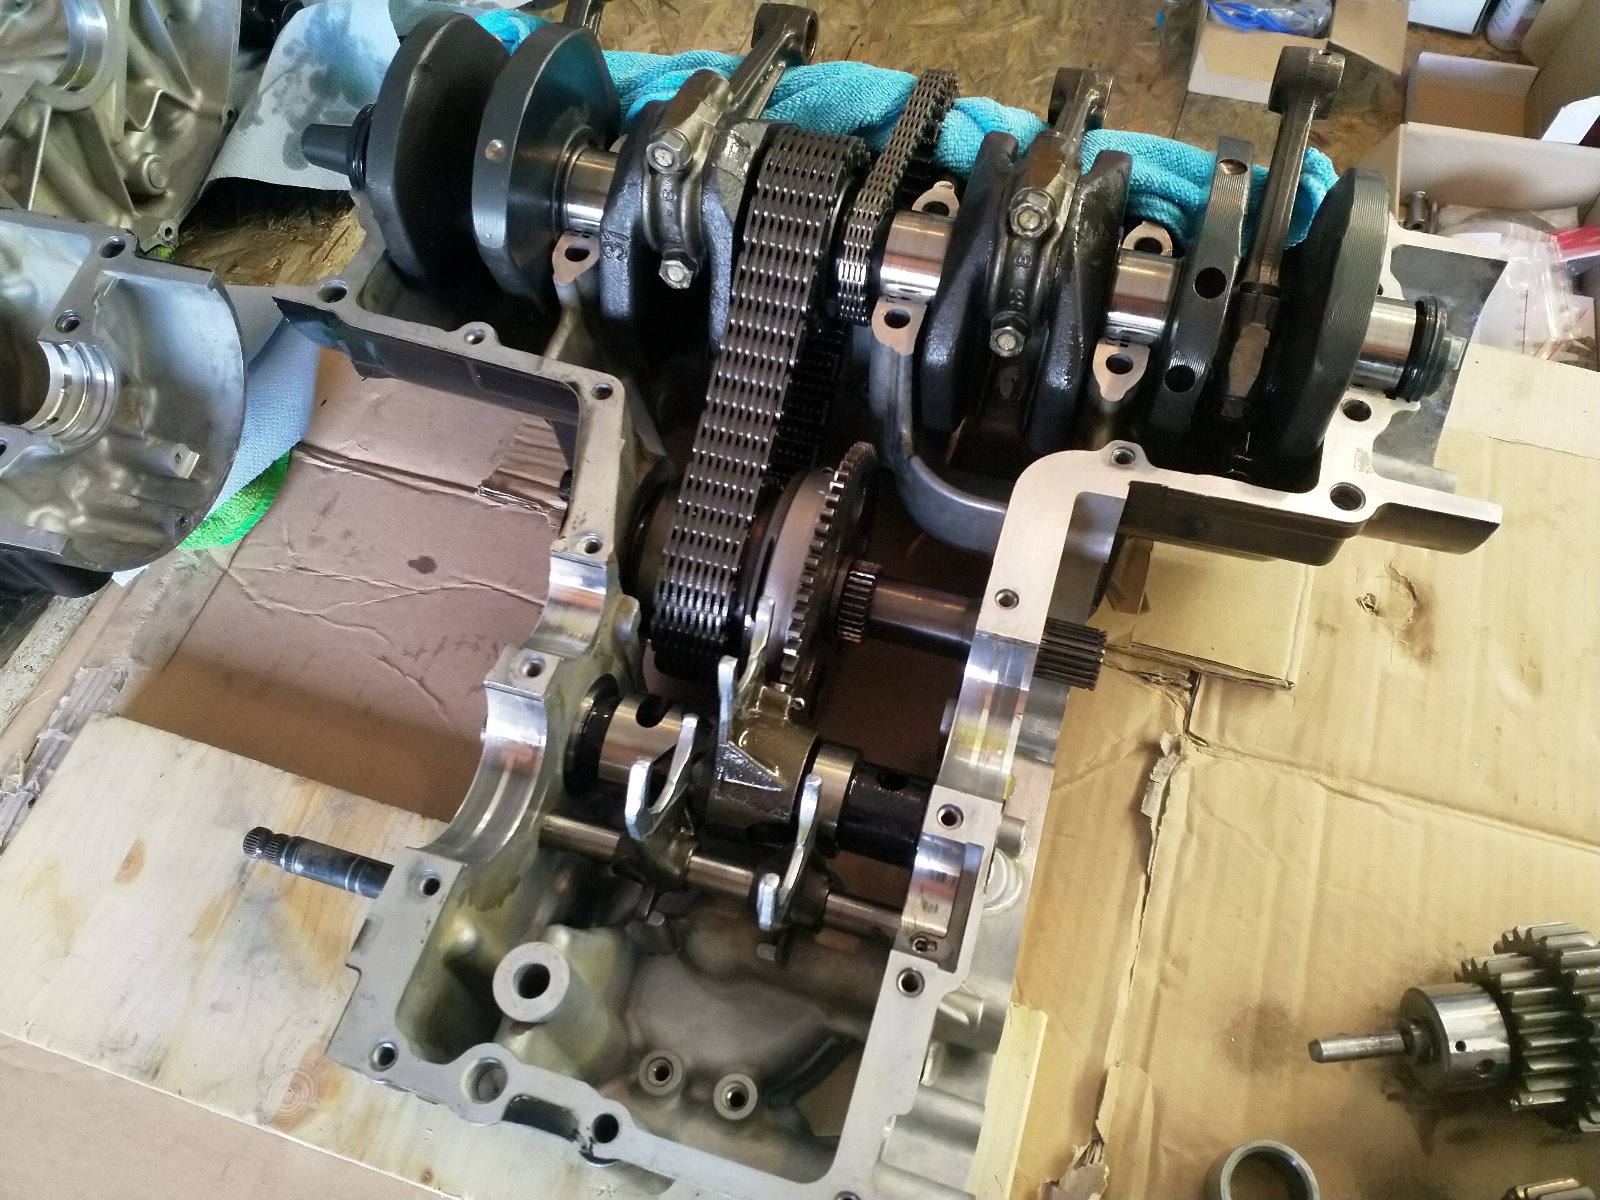
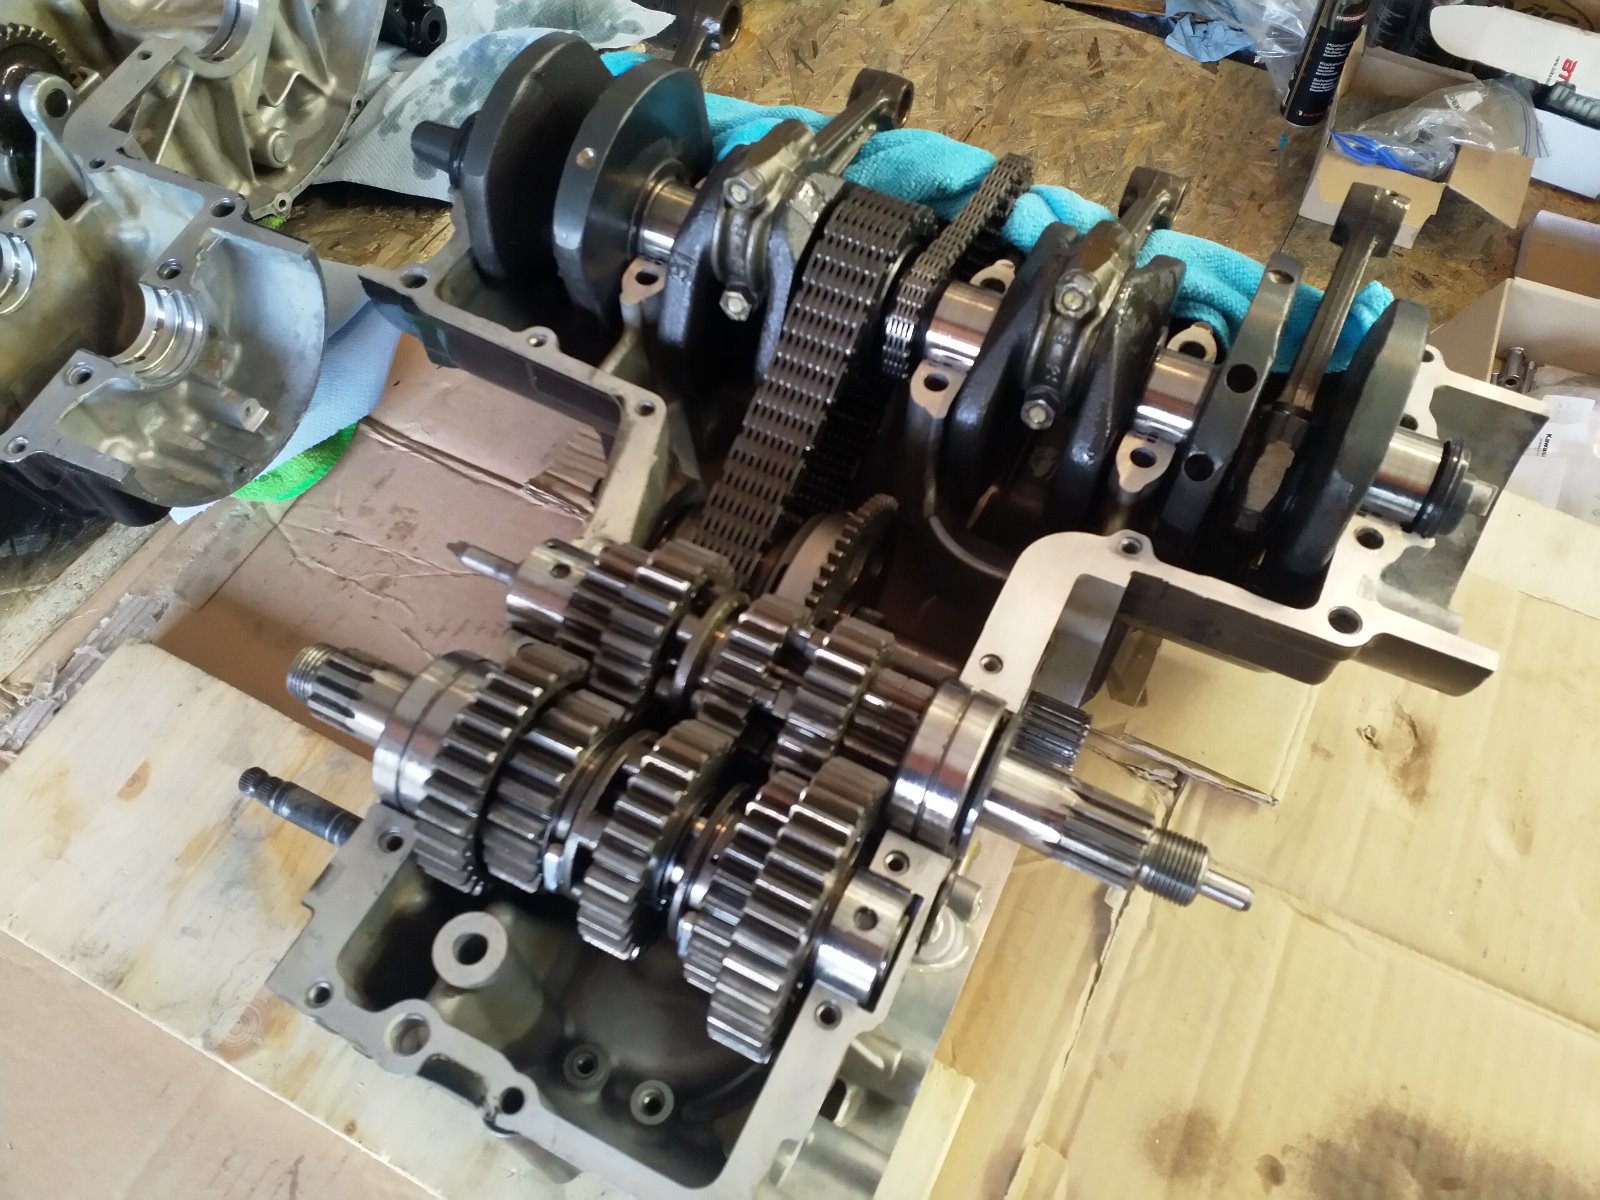
Replaced the dampers in the starter clutch with new ones that were surprisingly easy to find. Also did the springs and rollers (it was OK before but started slipping if the engine didn't fire up on the first few turns).
Some of you might recognise the mistake I made getting the crankcase halves back together: thinking I could assemble the bottom crankcase half first and then try to get the top on with all the gears, secondary shaft and crankshaft in place. I gave up after pissing around with the pins for the transmission bearings for ages. I bashed the secondary shaft back out and read the f'ing manual :laugh:

Replaced all the bearings (except on the transmission shafts - they were fine and way too much work to swap out). Measured the crankshaft and conrod bearing clearance with plastigauge and checked the lateral clearance of the conrods. Also checked the gap between second gear and the washer next to it. All the values were well within spec.
Replaced the dampers in the starter clutch with new ones that were surprisingly easy to find. Also did the springs and rollers (it was OK before but started slipping if the engine didn't fire up on the first few turns).
Some of you might recognise the mistake I made getting the crankcase halves back together: thinking I could assemble the bottom crankcase half first and then try to get the top on with all the gears, secondary shaft and crankshaft in place. I gave up after pissing around with the pins for the transmission bearings for ages. I bashed the secondary shaft back out and read the f'ing manual :laugh:
KZ1000 Restomod (
www.kzrider.com/forum/11-projects/614517-1977-kz1000-restomod
)
1977 KZ1000A1 ( www.kzrider.com/forum/11-projects/616901...-spare-parts-project )
1980 KZ750H ( kzrider.com/forum/11-projects/612054-kz750h-restoration )
2000 BMW F650GS
1977 KZ1000A1 ( www.kzrider.com/forum/11-projects/616901...-spare-parts-project )
1980 KZ750H ( kzrider.com/forum/11-projects/612054-kz750h-restoration )
2000 BMW F650GS
Last edit: 06 Jan 2020 07:31 by calum. Reason: Spelling
Please Log in or Create an account to join the conversation.
Moderators: Street Fighter LTD