
CSR1000 Project Build
- Wookie58
-

- Offline
- Moderator
- Posts: 4848
- Thanks: 2936
Re: CSR1000 Project Build
04 Jun 2023 08:12
Respect for pushing the boundaries, it looks a PITA

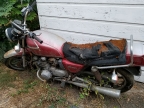
1982 KZ1000 Ltd
www.kzrider.com/forum/11-projects/617631...-82-begins?start=192
kzrider.com/filebase-alias?view=download...d-fault-diagnosis&ca
www.kzrider.com/forum/11-projects/617631...-82-begins?start=192
kzrider.com/filebase-alias?view=download...d-fault-diagnosis&ca
The following user(s) said Thank You: davido
Please Log in or Create an account to join the conversation.
- davido
-
 Topic Author
- Offline
- User
- Posts: 1582
- Thanks: 291
Re: CSR1000 Project Build
07 Jun 2023 09:04
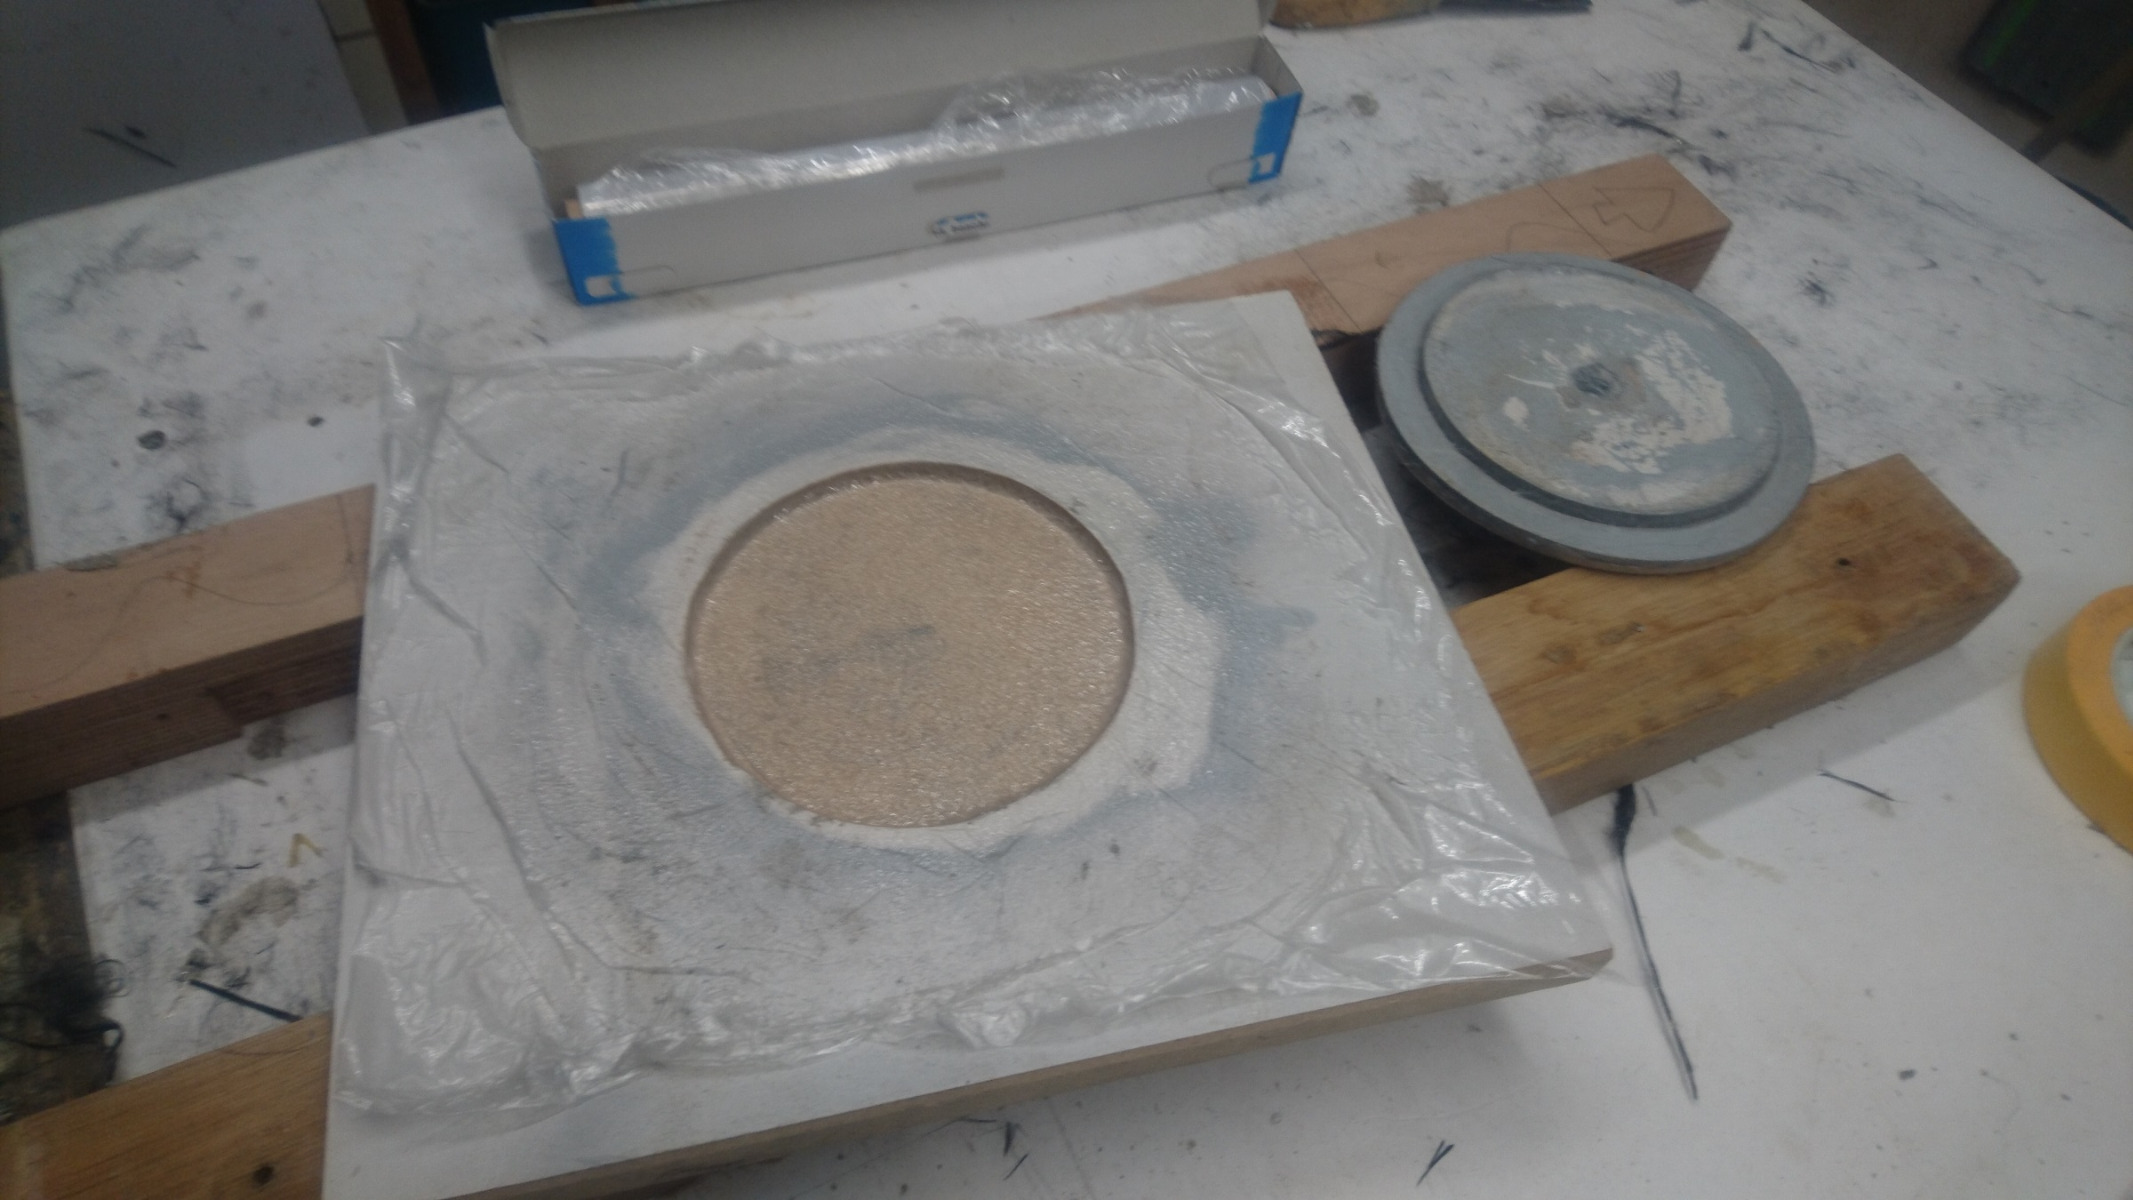
Fuel cap recess yesterday and today. This took a lot of cogitating but I think I've got it. The recess is so small (5mm) I wasn't sure the CF would fold over in a nice clean sharp way. Also, layering the top or the bottom of the recess isn't such a problem but the side is. A strip of 5mm CF!! Not easy but it needs to be done. If not, there's a danger of the whole thing splitting or cracking. Also,calculating the diameter of it. Which is the diameter of the fuel cap mount (120mm) Plus 3 or 4 layers of CF and resin (??? No idea how to accurately figure that out).
In the end I decided to build a press from MDF. I already had made a plug the diameter of the fuel cap + a couple of mm. So, I routed a hole the same diameter + a couple more mm on another piece of MDF. 5mm deep. Glued cling film on it ( I ran out of release film) and waxed everything up.
Clamped the bollocks out of it.....
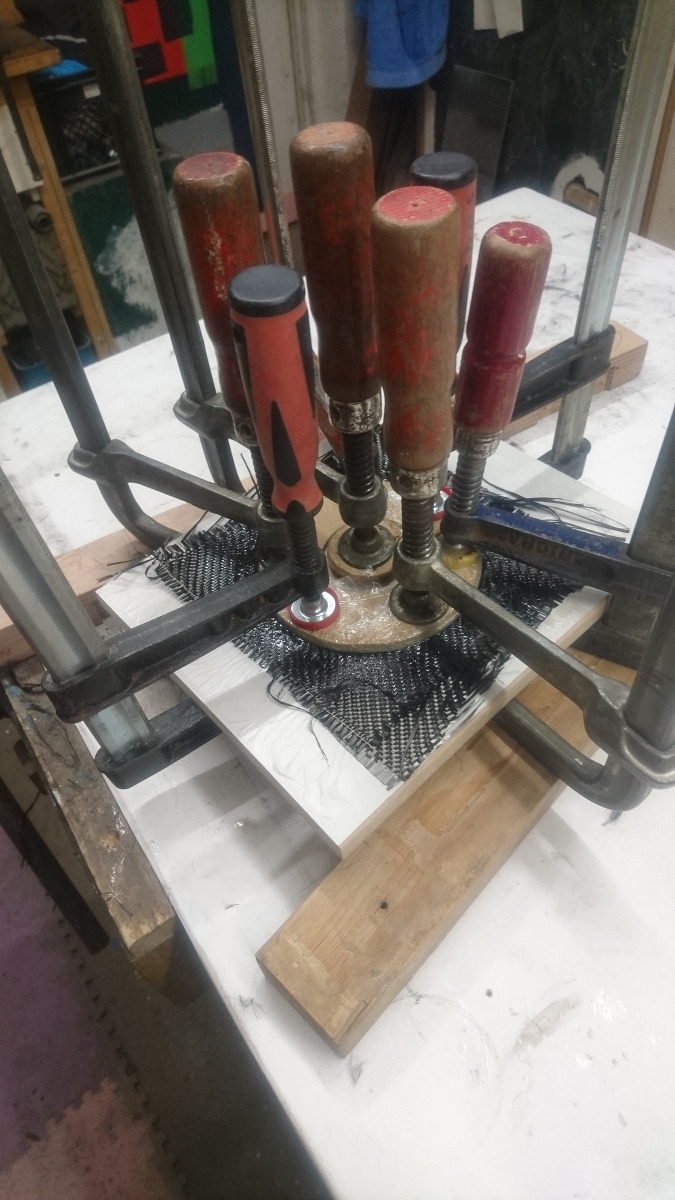
..and left it overnight.
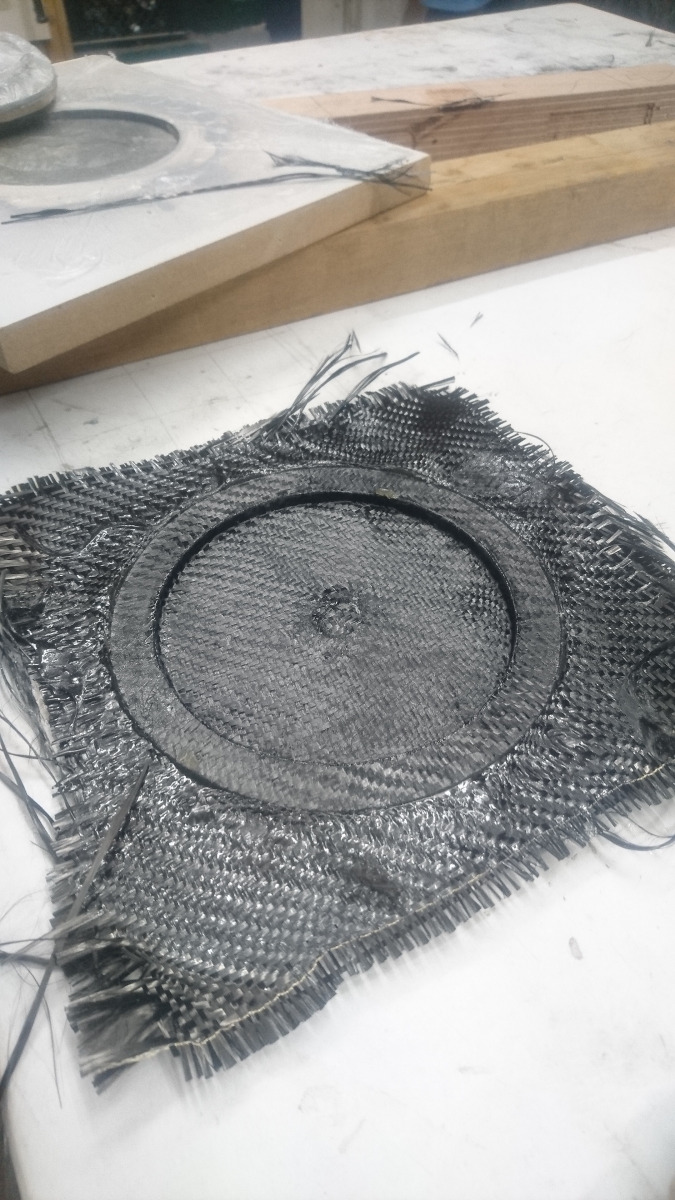
It worked so well that I routed the hole a couple of mm wider and repeated the process. So now I have a nice solid (4 layers) recess for the fuel cap mount. layered top,bottom and side.With a nice sharply defined edge. No air pockets or corners cut. Very happy with it.
Next up will be to trim it back sand it and then I can lay it in postion when I start laminating the top of the tank. (The Tank Top?)
In the end I decided to build a press from MDF. I already had made a plug the diameter of the fuel cap + a couple of mm. So, I routed a hole the same diameter + a couple more mm on another piece of MDF. 5mm deep. Glued cling film on it ( I ran out of release film) and waxed everything up.
Clamped the bollocks out of it.....
..and left it overnight.
It worked so well that I routed the hole a couple of mm wider and repeated the process. So now I have a nice solid (4 layers) recess for the fuel cap mount. layered top,bottom and side.With a nice sharply defined edge. No air pockets or corners cut. Very happy with it.
Next up will be to trim it back sand it and then I can lay it in postion when I start laminating the top of the tank. (The Tank Top?)
www.kzrider.com/forum/11-projects/594313-csr1000-project-build
CB550 (1978)
CB500/4 (1972)*
KZ1000CSR (1981)
XT 600E (1999)
TDM900 (2003)
CB550 (1978)
CB500/4 (1972)*
KZ1000CSR (1981)
XT 600E (1999)
TDM900 (2003)
The following user(s) said Thank You: Wookie58
Please Log in or Create an account to join the conversation.
- ZedZen
-

- Offline
- User
- Posts: 6
- Thanks: 3
Re: CSR1000 Project Build
07 Jun 2023 15:57
Loving this thread. The carbon tank is gonna look spectacular.
The following user(s) said Thank You: davido
Please Log in or Create an account to join the conversation.
- davido
-
Topic Author
- Offline
- User
- Posts: 1582
- Thanks: 291
Re: CSR1000 Project Build
08 Jun 2023 10:48
Did the tank top today. What a mess! I thought I had it all sussed out but wow. Covered in resin, carbon sticking to everything, It was like I had bushes growing out of my fingers.All my fingers! A real Laurel and Hardy day today! But its done. First layer on the top of the tank and the fuel cap recess fitted. So, that's all the hardware done. The rest is just building up the layers. Oh what fun!!!!!
www.kzrider.com/forum/11-projects/594313-csr1000-project-build
CB550 (1978)
CB500/4 (1972)*
KZ1000CSR (1981)
XT 600E (1999)
TDM900 (2003)
CB550 (1978)
CB500/4 (1972)*
KZ1000CSR (1981)
XT 600E (1999)
TDM900 (2003)
Please Log in or Create an account to join the conversation.
- davido
-
Topic Author
- Offline
- User
- Posts: 1582
- Thanks: 291
Re: CSR1000 Project Build
10 Jun 2023 08:31
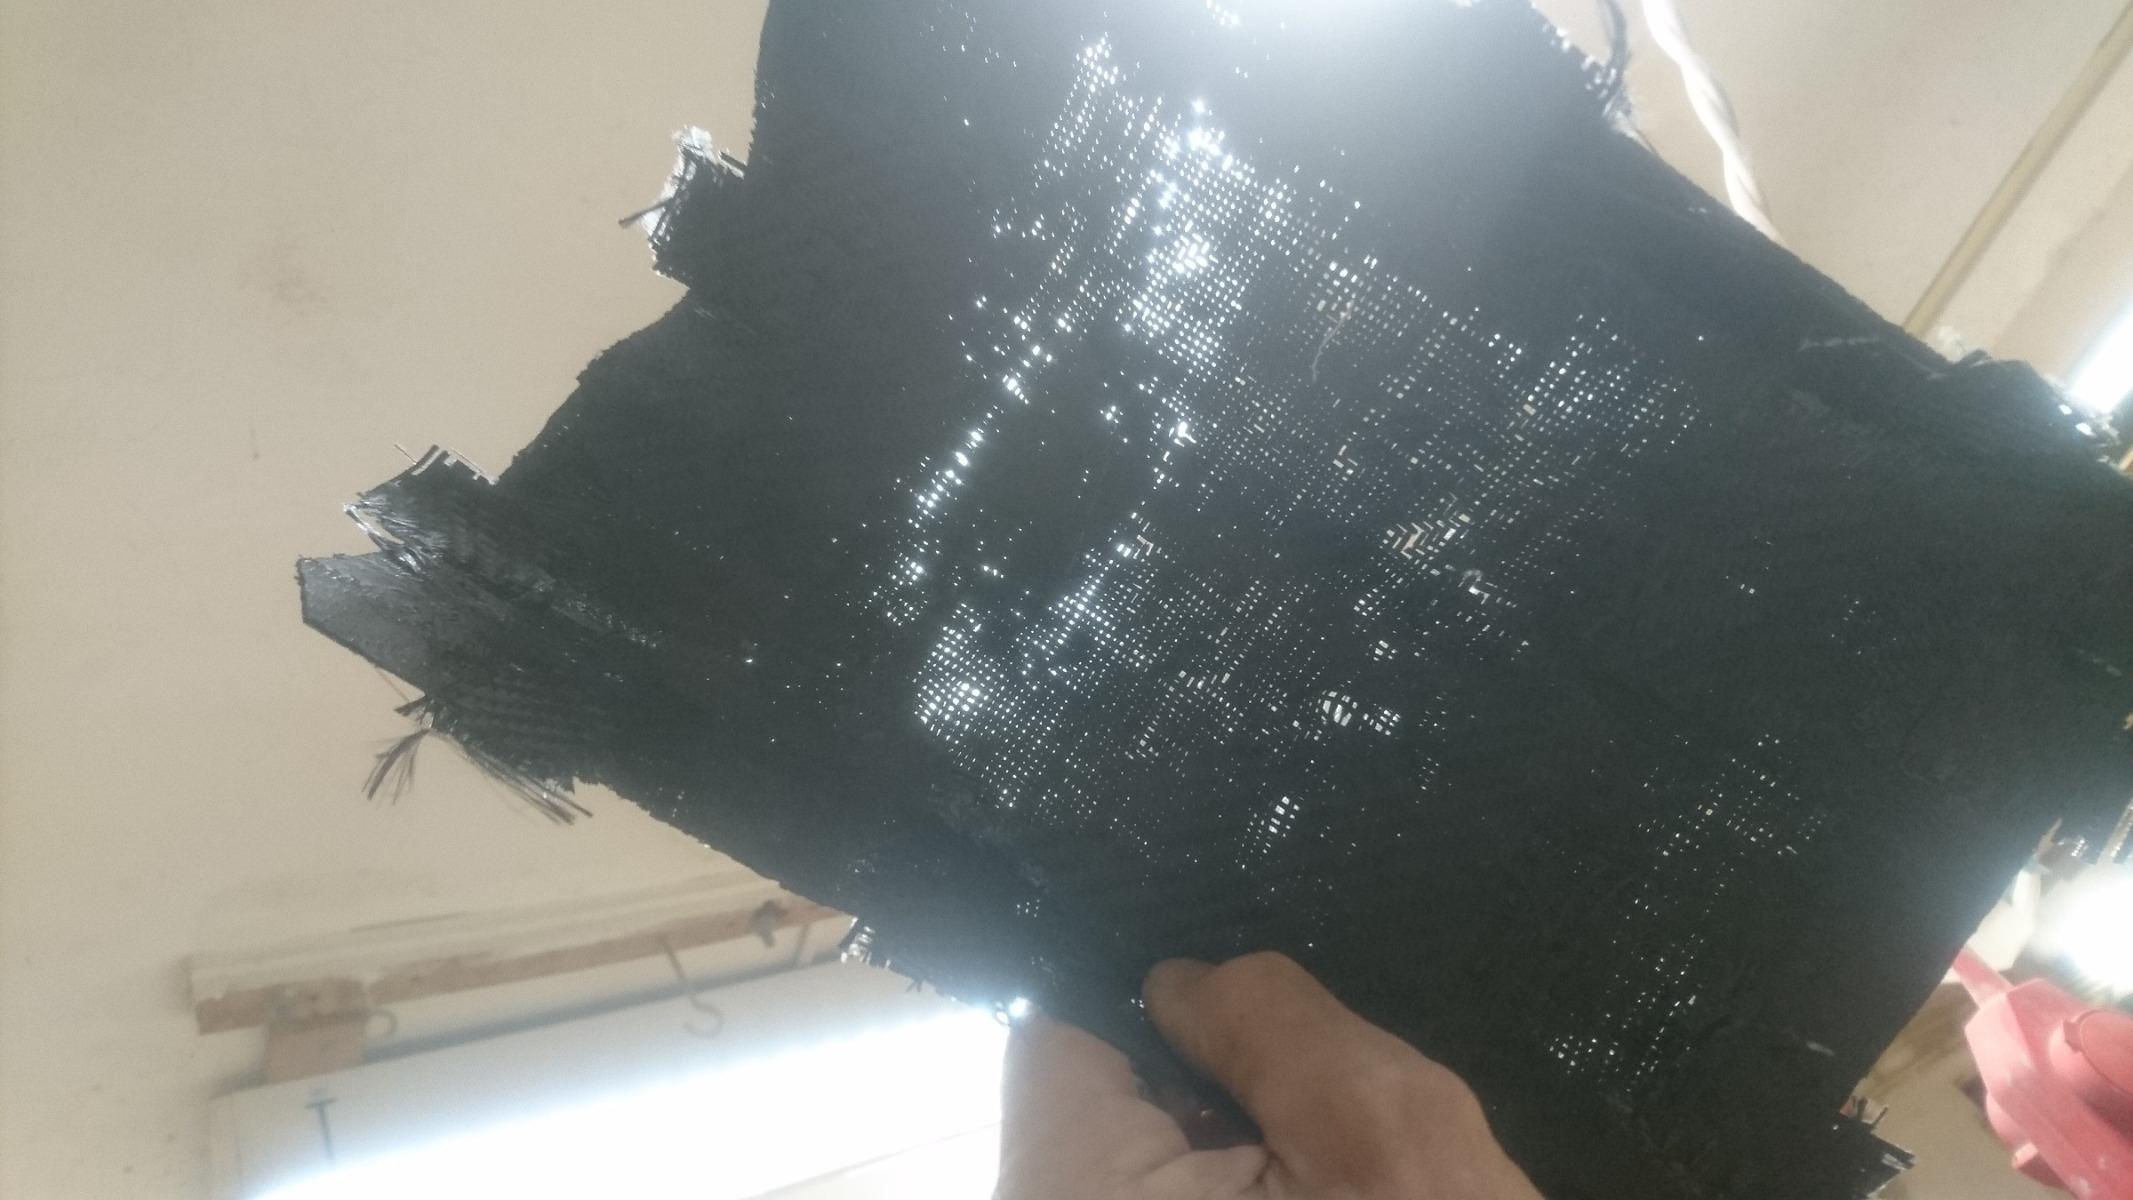
Here you go.First layer of CF on. Very rough and ready but its on. That's the main thing.Next up will be a lot of sanding to get it leveled before starting the next layer. It lifted slightly in a couple of places, so Ill probably end up having to sand through that and deal with it on the next layer. I will have to think of a more tidy way of doing this if I want the rest of the layers to go on clean. This last one was a mess.
This is as far as I can go for now,I have to be away for a week and today was powdercoating some bits for the CB550. I'll pick things up again as soon as I'm back.

P.S. For those of you familiar with the process, I understand that vacuum bagging and multi layer lay ups are the way to go but I have no previous experience or a vacuum pump.I plan to try multi layering the next 2 layers. From what I can tell,so long as the previous surface is sanded to 120 grit, there should be no problems. We will see!!
This is as far as I can go for now,I have to be away for a week and today was powdercoating some bits for the CB550. I'll pick things up again as soon as I'm back.
P.S. For those of you familiar with the process, I understand that vacuum bagging and multi layer lay ups are the way to go but I have no previous experience or a vacuum pump.I plan to try multi layering the next 2 layers. From what I can tell,so long as the previous surface is sanded to 120 grit, there should be no problems. We will see!!
www.kzrider.com/forum/11-projects/594313-csr1000-project-build
CB550 (1978)
CB500/4 (1972)*
KZ1000CSR (1981)
XT 600E (1999)
TDM900 (2003)
CB550 (1978)
CB500/4 (1972)*
KZ1000CSR (1981)
XT 600E (1999)
TDM900 (2003)
Please Log in or Create an account to join the conversation.
- Wookie58
-
- Offline
- Moderator
- Posts: 4848
- Thanks: 2936
Re: CSR1000 Project Build
10 Jun 2023 12:44
Looking really good Davido, make sure you are well protected when sanding (carbon dust and splinters are nasty sh*t)
1982 KZ1000 Ltd
www.kzrider.com/forum/11-projects/617631...-82-begins?start=192
kzrider.com/filebase-alias?view=download...d-fault-diagnosis&ca
www.kzrider.com/forum/11-projects/617631...-82-begins?start=192
kzrider.com/filebase-alias?view=download...d-fault-diagnosis&ca
Please Log in or Create an account to join the conversation.
- davido
-
Topic Author
- Offline
- User
- Posts: 1582
- Thanks: 291
Re: CSR1000 Project Build
25 Jun 2023 07:26Indeed.Been wearing all the stuff until yesterday. It was so hot,I was sanding in a t-shirt. Had a very itchy night!!Looking really good Davido, make sure you are well protected when sanding (carbon dust and splinters are nasty sh*t)
Anyway,what a job this is turning out to be. On closer inspection, the first layup was a lot worse than I initially thought. A couple of bubbles here and there and a lot of ripples.I attacked it with the sandpaper and ended up going through the CF in a few places. It was also quite an effort to sand the overlaps flat. I repaired it the best I could with a second layer of patches and I managed to get rid of the bubbles and ripples but again had to sand the bollocks out of it to get the overlaps down.
I have to say I was losing confidence.The whole tank looked very rough. After another sanding, I cleaned everything up and put on a full one piece layer, to see how that would sit over the patches. To my surprise, it went great.No seams,joints or overlaps showing through. The whole thing looked almost professional!! I already had a second full size piece of CF prepared so I layed that out while the resin was still a bit tacky and scrapered it down. Result.
I did cut it a bit short on some of the edges where it folds under the tank. So the fibers wouldnt lie flat but I'll sand them off when its dry and get those areas with the next layup. The contours around the tank-top area didnt want to sit down until I put a couple of cuts in the hole where the filler cap fits. This relieved the tension and I was able to get the contours sitting nicely.Thats all for now. Well pleased.
www.kzrider.com/forum/11-projects/594313-csr1000-project-build
CB550 (1978)
CB500/4 (1972)*
KZ1000CSR (1981)
XT 600E (1999)
TDM900 (2003)
CB550 (1978)
CB500/4 (1972)*
KZ1000CSR (1981)
XT 600E (1999)
TDM900 (2003)
The following user(s) said Thank You: Nessism
Please Log in or Create an account to join the conversation.
- Wookie58
-
- Offline
- Moderator
- Posts: 4848
- Thanks: 2936
Re: CSR1000 Project Build
25 Jun 2023 10:41
Looking really good, stick with it. carbon looks like a PITA to work with
1982 KZ1000 Ltd
www.kzrider.com/forum/11-projects/617631...-82-begins?start=192
kzrider.com/filebase-alias?view=download...d-fault-diagnosis&ca
www.kzrider.com/forum/11-projects/617631...-82-begins?start=192
kzrider.com/filebase-alias?view=download...d-fault-diagnosis&ca
Please Log in or Create an account to join the conversation.
- Skidmark
-
- Offline
- User
- Posts: 1084
- Thanks: 310
Re: CSR1000 Project Build
26 Jun 2023 21:33
Does the carbon fiber come with an expiration date? What is the shelf life, if any?
Retired gearhead
'81 KZ-750 E2
'87 Suzuki Savage 650 Street Tracker (lost in the shop fire)
'81 KZ-750 E2
'87 Suzuki Savage 650 Street Tracker (lost in the shop fire)
Please Log in or Create an account to join the conversation.
- davido
-
Topic Author
- Offline
- User
- Posts: 1582
- Thanks: 291
Re: CSR1000 Project Build
28 Jun 2023 07:32I don't think there's an expiration date for the carbon. I've done a lot of research on it over the last few months and I don''t remember seeing it mentioned. The vinylester is meant to be used quite quickly though.Even unopened cans are not meant to sit on the shelf for any length of time.(Not sure how long.) I reckon, Its going to take me round about a month in total, to get all my laminating finished. I don't think that's a problem.Does the carbon fiber come with an expiration date? What is the shelf life, if any?
Today I reinforced the front edges of the tank, also the tail piece.I put a few extra layers into the fuel cap recess,to lift it up and get a good flush level for the cap. I also started preparing to cut an access hatch in the underside of the tank to pull out the foam.I think I must have devised the most complex way possible to do this!!! (Don't ask me to explain it).
I phoned the 'Tank sealer' company to ask a couple of questions and amongst other things they say that I should let the tank cure for at least 2 weeks before putting on the tank sealer. So, I'll count the 2 weeks from when I've opened it up and pulled the foam out. Tank sealer is epoxy based and compatible with the vinylester resin,which is good.
Thats it for now. More photos once I've opened the tank up.
www.kzrider.com/forum/11-projects/594313-csr1000-project-build
CB550 (1978)
CB500/4 (1972)*
KZ1000CSR (1981)
XT 600E (1999)
TDM900 (2003)
CB550 (1978)
CB500/4 (1972)*
KZ1000CSR (1981)
XT 600E (1999)
TDM900 (2003)
Please Log in or Create an account to join the conversation.
- davido
-
Topic Author
- Offline
- User
- Posts: 1582
- Thanks: 291
Re: CSR1000 Project Build
29 Jun 2023 12:05
A big day today. I cut the access hatch out of the bottom of the tank. Yesterday I cut some slots along the line of the hatch and glued some locating tabs over them;

Then today I could go ahead and cut the rest of it out;

I built up a lot of carbon around the front and rear of the tank where the hardware sits, to reinforce these areas and the edges but the bottom of the tank itself is very thin. Only one or two layers of carbon;
When I've glued the hatch back in,I'll go over the whole bottom area with a couple more layers to strengthen it. The top of the tank is fine.though I did have to sand the area around the fuel cap quite a bit to level it out and I went through the carbon in a couple of places.This area I can build up from the inside and the tank top will get a final full layer for aesthetics.
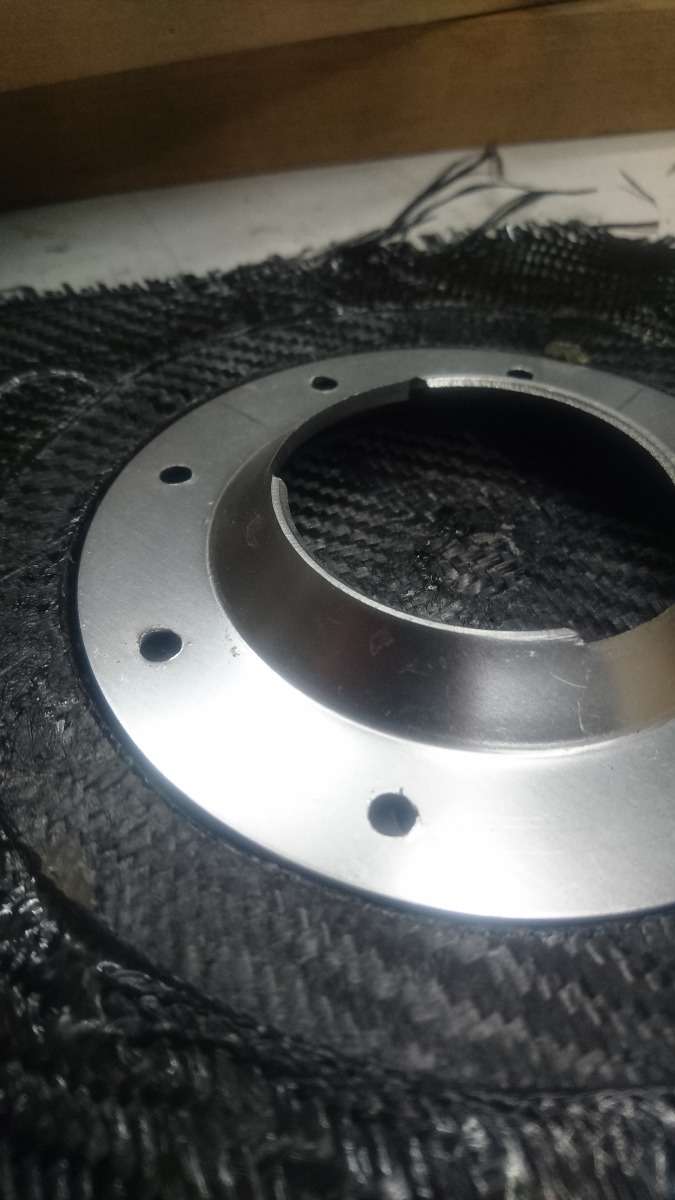
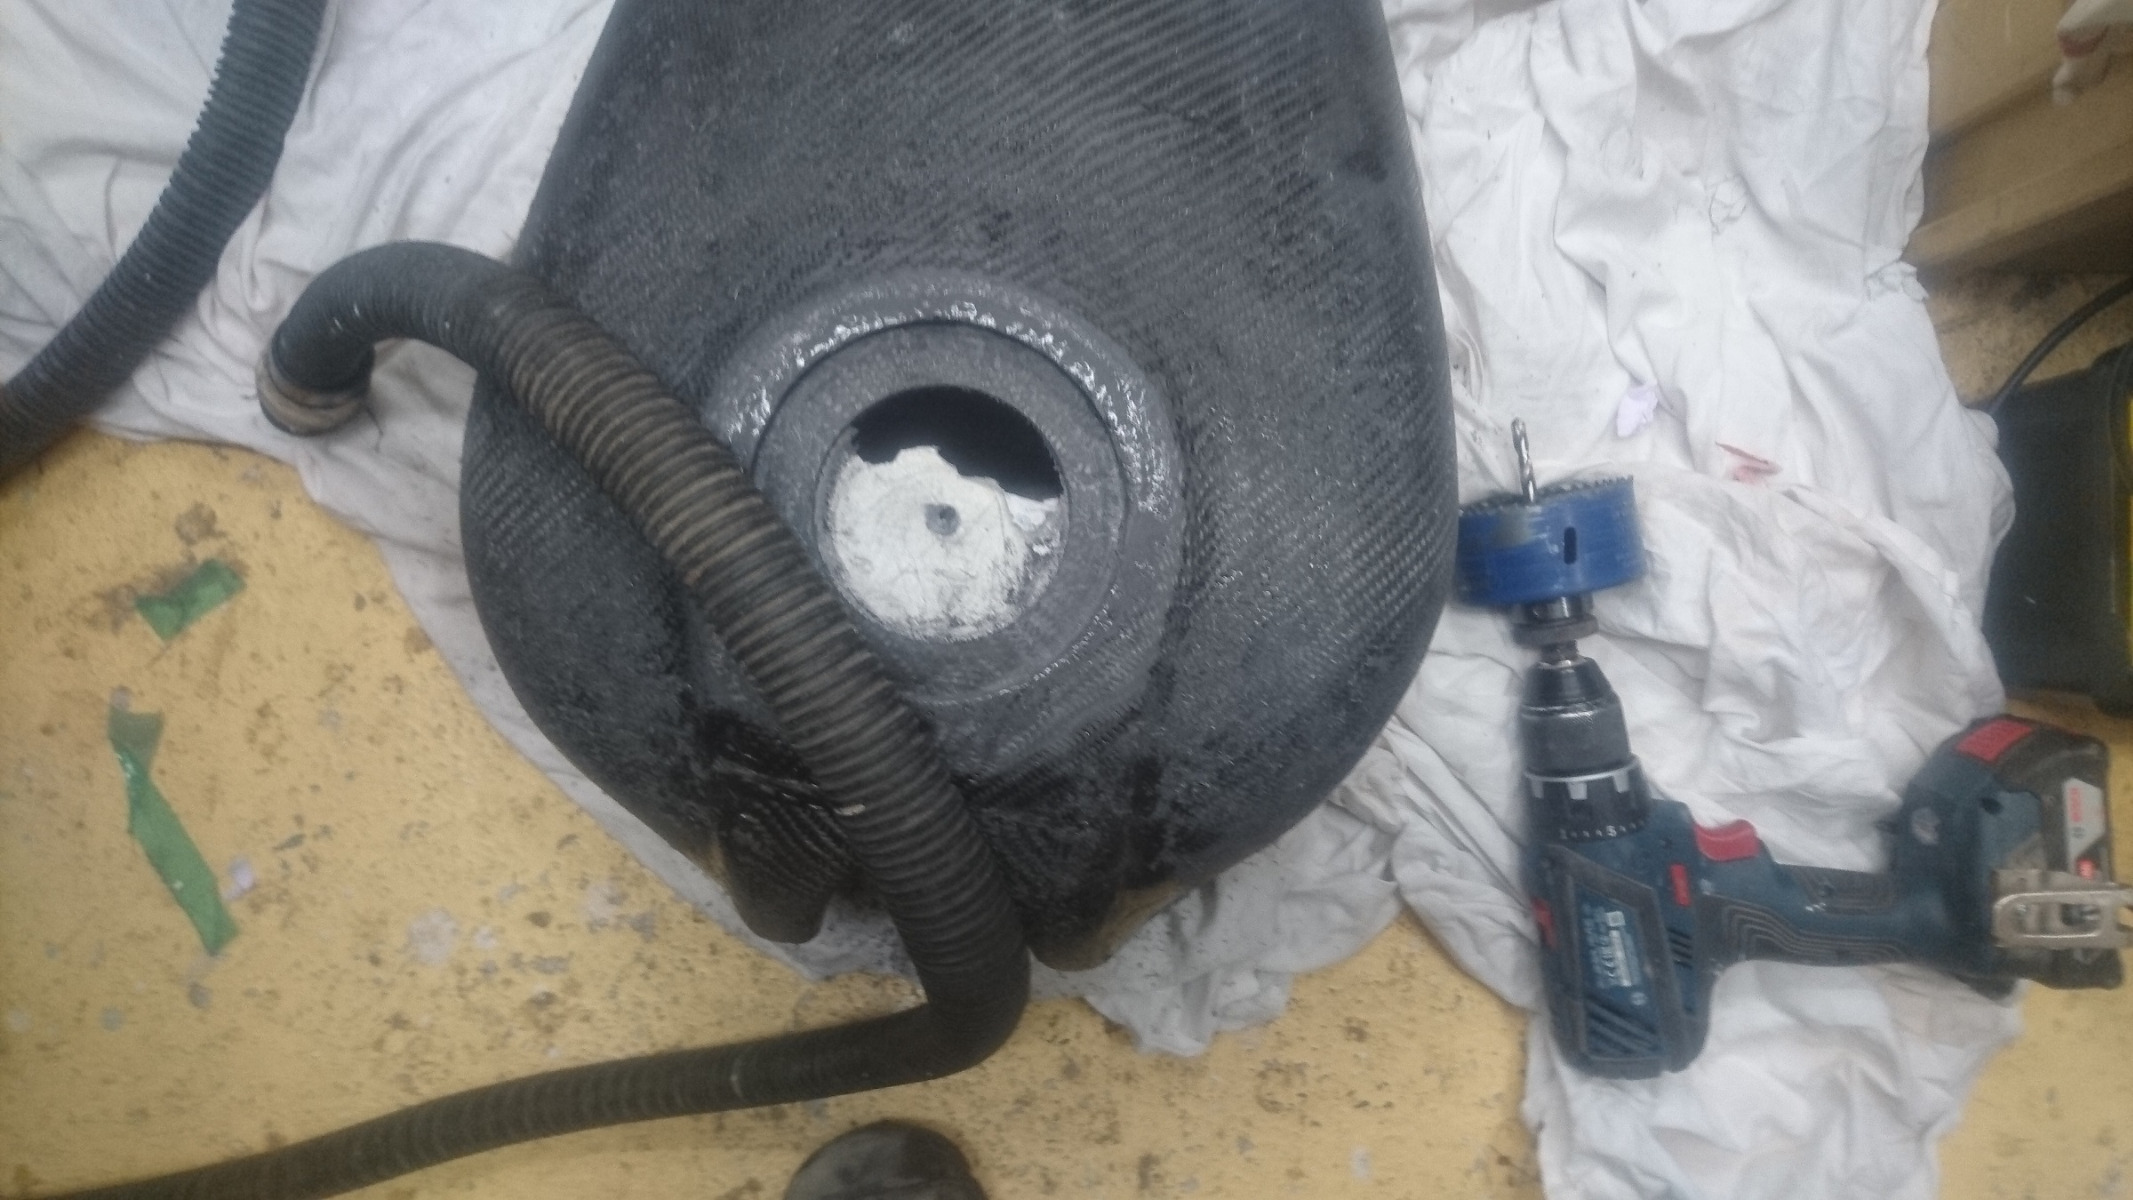
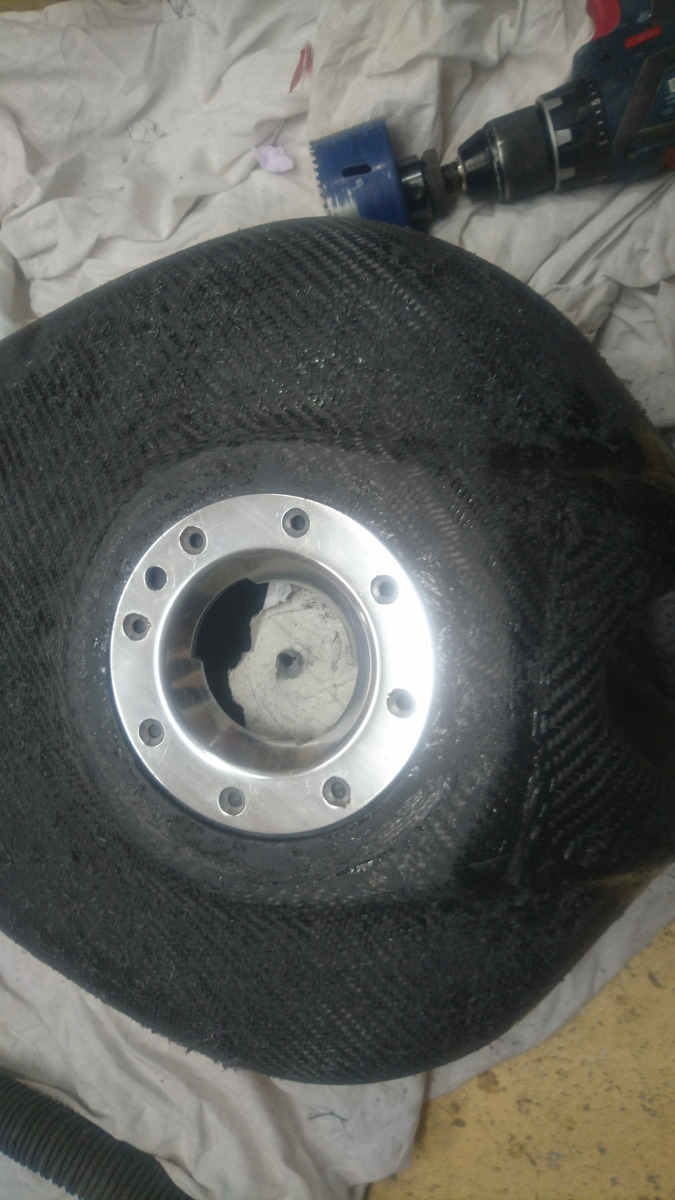
I also drilled out the fuel cap hole today. A bit nerve wracking as if it wasn't perfectly centered, I would have a problem but it went fine;
Next thing was to start pulling the foam out.What a job.I spent well over an hour at it and its still not done. The good news is that there are no problems separating it from the carbon iitself. I was a bit worried about that but the release film and the wax did their job and once I've hacked through the bulk of it,the foam and film come away easy peasy lemon squeazy;
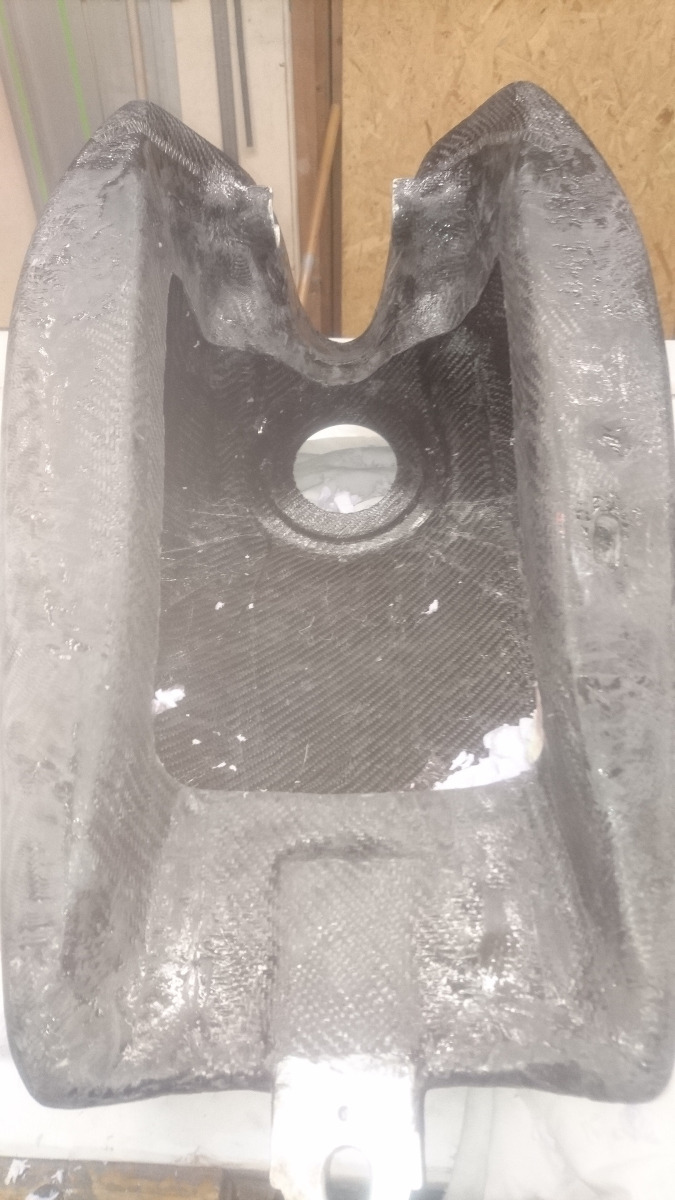
Tomorrow,I'll get the rest of the foam out. Then it a lot of sanding and more laminating. Still got to drill out the bolt holes for the filler cap and the holes for the fuel tap then I can close the hatch. (I might have to order some more carbon as well!!)
Then today I could go ahead and cut the rest of it out;
I built up a lot of carbon around the front and rear of the tank where the hardware sits, to reinforce these areas and the edges but the bottom of the tank itself is very thin. Only one or two layers of carbon;
When I've glued the hatch back in,I'll go over the whole bottom area with a couple more layers to strengthen it. The top of the tank is fine.though I did have to sand the area around the fuel cap quite a bit to level it out and I went through the carbon in a couple of places.This area I can build up from the inside and the tank top will get a final full layer for aesthetics.
I also drilled out the fuel cap hole today. A bit nerve wracking as if it wasn't perfectly centered, I would have a problem but it went fine;
Next thing was to start pulling the foam out.What a job.I spent well over an hour at it and its still not done. The good news is that there are no problems separating it from the carbon iitself. I was a bit worried about that but the release film and the wax did their job and once I've hacked through the bulk of it,the foam and film come away easy peasy lemon squeazy;
Tomorrow,I'll get the rest of the foam out. Then it a lot of sanding and more laminating. Still got to drill out the bolt holes for the filler cap and the holes for the fuel tap then I can close the hatch. (I might have to order some more carbon as well!!)
www.kzrider.com/forum/11-projects/594313-csr1000-project-build
CB550 (1978)
CB500/4 (1972)*
KZ1000CSR (1981)
XT 600E (1999)
TDM900 (2003)
CB550 (1978)
CB500/4 (1972)*
KZ1000CSR (1981)
XT 600E (1999)
TDM900 (2003)
The following user(s) said Thank You: Nessism
Please Log in or Create an account to join the conversation.
- davido
-
Topic Author
- Offline
- User
- Posts: 1582
- Thanks: 291
Re: CSR1000 Project Build
02 Jul 2023 09:04
So, I got the underneath of the fuel cap area reinforced this weekend.I sanded the whole of the inside,which was a very awkward job but had to be done to give the tank sealer something to key to.Then I closed up the hatch and lay some strips of CF around the joints. It was very thin in these areas and I managed to break the edges away in a couple of places but I got it all patched up. So, the inside of the tank is finished and ready for the sealer (in a couple of weeks). Hopefully tomorrow I can get the underneath of the tank beefed up a bit, then I can lay the final top layer and that'll be it.
www.kzrider.com/forum/11-projects/594313-csr1000-project-build
CB550 (1978)
CB500/4 (1972)*
KZ1000CSR (1981)
XT 600E (1999)
TDM900 (2003)
CB550 (1978)
CB500/4 (1972)*
KZ1000CSR (1981)
XT 600E (1999)
TDM900 (2003)
The following user(s) said Thank You: Wookie58
Please Log in or Create an account to join the conversation.