new gas cap on KZ1000E1 ST
- wiredgeorge
-
 Topic Author
- Offline
- User
-

Registered
- Posts: 5298
- Thanks: 45
new gas cap on KZ1000E1 ST
29 Nov 2006 07:07
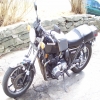
The gas cap on my ST leaks like a sieve. The seal is tight but the design is flawed I think. When parked on sidestand for a second, gas that has splashed up onto the underside of the cap will leak past the seal. I suspect it is because of insufficient pressure on the seal as the only thing that holds it pressured to the seal is the latch.
On my very first (decently done too) paint job using GM Med Red Metallic, I failed to paint all the way up under the cap to where the bung is. The gas that drooled started causing the paint to lift. This was my mistake so I reprimed the tank and that is how it sits on the bike now. I sure didn't want to repaint yet again and have the new paint lift due to gas drool and the unsightly streaks of gas on the clear coat were painful to look at.
What to do? Well, I looked at the JP Cycles catalog and they sell a weld in bung for the 82-early 96 style gas cap. This bung is intended for a vented cap. This type gas cap is a screw in affair and there are tons of options as far as the cap style. The bung is under $10 and the caps range in price from $10 to over a $100... Most of the more expensive are of the tasteless Harley type with skulls and "bike jewelry" type junk so I will probably go for a more plain look. In any case, I think this type cap will keep gas in more effectively.
Problem is:
1. Don't have welder
2. Scared of welding bung into tank
I KNOW what professionals to weld a tank but I was thinking that JB Weld the bung into place. Essentially, it is a threaded sleeve with a flange that fits over the tank metal so I would just put a bead of JB Weld beneath the flange and between the flange and tank metal. I could then use some body filler to smooth the area as there is about an 1/8" rectangular indentation in the tank where the original cap was fitted. This would also smooth the indentation out with the rest of the tank sheet metal. I have used JB Weld MANY TIME in the past to fix leaks in tanks and it will hold permanently and is not affected by gas... of that I am pretty sure.
Comments? Tips?
wiredgeorge Motorcycle Carburetors
Mico TX
www.wgcarbs.com
Too many bikes to list!
Mico TX
www.wgcarbs.com
Too many bikes to list!
Please Log in or Create an account to join the conversation.
- Pterosaur
-
- User
-

Public
- Thanks: 0
Re: new gas cap on KZ1000E1 ST
29 Nov 2006 07:26
wiredgeorge wrote:
Interesting possible fix for the cap - I'm interested in hearing how it works out...
As to the lifting issue, the best way I've found to avoid that is to NOT paint to the very lip of the filler neck. Before shooting the color coat, mask the top 1/3" inch or so - differs neck by neck - so that the part under the cap is left bare metal.
Then, when shooting clear, mask the same ring to within 1/8" or so from the top of the neck and make sure to sling a good couple of medium coats right on the circumference of the neck, forming a (gas resistant) seal between the color and the horizontal lip of the filler neck. Let dry THOUROUGHLY. Most common issue with people's understanding of how paint works is that if it's "dry" to the touch, it's "set". Actually, a catalyzed enamel can take up to a month to actually achieve its final "set".
Anytime the twisting motion of screwing on the cap breaks the painted surface so gas can get under it - especially on fresh paint, it's off to the races.
Hope that helps...
...On my very first (decently done too) paint job using GM Med Red Metallic, I failed to paint all the way up under the cap to where the bung is. The gas that drooled started causing the paint to lift. This was my mistake so I reprimed the tank and that is how it sits on the bike now. I sure didn't want to repaint yet again and have the new paint lift due to gas drool and the unsightly streaks of gas on the clear coat were painful to look at....
Comments? Tips?
Interesting possible fix for the cap - I'm interested in hearing how it works out...
As to the lifting issue, the best way I've found to avoid that is to NOT paint to the very lip of the filler neck. Before shooting the color coat, mask the top 1/3" inch or so - differs neck by neck - so that the part under the cap is left bare metal.
Then, when shooting clear, mask the same ring to within 1/8" or so from the top of the neck and make sure to sling a good couple of medium coats right on the circumference of the neck, forming a (gas resistant) seal between the color and the horizontal lip of the filler neck. Let dry THOUROUGHLY. Most common issue with people's understanding of how paint works is that if it's "dry" to the touch, it's "set". Actually, a catalyzed enamel can take up to a month to actually achieve its final "set".
Anytime the twisting motion of screwing on the cap breaks the painted surface so gas can get under it - especially on fresh paint, it's off to the races.
Hope that helps...
Please Log in or Create an account to join the conversation.
- Pterosaur
-
- User
-

Public
- Thanks: 0
- wiredgeorge
-
 Topic Author
- Offline
- User
-

Registered
- Posts: 5298
- Thanks: 45
Re: new gas cap on KZ1000E1 ST
29 Nov 2006 11:57
Since the area under the indent on the top of the tank was covered by the fuel lid, I didn't paint it... I masked it off and left the edge where gas could creep under too close to the painted surface. Next time I will paint as you suggest... that had already occured to me bwhahahaha... Actually, I tried to sand, hit the affected area with base and then re-clear it but I made a mess as the work wasn't blended well. When I reprimed the tank, TRUST ME... it was painted up onto the edge of the bung.
wiredgeorge Motorcycle Carburetors
Mico TX
www.wgcarbs.com
Too many bikes to list!
Mico TX
www.wgcarbs.com
Too many bikes to list!
Please Log in or Create an account to join the conversation.
- 2bskor
-

- Offline
- User
-

Registered
- Posts: 159
- Thanks: 2
Re: new gas cap on KZ1000E1 ST
29 Nov 2006 15:21
I have the identical bike and I also repainted the tank it it also lifted the paint. My problem was there are two screws that attach the gas cap to the tank, well there are o rings either on the top or the bottom, there is a seat for them and one fell out during assembly. I replaced bot of them with automotive orings and presto tight as a frogs rearend!!
1979 KZ1000ST (Canadian) Electronic Ignition, 4 into 1 header,K&N air filter
Please Log in or Create an account to join the conversation.
- wiredgeorge
-
 Topic Author
- Offline
- User
-

Registered
- Posts: 5298
- Thanks: 45
Re: new gas cap on KZ1000E1 ST
30 Nov 2006 06:59
Are you saying that THICKER than stock orings stopped the gas drooling? Since my tank is in primer, I guess I could just try some thicker orings as I buy LOTS of orings. I never thought of that! Thanks... I can't imagine all the darn ST / MK II tanks out there drooling and the owners not raising a stink so they MUST not have leaked initially.
wiredgeorge Motorcycle Carburetors
Mico TX
www.wgcarbs.com
Too many bikes to list!
Mico TX
www.wgcarbs.com
Too many bikes to list!
Please Log in or Create an account to join the conversation.
- wiredgeorge
-
 Topic Author
- Offline
- User
-

Registered
- Posts: 5298
- Thanks: 45
Re: new gas cap on KZ1000E1 ST
01 Dec 2006 06:34
I put new and thicker orings on the mount screws and recoated the seal with nitrile rubber yesterday. The cap definitely closes tighter but it remains to be seen if it stops drooling. Need to wait for warmer temps to check this out... it was 25 degrees this AM in the Texas Hill Country... May go for a ride later and check if it gets into the promised 60s.
wiredgeorge Motorcycle Carburetors
Mico TX
www.wgcarbs.com
Too many bikes to list!
Mico TX
www.wgcarbs.com
Too many bikes to list!
Please Log in or Create an account to join the conversation.
- 2bskor
-

- Offline
- User
-

Registered
- Posts: 159
- Thanks: 2
Re: new gas cap on KZ1000E1 ST
03 Dec 2006 06:51
My tank didn't leak until I took it off to repaint. When I reinstalled the cap it drooled and then while taking the cap back off I noticed it only had one oring and missing one, must have dropped?? The one remaining was quite compressed so I replaced both. Hope you stop drooling:laugh:
1979 KZ1000ST (Canadian) Electronic Ignition, 4 into 1 header,K&N air filter
Please Log in or Create an account to join the conversation.
- wiredgeorge
-
 Topic Author
- Offline
- User
-

Registered
- Posts: 5298
- Thanks: 45
Re: new gas cap on KZ1000E1 ST
03 Dec 2006 14:02
My oldest daughter is in the hospital having her third kiddo today so I am the babysitter and can't get out for a quick check. I am anxious to see if the new orings and bit of additional rubber on the seal stopped my drooling problems as I am also anxious to repaint the tank. I bought a NEW HVLP and better quality paint gun and really want to use it... it is also only about 50 and a bit gray/rainy and very windy so it may be a couple days.
wiredgeorge Motorcycle Carburetors
Mico TX
www.wgcarbs.com
Too many bikes to list!
Mico TX
www.wgcarbs.com
Too many bikes to list!
Please Log in or Create an account to join the conversation.
- KZReeder
-

- Offline
- User
-

Registered
- Posts: 149
- Thanks: 1
Re: new gas cap on KZ1000E1 ST
03 Dec 2006 17:28
wiredgeorge wrote:
George... I had the same trouble... thought I destroyed my new paint job the first time I put gas in it and parked it on the side stand.
New O-rings 99% fixed it for me but the gas still got under the (professionally shot) paint and I've got little cracks in the finish where the paint has lifted around the cap... another painter friend of mine blamed it on less than stellar paint prep.
I plan on media blasting and powder coating the tank this winter... I was told that JB weld is great for body work on things that are going to get powdered.
I am anxious to see if the new orings and bit of additional rubber on the seal stopped my drooling problems as I am also anxious to repaint the tank.
George... I had the same trouble... thought I destroyed my new paint job the first time I put gas in it and parked it on the side stand.
New O-rings 99% fixed it for me but the gas still got under the (professionally shot) paint and I've got little cracks in the finish where the paint has lifted around the cap... another painter friend of mine blamed it on less than stellar paint prep.
I plan on media blasting and powder coating the tank this winter... I was told that JB weld is great for body work on things that are going to get powdered.
Please Log in or Create an account to join the conversation.
- wiredgeorge
-
 Topic Author
- Offline
- User
-

Registered
- Posts: 5298
- Thanks: 45
Re: new gas cap on KZ1000E1 ST
04 Dec 2006 06:08
If the new orings don't COMPLETELY stop the drooling, I am going to install a Harley screw-in type cap. I don't have any desire to powdercoat the tank as I want it to match the rest of the body pieces already painted. Waiting for it to warm up some and will possibly do a bit of testing to see if the new orings did stop the leaking... Also, I am not sure about how well JB Weld would stand up to an oven... powder cures at almost 400 degrees if memory serves and sitting in 400 degrees for 1/2 hour might cause it to deform. Don't know as I have never tried. Will ask a powdercoater... maybe today as I have some stuff to go over.
wiredgeorge Motorcycle Carburetors
Mico TX
www.wgcarbs.com
Too many bikes to list!
Mico TX
www.wgcarbs.com
Too many bikes to list!
Please Log in or Create an account to join the conversation.
- KZReeder
-

- Offline
- User
-

Registered
- Posts: 149
- Thanks: 1
Re: new gas cap on KZ1000E1 ST
04 Dec 2006 15:12
wiredgeorge wrote:
I'm powder coating just about everything on my project since there's no plastic anymore... not to hi-jack your thread here, but our local powder-coater recomends using JB weld to patch stuff and recomends another product(can't thing of the name right now) for more finished stuff.
Back on topic: Good luck with the O-rings and if you decide to go the Harley cap route, let me know how that works... I'm considering putting a different cap on mine too... more for asthetics than anything else.
Later!
Claude
Post edited by: KZReeder, at: 2006/12/04 18:13
Also, I am not sure about how well JB Weld would stand up to an oven... powder cures at almost 400 degrees if memory serves and sitting in 400 degrees for 1/2 hour might cause it to deform. Don't know as I have never tried. Will ask a powdercoater... maybe today as I have some stuff to go over.
I'm powder coating just about everything on my project since there's no plastic anymore... not to hi-jack your thread here, but our local powder-coater recomends using JB weld to patch stuff and recomends another product(can't thing of the name right now) for more finished stuff.
Back on topic: Good luck with the O-rings and if you decide to go the Harley cap route, let me know how that works... I'm considering putting a different cap on mine too... more for asthetics than anything else.
Later!
Claude
Post edited by: KZReeder, at: 2006/12/04 18:13
Please Log in or Create an account to join the conversation.
Moderators: Street Fighter LTD


