
Valve Clearance Measurement Question
- Little B
-
 Topic Author
- Offline
- User
-

Registered
- Posts: 280
- Thanks: 3
Re: Valve Clearance Measurement Question
03 Dec 2007 07:37
Patton wrote:
The carbs were sync'd earlier this year but I didn't personally do it so I don't know if it was done correctly or not. I'm going to ask for a vacuum gauge for xmas so I can do it myself from now on.
I'm confused about the tensioner now.") According to the diagram in the manual, it shows the push rod with a grove in it. It says that the bolt that goes in there (lock bolt) is just to keep the push rod from falling into the crankcase. Evidently, it doesn't have anything to do with keeping it in position unless you need to lock the rod so it doesn't go in further while working inside the engine. But in that case, you have to use a longer bolt.
According to the diagram in the manual, it shows the push rod with a grove in it. It says that the bolt that goes in there (lock bolt) is just to keep the push rod from falling into the crankcase. Evidently, it doesn't have anything to do with keeping it in position unless you need to lock the rod so it doesn't go in further while working inside the engine. But in that case, you have to use a longer bolt.
So what I'm confused about is, how would changing the things you mentioned, make a difference in this instance? Are you explaining how to adjust a manual tensioner?
The adjustment routine is best done with a warm engine and after kicking or spinning the crankshaft over a few times to loosen things up. Then line up the T mark with the casing mark. Next loosen the adjuster locknut. Then loosen the bolt (which frees the inside pushrod so the spring can move it forward at the designed pressure -- the "automatic" part).
Then tighten the bolt (which locks the pushrod in position), and next tighten the locknut (to keep the bolt in place). And not Godzilla tight on either bolt or locknut, as several folks have stripped these parts or broken off the bolt.
Often a good carb sync will smooth the idle enough to greatly reduce the nail-digesting rattle at low rpm.
Good luck!<br><br>
The carbs were sync'd earlier this year but I didn't personally do it so I don't know if it was done correctly or not. I'm going to ask for a vacuum gauge for xmas so I can do it myself from now on.
I'm confused about the tensioner now.
According to the diagram in the manual, it shows the push rod with a grove in it. It says that the bolt that goes in there (lock bolt) is just to keep the push rod from falling into the crankcase. Evidently, it doesn't have anything to do with keeping it in position unless you need to lock the rod so it doesn't go in further while working inside the engine. But in that case, you have to use a longer bolt.So what I'm confused about is, how would changing the things you mentioned, make a difference in this instance? Are you explaining how to adjust a manual tensioner?
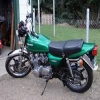
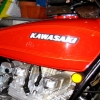
1981 KZ750-H2 LTD
Please Log in or Create an account to join the conversation.
- Patton
-

- Offline
- KZr Legend
-

Registered
- Posts: 18567
- Thanks: 2103
Re: Valve Clearance Measurement Question
03 Dec 2007 10:25
Little B wrote:
Was thinking your KZ750 adjuster was more similar to KZ900.:blush: The KZ750 diagram as shown below is confusing to me, and would defer to the instructions in your manual, and suggestions from other members with more KZ750 experience.
Good Luck!

Patton wrote:The adjustment routine is best done with a warm engine and after kicking or spinning the crankshaft over a few times to loosen things up. Then line up the T mark with the casing mark. Next loosen the adjuster locknut. Then loosen the bolt (which frees the inside pushrod so the spring can move it forward at the designed pressure -- the "automatic" part).
Then tighten the bolt (which locks the pushrod in position), and next tighten the locknut (to keep the bolt in place). And not Godzilla tight on either bolt or locknut, as several folks have stripped these parts or broken off the bolt.
Often a good carb sync will smooth the idle enough to greatly reduce the nail-digesting rattle at low rpm.
Good luck!
The carbs were sync'd earlier this year but I didn't personally do it so I don't know if it was done correctly or not. I'm going to ask for a vacuum gauge for xmas so I can do it myself from now on.
I'm confused about the tensioner now.
So what I'm confused about is, how would changing the things you mentioned, make a difference in this instance? Are you explaining how to adjust a manual tensioner?
Was thinking your KZ750 adjuster was more similar to KZ900.:blush: The KZ750 diagram as shown below is confusing to me, and would defer to the instructions in your manual, and suggestions from other members with more KZ750 experience.
Good Luck!
1973 Z1
KZ900 LTD
KZ900 LTD
Please Log in or Create an account to join the conversation.
- wiredgeorge
-

- Offline
- User
-
Registered
- Posts: 5298
- Thanks: 45
Re: Valve Clearance Measurement Question
03 Dec 2007 10:50
Little B... let me jump in here a second before you are off chasing rabbits down a variety of rabbit trails. The shim under bucket style, as you have, requires you put a feeler gauge between the bucket top and cam lobe. I am not sure what type feeler gauge you purchased from Z1Enterprises.com but I use a guage that is metric and the thinnest gauge is .051mm. Say I were to use that gauge on your tight valve? If I couldn't slide it under the cam lobe with the camshaft oriented correctly (see your manual for that orientation), then I would KNOW that valve clearance is between 0 and .051mm. If you can SPIN THE BUCKET, which usually isn't all that easy since it is kind of stuck in place by hydrostatic tension then you KNOW that you have MORE THAN 0 clearance but less than .051mm. I generally use a flat blade screwdriver and attempt to PUSH the bucket around on the retainer to see if it will move... if it won't, you have ZERO clearance. It doesn't matter tons if you have ZERO or between 0 and .051mm as you are going to have to remove the camshaft in order to measure your current shim and try and guess what shim will be needed for reassembly. The good thing about knowing if you are between 0 and .051mm is that you can pretty much guess what shim will be right. If you have no clearance you will have to guess, remeasure and possibly have to remove the camshaft AGAIN to install yet another shim.
At this point, don't worry about buying yet another manual or messing with your cam chain. You will have to remove your tensioner when you pull the camshafts and will have ample opportunity to observe how the thing works. If you get a bunch of play and then a tightened area, a little is OK but a lot indicates some stretch (read wear) on the chain. It won't jump off the cam sprockets if there is just a bit of wear and re-adjusting tension may resolve the issue. I honestly can't remember what type tensioner your bike has but memory is telling me that it is an "AUTOMATIC" type. The push rod on the automatic types is fairly short and you may benefit from going to a manual tensioner with a somewhat longer shaft... but see, I am running down a rabbit trail myself. Get those valves adjusted first! Re-read your manual on setting the 1/4 cylinders to TDC and how to align the marks on the two cams. The MOST important thing to remember is that the chain WILL (repeat WILL WILL WILL) bunch towards the front of the engine and you will install the exh camshaft and THINK you have the slack pulled out but half the time, the chain is bunched... wiggle and jiggle the cam chain at the front of the engine and make SURE it isn't bunched because this leads to install a tooth or two off.
At this point, don't worry about buying yet another manual or messing with your cam chain. You will have to remove your tensioner when you pull the camshafts and will have ample opportunity to observe how the thing works. If you get a bunch of play and then a tightened area, a little is OK but a lot indicates some stretch (read wear) on the chain. It won't jump off the cam sprockets if there is just a bit of wear and re-adjusting tension may resolve the issue. I honestly can't remember what type tensioner your bike has but memory is telling me that it is an "AUTOMATIC" type. The push rod on the automatic types is fairly short and you may benefit from going to a manual tensioner with a somewhat longer shaft... but see, I am running down a rabbit trail myself. Get those valves adjusted first! Re-read your manual on setting the 1/4 cylinders to TDC and how to align the marks on the two cams. The MOST important thing to remember is that the chain WILL (repeat WILL WILL WILL) bunch towards the front of the engine and you will install the exh camshaft and THINK you have the slack pulled out but half the time, the chain is bunched... wiggle and jiggle the cam chain at the front of the engine and make SURE it isn't bunched because this leads to install a tooth or two off.
wiredgeorge Motorcycle Carburetors
Mico TX
www.wgcarbs.com
Too many bikes to list!
Mico TX
www.wgcarbs.com
Too many bikes to list!
Please Log in or Create an account to join the conversation.
- Little B
-
Topic Author
- Offline
- User
-
Registered
- Posts: 280
- Thanks: 3
Re: Valve Clearance Measurement Question
03 Dec 2007 17:34
Patton wrote:
@WG:
Thanks a ton! My manual says I just need to lock the tensioner instead of removing it completely. That will save me having to remove the carbs. I'll keep the rest of what you said in mind as I proceed as well. Thanks again.
It confused me as well. In fact, until I read the supplement for my year in the back of the manual, I didn't know it used a cross wedge type. Evidently KAW had problems with the original ones they used and that is the reason they switched. However, the diagram shows the old version (ball lock type) which is why its confusing.:dry:The KZ750 diagram as shown below is confusing to me, and would defer to the instructions in your manual, and suggestions from other members with more KZ750 experience.
@WG:
Thanks a ton! My manual says I just need to lock the tensioner instead of removing it completely. That will save me having to remove the carbs. I'll keep the rest of what you said in mind as I proceed as well. Thanks again.
1981 KZ750-H2 LTD
Please Log in or Create an account to join the conversation.
- Little B
-
Topic Author
- Offline
- User
-
Registered
- Posts: 280
- Thanks: 3
Re: Valve Clearance Measurement Question
03 Dec 2007 23:41
All the shims are out and I figured out what I need using the chart in the KAW manual.
Here
is my ad if you'd like to trade shims! :woohoo:
The magnet idea made it really easy to get the buckets out, thanks WG!!! All except for one. I really had to 'convince' it that it wanted to come out but it finally did. I didn't have any luck getting it back in though. Seems really tight or something. All the other ones just easily slid back in. Exhaust valve 3 is the one giving me problems. Any thoughts guys?
My other question is about the camshaft cap bolts. They are all a sort of black color and smell, for lack of a better term, 'burnt'. Is that normal? If not, what would cause it? Before I got the bike, the PO had never changed the oil. When I changed it, it was black as night and the oil filter wasn't filtering the oil because the spring was no longer there. Could that have caused it?
Post edited by: Little B, at: 2007/12/05 02:11
1981 KZ750-H2 LTD
Please Log in or Create an account to join the conversation.
- Little B
-
Topic Author
- Offline
- User
-
Registered
- Posts: 280
- Thanks: 3
Re: Valve Clearance Measurement Question
05 Dec 2007 07:54
Little B wrote:
This turned out to be the lifter itself. When I tried putting the bucket over a different valve, it wouldn't go in there either. I tried a different bucket over exhaust #3 and it went on smoothly. So it is definitely the bucket instead of something in the valve. whew!
Should I try sanding it down and see if I can get it to work correctly again or is it better to buy a new one? Anyone know what could have caused it to get that way in the first place?
Still could use any ideas about the camshaft cap bolts being 'burnt'. Am also still looking to trade shims if anyone is interested! :woohoo:
I didn't have any luck getting it back in though. Seems really tight or something. All the other ones just easily slid back in. Exhaust valve 3 is the one giving me problems.
This turned out to be the lifter itself. When I tried putting the bucket over a different valve, it wouldn't go in there either. I tried a different bucket over exhaust #3 and it went on smoothly. So it is definitely the bucket instead of something in the valve. whew!
Should I try sanding it down and see if I can get it to work correctly again or is it better to buy a new one? Anyone know what could have caused it to get that way in the first place?
Still could use any ideas about the camshaft cap bolts being 'burnt'. Am also still looking to trade shims if anyone is interested! :woohoo:
1981 KZ750-H2 LTD
Please Log in or Create an account to join the conversation.
- RonKZ650
-
- Offline
- User
-
Registered
- Posts: 3714
- Thanks: 250
Re: Valve Clearance Measurement Question
05 Dec 2007 09:55
It's normal to have a rather burnt smell and some black buildup on the camshaft cap bolts. Also don't worry about the spring at the oil filter causing oil to be not filtered. This is not true. The oil is filtered exactly the same whether the spring is there or not. By all means have the spring, there, but if it's not, no big deal. If the bucket is tight in its bore a little emory cloth would probably restore it if all else fails. I wouldn't run it tight.
321,000 miles on KZ's that I can remember. Not going to see any more.
Please Log in or Create an account to join the conversation.
- OKC_Kent
-
- Offline
- User
-
Registered
- Posts: 1719
- Thanks: 21
Re: Valve Clearance Measurement Question
05 Dec 2007 10:13
I have always thought that RONKZ650 had the easiest way to adjust valves. I'd like to paste his method here, I copied it from one of his postings, if that's alright Ron?
Quote:
Unfortunately the KZ650 is underbucket shims so the special tools for the KZ900-1000 do not apply. Camshaft removal is necessary. This issue has been discussed here quite a bit. Everyone has a different procedure. As I’d wager to bet I’m the highest mileage rider here on KZs I’ve done many a shim and this is my procedure and I’ve not read anyone else’s that works as well.
To check clearances only use feeler gauges in the same increments as shims are available, so you need a .05mm, .10mm, .15mm, and a .20mm for the most part, don’t bother with in-between sizes. Take off your right side points cover and turn the engine over slowly while constantly trying to fit a .10mm feeler between the bucket and cam. If at any point of cam rotation the feeler slides through, move up to .15mm and see if it slides through at any point of rotation. If .10mm did not fit, move down to .05mm. What you want to do is find the largest feeler that will fit anywhere in the rotation of the engine for each valve, but we only care in .05mm increments. Why is this? Because shims only come in .05mm size increments. I try to get my valves all where a .10mm feeler fits and a .15 does not fit. This means my clearance is between .10 and .15mm somewhere. I don’t care where in between. For example lets say a .05mm feeler fit, but a .10mm did not. This would mean you would go down one shim size in that valve and theoretically when you recheck you would be right where you want to be, a .10 fits, .15 does not. If you measure zero clearance go down 2 sizes of shim and recheck.
To take cams out of a KZ650 do only one cam at a time. After removing your center tensioner sprocket and the cam caps, lift up one cam while keeping constant tension on the chain where it goes down into the engine and move the cam out of position to the center of the engine. Make sure you keep all slack between the cams and the chain tight going down into the engine. Now your cam is out of the way and you swap your shims then carefully move the cam back into place making sure of keeping the chain tight down in the engine. Tighten the caps to 5.5 ft/lb or so. Repeat for other cam. Why do we do it one cam at a time using this procedure? No retime is needed! Works great. Don’t over tighten the cam caps, trust me, they will strip before you hit 8 ft/lb, particularly the exhaust ones.
Unquote:
This is the way to do it, I find it easy when I do and I learned it here.
Kent
Cashion, OK
78 KZ650 B2 85,000+ miles
78 KZ650 B2 85,000+ miles
Please Log in or Create an account to join the conversation.
- Little B
-
Topic Author
- Offline
- User
-
Registered
- Posts: 280
- Thanks: 3
Re: Valve Clearance Measurement Question
05 Dec 2007 10:49
Thanks for the help guys! I'll try the emory cloth idea and hopefully save myself $25.")
I wish I knew about Ron's way before. I already have both camshafts out and I haven't been keeping tension on the chain the whole time either! :lol:
I'll probably order the shims new if I can't get a used deal worked out by Friday.
Is it safe to clean the gasket area around the cylinder head cover with a scotchbrite pad and acetone or should I use something else? Also, there is black stuff in the holes that go up to the reed valve assembly. Should I clean them out with a swab or something?
1981 KZ750-H2 LTD
Please Log in or Create an account to join the conversation.
- RonKZ650
-
- Offline
- User
-
Registered
- Posts: 3714
- Thanks: 250
Re: Valve Clearance Measurement Question
05 Dec 2007 11:40
Thanks for posting that Kent. I was going to mention it, but figured since I've said basically the same thing here quite a few times most guys had already read it and dismissed it as not the correct way. There's different ways to do it. I always thought it worked pretty well myself.
321,000 miles on KZ's that I can remember. Not going to see any more.
Please Log in or Create an account to join the conversation.
- Little B
-
Topic Author
- Offline
- User
-
Registered
- Posts: 280
- Thanks: 3
Re: Valve Clearance Measurement Question
09 Dec 2007 00:15
Well using emory cloth didn't work on that valve so I ordered a new one. I measured the thing with a digital caliper and it is oblong by a little less than 1mm.
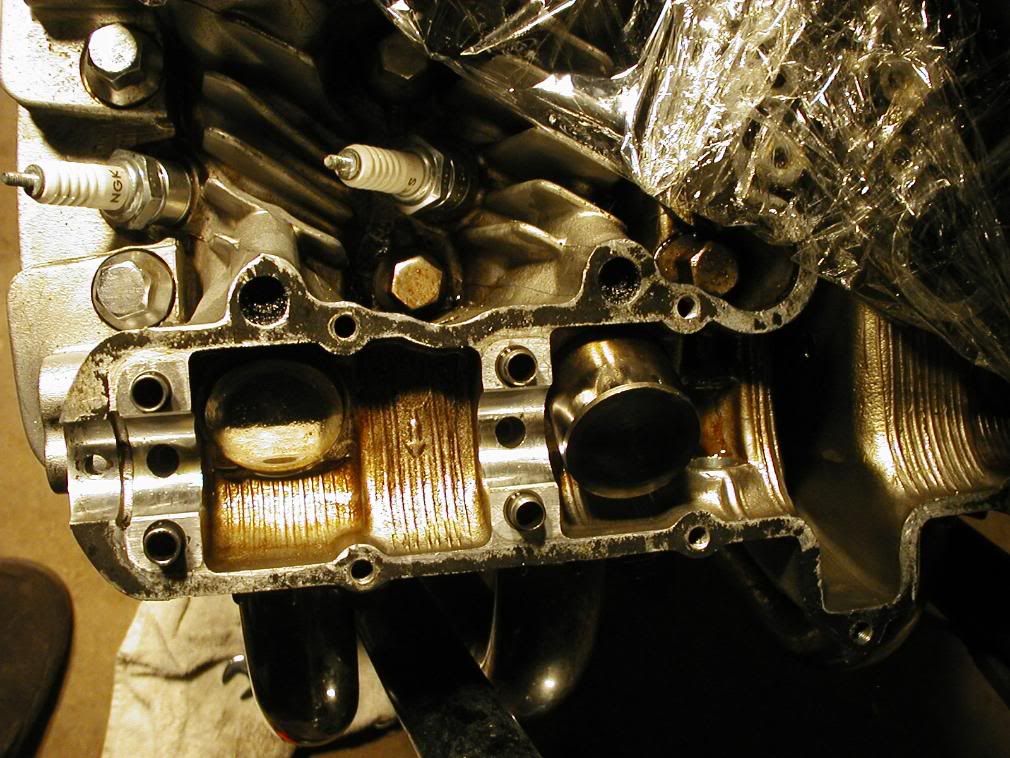
Is it safe to clean the gasket area around the cylinder head cover with a scotchbrite pad and acetone or should I use something else?
There is black stuff in the holes that go up to the reed valve assembly. Should I clean them out with a swab or something?
Should the tapered parts of the sleeves that sit inside where the camshaft bolts go be facing up or down?
Finally, what is the brown stuff? It isn't on the intake side.
1981 KZ750-H2 LTD
Please Log in or Create an account to join the conversation.
- KZErider
-

- Offline
- User
-
Registered
- Posts: 353
- Thanks: 12
Re: Valve Clearance Measurement Question
09 Dec 2007 00:38
Ron, your method, posted by Kent, made a lot of sense to me. I'll certainly be using it when my turn comes around. Thanks, Ron and Kent.
81 KZ750E2(project), 81 KZ750E2(parts donor), 87 BMW K 75C - got it runnin, didn't care for it, holding for family member, 79 CB650(project) Nomad 1700, VStar 950
Please Log in or Create an account to join the conversation.
Moderators: Street Fighter LTD